


Head badge rivets
 01-31-19 | 11:51 PM
#1

Thread Starter
Junior Member

Joined: Aug 2015
Posts: 78
Likes: 21
From: Boston, MA.
Bikes: 2003 Iron Horse comfort bike (daily rider); 1981(?) Raleigh Super Grand Prix 25.5", 1983 Raleigh Super Course, 25.5", Austro-Daimler Inter 10, 1988 Trek 560 25.5"; 1986 Peugeot Mont Cenis 64cm.; more to come
Head badge rivets
How do I remove the rivets from a classic Raleigh head badge?
 02-01-19 | 12:13 AM
#2
Senior Member

Joined: Jan 2019
Posts: 528
Likes: 84
Try removing the fork and getting some sort of stick or lever that won't damage the frame and try to lever any protruding rivet since they're sometimes not peened, then grab with some pliers from the front. Otherwise, carefully drill off the rivet head.
02-01-19 | 08:15 AM
#4
Thread Starter
Junior Member
Joined: Aug 2015
Posts: 78
Likes: 21
From: Boston, MA.
Bikes: 2003 Iron Horse comfort bike (daily rider); 1981(?) Raleigh Super Grand Prix 25.5", 1983 Raleigh Super Course, 25.5", Austro-Daimler Inter 10, 1988 Trek 560 25.5"; 1986 Peugeot Mont Cenis 64cm.; more to come
Thanks for your advice. Do you know the diameter of the drill needed or the rivet?
02-01-19 | 08:24 AM
#5
Senior Member
Joined: Sep 2015
Posts: 1,689
Likes: 105
From: New Jersey
They're not really rivets! [Okay, well, some are]
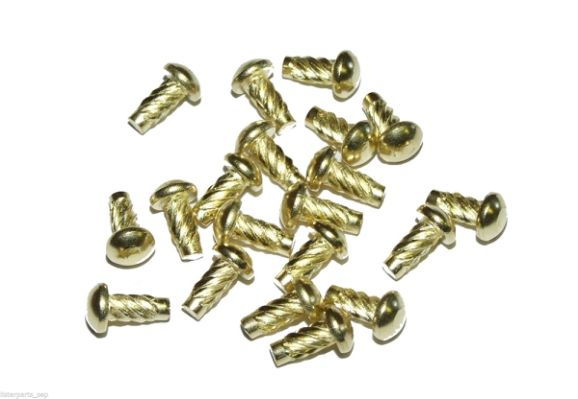
This comes up periodically, but head badges are traditionally attached with something called a "drive screw", which you can think of as a one-sided rivet, if it helps. I remember growing up working in Grandpa's wood shop, and he used fluted nails for the same reason: it helps hold two layers together (better than just pounding it together with a straight or tapered one), while also being very quick to install.
They can be popped out from the back if the heads are solid, otherwise (as I believe is actually the case with some Raleighs), use a slightly-larger-than-the-hole-in-the-rivet twist drill bit, and go through fast in one operation, or you can wind up grabbing and spinning the rivet, rather than drilling it.
This comes up periodically, but head badges are traditionally attached with something called a "drive screw", which you can think of as a one-sided rivet, if it helps. I remember growing up working in Grandpa's wood shop, and he used fluted nails for the same reason: it helps hold two layers together (better than just pounding it together with a straight or tapered one), while also being very quick to install.
They can be popped out from the back if the heads are solid, otherwise (as I believe is actually the case with some Raleighs), use a slightly-larger-than-the-hole-in-the-rivet twist drill bit, and go through fast in one operation, or you can wind up grabbing and spinning the rivet, rather than drilling it.
 02-01-19 | 11:24 AM
#7

Senior Member
Joined: Apr 2017
Posts: 2,248
Likes: 845
From: Los Angeles, CA
Bikes: 1964 Legnano Roma Olympiade, 1973 Raleigh Super Course, 1978 Raleigh Super Course, 1978 Peugeot PR10, 2002 Specialized Allez, 2007 Specialized Roubaix, 2013 Culprit Croz Blade
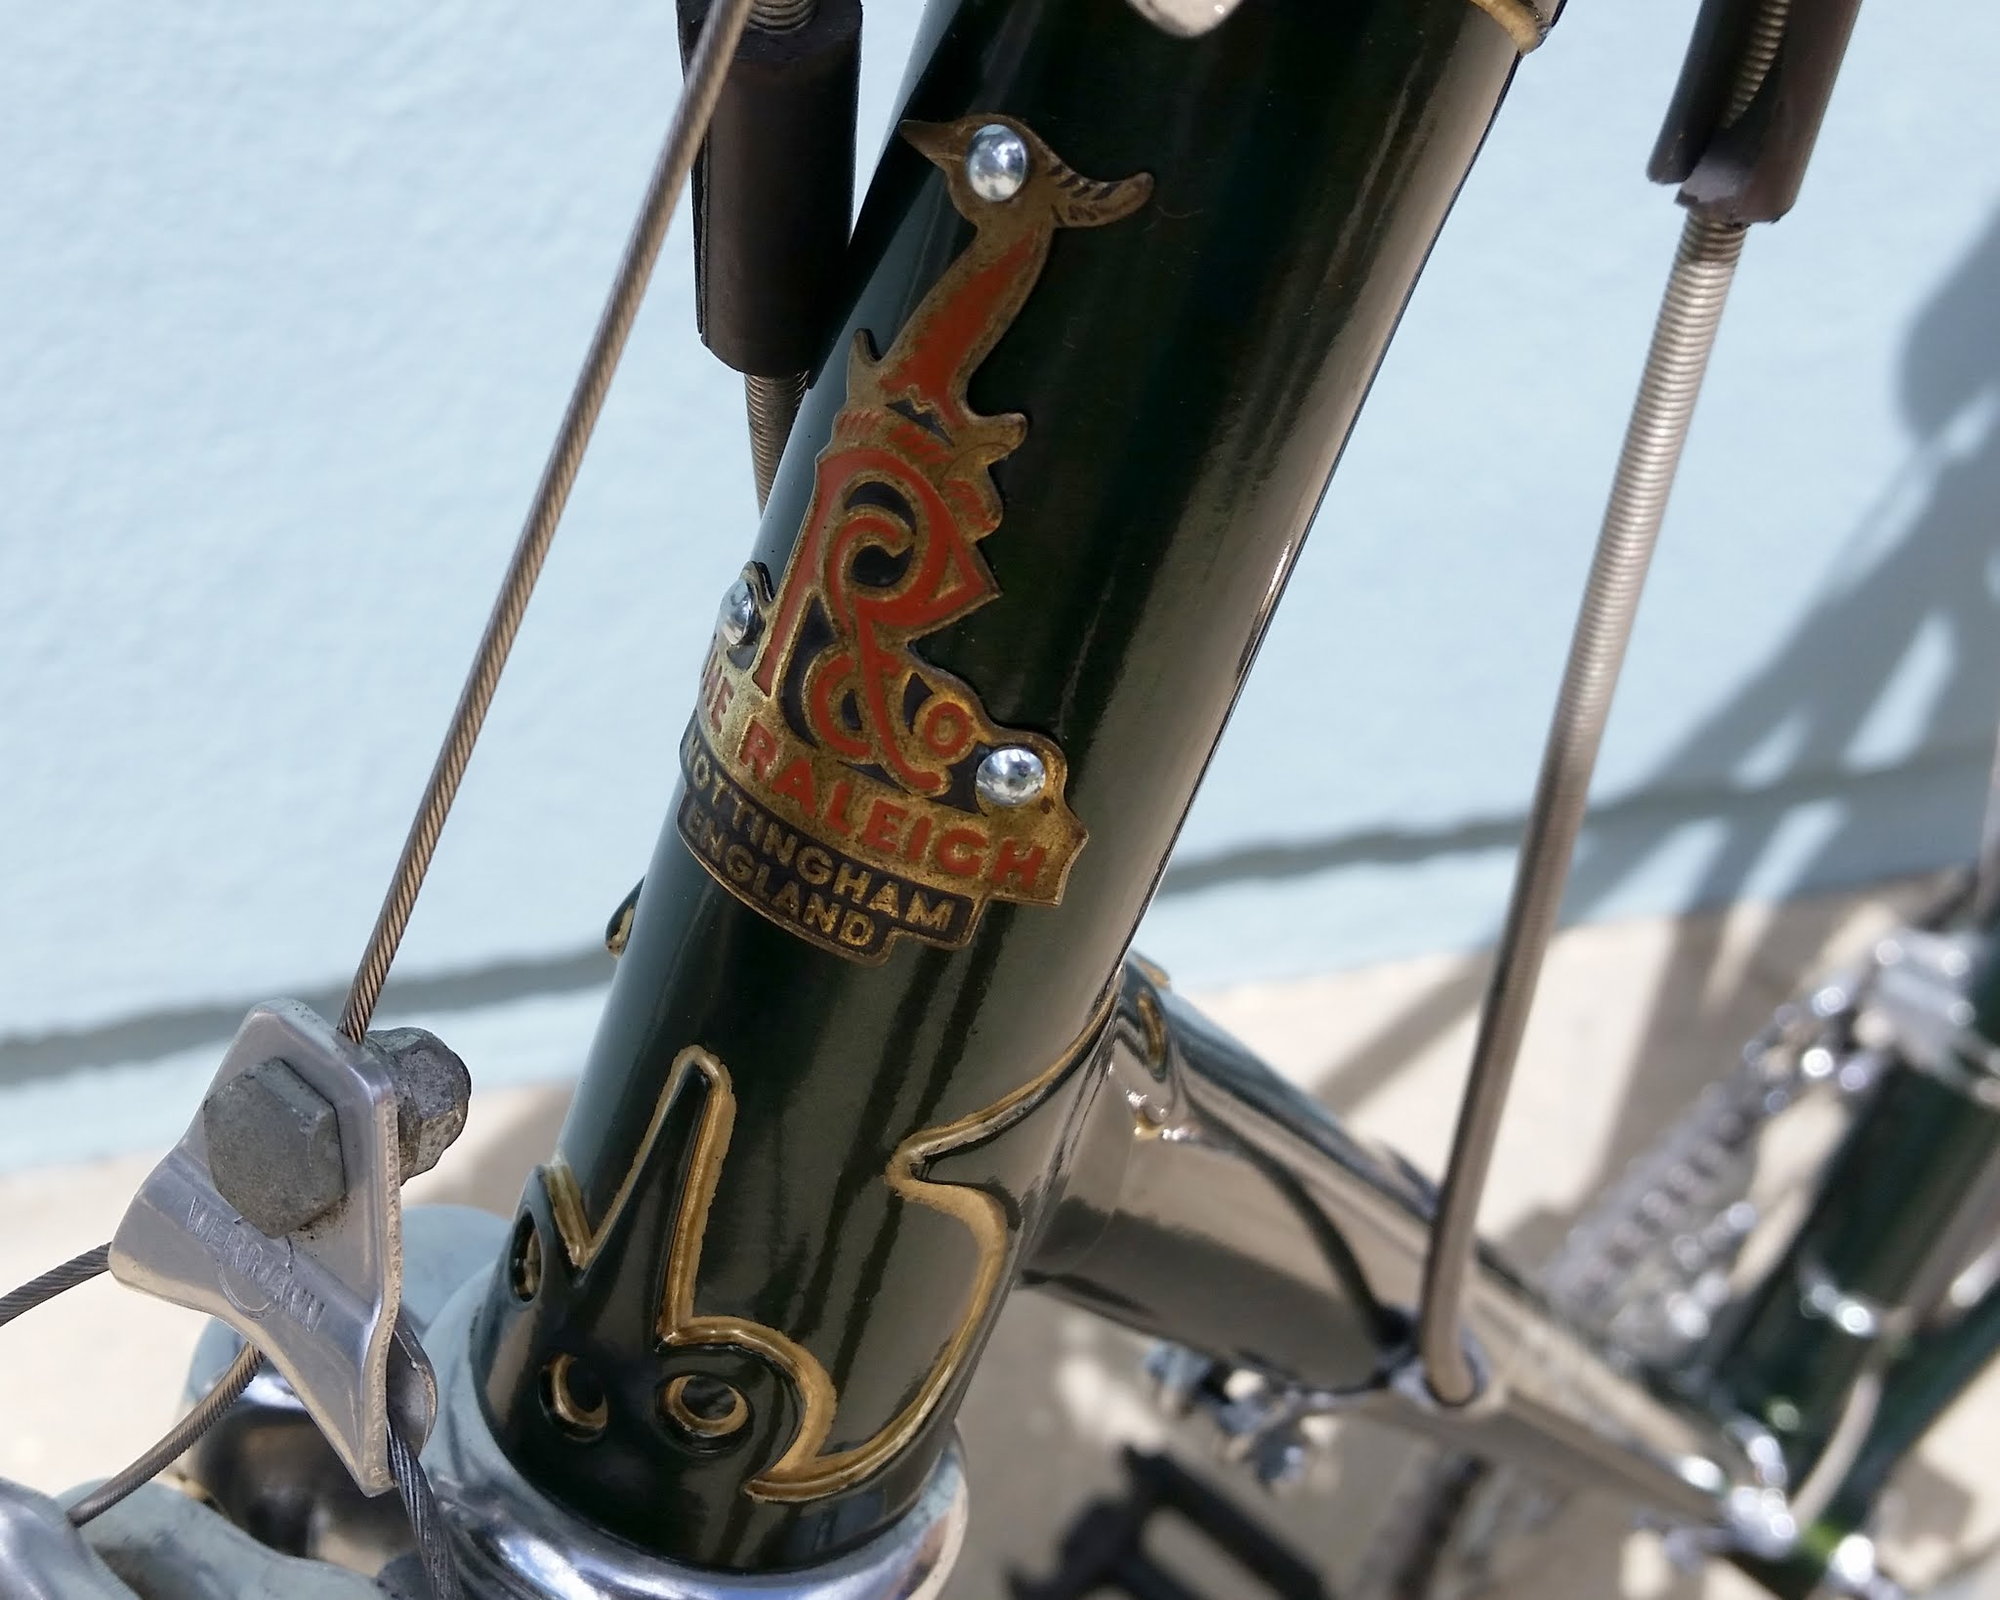
I worked from a bare frame, with holes, but no badge or rivets to remove. I found this badge on Ebay, and the seller included these round head rivets. I like these better than the hollow ring pop rivets I've seen on some Raleighs. Not sure what is correct. This picture is over a year old. The rivets have weathered a little to match the patina on the old badge. My rivets are like the ones pictured above. I used needle nose pliers to hold them, and tapped them in with a hammer. Be sure they aren't too long, or it may hit the steerer tube.
Edit: I said "rivet" I meant to say "drive screws". 🙄
Edit: I said "rivet" I meant to say "drive screws". 🙄
Last edited by Slightspeed; 02-01-19 at 03:11 PM.
02-01-19 | 12:18 PM
#8
Senior Member
Joined: Nov 2010
Posts: 1,229
Likes: 287
From: Magnolia State, 100° with 110% humidity
Bikes: American, Italian, and Japanese.. in no particular order.
Forum member CoRide59 had two sizes of drive screws on hand. He was generous enough to provide me with a few for my Bottecchia. PM him and inquire.
02-01-19 | 02:27 PM
#9

Senior Member


Joined: Dec 2006
Posts: 7,474
Likes: 559
I tried to use drive screws when I redid my Raleigh, and was careful with the bit size, but I felt like the head tube was starting to dent and the screws weren’t going in. Are you supposed to lube them?
I wound up just adhering the badge with clear silicone, and using brass escutcheon tacks bent over inside the head tube as dummy rivets.
I wound up just adhering the badge with clear silicone, and using brass escutcheon tacks bent over inside the head tube as dummy rivets.
02-01-19 | 04:46 PM
#10
Senior Member
Joined: Sep 2015
Posts: 1,689
Likes: 105
From: New Jersey
No, they don't need to be lubed, but they do need to be a specific size for a given hole. The packaging will tell you how big the hole needs to be for a given screw.
They are gently tapered so the "right size" is about the middle of the screw.
They are gently tapered so the "right size" is about the middle of the screw.
02-01-19 | 04:58 PM
#11
Senior Member
Joined: Dec 2006
Posts: 7,474
Likes: 559
Yeah, I assumed the drill size was important, and I followed the spec that was provided by McMaster Carr, where I bought the drive screws. Anyway it worked out fine the way I did it.
09-19-19 | 04:48 PM
#13

Senior Member
Joined: Sep 2017
Posts: 781
Likes: 398
From: Centennial, CO
Bikes: ‘85 Trek 760, ‘77/‘78 Trek 304, ‘74 Raleigh International
I bought a 100 pack of brass 2-56 1/8” screws from McMaster Carr. If anyone needs to attach a headbadge via this method, feel free to send overs PM.
01-03-22 | 11:57 PM
#15

Senior Member
Joined: Nov 2010
Posts: 22,994
Likes: 10,498
From: Sacramento, CA
Bikes: old ones
01-03-22 | 11:58 PM
#16
Senior Member
Joined: Nov 2010
Posts: 22,994
Likes: 10,498
From: Sacramento, CA
Bikes: old ones

Thread
Thread Starter
Forum
Replies
Last Post
mrkano
Bicycle Mechanics
7
01-09-11 11:34 PM
Geo Cruise
Bicycle Mechanics
9
11-23-10 12:24 PM
