


Rivnut tool
 12-06-20 | 03:49 PM
#1
Thread Starter
Member
Joined: Jun 2020
Posts: 36
Likes: 0
Rivnut tool
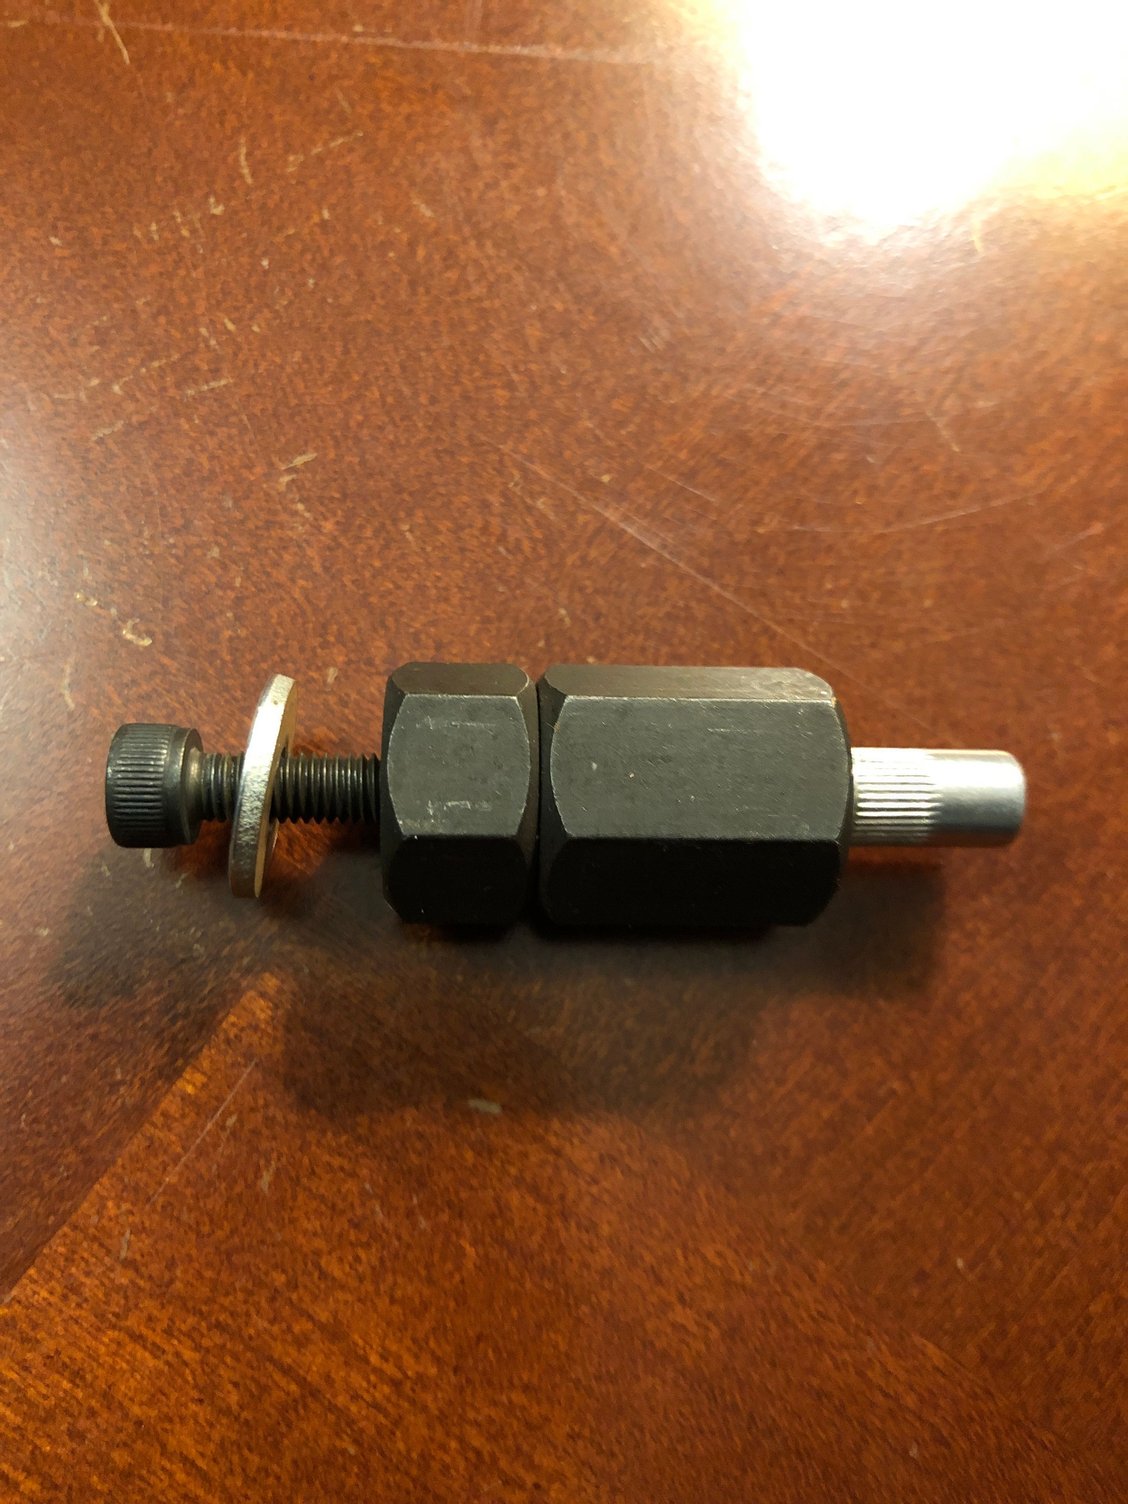
Can anyone tell me how to use this tool? I know the principal but can’t figure it out. I finally got the nerve to drill a hole in my frame but now can’t install the rivnut. I bought one of those skewer tools at the same time and can’t find it.
 12-06-20 | 07:20 PM
#2

Not lost wanderer.


Joined: Jan 2013
Posts: 3,684
Likes: 1,422
From: Lancaster, Pa
Bikes: Cambodia bike,2012 Fuji Stratos...
It looks like; put riv-nut on the allen screw, place in frame, hold tool with appropriate wrench and tighten the allen screw until the riv-nut expands inside of frame tube. Looks like it could take 3 or 4 hands to do it right.
12-06-20 | 07:29 PM
#3

Senior Member
Joined: Jan 2012
Posts: 1,475
Likes: 655
From: Joisey
Pic from the tool on Amazon.
Hint: clean the hole of burrs, try to clean the inside of the tube around the hole as well, than add a little epoxy to the outside of the rivnut body before insertion. The hardened epoxy will help prevent the rivnut from spinning later, especially if you don't tighten/crush it enough.
And I guess a warning, just from the reviews of the same/similar tool on amazon, seems like maybe some folks try to overtighten the rivnut and wind up snapping the installation bolt.
I tried to upload the pdf instruction sheet for a similar tool, but I couldn't figure how to upload a .pdf. Maybe I can't? Screenshot it as a .jpg and upload? I found it through google, so you can, too.
__________________
Fuggedaboutit!
Fuggedaboutit!
12-06-20 | 08:46 PM
#4
Thread Starter
Member
Joined: Jun 2020
Posts: 36
Likes: 0
mid I tighten the Allen screw it just keeps screwing into the rivnut. I think I have to hold the Allen and tighten the top but but it seems to just bind to the lower to where it feels like it will break.
12-06-20 | 08:47 PM
#5
Thread Starter
Member
Joined: Jun 2020
Posts: 36
Likes: 0
Pic from the tool on Amazon.
Hint: clean the hole of burrs, try to clean the inside of the tube around the hole as well, than add a little epoxy to the outside of the rivnut body before insertion. The hardened epoxy will help prevent the rivnut from spinning later, especially if you don't tighten/crush it enough.
And I guess a warning, just from the reviews of the same/similar tool on amazon, seems like maybe some folks try to overtighten the rivnut and wind up snapping the installation bolt.
I tried to upload the pdf instruction sheet for a similar tool, but I couldn't figure how to upload a .pdf. Maybe I can't? Screenshot it as a .jpg and upload? I found it through google, so you can, too.
12-06-20 | 09:25 PM
#6

Senior Member

Joined: Dec 2006
Posts: 7,472
Likes: 549
12-07-20 | 05:29 AM
#7
Senior Member


Joined: Feb 2020
Posts: 4,001
Likes: 2,317
This is much easier to tell if you have a lever setter.
If the OP did not get a few extra rivnuts with which to practice he might back up and do that.
12-07-20 | 09:45 AM
#8
Senior Member
Joined: Dec 2006
Posts: 7,472
Likes: 549
Agree 100%. I had a wrecked frame and was able to practice (see my post #6). Although I really had no trouble with the process, it was very reassuring to do a couple trials and see the results inside the tube. You could do the same thing with any piece of thin steel.
12-07-20 | 11:08 AM
#9
Senior Member

Joined: Oct 2005
Posts: 1,914
Likes: 449
From: Upper Left, USA
What's ya'lls opinion on doing this on a beefy vintage mountain bike fork? My friend has plans to do this. It's not something I would personally do but he's found examples of folks doing it on the internet and is pretty confident that it's no problem.
12-07-20 | 11:56 AM
#10
Senior Member
Joined: Dec 2006
Posts: 7,472
Likes: 549
Likely depends on how it's to be used. Around town bike, I suspect it's not a big deal. Extended off-road loaded touring, I would say why risk it?
12-07-20 | 01:02 PM
#11

Senior Member
Joined: May 2008
Posts: 10,106
Likes: 2,757
From: Fredericksburg, Va
Bikes: ? Proteous, '65 Frejus TDF, '73 Bottecchia Giro d'Italia, '83 Colnago Superissimo, '84 Trek 610, '84 Trek 760, '88 Pinarello Veneto, '88 De Rosa Pro, '89 Pinarello Montello, 'Litespeed Catalyst'94 Burley Duet, 97 Specialized RockHopper, 2010 Langster
Don't do it. Those bosses on the fork are not rivnuts, they are brazed on so no hole is created, IIRC.
__________________
Bikes don't stand alone. They are two tired.
Bikes don't stand alone. They are two tired.
12-07-20 | 02:26 PM
#12
Senior Member
Joined: Oct 2005
Posts: 1,914
Likes: 449
From: Upper Left, USA
There are lowrider mounts that are inset into the fork, but, yeah, for retrofitting I would rather have the braze-on on top of the fork and only on a fork that is way overbuilt.
07-18-21 | 01:01 PM
#14

Junior Member
Joined: Oct 2010
Posts: 10
Likes: 0
From: Olympia, WA
Bikes: 2012 Scott CR1 Pro, 2008 5.2 Madone
Lever Setting Tool for Rivnuts
There's a change in the resistance-to-effort that you can feel when these things set. What happens is that you stress the metal past yield, and after that point the stress-strain slope changes, it feels easier. Then as the collar squishes up against the flange it goes up again. (After that the resistance falls to zero.)
This is much easier to tell if you have a lever setter.
If the OP did not get a few extra rivnuts with which to practice he might back up and do that.
This is much easier to tell if you have a lever setter.
If the OP did not get a few extra rivnuts with which to practice he might back up and do that.
