


Fixed Cup Removal
 04-28-09 | 11:38 AM
#1
Thread Starter
Senior Member


Joined: Jan 2008
Posts: 15,095
Likes: 4,721
From: Beaverton, OR
Bikes: Yes
Fixed Cup Removal
Has anyone had any luck with the fixed cup removal method offered by Sheldon Brown using this DIY tool?
I was very optimistic. I set it up this morning, but I can't seem to get it to budge. I flooded the cup with PB Blaster and let it sit, so I'm hoping that when I go back to it tonight it'll just work.
In the meantime, does anyone have any tips to offer? At some point, it seems like I'd have to apply less pressure to the bolt on the inside to get the whole thing to turn. As I have it now, it seems about as tight as I can get it, but if I push on just the outside nut, the nut and bolt turn, but not the outside washer.
 04-28-09 | 11:59 AM
#2

PanGalacticGargleBlaster
Joined: Apr 2009
Posts: 7,531
Likes: 9
From: Smugglers Notch, Vermont
Bikes: Upright and Recumbent....too many to list, mostly Vintage.
The last one I worked on was stuck real bad too, I brought it down to my LBS and they removed it for free with that sheldon brown tool.
....Be sure you are turning it in the correct direction for the type of threading your BB has.
....Be sure you are turning it in the correct direction for the type of threading your BB has.
 04-28-09 | 12:05 PM
#4


Do you have access to a vise? This method has never failed for me, but it is nice to have a helper when getting the cup set properly in the jaws.
04-28-09 | 12:17 PM
#5
Thread Starter
Senior Member
Joined: Jan 2008
Posts: 15,095
Likes: 4,721
From: Beaverton, OR
Bikes: Yes
I started out by taking this to the LBS. For some strange reason, the flats on this fixed cup were the wrong size for the standard tools they had. I'm sure they have a vise, but this time of year I might need to make an appointment to get more than a minute or two of their time.
04-28-09 | 12:42 PM
#6

Thrifty Bill
Joined: Jan 2008
Posts: 23,639
Likes: 1,106
From: Mans of NC & SW UT Desert
Bikes: 86 Katakura Silk, 87 Prologue X2, 88 Cimarron LE, 1975 Sekai 4000 Professional, 73 Paramount, plus more
Soak it a couple of times with PB Blaster, and let it sit for a day or two. I have had good luck as long as I give the PB Blaster enough time. I am usually not too patient, I end up trying it about an hour after treating it, which sometimes works, sometimes does not.
04-28-09 | 01:26 PM
#7

Senior Member
Joined: Jan 2009
Posts: 537
Likes: 47
From: Mt. Horeb, Wisconsin
I've had great luck with this. I make sure there is at least one lock washer on each side to prevent slipping. In the toughest case I recall, I had my Craftsman breaker bar pushing forward with the frame sitting upright on a padded floor as i stood on the chainstays. Remember an english BB fixed cup is left-threaded.
04-28-09 | 01:33 PM
#8
Thread Starter
Senior Member
Joined: Jan 2008
Posts: 15,095
Likes: 4,721
From: Beaverton, OR
Bikes: Yes
04-28-09 | 03:28 PM
#9

feros ferio

Joined: Jul 2000
Posts: 22,397
Likes: 1,864
From: www.ci.encinitas.ca.us
Bikes: 1959 Capo Modell Campagnolo; 1960 Capo Sieger (2); 1962 Carlton Franco Suisse; 1970 Peugeot UO-8; 1982 Bianchi Campione d'Italia; 1988 Schwinn Project KOM-10;
On Capo #1, I finally gave up and let Jim Cunningham remove the fixed cup so that he could get started with the frame sandblasting and painting. Cyclart has the pro bottom bracket tool and a pole-mounted vise specifically for bottom bracket work. The old one fought us for the first several turns, which is the downside of the English/Swiss self-tightening system.
__________________
"Far and away the best prize that life offers is the chance to work hard at work worth doing." --Theodore Roosevelt
Capo: 1959 Modell Campagnolo, S/N 40324; 1960 Sieger (2), S/N 42624, 42597
Carlton: 1962 Franco Suisse, S/N K7911
Peugeot: 1970 UO-8, S/N 0010468
Bianchi: 1982 Campione d'Italia, S/N 1.M9914
Schwinn: 1988 Project KOM-10, S/N F804069
04-28-09 | 04:15 PM
#11
04-28-09 | 05:22 PM
#12

It's easier if the bike is sitting on its tires so you can use your weight to push down on the breaker bar. If you get slippage, your nut and bolt aren't tight enough. Put a wrench on the other side long enough to jam aganst the floor and stand on that breaker bar until it won't move any more. Now remove the second wrench and stand on the breaker bar again. Bounce if you're a lightweight.
 04-28-09 | 06:47 PM
#14

Old fart


Joined: Nov 2004
Posts: 26,324
Likes: 5,234
From: Appleton WI
Bikes: Several, mostly not name brands.

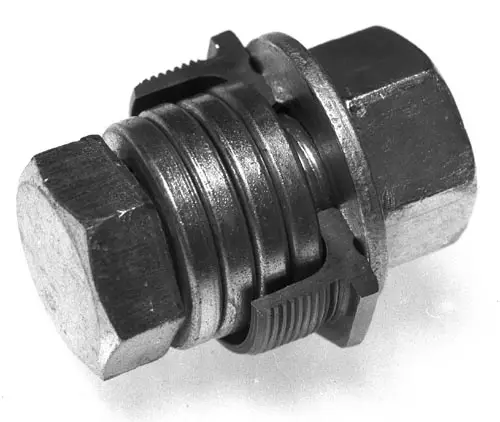
I tried the Sheldon Brown tool without success, took it to the LBS and left it for a week and a half -- still no joy, finally got this tool from Hugh Enox which did the trick:
 04-28-09 | 07:01 PM
#15

Senior Member
Joined: Mar 2009
Posts: 855
Likes: 0
From: Nova Scotia
I had great luck with this tool, too. I think I used a 3/4" bolt, with two lockwashers inside the cup, one lockwasher and a big flat washer on the outside, then the nut. Three foot length of ABS pipe as a cheater bar.
I don't remember if it's mentioned in Sheldon's description, but I use the adjustable cup to support the socket wrench extension. I also once had a really stubborn fixed cup, but since I wasn't keeping it I filed a bunch of notches around the spindle hole and that helped the flat washer get a really good grip on it.
I don't remember if it's mentioned in Sheldon's description, but I use the adjustable cup to support the socket wrench extension. I also once had a really stubborn fixed cup, but since I wasn't keeping it I filed a bunch of notches around the spindle hole and that helped the flat washer get a really good grip on it.
04-28-09 | 07:50 PM
#16

Se�or Member

Joined: Oct 2004
Posts: 18,462
Likes: 1,554
From: Hardy, VA
Bikes: Mostly English - predominantly Raleighs
I had one that was stuck on really tight. I tried the tool. I tried soaking. I gave up and took it to the LBS. A longer wrench and a few blows of the hammer had it come loose.
Sometimes there's no substitute for brute force.
Sometimes there's no substitute for brute force.
__________________
In search of what to search for.
In search of what to search for.
04-28-09 | 08:24 PM
#17

surly old man
Joined: Sep 2006
Posts: 3,393
Likes: 44
From: Carlisle, PA
Bikes: IRO Mark V, Karate Monkey half fat, Trek 620 IGH, Cannondale 26/24 MTB, Amp Research B3, and more.
I have never failed with the Sheldon tool. If the bolt is big enough to not snap in half, all you need is more leverage. Get thee a long length of pipe and a goon-helper who can assist keeping the frame in one place. Archimedes was right; this will work.
j
j
__________________
Cross Check Nexus7, IRO Mark V, Trek 620 Nexus7, Karate Monkey half fat, IRO Model 19 fixed, Amp Research B3, Surly 1x1 half fat fixed, and more...
--------------------------
SB forever
Cross Check Nexus7, IRO Mark V, Trek 620 Nexus7, Karate Monkey half fat, IRO Model 19 fixed, Amp Research B3, Surly 1x1 half fat fixed, and more...
--------------------------
SB forever
04-28-09 | 08:44 PM
#18

It's never failed me either. I've removed some steel cups that looked nearly bonded to the BB shell by rust. Soaking in penetrating oil, of course, will make things easier.
EDIT: What Dirtdrop said.
Last edited by JunkYardBike; 04-28-09 at 08:53 PM.
04-28-09 | 08:48 PM
#19

Chrome Freak
Joined: Dec 2005
Posts: 3,208
Likes: 26
From: Kuna, ID
Bikes: 71 Chrome Paramount P13-9, 73 Opaque Blue Paramount P15, 74 Blue Mink Raleigh Pro, 91 Waterford Paramount, Holland Titanium x2
That is my go to method now. It works great, even with my cheap Harbor Freight vise.
__________________
1971 Paramount P-13 Chrome
1973 Paramount P-15 Opaque Blue
1974 Raleigh Professional Blue Mink
1991 Waterford Paramount
Holland Titanium Dura Ace Group
Holland Titanium Ultegra Triple Group
1971 Paramount P-13 Chrome
1973 Paramount P-15 Opaque Blue
1974 Raleigh Professional Blue Mink
1991 Waterford Paramount
Holland Titanium Dura Ace Group
Holland Titanium Ultegra Triple Group
 04-28-09 | 10:28 PM
#21
Senior Member
Joined: Mar 2008
Posts: 1,683
Likes: 13
From: Kansai
One last thing to try with the Sheldon tool is to wipe everything down with mineral spirits or some other degreaser to make sure you are getting all the friction necessary. This has definitely worked for me where it was failing pre-degreasing.
04-29-09 | 06:59 AM
#23
Randomhead
Joined: Aug 2008
Posts: 25,930
Likes: 4,825
From: Happy Valley, Pennsylvania
We used to bolt the frame to the vise and that never failed
when all else fails, heat the cup, rust doesn't survive heat too well. Yes, it seems like that's backwards, but the cup isn't painted.
when all else fails, heat the cup, rust doesn't survive heat too well. Yes, it seems like that's backwards, but the cup isn't painted.
04-29-09 | 07:13 AM
#24

Senior Member
Joined: Dec 2001
Posts: 17,687
Likes: 12
From: n.w. superdrome
Bikes: 1 trek, serotta, rih, de Reus, Pogliaghi and finally a Zieleman! and got a DeRosa
I tried using the Sheldon tool on my Zieleman but to no avail, I didn't have a
gorilla helper so I brought the frame up to the LBS. they took out a VAR BB tool
and a 3 foot cheater bar. One loud snap and the fixed cup came out no less worse
for wear.
Marty
gorilla helper so I brought the frame up to the LBS. they took out a VAR BB tool
and a 3 foot cheater bar. One loud snap and the fixed cup came out no less worse
for wear.
Marty
__________________
Sono pi� lento di quel che sembra.
Odio la gente, tutti.
Want to upgrade your membership? Click Here.
Sono pi� lento di quel che sembra.
Odio la gente, tutti.
Want to upgrade your membership? Click Here.
04-29-09 | 07:47 AM
#25

BEHOLD! THE MANTICORE!
Joined: Sep 2008
Posts: 1,796
Likes: 2
From: 54914
after I snapped a couple bolt suing the sheldon method, I just got a long bolt with a couple of flat washers and used that to hole the fixed cup wrench in place, then broke it loose with a cheater bar