


another repaint thread: Spatter painting a bike frame


 09-13-11, 02:53 PM
#29
Lotus Monomaniac

Join Date: Mar 2011
Location: Pennsylvania
Posts: 1,031
Mentioned: 1 Post(s)
Tagged: 0 Thread(s)
Quoted: 5 Post(s)
Likes: 0
Liked 4 Times
in
4 Posts
Back in the day we had a spray gun with a special nozzle for producing spatter inside of car trunks and such.
I've also used a toothbrush dipped in paint and brushed over a wire mesh. Hover the mesh over the part to be painted and brush back and forth with the toothbrush.
Practice, practice, practice.
I've also used a toothbrush dipped in paint and brushed over a wire mesh. Hover the mesh over the part to be painted and brush back and forth with the toothbrush.
Practice, practice, practice.
09-13-11, 03:07 PM
#30
Senior Member
Join Date: Apr 2011
Location: Lancaster,CA the desert north of Los Angeles
Posts: 701
Bikes: 84' Ciocc, 79' Shogun 1000, 76' KHS Gran Sport, 96' Schwinn Super Sport,
Mentioned: 0 Post(s)
Tagged: 0 Thread(s)
Quoted: 2 Post(s)
Likes: 0
Liked 0 Times
in
0 Posts
HOT STUFF, that is way cooool. Did you use a toothbrush or paintbrush. Give us all the details.
09-13-11, 03:48 PM
#31

Senior Member

Join Date: Aug 2009
Location: Berkeley, CA
Posts: 7,244
Bikes: '72 Cilo Pacer, '72 Gitane Gran Tourisme, '72 Peugeot PX10, '73 Speedwell Ti, '74 Peugeot UE-8, '75 Peugeot PR-10L, '80 Colnago Super, '85 De Rosa Pro, '86 Look Equipe 753, '86 Look KG86, '89 Parkpre Team, '90 Parkpre Team MTB, '90 Merlin
Mentioned: 87 Post(s)
Tagged: 0 Thread(s)
Quoted: 834 Post(s)
Liked 2,127 Times
in
555 Posts
__________________
-Randy
'72 Cilo Pacer � '72 Peugeot PX10 � '73 Speedwell Ti � '74 Nishiki Competition � '74 Peugeot UE-8 � '86 Look Equipe 753 � '86 Look KG86 � '89 Parkpre Team Road � '90 Parkpre Team MTB � '90 Merlin Ti
Avatar photo courtesy of jeffveloart.com, contact: contact: jeffnil8 (at) gmail.com.
-Randy
'72 Cilo Pacer � '72 Peugeot PX10 � '73 Speedwell Ti � '74 Nishiki Competition � '74 Peugeot UE-8 � '86 Look Equipe 753 � '86 Look KG86 � '89 Parkpre Team Road � '90 Parkpre Team MTB � '90 Merlin Ti
Avatar photo courtesy of jeffveloart.com, contact: contact: jeffnil8 (at) gmail.com.
09-13-11, 03:59 PM
#33
Larger Chainring

Join Date: Jul 2009
Location: Corvallis, Oregon
Posts: 1,037
Bikes: 1988 Schwinn Circuit. Bike-Boom-Puegeot. First "real bike" Trek 720 Hybrid in gross disrepair.
Mentioned: 0 Post(s)
Tagged: 0 Thread(s)
Quoted: 1 Post(s)
Likes: 0
Liked 1 Time
in
1 Post
Whoa, you were able to get a free Waterford frameset by buying a fixie and selling off the components?
Excellent work. May I someday be so lucky.
Excellent work. May I someday be so lucky.
09-13-11, 04:00 PM
#34
Larger Chainring
Join Date: Jul 2009
Location: Corvallis, Oregon
Posts: 1,037
Bikes: 1988 Schwinn Circuit. Bike-Boom-Puegeot. First "real bike" Trek 720 Hybrid in gross disrepair.
Mentioned: 0 Post(s)
Tagged: 0 Thread(s)
Quoted: 1 Post(s)
Likes: 0
Liked 1 Time
in
1 Post
Just think you'll be able to put the money you didn't spend on it towards a full Waterford resto one day 
Nah, it looks great. Ride the heck out of it.
Nah, it looks great. Ride the heck out of it.
09-13-11, 07:13 PM
#35
Bicycle Repairman
I did splatter jobs on some freestyle bike components with an old paintbrush and some model enamel. Glob some paint on and give it a flick. It's messy so make sure you have a good area to do this. I liked Tamaya paint. It's just the right thickness, comes in a bazillion colors, and played well with most of the clearcoats I sprayed over it.
I know you can find squiggle paint at some hardware or craft stores. I did a bike frame with that once and it did a pretty neat job. They may even make splatter paint in a spray can now.
I know you can find squiggle paint at some hardware or craft stores. I did a bike frame with that once and it did a pretty neat job. They may even make splatter paint in a spray can now.
09-14-11, 04:28 AM
#36
Senior Member
Join Date: Nov 2008
Location: South Jersey
Posts: 1,959
Bikes: Too many Bicycles to list
Mentioned: 10 Post(s)
Tagged: 0 Thread(s)
Quoted: 90 Post(s)
Liked 137 Times
in
45 Posts
That looks cool, I liked the way my motorcycle came out when my buddy got done with it also so I may give it a try with one of the many frames I have that need a repaint.
09-14-11, 10:09 PM
#37
Senior Member

Join Date: Jan 2009
Location: San Diego
Posts: 744
Bikes: Too many to list, all titanium or steel.
Mentioned: 0 Post(s)
Tagged: 0 Thread(s)
Quoted: 7 Post(s)
Likes: 0
Liked 8 Times
in
7 Posts
I bumped in to Joe Bell on a weekend ride this past spring. If I see him again I'll ask how he gets his splatter effect. I'm assuming they have a gun with a tip that they use, but you never know. The job you did also looks great.
 09-15-11, 08:29 AM
#39
Passista
Join Date: Jul 2005
Posts: 7,599
Bikes: 1998 Pinarello Asolo, 1992 KHS Monta�a pro, 1980 Raleigh DL-1, IGH Hybrid, IGH Utility
Mentioned: 5 Post(s)
Tagged: 0 Thread(s)
Quoted: 868 Post(s)
Liked 721 Times
in
396 Posts
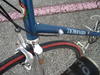
While sanding a grafitti covered wall for repainting, I found these, caused by many layers of dripping paint:
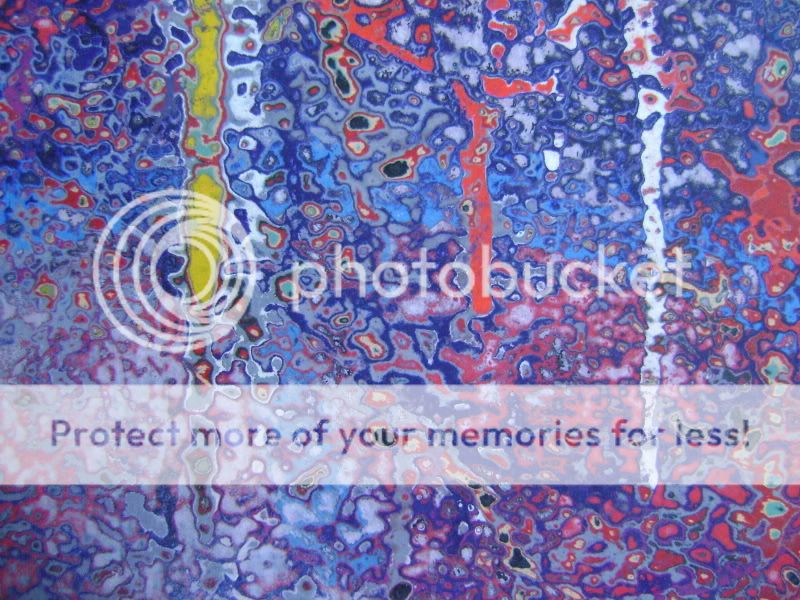
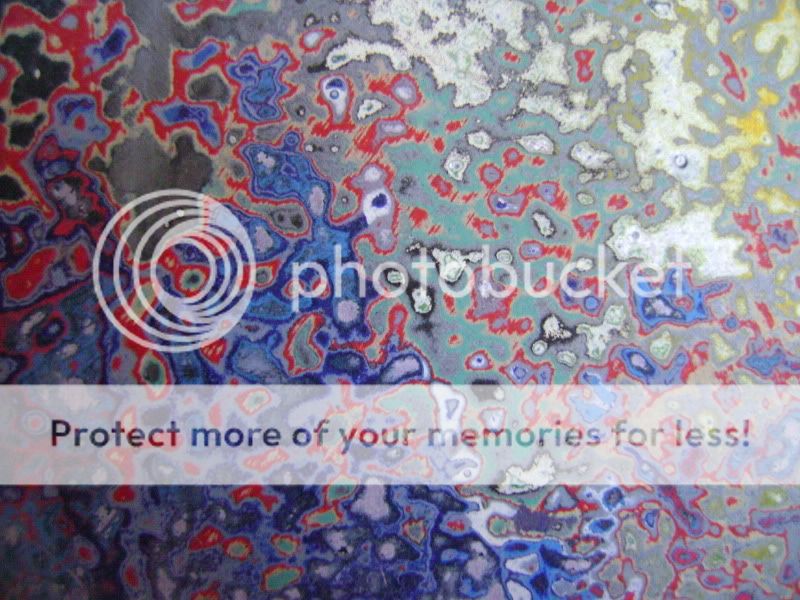
Thought it could be a nice effect for a bicycle, but it would be difficult to achieve on round tubes.
Thought it could be a nice effect for a bicycle, but it would be difficult to achieve on round tubes.
 09-15-11, 08:36 AM
#41

Bicycle Repair Man !!!

I have had a splatter painted bicycle for some time now. It is an eighties something Canadian made Proctor and, even though I do not really like the splatter effect, it does hide paint chips really well...


Built in Edmonton during our golden age... we used to have 4 frame builders working here in the eighties and Proctors tend to be extremely well made.
Last edited by Sixty Fiver; 09-15-11 at 08:45 AM.
09-15-11, 09:57 AM
#42
Senior Member
Join Date: Sep 2007
Location: Scottsdale, AZ
Posts: 4,466
Bikes: many
Mentioned: 0 Post(s)
Tagged: 0 Thread(s)
Quoted: 18 Post(s)
Likes: 0
Liked 16 Times
in
13 Posts
 09-20-11, 10:29 AM
#43
Senior Member
Thread Starter
Join Date: Nov 2009
Posts: 422
Mentioned: 0 Post(s)
Tagged: 0 Thread(s)
Quoted: 0 Post(s)
Likes: 0
Liked 1 Time
in
1 Post
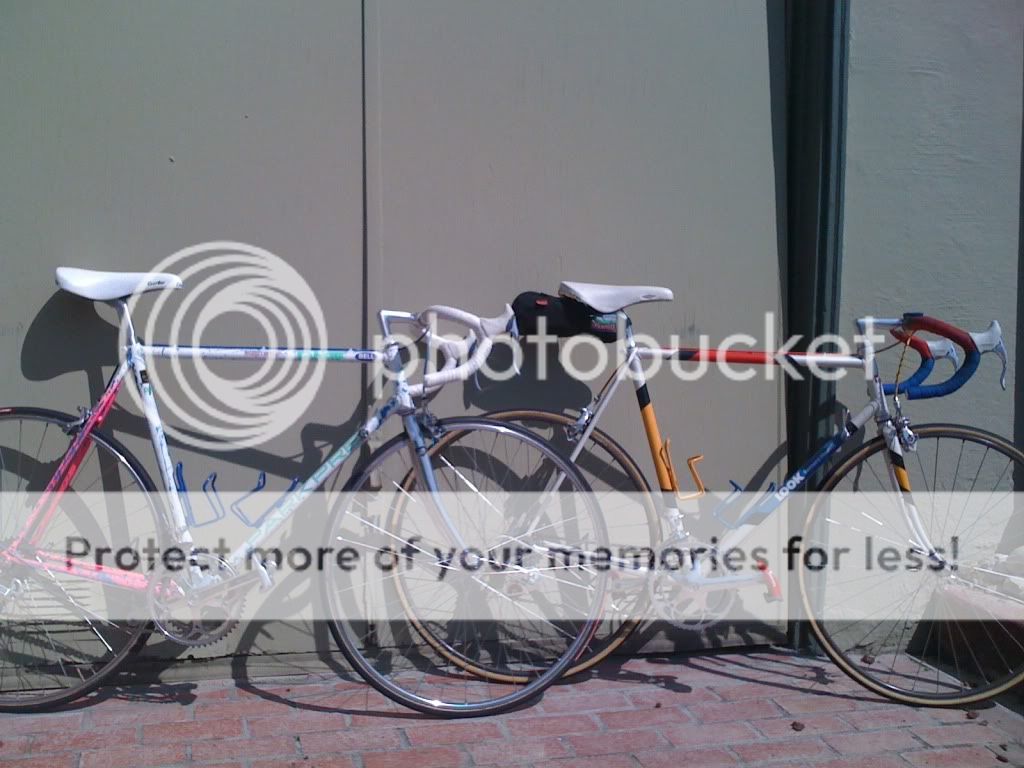
ok, here's an update. I added 3 more colors - orange, light blue and dark green.


also how i did it; quite simple actually. I took the small red tube thing that comes on a WD40 can and cut it into small 1cm sections and glued those to the nozzle of testers enamel spray cans (used both epoxy and super glue - worked the same as long as you seal all the way around the thin tube - or it will come out the sides. as pictured. when spraying, you have to push down very lightly - NOT all the way - for the paint to come out clumped/spattery. you will find that some of the nozzles you make work better than others in terms of getting even "spatter" - just switch the nozzle between cans once you find one that works. The key is to practice practice practice. perfect your technique before hitting the frame with paint.

My next step is to clear-coat the frame with some UPOL#1.
also how i did it; quite simple actually. I took the small red tube thing that comes on a WD40 can and cut it into small 1cm sections and glued those to the nozzle of testers enamel spray cans (used both epoxy and super glue - worked the same as long as you seal all the way around the thin tube - or it will come out the sides. as pictured. when spraying, you have to push down very lightly - NOT all the way - for the paint to come out clumped/spattery. you will find that some of the nozzles you make work better than others in terms of getting even "spatter" - just switch the nozzle between cans once you find one that works. The key is to practice practice practice. perfect your technique before hitting the frame with paint.
My next step is to clear-coat the frame with some UPOL#1.
09-20-11, 10:43 AM
#44

Senior Member
Join Date: Jun 2006
Posts: 20,305
Mentioned: 130 Post(s)
Tagged: 0 Thread(s)
Quoted: 3464 Post(s)
Liked 2,831 Times
in
1,997 Posts
I have had a friend paint two motorcycle gas tanks and side covers for me in a splatter finish and that is how he did it, he used a stiff brush and flicks it with his fingers (wears gloves) and then clears it. I don't have any pics scanned into my computer of it and the bike is buried in my shed & covered so I can't get any but it came out just like that frame.
Glenn
Glenn
I have done a splatter transition between two colors before, Imron w/o much reducer for the splatter then thin it out for the fill color. Low pressure to the gun does not hurt either.
09-20-11, 10:44 AM
#45
Senior Member
Join Date: Jun 2006
Posts: 20,305
Mentioned: 130 Post(s)
Tagged: 0 Thread(s)
Quoted: 3464 Post(s)
Liked 2,831 Times
in
1,997 Posts
ok, here's an update. I added 3 more colors - orange, light blue and dark green.
also how i did it; quite simple actually. I took the small red tube thing that comes on a WD40 can and cut it into small 1cm sections and glued those to the nozzle of testers enamel spray cans (used both epoxy and super glue - worked the same as long as you seal all the way around the thin tube - or it will come out the sides. as pictured. when spraying, you have to push down very lightly - NOT all the way - for the paint to come out clumped/spattery. you will find that some of the nozzles you make work better than others in terms of getting even "spatter" - just switch the nozzle between cans once you find one that works. The key is to practice practice practice. perfect your technique before hitting the frame with paint.
My next step is to clear-coat the frame with some UPOL#1.
 10-11-11, 05:01 PM
#48
Senior Member
Thread Starter
Join Date: Nov 2009
Posts: 422
Mentioned: 0 Post(s)
Tagged: 0 Thread(s)
Quoted: 0 Post(s)
Likes: 0
Liked 1 Time
in
1 Post
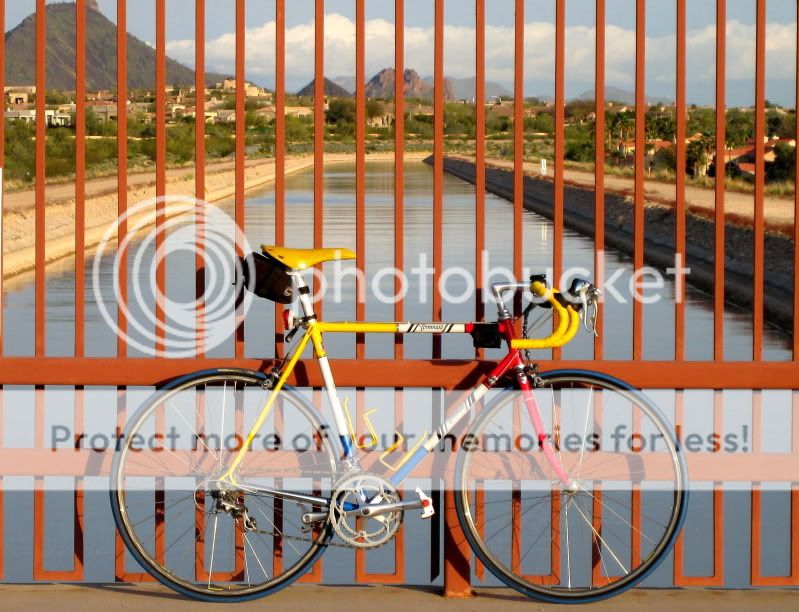
Final build! finished the clear coat and then wet sanded with 800, 1200, 2000, 4000grit and then car wax.
7800 Dura ace RD, shifters, Crank (i know i know... far from classic or vintage)
6600 Brakes (likely will get replaced when i find a good deal on DA)
7700 FD
Dura ace 130mm stem - hidden bolt design, Dura ace aero seatpost (740x era?)
7410 dura ace headset (So smooth!)
7400 dura ace wheelset - my only gripe with these is the dark anodized rims - eventually there going to get rubbed off from the brake pads and not look so great - who thought that this was a great idea to begin with?! (any one want to trade for a set that has silver rims?)
 10-11-11, 05:37 PM
#50
Senior Member
Join Date: Apr 2011
Location: Lancaster,CA the desert north of Los Angeles
Posts: 701
Bikes: 84' Ciocc, 79' Shogun 1000, 76' KHS Gran Sport, 96' Schwinn Super Sport,
Mentioned: 0 Post(s)
Tagged: 0 Thread(s)
Quoted: 2 Post(s)
Likes: 0
Liked 0 Times
in
0 Posts
WOW, only thing I would do is go to a 7700 crank and yes the rims in the before shot would be perfect. Have all the info in my book of future projects.