


Cold setting: If you're not going to do it yourself. . .
 02-16-12, 04:07 PM
#51
Senior Member
Join Date: Jul 2009
Posts: 11,128
Bikes: 1986 Alan Record Carbonio, 1985 Vitus Plus Carbone 7, 1984 Peugeot PSV, 1972 Line Seeker, 1986(est.) Medici Aerodynamic (Project), 1985(est.) Peugeot PY10FC
Mentioned: 22 Post(s)
Tagged: 0 Thread(s)
Quoted: 150 Post(s)
Likes: 0
Liked 34 Times
in
27 Posts
Although I think that it's a good idea to cold set and realign the DO faces on a steel frame even for a small amount of change like the 120 - 126mm one you are trying to do, many just don't bother to do so and go ahead and squeeze in their wider hubbed wheels into the rear triangle and cinch things down with the skewer without any real problems. You will just have to struggle with squeezing in and yanking out the wheel from the dropouts everytime you want to service it....
In short, it's not rocket science that will easily asplode in you face, don't sweat it if you don't want to do it.
Now for a 120 to 135mm jump, it's a different story.....
Chombi
In short, it's not rocket science that will easily asplode in you face, don't sweat it if you don't want to do it.
Now for a 120 to 135mm jump, it's a different story.....
Chombi
 02-22-12, 10:00 PM
#52

Senior Member

Join Date: Jun 2008
Location: Louisville, KY
Posts: 13,447
Mentioned: 33 Post(s)
Tagged: 0 Thread(s)
Quoted: 4236 Post(s)
Liked 2,949 Times
in
1,808 Posts
I'd decided to take it to the lbs to have them cold set mine as they'd quoted me a very reasonable $40 to do it. But of course today I got the daughter bundled up, grabbed the frame and took the bus over there only to find they're closed on Wednesdays.
Bummer. So, on the way home, I stopped by the two hardware stores that were open. The first didn't have threaded bar longer than 6" and didn't have any 2x4's. The second had both threaded bar and 2x4's, but the 2x4's were 8' long. I figured that was a bit much to try to get on the bus to take back home wearing my baby on my back and carrying a bike frame in my other hand, so I decided to spend the $5 to try the threaded bar method. Was glad to have my frame with me so I could see that 3/8 was the best fit for my dropouts. Kind of slow and painful going as for some reason the last owner of the bike must have gone hardcore the other way and moved it from 126 mm (I'm assuming as it was originally a 6 speed) to ~115 mm.
Took it out to ~140mm twice with the nuts in and it's sprung back to 120mm, so it looks like I'm going to have to spread it a bit farther if I want to get it out to 130, so my wife doesn't have to struggle to get the wheel in and out if she ever has to change a flat by herself.
Probably going to call it a night with the bar in there spreading the dropouts to 145 and try in the morning to see what that springs back to. Wish there was a number to know how far to go, but that probably depends on the steel, the bike design, and other factors I'm not thinking of. The fact I'm working on a mixte with the 3 stays back there probably doesn't help.
__________________
Bikes: 1996 Eddy Merckx Titanium EX, 1989/90 Colnago Super(issimo?) Piu(?),1990 Concorde Aquila(hit by car while riding), others in build queue "when I get the time"
Bikes: 1996 Eddy Merckx Titanium EX, 1989/90 Colnago Super(issimo?) Piu(?),
02-22-12, 11:05 PM
#53
Cottered Crank

Join Date: Aug 2010
Location: Chicago
Posts: 3,401
Bikes: 1954 Raleigh Sports 1974 Raleigh Competition 1969 Raleigh Twenty 1964 Raleigh LTD-3
Mentioned: 0 Post(s)
Tagged: 0 Thread(s)
Quoted: 8 Post(s)
Likes: 0
Liked 11 Times
in
7 Posts
Alignment gauges are as simple as an old axle cut in half (best to start with one that wasn't bent in the first place or it'll lie to you!)

Here is my last cold-set before I even started. Look how far the DO's are out of alignment from who-knows-what the PO did to the bike. Maybe it came from the factory this way. The second front axle is my fork alignment gauge set that I use in the front part of the DO to make sure everything stays planar while I'm adjusting instead of just bending the lower lip of the DO.
Adjustment is achieved by putting a Craftsman* long-handle box-end wrench on the inside and torque away at the axle itself. The DO's will bend WAY before the axle ever will. The human eye is pretty darn good at seeing even the slightest bit of misalignment.
* Lifetime guarantee
02-23-12, 02:51 AM
#54
Senior Member
Join Date: Oct 2009
Location: Minneapolis
Posts: 2,470
Bikes: -1973 Motobecane Mirage -197? Velosolex L'Etoile -'71 Raleigh Super Course
Mentioned: 0 Post(s)
Tagged: 0 Thread(s)
Quoted: 0 Post(s)
Likes: 0
Liked 2 Times
in
2 Posts
The only advice I'd like to add (didn't read page 2, sorry if Im repeating someone else's advice) is to put a clamp on the seatstays at the brake bridge. I've never done it myself, but I've heard from a couple different people that it's possible to crack the braze there. Less of a problem squeezing down than spreading out, of course.
02-23-12, 03:16 AM
#55
Junior Member
Join Date: Mar 2010
Posts: 13
Mentioned: 0 Post(s)
Tagged: 0 Thread(s)
Quoted: 0 Post(s)
Likes: 0
Liked 0 Times
in
0 Posts
[QUOTE=himespau;13886596]
Probably going to call it a night with the bar in there spreading the dropouts to 145 and try in the morning to see what that springs back to. Wish there was a number to know how far to go, but that probably depends on the steel, the bike design, and other factors I'm not thinking of. The fact I'm working on a mixte with the 3 stays back there probably doesn't help.[/QUOT/)
Dear Cold-setter,
I had to go to 165mm on my old ten speed to obtain a permanent 130mm . The frame is pure gas pipe .
Hush
02-23-12, 05:16 AM
#56
Hopelessly addicted...

Join Date: Aug 2009
Location: Central Maryland
Posts: 4,955
Bikes: 1949 Hercules Kestrel, 1950 Norman Rapide, 1970 Schwinn Collegiate, 1972 Peugeot UE-8, 1976 Raleigh Sports, 1977 Raleigh Sports, 1977 Jack Taylor Tandem, 1984 Davidson Tandem, 2010 Bilenky "BQ" 650B Constructeur Tandem, 2011 Linus Mixte
Mentioned: 13 Post(s)
Tagged: 0 Thread(s)
Quoted: 3 Post(s)
Likes: 0
Liked 10 Times
in
9 Posts
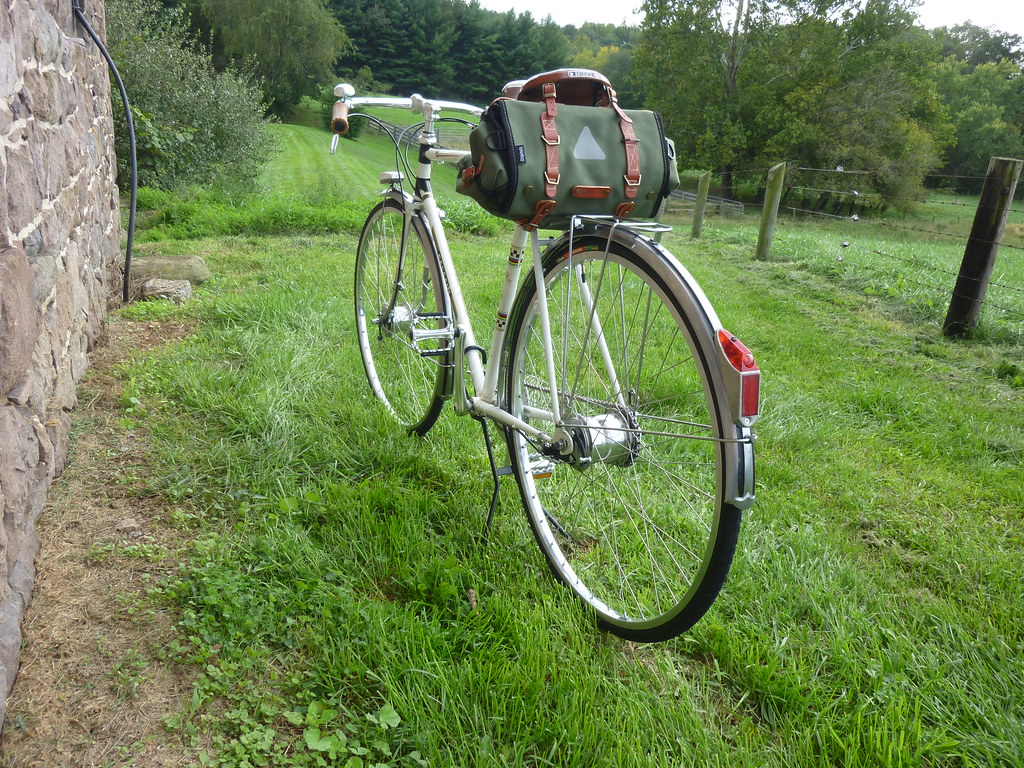
So kiwigem, are you seriously considering a Sturmey X-RF8(w) for this bike? I can tell you from personal experience that I have the drum brake version of this hub on my Peugeot PX-8 and like it a lot. It doesn't have a ton of miles on it yet, so I can't speak to longevity and reliability yet, but I expect it to be fine over the long run. I know that rhm has a small wheeled bike with one of these hubs, so you may want to touch bases with him to get his valuable insights.
P1010517 by Sallad Rialb, on Flickr
P1010517 by Sallad Rialb, on Flickr
02-23-12, 05:25 AM
#57
Senior Member
Join Date: Jun 2008
Location: Louisville, KY
Posts: 13,447
Mentioned: 33 Post(s)
Tagged: 0 Thread(s)
Quoted: 4236 Post(s)
Liked 2,949 Times
in
1,808 Posts
Thanks good to know I've got a ways to spread it yet. Will probably go to 150 then check and then go out in 3-5 mm increments checking each time depending on what it looks like after 150. Don't have quite gas pipe, but it's not the lightest stuff in the world either (proprietary Fuji tubing).
__________________
Bikes: 1996 Eddy Merckx Titanium EX, 1989/90 Colnago Super(issimo?) Piu(?),1990 Concorde Aquila(hit by car while riding), others in build queue "when I get the time"
Bikes: 1996 Eddy Merckx Titanium EX, 1989/90 Colnago Super(issimo?) Piu(?),
02-23-12, 07:37 AM
#58
Fahrrad Mama
Thread Starter

So kiwigem, are you seriously considering a Sturmey X-RF8(w) for this bike? I can tell you from personal experience that I have the drum brake version of this hub on my Peugeot PX-8 and like it a lot. It doesn't have a ton of miles on it yet, so I can't speak to longevity and reliability yet, but I expect it to be fine over the long run. I know that rhm has a small wheeled bike with one of these hubs, so you may want to touch bases with him to get his valuable insights.
P1010517 by Sallad Rialb, on Flickr
P1010517 by Sallad Rialb, on Flickr
02-23-12, 08:28 AM
#59
Hopelessly addicted...
Join Date: Aug 2009
Location: Central Maryland
Posts: 4,955
Bikes: 1949 Hercules Kestrel, 1950 Norman Rapide, 1970 Schwinn Collegiate, 1972 Peugeot UE-8, 1976 Raleigh Sports, 1977 Raleigh Sports, 1977 Jack Taylor Tandem, 1984 Davidson Tandem, 2010 Bilenky "BQ" 650B Constructeur Tandem, 2011 Linus Mixte
Mentioned: 13 Post(s)
Tagged: 0 Thread(s)
Quoted: 3 Post(s)
Likes: 0
Liked 10 Times
in
9 Posts
This bike was a barn find, so it's not perfect, but thankfully it doesn't have any rust.So you're going to put a derailleur back on the bike, eh? I think you know my thoughts on that.
 02-23-12, 08:39 AM
#60
Senior Member

Dovetube:
I have a story involving one the most prestigious frame painters in the U.K. If this fords any example, you can assume that stays, rear dropouts, front dropouts, fork blades, BB threads, BB facing, steering tube threads � and any symetery of the frame will be completely passed over by frame painters. There may be exceptions, but you would be well-advised to inquire whether "restoration" is a complete servicing, or only what you are more likely paying for � coating ... and for extra charges, graphics. This is not a negative reflection on the frame painters. They are trades people who are practicing their trade in the same way that coach builders are not automatically assumed to be motor fitters � to refer to a former age of motoring.
A frame of my experience was brilliantly painted in stove enamel matching the original and affixed with excellent recreations of the original graphics. But, the entire frame had to be strung, and every aspect mentioned above was found to be needing the attention of a frame maker � after the painters. Expensive tools were used ... even a lathe! The frame painters did their excellent work, and if they became aware of the needed servicing, they did not leave any note or advice. Now, this hand-built Reynolds 531 frame is as good or better than new. Not cheap!
Do painters do this stuff? .... I want to know if painters do this because I have to do work on curved blade forks which can get complicated.
A frame of my experience was brilliantly painted in stove enamel matching the original and affixed with excellent recreations of the original graphics. But, the entire frame had to be strung, and every aspect mentioned above was found to be needing the attention of a frame maker � after the painters. Expensive tools were used ... even a lathe! The frame painters did their excellent work, and if they became aware of the needed servicing, they did not leave any note or advice. Now, this hand-built Reynolds 531 frame is as good or better than new. Not cheap!
__________________
Vitus 979, Simplon 4 Star, Gazelle Champion Mondial, Woodrup Giro, Dawes Atlantis
Vitus 979, Simplon 4 Star, Gazelle Champion Mondial, Woodrup Giro, Dawes Atlantis
02-23-12, 09:03 AM
#61
Senior Member
Join Date: Jun 2008
Location: Louisville, KY
Posts: 13,447
Mentioned: 33 Post(s)
Tagged: 0 Thread(s)
Quoted: 4236 Post(s)
Liked 2,949 Times
in
1,808 Posts
Dovetube: I have a story involving one the most prestigious frame painters in the U.K. If this fords any example, you can assume that stays, rear dropouts, front dropouts, fork blades, BB threads, BB facing, steering tube threads — and any symetery of the frame will be completely passed over by frame painters. There may be exceptions, but you would be well-advised to inquire whether "restoration" is a complete servicing, or only what you are more likely paying for — coating ... and for extra charges, graphics. This is not a negative reflection on the frame painters. They are trades people who are practicing their trade in the same way that coach builders are not automatically assumed to be motor fitters — to refer to a former age of motoring.
A frame of my experience was brilliantly painted in stove enamel matching the original and affixed with excellent recreations of the original graphics. But, the entire frame had to be strung, and every aspect mentioned above was found to be needing the attention of a frame maker — after the painters. Expensive tools were used ... even a lathe! The frame painters did their excellent work, and if they became aware of the needed servicing, they did not leave any note or advice. Now, this hand-built Reynolds 531 frame is as good or better than new. Not cheap!
A frame of my experience was brilliantly painted in stove enamel matching the original and affixed with excellent recreations of the original graphics. But, the entire frame had to be strung, and every aspect mentioned above was found to be needing the attention of a frame maker — after the painters. Expensive tools were used ... even a lathe! The frame painters did their excellent work, and if they became aware of the needed servicing, they did not leave any note or advice. Now, this hand-built Reynolds 531 frame is as good or better than new. Not cheap!
__________________
Bikes: 1996 Eddy Merckx Titanium EX, 1989/90 Colnago Super(issimo?) Piu(?),1990 Concorde Aquila(hit by car while riding), others in build queue "when I get the time"
Bikes: 1996 Eddy Merckx Titanium EX, 1989/90 Colnago Super(issimo?) Piu(?),
02-23-12, 09:48 AM
#62
Curmudgeon in Training

Join Date: May 2009
Location: Rural Retreat, VA
Posts: 1,956
Bikes: 1974 Gazelle Champion Mondial, 2010 Cannondale Trail SL, 1988 Peugeot Nice, 1992ish Stumpjumper Comp,1990's Schwinn Moab
Mentioned: 1 Post(s)
Tagged: 0 Thread(s)
Quoted: 19 Post(s)
Likes: 0
Liked 9 Times
in
8 Posts
I bought the park tool version. Since acquiring it, I have yet to find a frame, even new factory frames, that was properly aligned.
02-23-12, 09:52 AM
#63
Senior Member

__________________
Bikes on Flickr
I prefer email to private messages. You can contact me at justinhughes@me.com
Bikes on Flickr
I prefer email to private messages. You can contact me at justinhughes@me.com
02-23-12, 10:04 AM
#64
Hopelessly addicted...
Join Date: Aug 2009
Location: Central Maryland
Posts: 4,955
Bikes: 1949 Hercules Kestrel, 1950 Norman Rapide, 1970 Schwinn Collegiate, 1972 Peugeot UE-8, 1976 Raleigh Sports, 1977 Raleigh Sports, 1977 Jack Taylor Tandem, 1984 Davidson Tandem, 2010 Bilenky "BQ" 650B Constructeur Tandem, 2011 Linus Mixte
Mentioned: 13 Post(s)
Tagged: 0 Thread(s)
Quoted: 3 Post(s)
Likes: 0
Liked 10 Times
in
9 Posts
Dovetube: I have a story involving one the most prestigious frame painters in the U.K. If this fords any example, you can assume that stays, rear dropouts, front dropouts, fork blades, BB threads, BB facing, steering tube threads — and any symetery of the frame will be completely passed over by frame painters. There may be exceptions, but you would be well-advised to inquire whether "restoration" is a complete servicing, or only what you are more likely paying for — coating ... and for extra charges, graphics. This is not a negative reflection on the frame painters. They are trades people who are practicing their trade in the same way that coach builders are not automatically assumed to be motor fitters — to refer to a former age of motoring.
A frame of my experience was brilliantly painted in stove enamel matching the original and affixed with excellent recreations of the original graphics. But, the entire frame had to be strung, and every aspect mentioned above was found to be needing the attention of a frame maker — after the painters. Expensive tools were used ... even a lathe! The frame painters did their excellent work, and if they became aware of the needed servicing, they did not leave any note or advice. Now, this hand-built Reynolds 531 frame is as good or better than new. Not cheap!
A frame of my experience was brilliantly painted in stove enamel matching the original and affixed with excellent recreations of the original graphics. But, the entire frame had to be strung, and every aspect mentioned above was found to be needing the attention of a frame maker — after the painters. Expensive tools were used ... even a lathe! The frame painters did their excellent work, and if they became aware of the needed servicing, they did not leave any note or advice. Now, this hand-built Reynolds 531 frame is as good or better than new. Not cheap!
02-23-12, 10:09 AM
#65
Senior Member
Join Date: Jun 2008
Location: Louisville, KY
Posts: 13,447
Mentioned: 33 Post(s)
Tagged: 0 Thread(s)
Quoted: 4236 Post(s)
Liked 2,949 Times
in
1,808 Posts
When I wanted to try cold setting the frame, I bought two lengths of threaded bar figuring if I can get the frame cold set to the right distance I can run one bar through each dropout, put a couple of washers and a nut on each side of each drop out and then a nut at the very end of the bar to act as an alignment gauge. Assuming the all thread doesn't bend, it might work. Or it might not as I have a feeling the all thread is going to bend. Figured it was cheap enough it was worth a shot.
__________________
Bikes: 1996 Eddy Merckx Titanium EX, 1989/90 Colnago Super(issimo?) Piu(?),1990 Concorde Aquila(hit by car while riding), others in build queue "when I get the time"
Bikes: 1996 Eddy Merckx Titanium EX, 1989/90 Colnago Super(issimo?) Piu(?),
02-23-12, 12:08 PM
#66
Cottered Crank
Join Date: Aug 2010
Location: Chicago
Posts: 3,401
Bikes: 1954 Raleigh Sports 1974 Raleigh Competition 1969 Raleigh Twenty 1964 Raleigh LTD-3
Mentioned: 0 Post(s)
Tagged: 0 Thread(s)
Quoted: 8 Post(s)
Likes: 0
Liked 11 Times
in
7 Posts
I use a 2x4 levering on the seatpost using a little brace of wood so that not all the force is bending the seat post. Sheldon didn't mention this but I'm a little paranoid about putting that much pressure in the middle section of the seatpost so I put another piece of wood to bridge across from the bb to the top tube and even out the force.
Before I even start to bend I check out the alignment of the dropouts and the rear triangle with the string method. If you don't start from a known good point you are just going to get further and further off as you bend stuff.
If the string checks out even then I will bend each set of stays one at a time. I put my caliper and measure the OLD and figure out how far I need to move each one. If I'm going from 120 to 126 I will bend each side out 3mm. Bend a little, remeasure, bend a little bit more and remeasure. Keep doing this until you get your 3mm. The OLD should measure 123 at this point as you were careful not to mess the other side up. Using a bike stand makes this MUCH easier than trying to do it on the ground. You'll mess the other side up by bending it in sure as ishtar if you do it on the ground.
Then do the string measurement again at this midpoint. You should see a difference now between the side you bent out and the side you didn't bend out. This will give you some confidence in your string gauge.
DO the other side now. Bend it out 3mm (for this example) Do a little bit at a time until you get the OLD to the full 126mm (or whatever you are shooting for. Recheck the strings. If you did this right they should be dead on the same.
Now re-align the DO's. This might have changed the OLD if you were measuring at the back. It's best to measure the OLD at the front of the DO's as that is where you will be bending them back in. If you measure at the back you will loose a little bit when you straighten them if you are making the OLD bigger.
Recheck your strings to make sure they are even, recheck the DO's to make sure they are aligned, and you are done
If the strings are not even when you start that means that the rear triangle was bent before you started. You will have to make a judgement call about how much you want to bend each side when you are spreading (or squeezing if you are going to a smaller OLD) It might take a bit of shuffling back and forth to get the string aligned on the seatpost and the OLD where you want it. Usually I just bend the side that has the string too close and keep rechecking the OLD and the string. If I get to an even string before I hit my goal OLD then I start over from that point and figure out how many more mm's I need to go and move both half-way. If I hit the OLD before the strings get even that means the rear triangle was REALLY out of alignment and the other side will actually have to be bent in while the first side needs to be bent more If the alignment was that bad to start you probably could see it before you began.
Check all the work in the end with a known good wheel that is centered without any offset/dish. Double check the wheel by putting it in both ways. If all was done right the wheel should slide into the DO's with the perfect amount of OLD, the wheel should be centered on the brake bridge when it is inserted in both directions.
Eyeball the welds/brazings all around the rear triangle to make sure that nothing was damaged and that everything seems to be fairly straight and even/symmetrical.
One last piece of advice. Find yourself a junk frame out of a dumpster to practice on. Depending on how handy you are it might take a few false steps and mistakes before you figure this out. Make your mistakes on a scrap frame where there is no harm no foul if you mess it up. Do it like the real thing. Aim for a certain number for OLD and see if you can do it. Once you get some confidence doing it there you can move along to a live patient you care about. Doctors start operating on cadavers before they work on living patients for this very reason. I was really nervous the first time I did this but after the second one it was pretty straightforward. Bending steel is fairly simple but I'm an electrician who bends pipe for a living -I may have a head start.
Last edited by Amesja; 02-23-12 at 12:13 PM.
02-23-12, 12:08 PM
#67
Curmudgeon in Training
Join Date: May 2009
Location: Rural Retreat, VA
Posts: 1,956
Bikes: 1974 Gazelle Champion Mondial, 2010 Cannondale Trail SL, 1988 Peugeot Nice, 1992ish Stumpjumper Comp,1990's Schwinn Moab
Mentioned: 1 Post(s)
Tagged: 0 Thread(s)
Quoted: 19 Post(s)
Likes: 0
Liked 9 Times
in
8 Posts
02-24-12, 03:57 PM
#68
Senior Member
himespau:
No it didn't, and a good thing too because the paint and graphics very likely cost the previous owner $500. Wooden blocks were used for clamping. Rags and tubular foam lagging was used during the process to protect the paint. There was one small chip that came off the fork assembly. When it was chucked into the lathe to mill down the collar for the lower press-fit race, the cutter lifted a tiny edge of the paint just below the race gland.
I've never had any significant damage to any paint at the frame shop except where I had a stay brazed on the Trek 560. I've made it a policy to never cold set stays for anything exceeding 6 mm � which is only a movement of 3 mm either side. But you might be surprised at how much realignment can be necessary for say a move from 120 to 126 mm. Like everything else I may say on this subject, there will be people who disagree. The frame maker who does my work doesn't.
Did it require a second round of painting after all the frame work? My frame needs a lot of touch up painting (will be doing it myself), but I've been saving it until after cold setting for a reason.
I've never had any significant damage to any paint at the frame shop except where I had a stay brazed on the Trek 560. I've made it a policy to never cold set stays for anything exceeding 6 mm � which is only a movement of 3 mm either side. But you might be surprised at how much realignment can be necessary for say a move from 120 to 126 mm. Like everything else I may say on this subject, there will be people who disagree. The frame maker who does my work doesn't.
__________________
Vitus 979, Simplon 4 Star, Gazelle Champion Mondial, Woodrup Giro, Dawes Atlantis
Vitus 979, Simplon 4 Star, Gazelle Champion Mondial, Woodrup Giro, Dawes Atlantis
02-24-12, 09:23 PM
#69
Senior Member
Join Date: Jun 2008
Location: Louisville, KY
Posts: 13,447
Mentioned: 33 Post(s)
Tagged: 0 Thread(s)
Quoted: 4236 Post(s)
Liked 2,949 Times
in
1,808 Posts
In my case I can get the stays about even and then I use the all thread method to spread the rear triangle, but the drive side moves out more easily than the NDS and when I get it fully spread there's a few mm in difference. So I bend that side back in and start over. I think I'm slowly working it out so that they're the right distance spread and equally so, but it's taking a lot more tries than I'd anticipated. Probably should have saved the time and just had the shop do it. I still might if I can't get it.
__________________
Bikes: 1996 Eddy Merckx Titanium EX, 1989/90 Colnago Super(issimo?) Piu(?),1990 Concorde Aquila(hit by car while riding), others in build queue "when I get the time"
Bikes: 1996 Eddy Merckx Titanium EX, 1989/90 Colnago Super(issimo?) Piu(?),
02-25-12, 06:39 AM
#70
Senior Member

Join Date: Jan 2012
Location: Forksbent, MN
Posts: 3,190
Bikes: Yes
Mentioned: 29 Post(s)
Tagged: 0 Thread(s)
Quoted: 301 Post(s)
Likes: 0
Liked 15 Times
in
15 Posts
Is there any risk of stressing/chipping a nice paint job due to the cold set? I mean, does the bending occur at a single point, or is it spread around. My gut thinks single point of greatest "weakness" sees the changes. So it is possible to chip paint over the "bent" area?
Secondly, has anyone experienced truly bad things spreading a 126 to 130. With horizontal (or semi Hz) dropouts, I seem to have a fair bit of adjustability to align the wheel even at 130. Just trying to sort out should do from must do, and assess risk to a nice paint job.
Would have started own thread, but there's been much hinting around at the above two points here...
Last edited by Chrome Molly; 02-25-12 at 06:42 AM.
02-25-12, 06:59 AM
#71
Senior Member
Join Date: Jun 2008
Location: Louisville, KY
Posts: 13,447
Mentioned: 33 Post(s)
Tagged: 0 Thread(s)
Quoted: 4236 Post(s)
Liked 2,949 Times
in
1,808 Posts
my concerns with paint that I kept mentioning was more due to scratching by whatever you used as the lever (and I've seen some scraping off of the paint in the drop out with the all thread method). Don't know about the single weak point movement, but it makes sense or at least it makes sense that the flex would occur after the last attachment point (seatpost).
__________________
Bikes: 1996 Eddy Merckx Titanium EX, 1989/90 Colnago Super(issimo?) Piu(?),1990 Concorde Aquila(hit by car while riding), others in build queue "when I get the time"
Bikes: 1996 Eddy Merckx Titanium EX, 1989/90 Colnago Super(issimo?) Piu(?),
02-26-12, 03:58 AM
#72
Senior Member
himespau
That is precisely the way I would have done it, but I have come to understand that the previous owner was under the impression that "restoration" included the metalwork. BTW, I am building this for a friend. Once finished, it should be a real nice looking machine. AS in the case you cite, the local frame-maker here does not do his own paintwork. He couriers his frames hundreds of Kms south to Osaka to have them painted. Of course they are all prepped and ready.
It is a shame that, in your case, the frame work wasn't done before the paint, but that's the way it goes sometimes.
__________________
Vitus 979, Simplon 4 Star, Gazelle Champion Mondial, Woodrup Giro, Dawes Atlantis
Vitus 979, Simplon 4 Star, Gazelle Champion Mondial, Woodrup Giro, Dawes Atlantis
03-12-13, 05:45 PM
#73
Senior Member
Join Date: Feb 2005
Posts: 56
Mentioned: 0 Post(s)
Tagged: 0 Thread(s)
Quoted: 0 Post(s)
Likes: 0
Liked 0 Times
in
0 Posts
I know this is an old thread but just wanted to put in my experience with cold setting the triangle. After reading through the (numerous) forums about the issue, I was very concerned about cold setting my old frame from 122 mm to 135 mm to accommodate upgraded components. Most all posts were dead set against even considering a mere 5 to 8 mm set and strongly suggested that the 13 mm spread I was considering a folly. So I took it to Mikkelson's in the East Bay for an eval. He pretty much gave me a puzzled look as to why anyone would think it impossible and clearly said he would it "No problem". He did the job and it turned out perfect. If I may suggest, if anyone is considering a cold set, maybe a frame builder is the best option.

 03-12-13, 07:02 PM
#75
Cottered Crank
Join Date: Aug 2010
Location: Chicago
Posts: 3,401
Bikes: 1954 Raleigh Sports 1974 Raleigh Competition 1969 Raleigh Twenty 1964 Raleigh LTD-3
Mentioned: 0 Post(s)
Tagged: 0 Thread(s)
Quoted: 8 Post(s)
Likes: 0
Liked 11 Times
in
7 Posts
The all-thread method will result in an alignment issue more often than not IMHO.
Then you have to go back and bend the sides individually anyhow.
It's just easier to measure the DO, know exactly how many mm's you want to spread to, and move each side a few mm's at a time until you get half the "growth" before moving to the other side. Don't over-shoot and if you DO overshoot then over-shoot the other side too or else you will see a difference in where the seat-stays bend (usually just below the seatstay bridge.) If you over-shoot one side you'll see more bend in the stay you over-shot in with a tighter radius while the side that wasn't over-shot will look "straighter" -especially if you over-shot the first one (which is usually case when you are going too fast.)
This isn't rocket surgery. The paint doesn't chip and if you use a 2x4 it's not going to scratch it either.
I like to put a brace of another 2x4 between the bottom bracket and the seatpost lug at the top because I don't trust that seat tube bearing all that leverage as the fulcrum, especially if it is a butted tube. You can dent or kink it and then you will be bumming. Another piece of wood to spread out the force is a good idea.
Also, when bending each side try and be consistant as to where you place the fulcrum of the lever on the seat tube. If you bend one side with the board near the BB and the other side with it near the lug at the top you could induce a twist in to the seat & chainstays.
I use the head tube as a guide and pull the board towards it, puling back on the head tube to get the leverage to bend the rear triangle.
I do all this levering with the frame in a bike stand and not on the ground like Sheldon's instructions. On the ground using your weight instead of your muscles is a good way to over-bend and to screw stuff up. I'm an electrician and we bend pipe all day long. Only cobblers jump up and down on their work. Use your muscles and be consistent. Pull with your chest muscles squeezing the 2x4 lever and the head-tube together. It's HARD work but you'll move mm's at a time and not over-shoot as easily.
Remember to bend an extra mm on each side because you will lose that when you straighten the dropouts. They will be splayed out after spreading them and you will have to bend them parallel again -then if you didn't give yourself an extra mm you will be too narrow and have to put more bend in each side again.
Be sure to check with a string before you even start to make sure the frame was straight to begin with. Many are NOT. Then you need to work very carefully and bend more on one side than the other to get it straight again. I've been amazed at how many frames were not straight from the factory. Also, I've seen some really bad Dropout alignments on frames that were in very good shape and obviously not ridden much. Even with a cut axle using the Sheldon method you can "see" misaligned dropouts that the factories thought were good enough to ship. That tells me that my own precision in aligning frames is better than many of the frame builders felt was necessary from the 70's, 80's and 90's.
Last edited by Amesja; 03-12-13 at 07:05 PM.