


Nashbar Touring Frame Build
 12-03-11 | 07:31 PM
#51
Senior Member
Joined: Aug 2004
Posts: 317
Likes: 0
From: Western NY
The build came out great! I've built up bikes before from the frame up, but I think this thread would be very educational to someone who has never done it before...and kudos to you for your first build coming out so well done. About how much money would you say you have into the bike? I know you have hours of time invested.
 12-04-11 | 12:04 PM
#52
Thread Starter
Senior Member
Joined: Jun 2009
Posts: 1,664
Likes: 0
From: North County San Diego
The build came out great! I've built up bikes before from the frame up, but I think this thread would be very educational to someone who has never done it before...and kudos to you for your first build coming out so well done. About how much money would you say you have into the bike? I know you have hours of time invested.
My goal was to stay under $500 for the frame/fork and additional parts. I definitely came in under that but I had some stuff laying around.
I'll put a list of parts together that I had and bought in addition and post it within a day or so.
 12-04-11 | 03:07 PM
#54
Thread Starter
Senior Member
Joined: Jun 2009
Posts: 1,664
Likes: 0
From: North County San Diego
The headset was probably the most difficult thing since if I messed the head tube up there weren't a lot of options. Then probably the front derailleur.
12-04-11 | 03:19 PM
#55

In the right lane
Joined: Dec 2005
Posts: 9,556
Likes: 8
From: Des Moines
Bikes: 1974 Huffy 3 speed
You can a Bianchi San Jose, which has a steel frame? Be interested to get your opinion about the harshness of the aluminum frame that you just built up.
I've heard many BF posters complain about aluminum and have always wondered if you couldn't atone for the frame metal by riding with 5 pounds less air in your tires.
I've heard many BF posters complain about aluminum and have always wondered if you couldn't atone for the frame metal by riding with 5 pounds less air in your tires.
12-04-11 | 03:37 PM
#56
Thread Starter
Senior Member
Joined: Jun 2009
Posts: 1,664
Likes: 0
From: North County San Diego
You can a Bianchi San Jose, which has a steel frame? Be interested to get your opinion about the harshness of the aluminum frame that you just built up.
I've heard many BF posters complain about aluminum and have always wondered if you couldn't atone for the frame metal by riding with 5 pounds less air in your tires.
I've heard many BF posters complain about aluminum and have always wondered if you couldn't atone for the frame metal by riding with 5 pounds less air in your tires.
 It's a really fun bike. As for frame materials I have never been a real discerner with that. If it wasn't for bike forums I probably wouldn't realize the difference and just chalk it up to tire size.
 So far what I have noticed is that the new build handles rear weight much better than the San Jose.
12-05-11 | 02:51 PM
#57
Thread Starter
Senior Member
Joined: Jun 2009
Posts: 1,664
Likes: 0
From: North County San Diego
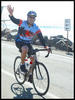
First Commute on the New Build...
It was a little cold this morning but since I have a pretty flexible schedule I was able to wait a bit before riding in. It was probably in the low to mid-50's when I started rolling. (I'm sure mid-westerners and those from back east are playing the tiniest violin for me right now) lol...
Well my 5.5-mile commute in went perfectly. This frame feels very stable - I like to judge a bike by how easy it is to ride with no hands and this one rocks. There's usually 12-18 pounds in the panniers and I know for some that's not a lot of weight but with the San Jose I *always* felt it back there. Not sure if it's the extra wheelbase, geometry or what but this feels really balanced. Never even felt the weight.
This is my first bike with bar-end shifters and I am loving these things. Using indexing mode on the right side, the shifting is crisp and precise. The left side is friction only and it makes it really easy to trim and make those fine adjustments when using extreme gearing combinations.
The stock Nashbar brake pads are the only questionable component so far. I may let them wear in a bit but I think there's going to be some Kool Stops in my future.
Here it is this morning at my destination:
12-05-11 | 03:15 PM
#58
Banned
Joined: Jun 2010
Posts: 43,586
Likes: 1,380
From: NW,Oregon Coast
Bikes: 8
My .02, I would have made the bike ridable first, ridden it,
and determine the stem Height from riding it rather than looks..
then cut down the fork
they don't grow back if you cut them too short.
or the kludges to raise a short steerer are less elegant
than having more steerer in the 1st place.
December in San Diego is a bit nippy, but at least you are not having the Navy
put you in just a cotton shirt then have to march around in it.
my visit was 12/66..
Last edited by fietsbob; 03-12-12 at 12:40 AM.
12-05-11 | 03:30 PM
#59
Dept. store bike bandit
Joined: May 2011
Posts: 329
Likes: 0
Very nice build.
I know what you mean...the bike I choose to commute with is very easy to ride no hands with, whereas the other one feels like it will aim itself for the nearest tree no-hands. Provides a very solid, stable feeling...which is exactly what you need when you've got weight on the back.
Great job.
.
.
.
Great job.
.
.
.
12-05-11 | 03:32 PM
#60
Senior Member

Joined: Jul 2008
Posts: 2,299
Likes: 16
Great build! I built up a crosscheck last year in mostly the same way (and faced mostly the same issues!).
One question: why did you route the front brake cable over your stem? I have mine routed under the bars and under the stem. The cable hanger is then parallel to the stem.
One question: why did you route the front brake cable over your stem? I have mine routed under the bars and under the stem. The cable hanger is then parallel to the stem.
12-05-11 | 06:01 PM
#62
Thread Starter
Senior Member
Joined: Jun 2009
Posts: 1,664
Likes: 0
From: North County San Diego
Great build! I built up a crosscheck last year in mostly the same way (and faced mostly the same issues!).
One question: why did you route the front brake cable over your stem? I have mine routed under the bars and under the stem. The cable hanger is then parallel to the stem.
One question: why did you route the front brake cable over your stem? I have mine routed under the bars and under the stem. The cable hanger is then parallel to the stem.
A few people have asked me that. I will be putting together a list of what I ended up buying vs. what I had laying around and how much it all cost.
12-05-11 | 09:06 PM
#63
Thread Starter
Senior Member
Joined: Jun 2009
Posts: 1,664
Likes: 0
From: North County San Diego
I have had a few inquiries as to how much this project cost. Like a lot of bike nuts, over the years I slowly acquired a few parts that would seem worthy of using for a build. Of course when I started I underestimated the actual amount of parts on hand. It takes more components than I originally thought to build a bike!
Once the frame & fork were ordered I researched parts to buy and this is the list I came up with:
Nashbar Touring Frame/Fork: $90 - Nashbar
Easton EA50 Handlebars: $10 - Jenson
Cane Creek s3 headset: $35 - Jenson
Shimano Ultegra bottom bracket: $25 - Jenson
Woodman Deathgrip Seat Clamp: $8 - Jenson
FSA Seatpost: $30 - Jenson
Shimano LX RD-M580 Rear Der: $49 - Jenson
Shimano LX M570 Front Der: $10 - Jenson
9-Speed Cassette: $25 - Amazon
9-Speed Chain: $15 - Amazon
Nashbar Cantilever Brakes: $22 - Nashbar
Shimano Dura Ace Bar-end Shifters: $92 - Amazon
Bar Tape: $7 - Nashbar
Front/Rear Cable Hangers: $5 - Nashbar
Brake Cables/Housing: $6 - Nashbar
Here's what I already had:
Maddux DRX 4000 wheel set
Panaracer Pasela TG 700x32 tires
Sora triple crank set
Cane Creek SCR-5 brake levers
Performance leather saddle
Shimano PD-A530 pedals
Stem(can't remember the make/model)
Adding it all up it looks like I am into it for around $429. I'm sure if I had to purchase the components I already had the cost would approach the $650-700 range with the right deals...still a good price for a solid bike.
If i did have to purchase the additional parts, here is what I would get:
Wheel set: Sun CR-18 - Niagara Cycle Works ($115)
Crankset: Shimano LX M572 - Jenson ($80)
Brake Levers: Cane Creek SCR-5 - Nashbar ($40)
Any old stem - $10-20
Saddle - @ $30
Pedals - whatever works
Hope this helps.
Last edited by megalowmatt; 12-05-11 at 09:14 PM.
12-06-11 | 11:13 PM
#64
Senior Member

Joined: Jul 2004
Posts: 424
Likes: 0
From: Chicago, IL
megalowmatt -
Nice build! I just built up one of these Nashbar frames about a month ago. In fact I even have the same Easton EA50 bar that you do, although I'll be swapping it out for a Ritchey Biomax bar. I don't like the drops on the EA 50 - I'd rather have the drops be more shallow like they are on the Ritchey bar. I even used a make-do headset cup press the same as you did. Mine was made with a 3/4" threaded rod and big hefty washers. I used a 10" adjustable wrench to tighten the bolts to snug the headset cups into place. I too used a screwdriver and hammer to tape the fork bearing race into place. The green color looks gorgeous on these frames and I did not have any real gripes about the welds. One of these days I'll get around to posting pics of my finished build - once I get that new bar installed and a front rack. I was riding a road bike as a commuter before this and I feel that it felt twitchy with all the weight on the rear. The Nashbar frame rides so much better. Even for aluminum it feels way more compliant going over bumps which is probably somewhat due to a longer wheelbase. Also, those longer chainstays allow you to get your rear panniers closer to over the rear axle versus way behind it. All of this makes for a much better handling, far more stable bike when loaded with gear. Speaking as a fellow Nashbar tourer owner, you're really going to love this new ride.
Nice build! I just built up one of these Nashbar frames about a month ago. In fact I even have the same Easton EA50 bar that you do, although I'll be swapping it out for a Ritchey Biomax bar. I don't like the drops on the EA 50 - I'd rather have the drops be more shallow like they are on the Ritchey bar. I even used a make-do headset cup press the same as you did. Mine was made with a 3/4" threaded rod and big hefty washers. I used a 10" adjustable wrench to tighten the bolts to snug the headset cups into place. I too used a screwdriver and hammer to tape the fork bearing race into place. The green color looks gorgeous on these frames and I did not have any real gripes about the welds. One of these days I'll get around to posting pics of my finished build - once I get that new bar installed and a front rack. I was riding a road bike as a commuter before this and I feel that it felt twitchy with all the weight on the rear. The Nashbar frame rides so much better. Even for aluminum it feels way more compliant going over bumps which is probably somewhat due to a longer wheelbase. Also, those longer chainstays allow you to get your rear panniers closer to over the rear axle versus way behind it. All of this makes for a much better handling, far more stable bike when loaded with gear. Speaking as a fellow Nashbar tourer owner, you're really going to love this new ride.
12-07-11 | 05:47 AM
#65
Senior Member
Joined: Oct 2008
Posts: 1,616
Likes: 184
From: Frankfurt, Germany
Bikes: Focus trash find commuter, Eddy Merckx Corsa, BP Stealth TT bike, Leader 720 TT bike, Boardman Comp Hybrid drop bar conversion, Quantec CX budget cyclocross build, SerottaNOS frameset ready to build up!
Lovely build and beautifully documented. Hope you enjoy the bike for many years to come.
12-07-11 | 10:09 AM
#66
Thread Starter
Senior Member
Joined: Jun 2009
Posts: 1,664
Likes: 0
From: North County San Diego
megalowmatt -
Nice build! I just built up one of these Nashbar frames about a month ago. In fact I even have the same Easton EA50 bar that you do, although I'll be swapping it out for a Ritchey Biomax bar. I don't like the drops on the EA 50 - I'd rather have the drops be more shallow like they are on the Ritchey bar. I even used a make-do headset cup press the same as you did. Mine was made with a 3/4" threaded rod and big hefty washers. I used a 10" adjustable wrench to tighten the bolts to snug the headset cups into place. I too used a screwdriver and hammer to tape the fork bearing race into place. The green color looks gorgeous on these frames and I did not have any real gripes about the welds. One of these days I'll get around to posting pics of my finished build - once I get that new bar installed and a front rack. I was riding a road bike as a commuter before this and I feel that it felt twitchy with all the weight on the rear. The Nashbar frame rides so much better. Even for aluminum it feels way more compliant going over bumps which is probably somewhat due to a longer wheelbase. Also, those longer chainstays allow you to get your rear panniers closer to over the rear axle versus way behind it. All of this makes for a much better handling, far more stable bike when loaded with gear. Speaking as a fellow Nashbar tourer owner, you're really going to love this new ride.
Nice build! I just built up one of these Nashbar frames about a month ago. In fact I even have the same Easton EA50 bar that you do, although I'll be swapping it out for a Ritchey Biomax bar. I don't like the drops on the EA 50 - I'd rather have the drops be more shallow like they are on the Ritchey bar. I even used a make-do headset cup press the same as you did. Mine was made with a 3/4" threaded rod and big hefty washers. I used a 10" adjustable wrench to tighten the bolts to snug the headset cups into place. I too used a screwdriver and hammer to tape the fork bearing race into place. The green color looks gorgeous on these frames and I did not have any real gripes about the welds. One of these days I'll get around to posting pics of my finished build - once I get that new bar installed and a front rack. I was riding a road bike as a commuter before this and I feel that it felt twitchy with all the weight on the rear. The Nashbar frame rides so much better. Even for aluminum it feels way more compliant going over bumps which is probably somewhat due to a longer wheelbase. Also, those longer chainstays allow you to get your rear panniers closer to over the rear axle versus way behind it. All of this makes for a much better handling, far more stable bike when loaded with gear. Speaking as a fellow Nashbar tourer owner, you're really going to love this new ride.
I agree about those EA50 bars - they do angle down a bit on the ends but fortunately I don't ride in the drops. If I ever start those bars will be replaced.
Still can't believe how well this handles rear weight...so much fun to ride
Last edited by megalowmatt; 12-07-11 at 10:16 AM.
12-07-11 | 12:27 PM
#67
Senior Member
Joined: Jul 2007
Posts: 400
Likes: 0
From: Reno, NV
That's a great looking bike at a really nice price. Seems strange though that a quality frame and fork cost less than a set of bar ends! I sure wish that somebody would introduce a reasonably priced alternative to the shimano dura-ace shifters.
12-07-11 | 03:55 PM
#68
Thread Starter
Senior Member
Joined: Jun 2009
Posts: 1,664
Likes: 0
From: North County San Diego
I had the same reservations about the shifters. They are ridiculously simple but totally worth the price. I can see why people like them.
02-11-12 | 12:38 PM
#70
Senior Member
Joined: Dec 2002
Posts: 247
Likes: 35
From: Bushnell, FL
Bikes: Recumbents and all HPV'S
Microshift makes 9 and 10 speed barend shifters for a bout $75 shipped from Taiwan. On Ebay. I got tired of replacing broken Shimano shifters and found these. The only thing is they are indexed mode only, no friction. I have them awhile and they work great.
02-14-12 | 12:11 PM
#71
Thread Starter
Senior Member
Joined: Jun 2009
Posts: 1,664
Likes: 0
From: North County San Diego
Thanks! I definitely recommend the frame and fork. It's been a great ride so far.
I looked at those as options but the Shimano bar ends were only $15 more at Amazon, so I went with what I knew. We will see how the shimano ones hold up.
I didn't realize this thread had been bumped. I was going to update it with a 150-mile ride report and note some small changes I made so there's an update to come within a couple days.
bent4me
Microshift makes 9 and 10 speed barend shifters for a bout $75 shipped from Taiwan. On Ebay. I got tired of replacing broken Shimano shifters and found these. The only thing is they are indexed mode only, no friction. I have them awhile and they work great.
Microshift makes 9 and 10 speed barend shifters for a bout $75 shipped from Taiwan. On Ebay. I got tired of replacing broken Shimano shifters and found these. The only thing is they are indexed mode only, no friction. I have them awhile and they work great.
I didn't realize this thread had been bumped. I was going to update it with a 150-mile ride report and note some small changes I made so there's an update to come within a couple days.
02-16-12 | 02:42 PM
#72
Thread Starter
Senior Member
Joined: Jun 2009
Posts: 1,664
Likes: 0
From: North County San Diego
One more update with a few changes...
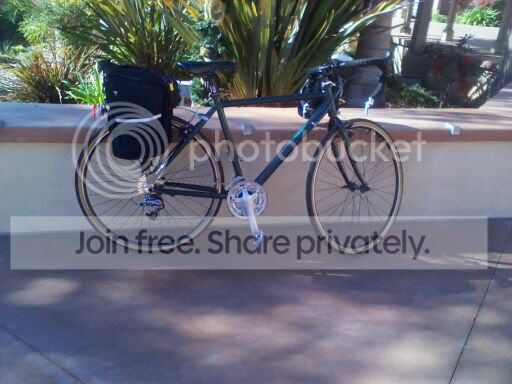
I've put probably 160 miles on the bike so far and it's really a nice ride. As mentioned earlier the stock Nashbar brake pads left little to be desired, so a few weeks ago, those were replaced with some Kool Stop Salmons.
Kool Stop brake pads:
The stopping power is *much* better and they seem to be wearing like brake pads should. The nashbar ones were kind of crumbling as they wore and the material was harder than the Kool Stops.
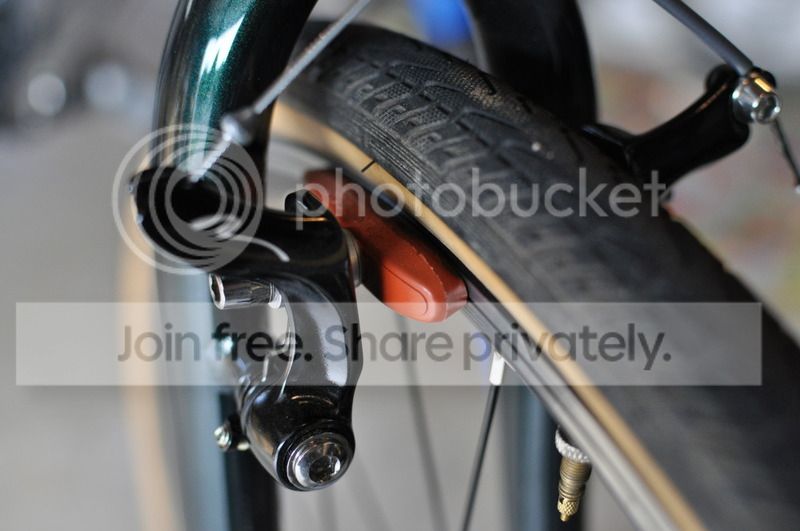
One additional change has been the stem. The one I used was something I had laying around...it was 70mm and didn't offer much rise, so I went with a Kalloy 90mm adjustable stem. I know these are kind of nerdy but I am really liking the adjustment options! So I have it set on 30* rise and like how I'm sitting a bit more upright. I probably could have accomplished something similar by leaving the steer tube longer but the stem would still have been a bit short.
Here's the new stem:
I don't think it looks too obtrusive...but some may think otherwise. You may notice I rerouted the front brake cable so the housing passes under the bars instead of over, like I had it before.
And now for what I should have used from the start - a real bike repair stand! Some of you may remember the "ghetto" stand I had bolted to my work bench. It was pretty awkward and I felt stooped over most of the time while working and it was killing my back.
Anyway, here's the new stand:

It's a dream to work on the bikes with this thing. Makes all the difference in the world and is very stable.
All in all so far so good with this bike.
I've put probably 160 miles on the bike so far and it's really a nice ride. As mentioned earlier the stock Nashbar brake pads left little to be desired, so a few weeks ago, those were replaced with some Kool Stop Salmons.
Kool Stop brake pads:
The stopping power is *much* better and they seem to be wearing like brake pads should. The nashbar ones were kind of crumbling as they wore and the material was harder than the Kool Stops.
One additional change has been the stem. The one I used was something I had laying around...it was 70mm and didn't offer much rise, so I went with a Kalloy 90mm adjustable stem. I know these are kind of nerdy but I am really liking the adjustment options! So I have it set on 30* rise and like how I'm sitting a bit more upright. I probably could have accomplished something similar by leaving the steer tube longer but the stem would still have been a bit short.
Here's the new stem:
I don't think it looks too obtrusive...but some may think otherwise.
You may notice I rerouted the front brake cable so the housing passes under the bars instead of over, like I had it before.And now for what I should have used from the start - a real bike repair stand! Some of you may remember the "ghetto" stand I had bolted to my work bench. It was pretty awkward and I felt stooped over most of the time while working and it was killing my back.
Anyway, here's the new stand:
It's a dream to work on the bikes with this thing. Makes all the difference in the world and is very stable.
All in all so far so good with this bike.
02-16-12 | 04:12 PM
#73
Senior Member
Joined: Jun 2010
Posts: 642
Likes: 145
From: Kanagawa JP
Bikes: Soma ES
Awesome thread, thanks for the pics and great descriptions. Headsets have kept me from building bikes from the ground up, but I see now I could probably pull it off. I think a new project is in the works...
02-19-12 | 09:41 PM
#75

Senior Member

Joined: Aug 2011
Posts: 22,676
Likes: 2,642
From: CID
Bikes: 1991 Bianchi Eros, 1964 Armstrong, 1988 Diamondback Ascent, 1988 Bianchi Premio, 1987 Bianchi Sport SX, 1980s Raleigh mixte (hers), All-City Space Horse (hers)
Good stuff. I hadn't checked this thread since everything came together. 
I really need a bike stand -- it's annoying to wrap handlebars or tweak the brakes when the bike is trying to get away from you...
I really need a bike stand -- it's annoying to wrap handlebars or tweak the brakes when the bike is trying to get away from you...