


Down tube replacement.
 05-20-21 | 02:44 PM
#1
Thread Starter
Junior Member

Joined: Dec 2020
Posts: 150
Likes: 379
From: Estonia
Bikes: HVZ Meteor 1979, HVZ Champion 1962, HVZ SS Moskva80 1981, D�rkopp 1936
Down tube replacement.
Hello
I got some experience in modding some bicycle frames( changed some dropouts, built a stem as practice) and got all the needed stuff to do some brazing as background info for you guys. But so far i have not done anything like this before, frame is pretty cool and decent in quality so i would like to save it. If i can learn something along the way doing this would also be awesome.
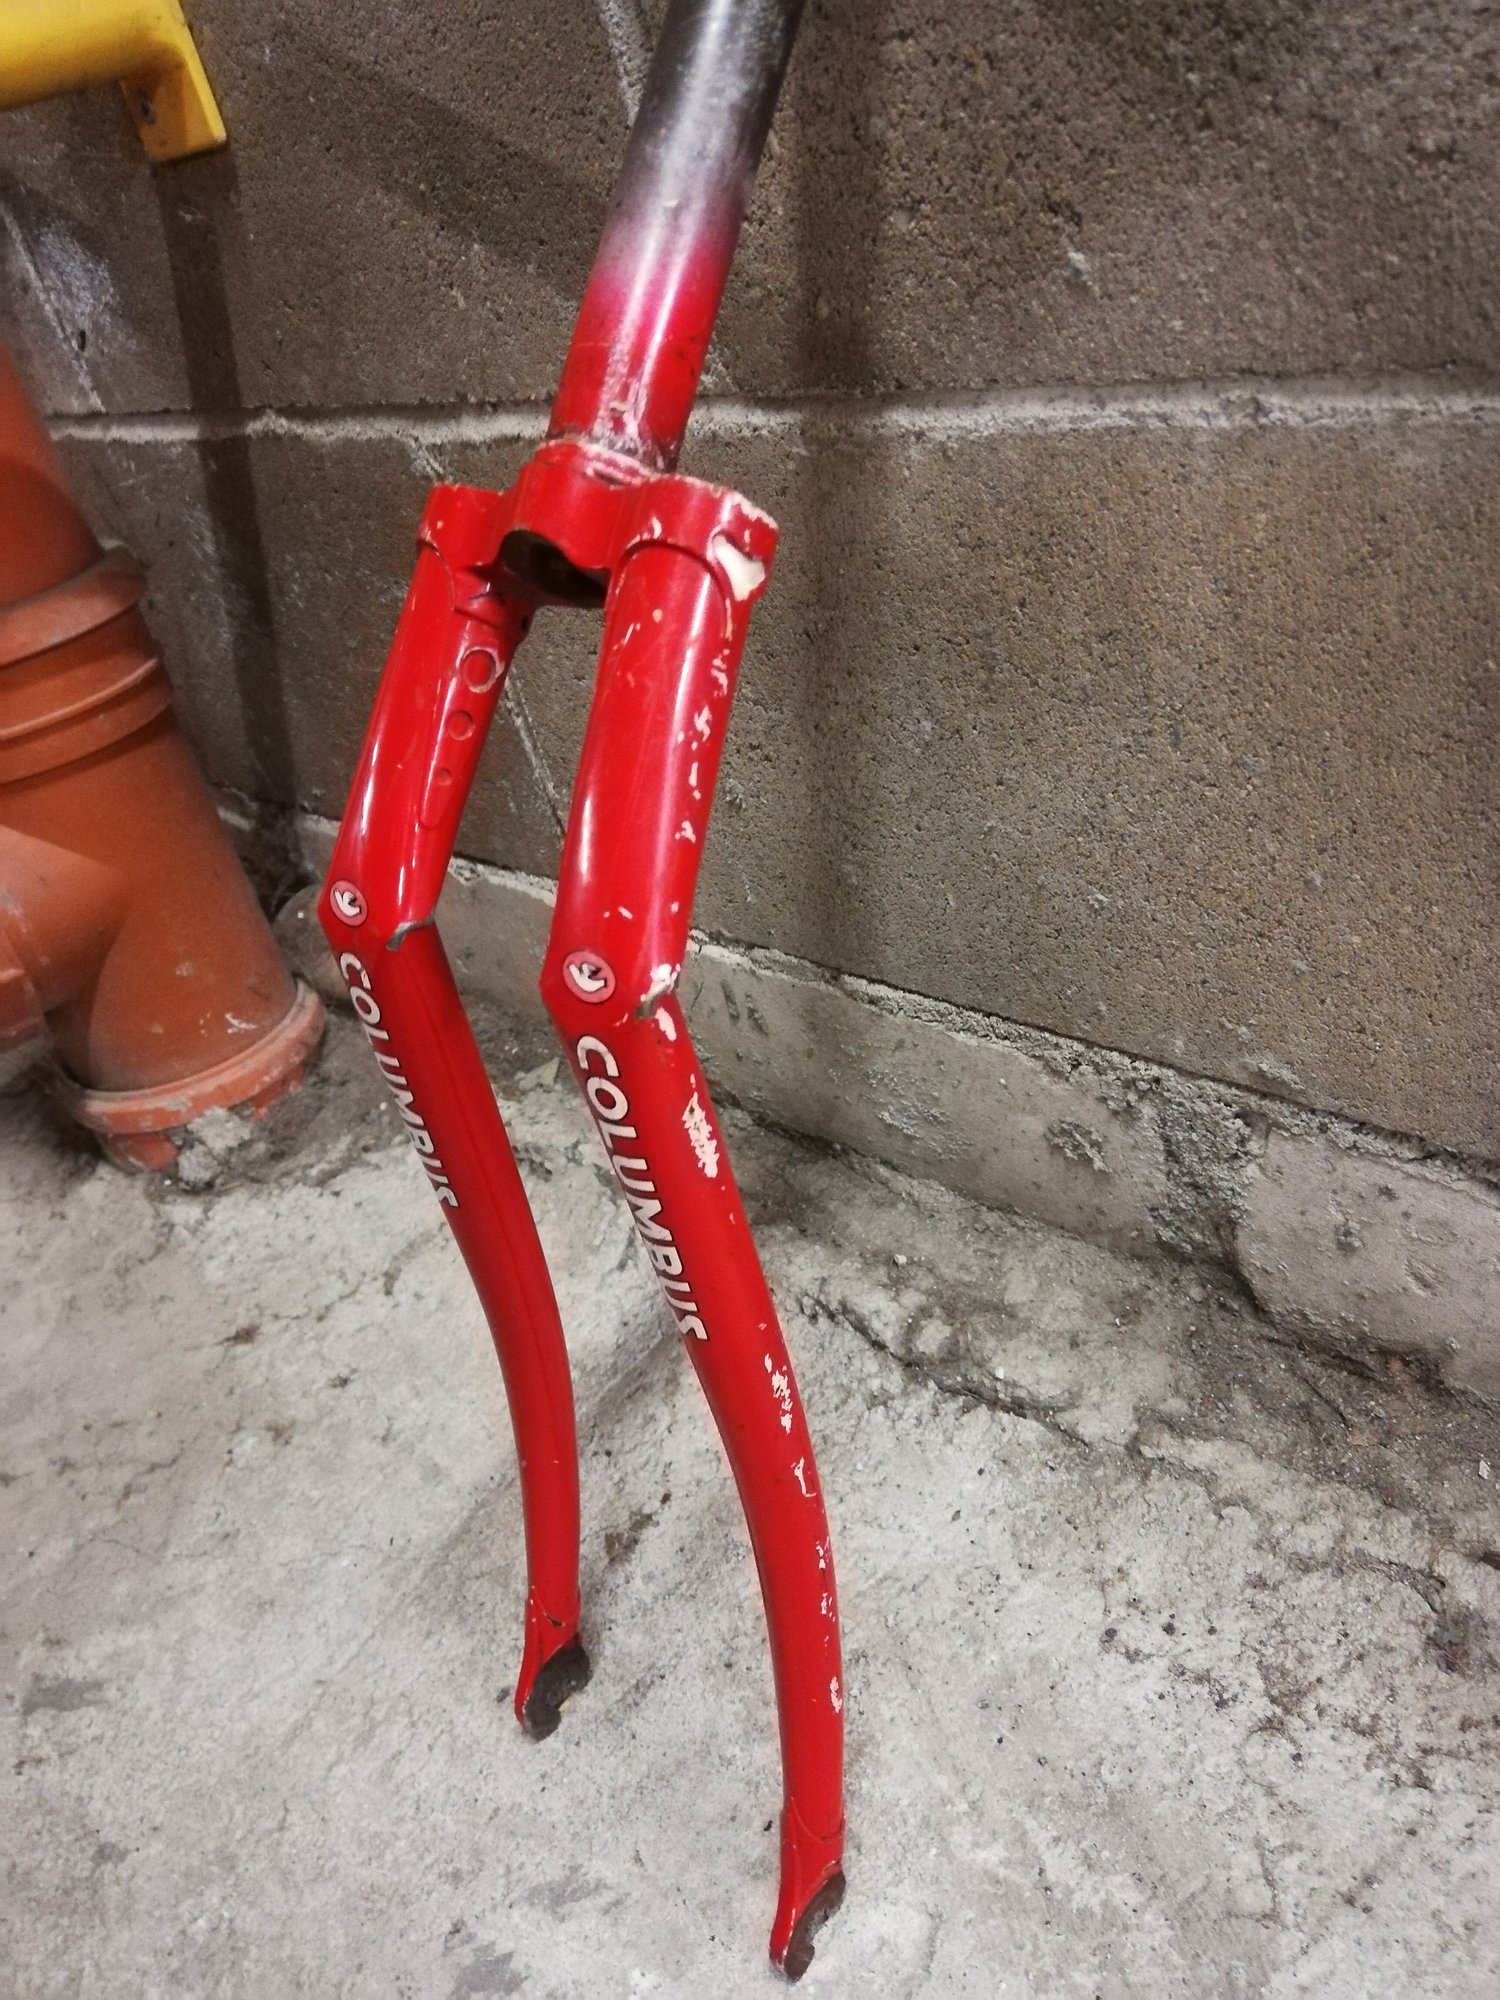
This frame had a pretty bad accident as one can see from the fork. I managed to roll out most of the down tube dent or folds using wood blocks, but a tiny crack appeared between the two dents so my first repair was unsuccesful. Tube is slightly bent also, but frame still seems to be aligned well, i see no problems on the top tube. My plan was to cut the headtube and downtube off, get the remaining parts of the tube out from the lugs using some carbide bits, aquire a new headtube and downtube and braze it back together. Does this sound like a reasonable plan? How would you tackle this tube replacement?


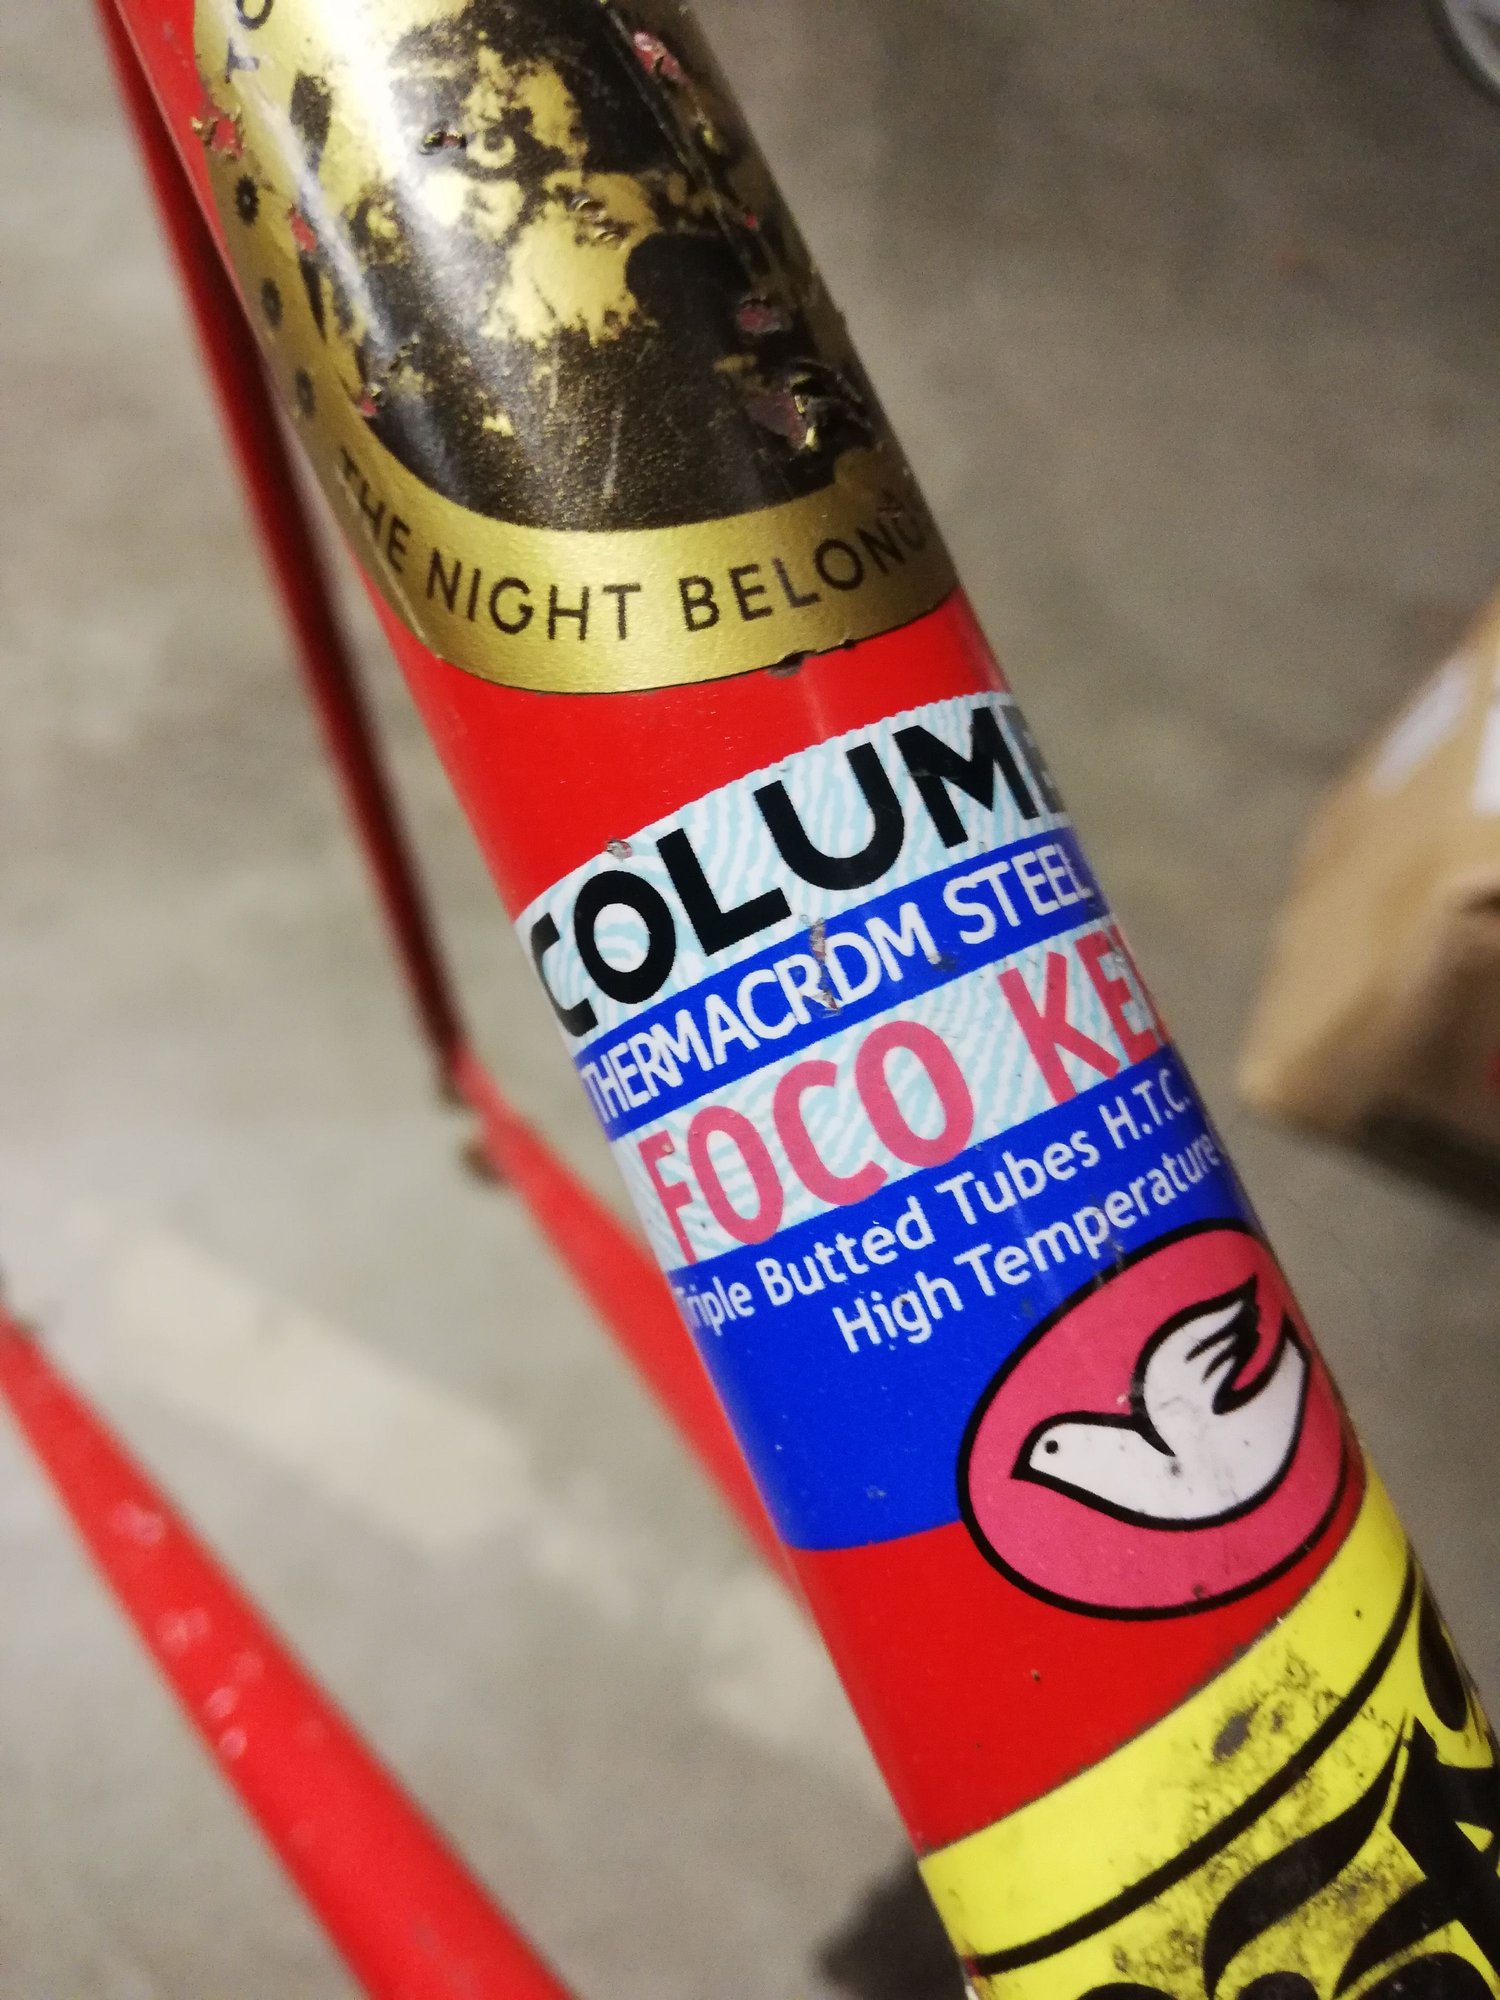
I got some experience in modding some bicycle frames( changed some dropouts, built a stem as practice) and got all the needed stuff to do some brazing as background info for you guys. But so far i have not done anything like this before, frame is pretty cool and decent in quality so i would like to save it. If i can learn something along the way doing this would also be awesome.
This frame had a pretty bad accident as one can see from the fork. I managed to roll out most of the down tube dent or folds using wood blocks, but a tiny crack appeared between the two dents so my first repair was unsuccesful. Tube is slightly bent also, but frame still seems to be aligned well, i see no problems on the top tube. My plan was to cut the headtube and downtube off, get the remaining parts of the tube out from the lugs using some carbide bits, aquire a new headtube and downtube and braze it back together. Does this sound like a reasonable plan? How would you tackle this tube replacement?
 05-20-21 | 03:59 PM
#2
Randomhead
Joined: Aug 2008
Posts: 25,930
Likes: 4,825
From: Happy Valley, Pennsylvania
I would see if I could get the downtube out of the head tube lug without removing the head tube. If you are going to remove the head tube, you might as well replace the whole front triangle.
05-20-21 | 05:25 PM
#3

Old fart


Joined: Nov 2004
Posts: 26,314
Likes: 5,225
From: Appleton WI
Bikes: Several, mostly not name brands.
Tim Isaac demonstrated how he pulls out damaged tubes. Cut a section out of the middle of the damaged tube and drill some holes in the stubs to hold bungee cords between the stubs (not a lot of tension, just enough to exert an even pull on the stubs). Heat the joint at one end of the stub with a big rosebud tip (or two, if you have another pair of hands to handle another torch). Heat the joint evenly and when the braze liquifies, the bungee cords pull the tube out of the joint with minimal distortion. Repeat on the other stub. Clean out the sockets and braze in the replacement tube.
05-20-21 | 06:41 PM
#5
Senior Member

Joined: Feb 2012
Posts: 19,344
Likes: 5,460
From: Rochester, NY
Bikes: Stewart S&S coupled sport tourer, Stewart Sunday light, Stewart Commuting, Stewart Touring, Co Motion Tandem, Stewart 3-Spd, Stewart Track, Fuji Finest, Mongoose Tomac ATB, GT Bravado ATB, JCP Folder, Stewart 650B ATB
All good advise given. One thing i will add is that the top tube will most certainly have been stressed. The DT can't get bent without the TT seeing some insult. This speaks to the after repair steering geometry. If the HT is left in place, only the DT is replaces with no other aligning work, I would expect the head angle to be a bit steeper then OEM was. I've only done a few main triangle tube replacements and I'll agree that replacing more then the obviously damaged tube is often easier then trying to save the HT, or at least for my skill set this has proven to be so. Andy
__________________
AndrewRStewart
AndrewRStewart
05-20-21 | 06:45 PM
#6

Senior Member
Joined: Jun 2004
Posts: 3,147
Likes: 553
From: Torrance, CA
Bikes: Homebuilt steel
I did a down tube replacement a few years ago and it went well. Started by chopping off the tube just above the bottom bracket and below head tube lug. Then took a carbide burr and ground out the majority of the tube from inside the bottom bracket shell, stopping just before hitting the braze. At that point it was easy to apply some heat and peel out the small remnant pieces of the down tube from inside the BB shell. For the head tube side, I heated the lug and slid it off the bottom of the head tube. You could also grind off the head tube lug if you rather. Either way the lug will be trashed. It's easy to find a new one though so no big deal. When reinstalling the tube you need to spring the frame a little but that's not hard. You can get the miter at the head tube nice and tight by sliding the tube down into the bottom bracket shell and then up to the head tube, filing where needed. Before attempting to fit the new tube be sure to check frame alignment. My frame sprung quite a bit after removing the old tube which surprised me since it rode fine. Residual stress from the accident hid by the other tubes in the frame.
Last edited by Nessism; 05-20-21 at 07:14 PM.
05-21-21 | 12:22 AM
#7
Thread Starter
Junior Member
Joined: Dec 2020
Posts: 150
Likes: 379
From: Estonia
Bikes: HVZ Meteor 1979, HVZ Champion 1962, HVZ SS Moskva80 1981, D�rkopp 1936
Thanks for your answers, some good ideas for sure. I will try the bungie method first and check for pins.
Can the frame be sprung back enough to install the down tube with both lugs still attached?
Nessism method seems also pretty reasonable, frame seems to have a full Nagasawa lugset, so getting that lug shouldnt be a problem.
Lets hope that there isnt much stress on the top tube, it measures fine with a straight edge on all angles. Down tube has about a 1-1,5mm air gap between the straight edge and tube on the bottom side where the dents are.
05-21-21 | 04:37 AM
#8


Top tube is bent behind the head tube lug, clearly. As suggested above, replacing the top tube, downtube, and head tube would be sensible. Also, consider a fork drilled for a brake to avoid a recurrence of the accident.
 05-21-21 | 06:53 AM
#9
Senior Member
Joined: Jun 2004
Posts: 3,147
Likes: 553
From: Torrance, CA
Bikes: Homebuilt steel
Thanks for your answers, some good ideas for sure. I will try the bungie method first and check for pins.
Can the frame be sprung back enough to install the down tube with both lugs still attached?
Nessism method seems also pretty reasonable, frame seems to have a full Nagasawa lugset, so getting that lug shouldnt be a problem.
Lets hope that there isnt much stress on the top tube, it measures fine with a straight edge on all angles. Down tube has about a 1-1,5mm air gap between the straight edge and tube on the bottom side where the dents are.
Can the frame be sprung back enough to install the down tube with both lugs still attached?
Nessism method seems also pretty reasonable, frame seems to have a full Nagasawa lugset, so getting that lug shouldnt be a problem.
Lets hope that there isnt much stress on the top tube, it measures fine with a straight edge on all angles. Down tube has about a 1-1,5mm air gap between the straight edge and tube on the bottom side where the dents are.
05-21-21 | 10:23 AM
#10
Randomhead
Joined: Aug 2008
Posts: 25,930
Likes: 4,825
From: Happy Valley, Pennsylvania
I would try not to destroy the head lug. You can definitely bend things a little without permanent deformation. Shove the downtube into the bb shell first, then put it into the head tube lug. Obviously, the head tube lug has to be clean and you might have to bend back some lug tips, but that's not an issue.
Concentrate the heat on the downtube pieces as much as you can.
Concentrate the heat on the downtube pieces as much as you can.
05-21-21 | 02:27 PM
#11
Senior Member
Joined: Feb 2012
Posts: 19,344
Likes: 5,460
From: Rochester, NY
Bikes: Stewart S&S coupled sport tourer, Stewart Sunday light, Stewart Commuting, Stewart Touring, Co Motion Tandem, Stewart 3-Spd, Stewart Track, Fuji Finest, Mongoose Tomac ATB, GT Bravado ATB, JCP Folder, Stewart 650B ATB
The couple of top tube replacements I've done have had the head and seat tubed ground away. So the TT miters were not too critical. The DT replacement I did included most of the TT and DT with a completely new HT and head lugs. I made a couple of sleeves to join the TT and DT stubs to the new sections. This image is in mid finishing. Andy

__________________
AndrewRStewart
AndrewRStewart


