


Dyno Wiring & Fork?
 06-27-25 | 12:21 PM
#1
Thread Starter
Senior Member

Joined: Dec 2011
Posts: 2,908
Likes: 249
From: NE Ohio
Bikes: 1992 Serotta Colorado II,Co-Motion Speedster, Giant Escape Hybrid, 1977 Schwinn Super Le Tour
Dyno Wiring & Fork?
Om my touring bike I am thinking about adding some type of guides for the dyno hub wiring. I think I saw one setup,maybe Brian Chapman, where they used the bushing from a chain.
Thoughts?
Thanks!
Thoughts?
Thanks!
 06-27-25 | 02:45 PM
#2

Senior Member


Joined: Apr 2009
Posts: 3,719
Likes: 5,504
From: Seattle
If you're sure you'll never have crimped ends on your wire, then stop reading here.
My preference is the ones that are an open "C" instead of an "O", so the wire can be loaded from the side. To ensure it won't happen accidentally on the road, use two of those close together, open sides facing opposite directions, and only a bit more than a wire diameter between them. That requires you to orient the wire at 90� to the fork blade to load or unload them. Usually the two "C" partial loops are made of one piece of tubing so it's not so hard to get them oriented correctly to each other when brazing. Use thick-wall tube, since the open-C shape is vulnerable to crushing if you whang it on something in the world.
Sorry I don't have any pics of ones I've made, but such things are available in a larger size for hydro brake lines. This pic is stolen from ceeway.com (frame parts supplier in the UK)

Someone with CAD skillz and a 3d printer could make the Shimano-style easily enough in plastic. Lemme know if you need pics so you don't have to reinvent them, but it's not rocket surgery. Just make the curved "foot" specific to the diameter of the frame tube you're sticking them to.
Printed in stainless for brazing would be awesome but I have no idea how to get that done. If someone makes 'em, please sign me up for a dozen of them.
They're pretty fiddly to make out of tubing with a hacksaw and needle files. Pro tip: braze the bit of tube to the fork (or downtube or whatever) first, then file out the opposing C-shapes and the gap between them. The bit of tube is hard to hold in a vise for filing. But then the stakes are high if you mess one up, so try it on scrap before committing to a real fork.
06-27-25 | 04:18 PM
#3
Thread Starter
Senior Member
Joined: Dec 2011
Posts: 2,908
Likes: 249
From: NE Ohio
Bikes: 1992 Serotta Colorado II,Co-Motion Speedster, Giant Escape Hybrid, 1977 Schwinn Super Le Tour
I have the SP hub and the "plug" is easily undone. So a closed guide would not be a problem. Just took a look at the bushing and I could probably just use half of a bushing.
06-27-25 | 04:25 PM
#4
Randomhead
Joined: Aug 2008
Posts: 25,930
Likes: 4,825
From: Happy Valley, Pennsylvania
I made some loops out of spokes. I don't really like how they look, so I don't know if I want to post a pic. I bent them around something, so the loops are pretty much the same size, but I was a bit careless about the ends, so they look a little random. I brazed the ends down to the fork, so it's a closed loop.
I thought about brazing the loops on so that it was an open loop. Not sure why I decided not to do that. Maybe next time.
I thought about brazing the loops on so that it was an open loop. Not sure why I decided not to do that. Maybe next time.
06-27-25 | 06:03 PM
#5
Senior Member
Joined: Feb 2012
Posts: 19,349
Likes: 5,466
From: Rochester, NY
Bikes: Stewart S&S coupled sport tourer, Stewart Sunday light, Stewart Commuting, Stewart Touring, Co Motion Tandem, Stewart 3-Spd, Stewart Track, Fuji Finest, Mongoose Tomac ATB, GT Bravado ATB, JCP Folder, Stewart 650B ATB
I've only done external wire clips a couple of times and each time I didn't like what resulted. Both in the looks as well as the wire's being contained/located were poorer that I wanted. One set up used closed and short lengths of K&S brand SS tubing. The other used slightly larger a diameter of the same series of SS tubing but with a cut away much like what Mark showed. Both versions had too much open wire between attachment clips/points/guides and the tubes were a bit too big in diameter for a sleek look. I found the wire could still snag on stuff as I parked or handled the bike
Were I ever to do this again I might run a nearly full length small diameter tube to contain the wire for as much of its length as possible. Or maybe on a fork blade has segmented tunnel sections with little gaps between to allow blade flex. I have to admit to some indecision/conflict with trying to contain wires along frames/forks. I really dislike internal routing but haven't run across a good solution for externally run wires. I have run rechargeable lights for decades and always just wound the wire around the frame tubes (batteries either in a water bottle or a nylon sack hanging from the TT) and found the ease to completely remove the light system has been a real nice feature for my bikes and uses.
I look forward to wire control methods that others have found to work well for them. Andy
__________________
AndrewRStewart
AndrewRStewart
06-27-25 | 06:04 PM
#6
Senior Member
Joined: Apr 2009
Posts: 3,719
Likes: 5,504
From: Seattle
Back in the early '80s I made a bunch of touring bikes with wire guides all the way to the back of the bike. We snipped off one loop of stainless cable housing, the kind Campy and Suntour used to use for bar-end shifters. It looks better because it's wound from round wire, not flat like most brake housing. Hold that up to the belt sander in narrow-nose pliers, to grind it flat where you cut it, then hold the pliers in a vise, BO facing up. Melt a tiny drop of silver onto the loop, then hold the BO + silver against the frame/fork and heat until the silver flows onto the target. Takes about as long as it took to read that.
Only possible problem is we were using single wire, using the frame as the return path. I don't think B&M style dual wire would fit through that (try it?), maybe not even SON co-ax. They looked really cute though.
Only possible problem is we were using single wire, using the frame as the return path. I don't think B&M style dual wire would fit through that (try it?), maybe not even SON co-ax. They looked really cute though.
06-28-25 | 06:06 PM
#7
Thread Starter
Senior Member
Joined: Dec 2011
Posts: 2,908
Likes: 249
From: NE Ohio
Bikes: 1992 Serotta Colorado II,Co-Motion Speedster, Giant Escape Hybrid, 1977 Schwinn Super Le Tour
Took a few moments when I was in the shop doing epoxy window repairs to try something. Had a spoke and used a pair of needle nose pliers to form a loop. This might be another idea.
07-01-25 | 04:40 PM
#8
Newbie
Joined: Mar 2018
Posts: 7
Likes: 5
Would you consider internal wiring?
Install a bottle boss by the drop out -- even grind down the section that extends into the tube to make fishing the wiring through easier -- and then another either in the crown or the section of fork tube close to the crown. The boss acts as a reinforcement.
Internal wiring can be a nuisance, but it also keeps the wire protected and the aesthetics clean.
07-05-25 | 05:42 AM
#9
semi-retired framebuilder
Joined: Dec 2007
Posts: 145
Likes: 580
From: Halifax, Nova Scotia, Canada
Bikes: twenty-three at last count
I’ve done several touring and rando forks with wiring braze-ons of various sorts, the one I like the best was loops of bent stainless steel spokes brazed on at the correct angle to allow the wire to run nice and straight down the fork legs. These open loop fittings allow the wire to be inserted or removed easily. This particular one was for SON wiring which is thicker than B&M’s, so it runs straight nicely down the back of the fork.
Last edited by Mark Beaver; 07-05-25 at 05:46 AM.
07-05-25 | 10:26 AM
#10
Thread Starter
Senior Member
Joined: Dec 2011
Posts: 2,908
Likes: 249
From: NE Ohio
Bikes: 1992 Serotta Colorado II,Co-Motion Speedster, Giant Escape Hybrid, 1977 Schwinn Super Le Tour
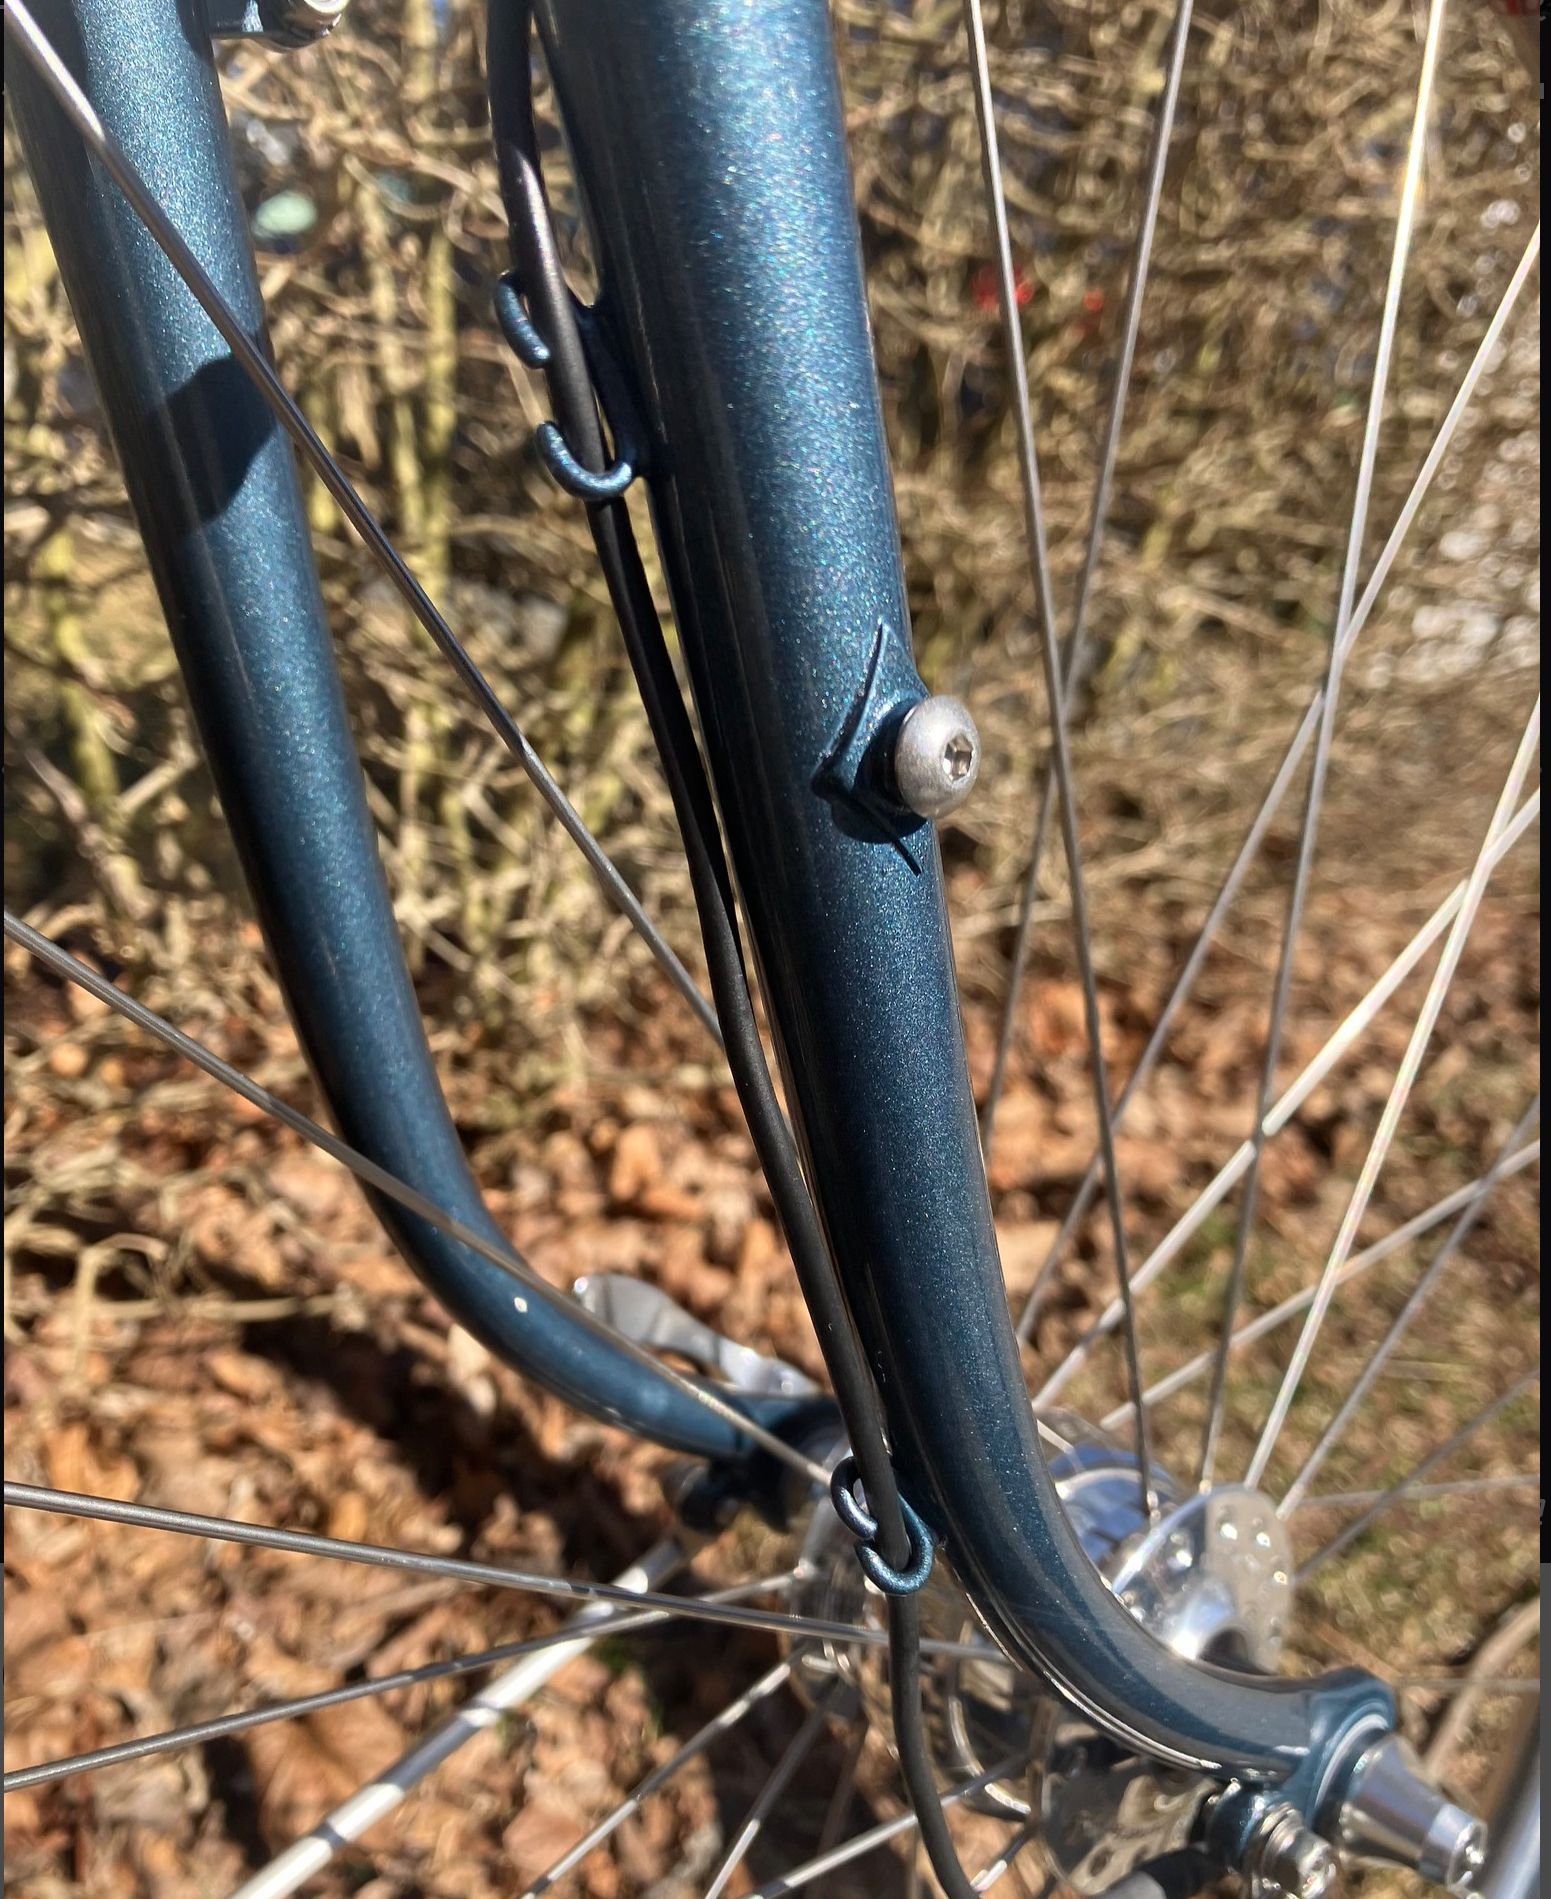
Project completed! I used a portion of 10 speed chain roller bushings and brazed them to the fork blade with silver. I primed the fork with epoxy primer last night and sprayed the base coat and clear today.
07-06-25 | 09:32 AM
#11
Newbie
Joined: Mar 2018
Posts: 7
Likes: 5
Nice! I love the creative problem solving and using other bike parts for bike parts. Excited to see pictures when they are available.
