


Rack strut tabs
 12-06-25 | 01:09 PM
#1
Thread Starter
Senior Member


Joined: Aug 2012
Posts: 680
Likes: 283
From: Seattle
Rack strut tabs
I have been sitting on this rack for about a year and finally am getting around to finishing it. I haven't done much brazing on stainless and I just had some tabs cut so I thought I would do a bit of a technique tune up and practice on a few before I dive into the rack.
This is 316 stainless tubing and tabs with 50n silver:
by https://www.flickr.com/photos/54319503@N05/, on Flickr
OK, not bad. I wish I had made the tabs slightly wider so they protrude outside the diameter of the tube. I have to put a blob of filler on each side to fill in the seams.
by https://www.flickr.com/photos/54319503@N05/, on Flickr
These are the real thing, finished and ready to be attached to the rack:
by https://www.flickr.com/photos/54319503@N05/, on Flickr
This is 316 stainless tubing and tabs with 50n silver:

OK, not bad. I wish I had made the tabs slightly wider so they protrude outside the diameter of the tube. I have to put a blob of filler on each side to fill in the seams.

These are the real thing, finished and ready to be attached to the rack:

__________________
https://www.flickr.com/photos/54319503@N05/
https://www.draper-cycles.com
https://www.flickr.com/photos/54319503@N05/
https://www.draper-cycles.com
 12-06-25 | 04:25 PM
#2

Senior Member


Joined: Apr 2009
Posts: 3,700
Likes: 5,480
From: Seattle

So starting with the wide/heavy <jk> ones (I think these are from Alex Wetmore), I notched them to fit over the tubing, hollow inside. I also notched the tubes for the stays, so they link into each other.

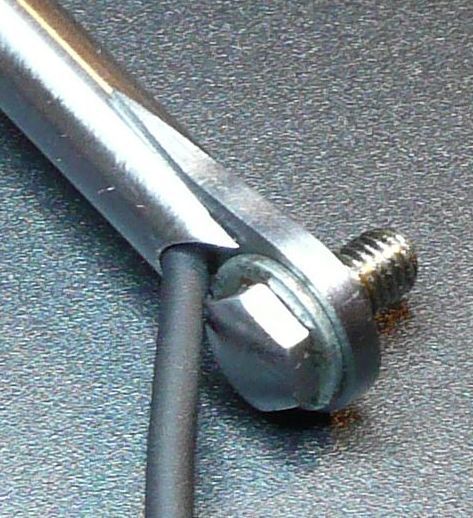
With a little extra filing on the tab for headlight wire routing, it's easy to run even a fat co-ax 2-conductor wire inside 5/16" tube:
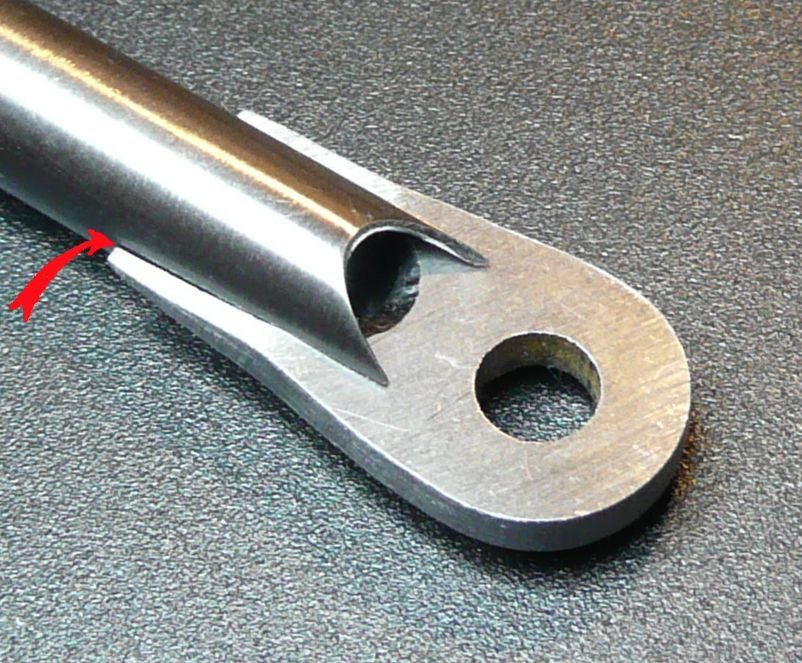
In case you were wondering, the sharp edge of the inside of the tube where the wire emerges is also rounded with a needle file to not cut into the insulation, and a piece of shrinkwrap is added to the wire just there in final assembly. This was done 14 years ago and the original wire is still there, no signs of the rack cutting into it.
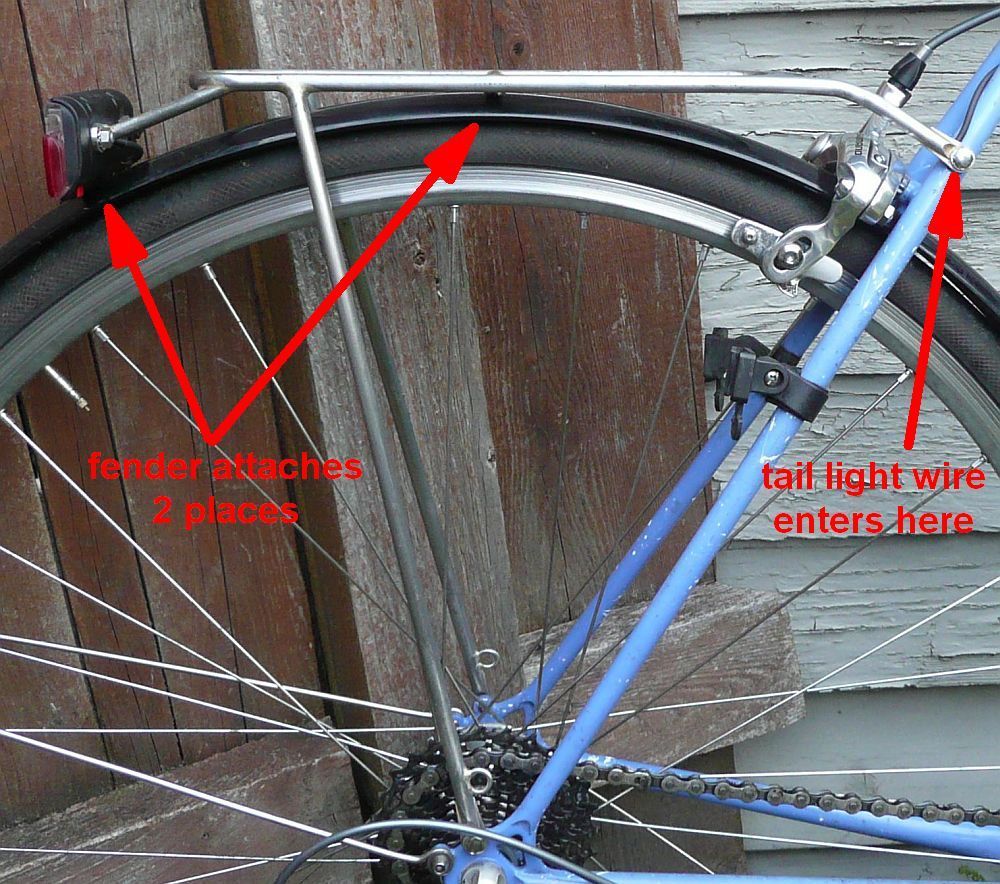
Rack weighs less than 6 ounces, and holds 250 lb (I sat on it!) Not recommended for carrying 250 lb on the road though.
It also replaces the two extra steel fender struts, bracket and bolts that this plastic fender came with, and needs to have without the rack, for another couple ounces knocked off net weight.
Bike is a 1979 Erickson with no provision for internal wiring. Wire just taped to the bottom of the toptube currently. The vertical rack struts that go to the dropouts are also hollow in the same way, ready for wire routing, if we ever want to change to a downtube/chainstay internal route.
12-06-25 | 06:58 PM
#3
Thread Starter
Senior Member
Joined: Aug 2012
Posts: 680
Likes: 283
From: Seattle
Very clever! This is for a big front rack that will carry a bag so weight wasn't a primary concern but I'm definitely keeping this in mind!
__________________
https://www.flickr.com/photos/54319503@N05/
https://www.draper-cycles.com
https://www.flickr.com/photos/54319503@N05/
https://www.draper-cycles.com
12-07-25 | 03:21 AM
#4
Senior Member
Joined: Apr 2009
Posts: 3,700
Likes: 5,480
From: Seattle
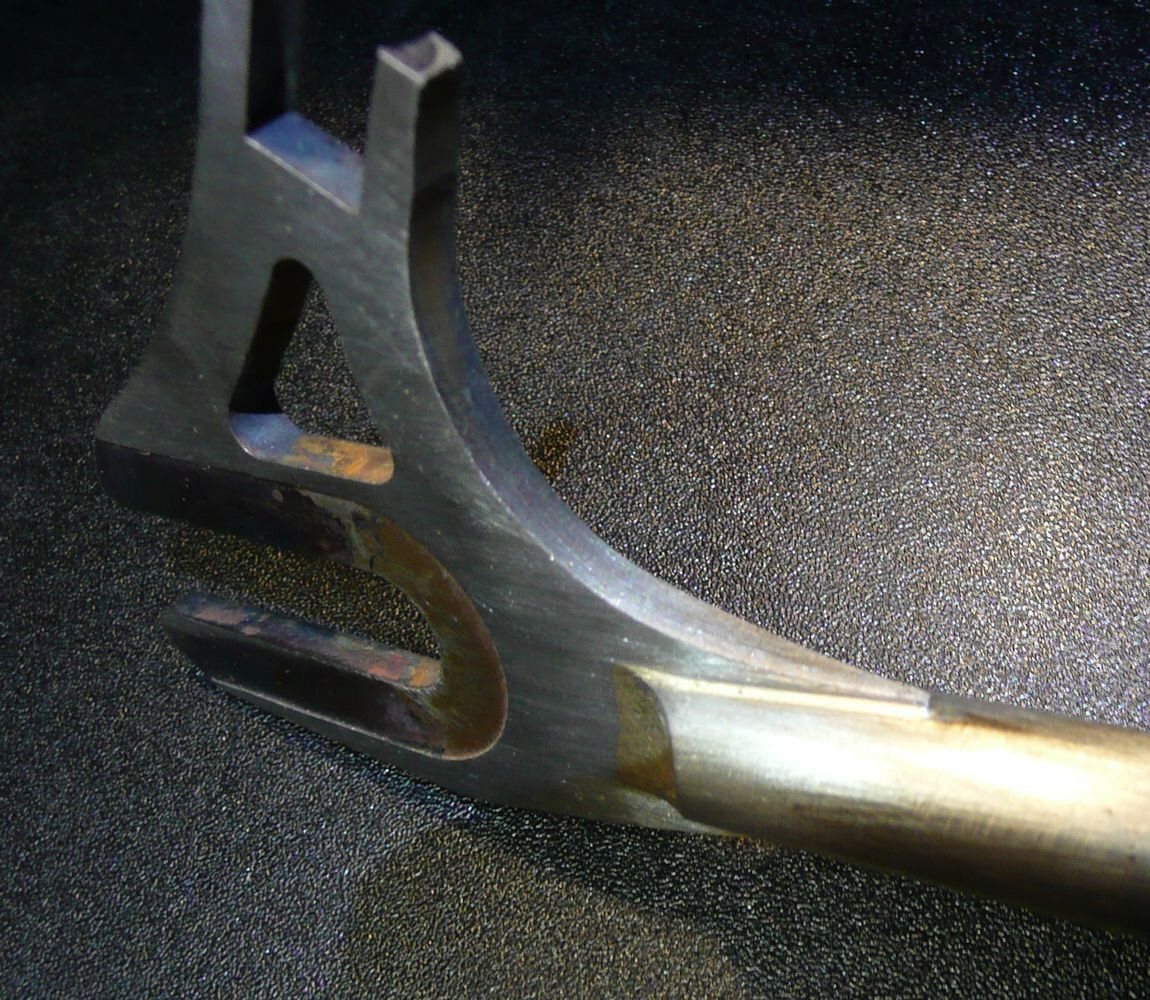
It makes a slightly larger difference in a track dropout, where I've also used the plunge-cut method. Here's the raw cut:
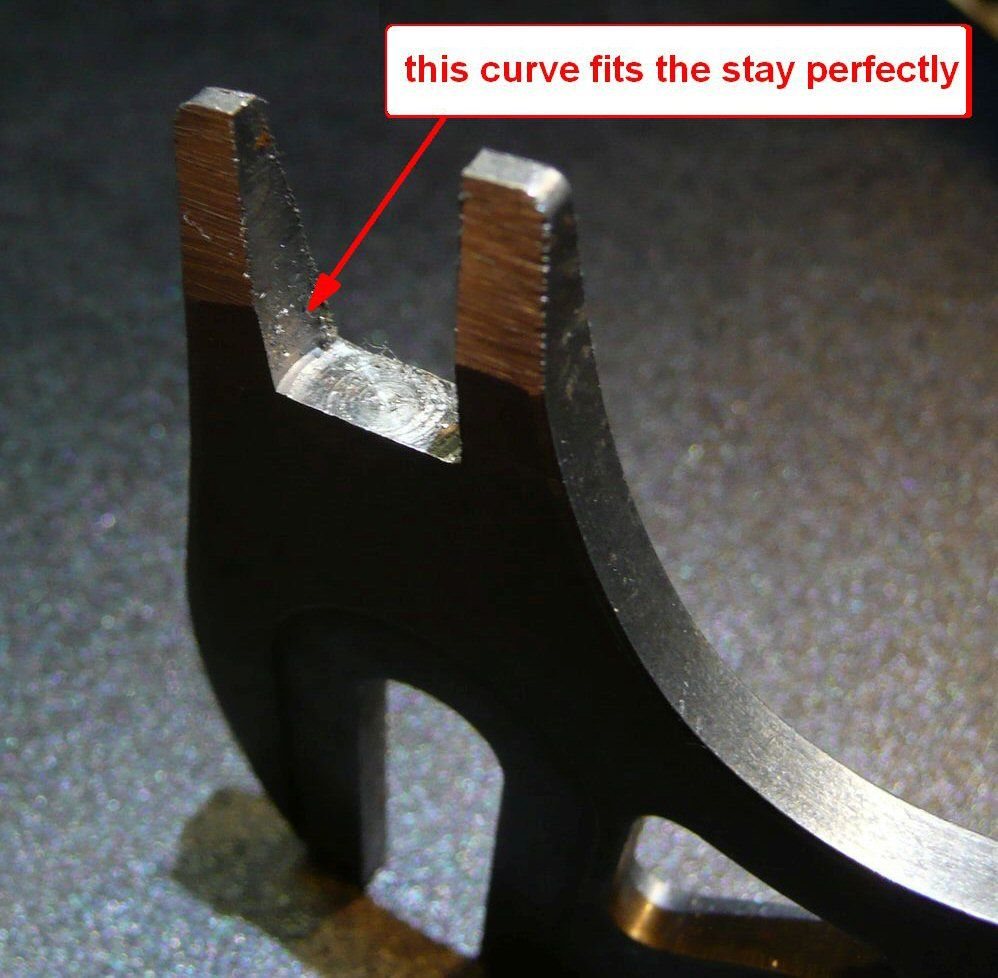
And as brazed:
 12-07-25 | 10:09 PM
#6
Senior Member
Joined: Apr 2009
Posts: 3,700
Likes: 5,480
From: Seattle
Here's a Davidson I did ~35 years ago. This was actually the "low cost" model Trackster, small quantity production rather than custom. I guess I made the dropouts look nicer than they needed to...

Your design (CAD or whatever) needs to tell you the angles of the sstay and cstay from horizontal, if you want the dropout slot to be horizontal. I just had an Excel spreadsheet, but it calc'd those angles for me. Not that the slot really needs to be horizontal, but it is traditional, and some folks will see it as a mistake if you diverge at all.
I had jaws in the milling machine vise with three 10 mm pins to hold the dropouts in two orientations: two pins held it for the cstay cut, and two for the sstay, with one of the pins used for both (thus only 3 pins needed). Maybe this is obvious but I can explain further if my words are not conjuring pictures for you. It was reasonably fast when I was doing a batch of frames of one size. Brazing was fast since they were self-jigging., and they came out clean with only minimal post-braze cleanup. I brazed them flat, in the plane of the flat dropouts, then cranked the dropouts over by simply using the stay as the lever. The joints are super strong so no worries, only the dropout bent.
12-08-25 | 01:59 PM
#7
Thread Starter
Senior Member
Joined: Aug 2012
Posts: 680
Likes: 283
From: Seattle
Yeah, the slots have to be horizontal...I judge people by this. Mainly because my #001 dropouts WEREN'T horizontal. Hahaha I used some plug dropouts for the kids track bikes I did and they weren't horizontal because of the plugs. I was too inexperienced at the time to address that shortcoming. I regret that...it's probably why I'm not building track bikes for Team USA. HAHA
__________________
https://www.flickr.com/photos/54319503@N05/
https://www.draper-cycles.com
https://www.flickr.com/photos/54319503@N05/
https://www.draper-cycles.com
12-09-25 | 10:00 AM
#9
Senior Member
Joined: Feb 2012
Posts: 19,344
Likes: 5,461
From: Rochester, NY
Bikes: Stewart S&S coupled sport tourer, Stewart Sunday light, Stewart Commuting, Stewart Touring, Co Motion Tandem, Stewart 3-Spd, Stewart Track, Fuji Finest, Mongoose Tomac ATB, GT Bravado ATB, JCP Folder, Stewart 650B ATB
Yeah, the slots have to be horizontal...I judge people by this. Mainly because my #001 dropouts WEREN'T horizontal. Hahaha I used some plug dropouts for the kids track bikes I did and they weren't horizontal because of the plugs. I was too inexperienced at the time to address that shortcoming. I regret that...it's probably why I'm not building track bikes for Team USA. HAHA
(I bolded the above for focus) Reminds me of being called out for building a pair of wheels wrong... While still in high school I switched over from wire ons (clinchers) to sew ups. The first set of wheels to get this were made by taping the rims together and transferring the spokes over. I had done a little bit of research (likely in DeLong's book, no internet back in 1973) and knew about spoke hole offsets needing to be aligned with the hub flanges and made sure the two rims matched up in this respect. I proudly rode the wheels and later attended a club ride. It was on this ride at the stop that one of the "core members" checked out my bike and the wheels and mentioned "too bad they are laced wrong". (I had had to shift the sew up rims one spoke hole around compared to the OEM ones, to maintain the right flange and right offset rim holes relationship). That was like a spoke through my heart! An ego blow. Well, that motivated me to learn more and decide that I should be less concerned what others thought of me and more about what actually works and why. Andy.
__________________
AndrewRStewart
AndrewRStewart
Last edited by Andrew R Stewart; 12-09-25 at 01:29 PM.
12-09-25 | 06:41 PM
#10
Senior Member
Joined: Apr 2009
Posts: 3,700
Likes: 5,480
From: Seattle
Of course you could just use long-slot road "horizontal" dropouts. If trackies sneer, remind them that Coppi did that, had his track bikes made with road dropouts. "If it's good enough for Fausto, it's good enough for me." (Of course these sneering trackies in my fantasy would never have heard of Coppi, if it were to happen in real life.)
12-09-25 | 10:53 PM
#11
Thread Starter
Senior Member
Joined: Aug 2012
Posts: 680
Likes: 283
From: Seattle

 12-10-25 | 01:21 AM
#12
Senior Member

Joined: Dec 2019
Posts: 1,187
Likes: 387
 I don't have a rear brake on my fixed gear frames but I've just made a SS one for somebody else, with V-brake posts. Hope it turns out OK!


