Show us your builds

 02-19-11 | 03:17 PM
#127
Senior Member
Joined: Oct 2009
Posts: 1,921
Likes: 5
From: England, currently dividing my time between university in Guildford and home just outside Reading
Bikes: Too many to list here!
Agreed! It can be nasty stuff! I mean, it's the reason for 100% of tsunamis, for heaven's sake! It was also responsible for the sinking of the Titanic, and it regularly causes rivers to flood! Used wrongly, Dihydrogen Monoxide can kill!
04-17-11 | 06:17 PM
#128

Senior Member
Joined: Sep 2008
Posts: 1,350
Likes: 4
From: Collegeville, PA
Bikes: Ruckelshaus Randonneur, Specialized Allez (early 90's, steel), Ruckelshaus Path Bomber currently being built
Here are some from #2, which I just got back from the painter yesterday, and built/test rode today. It's a 650b wheeled, SRAM Apex'd commuter/shopper/path bomber:


And the completed bike, a 650b wheeled commuter/shopper/path bomber:


Builder and built:

The entire album.
And the completed bike, a 650b wheeled commuter/shopper/path bomber:
Builder and built:
The entire album.
04-22-11 | 03:32 AM
#129
Junior Member
Joined: Oct 2010
Posts: 12
Likes: 0
My first build. Nova OS tubes, stamped lugs, MAPP gas, touring geometry, rattle can paint. 6 miles and counting...
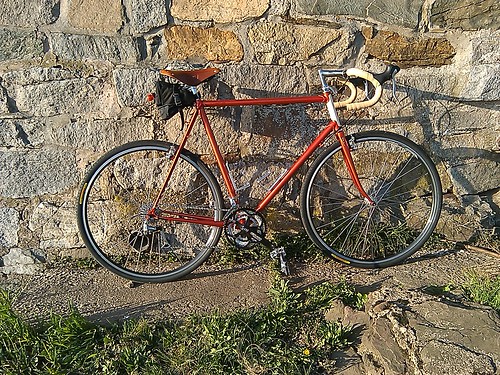
I got a lot of great info from this group. Thanks to all.
I got a lot of great info from this group. Thanks to all.
Last edited by guywithchickens; 04-22-11 at 03:46 AM. Reason: Fixed image link
04-22-11 | 07:47 AM
#130
Senior Member
Joined: Sep 2008
Posts: 1,350
Likes: 4
From: Collegeville, PA
Bikes: Ruckelshaus Randonneur, Specialized Allez (early 90's, steel), Ruckelshaus Path Bomber currently being built
Wow, for what I would call a true budget build, that looks amazing! Nice work! Did you use a jig, or did you freespace it?
Pete
Pete
04-22-11 | 07:54 AM
#131
Junior Member
Joined: Oct 2010
Posts: 12
Likes: 0
I used the jig ideas from Talbot's book. Worked out pretty well. The downside of a first frame is that it took about 5 months of on-and-off work...lots of thinking and measuring. I think a second frame would go much faster.
04-22-11 | 10:03 AM
#132
Senior Member
Joined: Sep 2008
Posts: 1,350
Likes: 4
From: Collegeville, PA
Bikes: Ruckelshaus Randonneur, Specialized Allez (early 90's, steel), Ruckelshaus Path Bomber currently being built
I just finished my second (see above). It does go much faster.
 07-22-11 | 06:44 PM
#135
Senior Member
Joined: Mar 2007
Posts: 6,401
Likes: 19
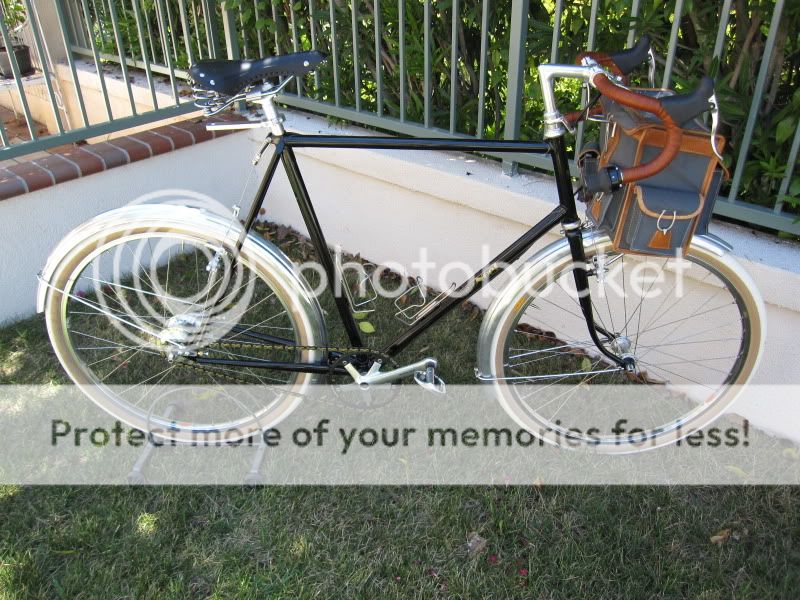
I've been thinking about building a lightweight rando frame for use with the Rohloff Speedhub, and finally got around to it. Deda 8/5/8 with Everest lugs, Paragon sliders, and the Imperial oval fork blades and crown Jan Heine/Compass Cycles is selling.
07-26-11 | 10:36 AM
#136

Junior Member
Joined: May 2011
Posts: 12
Likes: 0
From: Gainesville ffl
Bikes: Alpine mirage, custom cruiser
An old alpine mirage that i coverted into a fixie. Did everything myself welded the brake mounts closed aswell as the bottle holder and cable mounts. I grinded of the derailer mount and the fender mounts. And i recently wrecked it goin down hill into a stump and it bent the steerer top and bottom tube to give it that track geometry i always wanted. The b43's didnt even get a scratch but she pulls to the left. So gettin that track frame soon sunnn.
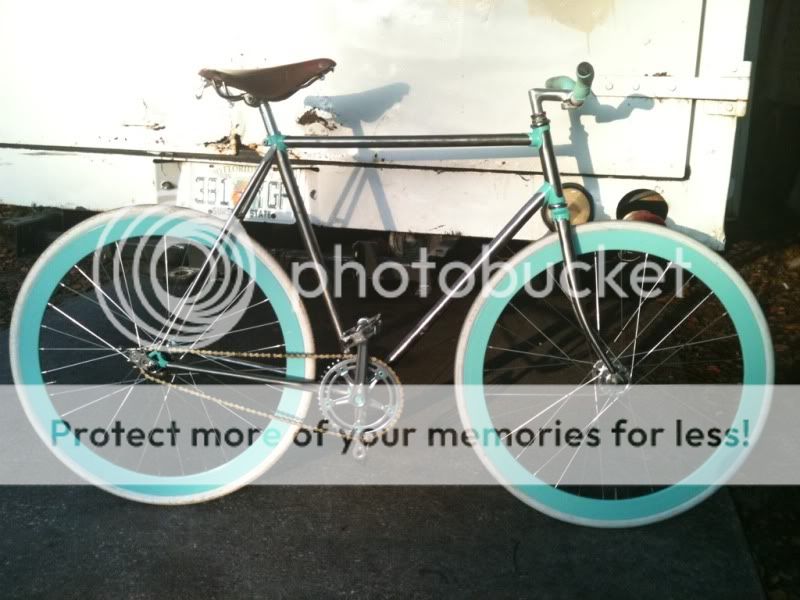
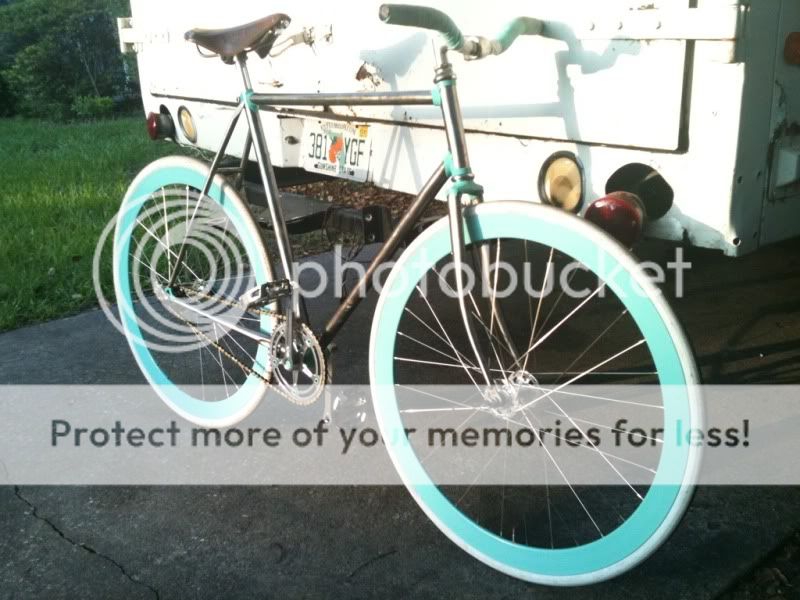
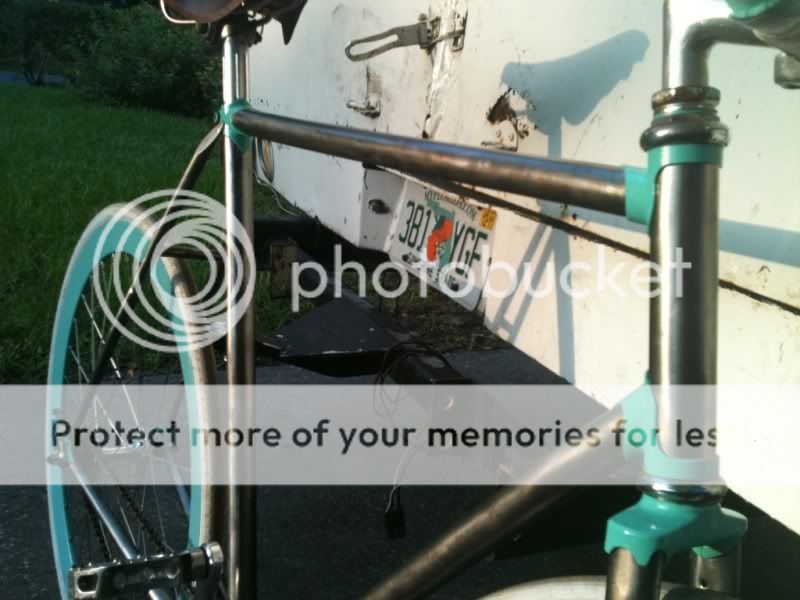
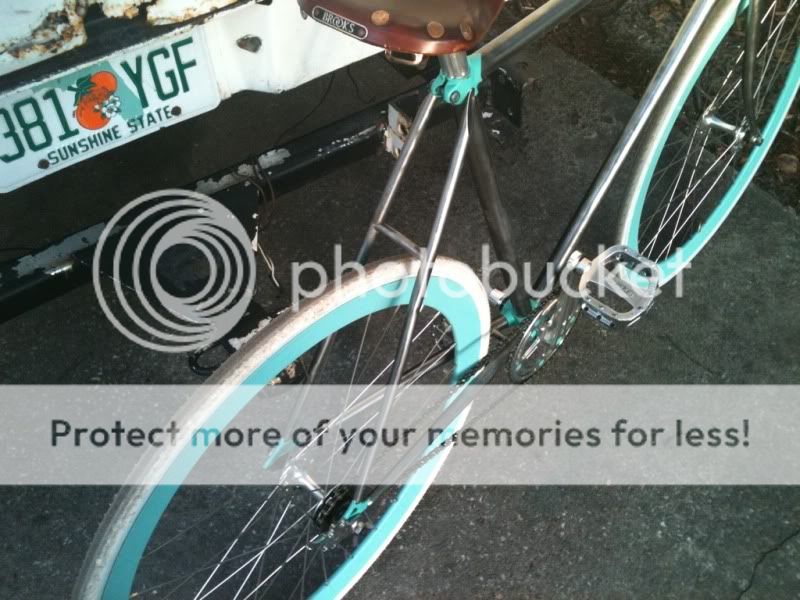
Sorry for the crappy iphone pics was in a hurry
Sorry for the crappy iphone pics was in a hurry
07-26-11 | 11:53 AM
#137

Bicycle Repair Man !!!
Joined: Sep 2007
Posts: 27,266
Likes: 152
From: YEG
Bikes: See my sig...
A little project I have been working on for some time but am just about ready for powdercoat... refitted my 1973 Phillip's 20 with rear stays and a fork taken from a Nishiki International which had a broken main tube and down tube. Stays and fork were of excellent quality with Suntour / Tange dropouts and as they came off a touring bike were just what I wanted for my separable touring bike.
Work was all free hand brazing and joining the old stays and new ones was accomplished by using chromoly sleeves / pins and the ends of the original chain and seat stays.
Added a few inches in the rear which will allow for better heel clearance and built up the fork with suspension correction in case I decide to go that route in the future and reduced the trail from the stock fork.
Increased the bb and pedal clearance which is an issue on 20's, especially when you run 175mm cranks and the bike should be a nice shade of British racing green after a little more clean up, detailing, and after I build custom racks.
Have been in test ride mode to ensure that the geometry is just right as I do not want to make any fork alterations after the powdercoating and figure I nailed it... the bike tracks and corners like it is on rails and is very stiff.
Looking pretty raw here and there is a little more work to be done... a few folks have said I should just clear coat the bike.
Work was all free hand brazing and joining the old stays and new ones was accomplished by using chromoly sleeves / pins and the ends of the original chain and seat stays.
Added a few inches in the rear which will allow for better heel clearance and built up the fork with suspension correction in case I decide to go that route in the future and reduced the trail from the stock fork.
Increased the bb and pedal clearance which is an issue on 20's, especially when you run 175mm cranks and the bike should be a nice shade of British racing green after a little more clean up, detailing, and after I build custom racks.
Have been in test ride mode to ensure that the geometry is just right as I do not want to make any fork alterations after the powdercoating and figure I nailed it... the bike tracks and corners like it is on rails and is very stiff.
Looking pretty raw here and there is a little more work to be done... a few folks have said I should just clear coat the bike.
07-31-11 | 10:39 AM
#138
Junior Member
Joined: Jul 2011
Posts: 11
Likes: 0
Finally done! www.flickr.com/photos/timdude
07-31-11 | 10:51 AM
#139


Decrepit Member
Joined: Aug 2005
Posts: 10,488
Likes: 92
From: Santa Rosa, California
Bikes: Waterford 953 RS-22, several Paramounts
Finally done! www.flickr.com/photos/timdude
 08-01-11 | 01:31 PM
#140
Junior Member
Joined: Nov 2008
Posts: 10
Likes: 0
From: Phoenix, AZ
Bikes: 1989 Miyata 914, 2008 Quintana Roo Seduza Tri
Custom Built Carbon TT "Sort of Funny" Bike
Just finished my first ever frame build...and I now have IMMENSE respect of those that do this for a living. This was a very difficult process and the level of thought and attention to detail that went into constructing this frame was almost beyond description. I'll post some details of how I built it in the next few weeks, as well as some feedback on how it rides....as I plan to start riding it this week.
The bike is a 700c Rear and 650c front in order to help lower the front end and get me in a better aero position...plus the frontal area is reduced. The old 24" funny bikes just looked....well....funny so I didn't go that route.
The frame consists of high modulus carbon tubes which were mitered and bonded and then the joints were wrapped with carbon strips. The rear end is a Deda Firebox (customized to mount to BB30) and the fork is an Advanced Composites Aero unit with an aluminum steerer. The bare frame before paint and cable guides, etc. weighed in at just over 2 pounds and just under 3 pounds when I started bolting parts on it. The bike as pictured weighs 16.8 pounds...only pedals missing.
[IMG]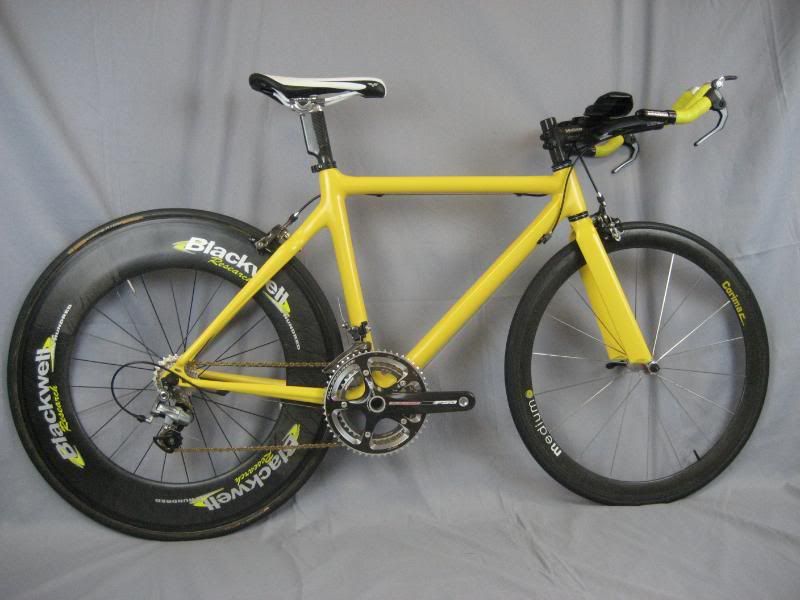 [/IMG]
The bike is a 700c Rear and 650c front in order to help lower the front end and get me in a better aero position...plus the frontal area is reduced. The old 24" funny bikes just looked....well....funny so I didn't go that route.
The frame consists of high modulus carbon tubes which were mitered and bonded and then the joints were wrapped with carbon strips. The rear end is a Deda Firebox (customized to mount to BB30) and the fork is an Advanced Composites Aero unit with an aluminum steerer. The bare frame before paint and cable guides, etc. weighed in at just over 2 pounds and just under 3 pounds when I started bolting parts on it. The bike as pictured weighs 16.8 pounds...only pedals missing.
[IMG]
[/IMG]
Last edited by mattradaz; 08-01-11 at 01:33 PM. Reason: Typo
08-01-11 | 03:58 PM
#141

Cisalpinist
Joined: Jan 2011
Posts: 5,557
Likes: 18
From: Holland
Bikes: blue ones.
The frame consists of high modulus carbon tubes which were mitered and bonded and then the joints were wrapped with carbon strips. The rear end is a Deda Firebox (customized to mount to BB30) and the fork is an Advanced Composites Aero unit with an aluminum steerer. The bare frame before paint and cable guides, etc. weighed in at just over 2 pounds and just under 3 pounds when I started bolting parts on it. The bike as pictured weighs 16.8 pounds...only pedals missing.
[[/IMG]
[[/IMG]
08-02-11 | 10:05 AM
#142
Junior Member
Joined: Nov 2008
Posts: 10
Likes: 0
From: Phoenix, AZ
Bikes: 1989 Miyata 914, 2008 Quintana Roo Seduza Tri
Italuminum,
I had many issues to work through as well...and I did end up using off the shelf tubes from Rock West Composites. All my notes are at my shop (so is the bike) but I'm certain I used the same size tube for the top/seat tubes (1.4 OD?) and used a bit larger tube (1.625 OD) for the downtube. I just used the standard .065" thickness tubes. I had some tell me to use a thinner tube, but for the minimal difference in weight and the added safety factor of the thicker tubing, I thought it was the way to go.
My biggest issue was getting the geometry correct with the 650c front wheel "curve ball" thrown in. It looks right....but I'll see how she handles when I ride it for the first time tomorrow.
Here's a few more pics...
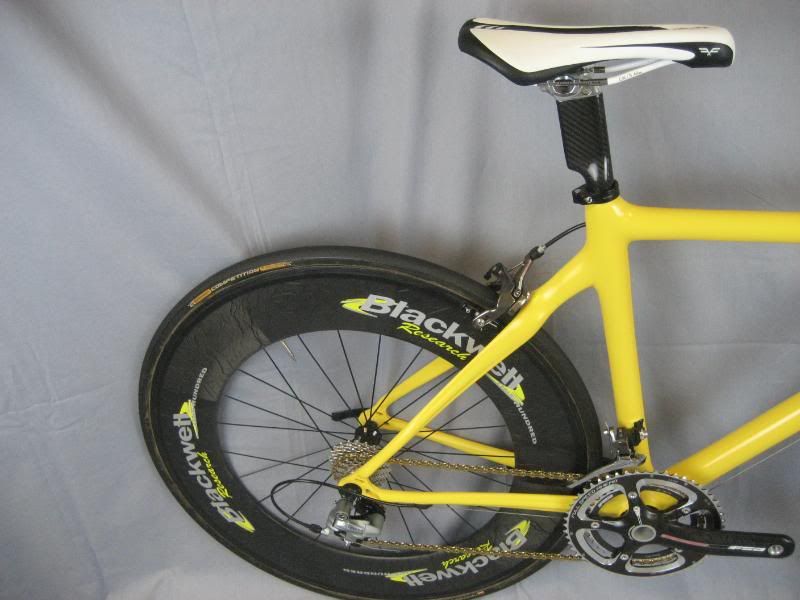
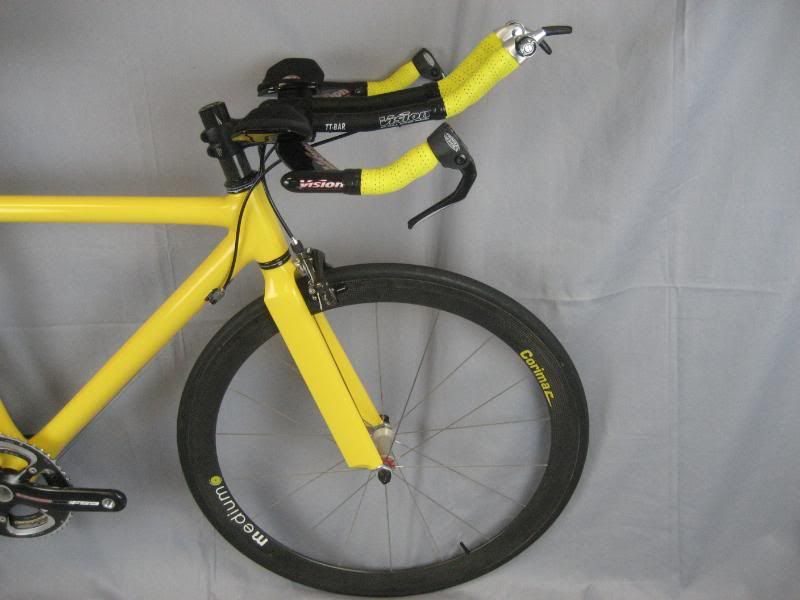
I had many issues to work through as well...and I did end up using off the shelf tubes from Rock West Composites. All my notes are at my shop (so is the bike) but I'm certain I used the same size tube for the top/seat tubes (1.4 OD?) and used a bit larger tube (1.625 OD) for the downtube. I just used the standard .065" thickness tubes. I had some tell me to use a thinner tube, but for the minimal difference in weight and the added safety factor of the thicker tubing, I thought it was the way to go.
My biggest issue was getting the geometry correct with the 650c front wheel "curve ball" thrown in. It looks right....but I'll see how she handles when I ride it for the first time tomorrow.
Here's a few more pics...
08-02-11 | 03:01 PM
#143
Cisalpinist
Joined: Jan 2011
Posts: 5,557
Likes: 18
From: Holland
Bikes: blue ones.
Italuminum,
I had many issues to work through as well...and I did end up using off the shelf tubes from Rock West Composites. All my notes are at my shop (so is the bike) but I'm certain I used the same size tube for the top/seat tubes (1.4 OD?) and used a bit larger tube (1.625 OD) for the downtube. I just used the standard .065" thickness tubes. I had some tell me to use a thinner tube, but for the minimal difference in weight and the added safety factor of the thicker tubing, I thought it was the way to go
Here's a few more pics...
I had many issues to work through as well...and I did end up using off the shelf tubes from Rock West Composites. All my notes are at my shop (so is the bike) but I'm certain I used the same size tube for the top/seat tubes (1.4 OD?) and used a bit larger tube (1.625 OD) for the downtube. I just used the standard .065" thickness tubes. I had some tell me to use a thinner tube, but for the minimal difference in weight and the added safety factor of the thicker tubing, I thought it was the way to go
Here's a few more pics...
08-26-11 | 08:38 PM
#145

Senior Member
Joined: Jul 2009
Posts: 970
Likes: 3
Bikes: 1989 Dahon Stainless Classic III Folder - 1990 Dahon Mariner Classic III Folder - 2005 Dahon Jetstream P8 Full Suspension Folder
What do you get when a Dahon folder gets drunk with a couple of OCC StingRays?
A Folding Pugsley (Fugsley)!!! https://www.ratrodbikes.com/forum/vie...p?f=21&t=44315
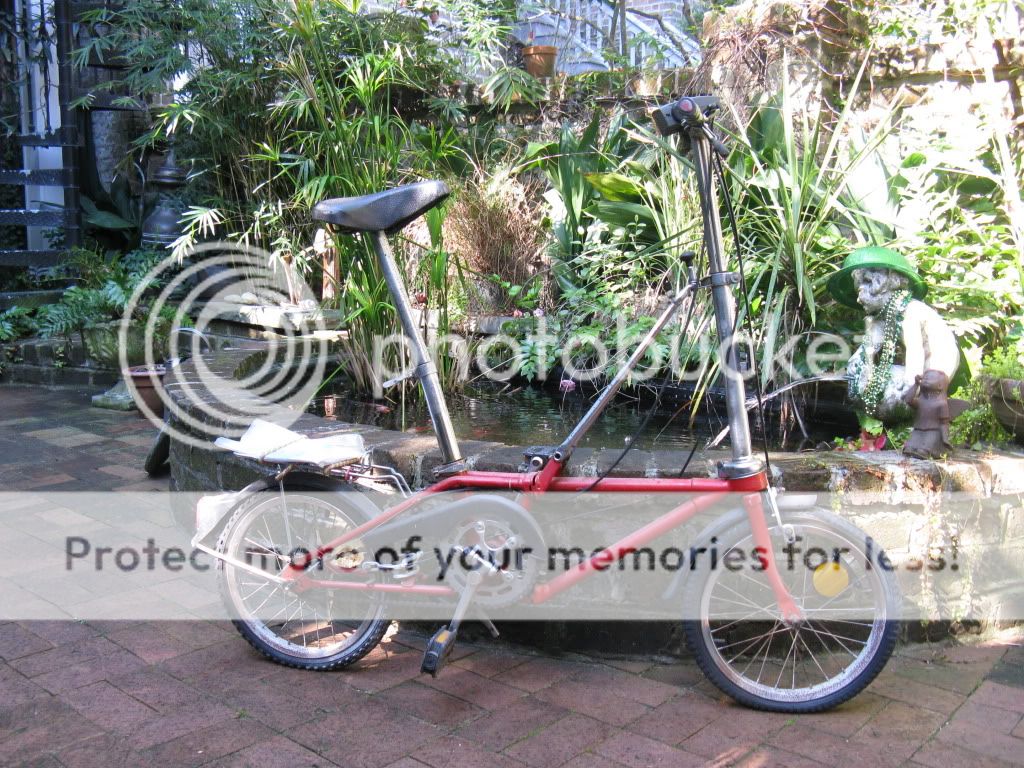
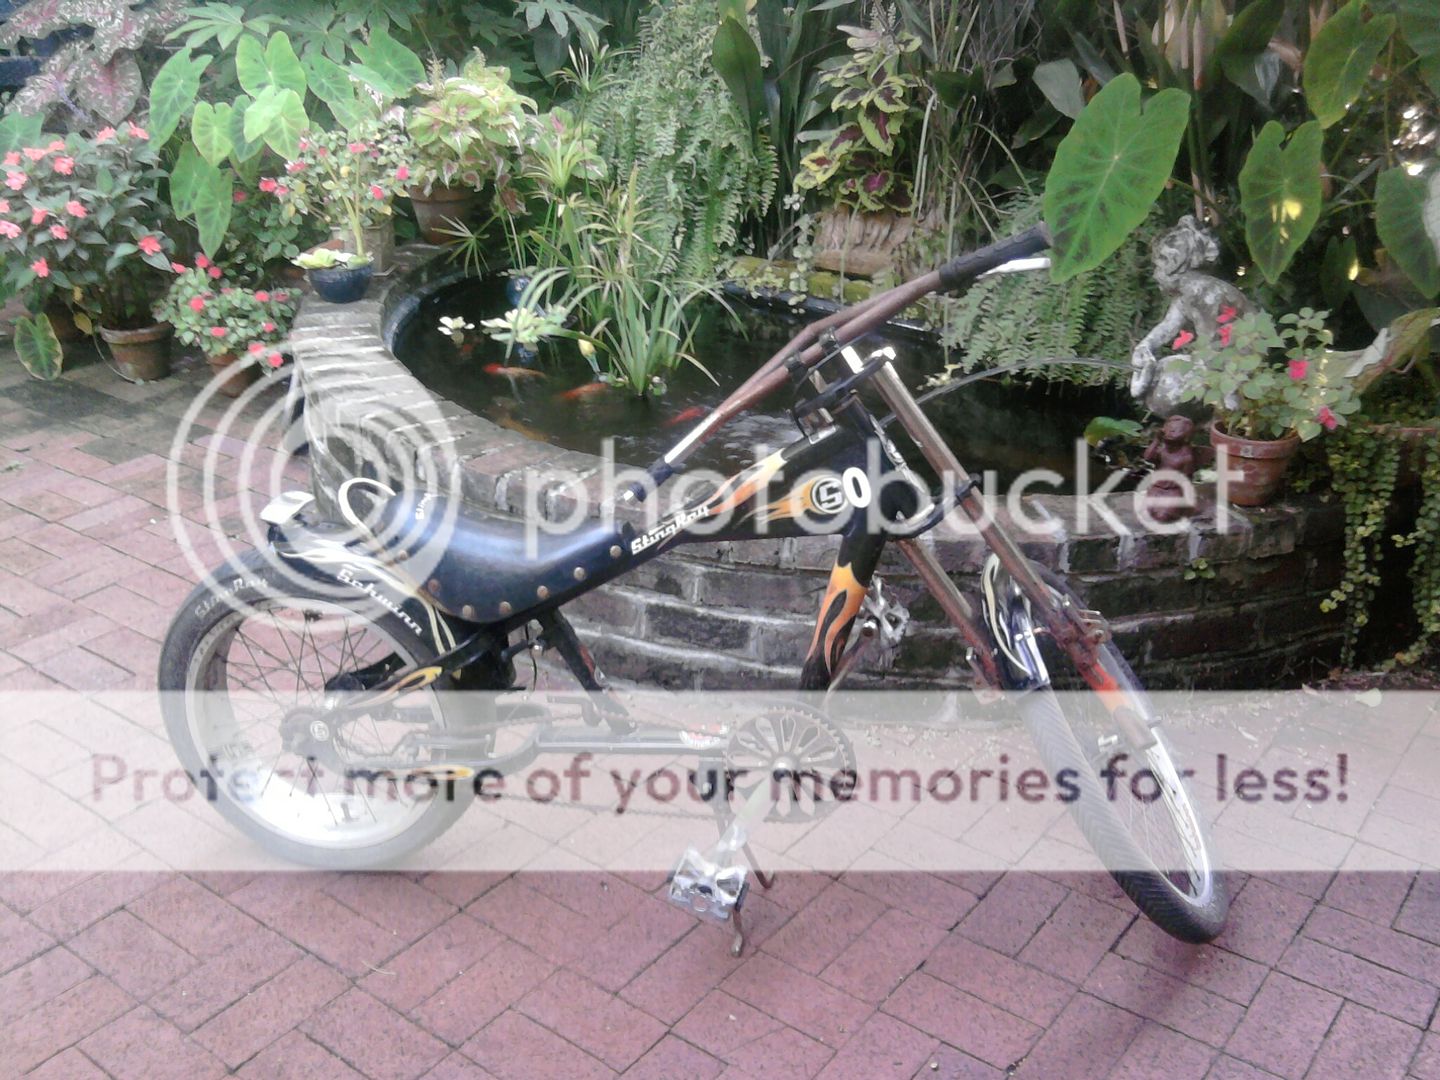
Hopefully welding will start this weekend!
Virtual Mockup
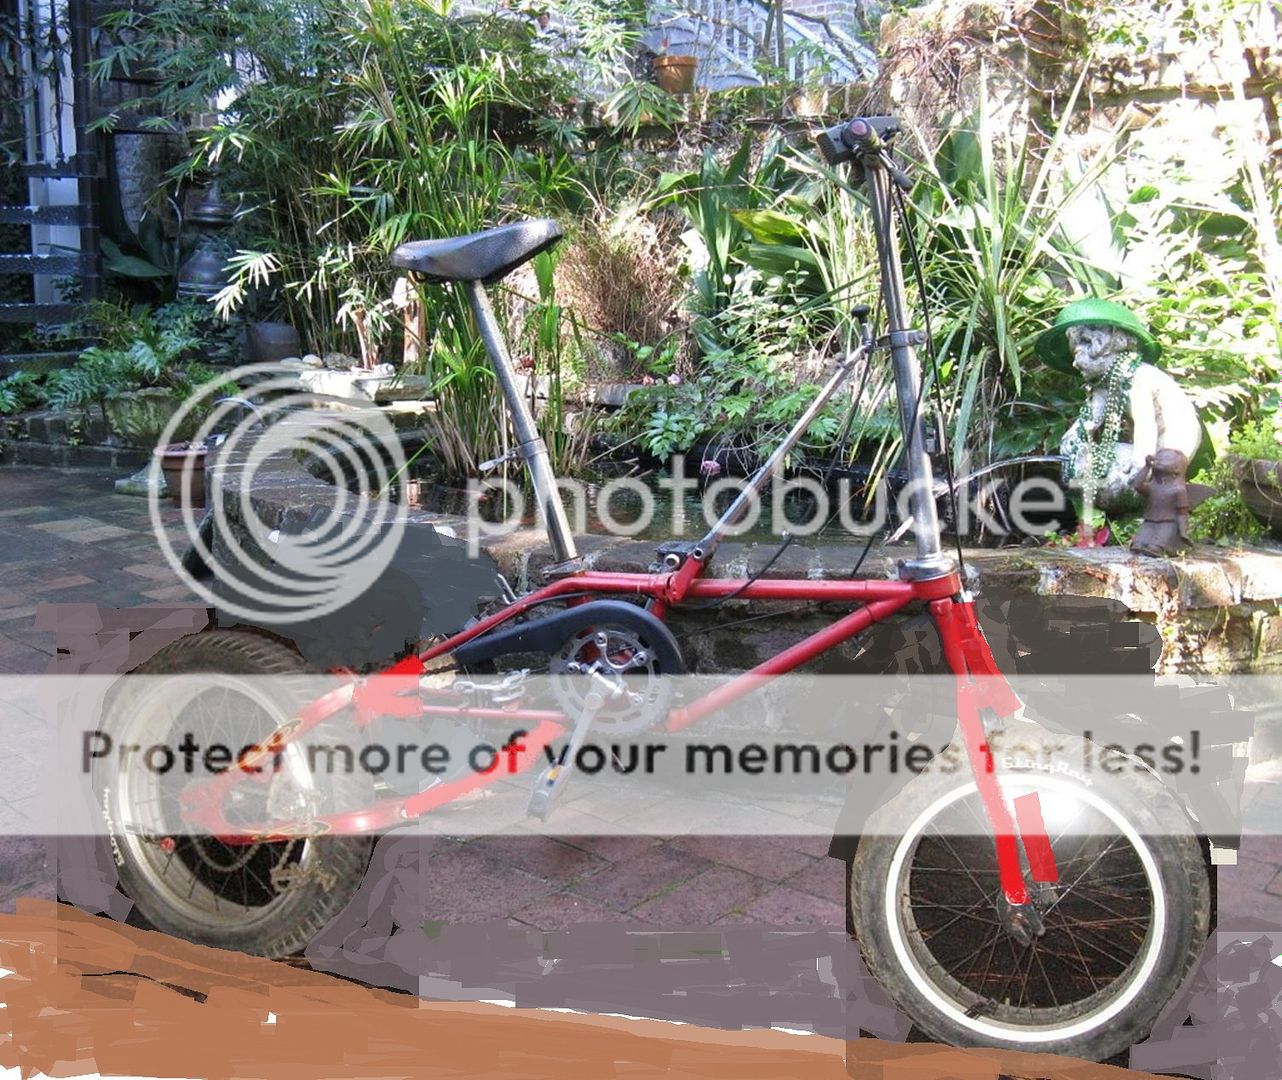
Actual Mockup
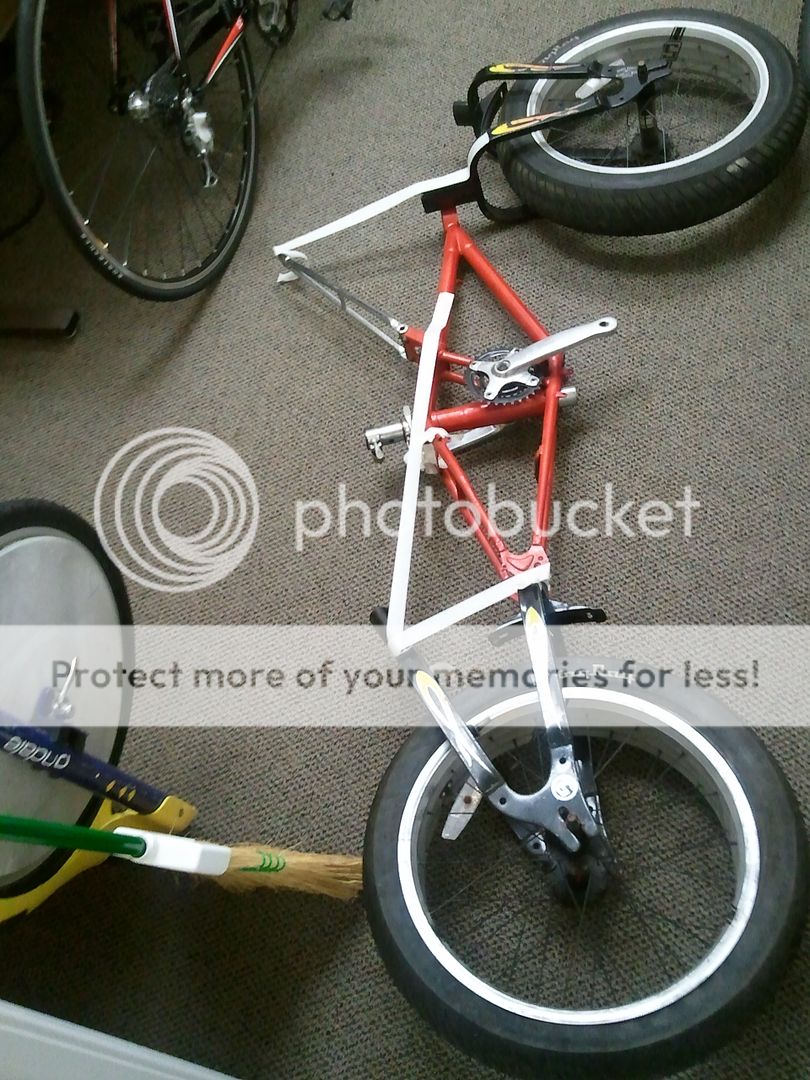
Old and new wheels. 16x1.5 versus 20x4!!!!
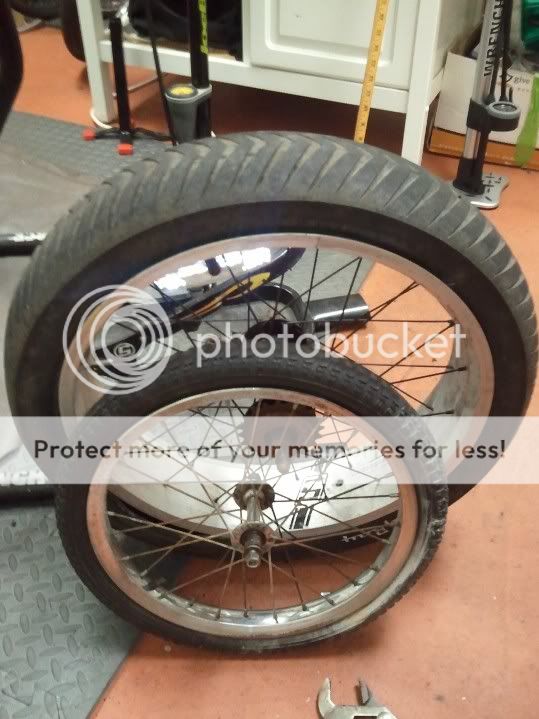
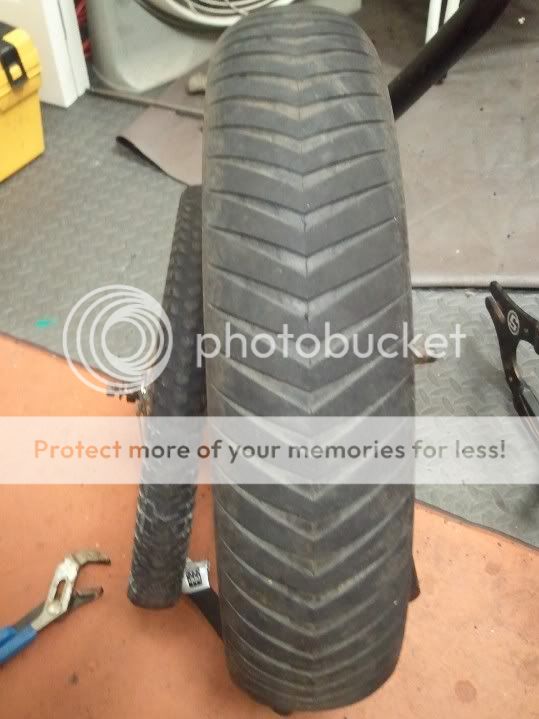
A Folding Pugsley (Fugsley)!!! https://www.ratrodbikes.com/forum/vie...p?f=21&t=44315
Hopefully welding will start this weekend!
Virtual Mockup
Actual Mockup
Old and new wheels. 16x1.5 versus 20x4!!!!
08-27-11 | 05:11 PM
#147
Bicycle Repair Man !!!
Joined: Sep 2007
Posts: 27,266
Likes: 152
From: YEG
Bikes: See my sig...
The actual brazing is the easy part and I figured that out in short order... anyone can weld but not anyone understands the dynamics of geometry and frame materials.
08-27-11 | 06:17 PM
#148
Decrepit Member
Joined: Aug 2005
Posts: 10,488
Likes: 92
From: Santa Rosa, California
Bikes: Waterford 953 RS-22, several Paramounts