


Hole in frame
 05-14-13, 05:41 PM
#1
Senior Member
Thread Starter
Join Date: Feb 2013
Posts: 98
Mentioned: 0 Post(s)
Tagged: 0 Thread(s)
Quoted: 0 Post(s)
Likes: 0
Liked 0 Times
in
0 Posts
Hole in frame
Alrighty, I have this frame that got a hole in it which trying to sand out the paint out of a dent. The idiot that did this apparently wasn't paying attention. It's kinda in the middle of the top bar. My question...can I just tack weld it and bono over it or do I need a more in depth fixin? It doesn't appear that it's weaker around the hole, a big gouge.

Here it is.
Thanks, j
Here it is.
Thanks, j
 05-14-13, 07:22 PM
#3
Senior Member
Thread Starter
Join Date: Feb 2013
Posts: 98
Mentioned: 0 Post(s)
Tagged: 0 Thread(s)
Quoted: 0 Post(s)
Likes: 0
Liked 0 Times
in
0 Posts
05-14-13, 07:34 PM
#4


Randomhead
Join Date: Aug 2008
Location: Happy Valley, Pennsylvania
Posts: 24,399
Mentioned: 0 Post(s)
Tagged: 0 Thread(s)
Quoted: 4 Post(s)
Liked 3,699 Times
in
2,519 Posts
I wouldn't ride that unless ending up on your face is ok
05-14-13, 07:40 PM
#5
Senior Member
Thread Starter
Join Date: Feb 2013
Posts: 98
Mentioned: 0 Post(s)
Tagged: 0 Thread(s)
Quoted: 0 Post(s)
Likes: 0
Liked 0 Times
in
0 Posts
05-14-13, 08:30 PM
#6
Junior Member
Join Date: Jan 2011
Location: Cumberland Maine
Posts: 10
Bikes: DORNBOX Handcrafted Performance Steel
Mentioned: 0 Post(s)
Tagged: 0 Thread(s)
Quoted: 0 Post(s)
Likes: 0
Liked 0 Times
in
0 Posts
JBone, as long as it's not close to the HT, I'd use silver or brass to fill in the area and primer or filler of your choice to finish it off. It would likely be the strongest part of the tube this way. My guess is that if you got in there with a welder, you'd likely make the hole bigger before you could actually make it smaller. Best-Chris
05-14-13, 09:06 PM
#7

Senior Member
Join Date: Feb 2012
Location: Rochester, NY
Posts: 18,096
Bikes: Stewart S&S coupled sport tourer, Stewart Sunday light, Stewart Commuting, Stewart Touring, Co Motion Tandem, Stewart 3-Spd, Stewart Track, Fuji Finest, Mongoose Tomac ATB, GT Bravado ATB, JCP Folder, Stewart 650B ATB
Mentioned: 0 Post(s)
Tagged: 0 Thread(s)
Quoted: 4210 Post(s)
Liked 3,876 Times
in
2,315 Posts
Before making any conclusions I think you need to further strip off the paint around the hole. Like a roof repair you might be surprised how much of the tube the repair needs to cover. No mention of tube material, steel has a far more forgiving nature. Andy.
 05-15-13, 05:51 AM
#9
Senior Member
Thread Starter
Join Date: Feb 2013
Posts: 98
Mentioned: 0 Post(s)
Tagged: 0 Thread(s)
Quoted: 0 Post(s)
Likes: 0
Liked 0 Times
in
0 Posts
I sprayed the primer on there to prevent rust. I can strip away the primer pretty easy with a wire brush. That was my plan before anymore work was to be done.
05-15-13, 01:04 PM
#11
Senior Member
Join Date: Feb 2012
Location: Rochester, NY
Posts: 18,096
Bikes: Stewart S&S coupled sport tourer, Stewart Sunday light, Stewart Commuting, Stewart Touring, Co Motion Tandem, Stewart 3-Spd, Stewart Track, Fuji Finest, Mongoose Tomac ATB, GT Bravado ATB, JCP Folder, Stewart 650B ATB
Mentioned: 0 Post(s)
Tagged: 0 Thread(s)
Quoted: 4210 Post(s)
Liked 3,876 Times
in
2,315 Posts
The simple way to fix the hole is to patch it with a plate brazed on then bondo till it looks nice to your eyes.
But on my reread of the OP I wonder why the tube produces a hole from sanding. Too aggressing a sanding? Was the tube already thinned by rust? This might be a replacement tube repair. Andy.
But on my reread of the OP I wonder why the tube produces a hole from sanding. Too aggressing a sanding? Was the tube already thinned by rust? This might be a replacement tube repair. Andy.
05-16-13, 06:41 AM
#12
Senior Member
Thread Starter
Join Date: Feb 2013
Posts: 98
Mentioned: 0 Post(s)
Tagged: 0 Thread(s)
Quoted: 0 Post(s)
Likes: 0
Liked 0 Times
in
0 Posts
The simple way to fix the hole is to patch it with a plate brazed on then bondo till it looks nice to your eyes.
But on my reread of the OP I wonder why the tube produces a hole from sanding. Too aggressing a sanding? Was the tube already thinned by rust? This might be a replacement tube repair. Andy.
But on my reread of the OP I wonder why the tube produces a hole from sanding. Too aggressing a sanding? Was the tube already thinned by rust? This might be a replacement tube repair. Andy.
Yea aggressive sanding.
05-16-13, 09:04 AM
#13
Senior Member
Ok, assuming that the cause is accurately determined in that the hole was caused by overly agressive sanding in that one spot. If so then it is likely that a larger area was actually also thinned out...basically leaving a good bit of the area as thin as aluminum foil. That pesents issues that must be strengthed.
So to get well, I would recommend removing the paint about 6 inches in both directions. Then work a flat screwdriver into the hole and open up the hole. Snap off the thinned metal edges that you have bend up and start again. When the hole is such that the edge is about as thick as you think the tube itself should be, stop opening it up and then use a round file to clean up the hole. Find a bit of chromo tubing the same diameter or an 1/8" smaller and cut and shape an oval piece from the side of this tube such that you have a round long oval patch at least 1/4" longer and wider than the hole. Drill a 1/16" hole in the middle of the patch and put a small finishing nail through the hole to give you something to hold onto.
Clean up everything you can get to so it can be brazed up. The patch will be easy to clean up, but the inside of the main tube may take ingenuity, such as wrapping a piece of emery cloth around your little finger and working it around the inside of the tube via the hole you have made. When you have physically done what can be done, clean further with acetone or lacquer thinner. Then using a pair of pliers or small vice grips on the end of the nail and work the patch into the hole and see if you can pull up on the nail and see if the patch will suck up to the inside of the hole relatively close. It should if you shaped it well enough. If so, then move the patch around using the nail and lay on some paste brazing flux, using the patch as a tool to get some flux on the inside of the tube also. Then clamp the frame in a stand, tie a string from the the tail of the vice grips to something overhead so it pulls up on the nail in the patch and thus holding the patch in place.
Flux up the top of the patch and the area around the hole and braze it. Put a thin layer of fillet braze over the patched area so you can then file it down just a bit to match the original OD of the damaged tube. Actually I would recommend using silver braze for the patching step to minimize the heat used and just handling the cosmetics of the patch with body filler or 'glass resin.
Or something like that. If it doesn't work out well, you could just cut out a couple of inches from the tube and cut a piece of tubing of the same diameter/length to insert in its place using a pair of internal sleeves to line it up and carry the strength. Doing this ends up with a lot more heat being applied to the tube which is why I suggested trying to just patch the hole first.
Request pictures and a text story line of how it went.
/K
05-16-13, 10:49 AM
#14
Senior Member
Thread Starter
Join Date: Feb 2013
Posts: 98
Mentioned: 0 Post(s)
Tagged: 0 Thread(s)
Quoted: 0 Post(s)
Likes: 0
Liked 0 Times
in
0 Posts
Ok, assuming that the cause is accurately determined in that the hole was caused by overly agressive sanding in that one spot. If so then it is likely that a larger area was actually also thinned out...basically leaving a good bit of the area as thin as aluminum foil. That pesents issues that must be strengthed.
So to get well, I would recommend removing the paint about 6 inches in both directions. Then work a flat screwdriver into the hole and open up the hole. Snap off the thinned metal edges that you have bend up and start again. When the hole is such that the edge is about as thick as you think the tube itself should be, stop opening it up and then use a round file to clean up the hole. Find a bit of chromo tubing the same diameter or an 1/8" smaller and cut and shape an oval piece from the side of this tube such that you have a round long oval patch at least 1/4" longer and wider than the hole. Drill a 1/16" hole in the middle of the patch and put a small finishing nail through the hole to give you something to hold onto.
Clean up everything you can get to so it can be brazed up. The patch will be easy to clean up, but the inside of the main tube may take ingenuity, such as wrapping a piece of emery cloth around your little finger and working it around the inside of the tube via the hole you have made. When you have physically done what can be done, clean further with acetone or lacquer thinner. Then using a pair of pliers or small vice grips on the end of the nail and work the patch into the hole and see if you can pull up on the nail and see if the patch will suck up to the inside of the hole relatively close. It should if you shaped it well enough. If so, then move the patch around using the nail and lay on some paste brazing flux, using the patch as a tool to get some flux on the inside of the tube also. Then clamp the frame in a stand, tie a string from the the tail of the vice grips to something overhead so it pulls up on the nail in the patch and thus holding the patch in place.
Flux up the top of the patch and the area around the hole and braze it. Put a thin layer of fillet braze over the patched area so you can then file it down just a bit to match the original OD of the damaged tube. Actually I would recommend using silver braze for the patching step to minimize the heat used and just handling the cosmetics of the patch with body filler or 'glass resin.
Or something like that. If it doesn't work out well, you could just cut out a couple of inches from the tube and cut a piece of tubing of the same diameter/length to insert in its place using a pair of internal sleeves to line it up and carry the strength. Doing this ends up with a lot more heat being applied to the tube which is why I suggested trying to just patch the hole first.
Request pictures and a text story line of how it went.
/K
So to get well, I would recommend removing the paint about 6 inches in both directions. Then work a flat screwdriver into the hole and open up the hole. Snap off the thinned metal edges that you have bend up and start again. When the hole is such that the edge is about as thick as you think the tube itself should be, stop opening it up and then use a round file to clean up the hole. Find a bit of chromo tubing the same diameter or an 1/8" smaller and cut and shape an oval piece from the side of this tube such that you have a round long oval patch at least 1/4" longer and wider than the hole. Drill a 1/16" hole in the middle of the patch and put a small finishing nail through the hole to give you something to hold onto.
Clean up everything you can get to so it can be brazed up. The patch will be easy to clean up, but the inside of the main tube may take ingenuity, such as wrapping a piece of emery cloth around your little finger and working it around the inside of the tube via the hole you have made. When you have physically done what can be done, clean further with acetone or lacquer thinner. Then using a pair of pliers or small vice grips on the end of the nail and work the patch into the hole and see if you can pull up on the nail and see if the patch will suck up to the inside of the hole relatively close. It should if you shaped it well enough. If so, then move the patch around using the nail and lay on some paste brazing flux, using the patch as a tool to get some flux on the inside of the tube also. Then clamp the frame in a stand, tie a string from the the tail of the vice grips to something overhead so it pulls up on the nail in the patch and thus holding the patch in place.
Flux up the top of the patch and the area around the hole and braze it. Put a thin layer of fillet braze over the patched area so you can then file it down just a bit to match the original OD of the damaged tube. Actually I would recommend using silver braze for the patching step to minimize the heat used and just handling the cosmetics of the patch with body filler or 'glass resin.
Or something like that. If it doesn't work out well, you could just cut out a couple of inches from the tube and cut a piece of tubing of the same diameter/length to insert in its place using a pair of internal sleeves to line it up and carry the strength. Doing this ends up with a lot more heat being applied to the tube which is why I suggested trying to just patch the hole first.
Request pictures and a text story line of how it went.
/K
I will investigate once I get the primer off and seeif there is any other thin areas. Hopefully I can just braze the ole and be done with it.
Thanks for all the comments. I guess the real purpose of the thread was to see if a quick fill in job was a possibility or if replacing the tube was the way to go.
Thanks again.
05-21-13, 10:44 AM
#15
Senior Member
Thread Starter
Join Date: Feb 2013
Posts: 98
Mentioned: 0 Post(s)
Tagged: 0 Thread(s)
Quoted: 0 Post(s)
Likes: 0
Liked 0 Times
in
0 Posts
Alright, so I've had time to look at silver brazing material. Is this ok to use?
https://www.homedepot.com/p/Lincoln-E...1#.UZuig4y9KSM
it's only 6% silver. Is that enough?
https://www.homedepot.com/p/Lincoln-E...1#.UZuig4y9KSM
it's only 6% silver. Is that enough?
05-21-13, 12:11 PM
#16
Randomhead
Join Date: Aug 2008
Location: Happy Valley, Pennsylvania
Posts: 24,399
Mentioned: 0 Post(s)
Tagged: 0 Thread(s)
Quoted: 4 Post(s)
Liked 3,699 Times
in
2,519 Posts
For a structural repair or to cover it over? If you just want to cover the hole, you could use jb weld or bondo. Devcon makes a metal-filled epoxy that is really strong. JB weld is also metal-filled epoxy
If you wanted to put a patch over it and have some hope of a structural repair, the common bike silver fillers are 45% and 56%. I would definitely use 56% in this case
If you wanted to put a patch over it and have some hope of a structural repair, the common bike silver fillers are 45% and 56%. I would definitely use 56% in this case
05-21-13, 01:03 PM
#17
Senior Member
Thread Starter
Join Date: Feb 2013
Posts: 98
Mentioned: 0 Post(s)
Tagged: 0 Thread(s)
Quoted: 0 Post(s)
Likes: 0
Liked 0 Times
in
0 Posts
for a structural repair or to cover it over? If you just want to cover the hole, you could use jb weld or bondo. Devcon makes a metal-filled epoxy that is really strong. Jb weld is also metal-filled epoxy
if you wanted to put a patch over it and have some hope of a structural repair, the common bike silver fillers are 45% and 56%. I would definitely use 56% in this case
if you wanted to put a patch over it and have some hope of a structural repair, the common bike silver fillers are 45% and 56%. I would definitely use 56% in this case
05-21-13, 02:14 PM
#18

Decrepit Member

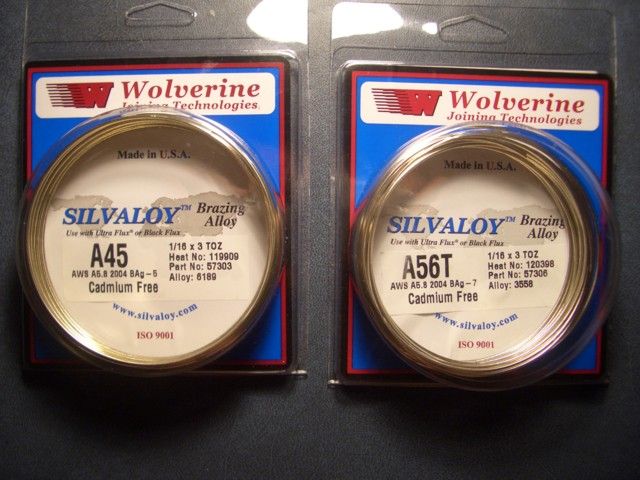
A56T Silvaloy cadmium free brazing alloy would be a good choice.
 05-21-13, 02:18 PM
#19
Randomhead
Join Date: Aug 2008
Location: Happy Valley, Pennsylvania
Posts: 24,399
Mentioned: 0 Post(s)
Tagged: 0 Thread(s)
Quoted: 4 Post(s)
Liked 3,699 Times
in
2,519 Posts
I meant silvering brazing on a patch. I think I wouldn't bother heating the tube if all I was going to do was paper over the flaw. In fact, I might duct tape it
05-21-13, 02:32 PM
#20
Banned
I've made a doubling Gusset for one frame tube , by Cutting a piece out of an even more damaged frame .
and sweat Brazing it over the damaged piece . pretty?, maybe not .. invisible.. but OK.
and sweat Brazing it over the damaged piece . pretty?, maybe not .. invisible.. but OK.
05-21-13, 05:02 PM
#21
Senior Member
Thread Starter
Join Date: Feb 2013
Posts: 98
Mentioned: 0 Post(s)
Tagged: 0 Thread(s)
Quoted: 0 Post(s)
Likes: 0
Liked 0 Times
in
0 Posts
05-21-13, 05:04 PM
#22
Senior Member
Thread Starter
Join Date: Feb 2013
Posts: 98
Mentioned: 0 Post(s)
Tagged: 0 Thread(s)
Quoted: 0 Post(s)
Likes: 0
Liked 0 Times
in
0 Posts
06-02-13, 08:32 PM
#23
Newbie
Join Date: Jun 2013
Posts: 2
Mentioned: 0 Post(s)
Tagged: 0 Thread(s)
Quoted: 0 Post(s)
Likes: 0
Liked 0 Times
in
0 Posts
I suggest some .035 Stainless the width of the dent, wrap it around the tube leave a little gap at the bottom sweat it on polish it up and it'll look like you wanted it that way.
06-18-13, 10:32 AM
#24
Senior Member
Thread Starter
Join Date: Feb 2013
Posts: 98
Mentioned: 0 Post(s)
Tagged: 0 Thread(s)
Quoted: 0 Post(s)
Likes: 0
Liked 0 Times
in
0 Posts
ok, I've had some time to look for the brazing alloy. I've had a pretty hard time finding the right stuff on the interweb. But I think this is a good deal.
https://compare.ebay.com/like/3211199...Types&var=sbar
Look like the right stuff?
https://compare.ebay.com/like/3211199...Types&var=sbar
Look like the right stuff?
06-18-13, 12:12 PM
#25
Randomhead
Join Date: Aug 2008
Location: Happy Valley, Pennsylvania
Posts: 24,399
Mentioned: 0 Post(s)
Tagged: 0 Thread(s)
Quoted: 4 Post(s)
Liked 3,699 Times
in
2,519 Posts
that looks good if you are going to attempt a patch.