


Mounting a new tire???
 12-08-16 | 06:01 AM
#1
Thread Starter
Senior Member
Joined: Oct 2016
Posts: 135
Likes: 1
From: Cleveland, OH
Bikes: 1986 Specialized Allez SE "Jim Merz" edition, Trek 750
Mounting a new tire???
OK, maybe I am the only one who doesn't know how to do this. Is there a trick, tool or technique to setting the last few inches of the tire here? In my youth I was capable of doing this with a tire having a Kevlar bead. Something has changed. Have watched youtube videos from Michelin to no avail. Any help would be greatly appreciated.

 12-08-16 | 06:16 AM
#2

Senior Member


Joined: Nov 2014
Posts: 27,576
Likes: 5,485
From: Eugene, Oregon, USA
Is one bead in already? Or neither bead?
The first thing I would do is double check you have a 700c rim.
The rim diameter will be about 10mm more than the BSD, so about 630mm outer diameter for 700c, and 640mm outside diameter for 27".
The first thing I would do is double check you have a 700c rim.
The rim diameter will be about 10mm more than the BSD, so about 630mm outer diameter for 700c, and 640mm outside diameter for 27".
12-08-16 | 06:49 AM
#3

Senior Member

Joined: Mar 2016
Posts: 2,095
Likes: 591
Bikes: '87-ish Pinarello Montello; '89 Nishiki Ariel; '85 Raleigh Wyoming, '16 Wabi Special, '16 Wabi Classic, '14 Kona Cinder Cone, 2023 Surly Disk Trucker
Yep, there are some "tricks of the trade" that you can use. Here's the method I use:
Never use a tire iron to mount a tire....ever. You'll only pinch the tube and make a flat.
I do this sitting on a stool with the wheel in my lap.
Make sure the tube is deflated.
Make sure to push the valve stem up into the tire so that the tire bead seats deeply into the rim.
Yeah, I start at the valve stem. Other mechanics start opposite the stem. Either way works but the important thing is to make sure that the valve is not down so far that the tire bead isn't seated fully.
For that last few inches put a toe strap on one end of where the tire is off the rim and tighten it down so that the tire bead doesn't slip off the rim.
Now starting opposite where the tire is off the rim start pushing and pulling with both hands and push the tire bead into the rim and pull the tire bead on both sides around the rim to the open part.
Make sure you continue to push the tube into the tire as you go and make sure the tube doesn't twist as you push it into the tire. This is important.
Holding the bead at the toe strap, start rolling the bead over the rim with the opposite hand. Be sure to push the tube into the tire as you go here to.
Yeah, it's NOT easy sometimes but you should make some progress.
Go back down to opposite the open part and repeat. Each time roll the bead with your entire hand over the rim's edge.
Keep at it and it will go on that rim.
If you've rubber your fingers raw and the tire goes on the rim, you've figured it out. From now on it's just practice.
Somebody posted a good video on this technique a while back. Not sure which thread it's on though.
-
Last edited by drlogik; 12-08-16 at 09:56 AM.
 12-08-16 | 08:39 AM
#5
Senior Member
Joined: Nov 2015
Posts: 540
Likes: 3
From: Houston
Bikes: Novarra Randonee 2016, Trek Verve 2 2015
Lubricate the tire beads with liquid soap.
Some tires are more difficult than others. Gatorskins are the devil!... Schwalbe Marathons and Marathon Plus are a piece of cake!
Some tires are more difficult than others. Gatorskins are the devil!... Schwalbe Marathons and Marathon Plus are a piece of cake!
12-08-16 | 09:20 AM
#7
Senior Member

Joined: Feb 2006
Posts: 2,947
Likes: 256
From: Sin City, Nevada
Bikes: Catrike 700, Greenspeed GTO trike, , Linear LWB recumbent, Haluzak Horizon SWB recumbent, Balance 450 MTB, Cannondale SM800 Beast of the East
Blame the tire not the rim. I avoid tires that are too difficult to mount. Not worth the trouble so I never buy that tire again. I don't want a tire that is so hard to mount that if I have a flat I would have great difficulty on the road switching out tubes.
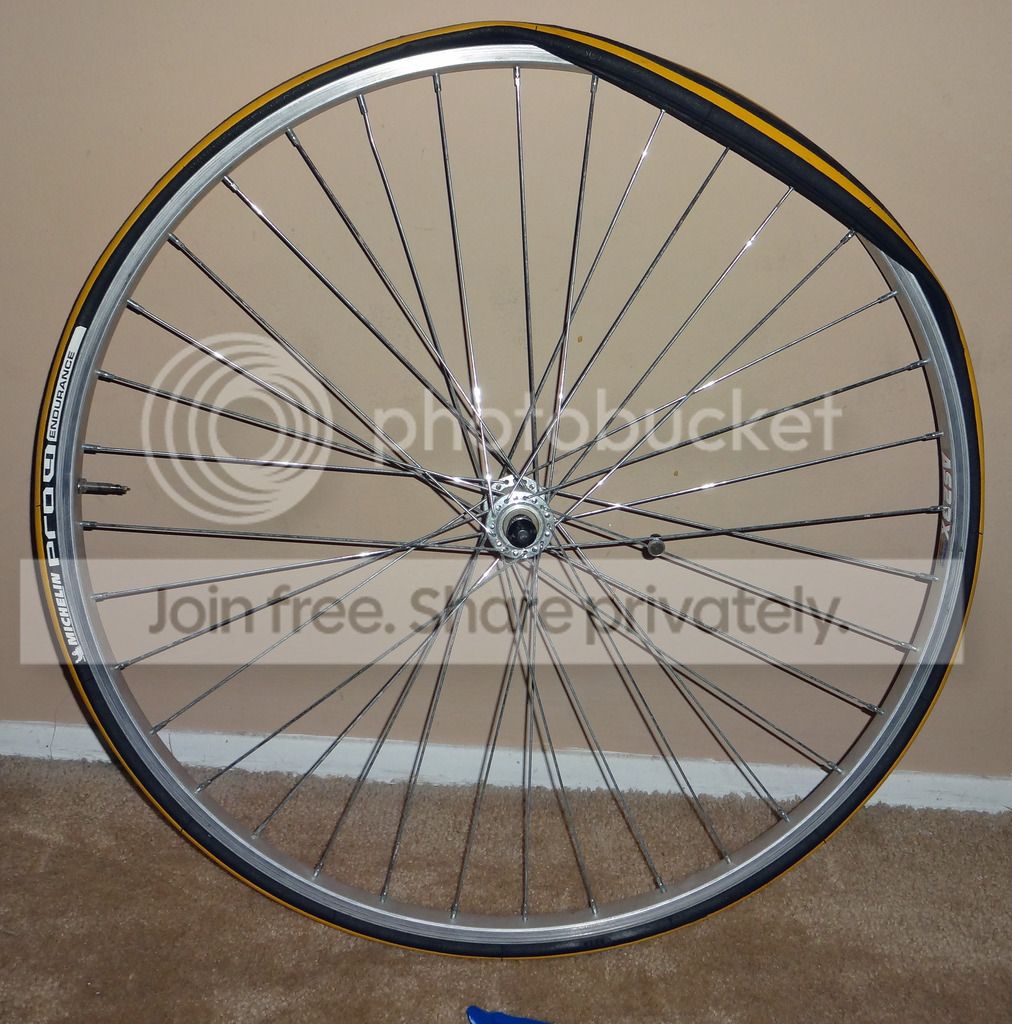
I can't see me being able to use my thumbs to mount the tire pictured by the OP. I use tire irons in this case and do it very carefully to avoid pinching the tube.
I can't see me being able to use my thumbs to mount the tire pictured by the OP. I use tire irons in this case and do it very carefully to avoid pinching the tube.
12-08-16 | 09:45 AM
#8
Full Member
Joined: Sep 2014
Posts: 226
Likes: 12
From: Western MA
I put a new tire on an empty rim a couple of times before I involve the inner tube. This stretches the bead a bit. And, since there's no inner tube on the rim, you can use a tire iron to your heart's content while loosening up the bead.
12-08-16 | 09:50 AM
#9
Senior Member

Joined: Jul 2008
Posts: 9,176
Likes: 654
From: Minas Ithil
No you won't. All you have to do is be watchful when you hook the tip over the edge of the rim so it doesn't pinch the tube. Coating the tube with baby powder first and inflating it slightly makes it easier so shove it up into the tire so it's not exposed to pinching. Then before you air it up fully squeeze the tire all the way around the rim to make sure the tube is all the way inside.
Last edited by Lazyass; 12-08-16 at 09:53 AM.
12-08-16 | 09:56 AM
#10
Senior Member
Joined: Mar 2016
Posts: 2,095
Likes: 591
Bikes: '87-ish Pinarello Montello; '89 Nishiki Ariel; '85 Raleigh Wyoming, '16 Wabi Special, '16 Wabi Classic, '14 Kona Cinder Cone, 2023 Surly Disk Trucker
Lazy,
Ok, "You should avoid using tire irons if possible".
Ok, "You should avoid using tire irons if possible".
12-08-16 | 09:56 AM
#12

Senior Member
Joined: Jun 2015
Posts: 3,379
Likes: 2,020
From: Pacific Northwest
Bikes: Yes.
Get the opposite side...
Many times, I have found the difficulty to be the bead I am working with "seems" to be too small in diameter because of friction with the rim is cumulative from the oppisite side of the rim. The solution is to start at the opposite side of where the difficulty is, pinch the tire and set the bead as near the center between the rim edges as possible. Work it around, never letting the tire relax, until complete. Usually that gives enough slack that the remainder can then be rolled over the edge.
The problem in my experience is the depth between the rim edges. Some wheels are deeper than others. The shallow ones seem more difficult because the tire can't move as far or as freely around the wheel.
Oddly enough, for me, kevlar/folding bead tires seem more difficult. Almost as if a certain amount of "initial stretch" is factored into the manufacture so it is proper size after it has been fully inflated.
+1 on Continentals being the most difficult. Hardshells being the worst!
12-08-16 | 11:19 AM
#13

Senior Member
Joined: Apr 2015
Posts: 8,206
Likes: 86
From: Metro Detroit/AA
Bikes: 2016 Novara Mazama
I use the base of my palm on the hard to install tires. I find I have more strength pushing with my whole forearm, rather than just my thumb. Also I second those that ask if the other side is in the rim or not, or if you are trying to do both sides at the same time.
12-08-16 | 12:04 PM
#14
Senior Member
Joined: Jul 2008
Posts: 30,506
Likes: 4,579
From: 25 miles northwest of Boston
Bikes: Bottecchia Sprint, GT Timberline 29r, Marin Muirwoods 29er, Trek FX Alpha 7.0
like base said, get the tire on the opposite side into the center of the wheel groove cuz that's a smaller diameter, then you'll have more slack for the final push. it takes some massaging & squeezing. I admit I do use a plastic tire lever very carefully at the end but only if I can be certain I'm not catching the tube. when I was a kid I got used to using a metal screwdriver. only took ruining 1 tube to learn how to do it without grabbing the tube. folding tires are easier to mount (in general) suppose it couldn't hurt to warm the tire, meaning don't store them in your basement before mounting, or if you do, bring them to another floor & warm them up or use a space heater?
12-08-16 | 12:18 PM
#16
Senior Member
Joined: Dec 2004
Posts: 12,560
Likes: 799
From: Middle of da Mitten
Bikes: Trek 7500, RANS V-Rex, Optima Baron, Velokraft NoCom, M-5 Carbon Highracer, Bacchetta Quattro, Catrike Speed
I find it's easiest for me to start opposite the valve stem. That way it's easier to push the tire bead all the way into the center of the rim where, as rumrunn6 says, the diameter is smaller. I just keep working the bead to the center as I keep the tension on the bead and eventually it gets worked to its point of least resistance. Once the tire is on, make sure to push the valve stem up into the tire because it's easy for the reinforcement to get pinched under the bead.
12-08-16 | 12:18 PM
#17

Old fart
Joined: Nov 2004
Posts: 26,411
Likes: 5,350
From: Appleton WI
Bikes: Several, mostly not name brands.
But you can use a "bead jack" to safely lift the bead over the sidewall without risking a puncture. VAR makes a combination bead jack/tire lever that is portable enough to carry with you on rides:

Kool Stop also makes a bead jack, but it's significantly larger than VAR's (and stiffer and better leverage as well), so it's better suited as a shop tool:
 12-08-16 | 12:31 PM
#18
Senior Member
Joined: Apr 2009
Posts: 39,897
Likes: 3,865
From: New Rochelle, NY
Bikes: too many bikes from 1967 10s (5x2)Frejus to a Sumitomo Ti/Chorus aluminum 10s (10x2), plus one non-susp mtn bike I use as my commuter
The key to mounting tires is to understand that since the tire's bead diameter is smaller than the rim's outside diameter, it's impossible.
Obviously it isn't, so there's a trick, which is to offset the tire to one side to get it over the rim. What makes that possible is the well at the center of the rim, which is deepest at it's center.
So, you want to move the tire do the center and push the slack to the opposite end. The first mistake you made was to pull the valve down blocking the center, which prevented the tire from moving to the deepest part of the well. The second mistake was in not ending at the valve, so the entire tire, except for the last section can move to the well, giving you the maximum slack to work with.
__________________
FB
Chain-L site
An ounce of diagnosis is worth a pound of cure.
Just because I'm tired of arguing, doesn't mean you're right.
�One accurate measurement is worth a thousand expert opinions� - Adm Grace Murray Hopper - USN
WARNING, I'm from New York. Thin skinned people should maintain safe distance.
FB
Chain-L site
An ounce of diagnosis is worth a pound of cure.
Just because I'm tired of arguing, doesn't mean you're right.
�One accurate measurement is worth a thousand expert opinions� - Adm Grace Murray Hopper - USN
WARNING, I'm from New York. Thin skinned people should maintain safe distance.
12-08-16 | 12:35 PM
#19
Full Member
Joined: Feb 2009
Posts: 463
Likes: 55
From: North East
This video - https://www.youtube.com/watch?v=-XUFV...ature=youtu.be from this thread - Trouble changing tire
Important to put one side of the bead on the rim entirely, and then begin with the other side.
This is one of the best videos I have seen for getting a tire back on the rim without having to use tire irons.
The part about partially inflating the tire before putting it on the rim is good advice, as is the part where he wiggles the valve a little just to make sure nothing is pinched.
12-08-16 | 12:43 PM
#20

Senior Member
Joined: Oct 2004
Posts: 7,125
Likes: 111
From: Huntington Beach, CA
Bikes: Cervelo Prodigy
The Kool Stop bead jack is distributed here in the USA by Kool Stop. But mine says its from the Netherlands. Wonderful tool. Even using a Continental Grand Prix 4000-S mounting on a carbon wheel, it works.
Some You tube demonstrations will avoid the "hard to fit" scenarios for this bead jack. If I had to make improvements on this, it would be on the "lever arm" part. The end what I call the "blade", is just a tad bit too thick and sometimes I get some slippage when applying force. To avoid this, I have to systematically inch my way to fully mount those last few inches. In other words, its not in one fell swoop.
Some You tube demonstrations will avoid the "hard to fit" scenarios for this bead jack. If I had to make improvements on this, it would be on the "lever arm" part. The end what I call the "blade", is just a tad bit too thick and sometimes I get some slippage when applying force. To avoid this, I have to systematically inch my way to fully mount those last few inches. In other words, its not in one fell swoop.
12-08-16 | 04:13 PM
#21
Newbie
Joined: Dec 2016
Posts: 3
Likes: 0
don't know if its been mentioned but what I do is put them out in the sun for a little while and that makes them easlier to work with. if its night time, and u cant wait till morning, try putting them in the drier for a few minutes, just don't let the wifey see u doing it 
12-08-16 | 09:29 PM
#24
Banned.
Joined: Jul 2016
Posts: 2,717
Likes: 10
From: downtown Bulverde, Texas
Bikes: '74 Raleigh International utility; '98 Moser Forma road; '92 Viner Pro CX upright
a little bit of air in the tube.
start right beside the valve stem.
work your way around all the way in one direction to finish back at the valve stem.
when you get close to the stem, let some air out of the tube, push the stem inward as far as you can to keep the tube from pinching and finish the bead at the stem.
start right beside the valve stem.
work your way around all the way in one direction to finish back at the valve stem.
when you get close to the stem, let some air out of the tube, push the stem inward as far as you can to keep the tube from pinching and finish the bead at the stem.
Last edited by bulldog1935; 12-08-16 at 09:32 PM.
12-08-16 | 10:30 PM
#25

Calamari Marionette Ph.D
Joined: Dec 2013
Posts: 7,861
Likes: 41
From: Coeur d' Alene
Bikes: 3 Chinese Gas Pipe Nerdcycles and 2 Chicago Electroforged Boat Anchors
a little bit of air in the tube.
Start right beside the valve stem.
Work your way around all the way in one direction to finish back at the valve stem.
When you get close to the stem, let some air out of the tube, push the stem inward as far as you can to keep the tube from pinching and finish the bead at the stem.
Start right beside the valve stem.
Work your way around all the way in one direction to finish back at the valve stem.
When you get close to the stem, let some air out of the tube, push the stem inward as far as you can to keep the tube from pinching and finish the bead at the stem.