


GT i-Drive 4.0 bottom bracket bearing rebuild
 02-16-20, 12:57 PM
#1
Junior Member
Thread Starter
GT i-Drive 4.0 bottom bracket bearing rebuild
My apologies if this is the wrong spot to post this. A quick search didn't pull up any rebuilds of this odd part on the internet so I figured I'd post one up for posterity.
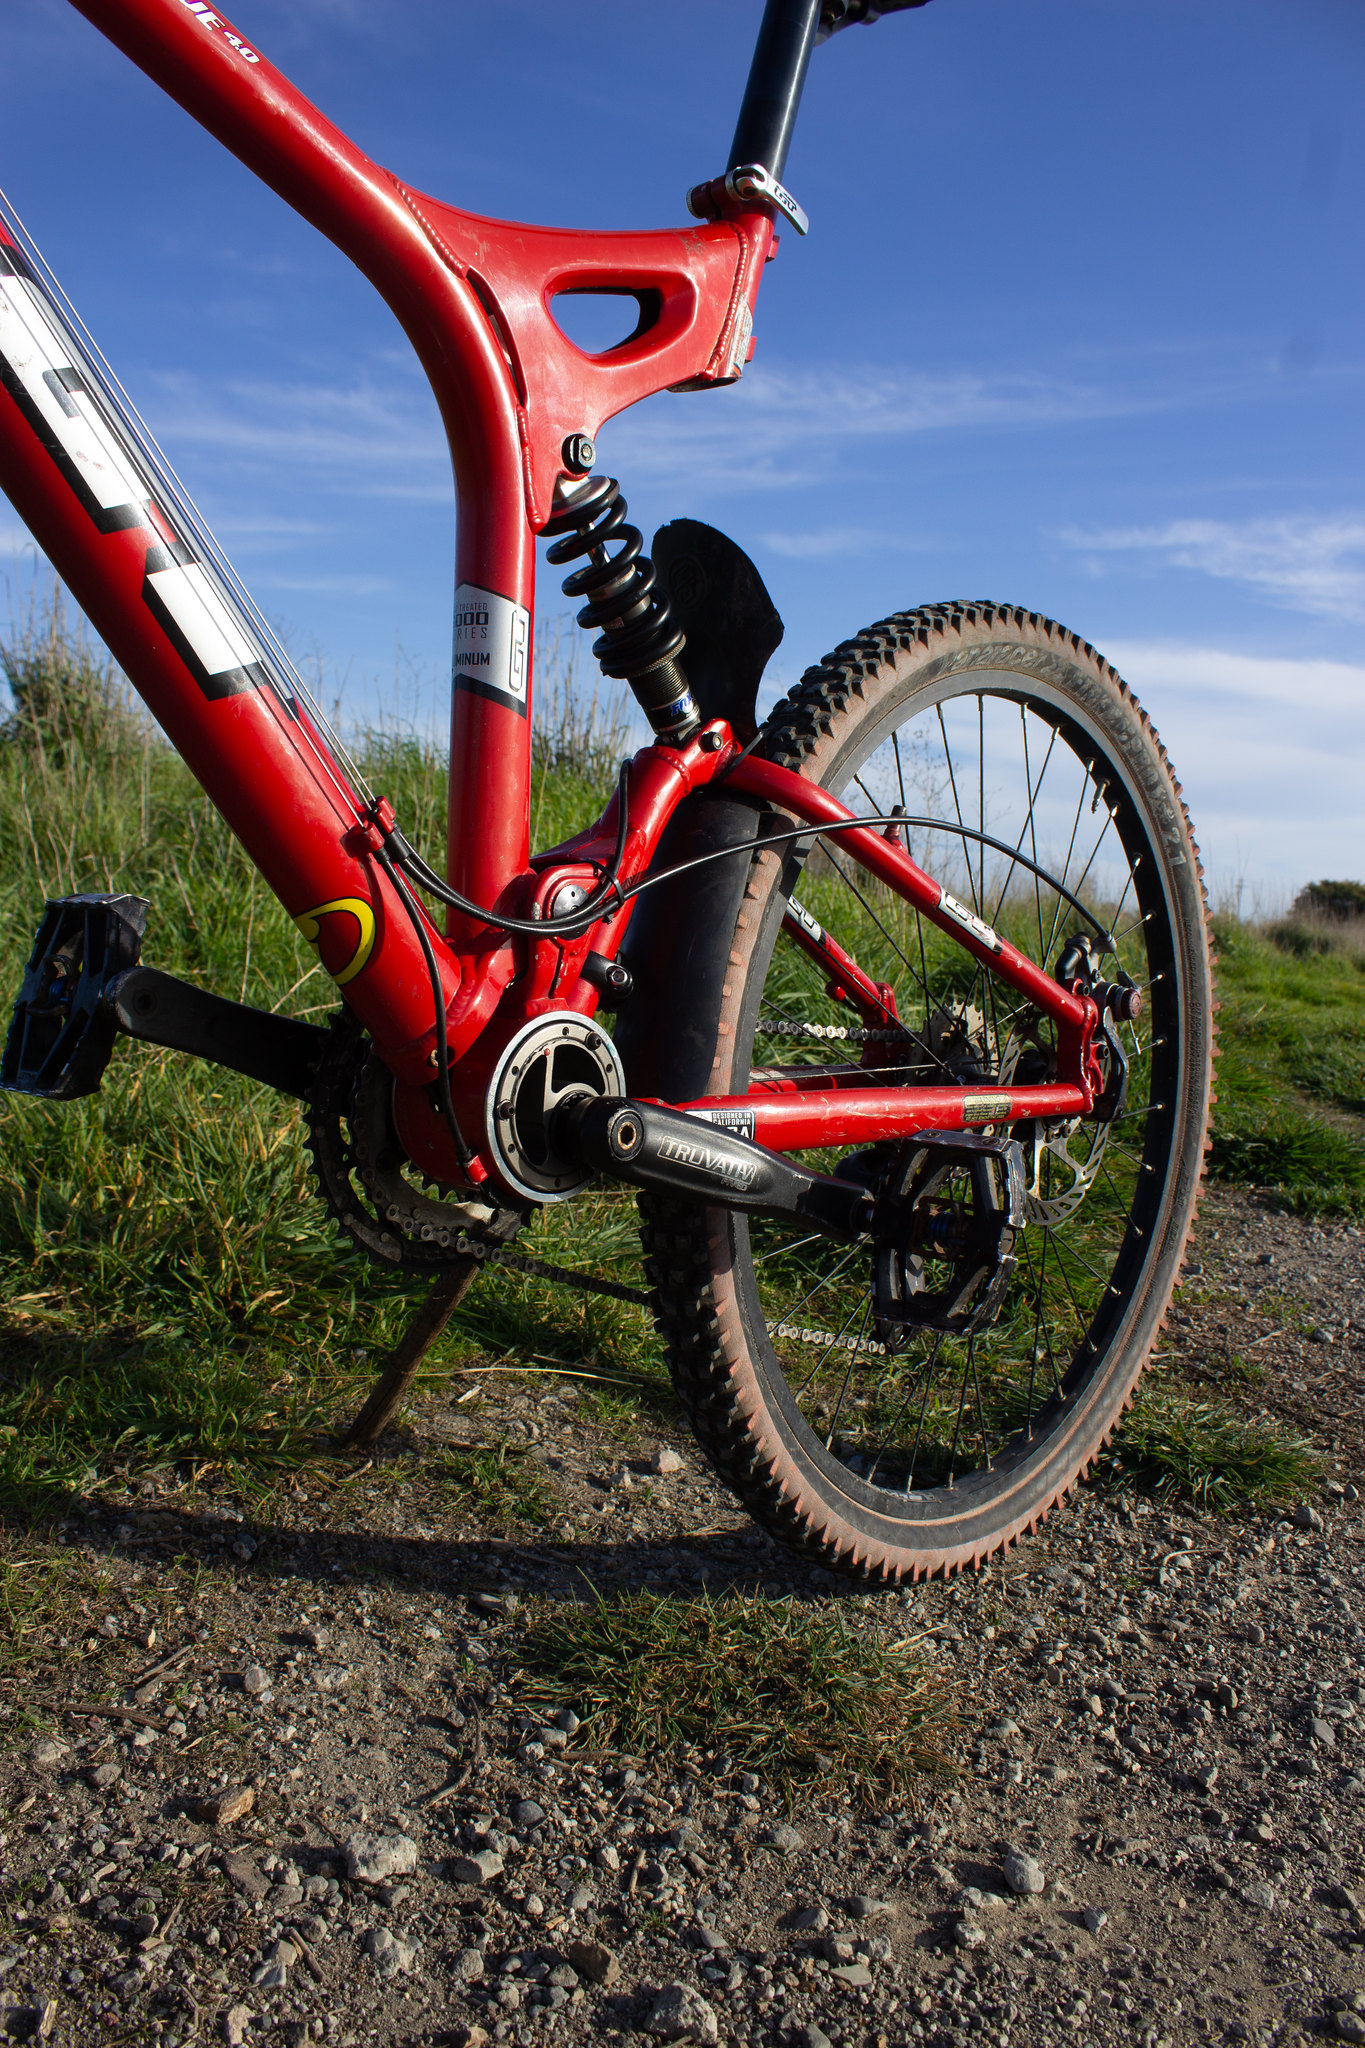
I spent the last couple of days rebuilding this 2002 GT i-Drive 4.0. Here it is at the end of the rebuild.
 IMG_7174
I got this bike at a salvage store for $50 specifically because I saw this bottom bracket/suspension design and wanted to figure out how it works. This post is an inside look at that giant machined bearing.
 IMG_7177
The bike was in rough shape - dirty, melting grips, both derailleurs shot, etc. - but somehow the tubes held air and the suspension felt fine. In the process of stripping it down I noticed that the suspension felt a little gritty. If there was ever a chance for me to leave that bearing alone, it had then passed.
Breaking it down was a bit of a process. I de-lnked the shock to the rear triangle, took the cranks off and with some effort removed the bottom bracket. At that point it was clear that I had to keep the bearing linked to the frame it connects through a strut that you can see poking into the shell so that I would have some leverage against which to twist the bearing.
 IMG_7171
The bearing is a two-part construction On the non-drive side, three small screws with precisely sized washers fit in to little machined indentations on the non-drive side of the larger part.
 IMG_7166
With those screws removed, I was able to screw apart the bearing by inserting the ends of a couple of files into the bare holes machined into the smaller, non-drive side part.
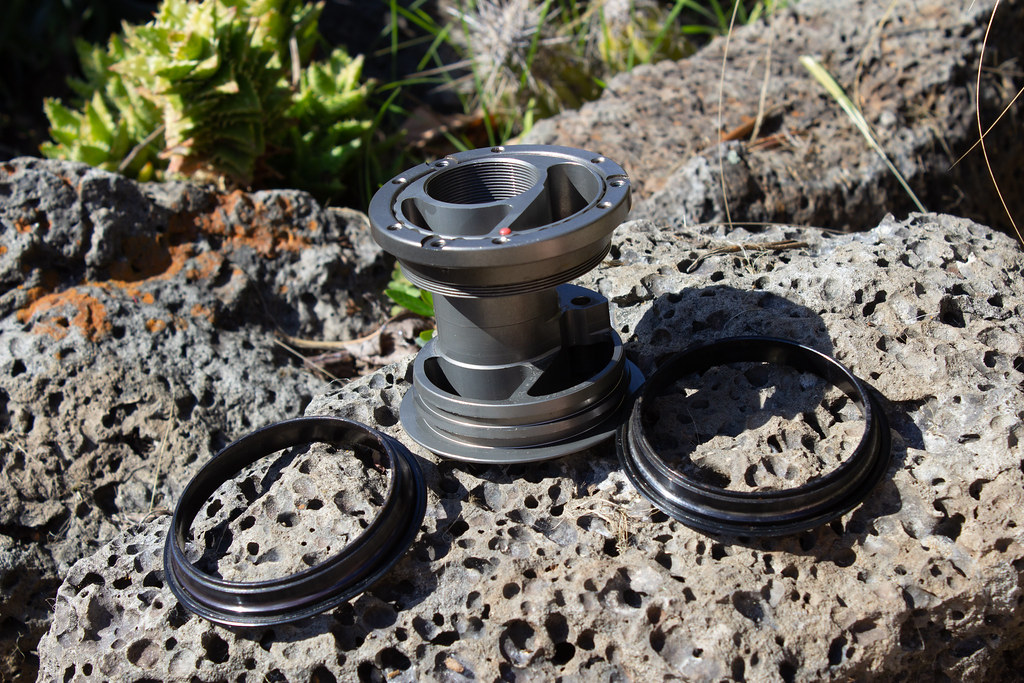
Those two big bearing parts don't have races machined into them, as I initially suspected. Instead they press two separate races together medially. The opposing races are set in the frame. Below are all of the parts (cleaned off) right before I started reassembly. The races are black. The races in the frame are, I assume, machined separately and pressed in.
 IMG_7152
Here's a glamour shot of the races and machined bearing shell.
 IMG_7138
You'll notice in that shot with the frame and all of the parts that there are two bearing cages. They are gigantic. Each one held 28 bearings, but they were spaced pretty far apart.
I figured if I was going to rebuild this part, I was going to go all in...
 IMG_7164
Each side took 59 bearings. I wish I had gotten a measurement on them - they're the same size used in the headset.
I pressed the race on to them and put the non-drive side bearing shell on top, taped it to the frame, and proceeded with the other side. The parts are all metal and machined very cleanly so doing this maintenance was easy - the only real challenge was figuring out how to unscrew the two halves of the shell. Even that could be done with a pretty boneheaded hack. The suspension feels very smooth now - though this is the first full suspension bike I've ever ridden so I didn't have a good basis of comparison. In fact this is the first 21st century bike I've ever rebuilt. Disc brake set up is a chore but they sure do stop on a dime.
This linkage looks arcane but is a pretty clever, if expensive, solution to get the geometry they wanted. If you look at that bearing shell, you'll see that the bottom bracket is off center, but very far - only a few centimeters. I guess that's not enough space to fit in a robust pivot point and arm to put the bottom bracket on. Since the bearing shell rotates around its central axis, this design is essentially cramming a very short pivot arm in between the frame and the bottom bracket. Newer i-drive bikes seem to have that same design but do use a longer pivot arm.
I hope this helps someone down the line keep one of these bikes from going to the trash, or at least is interesting for whoever is reading.
One final shot:
 IMG_7176
I spent the last couple of days rebuilding this 2002 GT i-Drive 4.0. Here it is at the end of the rebuild.
IMG_7174I got this bike at a salvage store for $50 specifically because I saw this bottom bracket/suspension design and wanted to figure out how it works. This post is an inside look at that giant machined bearing.
IMG_7177The bike was in rough shape - dirty, melting grips, both derailleurs shot, etc. - but somehow the tubes held air and the suspension felt fine. In the process of stripping it down I noticed that the suspension felt a little gritty. If there was ever a chance for me to leave that bearing alone, it had then passed.
Breaking it down was a bit of a process. I de-lnked the shock to the rear triangle, took the cranks off and with some effort removed the bottom bracket. At that point it was clear that I had to keep the bearing linked to the frame it connects through a strut that you can see poking into the shell so that I would have some leverage against which to twist the bearing.
IMG_7171The bearing is a two-part construction On the non-drive side, three small screws with precisely sized washers fit in to little machined indentations on the non-drive side of the larger part.
IMG_7166With those screws removed, I was able to screw apart the bearing by inserting the ends of a couple of files into the bare holes machined into the smaller, non-drive side part.
Those two big bearing parts don't have races machined into them, as I initially suspected. Instead they press two separate races together medially. The opposing races are set in the frame. Below are all of the parts (cleaned off) right before I started reassembly. The races are black. The races in the frame are, I assume, machined separately and pressed in.
IMG_7152Here's a glamour shot of the races and machined bearing shell.
IMG_7138You'll notice in that shot with the frame and all of the parts that there are two bearing cages. They are gigantic. Each one held 28 bearings, but they were spaced pretty far apart.
I figured if I was going to rebuild this part, I was going to go all in...
IMG_7164Each side took 59 bearings. I wish I had gotten a measurement on them - they're the same size used in the headset.
I pressed the race on to them and put the non-drive side bearing shell on top, taped it to the frame, and proceeded with the other side. The parts are all metal and machined very cleanly so doing this maintenance was easy - the only real challenge was figuring out how to unscrew the two halves of the shell. Even that could be done with a pretty boneheaded hack. The suspension feels very smooth now - though this is the first full suspension bike I've ever ridden so I didn't have a good basis of comparison. In fact this is the first 21st century bike I've ever rebuilt. Disc brake set up is a chore but they sure do stop on a dime.
This linkage looks arcane but is a pretty clever, if expensive, solution to get the geometry they wanted. If you look at that bearing shell, you'll see that the bottom bracket is off center, but very far - only a few centimeters. I guess that's not enough space to fit in a robust pivot point and arm to put the bottom bracket on. Since the bearing shell rotates around its central axis, this design is essentially cramming a very short pivot arm in between the frame and the bottom bracket. Newer i-drive bikes seem to have that same design but do use a longer pivot arm.
I hope this helps someone down the line keep one of these bikes from going to the trash, or at least is interesting for whoever is reading.
One final shot:
IMG_7176
Last edited by loosemilk; 01-17-22 at 09:01 PM.
 05-02-21, 03:38 PM
#2
Newbie
Join Date: May 2021
Posts: 1
Mentioned: 0 Post(s)
Tagged: 0 Thread(s)
Quoted: 1 Post(s)
Likes: 0
Liked 0 Times
in
0 Posts
I drive 4.0
I have a yellow I drive 4.0. I've had the bike for about 15 years and I get some play in the crank bearing when I stand up and try to give it some torque. I'm guessing I have to replace the bearing as well? I'm no bike mechanic by nature and I don't feel like getting slammed with repair bills. Maybe someone could help? I would appreciate it greatly fellow mountain bike riders.
thanks
thanks
05-06-21, 08:30 PM
#3
Junior Member
Thread Starter
I have a yellow I drive 4.0. I've had the bike for about 15 years and I get some play in the crank bearing when I stand up and try to give it some torque. I'm guessing I have to replace the bearing as well? I'm no bike mechanic by nature and I don't feel like getting slammed with repair bills. Maybe someone could help? I would appreciate it greatly fellow mountain bike riders.
thanks
thanks
If you are comfortable pulling the crank and bottom bracket yourself, my post here will hopefully help you out. I'd definitely check once you have the bottom bracket out if there is any play in that as well - it's possible that would contribute to some of the play you're feeling in the suspension since they're quite close.
The tools I needed to go through this whole process were:
- Crank puller
- socket wrench (for the crank bolts)
- bottom bracket tool (for your specific bottom bracket type)
- a big wrench for the bb tool
- set of metric allen wrenches (I think only 4, 5, & 6 mm were needed for this but I could be wrong)
- a bottom bracket pin spanner (you'll need this to take apart the suspension bearing. I used a couple of files but that's really not a good idea)
- forceps (for placing the bearings)
The consumables needed are:
- 118 5/32" loose ball bearings (you could use 56 if you keep the cages - I elected not to, which might extend the amount of time I need before going in there again)
- grease - whatever you use for headsets. I use boat trailer wheel bearing grease, you can get it at most hardware stores
- degreaser - something to clean off the old bearing surfaces and make sure they're not messed up
- rags/paper towel - more clean-up
It is a lot, but the process is pretty straightforward. the only place you could really go wrong is if you over-torque the big bearing assembly when putting it back together. To avoid this, you could just mark which notch in the inner ring initially has a bolt fir into it (see images 7166 & 7171 in my post). Doing it yourself may very well be the only option. I went to my favorite shop to buy bearings halfway through and they told me they'd had an iDrive for a while that nobody wanted to attempt to rebuild. When I came back in and told them I'd rebuilt mine in just a few hours the manager straight up offered me a job.
Best of luck with yours, and do report back.
Likes For loosemilk:
01-13-22, 07:35 AM
#4
Newbie
Join Date: Jan 2022
Posts: 2
Mentioned: 0 Post(s)
Tagged: 0 Thread(s)
Quoted: 1 Post(s)
Likes: 0
Liked 0 Times
in
0 Posts
I drive bottom bracket
Hi,
New here. I have a 2004 GT I drive. Making some mods. Just wondered if just removing the bb is the same process as on other mtbs? Is it in some way linked to the I drive system other than the casing?
Thanks for any help in advance.
New here. I have a 2004 GT I drive. Making some mods. Just wondered if just removing the bb is the same process as on other mtbs? Is it in some way linked to the I drive system other than the casing?
Thanks for any help in advance.
01-14-22, 09:48 AM
#5
Full Member
Join Date: Oct 2010
Posts: 212
Mentioned: 0 Post(s)
Tagged: 0 Thread(s)
Quoted: 19 Post(s)
Liked 33 Times
in
20 Posts
If you are comfortable pulling the crank and bottom bracket yourself, my post here will hopefully help you out. I'd definitely check once you have the bottom bracket out if there is any play in that as well - it's possible that would contribute to some of the play you're feeling in the suspension since they're quite close.
The tools I needed to go through this whole process were:
- Crank puller
- socket wrench (for the crank bolts)
- bottom bracket tool (for your specific bottom bracket type)
- a big wrench for the bb tool
- set of metric allen wrenches (I think only 4, 5, & 6 mm were needed for this but I could be wrong)
- a bottom bracket pin spanner (you'll need this to take apart the suspension bearing. I used a couple of files but that's really not a good idea)
- forceps (for placing the bearings)
The consumables needed are:
- 118 5/32" loose ball bearings (you could use 56 if you keep the cages - I elected not to, which might extend the amount of time I need before going in there again)
- grease - whatever you use for headsets. I use boat trailer wheel bearing grease, you can get it at most hardware stores
- degreaser - something to clean off the old bearing surfaces and make sure they're not messed up
- rags/paper towel - more clean-up
It is a lot, but the process is pretty straightforward. the only place you could really go wrong is if you over-torque the big bearing assembly when putting it back together. To avoid this, you could just mark which notch in the inner ring initially has a bolt fir into it (see images 7166 & 7171 in my post). Doing it yourself may very well be the only option. I went to my favorite shop to buy bearings halfway through and they told me they'd had an iDrive for a while that nobody wanted to attempt to rebuild. When I came back in and told them I'd rebuilt mine in just a few hours the manager straight up offered me a job.
Best of luck with yours, and do report back.
01-14-22, 11:09 AM
#6
Junior Member
Thread Starter
Removing the bb is just like in other bikes, though it could be a bit more trouble if it's stuck because the big cylinder will rotate first. There aren't any extra steps that I can recall though.
01-14-22, 11:09 AM
#7
Junior Member
Thread Starter
01-14-22, 12:01 PM
#8
Newbie
Join Date: Jan 2022
Posts: 2
Mentioned: 0 Post(s)
Tagged: 0 Thread(s)
Quoted: 1 Post(s)
Likes: 0
Liked 0 Times
in
0 Posts
Idrive isis crank removal and bb 👍
Thanks for your help. Yes, after pulling the crank I did notice some movement from the idrive unit when removing the bb. After using the correct isis crank puller and not a standard square tapered one, it all worked out ok in the end. Good to get some sound advice on this forum👍
