


Drillium How-To Guide Part Two (Filing and Sanding)
 02-26-11 | 06:03 PM
#1

Thread Starter
Banned.
Joined: Jul 2009
Posts: 12,292
Likes: 4,863
From: PAZ
Drillium How-To Guide Part Two (Filing and Sanding)
*** Cross References to the other two supporting threads:
https://www.bikeforums.net/classic-vi...anodizing.html
https://www.bikeforums.net/classic-vi...irty-deed.html
Okay, away we go on the next step of the adventure:
FILING AND SANDING:
NOTE: Due to loss of original photos, both on BF C&V and my own personal archives, I've had to scale down the description here. Suffice to say that the basics of filing/cleaning up scratches is pretty much straightforward enough. I hope the few pics uploaded here will suffice.
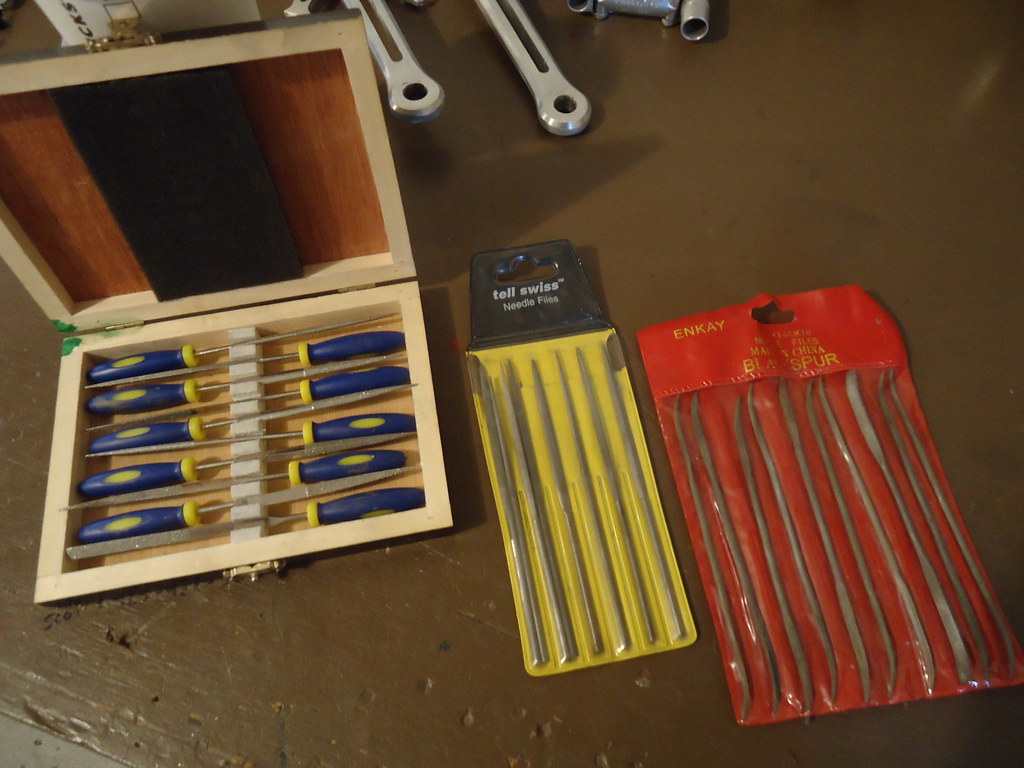
You want a pretty varied set of files for whatever you may come across. I've had stuff that was beaten-up so badly I wanted a belt-sander
However, I've been able to get everything using the sets below. Mainly, my tools consist of a set of rough-files (carbide-granule covered) and finish-files:
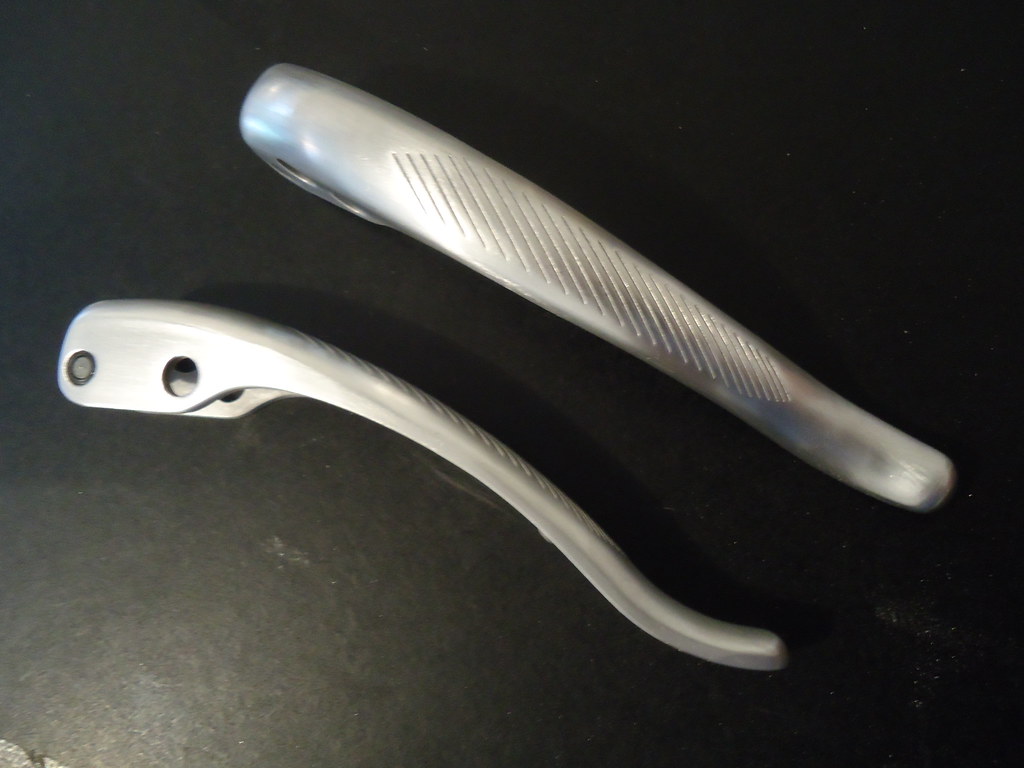
Here's what we're starting with: a pair of Campy Ergopower brake levers supplied by our own Gomango. Note the deep gouges. We'll need to start with the rough files:
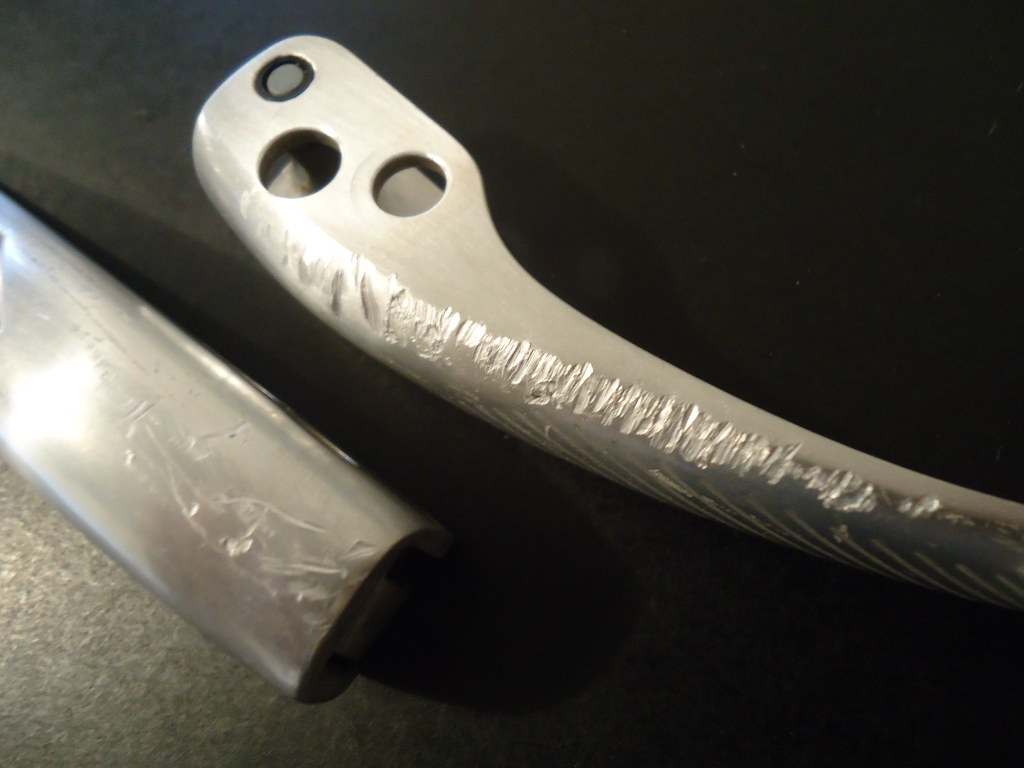
Note how deep the gouges are. In this case, they're a bit spread out. In other cases, you might end up with a deep nick/scrape in only one area. To clean up something like that, you'll want to feather the filing out from the gouge - otherwise, you'll end up with a noticeable depression which will do your aesthetics no good at all.
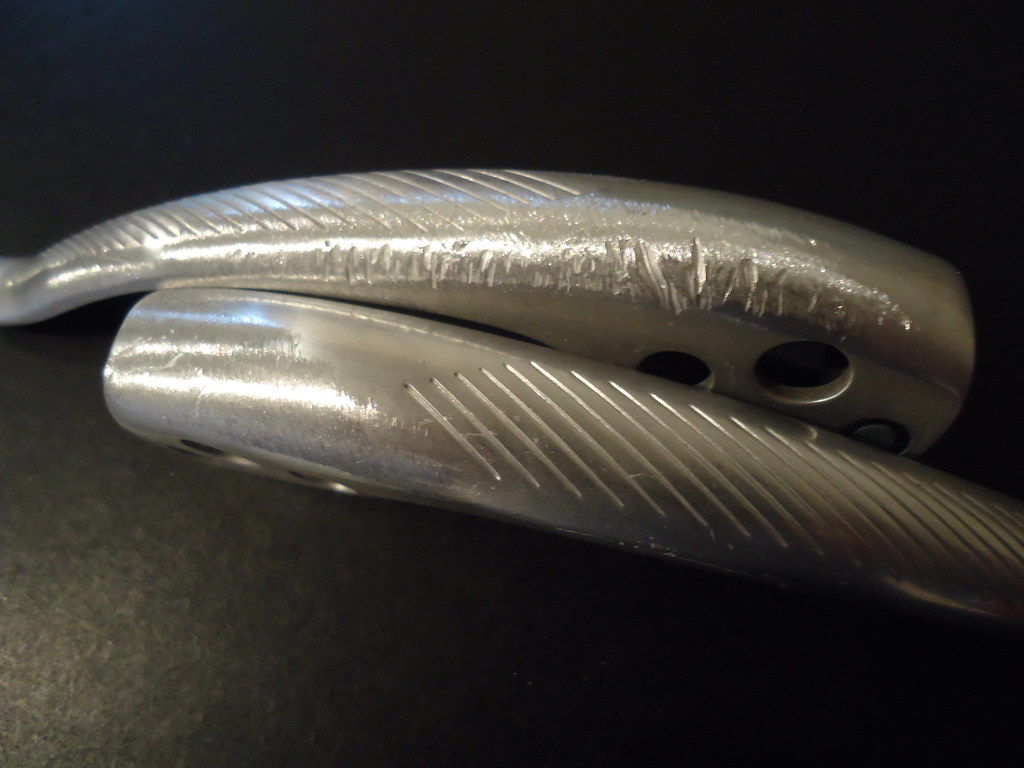
This is what it looks like once we've begun the rough filing - note we need to be careful and feather a bit around the factory engravings. We don't want to lose any detail if we don't have to, but in some cases - depending on where the gouges occur - there will be little choice. We can't put metal back once it's gone! Something to keep in mind while we're filing; take it slowly and deliberately:
Finished with rough filing. The unsightly gouges are gone; now it's just a matter of smoothing everything out:

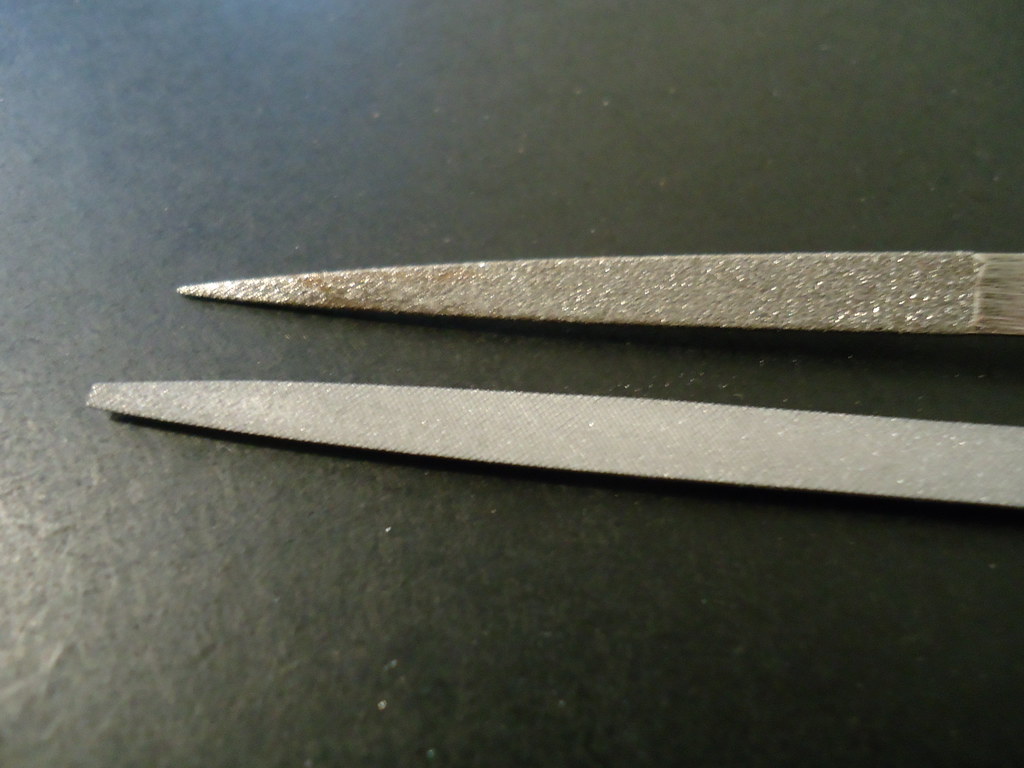
Rough file at top, finish file below:
Smoothing out can be done to your own personal satisfaction. Some people will be happy with a finish that polishes out to a satin finish while others are looking for a mirror-shine. It's all up to you.
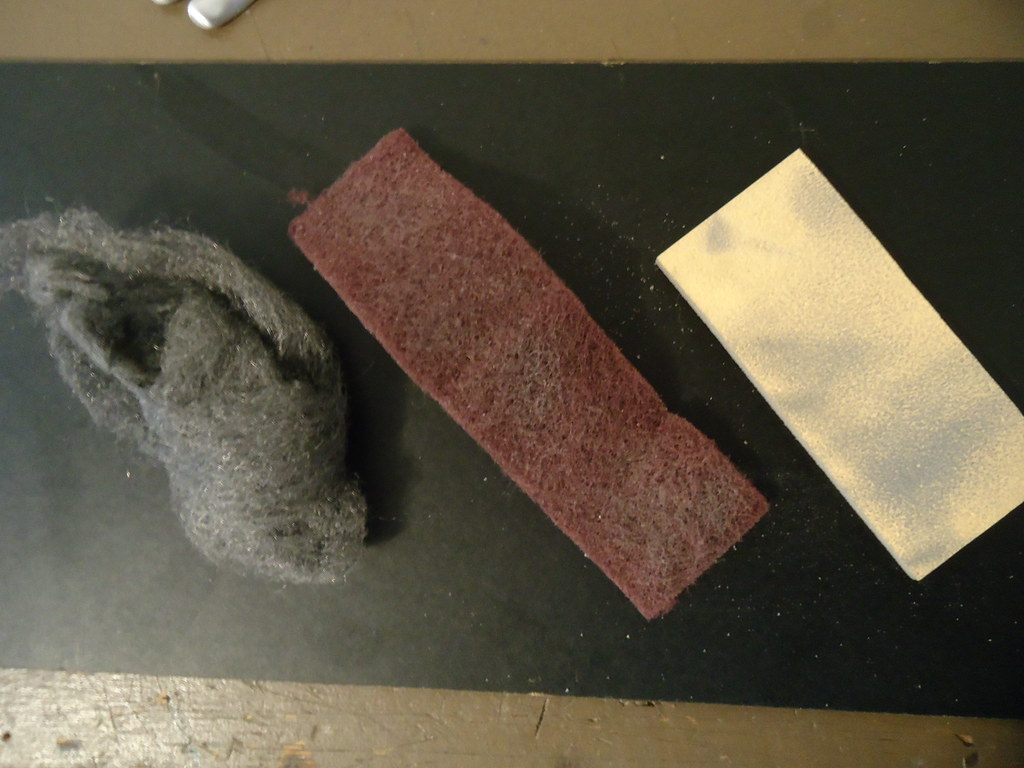
I use sanding films, Scotch-brite pads and flexible sandpaper in addition to the finish files. Normally I use the finish files first, getting rid of most of the rough file marks, then progress to the Scotch-brite pads, sandpaper and finally fine-grit sanding films (I get these last from my local hobby shop).
Note the ball of steel wool - this works wonders, too. Brass wool is even better:
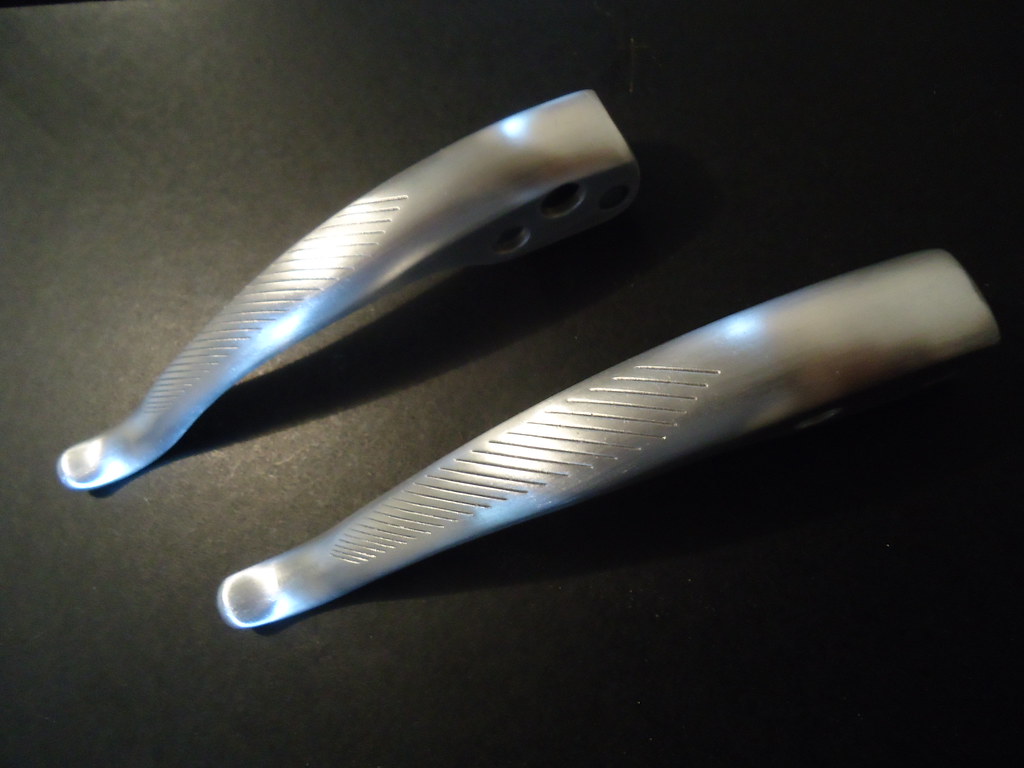
The subject levers after completing the finish file/sanding. In this case, I took them pretty far and they polished up very nicely:
Gouges completely gone - and no unsightly dip/depression where they once were. Feathering paid off handsomely here:
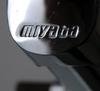
And finally, here they are with a medium-polished finish - and a little drillium slot added for good measure:

DD
https://www.bikeforums.net/classic-vi...anodizing.html
https://www.bikeforums.net/classic-vi...irty-deed.html
Okay, away we go on the next step of the adventure:
FILING AND SANDING:
NOTE: Due to loss of original photos, both on BF C&V and my own personal archives, I've had to scale down the description here. Suffice to say that the basics of filing/cleaning up scratches is pretty much straightforward enough. I hope the few pics uploaded here will suffice.
You want a pretty varied set of files for whatever you may come across. I've had stuff that was beaten-up so badly I wanted a belt-sander
However, I've been able to get everything using the sets below. Mainly, my tools consist of a set of rough-files (carbide-granule covered) and finish-files:
Here's what we're starting with: a pair of Campy Ergopower brake levers supplied by our own Gomango. Note the deep gouges. We'll need to start with the rough files:
Note how deep the gouges are. In this case, they're a bit spread out. In other cases, you might end up with a deep nick/scrape in only one area. To clean up something like that, you'll want to feather the filing out from the gouge - otherwise, you'll end up with a noticeable depression which will do your aesthetics no good at all.
This is what it looks like once we've begun the rough filing - note we need to be careful and feather a bit around the factory engravings. We don't want to lose any detail if we don't have to, but in some cases - depending on where the gouges occur - there will be little choice. We can't put metal back once it's gone! Something to keep in mind while we're filing; take it slowly and deliberately:
Finished with rough filing. The unsightly gouges are gone; now it's just a matter of smoothing everything out:
Rough file at top, finish file below:
Smoothing out can be done to your own personal satisfaction. Some people will be happy with a finish that polishes out to a satin finish while others are looking for a mirror-shine. It's all up to you.
I use sanding films, Scotch-brite pads and flexible sandpaper in addition to the finish files. Normally I use the finish files first, getting rid of most of the rough file marks, then progress to the Scotch-brite pads, sandpaper and finally fine-grit sanding films (I get these last from my local hobby shop).
Note the ball of steel wool - this works wonders, too. Brass wool is even better:
The subject levers after completing the finish file/sanding. In this case, I took them pretty far and they polished up very nicely:
Gouges completely gone - and no unsightly dip/depression where they once were. Feathering paid off handsomely here:
And finally, here they are with a medium-polished finish - and a little drillium slot added for good measure:
DD
Last edited by Drillium Dude; 04-15-16 at 04:17 PM.
 02-26-11 | 06:05 PM
#2
Thread Starter
Banned.
Joined: Jul 2009
Posts: 12,292
Likes: 4,863
From: PAZ
Okay, that's it for this installment. Part three will be the part a lot of you are most interested in: drilling. But we have to take it in turns. Since anodizing is designed to protect the finish, it's necessarily hard - and hard to drill through, too. Stripping it, therefore, is a must. And who wants to drill a part - ostensibly to make it look more interesting - when it's all scratched up? So, we clean it up.
In other words, the success of the finished product depends entirely upon our preparation. Step three will be covered next weekend; stay tuned!
DD
In other words, the success of the finished product depends entirely upon our preparation. Step three will be covered next weekend; stay tuned!
DD
Last edited by Drillium Dude; 02-26-15 at 02:37 PM.


 02-27-11 | 07:30 AM
#9

Senior Member
Joined: Jun 2005
Posts: 1,899
Likes: 933
From: In transit
Bikes: 07 Vanilla, 98 IRD road frame built up with 25th Ann DA, Surly cross check with 105 comp, 78 Raleigh Comp GS, 85 Centurionelli
Great how-to thread DD. It's like the home improvement channel for bikes. Nicely photographed as well, would make a good chapter in your book!
03-03-11 | 09:01 PM
#10
Thread Starter
Banned.
Joined: Jul 2009
Posts: 12,292
Likes: 4,863
From: PAZ
**UPDATE**
For those of you looking forward to the actual "drillium" installment of the How-To guide (I was planning on doing the work/photography/write-up this weekend), it will be delayed until Thursday or Friday of next week at the earliest.
I got a chance to earn some more money (for my lawyer) utilizing my mad remodeling skillz That job will go from Saturday morning until Wednesday afternoon.
Sorry - but rest assured I will not leave this guide hanging...please bear with me.
DD
For those of you looking forward to the actual "drillium" installment of the How-To guide (I was planning on doing the work/photography/write-up this weekend), it will be delayed until Thursday or Friday of next week at the earliest.
I got a chance to earn some more money (for my lawyer) utilizing my mad remodeling skillz
That job will go from Saturday morning until Wednesday afternoon.Sorry - but rest assured I will not leave this guide hanging...please bear with me.
DD
 06-23-12 | 08:41 PM
#12
Thread Starter
Banned.
Joined: Jul 2009
Posts: 12,292
Likes: 4,863
From: PAZ
^ Be patient, grasshopper - I decided to take a break today and finish this off tomorrow. I have most of the new pics taken; just need to upload and sort before I re-do post #1.
Tomorrow - promise
DD
Tomorrow - promise
DD
 02-25-15 | 07:30 PM
#14
Thread Starter
Banned.
Joined: Jul 2009
Posts: 12,292
Likes: 4,863
From: PAZ
Bump. Pics will have to be uploaded again. They've disappeared - maybe I hit my limit at some point on Flickr and the oldest got deleted? Dunno. Haven't revisited this thread in a long time, but I'll get it updated soon.
Please bear with; currently my connectivity is limited to going to Starbucks for their free WiFi
DD
Please bear with; currently my connectivity is limited to going to Starbucks for their free WiFi
DD
02-26-15 | 02:46 PM
#15
Thread Starter
Banned.
Joined: Jul 2009
Posts: 12,292
Likes: 4,863
From: PAZ
New pics added and description altered to suit. Enjoy
DD
DD
02-28-15 | 04:42 PM
#17
Thread Starter
Banned.
Joined: Jul 2009
Posts: 12,292
Likes: 4,863
From: PAZ
https://www.bikeforums.net/classic-vi...anodizing.html
I used to use EO but have found Jestco's anodizing remover to be superior in every way. Try it - you may end up a convert, too
DD
03-01-15 | 12:39 PM
#19

Ride, Wrench, Swap, Race

Joined: Jan 2010
Posts: 9,808
Likes: 1,778
From: Northern California
Bikes: Cheltenham-Pedersen racer, Boulder F/S Paris-Roubaix, Varsity racer, '52 Christophe, '62 Continental, '92 Merckx, '75 Limongi, '76 Presto, '72 Gitane SC, '71 Schwinn SS, etc.
One note about using abrasive processes on aluminum:
Airborne aluminum is a potent neuro-toxin that causes permanent neurological damage.
Wet-sanding and/or high-efficiency exhaust evacuation is recommended.
Airborne aluminum is a potent neuro-toxin that causes permanent neurological damage.
Wet-sanding and/or high-efficiency exhaust evacuation is recommended.
03-07-15 | 08:23 AM
#20
Senior Member
Joined: Sep 2009
Posts: 689
Likes: 1
From: new york
Bikes: cuevas
Hey Drillium Dude
are you going to show us the step by step set up to drilling a chain ring? The breaks and shift lever are great.
I am looking forward to it, don't stop now please share. I am removing the ano dize right now.
are you going to show us the step by step set up to drilling a chain ring? The breaks and shift lever are great.
I am looking forward to it, don't stop now please share. I am removing the ano dize right now.
03-07-15 | 12:31 PM
#21
Thread Starter
Banned.
Joined: Jul 2009
Posts: 12,292
Likes: 4,863
From: PAZ
 : https://www.bikeforums.net/classic-vi...irty-deed.html
Please share your results somewhere on the Forum (the thread above or the Drillium Club thread would be perfect). I always like to see other members' results after they've taken Dremel or drill in hand
DD
03-07-15 | 12:40 PM
#22
Senior Member
Joined: Jul 2006
Posts: 14,492
Likes: 269
From: STP
A little searching turned up this little jewel : https://www.bikeforums.net/classic-vi...irty-deed.html
Please share your results somewhere on the Forum (the thread above or the Drillium Club thread would be perfect). I always like to see other members' results after they've taken Dremel or drill in hand
DD
: https://www.bikeforums.net/classic-vi...irty-deed.htmlPlease share your results somewhere on the Forum (the thread above or the Drillium Club thread would be perfect). I always like to see other members' results after they've taken Dremel or drill in hand
DD
FYI Your work lives on. Even though I am selling the Colnago Elegant frameset in a downsizing effort, the entire Campy drivetrain ended up on a recently acquired Chris Kvale.
Wish you could hear all of the positive comments your work has received at the shop. They all thought those Ergos you did were toast.
Guess they were wrong.
I'll toss some recent pics up when I get home from our son's soccer game later today.
Placeholder pic:
[IMG]
 Untitled by gomango1849, on Flickr[/IMG]
03-07-15 | 01:49 PM
Untitled by gomango1849, on Flickr[/IMG]
03-07-15 | 01:49 PM
#23
Thread Starter
Banned.
Joined: Jul 2009
Posts: 12,292
Likes: 4,863
From: PAZ
Heh DD,
FYI Your work lives on. Even though I am selling the Colnago Elegant frameset in a downsizing effort, the entire Campy drivetrain ended up on a recently acquired Chris Kvale.
Wish you could hear all of the positive comments your work has received at the shop. They all thought those Ergos you did were toast.
Guess they were wrong.
I'll toss some recent pics up when I get home from our son's soccer game later today.
Placeholder pic:
[IMG]Untitled by gomango1849, on Flickr[/IMG]
FYI Your work lives on. Even though I am selling the Colnago Elegant frameset in a downsizing effort, the entire Campy drivetrain ended up on a recently acquired Chris Kvale.
Wish you could hear all of the positive comments your work has received at the shop. They all thought those Ergos you did were toast.
Guess they were wrong.
I'll toss some recent pics up when I get home from our son's soccer game later today.
Placeholder pic:
[IMG]
Untitled by gomango1849, on Flickr[/IMG]Gotcha. Some bikes I'd sell complete, but others would surely get parted out. Some parts I'll simply never sell and they'll go to those named in my will. Since your drillium Ergo levers are only the second pair in existence, I guess they should remain keepers!
DD
Last edited by Drillium Dude; 03-07-15 at 01:53 PM.
03-07-15 | 02:20 PM
#24
Senior Member
Joined: Jul 2006
Posts: 14,492
Likes: 269
From: STP
Three and a Kvale frameset that's perpetually for sale until I find the correctly sized human to purchase it.
I need to stop at this number, but I have have a terrible time saying no to such a pretty face.
I need to stop at this number, but I have have a terrible time saying no to such a pretty face.
04-15-16 | 03:46 PM
#25
I AM AI
Joined: Aug 2013
Posts: 4,285
Likes: 1,160
From: Tucson, AZ
Bikes: 2008 S-Works Roubaix SL, 1979 Raleigh Comp GS, 1978 Schwinn Volare
Man. First I've seen this thread (linked from 'How Far is Too Far Gone for Brake Levers?'), and holy crap. I had no idea this was in the realm of legitimate possibility.
My education continues.
Big thanks [MENTION=168558]Drillium Dude[/MENTION]
My education continues.
Big thanks [MENTION=168558]Drillium Dude[/MENTION]
__________________
A race bike in any era is a highly personal choice that at its "best" balances the requirements of fit, weight, handling, durability and cost tempered by the willingness to toss it and oneself down the pavement at considerable speed. ~Bandera
A race bike in any era is a highly personal choice that at its "best" balances the requirements of fit, weight, handling, durability and cost tempered by the willingness to toss it and oneself down the pavement at considerable speed. ~Bandera