


Broken Spokes: Better Rim for Clydesdale?
 05-09-20, 10:59 PM
#51
"Broke College Student"
Thread Starter

I watched a video which demonstrated the installation process for a cassette. I had some questions after watching it:
The video:
1. I noticed he mentions that you have to apply grease before installing the lockring. I did not purchase any grease. Where can I buy the grease, if needed?
2. The video also mentions that you must apply a certain amount of torque to tighten down the cassette. What if I don't have the proper tools for that, and how do I know I have applied the proper amount of torque?
3. Where would the spacer go in my configuration?
Thanks.
The video:
2. The video also mentions that you must apply a certain amount of torque to tighten down the cassette. What if I don't have the proper tools for that, and how do I know I have applied the proper amount of torque?
3. Where would the spacer go in my configuration?
Thanks.
 05-10-20, 12:07 AM
#52
Senior Member
Join Date: Dec 2019
Location: South Shore of Long Island
Posts: 2,800
Bikes: 2010 Carrera Volans, 2015 C-Dale Trail 2sl, 2017 Raleigh Rush Hour, 2017 Blue Proseccio, 1992 Giant Perigee, 80s Gitane Rallye Tandem
Mentioned: 12 Post(s)
Tagged: 0 Thread(s)
Quoted: 1088 Post(s)
Liked 1,027 Times
in
723 Posts
1. I've never bothered to grease lockring threads, didn't even know that was a thing and I wouldn't be exaggerating to state I've installed thousands of cassettes.
2. To tighten the cassette you need a cassette lockring tool and a pair of adjustable pliers or 25mm wrench, the parktool chain whip also has a 25mm opening for the lockring tool but eventually you'll need the wrench or adjustable. With this one I just tighten with a good amount of force till it stops tightening, I worked in a shop that had a cassette lockring tool perpetually in a vice so you could hand start the lockring, set the wheel on the tool and turn the wheel to till the ring stopped tightening. It did make things simple and easy. I've had lockrings fall off from not tightening enough, never seen a lockring over tightened.
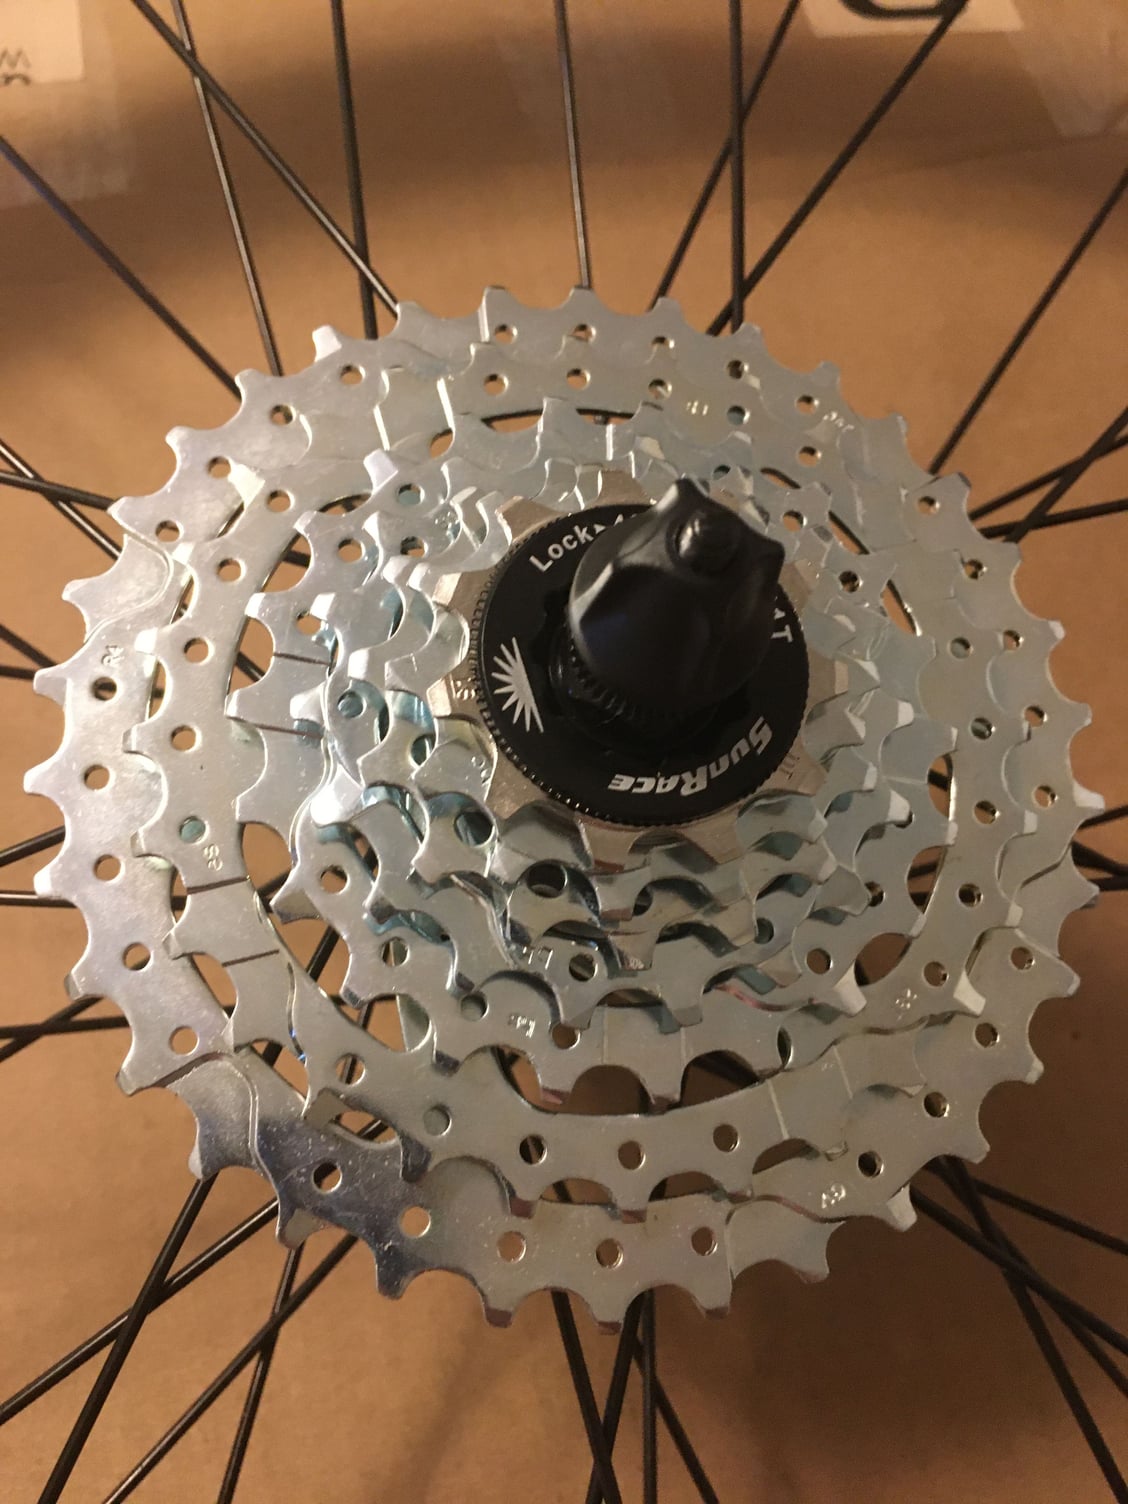
3.Spacer, cassette, then lockring.
2. To tighten the cassette you need a cassette lockring tool and a pair of adjustable pliers or 25mm wrench, the parktool chain whip also has a 25mm opening for the lockring tool but eventually you'll need the wrench or adjustable. With this one I just tighten with a good amount of force till it stops tightening, I worked in a shop that had a cassette lockring tool perpetually in a vice so you could hand start the lockring, set the wheel on the tool and turn the wheel to till the ring stopped tightening. It did make things simple and easy. I've had lockrings fall off from not tightening enough, never seen a lockring over tightened.
3.Spacer, cassette, then lockring.
 05-10-20, 11:31 AM
#53
Senior Member
Visit ryde.nl. Their Andra 40 rim is about the only thing out there built for the load the OP puts on a bike. Note that the specs include their max load rating and also give a spoke tension recommendation. Also note how heavy they are. Note the design of spoke holes. They are serious about making that rim work.
Velocity Cliffhanger is probably better than original. Still underbuilt for the job. Velocity has a long record of QC problems. Myself in 400,000 miles have broken exactly 3 rims and all three were Velocity. They give prompt service on warranty claims and won’t try to weasel out of a claim. But at some point you won’t want another replacement from them.
Velocity Cliffhanger is probably better than original. Still underbuilt for the job. Velocity has a long record of QC problems. Myself in 400,000 miles have broken exactly 3 rims and all three were Velocity. They give prompt service on warranty claims and won’t try to weasel out of a claim. But at some point you won’t want another replacement from them.
05-11-20, 12:12 AM
#54
Senior Member
Grease on the lockring isn't a bad idea, but it won't blow up without it. Like nearly any bearing grease is fine for almost any bicycle application--stuff for motorsports, boats, whatever. Or you can buy small tubes targeted towards the bike industry at what are proportionally very high prices, but kind of no big deal in the scheme of how little grease bikes use.
05-11-20, 08:17 AM
#55

Mad bike riding scientist

Join Date: Nov 2004
Location: Denver, CO
Posts: 27,369
Bikes: Some silver ones, a red one, a black and orange one, and a few titanium ones
Mentioned: 152 Post(s)
Tagged: 1 Thread(s)
Quoted: 6222 Post(s)
Liked 4,222 Times
in
2,368 Posts
I watched a video which demonstrated the installation process for a cassette. I had some questions after watching it:
The video: https://youtu.be/9KAaP7pbFV0
1. I noticed he mentions that you have to apply grease before installing the lockring. I did not purchase any grease. Where can I buy the grease, if needed?
2. The video also mentions that you must apply a certain amount of torque to tighten down the cassette. What if I don't have the proper tools for that, and how do I know I have applied the proper amount of torque?
3. Where would the spacer go in my configuration?
Thanks.
As for torque, yes, there are torque specifications...I'm lazy and won't look them up...but it's also not critical. Turn the lock ring until it makes contact with the cassette. It will usually have a "clicking" or "ratcheting" sound. Once you've made contact, turn the lock ring about a quarter of a turn tighter. That's enough to hold the cassette in place but not so tight that you will struggle to get the lock ring off later. I've seen a lot of lock rings where people have gone all 800 lb gorilla on them and they are a difficult to get loose.
That, by the way, is good advice on any bicycle bolt. Don't tighten it down as tight as it will go. If you can tighten something with a torque wrench, do so but if you can't stop tightening long before you twist off the bolt.
Since you are using a spacer, I have one final caveat. Check that the cassette is on the freehub body solidly. It shouldn't move back and forth on the body when the lock ring is tightened. If it does, you need a thicker spacer.
Good luck
__________________
Stuart Black
Plan Epsilon Around Lake Michigan in the era of Covid
Old School�When It Wasn�t Ancient bikepacking
Gold Fever Three days of dirt in Colorado
Pokin' around the Poconos A cold ride around Lake Erie
Dinosaurs in Colorado A mountain bike guide to the Purgatory Canyon dinosaur trackway
Solo Without Pie. The search for pie in the Midwest.
Picking the Scablands. Washington and Oregon, 2005. Pie and spiders on the Columbia River!
05-11-20, 08:29 AM
#56
Senior Member

Join Date: Apr 2010
Location: Mountain View, CA USA and Golden, CO USA
Posts: 6,341
Bikes: 97 Litespeed, 50-39-30x13-26 10 cogs, Campagnolo Ultrashift, retroreflective rims on SON28/PowerTap hubs
Mentioned: 9 Post(s)
Tagged: 0 Thread(s)
Quoted: 550 Post(s)
Liked 325 Times
in
226 Posts
The number of cycles they survive depends on magnitude of variation and average stress.
As a clydestale, you have more weight changing their load.
Machine built wheels are not stress relieved, so parts of spoke elbows are never taken past their elastic limit, have high average stress, and break. The rear wheel has more weight on it and torque from pedaling.
You need to properly stress relieve spokes when new, and will have the same problems with new wheels when you don't do that.
I'd learn how to build wheels and replace the spokes with double butted ones.
Otherwise I'd start with a new wheel and stress relieve it. Grab near parallel spokes and squeeze them towards eachother, push the crossings down with something softer, or bend the spokes around eachother at their crossing using something softer. Plastic screw driver handles, old left crank arms, and brass drifts work. Correct any true issues after stress relieving. Put a wood block on the ground and go around the rim pushing on the sides to unload spokes and relieve any windup.
Just stress relieving can't bend the spokes for good support at the hub or correct the angle at the rim when the nipples aren't pivoting enough as when building a new wheel but will usually work.
Getting out of the saddle on bumps will prevent pinch flats and bent rims, but won't help with broken spokes because they're failing due to fatigue.
Last edited by Drew Eckhardt; 05-11-20 at 08:35 AM.
05-14-20, 12:15 PM
#57
"Broke College Student"
Thread Starter
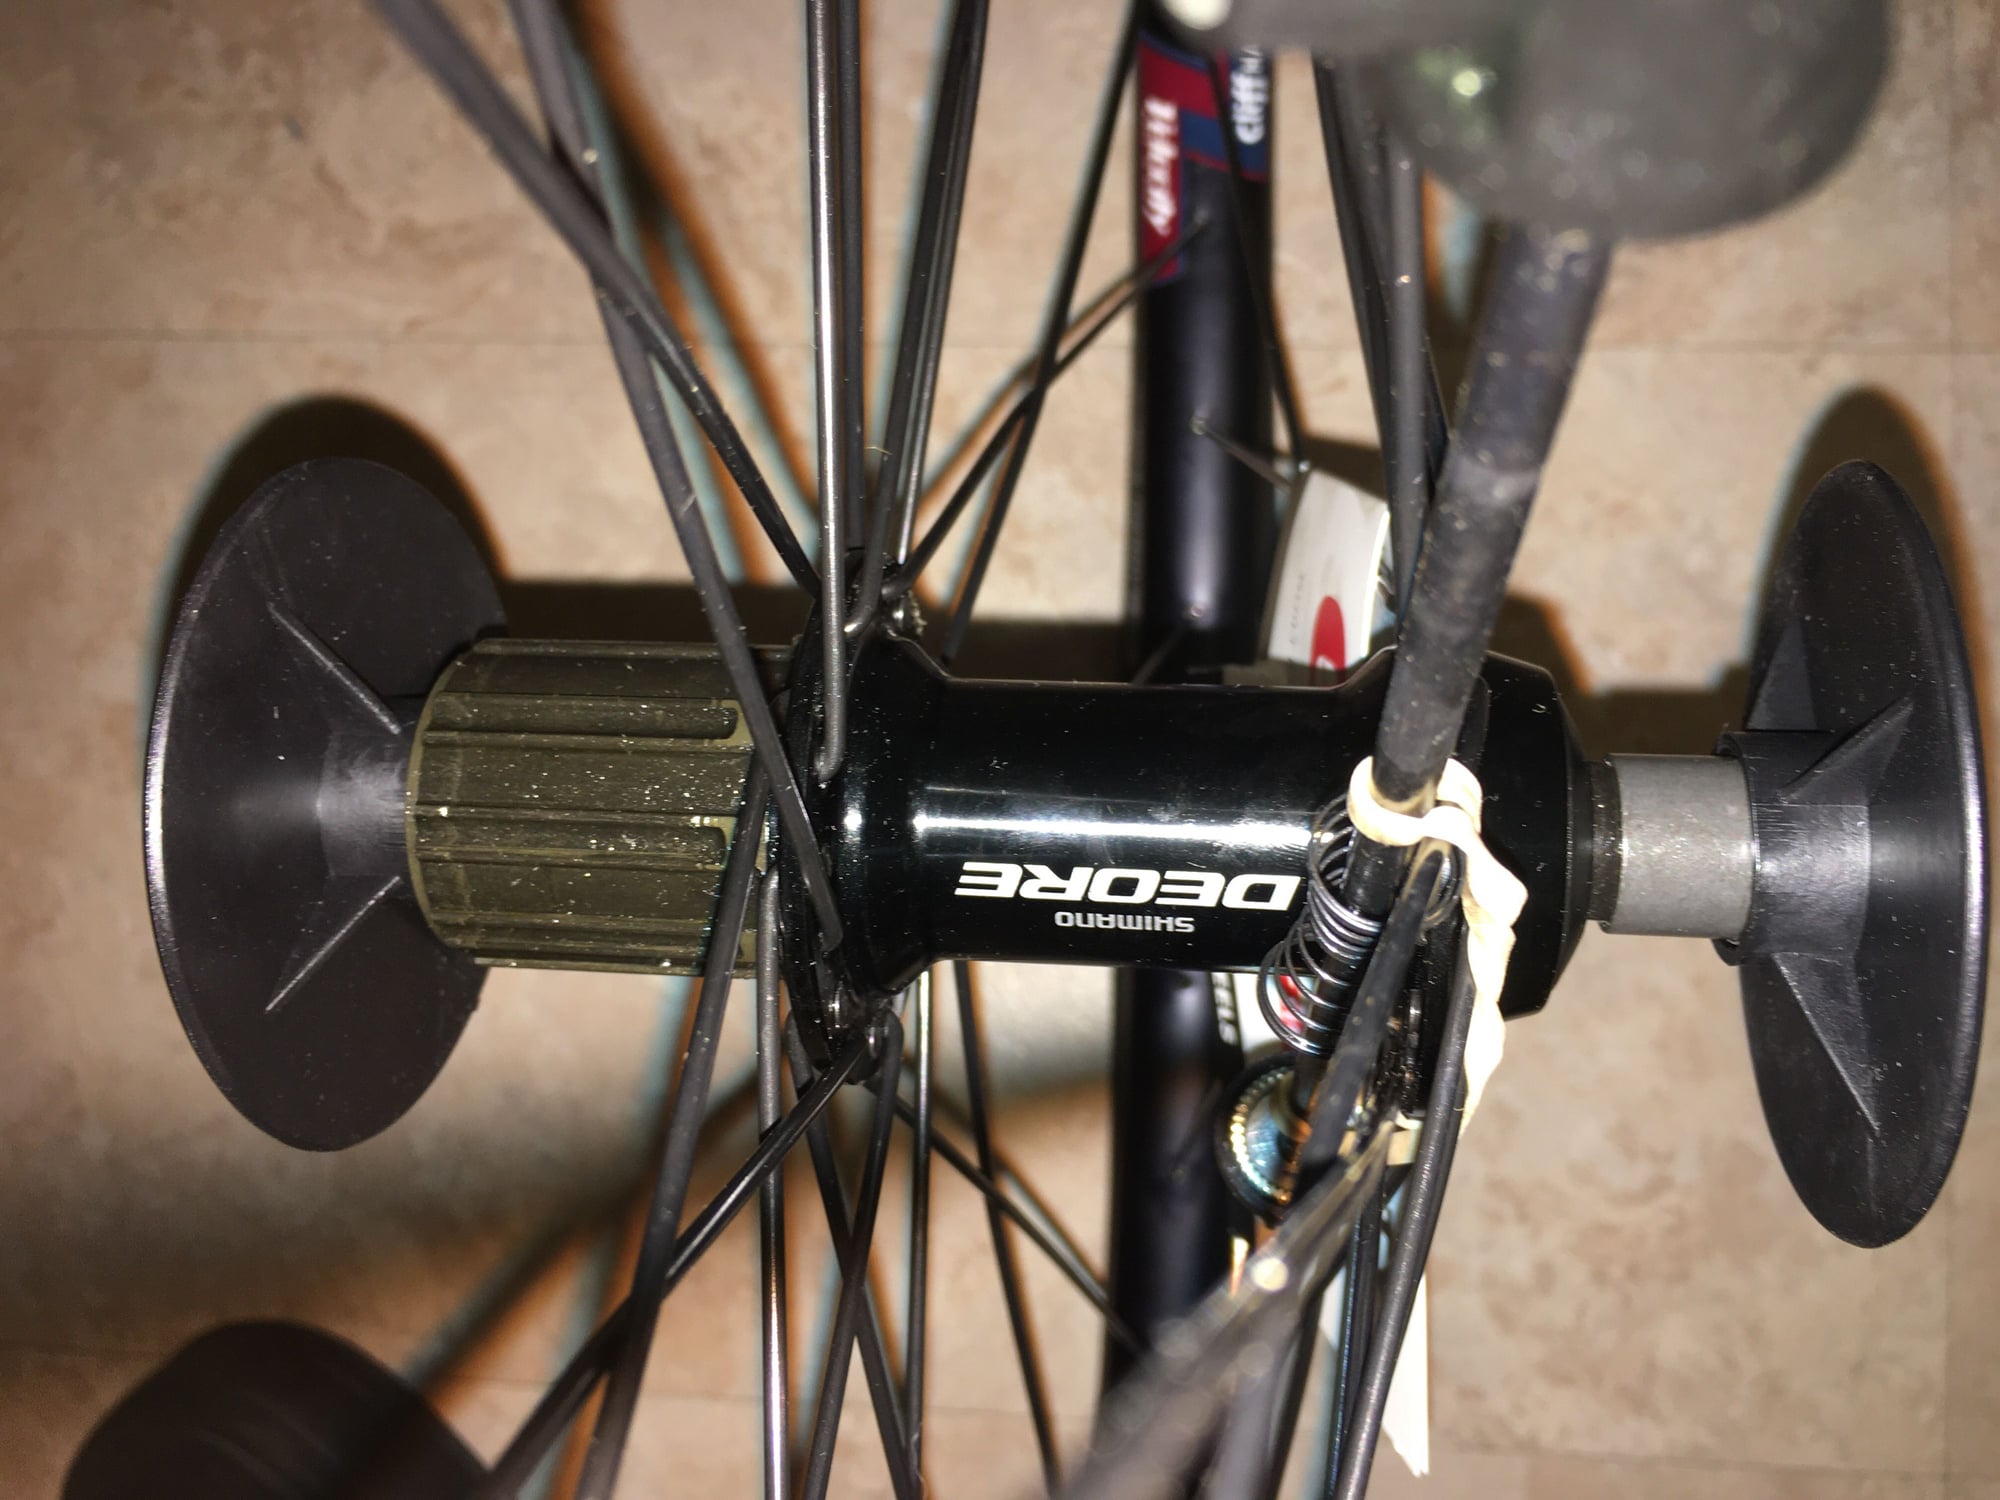
I received the parts. I know this may be a dumb question - but where does the freehub go? I'm assuming I place the spacer and freewheel on top of it? It seems like it would be much wider.
05-14-20, 12:19 PM
#58
Senior Member
Join Date: Dec 2019
Location: South Shore of Long Island
Posts: 2,800
Bikes: 2010 Carrera Volans, 2015 C-Dale Trail 2sl, 2017 Raleigh Rush Hour, 2017 Blue Proseccio, 1992 Giant Perigee, 80s Gitane Rallye Tandem
Mentioned: 12 Post(s)
Tagged: 0 Thread(s)
Quoted: 1088 Post(s)
Liked 1,027 Times
in
723 Posts
Yup, spacer then cassette and tighten lockring.
05-14-20, 02:12 PM
#59
Really Old Senior Member

The CASSETTE is placed on after the spacer and secured with the lock ring.
05-14-20, 02:35 PM
#61
Expired Member

Join Date: Jun 2007
Location: TN
Posts: 11,564
Mentioned: 41 Post(s)
Tagged: 0 Thread(s)
Quoted: 3683 Post(s)
Liked 5,447 Times
in
2,769 Posts
I had always tightened the cassette lockring until it clicked a few times and called it good. Never had one come loose on the road. Someone on the forum suggested that might not be enough so I dragged out the torque wrench to check. Eye opener! The recommended torque was much more than what I had been doing. I still don't use the wrench each time but I crank them down much tighter than before. Yes, they are more difficult to remove Through the years I've been on rides with three folks who had cassettes loosen up. Temporary fixes aren't too difficult but each time it took awhile to figure what was going on.
Through the years I've been on rides with three folks who had cassettes loosen up. Temporary fixes aren't too difficult but each time it took awhile to figure what was going on.
05-14-20, 10:07 PM
#62
"Broke College Student"
Thread Starter
I think I figured it out. I don't have any tools (except the lock-ring tool I ordered) here so I'll have to button it up tomorrow when I have access to the proper tools, and put some gorilla tape as a makeshift rim tape so I can inflate the tire. (I should have ordered a new rim strip, but completely forgot.)
The tubes that were sent were 26x1.5-1.75", even though I ordered 26x1.75-2.125" (the tire is a 26x2.0".) I've read in other threads that these tubes should work (as they'll stretch), but they look pretty narrow. Will these work?
I'm also going to apologize for all of the misunderstanding. I know the basics of a bicycle (changing/fixing tires, raising seat, reseating chain, etc.) but don't really dive much into the more complicated aspects of the mechanicals, like the derailleurs. I've learned a lot. So thanks to everyone for their patience. It's greatly appreciated.
05-14-20, 10:39 PM
#63
Senior Member
Join Date: Dec 2019
Location: South Shore of Long Island
Posts: 2,800
Bikes: 2010 Carrera Volans, 2015 C-Dale Trail 2sl, 2017 Raleigh Rush Hour, 2017 Blue Proseccio, 1992 Giant Perigee, 80s Gitane Rallye Tandem
Mentioned: 12 Post(s)
Tagged: 0 Thread(s)
Quoted: 1088 Post(s)
Liked 1,027 Times
in
723 Posts
If you use gorilla tape double wrap it, in high heat with pressure the tape can push into the spoke holes. A double layer, especially if its similar to duct tape can keep that from happening.
The tube should still work fine.
The tube should still work fine.
05-14-20, 10:51 PM
#64
"Broke College Student"
Thread Starter
Will do... I should've ordered some proper rim tape like Velox. I noticed the spokes in this wheel are recessed down inside the wheel, which is kind of interesting.
05-15-20, 08:18 AM
#65
Senior Member
Join Date: Jan 2009
Location: San Diego, CA
Posts: 3,677
Mentioned: 10 Post(s)
Tagged: 0 Thread(s)
Quoted: 839 Post(s)
Liked 1,064 Times
in
747 Posts
The tubes that were sent were 26x1.5-1.75", even though I ordered 26x1.75-2.125" (the tire is a 26x2.0".) I've read in other threads that these tubes should work (as they'll stretch), but they look pretty narrow. Will these work?
I'm also going to apologize for all of the misunderstanding. I know the basics of a bicycle (changing/fixing tires, raising seat, reseating chain, etc.) but don't really dive much into the more complicated aspects of the mechanicals, like the derailleurs. I've learned a lot. So thanks to everyone for their patience. It's greatly appreciated.
I'm also going to apologize for all of the misunderstanding. I know the basics of a bicycle (changing/fixing tires, raising seat, reseating chain, etc.) but don't really dive much into the more complicated a
spects of the mechanicals, like the derailleurs. I've learned a lot. So thanks to everyone for their patience. It's greatly appreciated.
05-15-20, 03:50 PM
#66
"Broke College Student"
Thread Starter
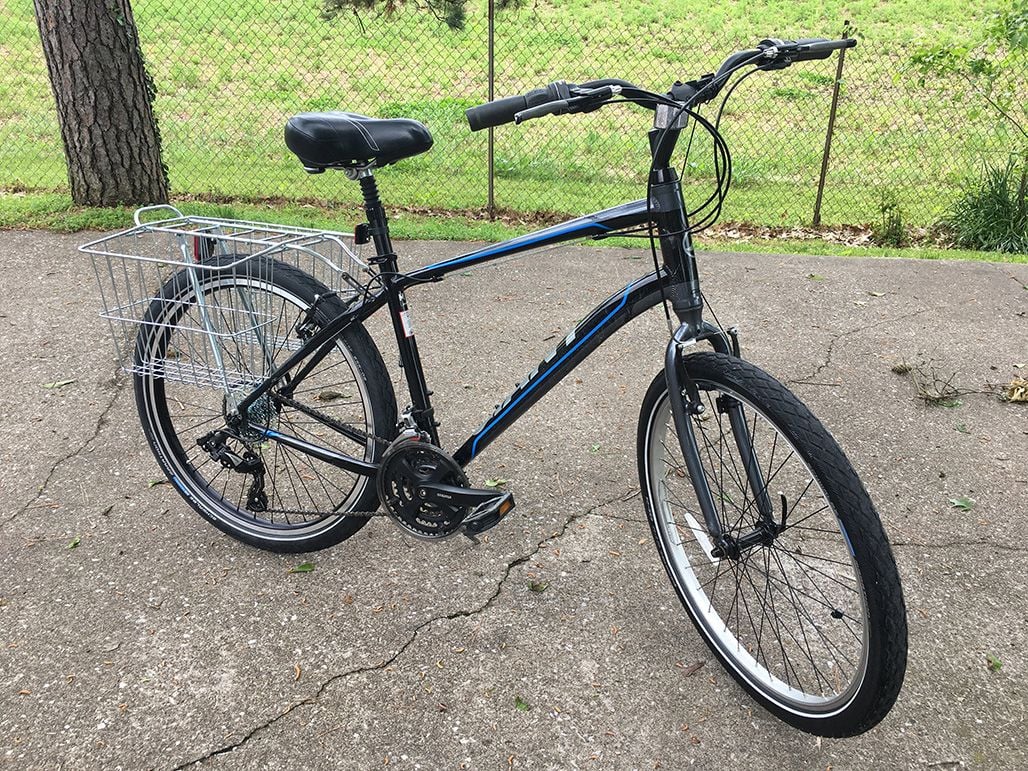
I got everything installed and took the bike for a short test ride around the block. Everything ran fine and the bike shifted smoothly. I don't have a torque wrench, so I tightened it down as much as possible with the adjustable wrench I have.
My pump came with a plastic Presta-Schrader adapter, but it wasn't working too well. It was leaking more air than was going into the tube, and when I removed the adapter it removed the entire Presta core. I set it aside only to never see it again, so one of the tubes is now missing the valve core. But the brass Presta-Schrader adapter I ordered fit fine and leaked just a minimal amount of air. I inflated the rear tire to 60 PSI, and the front to 45 PSI.
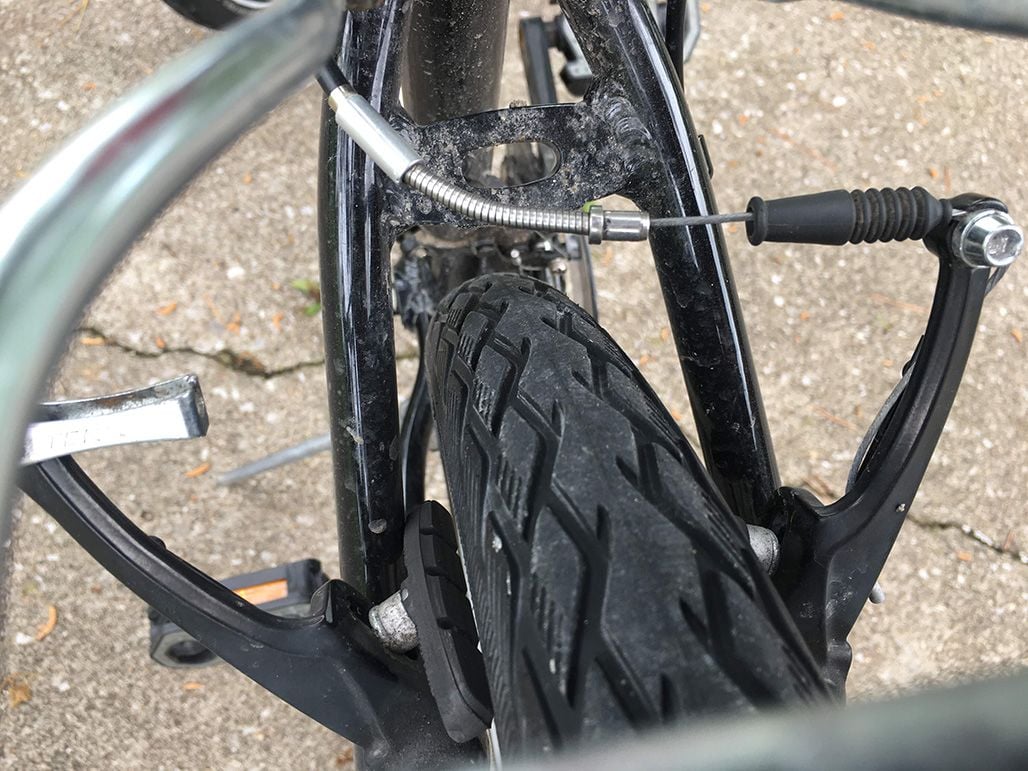
The only issue I had is the rear brakes. I couldn't slot the rear brakes back into the holder (?) so I only have my front brakes, even after making the adjustments near the lever. I also had this problem on the old wheel, especially if the tires were fully inflated. Any ideas on what could be happening?
My pump came with a plastic Presta-Schrader adapter, but it wasn't working too well. It was leaking more air than was going into the tube, and when I removed the adapter it removed the entire Presta core. I set it aside only to never see it again, so one of the tubes is now missing the valve core.
But the brass Presta-Schrader adapter I ordered fit fine and leaked just a minimal amount of air. I inflated the rear tire to 60 PSI, and the front to 45 PSI.The only issue I had is the rear brakes. I couldn't slot the rear brakes back into the holder (?) so I only have my front brakes, even after making the adjustments near the lever. I also had this problem on the old wheel, especially if the tires were fully inflated. Any ideas on what could be happening?
05-15-20, 04:00 PM
#67
Really Old Senior Member
If you now have a wider rim, the brakes have to be adjusted out some.
Swap/remove spacers as needed.
Swap/remove spacers as needed.
05-15-20, 05:59 PM
#68
"Broke College Student"
Thread Starter
It was doing this with the previous wheel from time to time. What would I need to do to adjust the brakes, outside of what I've been doing to adjust the tension on the cable?
05-15-20, 06:38 PM
#69
Really Old Senior Member
Sometimes you simply have to look for the simple answer.
05-15-20, 07:17 PM
#70
"Broke College Student"
Thread Starter
I'm assuming you're asking if the cable and the noodle is seated in the housing. I can't even get it in the housing - there's not enough slack in the cable to get it in the housing.
05-15-20, 08:46 PM
#71
Really Old Senior Member
Study this-
https://www.sheldonbrown.com/glossary.html
