


Help with a cable stop fix
 06-01-22, 01:46 AM
#26
Newbie
Join Date: May 2022
Posts: 12
Mentioned: 0 Post(s)
Tagged: 0 Thread(s)
Quoted: 2 Post(s)
Likes: 0
Liked 8 Times
in
7 Posts
I can look at the scotchweld range just recommended one as it available to someone on another forum ,not cheap and most come minimum 50ml which I why I went JB weld which is a similar double syringe pack but much much smaller you will need less than 1ml ! Those 3m products plus similar is how most composite bike have had dropouts/chain and seatstays bonded onto frame,likewise seattube sleeves,tube/lug junctions on a Colnago ,also bonding tubes together before the carbon wrap on custom tube to tube construction bikes and bonding bodywork onto McLaren type super car chassis

Likes For stefthehat:
06-01-22, 08:29 AM
#27

LR�P=HR
Join Date: Sep 2019
Location: SF Bay Area
Posts: 2,204
Bikes: 1981 Holdsworth Special, 1993 C-dale MT3000 & 1996 F700CAD3, 2018 Cervelo R3 & 2022 R5, JustGo Runt, Ridley Oval, Kickr Bike 8-)
Mentioned: 2 Post(s)
Tagged: 0 Thread(s)
Quoted: 873 Post(s)
Liked 1,221 Times
in
706 Posts
Epoxy
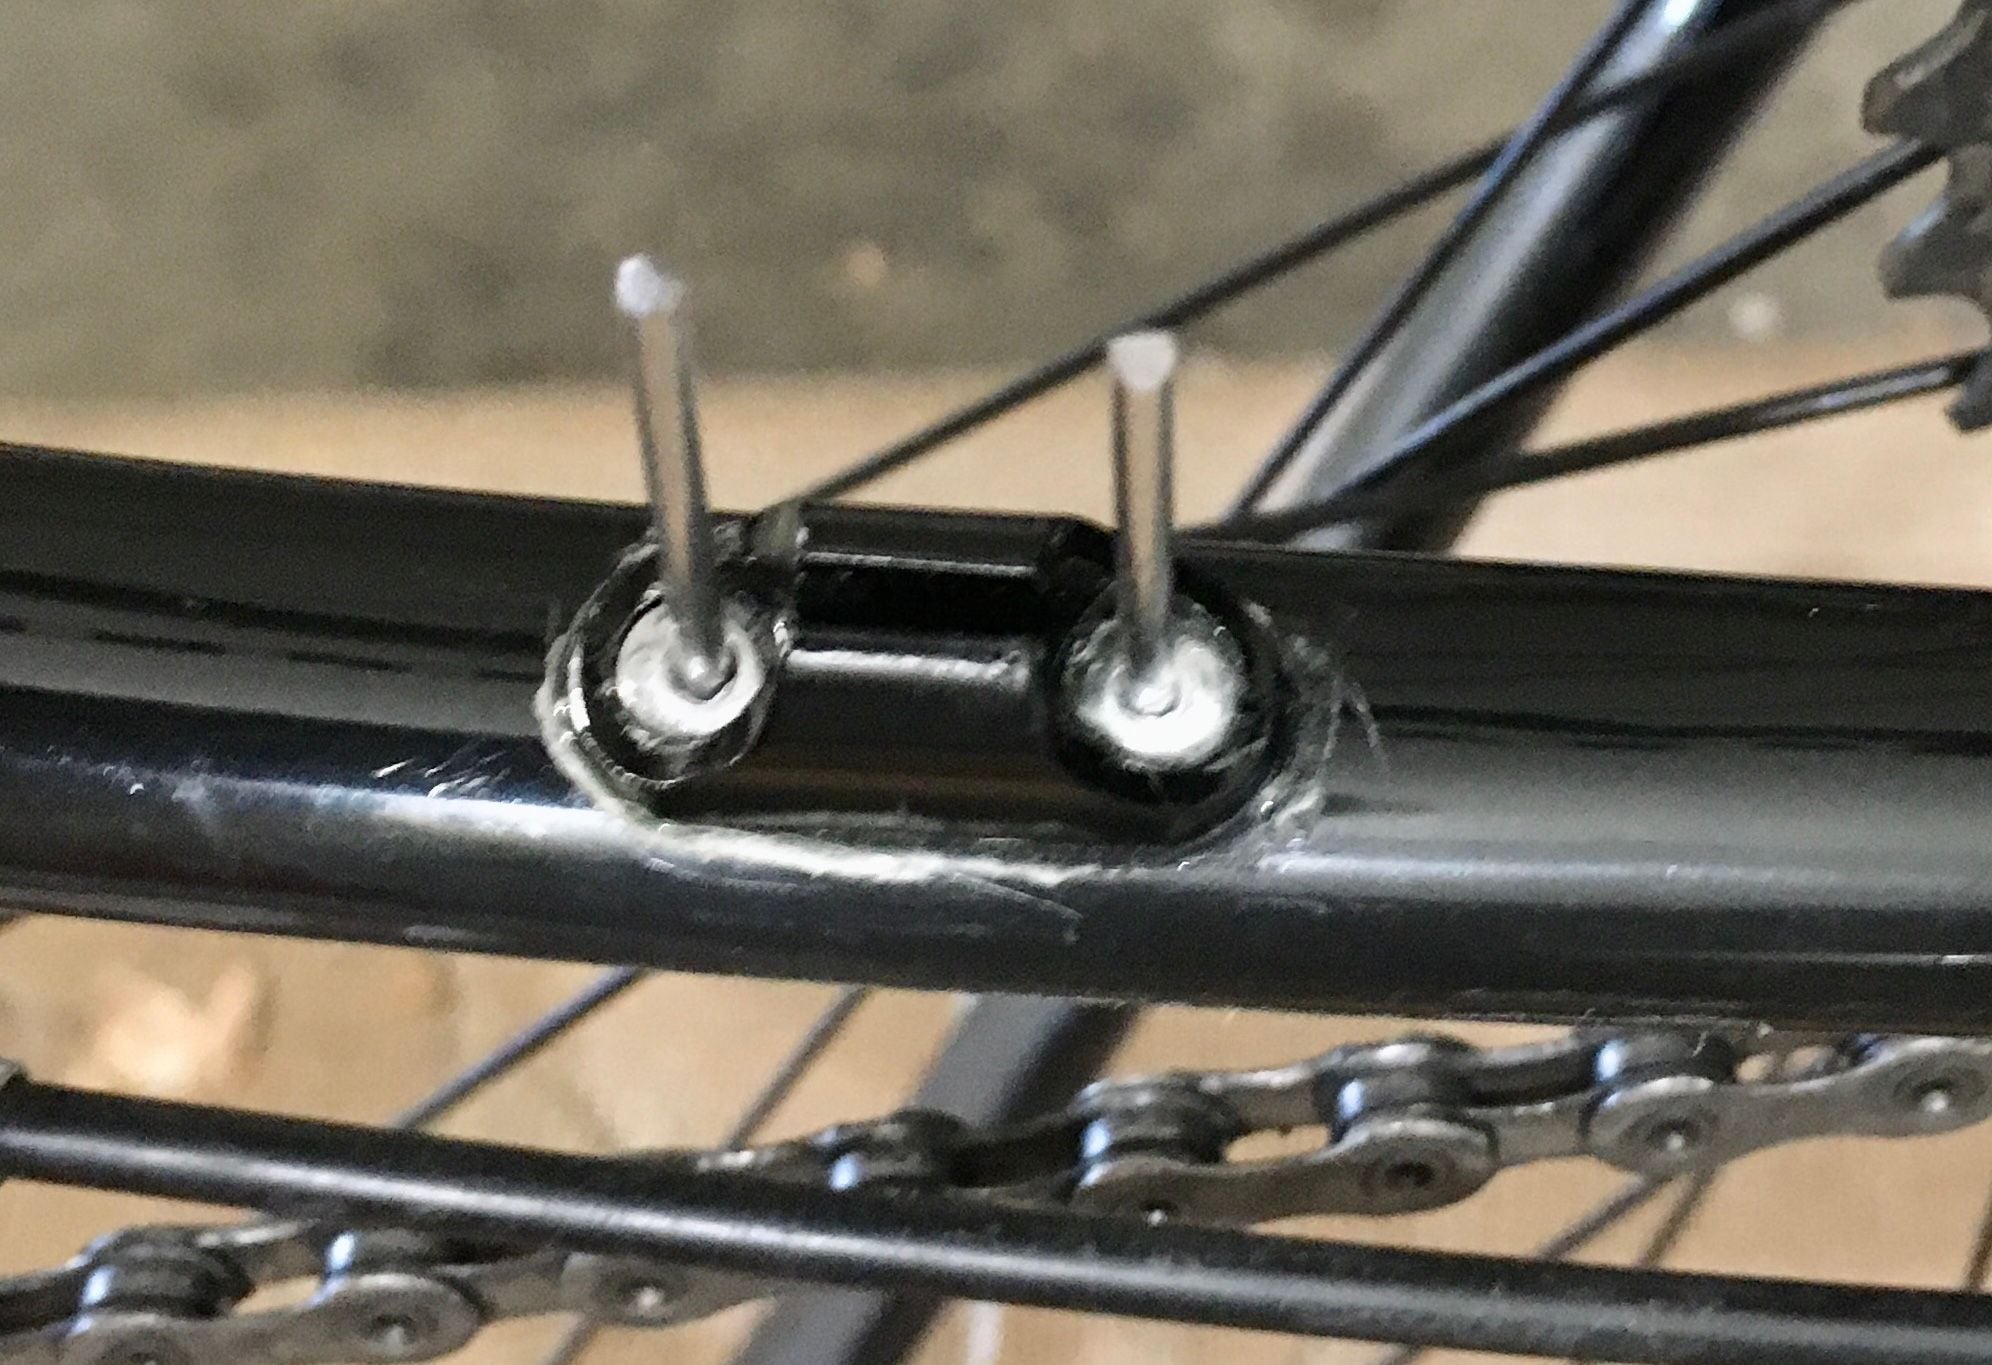
Looking at the close up, I believe the two pop rivets are the truly structural strength in the joint.
If I was going to get into this, I�d be looking to replace those rivets.
Getting the pop rivet gun in there might be tough. But a small length of metal tube could be used to extend the gun (if it�s still able to grab the rivet).
But if you�re really going to use epoxy for a highly stressed location��.
When mixing epoxy, don't mix the amount you need�. Mix more.
Mix well, folding from edges to middle.
scoop from middle of very well mixed pile, and mix the scooped amount again.
Then take from middle of that double mixed pile for the repair/project.
For such a small repair, you will throw away more than you use.
Select a slow setting epoxy (45+min if you can find it)
Keep the part within the epoxy temp range for the recommended full setting time.
Don�t keep it warm for 45mins then move it to a cold garage (don�t ask).
Barry

Likes For Barry2:
06-03-22, 11:04 AM
#28
Senior Member
Thread Starter

Thanks again everybody for your input on this repair.
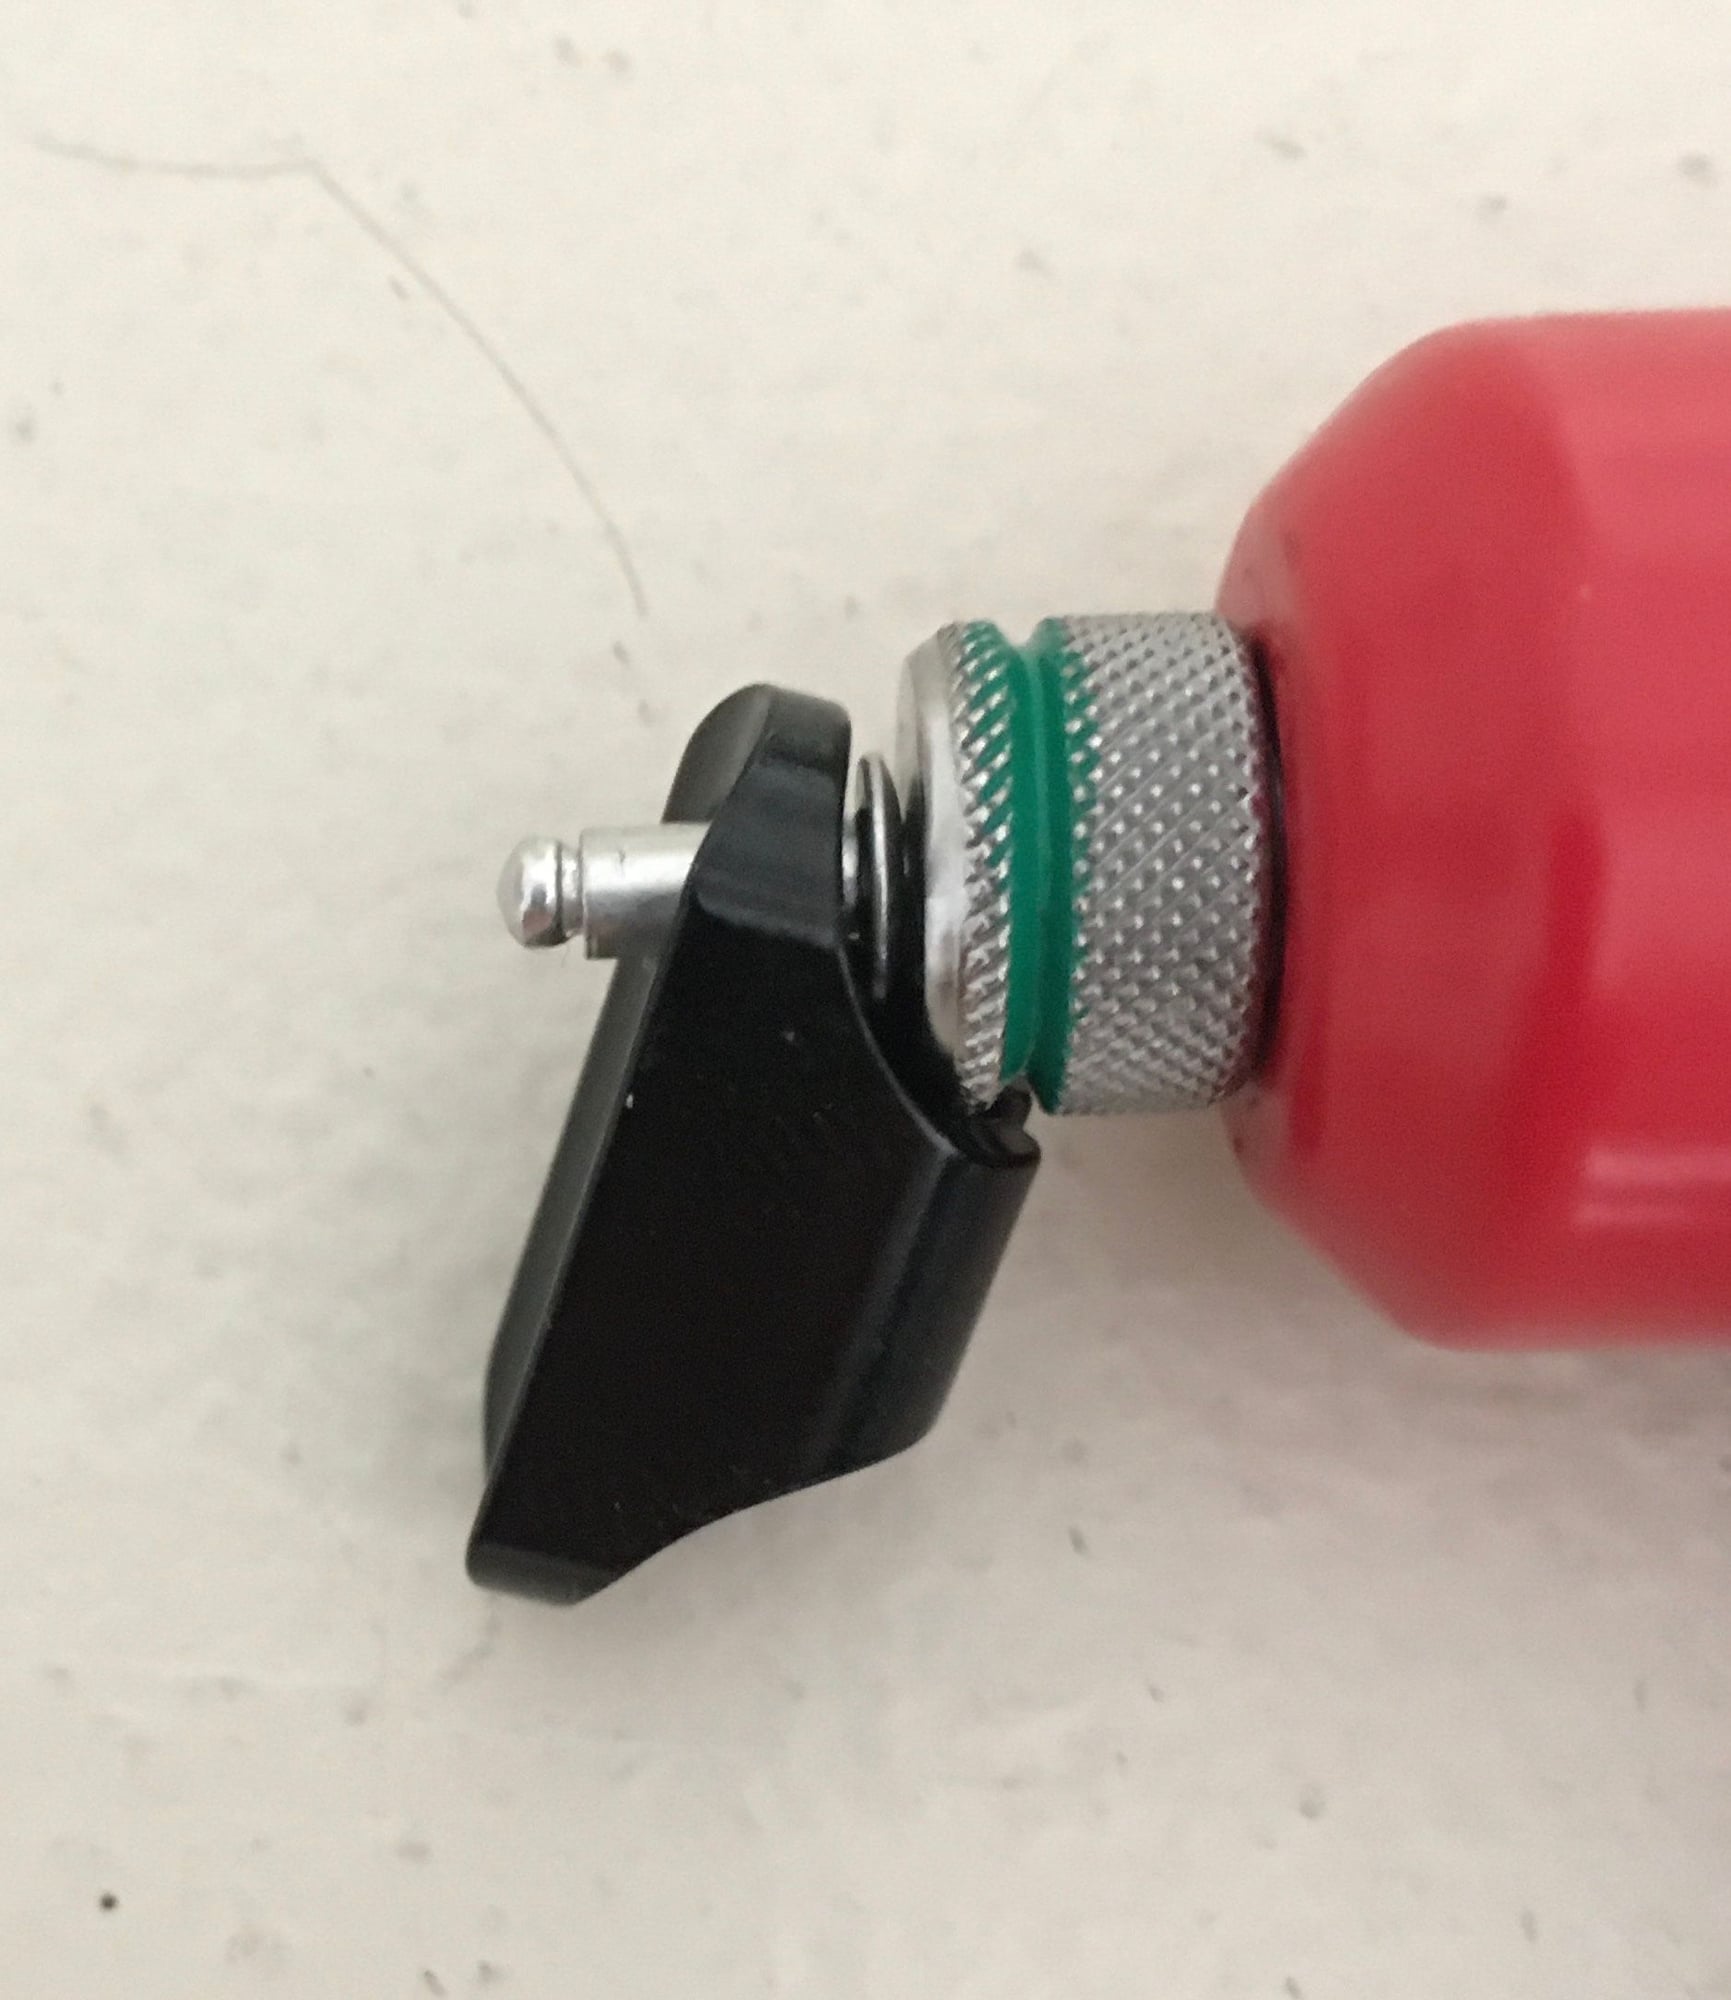
I'm gathering some tools now, including rivets and a manual riveting tool. Unfortunately, ran into an issue with this tool. As you can see in the photo.
The rivets are 1/ 8", looks like they should be fine if inserted vertically through the cable stop. But the riveting tool head doesn't fit in the space available.
Any ideas? Worst case, I could skip the riveting, but not feeling that only the epoxy will hold.
06-03-22, 11:51 AM
#29
LR�P=HR
Join Date: Sep 2019
Location: SF Bay Area
Posts: 2,204
Bikes: 1981 Holdsworth Special, 1993 C-dale MT3000 & 1996 F700CAD3, 2018 Cervelo R3 & 2022 R5, JustGo Runt, Ridley Oval, Kickr Bike 8-)
Mentioned: 2 Post(s)
Tagged: 0 Thread(s)
Quoted: 873 Post(s)
Liked 1,221 Times
in
706 Posts
Like I said two posts above.... Extend the rivet gun with a small length of metal tube because it'll be tough to get in there.
(Even a couple-three washers will do it!)
Barry
(Even a couple-three washers will do it!)
Barry
Last edited by Barry2; 06-03-22 at 12:32 PM.
06-08-22, 01:41 PM
#30
Senior Member
Thread Starter
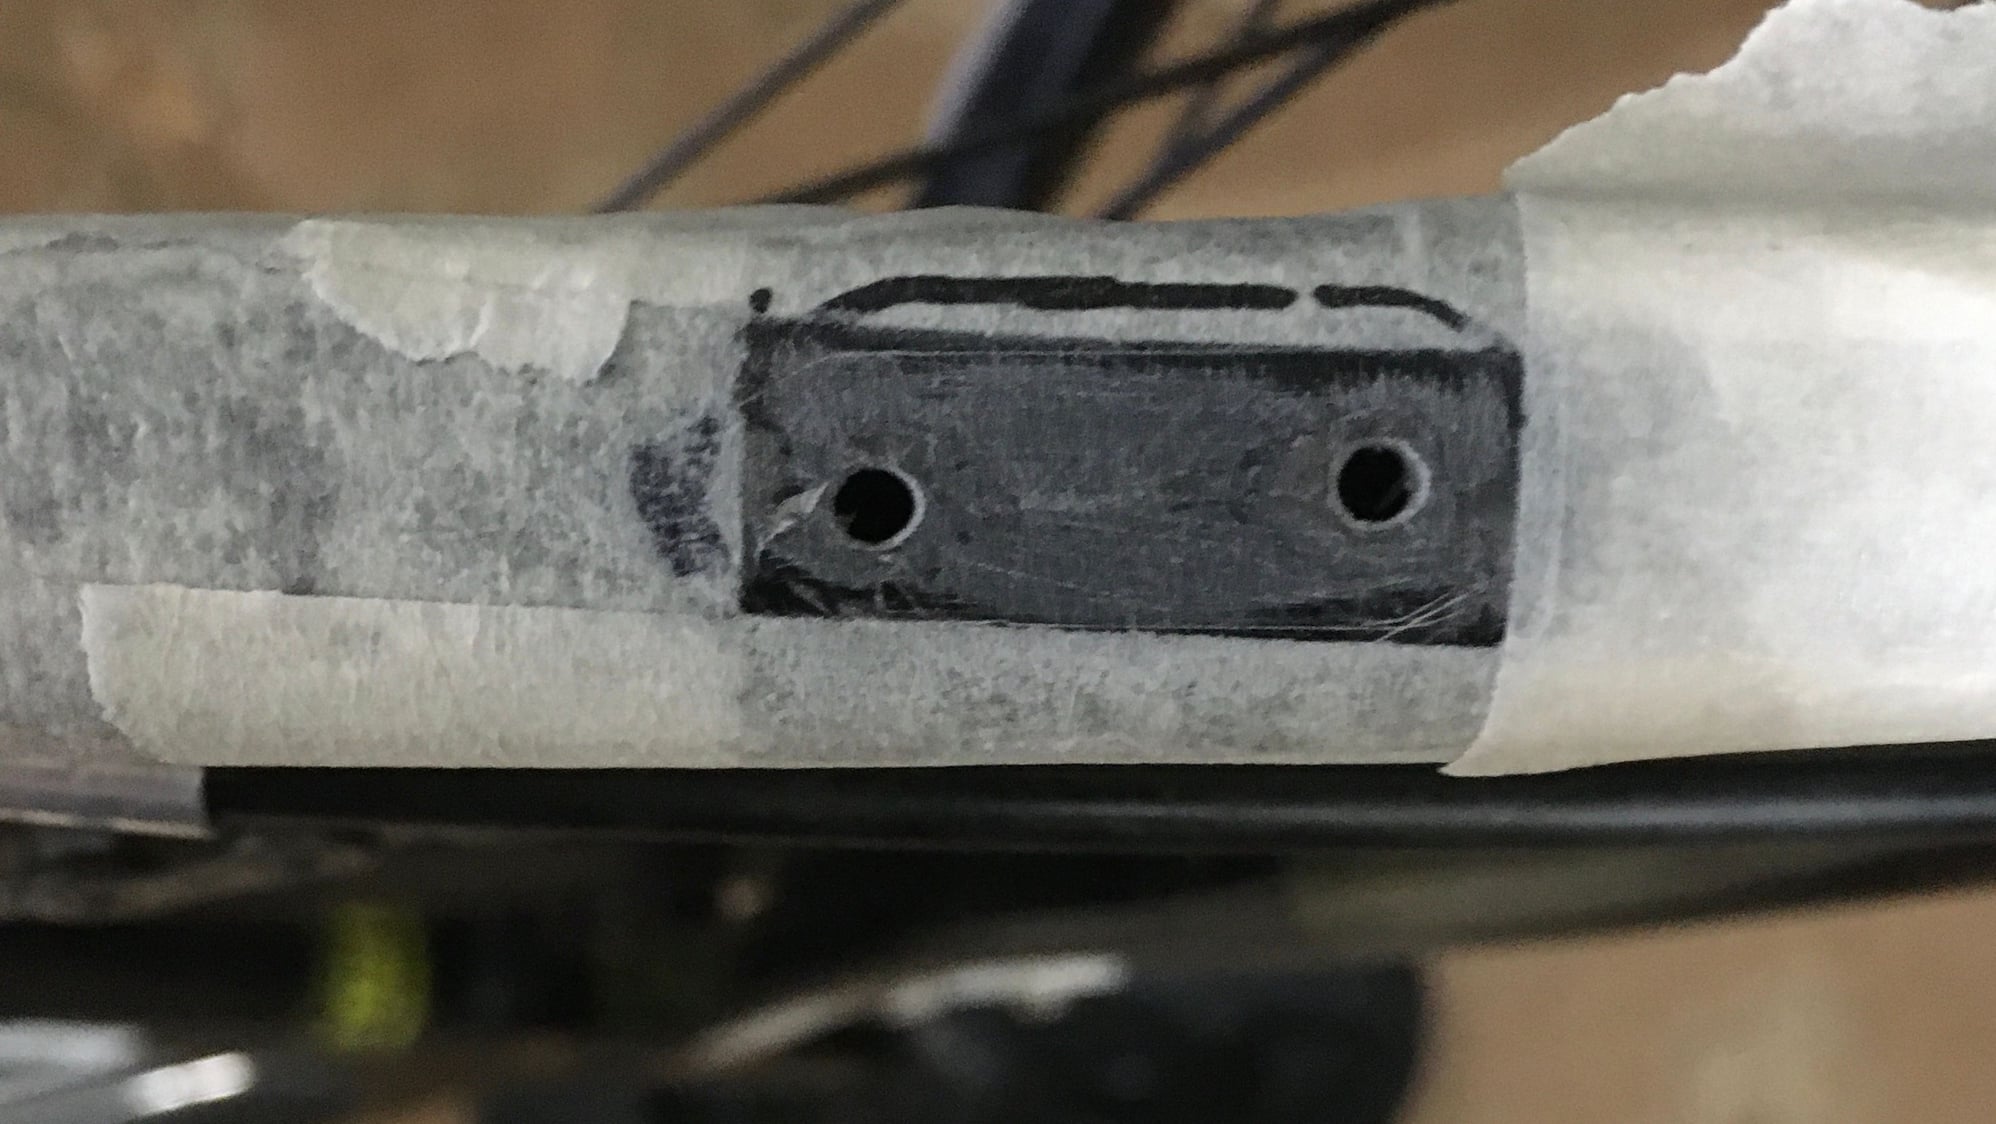
Here's the frame prep area and stop part. The stop has some curved bottom side, compared to the frame, and I wonder if I should go ahead and file some more or leave it as it is now?
06-08-22, 02:08 PM
#31
LR�P=HR
Join Date: Sep 2019
Location: SF Bay Area
Posts: 2,204
Bikes: 1981 Holdsworth Special, 1993 C-dale MT3000 & 1996 F700CAD3, 2018 Cervelo R3 & 2022 R5, JustGo Runt, Ridley Oval, Kickr Bike 8-)
Mentioned: 2 Post(s)
Tagged: 0 Thread(s)
Quoted: 873 Post(s)
Liked 1,221 Times
in
706 Posts
is the part painted?
If so, take it to bare metal where it touches the frame and use a course grit.
Some surface texture will help the bond.
And yes getting the metal as close to the frame as possible is better.
Were you able to space the rivet gun so as to get into the corner?
Clean both frame and metal with a little IPA >90% or better on a cloth. (not the beer).
leave both to DRY, then leave them to DRY some more.
This removes the grease from fingers and any remaining dust.
After leaving them to dry long enough that you just can't stand it any longer, go a little longer.
Plan on adding rivets at the time the gluing takes place.
This clamps the part and stops any possibility of fracturing the bond by adding a rivet later.
Here's hoping all goes well
8-)
Barry
LASTLY - Have you popped a rivet ahead of time?
Depending how strong the rivets are, you don't want to pull the rivet all the way through the carbon.
If it feels like that might happen, consider not pulling to POP, but pulling partially and cutting off the rivet very gently after the glue sets.
Last edited by Barry2; 06-08-22 at 02:16 PM.
Likes For Barry2:
06-08-22, 02:35 PM
#32
Senior Member
Join Date: Sep 2013
Location: Massachusetts
Posts: 4,530
Mentioned: 34 Post(s)
Tagged: 0 Thread(s)
Quoted: 2112 Post(s)
Liked 663 Times
in
443 Posts
If that stop sort of kinda matches the original stop, I would stop. No amount of modding is going to make it adequate. If you have a *perfect* fit it is a crap shoot repair.
The lever arm on the stock stop is long, and the torque that joint will face is way bigger than you imagine.
Don’t want to be a Debbie downer, but…
…been there, done that, wouldn’t do it again.
-mr. bill
The lever arm on the stock stop is long, and the torque that joint will face is way bigger than you imagine.
Don’t want to be a Debbie downer, but…
…been there, done that, wouldn’t do it again.
-mr. bill
Last edited by mr_bill; 06-08-22 at 02:39 PM.
06-08-22, 02:56 PM
#33
Senior Member
Thread Starter
@ Barry2
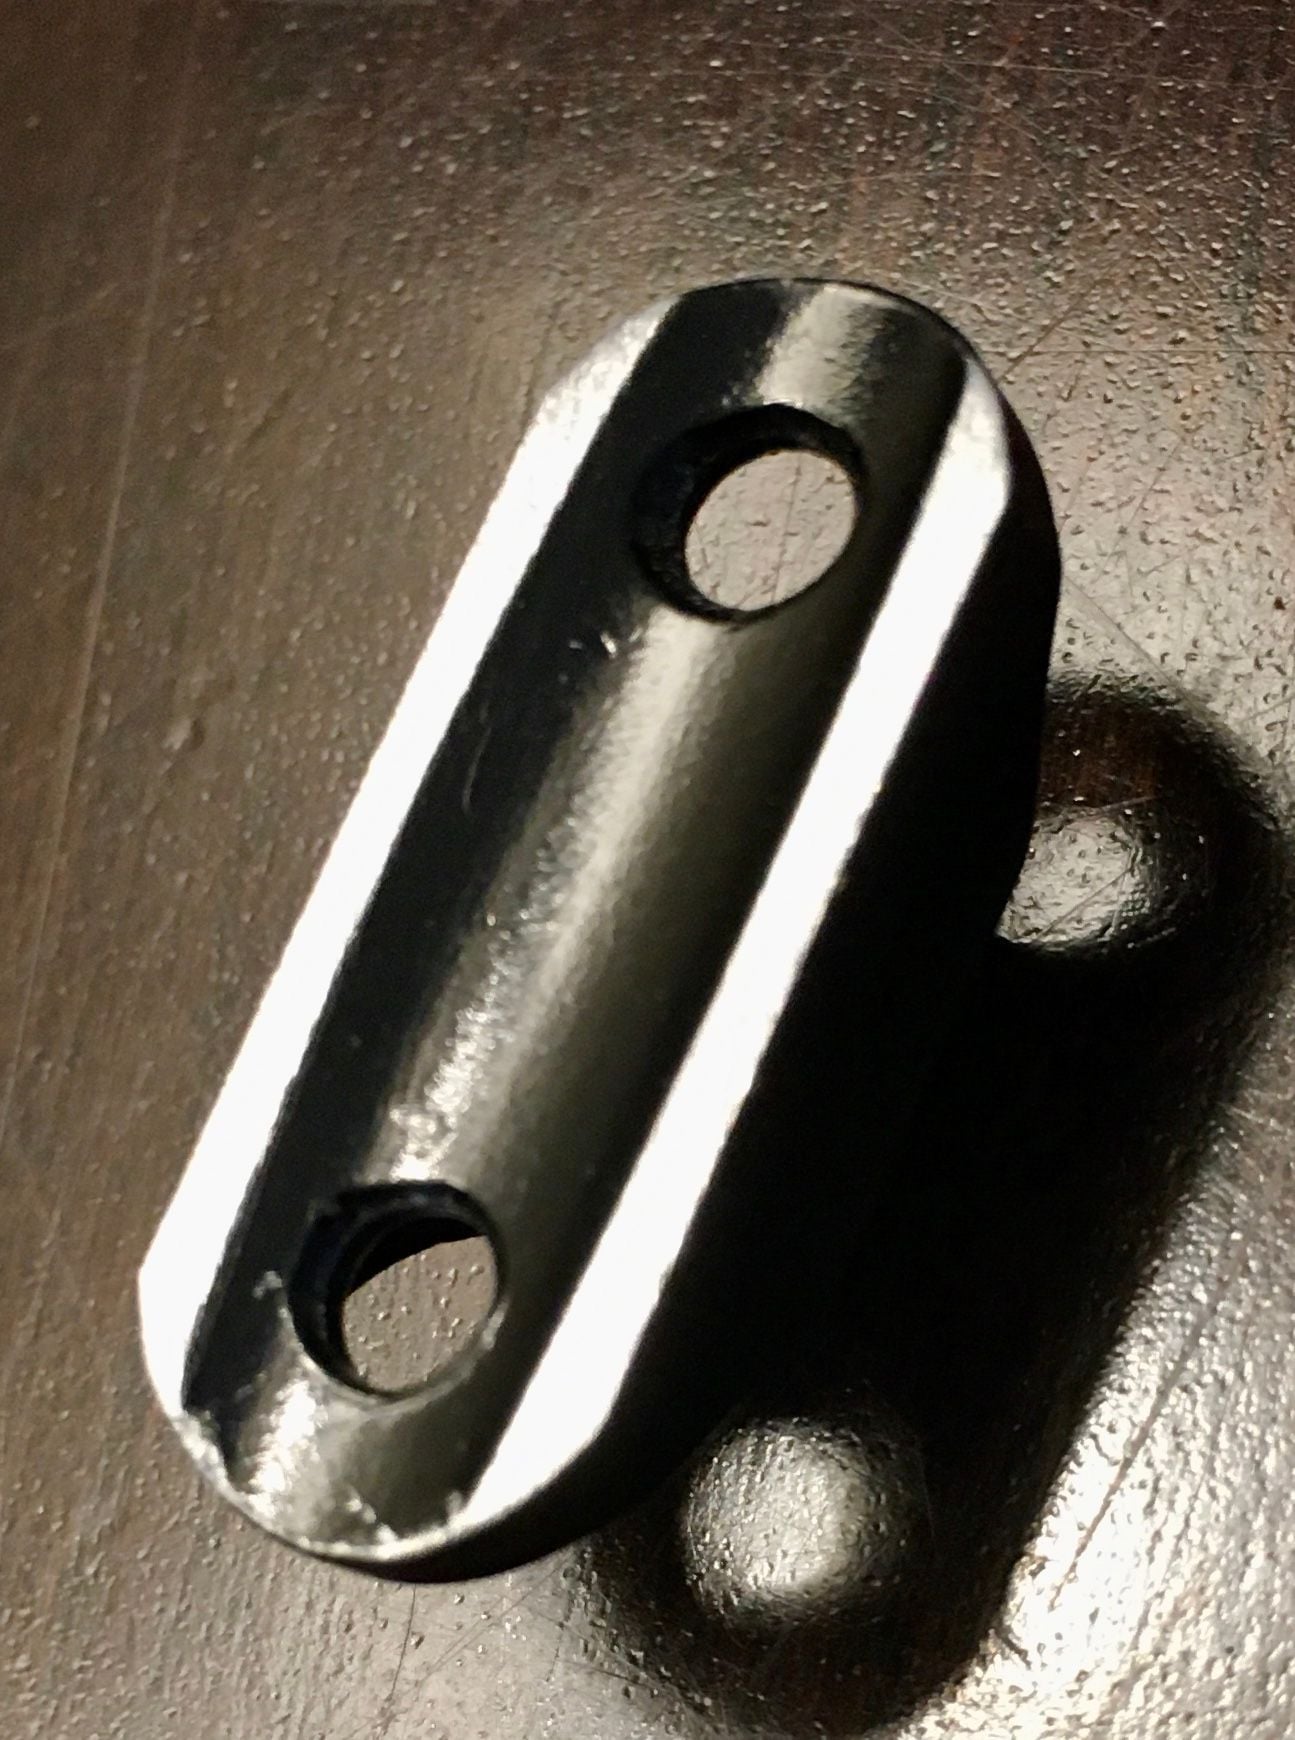
Took some significant side filing already (where the white sides in photo), but there's still some depth to it Stop is coated, The frame is almost flat.
The good news is that the holes in the stop are perfectly spaced and match the holes on the frame. And the holes in the frame are 1/8" just perfect for the rivets.
Didn't get to the cleaning part yet.
The riveting step, did a test run with a couple of nuts and/or some spacer/tube found at local DIY store. Seems to work, but doesn't cut through the rivet after insertion. Not a big deal, just another step to cut whatever is left.
@ drlogik
the clamp solution, not considered at this point, since the chain stay is not round. More of a trapezoidal shape.
Last edited by rovis; 06-08-22 at 03:03 PM.
06-09-22, 06:11 AM
#34
Newbie
Join Date: May 2022
Posts: 12
Mentioned: 0 Post(s)
Tagged: 0 Thread(s)
Quoted: 2 Post(s)
Likes: 0
Liked 8 Times
in
7 Posts
Cable stop
Barry�s comment on not splintering the carbon with the tightening of rivet is v v important ,a lot of my pushing for bonding by epoxy was based on the drawbacks of the rivet method which is really only to make the process of frames out of the door easier/quicker/cheaper for the manufacturer,if the stop has paint or anodising taken off ,yes you can file some off to get a better fit ,but the epoxy will fill the gap and obviously dry solid ,the reason I mentioned having had success in past with fitting a small screw in at same time as bonding was a way to avoid any bulging/splintering /unseen weakness caused by riveting
Likes For stefthehat:
06-09-22, 06:22 AM
#35
Newbie
Join Date: May 2022
Posts: 12
Mentioned: 0 Post(s)
Tagged: 0 Thread(s)
Quoted: 2 Post(s)
Likes: 0
Liked 8 Times
in
7 Posts
Stop
Also a very slight radius on the sharp edges of the stop [only talking one or two millimetres]helps epoxies not cracking at those sudden stop/start stress raisers ,I know you want a neat job but that�s why in my early posting I was mentioning the epoxy extending just a mm or two outside the stops footprint and same up the side but i�am pedantic ,to me the first photo of epoxy left under original stop showed it was far too little and contributed little ,no way would they of keyed up any surfaces it would of all been gloss on gloss ,minimal epoxy ,someone knocking out as many rivet operations as possible
Likes For stefthehat:
06-10-22, 11:38 AM
#36
Senior Member
Thread Starter
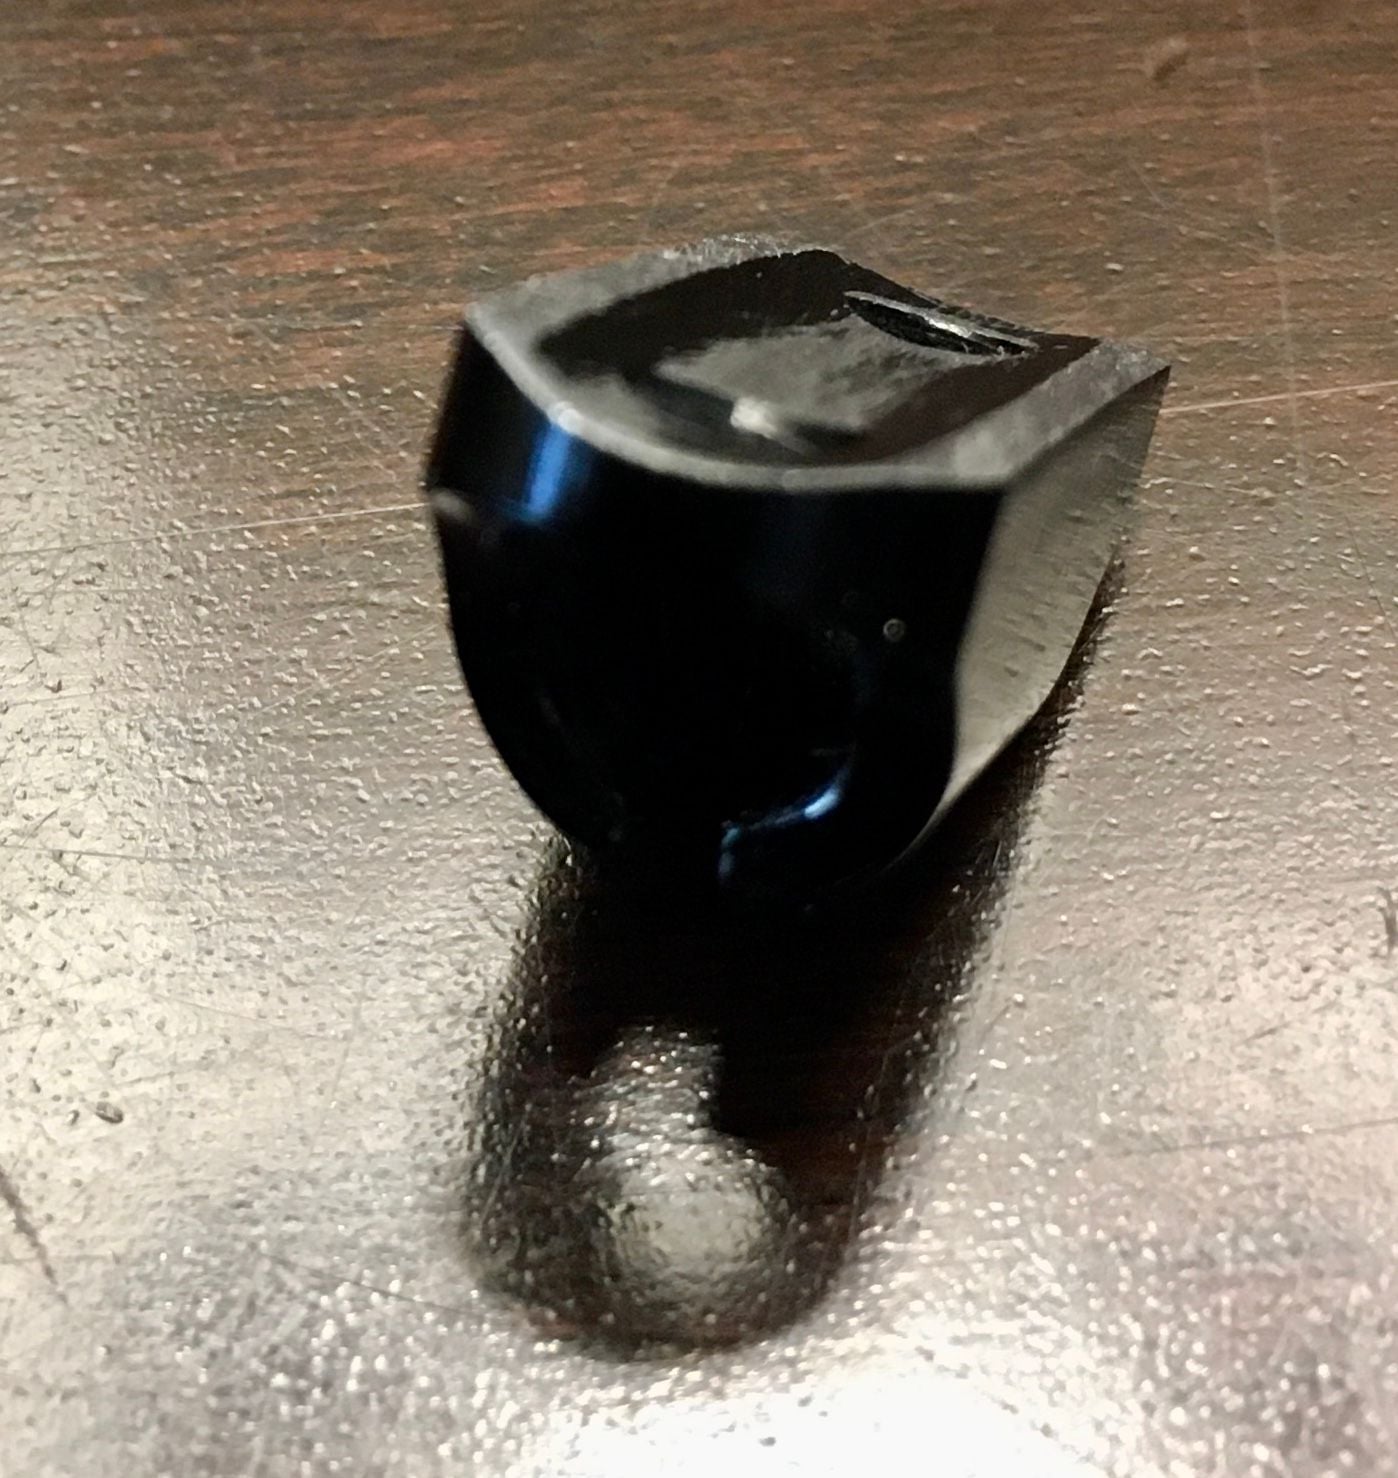
Second round of sanding on the stop part. You can see the amount of curve left on the bottom of the part.
stefthehat do you mean I should sand the outside perimeter of the stop bottom to make it rounder?
stefthehat do you mean I should sand the outside perimeter of the stop bottom to make it rounder?
Last edited by rovis; 06-10-22 at 11:44 AM.
06-11-22, 06:16 AM
#37
Senior Member
Join Date: Sep 2013
Location: Massachusetts
Posts: 4,530
Mentioned: 34 Post(s)
Tagged: 0 Thread(s)
Quoted: 2112 Post(s)
Liked 663 Times
in
443 Posts
There’s a reason why the cable stop on your Intenso stood so proud from the chainstay.
Before you continue, with that “close enough” (it’s not close at all) cable stop it’s likely your bare shift cable will rub on the chainstay close to the bottom bracket. Test fit sooner rather than later. (A tensioned shift cable will have a worse fit.)

-mr. bill
Before you continue, with that “close enough” (it’s not close at all) cable stop it’s likely your bare shift cable will rub on the chainstay close to the bottom bracket. Test fit sooner rather than later. (A tensioned shift cable will have a worse fit.)
-mr. bill
Last edited by mr_bill; 06-11-22 at 07:28 AM. Reason: Add pic
Likes For mr_bill:
06-13-22, 12:07 PM
#38
Newbie
Join Date: May 2022
Posts: 12
Mentioned: 0 Post(s)
Tagged: 0 Thread(s)
Quoted: 2 Post(s)
Likes: 0
Liked 8 Times
in
7 Posts
Cable stop
Sorry I missed this so probably too late ,i�am being pedantic and just trying to give you X% extra on repair holding ,now you�re using rivets the repair is going to hold mainly due to them but if you�re going to use some epoxy as well ,let�s get the most out of it ,yes v slightly round off the sharp edge and any corners ,epoxies love to crack at these sharp junction points ,it would/will be hard to mask neatly but having a couple of mm�s of epoxy �radiused� around edge of stop would be nice ,but with the rivets far from vital ,perhaps more important is �keying� up the inside of the indentations on the underside ,the epoxy will fill that nicely and give a nice �3d� anchor after curing ,i�am being a pedant anything you do with the epoxy will be miles better than what was put on originally
Likes For stefthehat:
06-20-22, 10:39 AM
#39
Senior Member
Thread Starter
I went ahead with the repair. Inserted two rivets, but didn't extrude them. Added some epoxy to the body (the part that goes in the hole) and most likely this should glue them to the frame (about 1mm thick) and the stop part itself. I'm going to try to add more epoxy around the stop, but so far it feels pretty solid. Not sure yet if any cable rubbing, need to run the cable through the stop first.
06-20-22, 03:34 PM
#40
Senior Member
Join Date: Jan 2007
Location: Eastern VA
Posts: 1,733
Bikes: 2022 Fuel EX 8, 2021 Domane SL6, Black Beta (Nashbar frame), 2004 Trek 1000C for the trainer
Mentioned: 1 Post(s)
Tagged: 0 Thread(s)
Quoted: 275 Post(s)
Liked 448 Times
in
267 Posts
Thanks for the detailed instructions! I was looking at the 3M's products and is simply overwhelming! I kind of narrowed it down to Scotch-Weld products.
https://www.3m.com/3M/en_US/p/c/adhe...tt=scotch%20DP
The replacement part is aluminum: https://cycle-frames.com/collections...t-black-finish
https://www.3m.com/3M/en_US/p/c/adhe...tt=scotch%20DP
The replacement part is aluminum: https://cycle-frames.com/collections...t-black-finish
Likes For biker128pedal:
06-20-22, 03:50 PM
#41
Senior Member
Thread Starter
After finishing the epoxy and rivet insertion, I realized I've made a mistake: initially I was planning on extruding the rivets, but while inserting them I also added a small amount of epoxy to the body of the rivets. However, I left the part to cure and then realized that pulling on the rivets might damage the frame. Now, I have to get rid of the rivet posts (the part that's normally cut). Space being really tight, I'm going to use a small rotary tool to grind away the posts.
If I would've thought of this before gluing the rivets in, I could've cut them before insertion.
If I would've thought of this before gluing the rivets in, I could've cut them before insertion.
06-21-22, 09:16 AM
#42
Newbie
Join Date: May 2022
Posts: 12
Mentioned: 0 Post(s)
Tagged: 0 Thread(s)
Quoted: 2 Post(s)
Likes: 0
Liked 8 Times
in
7 Posts
Well done ,looks ok ,sounds like you went through stuff methodically,was only talking about this job at work today ,if you�re cable run is ok ,the lower height stop plus a wider footprint either side of cable entry will be a huge help longterm
Likes For stefthehat:
06-24-22, 04:13 PM
#43
Senior Member
Thread Starter
Finally managed to finish the stop fix and pull the cable through. After that though, my shifting is totally out-of-whack and need to redo the setup.
