Vintage conversion help
 06-24-24 | 10:35 AM
#1
Thread Starter
Newbie
Joined: Sep 2022
Posts: 56
Likes: 19
Vintage conversion help
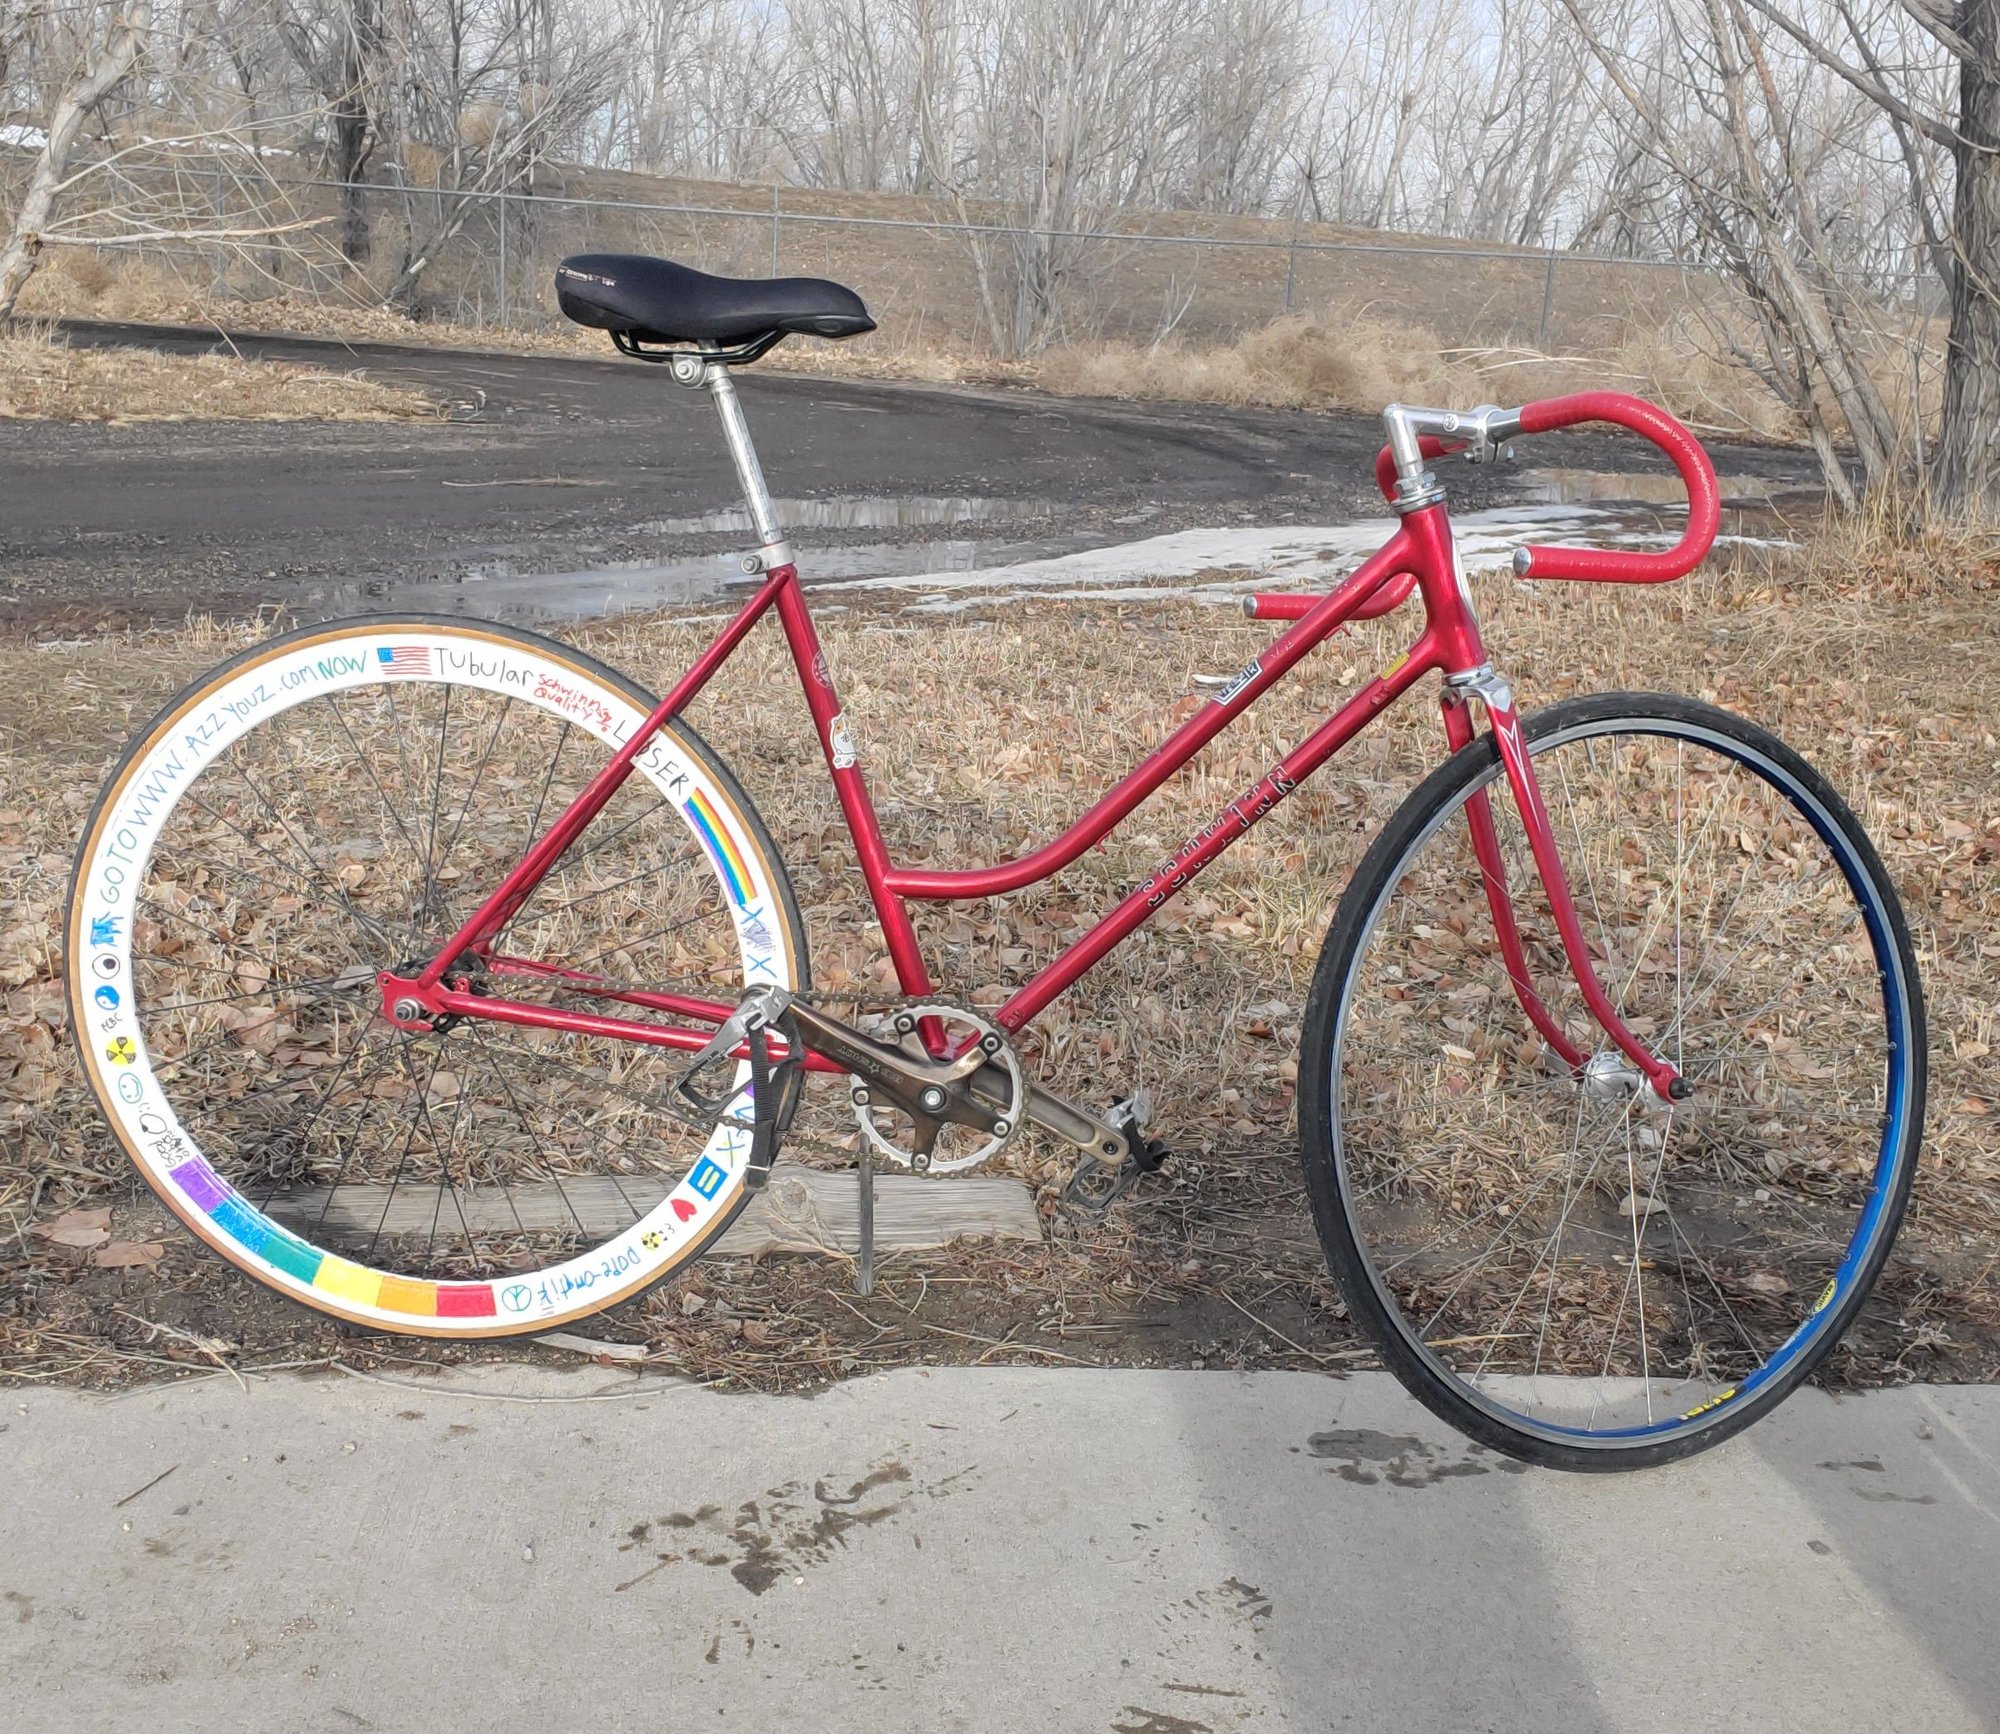
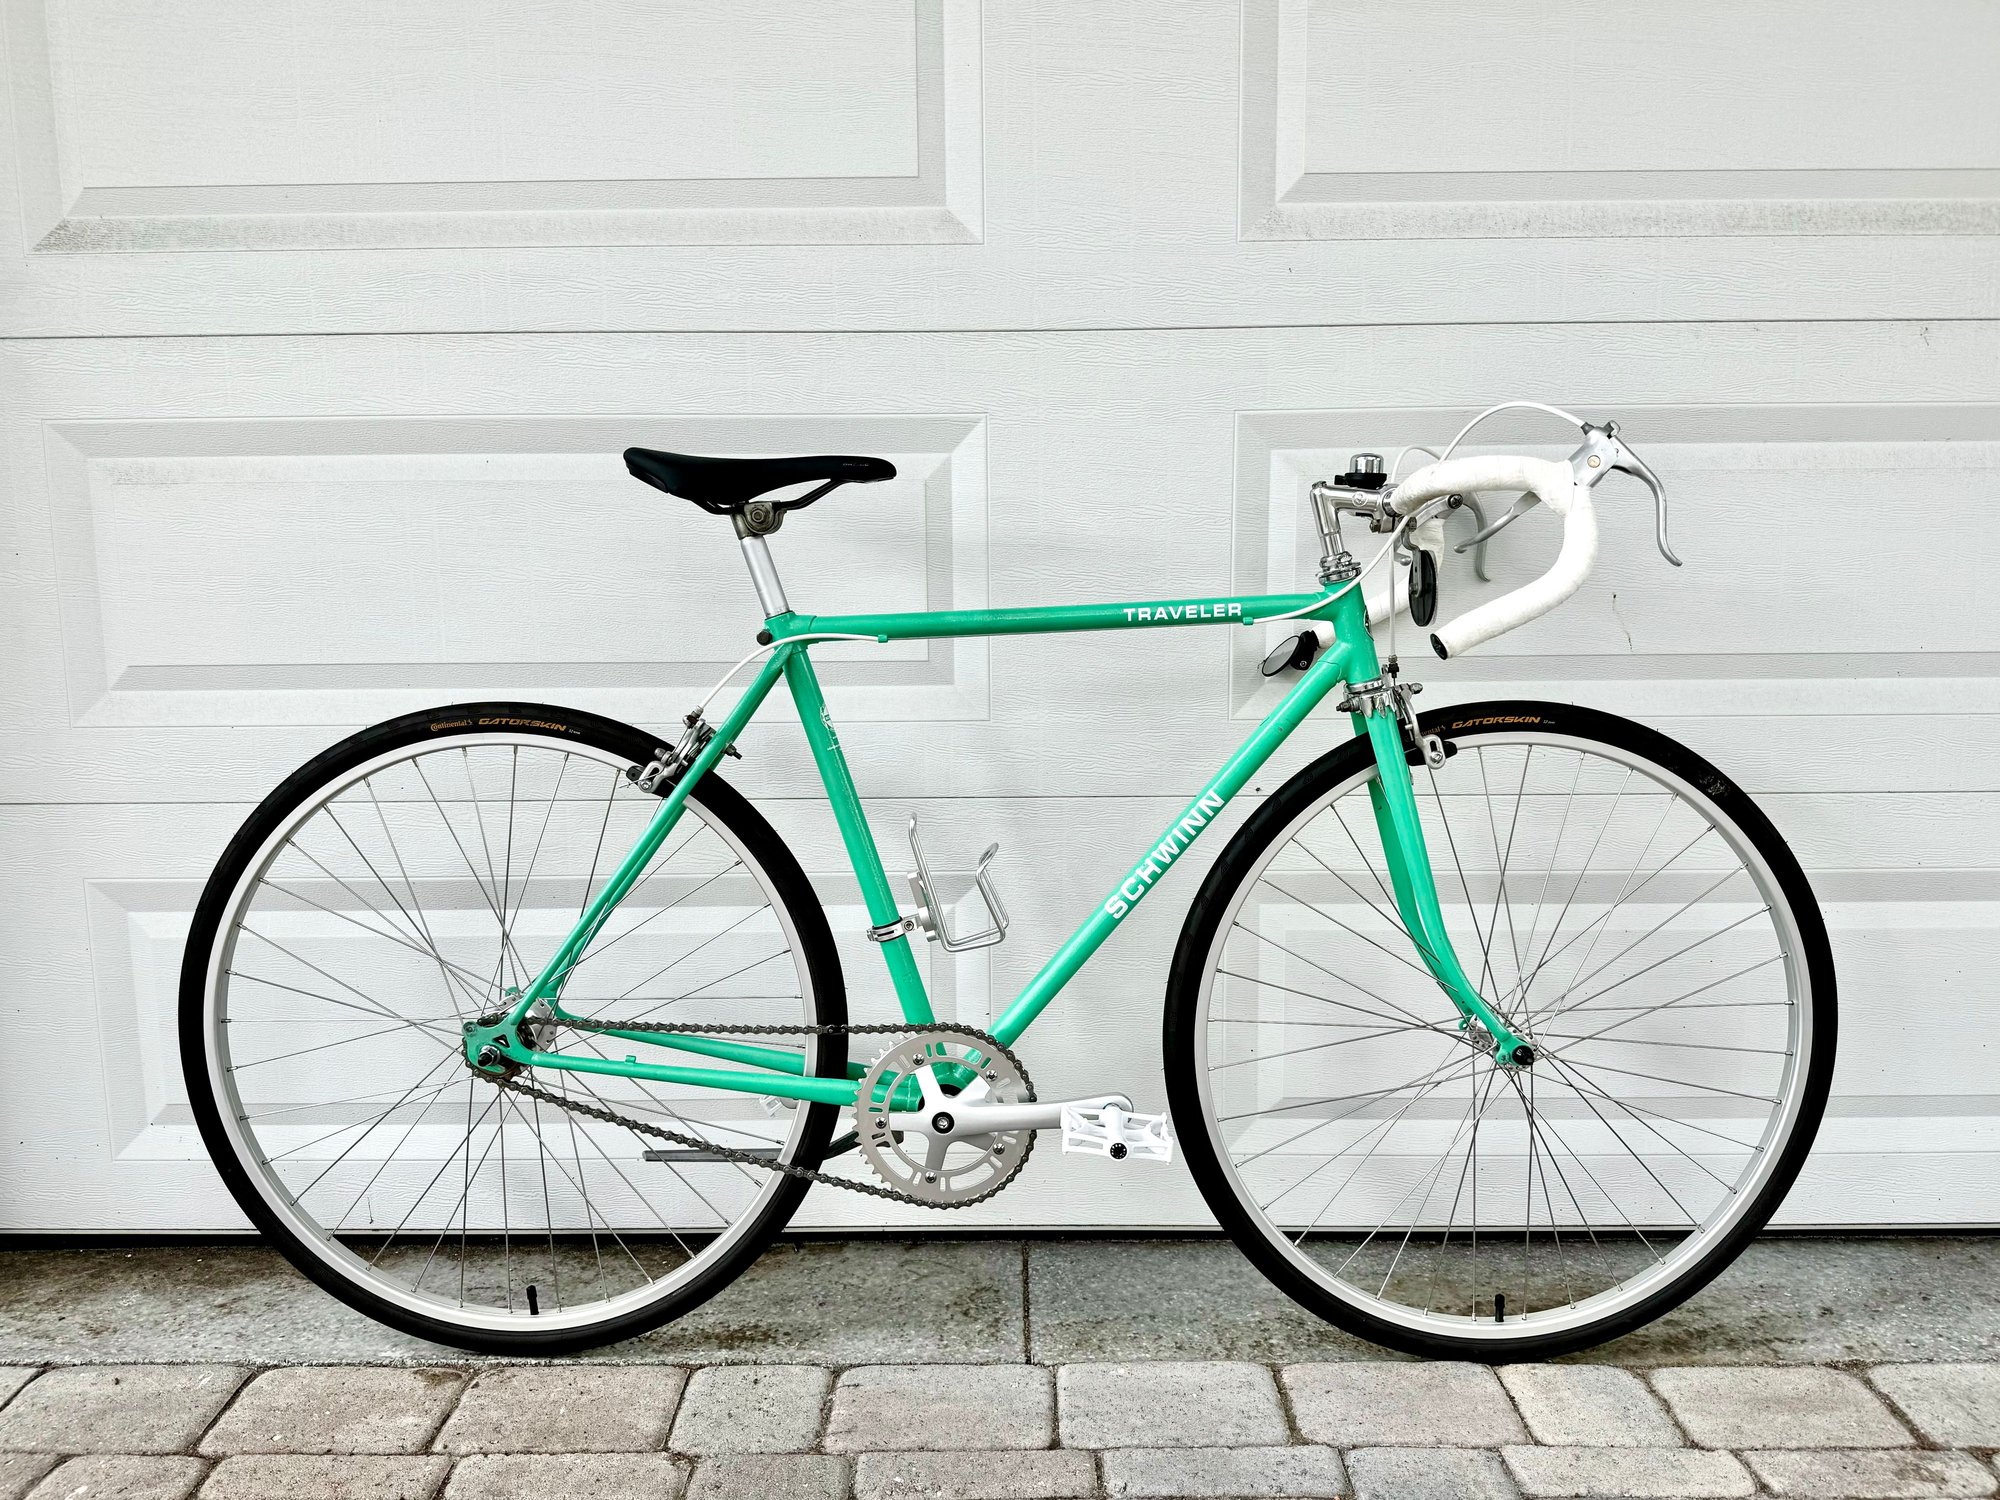
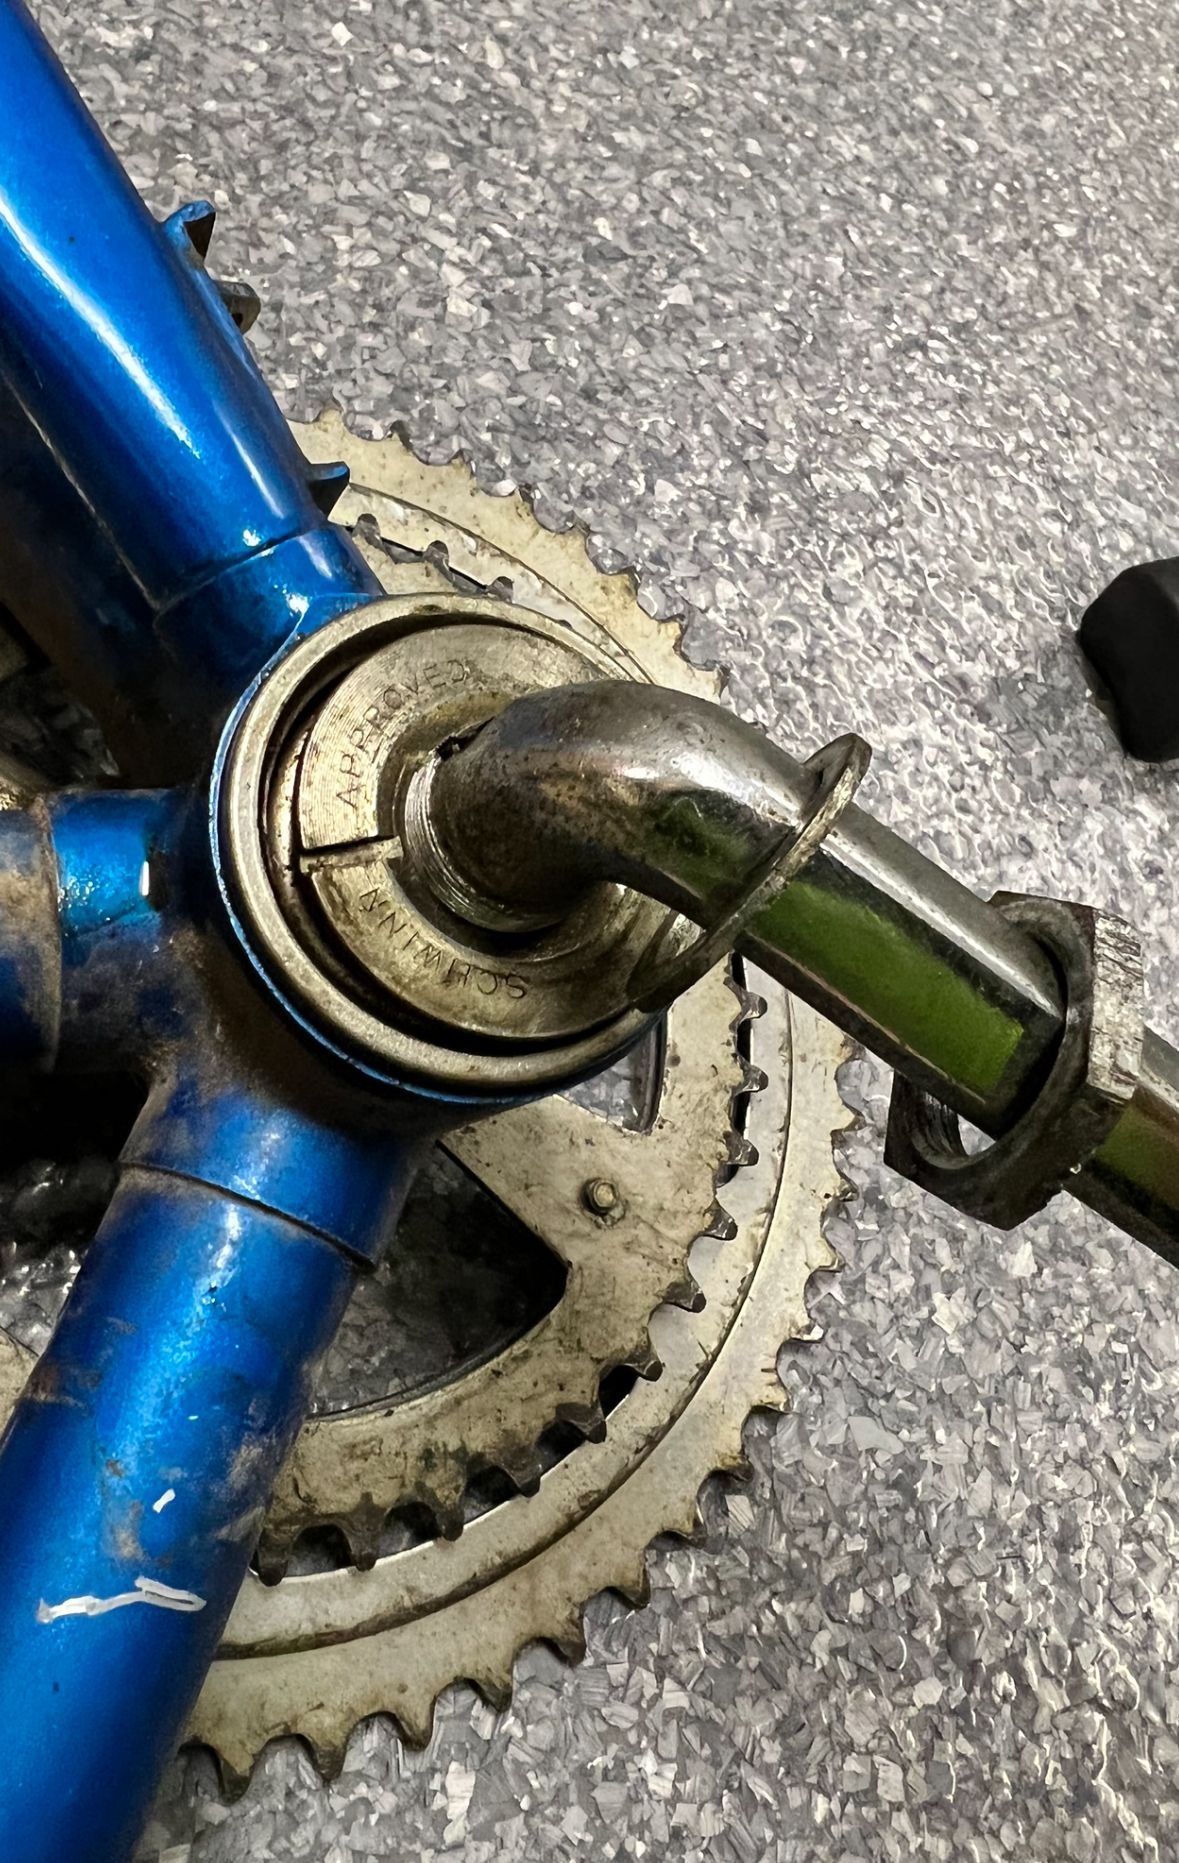
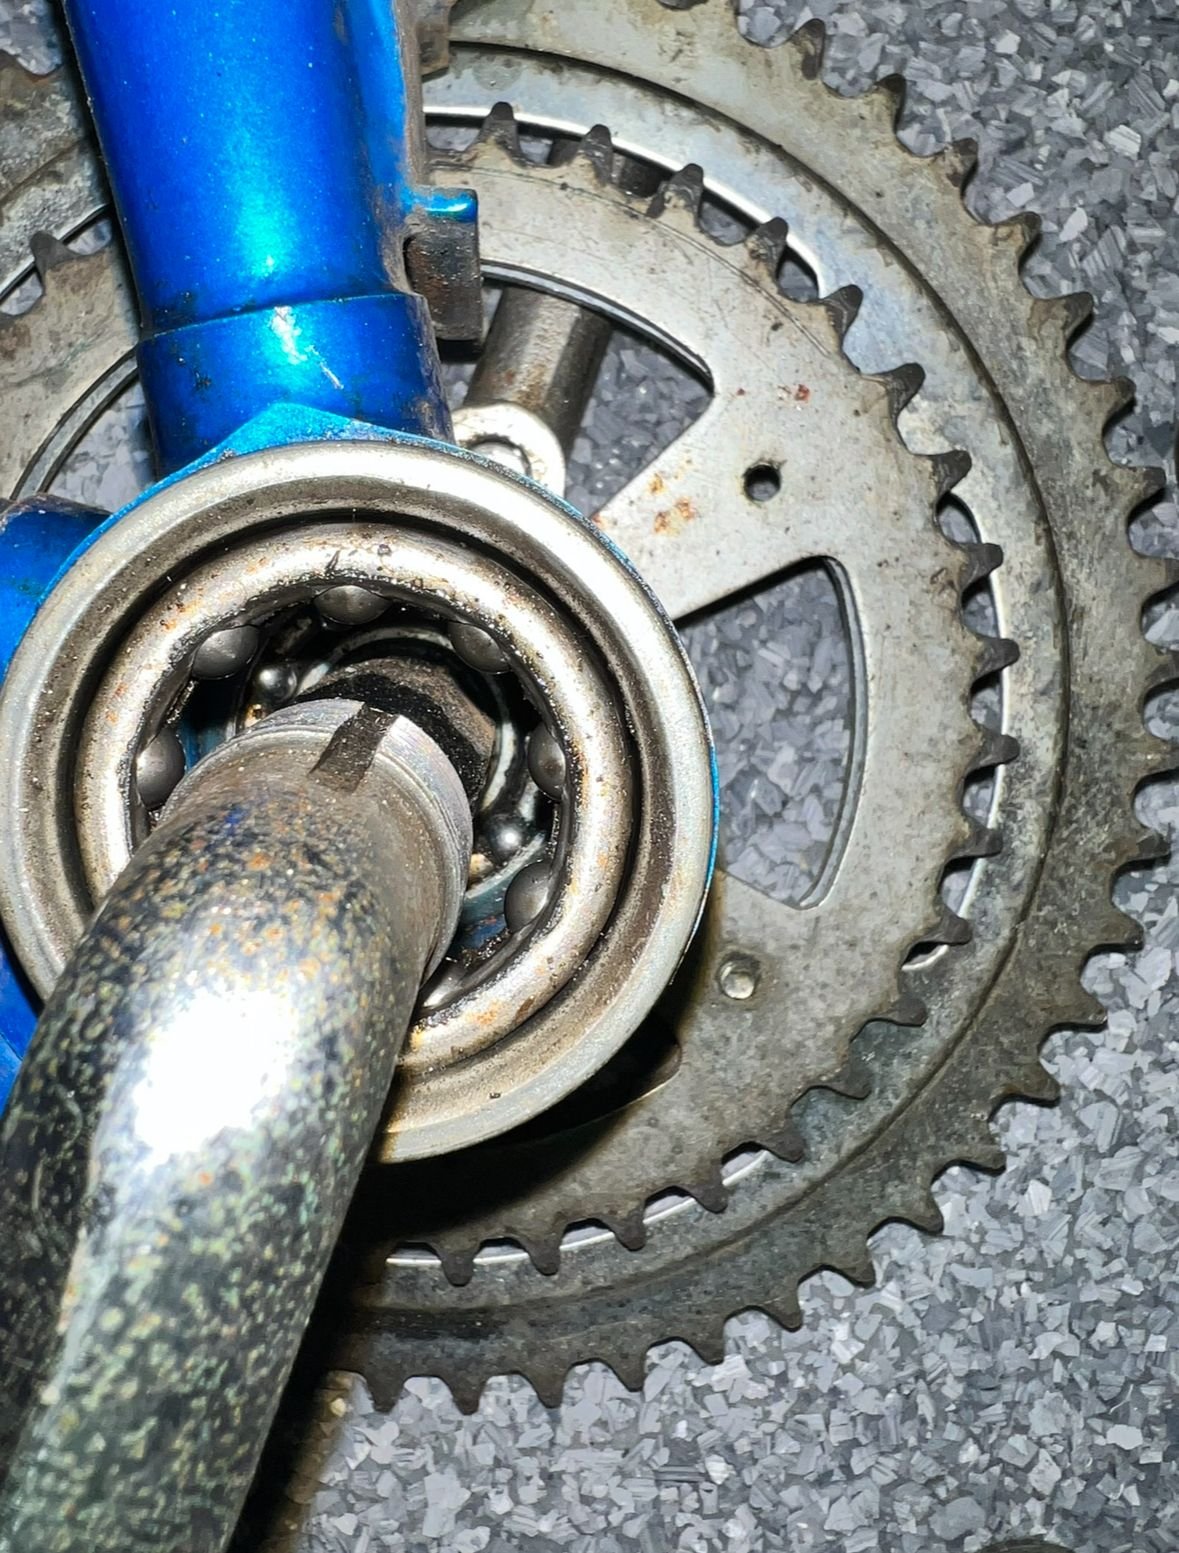
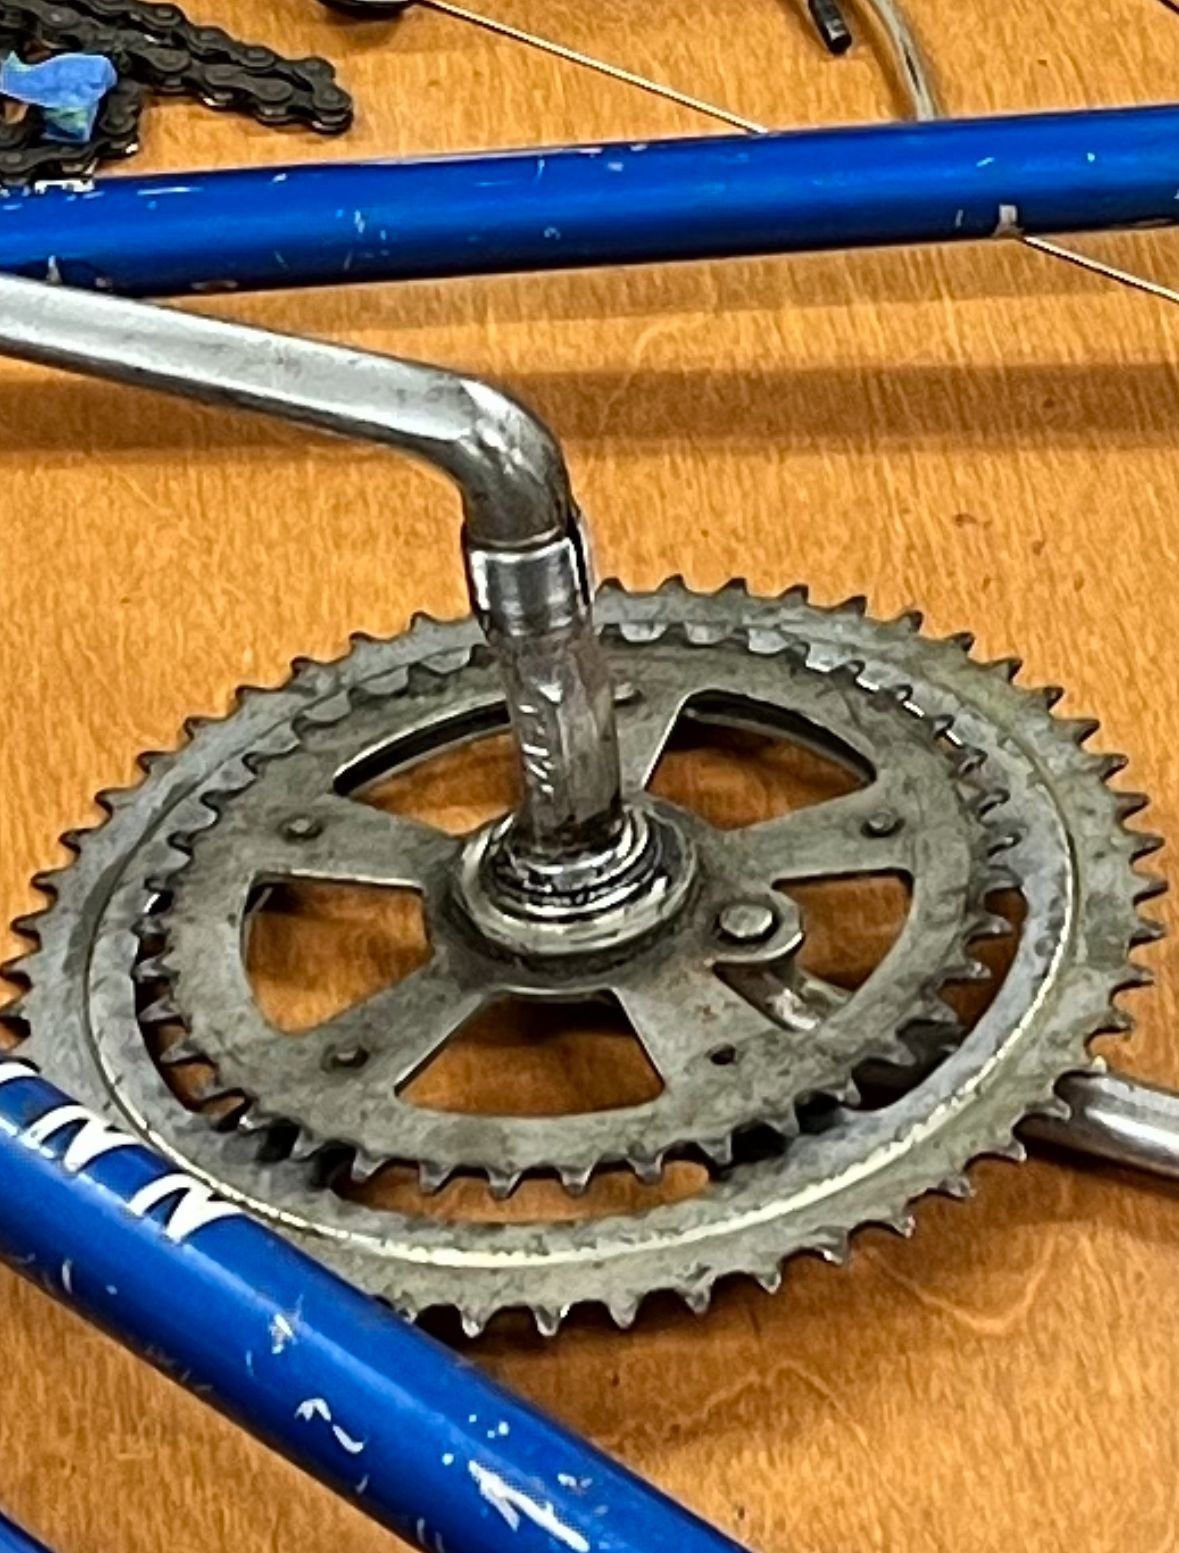
Hi SS group.. I’m attempting my first single speed conversion on a 1977 Schwinn Traveler and need help figuring out my bottom bracket/crank situation. I want to get a more modern SS crank around 44T or so but not sure what to do about the BB. Attached are some pictures of my current crank and BB, which is just smoothed cups for the bearings. I assume I need to remove and replace with a modern retrofit BB but not sure?
Any guidance is greatly appreciated!

Any guidance is greatly appreciated!
 06-24-24 | 10:55 AM
#2

Senior Member


Joined: May 2013
Posts: 2,643
Likes: 3,330
From: Greenwood SC USA
Bikes: 2002 Mercian Vincitore, 1982 Mercian Colorado, 1976 Puch Royal X, 1973 Raleigh Competition, 1971 Gitane Tour de France and others
I haven't worked with enough American/Ashtabula bottom brackets to be sure, but I think you need something like this - https://www.danscomp.com/truvativ-am...waAspfEALw_wcB
06-24-24 | 10:11 PM
#3

Sweating in the desert
Joined: Jan 2022
Posts: 1,169
Likes: 1,601
From: Henderson/Las Vegas NV
Bikes: Trek Alpha 3700, GT STS DH, Raleigh Grand Prix, Fisher Montare, Fisher CR-7, Fisher Aquila, Diamondback Sorrento Single Speed BMX Conversion, The Bike Beat Revolution, KHS XC 504R, Giant Warp DS2
maybe something like this...One piece crank to 3 piece square taper.
https://www.amazon.com/Fenix-Cycles-...f&gad_source=1
https://www.amazon.com/Fenix-Cycles-...f&gad_source=1
06-24-24 | 10:55 PM
#4
Broken neck Ken


Joined: Oct 2008
Posts: 5,221
Likes: 3,516
From: Portland, OR
Bikes: Trek Domane SL6 Gen 3, Soma Fog Cutter, Detroit Bikes Sparrow FG, Trek Mt Track XCNimbus MUni
maybe something like this...One piece crank to 3 piece square taper.
https://www.amazon.com/Fenix-Cycles-...f&gad_source=1
https://www.amazon.com/Fenix-Cycles-...f&gad_source=1
Funny thing though. The boat anchor Ashtabula crank lasted twenty years, and the conversion didn't last five. All post apocalypse bikes will have Ashtabula cranks.
06-25-24 | 05:22 AM
#5
Thread Starter
Newbie
Joined: Sep 2022
Posts: 56
Likes: 19
maybe something like this...One piece crank to 3 piece square taper.
https://www.amazon.com/Fenix-Cycles-...f&gad_source=1
https://www.amazon.com/Fenix-Cycles-...f&gad_source=1
06-25-24 | 05:22 AM
#6
Thread Starter
Newbie
Joined: Sep 2022
Posts: 56
Likes: 19
06-25-24 | 09:45 AM
#7

Senior Member
Joined: Aug 2015
Posts: 814
Likes: 663
From: Delaware Sea Shore
Bikes: There is always room for one more.
I haven't worked with enough American/Ashtabula bottom brackets to be sure, but I think you need something like this - https://www.danscomp.com/truvativ-am...waAspfEALw_wcB
__________________
Don
Don
Last edited by GeezyRider; 06-25-24 at 09:52 AM.
06-25-24 | 09:54 AM
#8
Thread Starter
Newbie
Joined: Sep 2022
Posts: 56
Likes: 19
06-25-24 | 10:04 AM
#9
Senior Member
Joined: Aug 2015
Posts: 814
Likes: 663
From: Delaware Sea Shore
Bikes: There is always room for one more.
06-25-24 | 10:13 AM
#10
Senior Member
Joined: Aug 2015
Posts: 814
Likes: 663
From: Delaware Sea Shore
Bikes: There is always room for one more.
Also, a quick tip for installing the adapter:
1. Lube the bottom bracket shell and press both sides of of the adapter into the shell.
2. Install the drive side portion of the bottom bracket.
3. Once the drive side of the bottom bracket is snug, continue turning it with your bottom bracket tool until the holes for the fastening bolts line up with the holes in non-drive side adapter.
This is easiest way I have found to line up the holes for the adapter bolts.
__________________
Don
Don
06-25-24 | 10:54 AM
#11
Thread Starter
Newbie
Joined: Sep 2022
Posts: 56
Likes: 19
Originally Posted by GeezyRider;[url=tel:23277853
23277853[/url]]Also, a quick tip for installing the adapter:
1. Lube the bottom bracket shell and press both sides of of the adapter into the shell.
2. Install the drive side portion of the bottom bracket.
3. Once the drive side of the bottom bracket is snug, continue turning it with your bottom bracket tool until the holes for the fastening bolts line up with the holes in non-drive side adapter.
This is easiest way I have found to line up the holes for the adapter bolts.