


My "I'm building a home grown xtra-cycle!" thread.
 07-19-09, 07:22 PM
#1
Senior Member
Thread Starter
Join Date: Mar 2009
Location: Boise, ID.
Posts: 1,251
Mentioned: 0 Post(s)
Tagged: 1 Thread(s)
Quoted: 2 Post(s)
Likes: 0
Liked 1 Time
in
1 Post
My "I'm building a home grown xtra-cycle!" thread.
So I've been bitten by the xtra-cycle bug, and have decided I should build one.
The main bike frame is a 90's era Skykomish Marble Point. It will be providing the drivetrain as well. (Shimano Biopace triple rings and a 7 speed rear cassette). I found it in a thrift store and have added fenders, 1.5 Panaracer slicks, a new saddle, powergrips, and a rack to it since. I have a nashbar trekking bar en route. The goal is to include all these new parts in the xtra cycle build as well.


I have a friend who is going to be doing the welding for me @ his shop. I'm hoping to find another rack and use a skateboard deck for the cargo mounting.
The stopping point I'm at now is deciding what to use for the rear triangle. I fished a cheapo AMX FS bike out of the scrap yard. My issue with that is it doesn't have a dropout for the RD. (The included one was mounted on the axle).


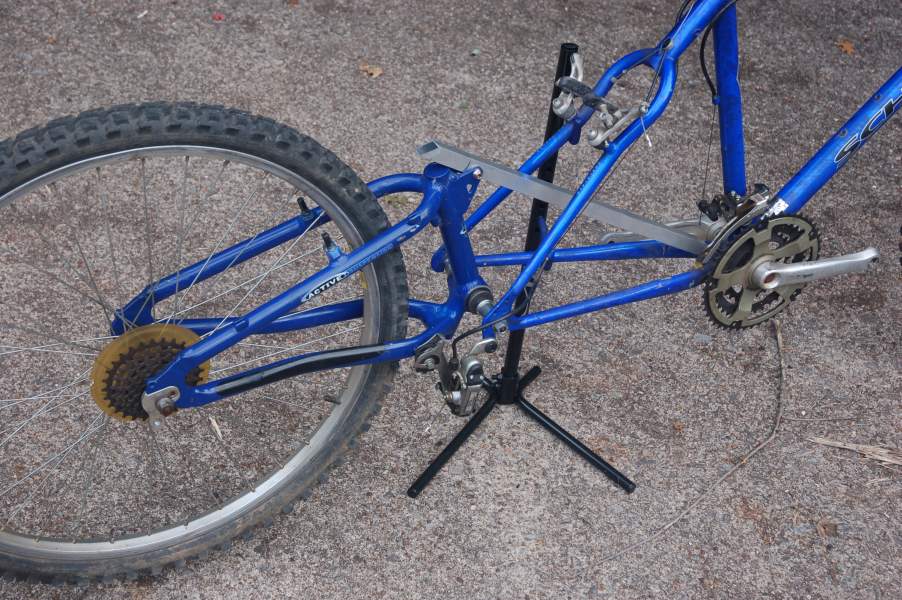
Option two - the one I'm kinda leaning towards is hacking apart this Schwinn Ranger which has dual rear eyelets and the appropriate RD drop.


Which one would you guys suggest I use?
That leads me to this question. I notice most people are bolting the BB of bike B to the Rear dropouts of Bike A. Is this the best way? I'd prefer it be welded, but need to talk to my friend to see how we can succesfully fill the gap once I remove the BB from bike B.
I'll keep this updated as it progresses.
The main bike frame is a 90's era Skykomish Marble Point. It will be providing the drivetrain as well. (Shimano Biopace triple rings and a 7 speed rear cassette). I found it in a thrift store and have added fenders, 1.5 Panaracer slicks, a new saddle, powergrips, and a rack to it since. I have a nashbar trekking bar en route. The goal is to include all these new parts in the xtra cycle build as well.
I have a friend who is going to be doing the welding for me @ his shop. I'm hoping to find another rack and use a skateboard deck for the cargo mounting.
The stopping point I'm at now is deciding what to use for the rear triangle. I fished a cheapo AMX FS bike out of the scrap yard. My issue with that is it doesn't have a dropout for the RD. (The included one was mounted on the axle).
Option two - the one I'm kinda leaning towards is hacking apart this Schwinn Ranger which has dual rear eyelets and the appropriate RD drop.
Which one would you guys suggest I use?
That leads me to this question. I notice most people are bolting the BB of bike B to the Rear dropouts of Bike A. Is this the best way? I'd prefer it be welded, but need to talk to my friend to see how we can succesfully fill the gap once I remove the BB from bike B.
I'll keep this updated as it progresses.
Last edited by corkscrew; 07-19-09 at 07:25 PM. Reason: Added pictures.
 07-19-09, 07:36 PM
#2


Bicycle Repair Man !!!


I used the rear triangle from a CCM FS that had vertical drops and a derailer hangar, double racks, a skateboard deck, and bolted the assembly with an intention to weld it but that was not really needed.
Using a hard tail frame (ie. Schwinn) would probably require the use of a torch as it does not have the ready made mounting points the FS triangle does.
The bike has gone a few thousand miles with no issues save for a broken plastic fender hangar and has carried some immense loads and done some decent towing as well.
07-19-09, 07:54 PM
#3
Senior Member
Thread Starter
Join Date: Mar 2009
Location: Boise, ID.
Posts: 1,251
Mentioned: 0 Post(s)
Tagged: 1 Thread(s)
Quoted: 2 Post(s)
Likes: 0
Liked 1 Time
in
1 Post
You've got a nice build there. 
I realize the Schwinn will require welding, I'm ok with that. My friend owns a shop doing vehicular mods (installing wheel chair lifts, fabricating random ideas, etc). Hes offered me a few hours of his time for a 12 pack of his favorite.
The thoughts are that the Schwinn will provide the rear DR dropout, as well as making it easier to clear the rear fender. Was thinking it might make it easier to level out the racks as well.
That being said I like the way the FS swing arm looks. Is there a viable way to mount a RD hanger to a frame like that? Or some other work around? I don't have the $$ for a IGH and also have to many local hills to go SS.
I realize the Schwinn will require welding, I'm ok with that.
My friend owns a shop doing vehicular mods (installing wheel chair lifts, fabricating random ideas, etc). Hes offered me a few hours of his time for a 12 pack of his favorite. The thoughts are that the Schwinn will provide the rear DR dropout, as well as making it easier to clear the rear fender. Was thinking it might make it easier to level out the racks as well.
That being said I like the way the FS swing arm looks. Is there a viable way to mount a RD hanger to a frame like that? Or some other work around? I don't have the $$ for a IGH and also have to many local hills to go SS.
07-20-09, 04:55 AM
#4
Senior Member

Join Date: Nov 2007
Posts: 3,720
Mentioned: 3 Post(s)
Tagged: 0 Thread(s)
Quoted: 317 Post(s)
Likes: 0
Liked 1 Time
in
1 Post
corkscrew wrote: So I've been bitten by the xtra-cycle bug, and have decided I should build one.
The main bike frame is a 90's era Skykomish Marble Point. It will be providing the drivetrain as well. (Shimano Biopace triple rings and a 7 speed rear cassette). I found it in a thrift store and have added fenders, 1.5 Panaracer slicks, a new saddle, powergrips, and a rack to it since. I have a nashbar trekking bar en route. The goal is to include all these new parts in the xtra cycle build as well.
I have a friend who is going to be doing the welding for me @ his shop. I'm hoping to find another rack and use a skateboard deck for the cargo mounting.
The stopping point I'm at now is deciding what to use for the rear triangle. I fished a cheapo AMX FS bike out of the scrap yard. My issue with that is it doesn't have a dropout for the RD. (The included one was mounted on the axle).
Go for the blue AMX FR one! I made four bikes like this so far, and I would not use anything else. It is supe easy and you can trust it for strenght. The missing rear der hanger is no problem at all. You can buy them cheap online or I can send uou one for free, pm me your adress.
Option two - the one I'm kinda leaning towards is hacking apart this Schwinn Ranger which has dual rear eyelets and the appropriate RD drop.
Which one would you guys suggest I use?
That leads me to this question. I notice most people are bolting the BB of bike B to the Rear dropouts of Bike A. Is this the best way? I'd prefer it be welded, but need to talk to my friend to see how we can succesfully fill the gap once I remove the BB from bike B.
No welding, at least not until you are absolutely sure you`ve got it right and that could take some time. Especially with a der geared bike (I am using a dumpsterfind Nexus7 on my latest build) it is essensial to get the right angel between the front bike and the rear triangle, and it can take some trying and failing to find it. Bolting is good, until you are absolutely sure.
Also If you use a rear triangle with all the eyes for fenders and racks you are still not sure they are in the right place for your new setup, it rarely is.I use the "p-clamp" system for the two racks on my Dogbike2 and I am happy I did, I had to change the setup to put a fatter tyre in there. This winter I am going to have it welded since it has now been properly tested (and this is my fourth build). Keep us updated! Great fun to followa new longtail being borned.
I'll keep this updated as it progresses.[/quote]
07-20-09, 06:04 AM
#5
Senior Member
Join Date: Jun 2009
Posts: 130
Mentioned: 0 Post(s)
Tagged: 0 Thread(s)
Quoted: 3 Post(s)
Likes: 0
Liked 0 Times
in
0 Posts
I hope that description makes sense!
I'd bolt the bar to the main frame first, and then perhaps weld over the joints later on if I felt like it.
Once I find a steel mountain-bike frame of the right size, I'll be making one as well. Good luck!
07-20-09, 09:05 AM
#6
Senior Member
Thread Starter
Join Date: Mar 2009
Location: Boise, ID.
Posts: 1,251
Mentioned: 0 Post(s)
Tagged: 1 Thread(s)
Quoted: 2 Post(s)
Likes: 0
Liked 1 Time
in
1 Post
Go for the blue AMX FR one! I made four bikes like this so far, and I would not use anything else. It is supe easy and you can trust it for strenght. The missing rear der hanger is no problem at all. You can buy them cheap online or I can send uou one for free, pm me your adress.
No welding, at least not until you are absolutely sure you`ve got it right and that could take some time. Especially with a der geared bike (I am using a dumpsterfind Nexus7 on my latest build) it is essensial to get the right angel between the front bike and the rear triangle, and it can take some trying and failing to find it. Bolting is good, until you are absolutely sure.
Also If you use a rear triangle with all the eyes for fenders and racks you are still not sure they are in the right place for your new setup, it rarely is.I use the "p-clamp" system for the two racks on my Dogbike2 and I am happy I did, I had to change the setup to put a fatter tyre in there. This winter I am going to have it welded since it has now been properly tested (and this is my fourth build). Keep us updated! Great fun to followa new longtail being borned.
Nice work on the Dogbike btw! Also nice score on the dumpster nexus 7. I really need to start scouring more dumpsters. (Although all the bikes involved in this were either thrift, dumpster or scrap yard finds). I am starting to like the AMX swing more with everytime I see the pictures. If that RD Hanger works out I'll go that route.
For test fitting, whats the easiest way to bolt the AMX BB to the Skykomish dropouts? The AMX BB spindle isn't long enough, and doesn't use screw-in style bolts, rather it looks like it locked down the cranks with nuts. Just curious so I can properly test fit things.
On the racks - I figured they wouldn't perfectly line up, but thought a frame triangle of similar size would make it easier. If I can't find a "free" rack to use I'll order an adjustable height one to make up the difference.
I was planning to remove the BB from BB shell on my rear triangle, and then put a length of ~10mm bar through the BB shell, perpendicular to the rest of the frame (i.e. so the bar is lying just like the BB spindle once was). I'd bring it into contact with the top of the BB shell (still on the inside face of the BB shell), and weld it in place. Then that bar can fix into the rear dropouts of the main bike frame.
Thanks for the help guys - I'll re-grease and reinstall the skykomish fork tonight and start test fitting more options with the AMX swing arm.
07-20-09, 10:23 AM
#7
Senior Member
Join Date: Jun 2009
Posts: 130
Mentioned: 0 Post(s)
Tagged: 0 Thread(s)
Quoted: 3 Post(s)
Likes: 0
Liked 0 Times
in
0 Posts
Both frames pivot about their wheels, and they can be raised or lowered as required:
Even once they're bolted together, you'll be able to move that joint. The final position is set when you fix the bar from the top of the rear triangle over to the main frame (near its BB). That's what stops the whole thing flexing about the rear-triangle-BB/main-bike-dropout, of course.
To retain proper angles on the main bike, it's rear-droupts need to be at the height they would have been if they were holding a wheel, i.e. a height equal to the radius of wheel+tyre that you're using on the front. You'll have to adjust the joint between the two frame to acheive this, and then use a support bar (as mentioned above) of the right length to set that position.
Sorry if that was all obvious - but anyway - no, using something other than the existing spindles in the BB of the rear triangle, to connect the rear triangle to the main frame, shouldn't be a problem. At least I think so!
07-20-09, 03:16 PM
#8
Senior Member
Join Date: Nov 2007
Posts: 3,720
Mentioned: 3 Post(s)
Tagged: 0 Thread(s)
Quoted: 317 Post(s)
Likes: 0
Liked 1 Time
in
1 Post
No... or rather, that's just not an issue. YOU make the "new BB" (on the rear triangle) at the same height as the dropouts on the main bike, when you bolt them together.
Both frames pivot about their wheels, and they can be raised or lowered as required:

Even once they're bolted together, you'll be able to move that joint. The final position is set when you fix the bar from the top of the rear triangle over to the main frame (near its BB). That's what stops the whole thing flexing about the rear-triangle-BB/main-bike-dropout, of course.
To retain proper angles on the main bike, it's rear-droupts need to be at the height they would have been if they were holding a wheel, i.e. a height equal to the radius of wheel+tyre that you're using on the front. You'll have to adjust the joint between the two frame to acheive this, and then use a support bar (as mentioned above) of the right length to set that position.
Sorry if that was all obvious - but anyway - no, using something other than the existing spindles in the BB of the rear triangle, to connect the rear triangle to the main frame, shouldn't be a problem. At least I think so!
Both frames pivot about their wheels, and they can be raised or lowered as required:
Even once they're bolted together, you'll be able to move that joint. The final position is set when you fix the bar from the top of the rear triangle over to the main frame (near its BB). That's what stops the whole thing flexing about the rear-triangle-BB/main-bike-dropout, of course.
To retain proper angles on the main bike, it's rear-droupts need to be at the height they would have been if they were holding a wheel, i.e. a height equal to the radius of wheel+tyre that you're using on the front. You'll have to adjust the joint between the two frame to acheive this, and then use a support bar (as mentioned above) of the right length to set that position.
Sorry if that was all obvious - but anyway - no, using something other than the existing spindles in the BB of the rear triangle, to connect the rear triangle to the main frame, shouldn't be a problem. At least I think so!
Some peopel use a steel flatbar from a cheapo MTB for this. I like to use the square (rectangular) tubing that is used on he
older roof racks for cars (Thule and others). They are plentiful in the dumpsters around here.
Last edited by badmother; 07-20-09 at 03:17 PM. Reason: spelling
07-20-09, 03:58 PM
#9
Senior Member
Join Date: Nov 2007
Posts: 3,720
Mentioned: 3 Post(s)
Tagged: 0 Thread(s)
Quoted: 317 Post(s)
Likes: 0
Liked 1 Time
in
1 Post
I am lucky to find great stuff in the dumpsters. Using 3 different 7 gears IGH`s at the moment and keeping 2 5 speed ones as spares plus plenty I gave away.
I take it the blue triangle has got a BB with a loose axel plus bearrings and cups on each side. Keep the cups where they are (ditch the rest). Put the rod (or axel) trough the holes where the BB axel used to go. Try to find a small piece of tube to fit between the axel and cups (to fill up most of the free space. Cut the tube (but not the axel) flush with the innside of the rear dropouts of the red bike (or flush with the outside of the BB housing of the blue bike, the next step will tell you). I`we used a piece of curtain rods from IKEA and similar stuff.
If you now insert the whole thing into its place in the rear drops of the red bike you`ll see that you can not thighten it down yet becouse there is space between the blue BB housing and the red dropouts. What I normally do here is to cut two similar pieces (approx 3 cms) off a alu MTB flat bar or similar tubing. (The curtain rod from the BB housing need to go innside these pieces. If that is not possible cut the curtain rod flush with the outside of the BB.) You need to be wey accurate when measuring the size needed, but you can use some washers or similar to adjust if you cut too short. Thread the pieces described onto the axel, one on each side of the blue BB. Put a washer on the outside of the red dropouts, one on each side and thighten with the nuts. Make sure you keep the axel sentered innside the tubes and spacers. You might want to use some aditional plastic tubing innside the alu handlebar and curtain rod spacers or maybe some body filling or epoxy to keep it in place. Nothing strong is needed, look for something that is not heavy.
Also if you make some sort of easy bolt on solution where the rod from the BB connects to the top of the blue triangle you can disconnect there plus at the red dropouts and thereby have a easy way to make it shorter for transport or storage. One more good reason for bolting instead of welding. If you disconnect often you need a quick release for the cabels. You can buy or make that.
A lot of writing and no pix, but I hope you get what I mean. Thee is quite a lot of pix in the sticky and different longtail threads if you look around. Looking forward to seeing the result.
Last edited by badmother; 07-20-09 at 04:10 PM.
07-20-09, 04:06 PM
#10
Bicycle Repair Man !!!
The rear of my longbike uses it's bottom bracket spindle to mount itself to the rear dropouts of the lead bike... it was a symmetrical spindle so there was no offset to worry about and it fit perfectly.
Both bikes have vertical dropouts.
My centre bar is 1 inch steel pipe that is bolted in place.
I opted to lower things a little to get a better chain line, bring the top tube down a little so that the bike would accommodate more riders, and it creates a slacker head tube and frame angle which makes the handling very neutral.
07-20-09, 04:11 PM
#11
Senior Member
Join Date: Jun 2009
Posts: 130
Mentioned: 0 Post(s)
Tagged: 0 Thread(s)
Quoted: 3 Post(s)
Likes: 0
Liked 0 Times
in
0 Posts
Truth, but it is only final if you weld it. I often end up trying different lenghts on this bar. Therefor I suggest you use a piece of scrap tubing or maybe also wood for a start- until it looks good and the shifting is fine, without the chain scraping against the fame.
Some peopel use a steel flatbar from a cheapo MTB for this. I like to use the square (rectangular) tubing that is used on he
older roof racks for cars (Thule and others). They are plentiful in the dumpsters around here.
Some peopel use a steel flatbar from a cheapo MTB for this. I like to use the square (rectangular) tubing that is used on he
older roof racks for cars (Thule and others). They are plentiful in the dumpsters around here.
I was planning to use some tubing from a bike frame as the final material for the bar - since I have plenty of that around.
The post above about modifying the geometry to suit is quite interesting as well.
07-20-09, 10:08 PM
#12
Senior Member
Thread Starter
Join Date: Mar 2009
Location: Boise, ID.
Posts: 1,251
Mentioned: 0 Post(s)
Tagged: 1 Thread(s)
Quoted: 2 Post(s)
Likes: 0
Liked 1 Time
in
1 Post
Thanks for the info everyone. I didn't make a lot of progress tonight as I've come down with a summer cold.  Ended up napping the evening away!
Only thing to report is I have the AMX (Bike B) BB soaking in PB Blaster right now, as the wrench flats didn't want to cooperate. I have the wheels from the AMX sitting around doing nothing, so I'll strip down the rear one and use its axel in the dropouts of Bike A. Also have the handlebar from Bike A that I can hack up to space out the BB in the dropouts.
My friend said he had plenty of extra metal stock we can use, although he suggested we just cut up the rest of whatever frame ended up being the new rear triangle. Looks like I saved that china made schwinn from the chopping block this time.
I perused the hell out of the homegrown longbike thread before I started this one! Lots of great looking bikes but none of them are real clear on how they set up the BB/Rear dropout connection.
Ended up napping the evening away!Only thing to report is I have the AMX (Bike B) BB soaking in PB Blaster right now, as the wrench flats didn't want to cooperate. I have the wheels from the AMX sitting around doing nothing, so I'll strip down the rear one and use its axel in the dropouts of Bike A. Also have the handlebar from Bike A that I can hack up to space out the BB in the dropouts.
My friend said he had plenty of extra metal stock we can use, although he suggested we just cut up the rest of whatever frame ended up being the new rear triangle. Looks like I saved that china made schwinn from the chopping block this time.
I perused the hell out of the homegrown longbike thread before I started this one! Lots of great looking bikes but none of them are real clear on how they set up the BB/Rear dropout connection.
07-21-09, 12:26 AM
#13
Senior Member
Join Date: Nov 2007
Posts: 3,720
Mentioned: 3 Post(s)
Tagged: 0 Thread(s)
Quoted: 317 Post(s)
Likes: 0
Liked 1 Time
in
1 Post


Actually I think this thread is very good so far so we should all make an effort to make it looong and goood so it can serve as a "How to" thread for the future.
If the blue bikes BB is killing you you could look into sixty`s solution with the BB axel. Not so easely detatchable but should hold up well enough. Did this first on Dogbike(1) but did not like the coldsetting of the alu front frame.
Last edited by badmother; 07-21-09 at 12:29 AM.
07-21-09, 09:55 PM
#14
Senior Member
Thread Starter
Join Date: Mar 2009
Location: Boise, ID.
Posts: 1,251
Mentioned: 0 Post(s)
Tagged: 1 Thread(s)
Quoted: 2 Post(s)
Likes: 0
Liked 1 Time
in
1 Post
I got tested for that actually. Thankfully it came back negative.  Just a regular sinus pressure type cold.
I didn't make much progress tonight, stupid naps. I did get the AMX BB apart though, even though it took a pipe wrench, a hammer/screwdriver combo, and a set of vise grips to get it open. I also stripped down the axel from the AMX's rear wheel - looks like it should be just about what I need. So I've got those parts soaking in degreaser right now, along with the Skykomish's headset parts. I'm hoping to re-install the fork tomorrow, and start mocking up how I want this to come together.
Thankfully it came back negative. Just a regular sinus pressure type cold. I did get the AMX BB apart though, even though it took a pipe wrench, a hammer/screwdriver combo, and a set of vise grips to get it open. I also stripped down the axel from the AMX's rear wheel - looks like it should be just about what I need. So I've got those parts soaking in degreaser right now, along with the Skykomish's headset parts. I'm hoping to re-install the fork tomorrow, and start mocking up how I want this to come together.
07-30-09, 12:09 AM
#15
Senior Member
Thread Starter
Join Date: Mar 2009
Location: Boise, ID.
Posts: 1,251
Mentioned: 0 Post(s)
Tagged: 1 Thread(s)
Quoted: 2 Post(s)
Likes: 0
Liked 1 Time
in
1 Post
!
Update time!
I've played around with the frame(s) a bit, and finally took the bits down my friends shop tonight.
Here is a shot of me playing with angles.

Once at the shop we discussed options. Turns out they don't have a TIG welder, and thus didn't feel up to the task of welding my cho-moly bikes. We ended up bolting things together. The BB of the donor swing arm now contains a stripped down rear axle. We used some bits of metal tubing to center up the BB in the rear dropouts, and have urethane bushings filling the spare space. There is an additional metal tubing spacer inside the BB that goes between the two bushings.

For the new support beam, we used some 1 inch thin wall square tubing. Its bolted to the swing arm with a grade 8 bolt and lock nut. It connects to the red bike in the area between the chain stay bridge and BB using two large washers. We cut custom spacers to fill the space between the top washer and the new bar, as well as to square up the bolt when it came out the top bar. Its also grade 8 hardware. Ted tack welded the top washer and first spacer together, so its solid but can still be removed if I need to change something later.


Next we ground off a few unwanted bits. Mainly the rear brake mounts on the red bike, along with the center mounted tube that fed them. We also took off the points on the swing arm that used to mount it to its old frame.

Ted gave me the address/number of the shop that does his powder coating, so I'm hoping to change up the color scheme as soon as this weekend. Also the nashbar trekking bar came in, and Badmother was kind enough to provide a rear derailuer hanger. THANK YOU! All I should need after the powder coating is new cables and chain(s), another rack and a skateboard deck.
Here is how it sits now in the back patio. I'll be stripping it down tomorrow night to take to the powder coater.

I've played around with the frame(s) a bit, and finally took the bits down my friends shop tonight.
Here is a shot of me playing with angles.
Once at the shop we discussed options. Turns out they don't have a TIG welder, and thus didn't feel up to the task of welding my cho-moly bikes. We ended up bolting things together. The BB of the donor swing arm now contains a stripped down rear axle. We used some bits of metal tubing to center up the BB in the rear dropouts, and have urethane bushings filling the spare space. There is an additional metal tubing spacer inside the BB that goes between the two bushings.
For the new support beam, we used some 1 inch thin wall square tubing. Its bolted to the swing arm with a grade 8 bolt and lock nut. It connects to the red bike in the area between the chain stay bridge and BB using two large washers. We cut custom spacers to fill the space between the top washer and the new bar, as well as to square up the bolt when it came out the top bar. Its also grade 8 hardware. Ted tack welded the top washer and first spacer together, so its solid but can still be removed if I need to change something later.
Next we ground off a few unwanted bits. Mainly the rear brake mounts on the red bike, along with the center mounted tube that fed them. We also took off the points on the swing arm that used to mount it to its old frame.
Ted gave me the address/number of the shop that does his powder coating, so I'm hoping to change up the color scheme as soon as this weekend. Also the nashbar trekking bar came in, and Badmother was kind enough to provide a rear derailuer hanger.
THANK YOU! All I should need after the powder coating is new cables and chain(s), another rack and a skateboard deck. Here is how it sits now in the back patio. I'll be stripping it down tomorrow night to take to the powder coater.
07-30-09, 08:00 AM
#16
Steel Member

Join Date: Jul 2008
Location: Knoxville, TN
Posts: 1,427
Bikes: N + 1
Mentioned: 1 Post(s)
Tagged: 0 Thread(s)
Quoted: 7 Post(s)
Likes: 0
Liked 1 Time
in
1 Post
Interesting progress to watch. That lower point being in compression, I used a bolt through the square tubing, nylon lock nut and a shock absorber (auto) top washer beneath the chainstays to hold the extra member in place. I drilled/threaded the rear suspsension pivot from the rear triangle I used and threaded it to a spare rear axle I had laying around...ultimately, it turned out clean and didn't require welding...though I'm thinking of welding up a frame to make a rear rack that's more like what you see on the Kona Ute or the Free Radical kits. Not trying to hijack the thread here, just adding a little more data...which I hope is helpful. Here are some pics..

07-30-09, 08:34 AM
#17
Senior Member
Thread Starter
Join Date: Mar 2009
Location: Boise, ID.
Posts: 1,251
Mentioned: 0 Post(s)
Tagged: 1 Thread(s)
Quoted: 2 Post(s)
Likes: 0
Liked 1 Time
in
1 Post
Really mine didn't "require" welding, but it certainly isn't a bad thing to have. The welded bits are the lower end of the square tube, welded to the washer with the angled spacer between. It really helped fill in some of the gaps since the spacer was less than perfect. (Hard to cut tubing that thin
).I'll try and post some better pics of the detailed areas later.
07-30-09, 09:07 AM
#18
Steel Member
Join Date: Jul 2008
Location: Knoxville, TN
Posts: 1,427
Bikes: N + 1
Mentioned: 1 Post(s)
Tagged: 0 Thread(s)
Quoted: 7 Post(s)
Likes: 0
Liked 1 Time
in
1 Post
I'd guess a 'main' frame that has a platform & threaded insert for a kick stand would be the easiest solution, but I found a freebie that was a little "higher end", so I worked with what I had.
07-30-09, 09:46 AM
#20
Senior Member
Thread Starter
Join Date: Mar 2009
Location: Boise, ID.
Posts: 1,251
Mentioned: 0 Post(s)
Tagged: 1 Thread(s)
Quoted: 2 Post(s)
Likes: 0
Liked 1 Time
in
1 Post
Ted (the guy helping me out last night) wished the same thing for my red bike. I'm glad I'm using a main bike that is at least of decent quality though. (Tange 5 tubing).
07-31-09, 08:30 AM
#21
Senior Member
Join Date: Nov 2007
Posts: 3,720
Mentioned: 3 Post(s)
Tagged: 0 Thread(s)
Quoted: 317 Post(s)
Likes: 0
Liked 1 Time
in
1 Post
Great to see them both looking good so far.
I am thinking of making a 20" longtail, maybe a project for this winter- or before if the inspiration hits me. I like my folders more and more.
I am thinking of making a 20" longtail, maybe a project for this winter- or before if the inspiration hits me. I like my folders more and more.
08-12-09, 12:50 PM
#22
Senior Member
Thread Starter
Join Date: Mar 2009
Location: Boise, ID.
Posts: 1,251
Mentioned: 0 Post(s)
Tagged: 1 Thread(s)
Quoted: 2 Post(s)
Likes: 0
Liked 1 Time
in
1 Post
@ Badmother: Good luck with that build.
Updates: I scrapped taking it to the powder coater due to financial reasons. Figure I can ride it for awhile and once I'm sure I'm happy with it, go and get it done. Ended up sanding down the "midpoint" between the two frames, and painting it with rattle can black primer. Covers all the exposed bits and eases the transition between the two colors.
I get paid tomorrow (yay) which is where the rest of the parts I need are coming in to play. So far I need the new cables, chains, and might need new shifters (have the 7speed triggers taken apart and soaking in pbblaster, hoping they'll work ok when re-assembled). I need a new front derailuer - as my frame no longer has room for the cable pull for a bottom swing one. Also searching for a used rear derailuer to use as a chain guide. I have a few but all of them are cheaper ones that use built in drop out hangers and don't have cages that open.
This leads to the questions:
Brakes: I'm re-using the Skykomish canti-levers. However the AMX bike was set up with V-brakes (no-named cheap variety). Will I be able to use my canti-levers back there? I don't have an appropriate housing stop, which is why I ask. Or should I switch over to new v-brakes and levers?
08-12-09, 01:15 PM
#23
Bicycle Repair Man !!!
Re brakes... I use a canti up front and have a v-brake in the rear because there was no way to mount a matching canti. The stopping power is awesome at both ends and with the canti up front I had no problem installing a front rack and fairly wide fender.
It looks like your bike is coming along very nicely.
It looks like your bike is coming along very nicely.
08-13-09, 02:19 PM
#24
Senior Member
Thread Starter
Join Date: Mar 2009
Location: Boise, ID.
Posts: 1,251
Mentioned: 0 Post(s)
Tagged: 1 Thread(s)
Quoted: 2 Post(s)
Likes: 0
Liked 1 Time
in
1 Post
@Sixty: I take it your running two types of brake levers?
I worked on it last night. Pulled the wider disc-brake style rack off my cannondale, since once the xtra is done it won't be pulling mule duty anymore. Got the racks mounted up level, and the fenders installed.
Ran down to the LBS today and got two SRAM 6/7/8 speed chains and all the cabling and housings I'd need. Debating on if I'm going to re-use the V-brakes from the AMX (chinese made "Power" brand), or drop some more $$ on the entry level avid models @ rei. More $$ = bad, but better brakes w/new pads == good. Hrmmmm. I'll decide by the time I drive home (ugh, "drive").
08-13-09, 05:01 PM
#25
Bicycle Repair Man !!!
My levers are the same... canti levers usually don't have an issue with v brakes but v brake levers have an issue with cantis because of the different pull required of each brake.
A few types of levers are universal because the pull can be adjusted.
I put in a new chain guide tensioner the other night to keep the chain from (lightly)scrubbing on the front chainstay and that is working like a charm.
A few types of levers are universal because the pull can be adjusted.
I put in a new chain guide tensioner the other night to keep the chain from (lightly)scrubbing on the front chainstay and that is working like a charm.