I am in the middle of refinishing a Canopus bike I picked up recently (
http://www.bikeforums.net/showthread...on-Restoration) and I was having to figure out what to do with the artwork. I went to a few places that could make the decals, but in each case I would end up having to pay them to take pictures of the decals and make a digital file. Estimates ranged from 1-2 hours at about $65 an hour. Ouch! While I love the frame, I am reluctant to pay $800 to do a full refinish and graphics. So, I sat down today and figured out how to convert my graphics to digital files and I thought I would share what I learned.
The required components to do this are realtively simple and mostly free. You will need:
A digital camera
Inkscape (free on the web)
MS Paint
You may use other programs, but this is what I used. For the record, this is not a gnats butt detail tutorial, I assume that you already know how to use Windows based programs and can use MS Paint to edit pictures.
You first need to take a picture of your decals. This can be done on the bike, but you have to know that the curve of the tubes will cause it to look different in a flat picture. This can be overcome in two ways, take many pictures from different angles and merge the photos with something like Photoshop, or remove the decals and photograph them on a piece of paper. I opted for option 2. I know that not everyone will have that option, but this way is pretty simple if you can remove the decals. In my case, using the hairdryer method to heat them and remove them worked out well.
Here is my picture of the removed decal. As you can see, it was in rough shape and did not come off pretty. Of the three I did, this was the worst by far. So, I figured it would be the best for a tutorial.

With your image, open it in Inkscape. Inkscape can open most any image, so it is pretty nice. Once opened, you want to trace the image. What you hope for is a nice, clean image with a bunch of contrast. If your image does not have enough contrast, you can adjust in any photo editing software. Play with the brightness and contrast until you have what you need. You may have to play with the photo and test in Inkscape a few times, I had to do this with my down tube decal.
Once opened, you simply need to select the image (important, or nothing will happen), then click on Path/Trace Bitmap.

Simply accept the defaults, and then click on "Ok". After a few moments, you will have a new image overlayed on your picture.
Click on the image and drag it off to the side.

Delete the original picture and you are left with the new vector image.

You will want to drag the vector image back to the wireframe outline in the middle before saving, because it seems to only save what is in the frame. Once aligned, save the new vector image as a .png file. This is a format that both MS Paint and Inkscape open easily. You could try other types, but this has the advantage of working.
Open the .png file in MS Paint and you now can edit your vector file. In my case, with the bunged decal, I had a ton of crap to clean up, but it is better than losing the decal or paying $65/hr to save it, at least IMO.
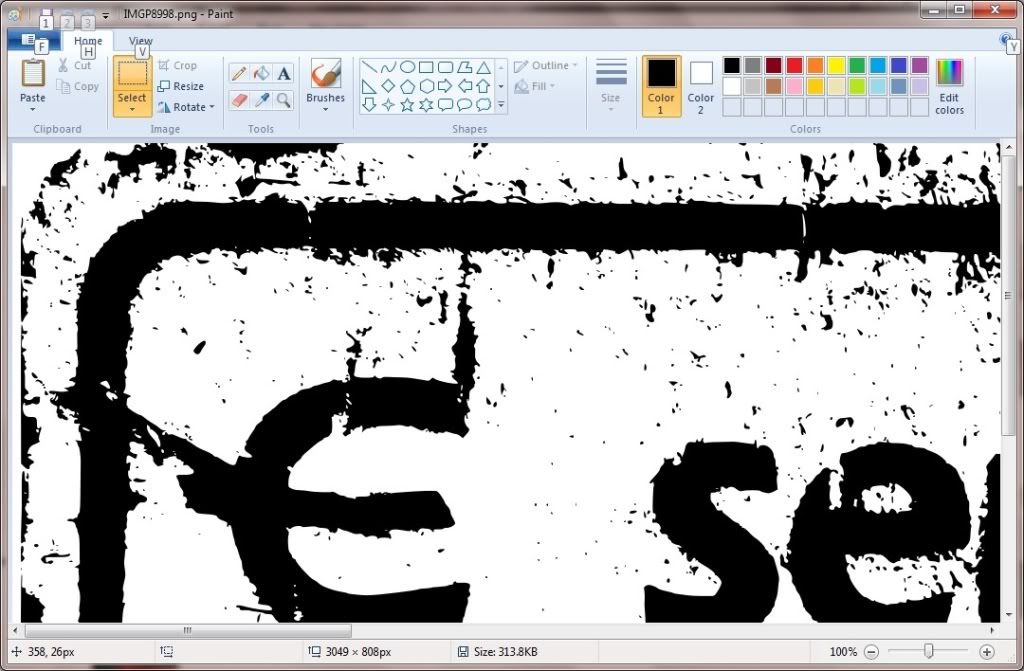
For me, it is easier to zoom in on the picture to clean up.

Don't forget to save often, nothing worse than losing hours of work. Once you are done, if you need to save the file in a different format, you can reopen the file in Inkscape and save it in any format supported by Inlscape (there are a bunch). The people I intend on using to refinish my frame are requesting .eps format.
So, here are the before and after photos.
Decal
Initial vector file

Finished vector file

You can now take it to wherever you want to have it reproduced, or try and print them yourself.
Good luck.