Originally Posted by
miamijim
No 101's for this project. Graduate level wrenching on this one!!!
So, if your like me you've had your share of bike with seatposts that have been tore up from rough seat tubes. In this brief tutorial we'll go over cleaning up a seat tube.
Degrease the inside of the tube. It needs to be very clean!! If it isnt your tools will get gummed up very quickly!!
Now we need to find the rough spots. I marker up a seatpost with sharpie or other suitable fine smelling marker. Insert seatpost and remove. Compare marks on seatpost with the inside of the tube to locate trouble areas.
VERY IMPORTANT: DO NOT twist the post as its inserted and removed. Straight in, straight out.
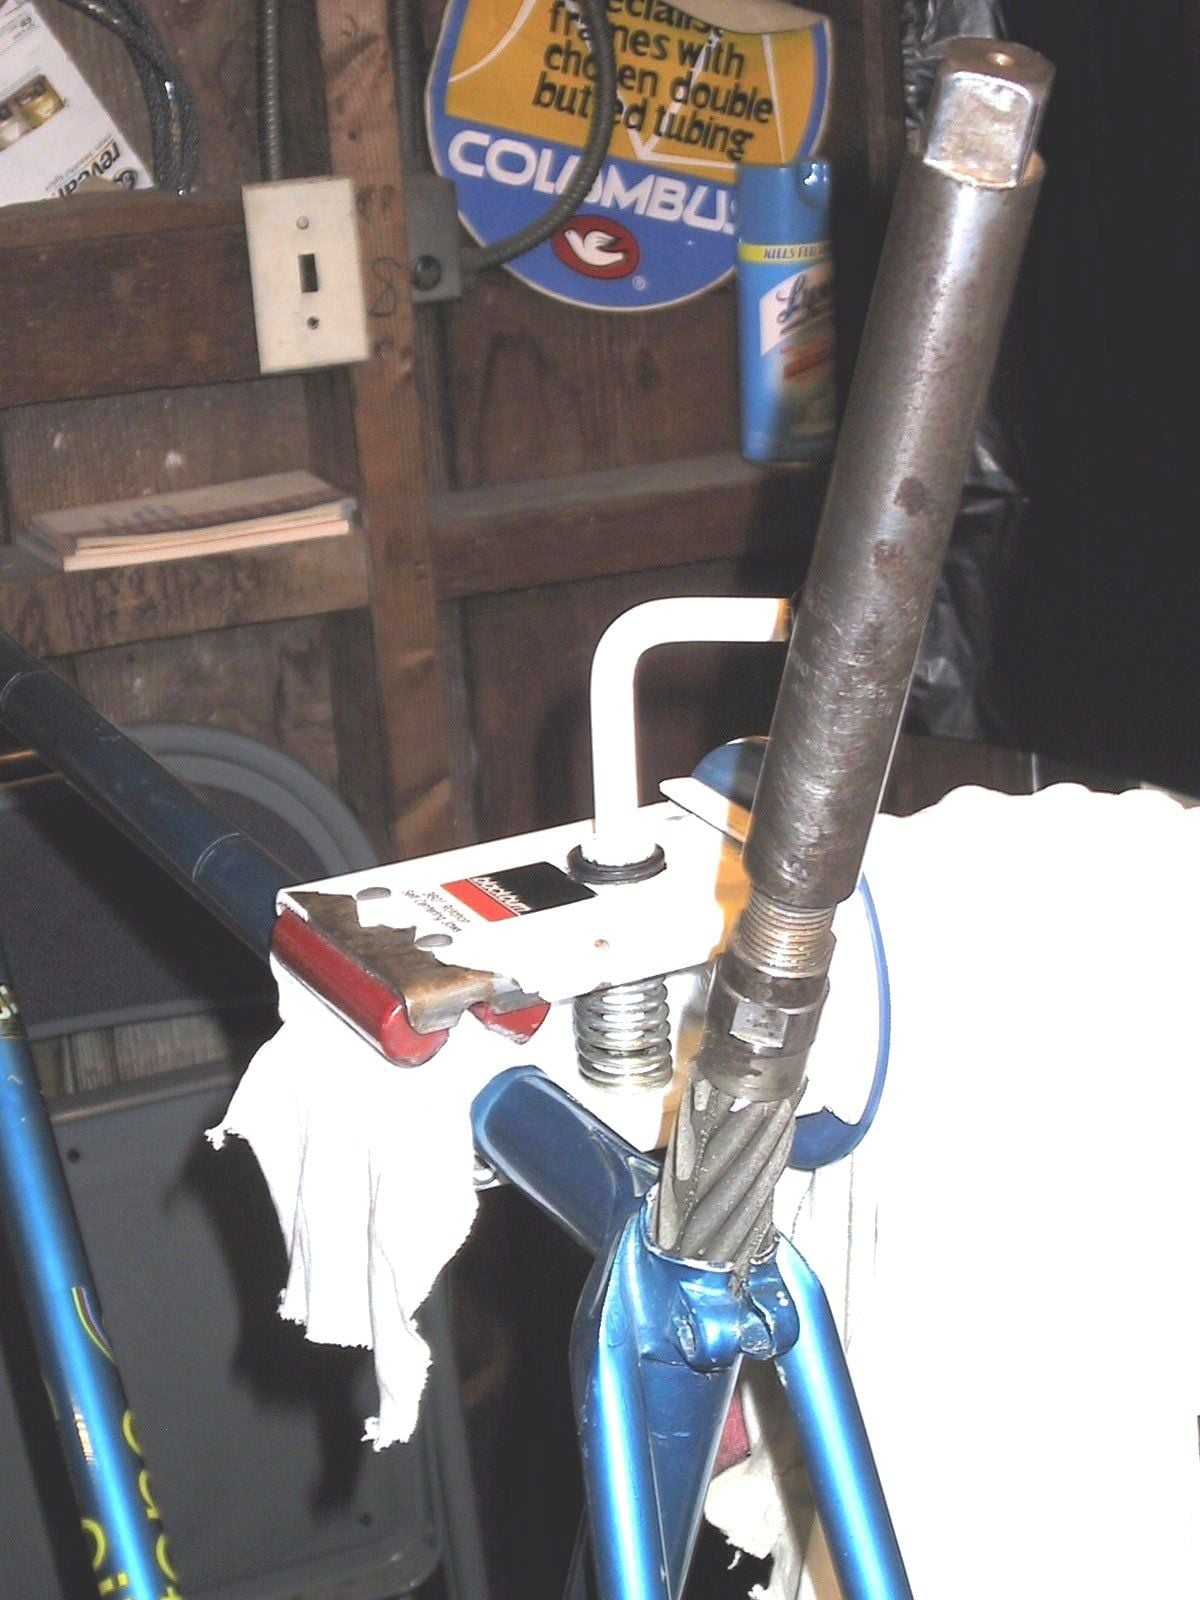
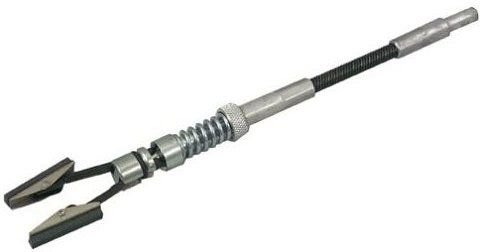
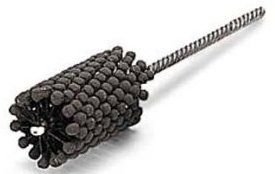
Now we know where the high spots are. I primarily use 2 tools for cleaning up seat tubes, a 'b@stard file' and an automotive brake hone. The b@stard file I have is ~8" long, flat on one side and curved on the other. Its proper name may be a 5/8" b@stard file. Automtive brake hones attach to drill and spin to smooth the inside of calipers re-sealing. There are 2 types, the one like my picture and another with a bunch of small balls. When mine wears out I'll try the ball style.
miamijim, great tutorial.
Here's some additional info that I've posted over the years in regards to these issues.
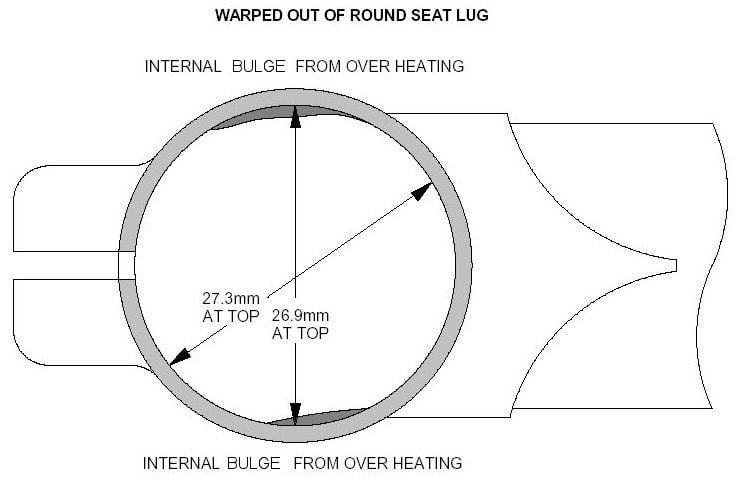
We machined a set of steel mandrels in the common seat post diameters, 26mm to 27.4m, to round out the top of the seat tubes. A great number of bikes and frames came with badly sized seat tubes, including a lot of the most sacred holy Italian marques. (yes, it's sacrilege but true)

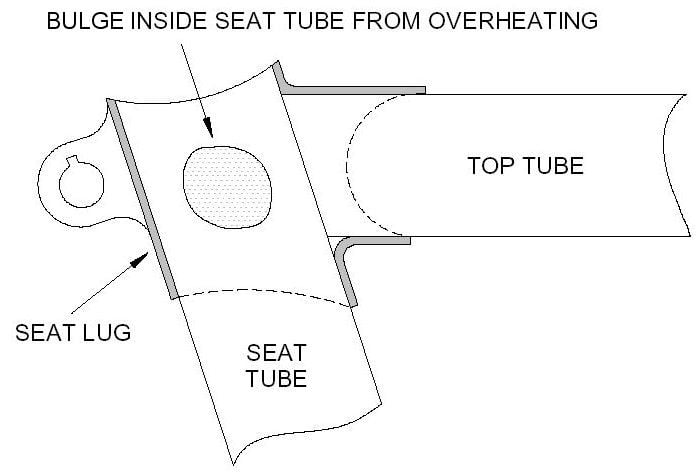
After doing your step 1 recomendation - spreading the "ears" in the lugs, we would check the seat tubes with a mandrel. We found that many seat tubes were not only out of round but had bulges inside from over heating when the seat stays were brazed on. The mandrels removed much of the bulge.
Next we reamed the seat tubes then honed them with an automotive brake cylinder hone. Finally we made sure there were no burrs at the top or inside the seat tubes. I've used a fine tooth Swiss pattern 1/2 round or round files to do this. Fine tooth because the tops of the seat tubes tend to be hard from cooling down too fast and fine tooth files work better on the harder steel..

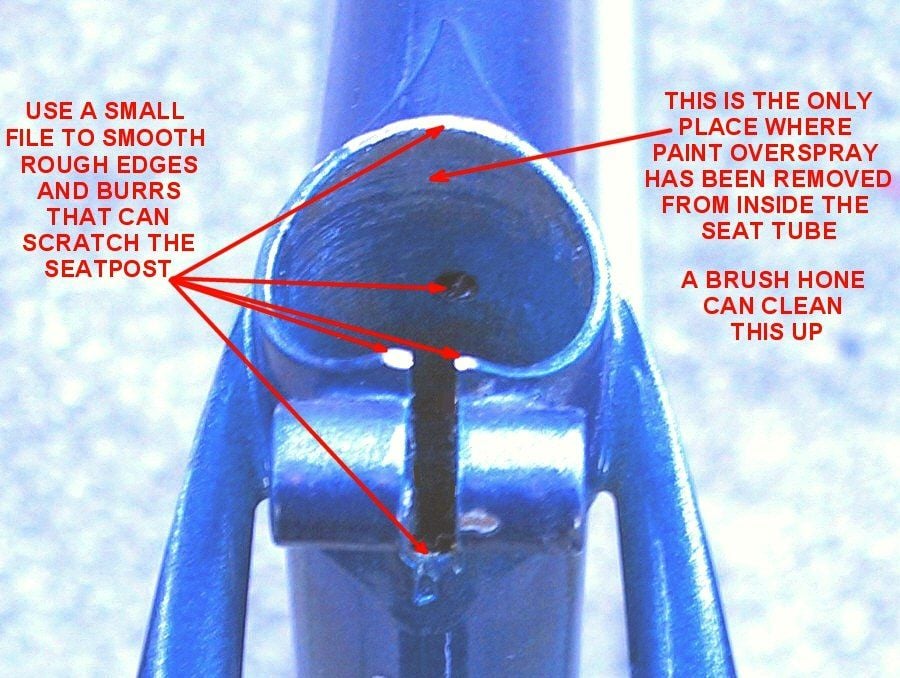
This was an NOS frame. Looks like they may have run an undersized reamer down the seat tube to remove excess paint but not cleaned things up.
I found my 26mm-32mm spiral flute adjustable reamer at a surplus tool shop back in 1975 for $5.

verktyg
