


Hints and tricks thread

 12-24-20 | 06:57 PM
#727
Senior Member


Joined: Nov 2014
Posts: 1,228
Likes: 1,170
From: Saratoga calif.
Bikes: 2 ezip electric bikes, trek 800 antelope, nishiki international, 1948 schwin new world, phillippe french boutique bike
I often repaint bikes. I take off whatever chain stay protector is there if it is chewed up. Most are made of some kind of tape. On the Fuji I just finished I was trying to think of something I could use instead of buying one. looking around the shop I saw some heavy duty duct tape on the wall. This isn't the light weight grey stuff. it is much thicker and sturdier. The Problem was how to cut it to size and shape . this tape sticks aggressively and if you stick it to itself while handling you are finished. What I needed was something I could stick a length of tape to, cut it to a tapered shape so it would fit the tapered chain stay , then be able to peal it off once it was cut. What I found that works is parchment paper, which you can find in the grocery store . it is used in baking. The duct tape sticke to it so it can be cut then easily peals off without loosing its stickiness. It worked great and should be very durable.
update
I now use "gorilla " tape and set it on a clip board, cut it with a razor knife and straight edge, pull it off the board and place on the chain stay.
update
I now use "gorilla " tape and set it on a clip board, cut it with a razor knife and straight edge, pull it off the board and place on the chain stay.
Last edited by capnjonny; 06-25-24 at 09:21 AM.
12-27-20 | 07:25 PM
#728
Senior Member
Joined: Nov 2014
Posts: 1,228
Likes: 1,170
From: Saratoga calif.
Bikes: 2 ezip electric bikes, trek 800 antelope, nishiki international, 1948 schwin new world, phillippe french boutique bike
If you are having trouble removing the plastic covers that hide the crank spindle bolts try squirting some wd40 into the slot then use the edge of a park mini cone wrench as a screw driver to twist the cap off. I don't know how many of those old brittle plastic caps I have ruined before I thought of this. Also, it you have the kind of spindle that takes a bolt instead of a nut there is a type(I think it is shimano ) that takes an Allen key and has a rubber gasket on it . looks great and you don't need to find a plastic cap.
01-03-21 | 08:58 PM
#729
Senior Member
Joined: Jun 2014
Posts: 4,628
Likes: 943
From: Ontario, Canada
Bikes: iele Latina, Miele Suprema, Miele Uno LS, Miele Miele Beta, MMTB, Bianchi Model Unknown, Fiori Venezia, Fiori Napoli, VeloSport Adamas AX
Back in the mid-1980s I made a tool for removing slotted crankarm covers. The tool was made from a T-shape piece that came with rear racks to stop the rack from sliding down the seatstays. It bolted to the front of the rack and t o the rear brake bolt. That tool still resides in my bicycling tool box and still gets used a fair bit.
Cheers
Cheers
01-26-21 | 12:21 AM
#730
Senior Member
Joined: Apr 2012
Posts: 6,016
Likes: 924
From: Nor Cal
Here's a few:
Motor casing to hold tools. Larger one is from a garbage disposal. Not everyone likes this as it magnetizes the tools a bit.
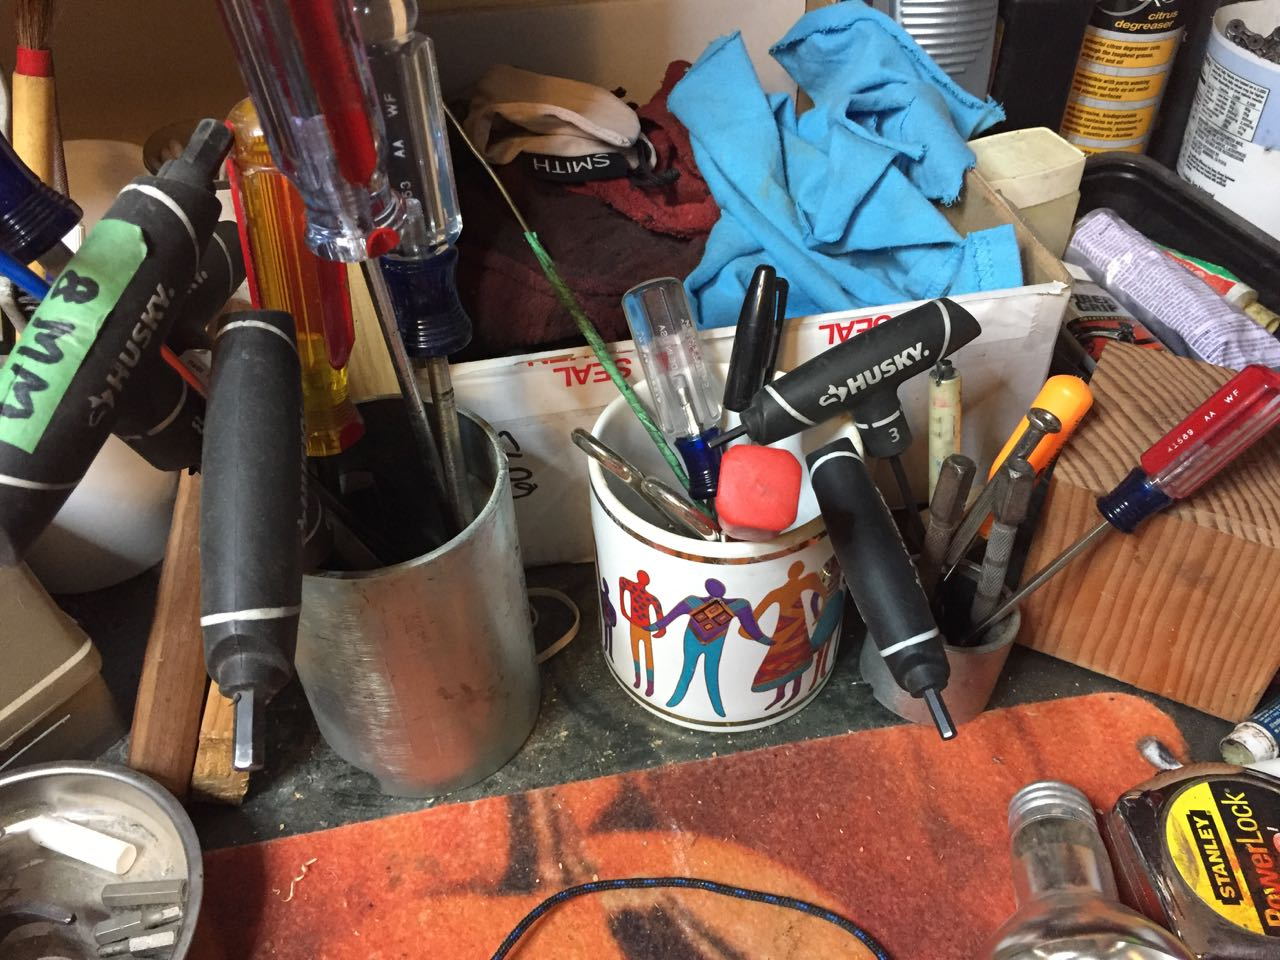
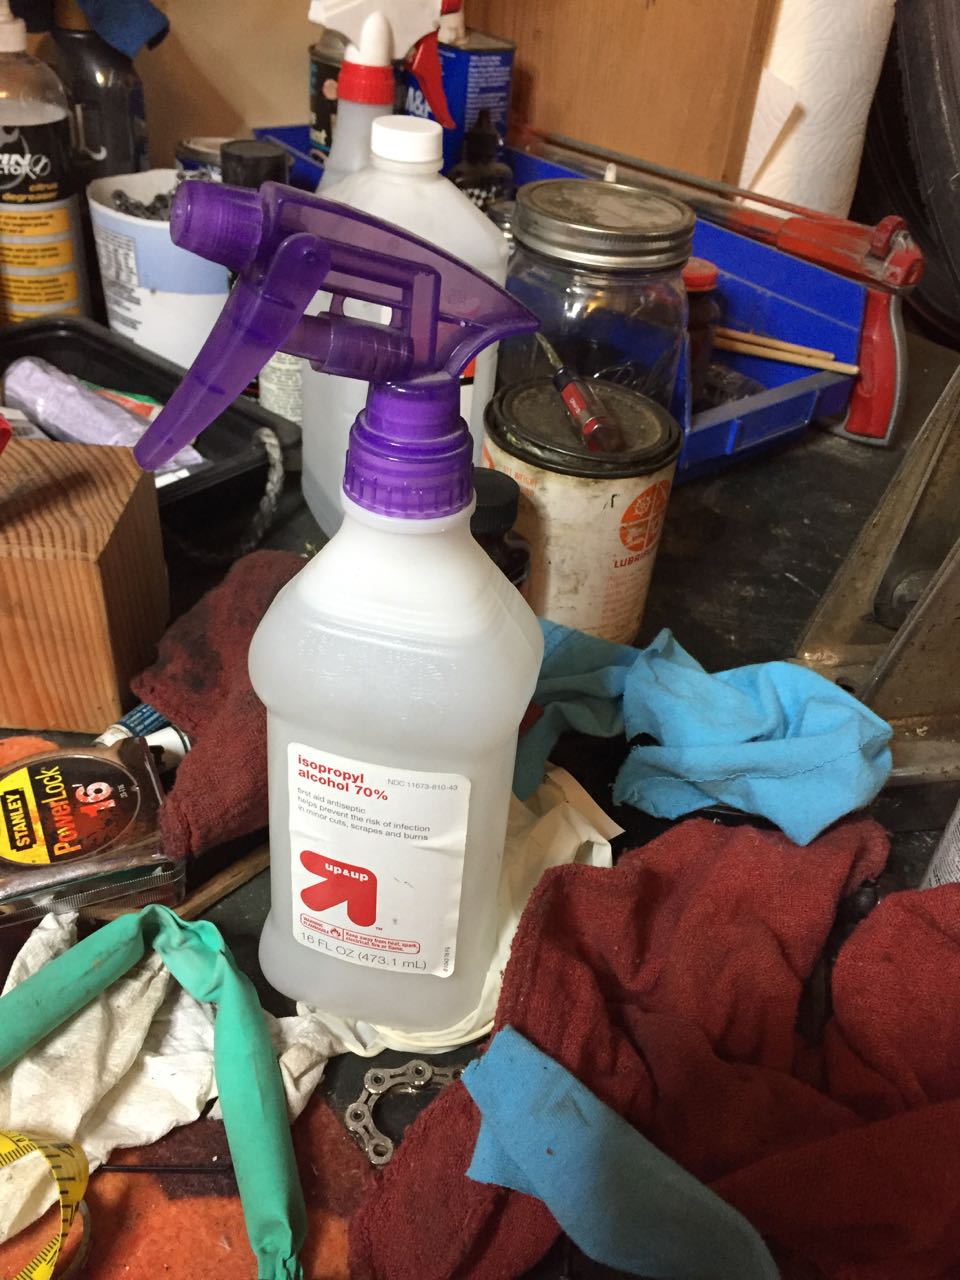
Sprayer head on alcohol bottle for utility cleaning. Threads & sizes are pretty standard.
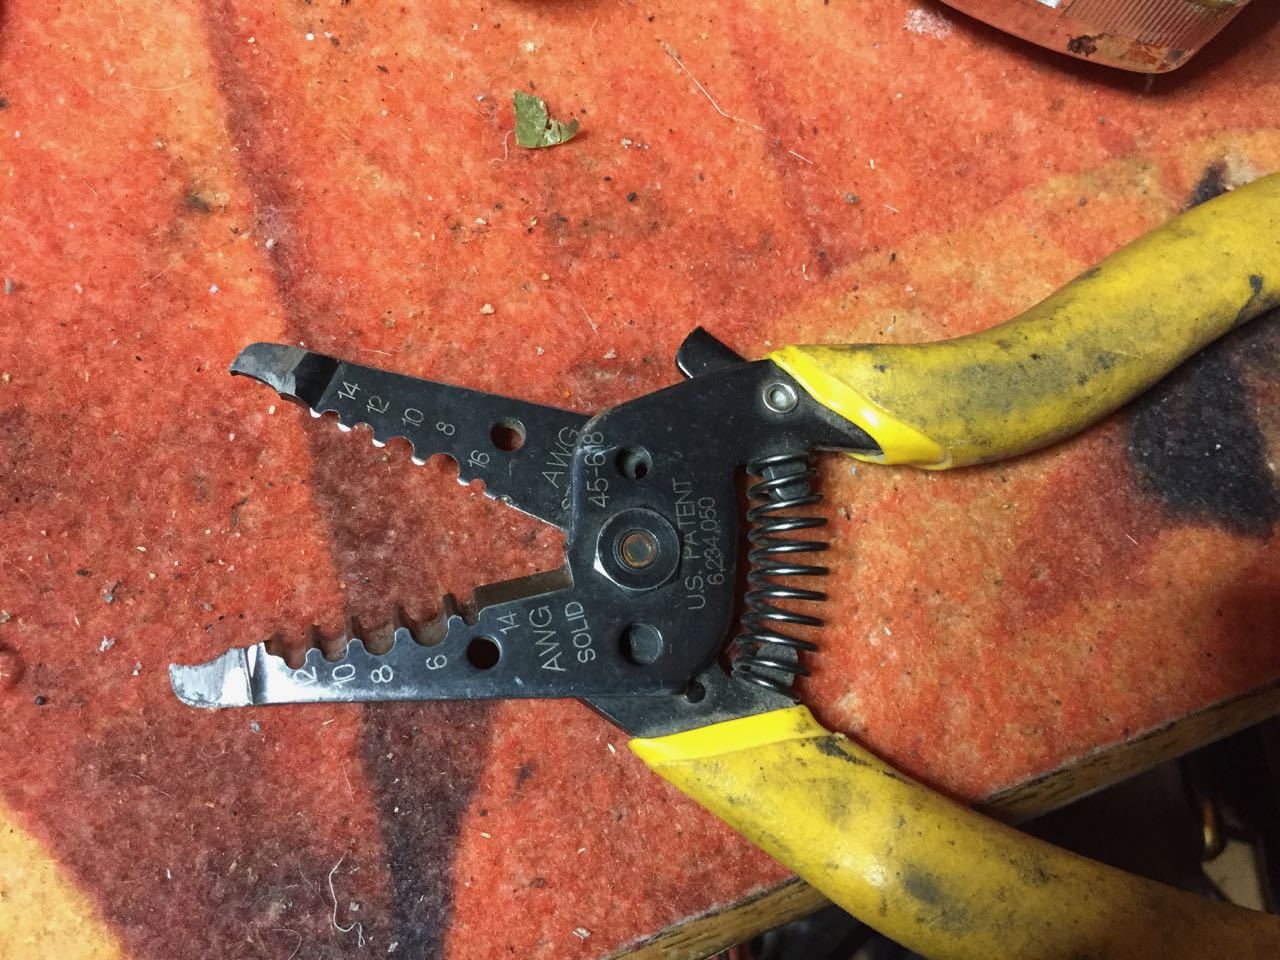
Master link tool from old wire stripper. Posted previously.
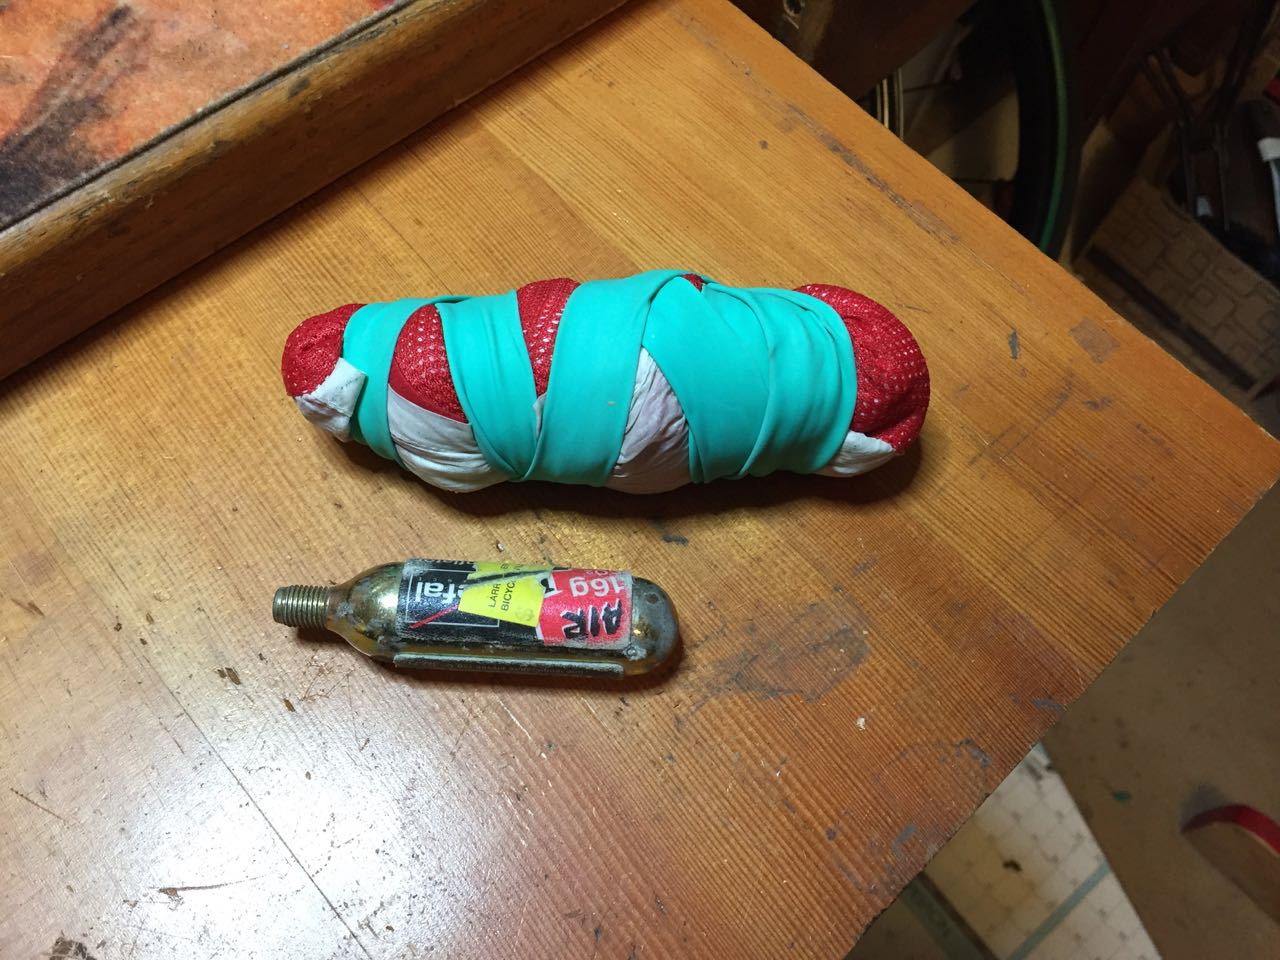
Vest wrapped with piece of latex tube. Makes it small and not slippery so it doesn't come out of jersey pocket.
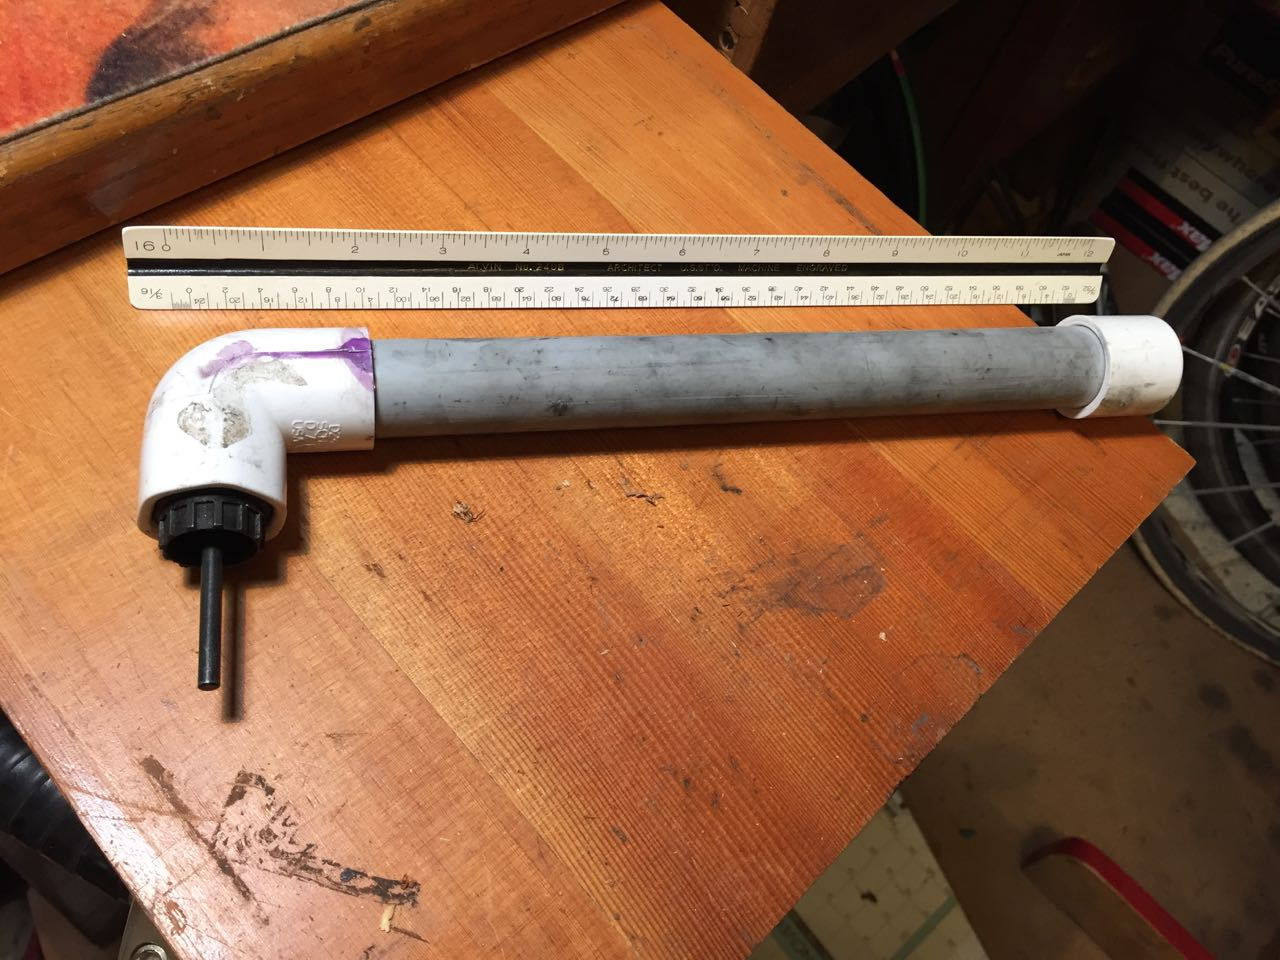
Cassette tool handle from PVC pipe. Heat fitting with heat gun to soften and press over tool.
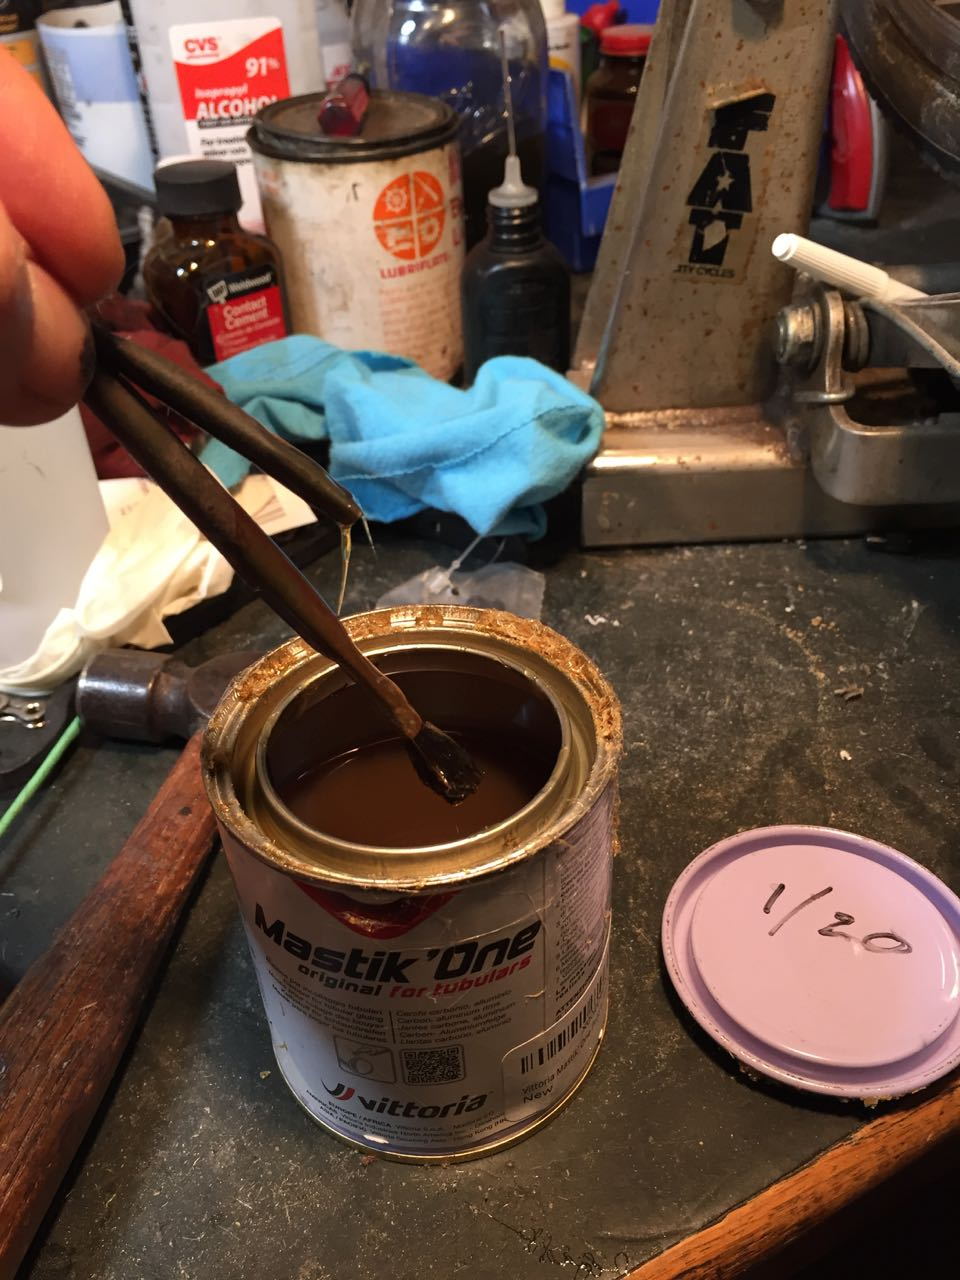
Glue brush stored in can.
Motor casing to hold tools. Larger one is from a garbage disposal. Not everyone likes this as it magnetizes the tools a bit.
Sprayer head on alcohol bottle for utility cleaning. Threads & sizes are pretty standard.
Master link tool from old wire stripper. Posted previously.
Vest wrapped with piece of latex tube. Makes it small and not slippery so it doesn't come out of jersey pocket.
Cassette tool handle from PVC pipe. Heat fitting with heat gun to soften and press over tool.
Glue brush stored in can.
01-26-21 | 10:50 AM
#731
Senior Member


Joined: Mar 2007
Posts: 9,175
Likes: 5,355
From: SF Bay Area, East bay
Bikes: Miyata 618 GT, Marinoni, Kestral 200, Soma double cross 2002 Trek 5200, KHS Flite, Koga Miyata, Schwinn Spitfire 5, Mondia Special, Univega Alpina, Miyata team Ti, Santa Cruz Highball, Waterford rs11
I use the alcohol sprayer for hood and grip removal and install.
04-22-21 | 12:14 PM
#734
Senior Member
Joined: Jul 2017
Posts: 1,992
Likes: 513
From: Pacific Northwest
Bikes: Argon 18 Gallium, BH G7, Rocky Mountain Instinct C70
Not my hint/trick, as I read about this in a post about tyres. But I thought I'd re-share it here.
For tyres that are difficult to mount, let them sit, unboxed, out in the sun for a bit. I did this for my most recent tyre and the heat from the sun combined with the darkness of the tyre allowed it to be mounted much easier than straight out of the box.
For tyres that are difficult to mount, let them sit, unboxed, out in the sun for a bit. I did this for my most recent tyre and the heat from the sun combined with the darkness of the tyre allowed it to be mounted much easier than straight out of the box.
04-26-21 | 11:34 AM
#735
Senior Member
Joined: Nov 2014
Posts: 1,228
Likes: 1,170
From: Saratoga calif.
Bikes: 2 ezip electric bikes, trek 800 antelope, nishiki international, 1948 schwin new world, phillippe french boutique bike
3 M 90 spray adhesive lives in my shop and has many uses. When I want to mount cheap bar tape( without adhesive) I take a small bit of aluminum foil and put it inside a large mouth jar cap forming a dish,. then I spray a bit of contact cement in the dish and use a q tip as a brush to spread a ribbon of glue on the handle bars. At the levers I cut a small piece of bar tape and paint the back side along with the bottom of the lever clamp . this holds the bar tape while I wrap the bars.
Another use for the tinfoil cup is for touch up paint. I have lots of partial cans of Rustoleum spray paint in different colors. To touch up a paint job take what ever colors you want to mix together to achieve a match and spray a dollop in the cup then take a paint brush and mix them together till you get a good match.
For touch ups you need a sharply pointed brush, preferably sable . I will take a small one and carefully trim the bristles till they form a point. This makes it easy to touch up small chips without getting any on the original paint. Even a close match works pretty well if it is confined to the chip or scratch. Solid colors are much easier to touch up than pearls or metallic paints. With dark colored frames it is sometimes better to use black as a touch up paint. On dark blue for example it practically disappears.
12-19-21 | 08:35 AM
#736

Full Member
Joined: Sep 2015
Posts: 340
Likes: 72
From: Denver Colorado
Bikes: 2020 Pivot Vault, 1983 Rossin Record, Garneau R1, Mesamods home built gravel/rain commuter bike, 1995 Barracuda A2V modified with Surley single speed dropouts, 1969 Bottecchia junkyard special fixed gear, Cervelo P4, Mesamods 650b klunker
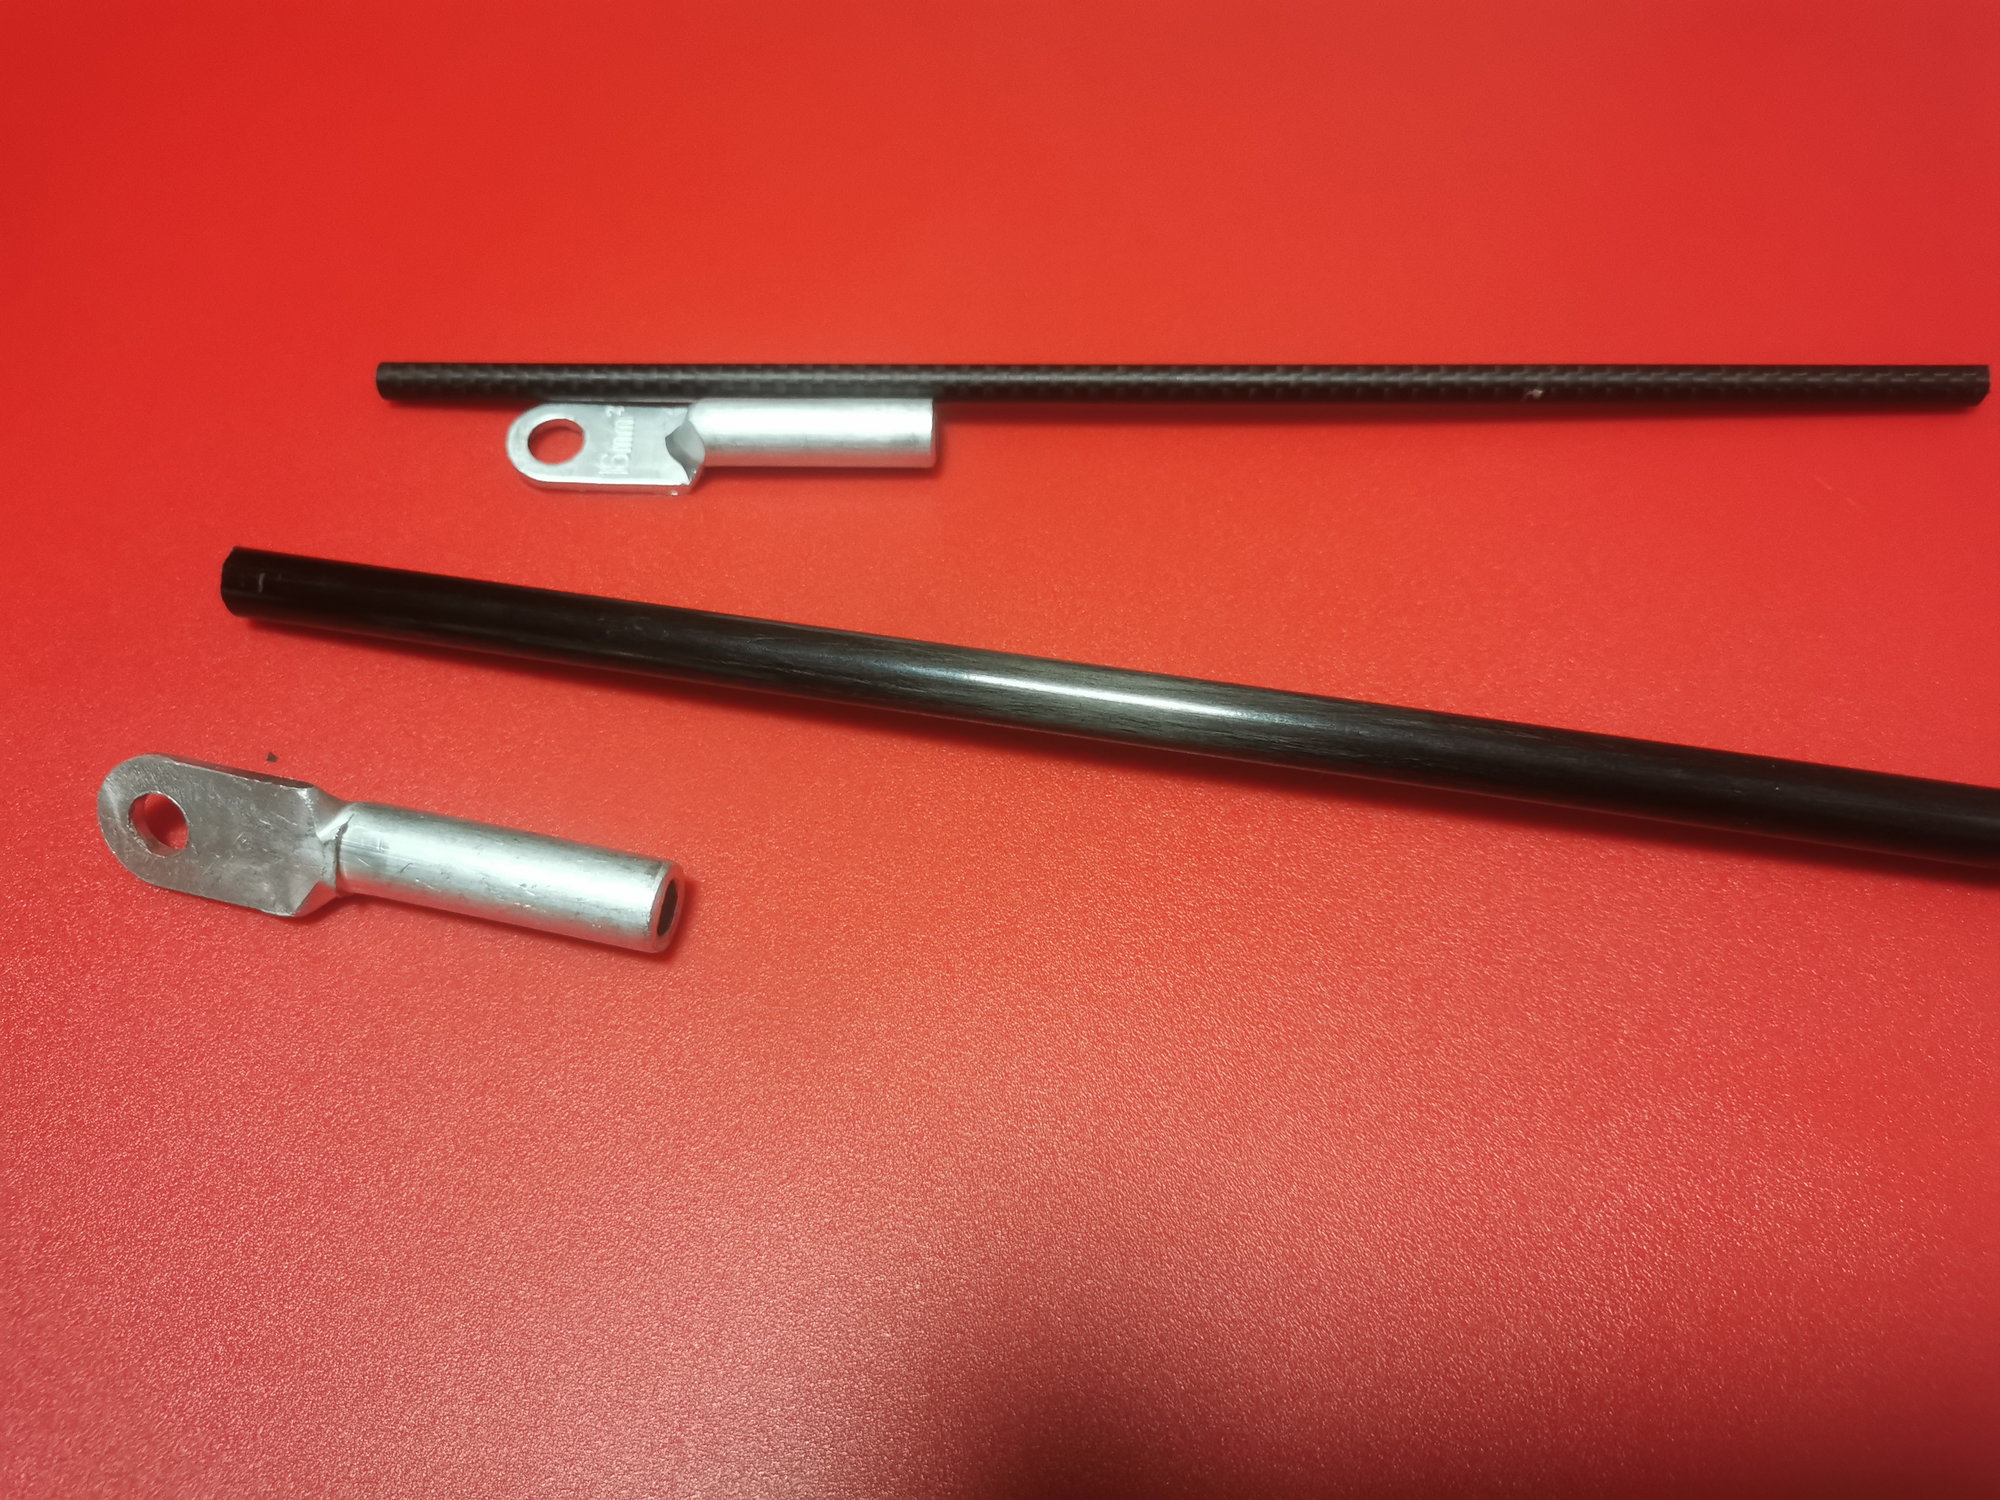
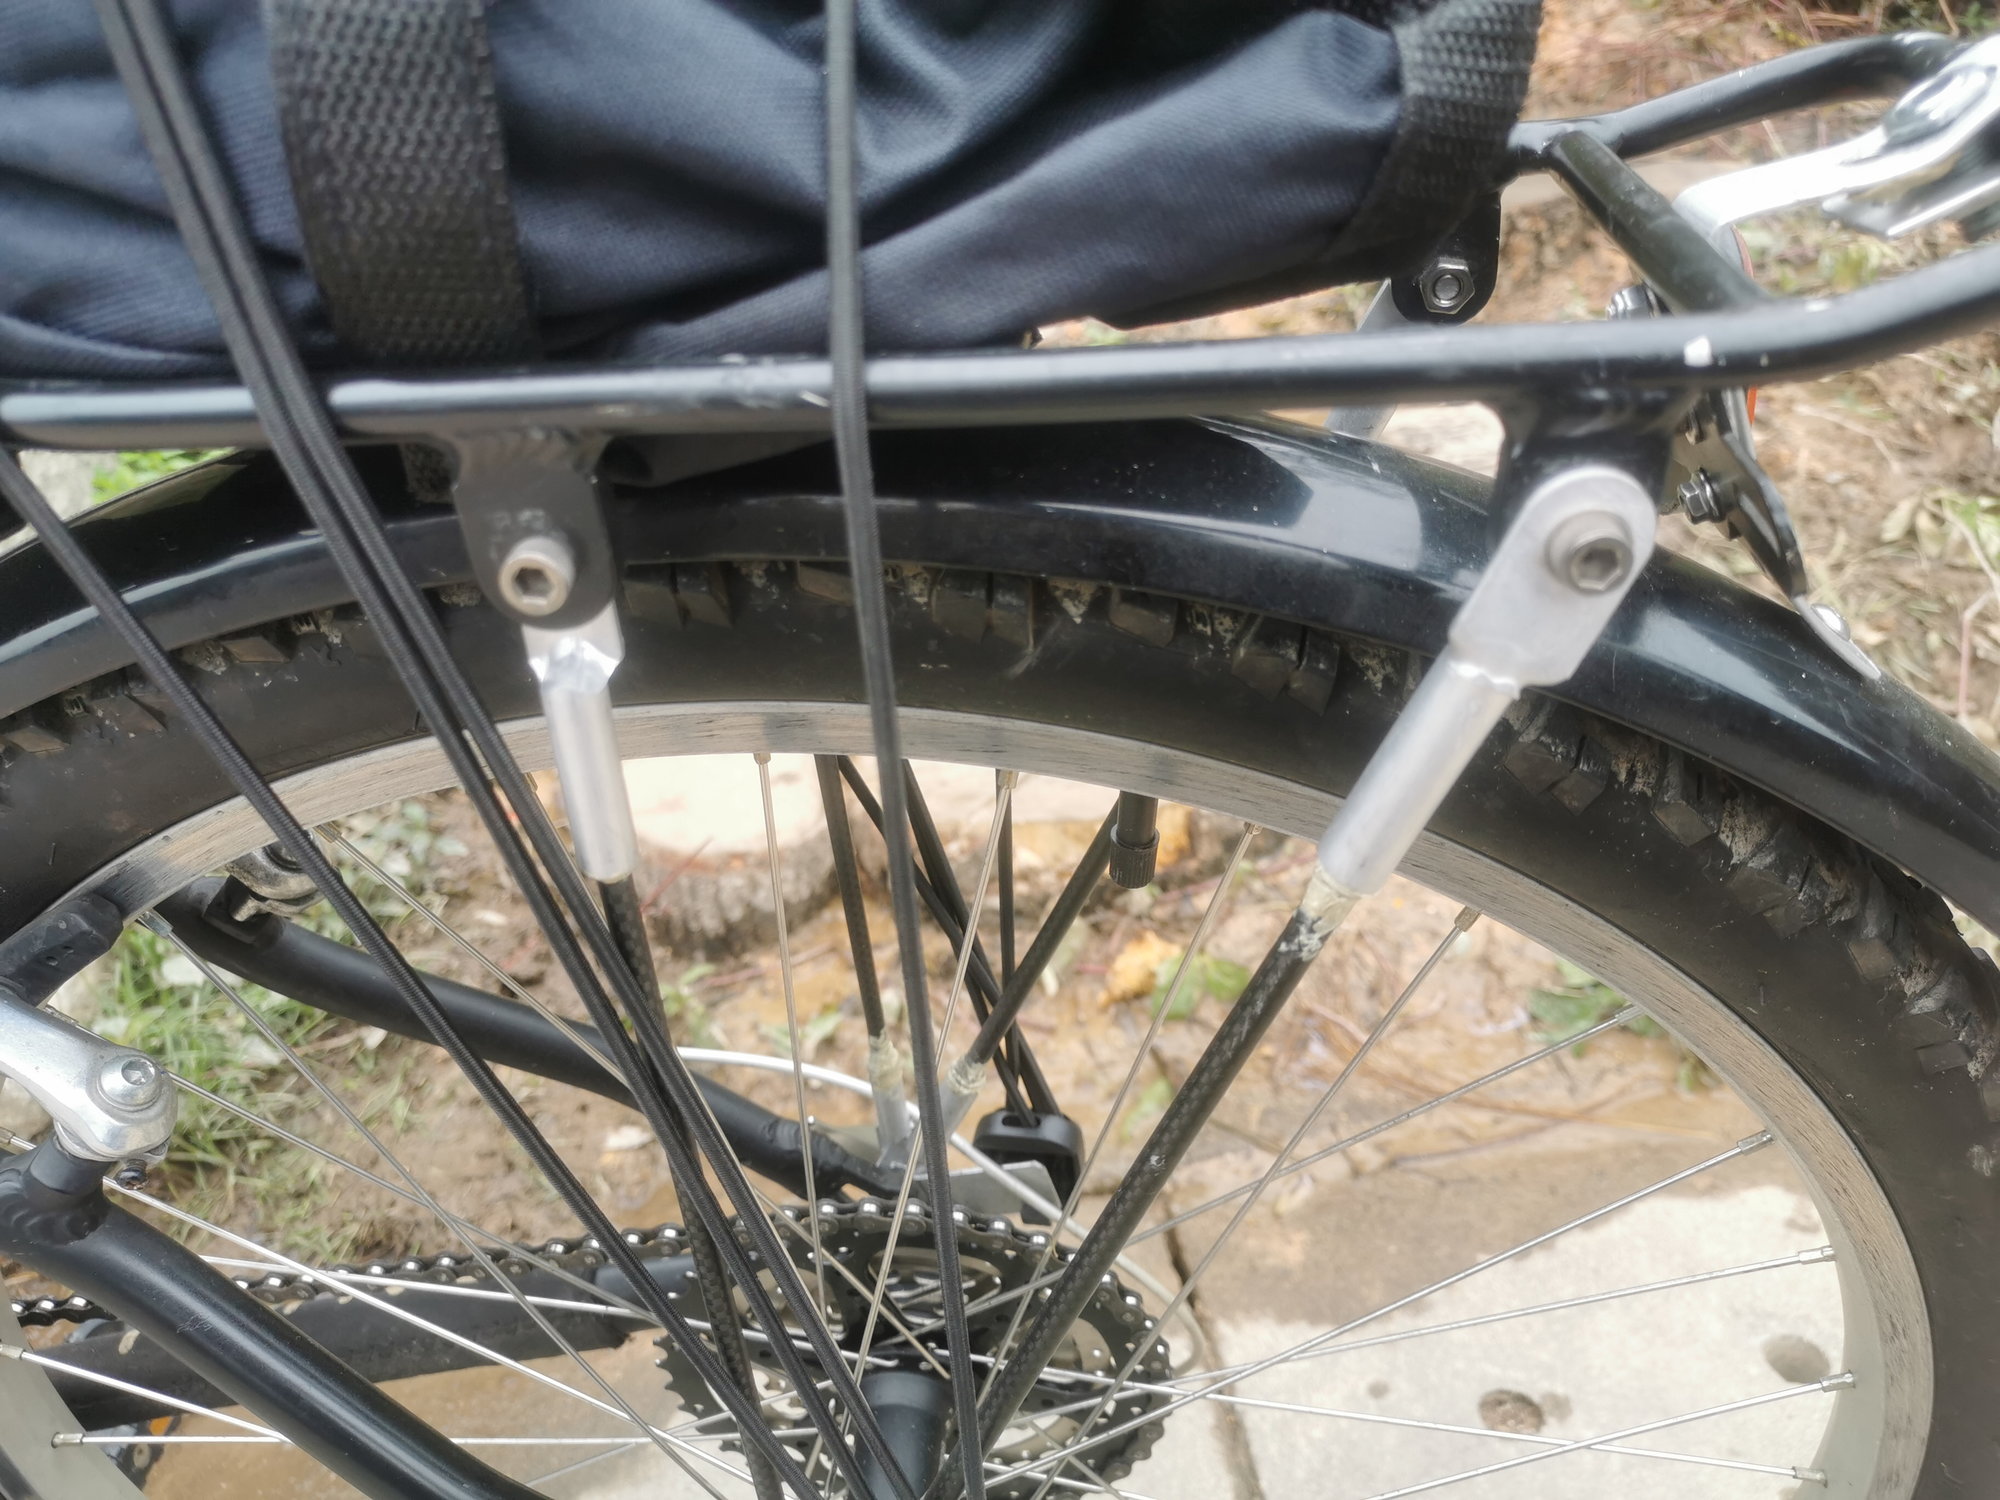
I made a short video of a front derailleur hack I've been doing for the last few years. I came up with this idea to mimic the structural stability of Shimano Di2 and 11 speed group front derailleurs that have a support screw and backing plate installed. Older front derailleurs, primarily those with braze on type mounts and carbon fiber frames. The improved shift performance from the small to big ring is pretty dramatic.
 02-12-22 | 08:07 AM
#738
Senior Member
Joined: Jan 2013
Posts: 3,139
Likes: 877
Bikes: too many sparkly Italians, some sweet Americans and a couple interesting Japanese
I made a short video of a front derailleur hack I've been doing for the last few years. I came up with this idea to mimic the structural stability of Shimano Di2 and 11 speed group front derailleurs that have a support screw and backing plate installed. Older front derailleurs, primarily those with braze on type mounts and carbon fiber frames. The improved shift performance from the small to big ring is pretty dramatic.
https://youtu.be/uSkwjZ8vWUY
https://youtu.be/uSkwjZ8vWUY
 02-12-22 | 09:41 AM
#739
elcraft
Joined: Sep 2008
Posts: 840
Likes: 120
From: Greater Boston


 03-14-22 | 10:55 AM
#743
Member
Joined: Feb 2021
Posts: 42
Likes: 24
Bikes: 2021 Trek Verve 1 Disc
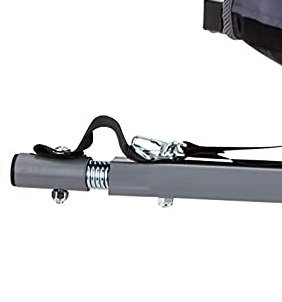
On the Instep Double Seat Bike Trailer:
Wrap the spring in the hitch connector with a layer of bar tape or electrical tape. Remove it completely first.
It starts rattling and the tape fixes the issue.
I thought my bike was making noise until I found that little gremlin.
Wrap the spring in the hitch connector with a layer of bar tape or electrical tape. Remove it completely first.
It starts rattling and the tape fixes the issue.
I thought my bike was making noise until I found that little gremlin.
05-04-22 | 10:10 AM
#744
Senior Member

Joined: Jul 2004
Posts: 8,162
Likes: 647
From: Brooklyn NY
Bikes: Kuota Kredo/Chorus, Trek 7000 commuter, Trek 8000 MTB and a few others
I just posted this in a regular thread but I think it counts as a hint or trick.
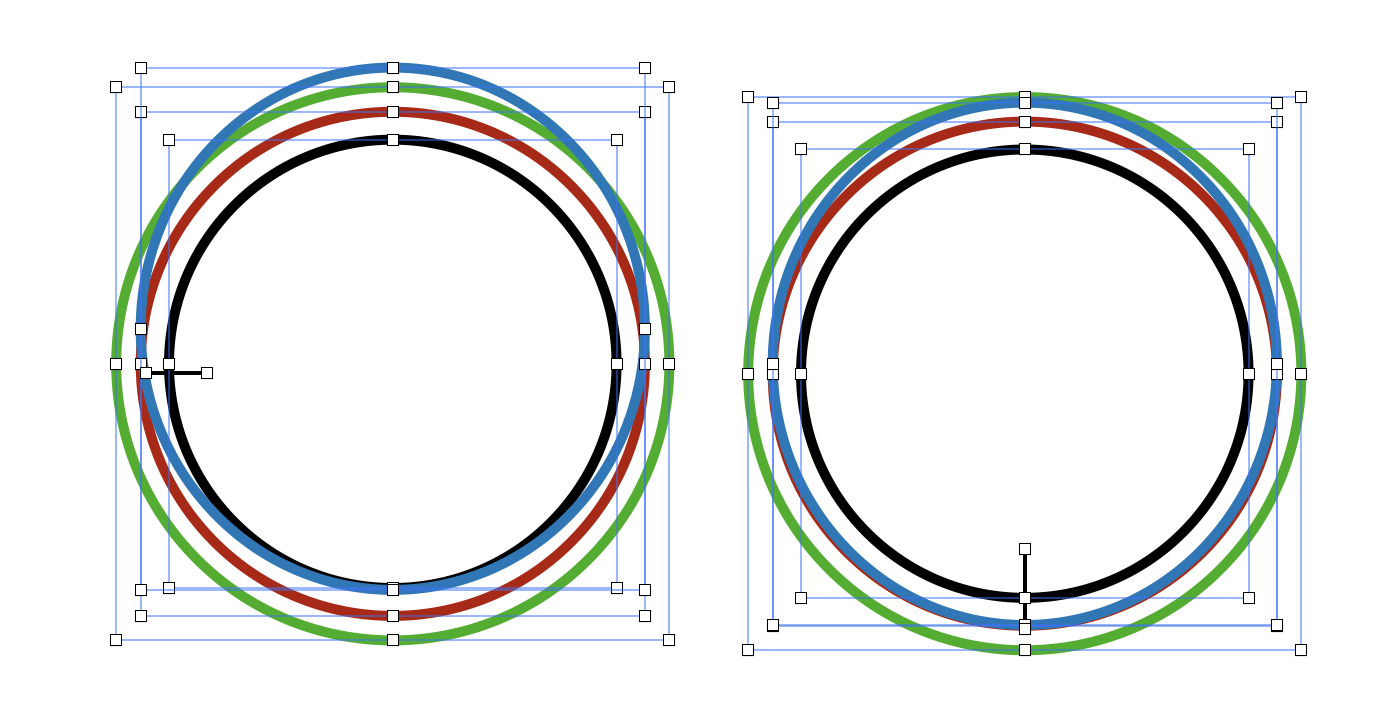
This is my trick for getting even tight tires onto a rim, usually without tools. The trick is to not do the last bit opposite the valve but at 90 degrees to it, and have the opposite side as far into the middle groove as possible to give you just a little more length to get over the rim, and that goes for taking off or putting on. The valve prevents the tire's bead from going into the center groove.
On the left is the correct way, with the blue tire all the way in the groove and slightly stretched with the stem at 90 degrees on the left. On the right the tire is in the bead and can't stretch over the rim with the stem in the way. Green is outer rim, red is the bead channel and the black is the inner groove. Not all rims are like this though with the center groove but it may still make it easier.
07-22-22 | 11:58 AM
#745
Senior Member
Joined: Feb 2015
Posts: 762
Likes: 56
I had a leaky presta valve core, so I removed the core, put some grease on the threads, reinserted the core and then wrapped the core/valve stem junction with a single layer of Duck Tape. It's working great, no more slow leak!
07-24-22 | 09:23 AM
#747
Senior Member
Joined: Jul 2004
Posts: 8,162
Likes: 647
From: Brooklyn NY
Bikes: Kuota Kredo/Chorus, Trek 7000 commuter, Trek 8000 MTB and a few others
Try using plumber's teflon tape. It should work better even. But that begs the question, why not just replace the core. They don't cost much at all. I bought a box of 10 for $10, including the tool.
07-26-22 | 07:38 AM
#748

Old fart
Joined: Nov 2004
Posts: 26,345
Likes: 5,251
From: Appleton WI
Bikes: Several, mostly not name brands.
11-21-22 | 08:52 AM
#749
Senior Member
Joined: Apr 2016
Posts: 3,835
Likes: 1,768
That's fine if you can show that you're going to/from a job that requires a hammer, or you just bought/borrowed it, otherwise it's "going equipped for theft or burglary" or "possession of an offensive weapon in a public place" depending on the mood of the police officer who stops you. Better to have something that can be concealed on the bike, or that has a bike-related application, if you must carry something.
01-10-23 | 10:47 PM
#750
Newbie
Joined: Dec 2022
Posts: 37
Likes: 7
From: Northern Colorado
Bikes: Bridgestone MB5; Dahon Speed "Trio"
Shimano Nexus 3 speed bell crank cable install: popsicle stick 3rd hand
Installing a new shift cable in the bell crank for a Shimano 3 speed hub, it takes three hands to hold the cable snug, tighten the clamp bolt onto the cable and also hold the bell crank push rod arm in position so the yellow mark is between the yellow set lines on the housing window. Tape three popsicle sticks together and slip the end of the stack into the bell crank housing to shim the arm into position. Add some folded paper in the stack to fine-tune the thickness. This will free you up to work on the clamp bolt with the wrench while pulling the cable snug.