


removing cogs from freewheel
 08-13-08 | 05:37 PM
#1

Thread Starter
Waiting for his CX
Joined: Jul 2008
Posts: 452
Likes: 1
From: Atlanta, Georgia; Lewisburg Pennsyvania
Bikes: Jamis Satellite, Motobecane Fantom Cross UNO, Fuji Team singlespeed
removing cogs from freewheel
So I got the freewheel off of a hub im using planning on using the spacers/cogs for a manual change double speed bike, but I a having trouble getting the cogs apart. If they aren't coming apart easily does this mean its a cassette? I always thought freewheels just sort of fell apart when taken off the hub
 08-13-08 | 06:53 PM
#3
cycles per second

Joined: Oct 2003
Posts: 1,975
Likes: 203
From: Minnesota
Bikes: Early 1980's Ishiwata 022 steel sport/touring, 1986 Vitus 979, 1988 DiamondBack Apex, 1997 Softride PowerWing 700, 2001 Trek OCLV 110
Are the cogs still on a ratcheting body? Then it's a freewheel. If not, it's a cassette.
The largest cogs of some cassettes are often held together with screws (4mm hex head or 2mm allen) or rivets.
A good way to get cogs off a freewheel is to put it on a wheel and use two chain whips to spin off the smallest cog (Hyperglide freewheels use a lockring, though).
The largest cogs of some cassettes are often held together with screws (4mm hex head or 2mm allen) or rivets.
A good way to get cogs off a freewheel is to put it on a wheel and use two chain whips to spin off the smallest cog (Hyperglide freewheels use a lockring, though).
08-13-08 | 08:27 PM
#4

Senior Member

Joined: Feb 2004
Posts: 30,225
Likes: 649
From: St Peters, Missouri
Bikes: Catrike 559 I own some others but they don't get ridden very much.
So I got the freewheel off of a hub im using planning on using the spacers/cogs for a manual change double speed bike, but I a having trouble getting the cogs apart. If they aren't coming apart easily does this mean its a cassette? I always thought freewheels just sort of fell apart when taken off the hub
08-13-08 | 11:03 PM
#5
Senior Member
Joined: Mar 2008
Posts: 5,559
Likes: 53
From: The 'Wack, BC, Canada
Bikes: Norco (2), Miyata, Canondale, Soma, Redline
On the freewheel assemblies I've played with there's always been two thread on cog rings. The smallest of course then another at a step in the stack about 3rd or 4th up the line.
If you're not sure which you've got learn to spot the differences by heading over to www.sheldonbrown.com and search for "wheels". Or better yet the Sheldon Brown shortcuts sticky thread at the top of the listings in this forum....
https://www.bikeforums.net/bicycle-mechanics/253025-sheldonbrown-com-shortcuts.html
02-18-21 | 05:20 PM
#6

Newbie
Joined: Dec 2020
Posts: 63
Likes: 7
From: Round Rock, TX
Bikes: About 5, maybe 6?
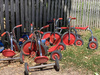
Hi gang, I'm resurrecting this old thread. I have a Suntour Freewheel that I want to restore to pristine condition, don't care how long it takes to make each cog look like new. I'm taking the FW apart as well and adding new bearings. I'm also recondition the original chain, don't want a new chain. I'm pretty sure I don't have the "Hyper-Glide" version. I'm posting a pic of my jig I made below. Note that my FW top lock cup for the bearings is not broken free yet, I assume that's not necessary, probably should have broken it free before taking it off the wheel, but because I didn't have the right tool (I have 4 cassette/FW Park tools, just not the one for this FW) I had a LBS break it free for me, but I think once the cogs are all off I can hold the inner FW hub tight enough to get that to spin off (CW as it's reverse threaded) with my spanner tool.
As for the cog removal, I only have one Park chain whip so holding the entire FW like this should work, but as it is it's not budging. Again, soaked in PB blaster for a day, I've tapped lightly with a small ball peen hammer on the face of the smallest cog (to promote shock movement), I've use a large rubber mallet whilst holding the chain whip to pound the handle of the chain whip and finally I did apply some heat using my MAP gas torch to the first cog, but didn't want to heat too much to damage anything. I don't get it, I'm a 230lb man, leaning my entire body on this thing. I am turning it CCW as they are right-hand threaded, which makes sense else the damn then would never stay on the wheel hub. I'm at a loss...next step is I have the first 2 cogs literally submerged in PB blaster (will sit over-night) and then use some sort of 2X4 cut so it connects to the end of the chain whip handle for a cheater bar. Any tips? Please let me know?

As for the cog removal, I only have one Park chain whip so holding the entire FW like this should work, but as it is it's not budging. Again, soaked in PB blaster for a day, I've tapped lightly with a small ball peen hammer on the face of the smallest cog (to promote shock movement), I've use a large rubber mallet whilst holding the chain whip to pound the handle of the chain whip and finally I did apply some heat using my MAP gas torch to the first cog, but didn't want to heat too much to damage anything. I don't get it, I'm a 230lb man, leaning my entire body on this thing. I am turning it CCW as they are right-hand threaded, which makes sense else the damn then would never stay on the wheel hub. I'm at a loss...next step is I have the first 2 cogs literally submerged in PB blaster (will sit over-night) and then use some sort of 2X4 cut so it connects to the end of the chain whip handle for a cheater bar. Any tips? Please let me know?
Last edited by niswanger; 02-18-21 at 10:37 PM.
02-18-21 | 10:33 PM
#7

Insane Bicycle Mechanic


Joined: Mar 2008
Posts: 10,162
Likes: 1,125
From: other Vancouver
Hi gang, I'm resurrecting this old thread. I have a Suntour Freewheel that I want to restore to pristine condition, don't care how long it takes to make each cog look like new. I'm taking the FW apart as well and adding new bearings. I'm also recondition the original chain, don't want a new chain. I'm pretty sure I don't have the "Hyper-Glide" version. I'm posting a pic of my jig I made below. Note that my FW top lock cup for the bearings is not broken free yet, I assume that's not necessary, probably should have broken it free before taking it off the wheel, but because I didn't have the right tool (I have 4 cassette/FW Park tools, just not the one for this FW) I had a LBS break it free for me, but I think once the cogs are all off I can hold the inner FW hub tight enough to get that to spin off (CW as it's reverse threaded) with my spanner tool.
As for the cog removal, I only have one Park chain whip so holding the entire FW like this should work, but as it is it's not budging. Again, soaked in PB blaster for a day, I've tapped lightly with a small ball peen hammer on the face of the smallest cog (to promote shock movement), I've use a large rubber mallet whilst holding the chain whip to pound the handle of the chain whip and finally I did apply some heat using my MAP gas torch to the first cog, but didn't want to heat too much to damage anything. I don't get it, I'm a 230lb man, leaning my entire body on this thing. I am turning it CCW as they are right-hand threaded, which makes sense else the damn then would never stay on the wheel hub. I'm at a loss...next step is I have the first 2 cogs literally submerged in PB blaster (will sit over-night) and then use some sort of 2X4 cut so it connects to the end of the chain whip handle for a cheater bar. Any tips? Please let me know?

As for the cog removal, I only have one Park chain whip so holding the entire FW like this should work, but as it is it's not budging. Again, soaked in PB blaster for a day, I've tapped lightly with a small ball peen hammer on the face of the smallest cog (to promote shock movement), I've use a large rubber mallet whilst holding the chain whip to pound the handle of the chain whip and finally I did apply some heat using my MAP gas torch to the first cog, but didn't want to heat too much to damage anything. I don't get it, I'm a 230lb man, leaning my entire body on this thing. I am turning it CCW as they are right-hand threaded, which makes sense else the damn then would never stay on the wheel hub. I'm at a loss...next step is I have the first 2 cogs literally submerged in PB blaster (will sit over-night) and then use some sort of 2X4 cut so it connects to the end of the chain whip handle for a cheater bar. Any tips? Please let me know?
It's possible to remove freewheel cogs with one chain whip if the freewheel is held in a freewheel vise and the vise is attached to a sturdy bench. It can take a lot of torque to loosen old cogs- I remember breaking chain whips when the freewheels were new. After 40 years of non-maintenance... all bets are off.
__________________
Jeff Wills
Comcast nuked my web page. It will return soon..
Jeff Wills
Comcast nuked my web page. It will return soon..
02-18-21 | 10:40 PM
#8
Newbie
Joined: Dec 2020
Posts: 63
Likes: 7
From: Round Rock, TX
Bikes: About 5, maybe 6?
Ah...forgot to convert the google image...btw in case you use google images, you can go to your photo, click share, get link, then paste the link on this site that converts it to a shareable deep link img location for use with BBC tags etc.
Any way, I fixed my OP...so I do feel I'm about to break my chain whip, it's actually submerged in PB Blaster (first 2.5 cogs deep) and I'll have another go at it tomorrow. I really want to get them removed, so I can use my greenie wheel and make the cogs just like new and then clean out, replace bearings and re-lube the center part with the pawls.
Any way, I fixed my OP...so I do feel I'm about to break my chain whip, it's actually submerged in PB Blaster (first 2.5 cogs deep) and I'll have another go at it tomorrow. I really want to get them removed, so I can use my greenie wheel and make the cogs just like new and then clean out, replace bearings and re-lube the center part with the pawls.
02-19-21 | 04:42 AM
#9

Senior Member
Joined: Feb 2015
Posts: 6,006
Likes: 2,286
From: Mission Viejo
Bikes: 1986 Cannondale SR400 (Flat bar commuter), 1988 Cannondale Criterium XTR, 1992 Serotta T-Max, 1995 Trek 970
I have used a 2x6 with lag bolts to hold the large freewheel cog.
Also, there has to be a very compelling reason to break open a freewheel body and service the pawls and bearings.
In the past, I have soaked the freewheel body in solvent and dripped Phil’s tenacious oil, spun it and repeat, and let the oil soak through the body.
There are some of people here who have completely disassembled a freewheel body, and I take off my hat to them, but I highly doubt you can replace any springs or pawls. And if the races are bad the freewheel is toast.
John
02-19-21 | 09:24 AM
#10
Used to be Conspiratemus
Joined: Jan 2009
Posts: 1,520
Likes: 247
From: Hamilton ON Canada
Ah...forgot to convert the google image...btw in case you use google images, you can go to your photo, click share, get link, then paste the link on this site that converts it to a shareable deep link img location for use with BBC tags etc.
Any way, I fixed my OP...so I do feel I'm about to break my chain whip, it's actually submerged in PB Blaster (first 2.5 cogs deep) and I'll have another go at it tomorrow. I really want to get them removed, so I can use my greenie wheel and make the cogs just like new and then clean out, replace bearings and re-lube the center part with the pawls.
Any way, I fixed my OP...so I do feel I'm about to break my chain whip, it's actually submerged in PB Blaster (first 2.5 cogs deep) and I'll have another go at it tomorrow. I really want to get them removed, so I can use my greenie wheel and make the cogs just like new and then clean out, replace bearings and re-lube the center part with the pawls.
02-19-21 | 09:54 AM
#11
Senior Member

Joined: Feb 2012
Posts: 19,360
Likes: 5,492
From: Rochester, NY
Bikes: Stewart S&S coupled sport tourer, Stewart Sunday light, Stewart Commuting, Stewart Touring, Co Motion Tandem, Stewart 3-Spd, Stewart Track, Fuji Finest, Mongoose Tomac ATB, GT Bravado ATB, JCP Folder, Stewart 650B ATB
Comments- The only Hyperglide item you might have is the chain. SunTour would be sued by Shimano if they used a trademarked term from Shimano.
- Yes the last two small cogs should be threaded on, some SunTour freewheels had only the three biggest cogs splined on so it can be a find out as you go to a degree.
- Yes chain whips can and do break before cogs loosen sometimes. A stronger whip and more leverage is the solution. However I see no need to remove the cogs but they are not mine...
- I have taken apart many of these and other freewheels back in the days. Usually the internals are in good condition as they should live in an oil coated world so shouldn't rust quickly. I agree with the others in that taking the internals apart is a job that has risks and little benefit compared to a flushing out with solvent and dripping in thick oil. If you do take this apart note the amount of slop between the inner core and outer half of the body. ST used very thin shims/washers under the hammered tight threaded race (note it's a LH thread). When reassembling the race can end up a bit less or more tight and thus the bearing "adjustment" can be off. It's usually suggested that the end result has a tiny bit of slop to the bearing adjustment. Having a spare FW for parts is a good idea. Don't use grease to relube, use oil.
- The only two times I've had a real problem in doing this stuff is when i failed to fully secure the race on reassembly. Then some miles later you hear a faint jingling of the race rattling about on the axle end just before the outer half of the body slides off the inner core enough for the balls and ratchet pawls to fall to the ground. It's no fun to turn your bike into an awkward scooter Andy
Andy
- Yes the last two small cogs should be threaded on, some SunTour freewheels had only the three biggest cogs splined on so it can be a find out as you go to a degree.
- Yes chain whips can and do break before cogs loosen sometimes. A stronger whip and more leverage is the solution. However I see no need to remove the cogs but they are not mine...
- I have taken apart many of these and other freewheels back in the days. Usually the internals are in good condition as they should live in an oil coated world so shouldn't rust quickly. I agree with the others in that taking the internals apart is a job that has risks and little benefit compared to a flushing out with solvent and dripping in thick oil. If you do take this apart note the amount of slop between the inner core and outer half of the body. ST used very thin shims/washers under the hammered tight threaded race (note it's a LH thread). When reassembling the race can end up a bit less or more tight and thus the bearing "adjustment" can be off. It's usually suggested that the end result has a tiny bit of slop to the bearing adjustment. Having a spare FW for parts is a good idea. Don't use grease to relube, use oil.
- The only two times I've had a real problem in doing this stuff is when i failed to fully secure the race on reassembly. Then some miles later you hear a faint jingling of the race rattling about on the axle end just before the outer half of the body slides off the inner core enough for the balls and ratchet pawls to fall to the ground. It's no fun to turn your bike into an awkward scooter
Andy
__________________
AndrewRStewart
AndrewRStewart
02-19-21 | 10:48 AM
#12
Newbie
Joined: Dec 2020
Posts: 63
Likes: 7
From: Round Rock, TX
Bikes: About 5, maybe 6?
I think you are wasting your time. That freewheel looks better than any of mine. If you keep up with this you will break something with that 230 lb. of yours. I weigh only a little more than half what you do and I have broken chain whips as well as similar makeshift jigs of lumber and wood screws. That freewheel is not such a superb piece of engineering that it is worth breaking tools or injuring yourself when something slips and lets go.
02-19-21 | 10:55 AM
#13
Newbie
Joined: Dec 2020
Posts: 63
Likes: 7
From: Round Rock, TX
Bikes: About 5, maybe 6?
Comments- The only Hyperglide item you might have is the chain. SunTour would be sued by Shimano if they used a trademarked term from Shimano.
- Yes the last two small cogs should be threaded on, some SunTour freewheels had only the three biggest cogs splined on so it can be a find out as you go to a degree.
- Yes chain whips can and do break before cogs loosen sometimes. A stronger whip and more leverage is the solution. However I see no need to remove the cogs but they are not mine...
- I have taken apart many of these and other freewheels back in the days. Usually the internals are in good condition as they should live in an oil coated world so shouldn't rust quickly. I agree with the others in that taking the internals apart is a job that has risks and little benefit compared to a flushing out with solvent and dripping in thick oil. If you do take this apart note the amount of slop between the inner core and outer half of the body. ST used very thin shims/washers under the hammered tight threaded race (note it's a LH thread). When reassembling the race can end up a bit less or more tight and thus the bearing "adjustment" can be off. It's usually suggested that the end result has a tiny bit of slop to the bearing adjustment. Having a spare FW for parts is a good idea. Don't use grease to relube, use oil.
- The only two times I've had a real problem in doing this stuff is when i failed to fully secure the race on reassembly. Then some miles later you hear a faint jingling of the race rattling about on the axle end just before the outer half of the body slides off the inner core enough for the balls and ratchet pawls to fall to the ground. It's no fun to turn your bike into an awkward scooter Andy
- Yes the last two small cogs should be threaded on, some SunTour freewheels had only the three biggest cogs splined on so it can be a find out as you go to a degree.
- Yes chain whips can and do break before cogs loosen sometimes. A stronger whip and more leverage is the solution. However I see no need to remove the cogs but they are not mine...
- I have taken apart many of these and other freewheels back in the days. Usually the internals are in good condition as they should live in an oil coated world so shouldn't rust quickly. I agree with the others in that taking the internals apart is a job that has risks and little benefit compared to a flushing out with solvent and dripping in thick oil. If you do take this apart note the amount of slop between the inner core and outer half of the body. ST used very thin shims/washers under the hammered tight threaded race (note it's a LH thread). When reassembling the race can end up a bit less or more tight and thus the bearing "adjustment" can be off. It's usually suggested that the end result has a tiny bit of slop to the bearing adjustment. Having a spare FW for parts is a good idea. Don't use grease to relube, use oil.
- The only two times I've had a real problem in doing this stuff is when i failed to fully secure the race on reassembly. Then some miles later you hear a faint jingling of the race rattling about on the axle end just before the outer half of the body slides off the inner core enough for the balls and ratchet pawls to fall to the ground. It's no fun to turn your bike into an awkward scooter
Andy
02-19-21 | 11:01 AM
#14
SE Wis
Joined: Apr 2005
Posts: 11,551
Likes: 4,331
From: Milwaukee, WI
Bikes: '68 Raleigh Sprite, '02 Raleigh C500, '84 Raleigh Gran Prix, '91 Trek 400, 2013 Novara Randonee, 1990 Trek 970
Try some heat on the small cog and then spin it off with the chainwhip.
You can use n old piece of chain and a vise grips for a second chain whip.
You can use n old piece of chain and a vise grips for a second chain whip.
02-19-21 | 11:02 AM
#15

BMX Connoisseur
Joined: Jun 2016
Posts: 774
Likes: 108
From: Canada
Bikes: 1988 Kuwahara Newport, 1983 Nishiki, 1984 Diamond Back Viper, 1991 Dyno Compe
Hopefully this doesn't sound too hair brained. I would take a old chain wrap it around the small cog and then with the extra length of chain I would pinch it together in a vice. This should hold the free wheel in place. Then I would take your rig there for the big cog but put it on a long 2x4 so I would have some extra leverage and turn that.
02-19-21 | 11:03 AM
#16
Newbie
Joined: Dec 2020
Posts: 63
Likes: 7
From: Round Rock, TX
Bikes: About 5, maybe 6?
I have already, but not near enough...just got it mildly warm with my MAP gas torch. Are there any plastic components in this FW? Any dust caps? Anything non-metallic? I know that a good amount of heat will be the only way this could work.
02-19-21 | 11:57 AM
#17


For those who continue to offer hold-my-beer tips after niswanger had already agreed with the idea of redirecting his refurbishing efforts where they would actually do some good: please don't attempt to talk him back onto the ledge.
Signed, a chastened graduate of the "if it ain't broke, fix it 'til it is" school of bike repair.
Signed, a chastened graduate of the "if it ain't broke, fix it 'til it is" school of bike repair.
02-19-21 | 02:07 PM
#18
Newbie
Joined: Dec 2020
Posts: 63
Likes: 7
From: Round Rock, TX
Bikes: About 5, maybe 6?
I'm a stubborn, almost old man, but thanks for all the encouragement and discouragement. Whilst I generally agree, if it ain't broke don't fix it, I know this mechanism can be rebuilt to almost new (in better operation than it current was/is now). I got it broken free, glad I tried one more time w/o putting more heat because there IS plastic, specifically what looks to be like the cross-section cut of a schedule 80 grey electrical pipe as shims. The first shim, behind the smallest cog is AL and it's actually extruded/drawn AL bent around a die (you can see the union where the two ends come together). The second/third/forth shims are all plastic where the second shim is now pretty much destroyed due to my slight heating yesterday (not level thickness so that MUST be replaced). I'm going to A. Look for a used one (probably a .00003% chance of finding one. B. 3D print a couple out of PETG and pick the one closest yet a wee-bit bigger in all dimensions and then wet sand/hone to the correct dimension. C. Or, find out if some schedule 40 6061 AL pipe might fit the bill and have a friend machine all AL ones for me. I also inscribed with a Dremel (small hash) on the free wheel housing notches and the cogs so they go back in the exact same spot, even though they are not keyed except for the largest cog. I know, attention to detail I guess. Finally, here in lies the problem with internet information. I don't recall seeing (even on all of Sir Sheldon Brown's articles on free wheels) any caution about heating cogs and destroying plastic shims etc. So let it be known, if you want to take apart an older 80's Suntour 6sp free wheel like I have shown in this post, then do NOT use heat.

02-19-21 | 09:21 PM
#19
Senior Member
Joined: Feb 2012
Posts: 19,360
Likes: 5,492
From: Rochester, NY
Bikes: Stewart S&S coupled sport tourer, Stewart Sunday light, Stewart Commuting, Stewart Touring, Co Motion Tandem, Stewart 3-Spd, Stewart Track, Fuji Finest, Mongoose Tomac ATB, GT Bravado ATB, JCP Folder, Stewart 650B ATB
Roy- I ran ST freewheels for a couple of decades and still have a box of spares/scraps. Let me know if you are in need. Andy
__________________
AndrewRStewart
AndrewRStewart
02-19-21 | 10:42 PM
#20
Newbie
Joined: Dec 2020
Posts: 63
Likes: 7
From: Round Rock, TX
Bikes: About 5, maybe 6?
 02-20-21 | 12:35 AM
#21
Used to be Conspiratemus
Joined: Jan 2009
Posts: 1,520
Likes: 247
From: Hamilton ON Canada
Everybody knows that freewheel sprocket spacers are usually/often plastic. Sorry that you kept fixing it till it broke. I hope the cosmetic enhancement is worth it.
Please don’t take the freewheel apart now. Honestly, unless you are pastorbobnlnh you will not, in fact, be able to rebuild it to operate better than it does now. Read Andrew’s post again, which you quoted.
Please don’t take the freewheel apart now. Honestly, unless you are pastorbobnlnh you will not, in fact, be able to rebuild it to operate better than it does now. Read Andrew’s post again, which you quoted.
02-20-21 | 12:19 PM
#22
Newbie
Joined: Dec 2020
Posts: 63
Likes: 7
From: Round Rock, TX
Bikes: About 5, maybe 6?
Alright conspiratemus1, I disagree. 1. I am not pastorbobnlnh I am me, myself and I as named on this forum Roy Niswanger. 2. I and "dedhed" are also included in the world population aka "everybody", yet we both didn't know the spacers were plastic. It's too bad someone w/in this forum thread discussion didn't warn of it when I mention I got it mildly warm with a torch (that destroyed one of the spacers) or when dedhed said to add more heat and I thought of doing just that (glad I didn't). But regardless, a simple spacer like the one I destroyed can be replaced fairly cheap (machined AL or 3D printed). I already disassembled the freewheel...oh damn my world is going to end now.
For other's, as a new freewheel medic myself, I have a few questions. I elaborate on these questions in the below video as well:
1. How often are one of the very thin outer bearing locking ring/race shims removed for more ideal mating of the outer lock race to the bearings due to race wear over time? I am replacing all the 1/8" bearings.
2. I have marked each cog and one spline on the freewheel hub so as to reassemble exactly as it came off. In my video I ask if the prior assembly was correct (must be factory because I've never taken it apart). In Sheldon Brown's website on freewheels: https://www.sheldonbrown.com/freewheels.html he mentions the following in assembly of the cogs: "The high side of the teeth of SunTour sprockets faces to the right." What does he mean "The high side..."? Then he goes onto say: "The ramps for chain pickup on newer sprockets also face to the right." So face to the right is from what perspective of the person? I like to reference transportation vehicles/vessels with regards to components as "inboard or outboard" so does he mean the ramped side faces out or to the outboard or vice/versa? Finally, my ramped teeth were facing out or towards the outboard but also on the trailing edge of normal rotation. I'm trying to visualize that and I think it makes sense because the RD cage and chain orientation and contact of the FW is at the 6 o-clock position which means that is now the leading edge of chain to FW contact correct?
3. Finally, what's the suggestion you all have on my chain, will a new one really not work that great? Basically what's a best practice here? In my video I show my chain and tell how I know I can put it back on so it's in the same inboard/outboard orientation as it was.
02-20-21 | 12:47 PM
#23
Senior Member
Joined: Feb 2012
Posts: 19,360
Likes: 5,492
From: Rochester, NY
Bikes: Stewart S&S coupled sport tourer, Stewart Sunday light, Stewart Commuting, Stewart Touring, Co Motion Tandem, Stewart 3-Spd, Stewart Track, Fuji Finest, Mongoose Tomac ATB, GT Bravado ATB, JCP Folder, Stewart 650B ATB
1-Not too often if only because few do the complete take apart. Freewheels see very little bearing track wear due to a few aspects. The time the bearings are rolling there's virtually no load on them (assuming a correct amount of bearing slop is present). When they are transferring force they are stationary. Remember the smaller the rolling element the greater the effect of any change in preload.
2- This is one of the advances that the Asian manufactures brought to the cycling world (AFAIK), cog teeth with specific profiles to enhance either shifting or cross chaining. There are many different profiles that ST used over the years and between the various models and cog positions. If you look at the photo of the still assembled FW you'll see that the largest 3 cogs have tooth top with no added chamfering on the tip. If looked from behind the bike one can see these teeth have a chisel shaped tip with the sharp edge closer to the outside of the bike and the bevel going down as you go toward the spokes. This to better grab the chain during shifting (remember this design predated current indexed tooth designs by about 15+ years). The 3 smaller cogs have the added chamfer to the tooth's outward face with it removing the rear outer tooth tip. I believe this is to better allow cross chaining. Just duplicate this pair of patterns when you reassemble.
3- Very few chains are directional in their install/function. At one time some I knew were concerned about the chain's surface wear and side to side flexibility and tracked how the chain was removed then reinstalled to control this. I never bought into this and think the periodic cleaning and lubing of the chain makes a FAR larger difference in life span and function. As to whether to reuse the chain I generally consider the "stretch" wear amount as a first priority then overall visual condition next. Is the old chain still good measurement wise? Remember that the cog teeth have some amount of wear (and there's no tooth wear measurement tool that I know of that will work on this FW) so the question might be "Are the FW teeth worn enough to no longer allow the new chain to fully mesh, and thus have no skipping. The only way to truely know this for sure is to install a new chain and power away in every cog to see what happens. We do this during bike servicing routinely and we don't dispose of the old chain till we've confirmed the new chain and old cogs are agreeable with each other. Andy
. Freewheels see very little bearing track wear due to a few aspects. The time the bearings are rolling there's virtually no load on them (assuming a correct amount of bearing slop is present). When they are transferring force they are stationary. Remember the smaller the rolling element the greater the effect of any change in preload. 2- This is one of the advances that the Asian manufactures brought to the cycling world (AFAIK), cog teeth with specific profiles to enhance either shifting or cross chaining. There are many different profiles that ST used over the years and between the various models and cog positions. If you look at the photo of the still assembled FW you'll see that the largest 3 cogs have tooth top with no added chamfering on the tip. If looked from behind the bike one can see these teeth have a chisel shaped tip with the sharp edge closer to the outside of the bike and the bevel going down as you go toward the spokes. This to better grab the chain during shifting (remember this design predated current indexed tooth designs by about 15+ years). The 3 smaller cogs have the added chamfer to the tooth's outward face with it removing the rear outer tooth tip. I believe this is to better allow cross chaining. Just duplicate this pair of patterns when you reassemble.
3- Very few chains are directional in their install/function. At one time some I knew were concerned about the chain's surface wear and side to side flexibility and tracked how the chain was removed then reinstalled to control this. I never bought into this and think the periodic cleaning and lubing of the chain makes a FAR larger difference in life span and function. As to whether to reuse the chain I generally consider the "stretch" wear amount as a first priority then overall visual condition next. Is the old chain still good measurement wise? Remember that the cog teeth have some amount of wear (and there's no tooth wear measurement tool that I know of that will work on this FW) so the question might be "Are the FW teeth worn enough to no longer allow the new chain to fully mesh, and thus have no skipping. The only way to truely know this for sure is to install a new chain and power away in every cog to see what happens. We do this during bike servicing routinely and we don't dispose of the old chain till we've confirmed the new chain and old cogs are agreeable with each other. Andy
__________________
AndrewRStewart
AndrewRStewart
02-20-21 | 12:59 PM
#24
Senior Member
Joined: Feb 2012
Posts: 19,360
Likes: 5,492
From: Rochester, NY
Bikes: Stewart S&S coupled sport tourer, Stewart Sunday light, Stewart Commuting, Stewart Touring, Co Motion Tandem, Stewart 3-Spd, Stewart Track, Fuji Finest, Mongoose Tomac ATB, GT Bravado ATB, JCP Folder, Stewart 650B ATB
Roy- I think I have two spacers that match yours. My digital caliper shows the spacers have an OD of 53.83, ID of 44.46 and thickness of 3.65. Let me know if these will help. Andy
__________________
AndrewRStewart
AndrewRStewart
02-20-21 | 01:39 PM
#25
Newbie
Joined: Dec 2020
Posts: 63
Likes: 7
From: Round Rock, TX
Bikes: About 5, maybe 6?
That's great Andrew, I think those are the ones I need. I only need one but would happily take both if you are open to selling and shipping them to me. Let me know in PM and I can paypal you the funds.