


Shorten Chain

 11-23-12 | 03:05 PM
#2
Senior Member


Joined: Feb 2012
Posts: 19,373
Likes: 5,515
From: Rochester, NY
Bikes: Stewart S&S coupled sport tourer, Stewart Sunday light, Stewart Commuting, Stewart Touring, Co Motion Tandem, Stewart 3-Spd, Stewart Track, Fuji Finest, Mongoose Tomac ATB, GT Bravado ATB, JCP Folder, Stewart 650B ATB
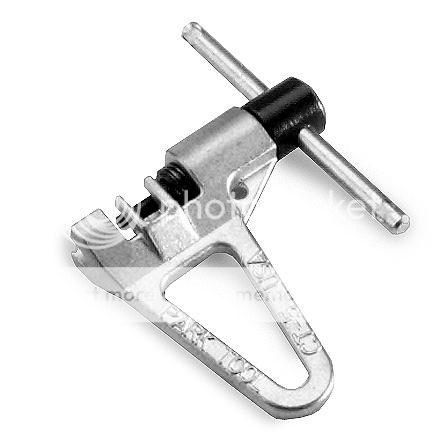
With a chain tool. Andy
11-23-12 | 03:06 PM
#3
Senior Member
Joined: Jul 2007
Posts: 229
Likes: 3
 11-23-12 | 03:08 PM
#4
Senior Member

Joined: Apr 2009
Posts: 39,897
Likes: 3,865
From: New Rochelle, NY
Bikes: too many bikes from 1967 10s (5x2)Frejus to a Sumitomo Ti/Chorus aluminum 10s (10x2), plus one non-susp mtn bike I use as my commuter
Since 1/8" chains (usually) come with connector links (master links), shortening is straightforward. Generally you use an inexpensive chain tool which you can find just about anywhere.
If you don't have a chain tool, but do have access to a bench grinder, you can grind the pins flush at both ends of the outer link then push them out with a hammer and punch. You only have to push far enough for the plate to fall free, then the link will fall out the other side of the chain. Replace this link with the connector on your bike and you're good to go.
Be sure to measure carefully, because it's a measure twice, cut once kind of a deal. But if you do mess up, you can resplice the chain with a second connector or a chain tool.
__________________
FB
Chain-L site
An ounce of diagnosis is worth a pound of cure.
Just because I'm tired of arguing, doesn't mean you're right.
�One accurate measurement is worth a thousand expert opinions� - Adm Grace Murray Hopper - USN
WARNING, I'm from New York. Thin skinned people should maintain safe distance.
FB
Chain-L site
An ounce of diagnosis is worth a pound of cure.
Just because I'm tired of arguing, doesn't mean you're right.
�One accurate measurement is worth a thousand expert opinions� - Adm Grace Murray Hopper - USN
WARNING, I'm from New York. Thin skinned people should maintain safe distance.
11-23-12 | 03:17 PM
#5
Mechanic/Tourist
Joined: Apr 2007
Posts: 7,522
Likes: 12
From: Syracuse, NY
Bikes: 2008 Novara Randonee - love it. Previous bikes:Motobecane Mirage, 1972 Moto Grand Jubilee (my fave), Jackson Rake 16, 1983 C'dale ST500.
Cut to the same number of links as the old chain, not counting the master on either. You should have an inner link at each end once cut. You can always check by wrapping the chain around the chainwheel and installed wheel with the wheel roughly centered in the dropout slot before cutting. You should have roughly one link space between the two inner plates.
Once cut, install the chain on the bike and snap the master link on. Pull back on the wheel so that it is cantered in the frame with only very slight tension on the chain. Tighten the right nut snug but not all the way tight. Recenter the wheel and tighten the left nut slightly. If a coaster brake, attach the brake arm with the clamp on the stay loose to allow movement. Turn the cranks to find any tight places in the rotation. Always rotate the cranks forward during this process - use your hands rather than back-pedal to stop the wheel.
Place at the cranks at the tightest point and loosen the right nut just enough to release chain tension. Recenter the wheel with the left nut and crank around again. Fine tune till satisfied, tighten brake arm clamp.
11-24-12 | 09:20 AM
#6
Senior Member

Joined: Feb 2001
Posts: 12,948
Likes: 9
From: England
Use the chainlength guide at parktools, they have several methods.
Use a chain tool. Since you only need to remove links, you can just punch them out using a hammer and nail on top of a vice, but a chaintool is a useful thing to have.
Practice on some old chain links first.
Count twice. Look at your master link and see how it works, they are all tool-free. After removing the master link, remove the excess links from one end but take care to leave the correct link type for rejoining the masterlink. Generally, the masterlink connects 2 innie links so don't leave an outy link at one end.

Thread
Thread Starter
Forum
Replies
Last Post
auchencrow
Bicycle Mechanics
21
09-03-10 01:36 PM
