


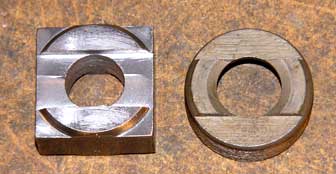
BB removal...!
 02-05-13 | 08:44 AM
#26
Thread Starter
Senior Member
Joined: Dec 2012
Posts: 117
Likes: 0
Additional thoughts would be appreciated!
 02-05-13 | 10:15 AM
#27
Thread Starter
Senior Member
Joined: Dec 2012
Posts: 117
Likes: 0
You may have one old enough to be pre-Raleigh and thus have the standard British threading. If you still have the headbadge, it will say Birmingham if it is pre-Raleigh, Nottingham if it was produced by Raleigh. By all means try to save the old parts, some of us are always on the lookout for replacements.
What do you plan to do with the old cranks? If this is truly a pre-Raleigh Hercules I may want to take them off your hands.
-G
What do you plan to do with the old cranks? If this is truly a pre-Raleigh Hercules I may want to take them off your hands.
-G
02-05-13 | 12:42 PM
#28
Mechanic/Tourist
Joined: Apr 2007
Posts: 7,522
Likes: 12
From: Syracuse, NY
Bikes: 2008 Novara Randonee - love it. Previous bikes:Motobecane Mirage, 1972 Moto Grand Jubilee (my fave), Jackson Rake 16, 1983 C'dale ST500.
I have been attempting to turn the fixed cup(drive side/right) out by turning the sheldon home made tool toward the back of the frame. I'm wondering if that is the correct direction and how to tell which is correct. I have sheared off two 5/16" case hardened bolt attempting this!
Additional thoughts would be appreciated!
Additional thoughts would be appreciated!
Left-hand threaded fixed cups unscrew clockwise, looking from the drive side. I don't know what you mean by "toward the back of the frame" - it's better to tell us if you are turning clockwise or counterclockwise, and which side of the frame you are standing on.
For a left-handed thread you should be facing the drive side of the frame and be turning the bolt clockwise to loosen the fixed cup, as Sheldon explains in the section after the description of the tool.
Last edited by cny-bikeman; 02-05-13 at 02:37 PM.
02-05-13 | 06:00 PM
#29

Half way there
Joined: May 2011
Posts: 1,109
Likes: 1
From: Durham, NC
Bikes: 69 Hercules, 73 Raleigh Sports, 74 Raliegh Competition, 78 Nishiki Professional, 79 Nishiki International, 83 Colnago Super, 83 Viner Junior
02-05-13 | 07:38 PM
#31
Thread Starter
Senior Member
Joined: Dec 2012
Posts: 117
Likes: 0
Mechanic's first rule of stuck parts: Push hard, push a little harder, stop and think.
Left-hand threaded fixed cups unscrew clockwise, looking from the drive side. I don't know what you mean by "toward the back of the frame" - it's better to tell us if you are turning clockwise or counterclockwise, and which side of the frame you are standing on.
For a left-handed thread you should be facing the drive side of the frame and be turning the bolt clockwise to loosen the fixed cup, as Sheldon explains in the section after the description of the tool.
02-05-13 | 08:40 PM
#32

S'Cruzer
Joined: Jun 2010
Posts: 2,445
Likes: 19
From: 122W 37N
Bikes: too many
(pure personal opinion, its worth whatcha paid for it...)
the more you 'restore' something like that head badge, the greater the chance of making it worse. the patina of age has more value than making it look shiny/new. if its really grody, maybe put it in an ultrasonic cleaner (since its off the bike), then rivet it back on.
:deal:
the more you 'restore' something like that head badge, the greater the chance of making it worse. the patina of age has more value than making it look shiny/new. if its really grody, maybe put it in an ultrasonic cleaner (since its off the bike), then rivet it back on.
:deal:
02-05-13 | 09:02 PM
#33
Thread Starter
Senior Member
Joined: Dec 2012
Posts: 117
Likes: 0
(pure personal opinion, its worth whatcha paid for it...)
the more you 'restore' something like that head badge, the greater the chance of making it worse. the patina of age has more value than making it look shiny/new. if its really grody, maybe put it in an ultrasonic cleaner (since its off the bike), then rivet it back on.:deal:
the more you 'restore' something like that head badge, the greater the chance of making it worse. the patina of age has more value than making it look shiny/new. if its really grody, maybe put it in an ultrasonic cleaner (since its off the bike), then rivet it back on.:deal:
02-06-13 | 02:18 AM
#34
Senior Member
Joined: Oct 2009
Posts: 1,921
Likes: 5
From: England, currently dividing my time between university in Guildford and home just outside Reading
Bikes: Too many to list here!
By "towards the back of the frame" I meant: I am standing on the drive side, the frame is up with the seat tube on the bench and the rear to my right. I am turning clockwise toward the back. I am going to make an attempt at my version of the "sheldon" tool using some different and heavier components.
You want to unscrew the fixed cup by turning it clockwise (looking at it from the outside of the BB shell, facing towards the side it's threaded into), so I think what you're doing is correct.
02-06-13 | 07:32 AM
#35
Mechanic/Tourist
Joined: Apr 2007
Posts: 7,522
Likes: 12
From: Syracuse, NY
Bikes: 2008 Novara Randonee - love it. Previous bikes:Motobecane Mirage, 1972 Moto Grand Jubilee (my fave), Jackson Rake 16, 1983 C'dale ST500.
By "towards the back of the frame" I meant: I am standing on the drive side, the frame is up with the seat tube on the benchand the rear to my right. I am turning clockwise toward the back. I am going to make an attempt at my version of the "sheldon" tool using some different and heavier components.
02-06-13 | 08:41 AM
#36
Thread Starter
Senior Member
Joined: Dec 2012
Posts: 117
Likes: 0
Again, this is why clockwise/cclocwise is best. I can only guess what you mean by the frame is "up," or the seat tube is "on" the bench, or the difference between "the rear" and "the back." I am not making fun of you, it's just that "clockwise facing the drive side of the frame" is many fewer words and more clear. Some people do not value their time greatly, or just want to do it themselves, but at this point if I were in your position would be taking the bike to a shop to have them remove the fixed cup in about 5 minutes (including handling time). I happen to have a fixed cup tool but few are in that position.
I do appreciate the thought of the LBS helping out and there are some good ones here in "cracker country." I;ll document the progress!
 02-11-13 | 04:03 PM
#38
Senior Member
Joined: Jan 2012
Posts: 2,243
Likes: 4
From: Spokane, WA
Bikes: Specialized Sequoia Elite/Motobecane Fantom Cross Team Ti/'85 Trek 520

So yesterday I got a grade 8 bolt in 9/16ths size with matching grade 8 nut and 3 lock washers and put it into the adjustable cup. Put my half inch socket with short extension into the BB shell and then tightened it down. Used a big ole breaker bar and it ended up breaking the cup free and I was able to save the bike. Never came across one so stuck as that one but all is well now.
02-11-13 | 04:40 PM
#39
Thread Starter
Senior Member
Joined: Dec 2012
Posts: 117
Likes: 0
So yesterday I got a grade 8 bolt in 9/16ths size with matching grade 8 nut and 3 lock washers and put it into the adjustable cup. Put my half inch socket with short extension into the BB shell and then tightened it down. Used a big ole breaker bar and it ended up breaking the cup free and I was able to save the bike. Never came across one so stuck as that one but all is well now.
02-11-13 | 05:46 PM
#40
Senior Member
Joined: Jan 2012
Posts: 2,243
Likes: 4
From: Spokane, WA
Bikes: Specialized Sequoia Elite/Motobecane Fantom Cross Team Ti/'85 Trek 520
Make sure you get grade 8 and not grade 5. It would be a pisser to break the bolt while attempting.
The key about this is that since I was working on the adjustable side not the fixed side, I had to loosen the cup in the normal counter clockwise fashion. Normally if you fix a bolt to the cup and try to remove it from outside the frame, you won't get anywhere because the tool will loosen before the cup loosens. So I put my socket and extension INSIDE the bb shell and then I used the breaker bar to tighten the bolt down which caused the adjustable cup to break free in the proper motion. Use logic and reason to understand that the tool is going to work best if it is tightening down the bolt and nut and washers in the direction that you want to remove the cup since as you tighten the tool more, its trying to loosen the cup at the same time.
The key about this is that since I was working on the adjustable side not the fixed side, I had to loosen the cup in the normal counter clockwise fashion. Normally if you fix a bolt to the cup and try to remove it from outside the frame, you won't get anywhere because the tool will loosen before the cup loosens. So I put my socket and extension INSIDE the bb shell and then I used the breaker bar to tighten the bolt down which caused the adjustable cup to break free in the proper motion. Use logic and reason to understand that the tool is going to work best if it is tightening down the bolt and nut and washers in the direction that you want to remove the cup since as you tighten the tool more, its trying to loosen the cup at the same time.
02-18-13 | 09:46 AM
#41
Thread Starter
Senior Member
Joined: Dec 2012
Posts: 117
Likes: 0
Make sure you get grade 8 and not grade 5. It would be a pisser to break the bolt while attempting.
The key about this is that since I was working on the adjustable side not the fixed side, I had to loosen the cup in the normal counter clockwise fashion. Normally if you fix a bolt to the cup and try to remove it from outside the frame, you won't get anywhere because the tool will loosen before the cup loosens. So I put my socket and extension INSIDE the bb shell and then I used the breaker bar to tighten the bolt down which caused the adjustable cup to break free in the proper motion. Use logic and reason to understand that the tool is going to work best if it is tightening down the bolt and nut and washers in the direction that you want to remove the cup since as you tighten the tool more, its trying to loosen the cup at the same time.
The key about this is that since I was working on the adjustable side not the fixed side, I had to loosen the cup in the normal counter clockwise fashion. Normally if you fix a bolt to the cup and try to remove it from outside the frame, you won't get anywhere because the tool will loosen before the cup loosens. So I put my socket and extension INSIDE the bb shell and then I used the breaker bar to tighten the bolt down which caused the adjustable cup to break free in the proper motion. Use logic and reason to understand that the tool is going to work best if it is tightening down the bolt and nut and washers in the direction that you want to remove the cup since as you tighten the tool more, its trying to loosen the cup at the same time.
So...I drew a diagram of the existing condiiton and it looks like to me that in order to "screw' this thing out I have to turn it C Clockwise.
Note the direction of the threads relative to the face of the BB shell. I have exaggerated the pitch, etc. to illustrate the condition. With the frame sitting on the floor, bench, what ever, the arrows indicate the direction. If I turn or tighten clockwise I am turning toward the front of the frame and that
02-18-13 | 10:02 AM
#42
Senior Member
Joined: Oct 2009
Posts: 1,921
Likes: 5
From: England, currently dividing my time between university in Guildford and home just outside Reading
Bikes: Too many to list here!
I understand about the clockwise and c clockwise and it makes sense. What doesn't make sense is that as I "crank" on this thing it appears to be tightening it in the BB shell.
So...I drew a diagram of the existing condiiton and it looks like to me that in order to "screw' this thing out I have to turn it C Clockwise.
Note the direction of the threads relative to the face of the BB shell. I have exaggerated the pitch, etc. to illustrate the condition. With the frame sitting on the floor, bench, what ever, the arrows indicate the direction. If I turn or tighten clockwise I am turning toward the front of the frame and that appears to be tightening the cup in the shell. I need some directional help here!!!
So...I drew a diagram of the existing condiiton and it looks like to me that in order to "screw' this thing out I have to turn it C Clockwise.
Note the direction of the threads relative to the face of the BB shell. I have exaggerated the pitch, etc. to illustrate the condition. With the frame sitting on the floor, bench, what ever, the arrows indicate the direction. If I turn or tighten clockwise I am turning toward the front of the frame and that
"turning forwards" is a bad term to use - if you make a full rotation (clockwise or anticlockwise), you'll move the wrench both "forward" and "backward" at different points.
*at least on british/ISO and Raleigh threads they are
 02-18-13 | 04:39 PM
#45
Senior Member
Joined: Jan 2012
Posts: 2,243
Likes: 4
From: Spokane, WA
Bikes: Specialized Sequoia Elite/Motobecane Fantom Cross Team Ti/'85 Trek 520
I understand about the clockwise and c clockwise and it makes sense. What doesn't make sense is that as I "crank" on this thing it appears to be tightening it in the BB shell.
So...I drew a diagram of the existing condiiton and it looks like to me that in order to "screw' this thing out I have to turn it C Clockwise.
Note the direction of the threads relative to the face of the BB shell. I have exaggerated the pitch, etc. to illustrate the condition. With the frame sitting on the floor, bench, what ever, the arrows indicate the direction. If I turn or tighten clockwise I am turning toward the front of the frame and that appears to be tightening the cup in the shell. I need some directional help here!!!
So...I drew a diagram of the existing condiiton and it looks like to me that in order to "screw' this thing out I have to turn it C Clockwise.
Note the direction of the threads relative to the face of the BB shell. I have exaggerated the pitch, etc. to illustrate the condition. With the frame sitting on the floor, bench, what ever, the arrows indicate the direction. If I turn or tighten clockwise I am turning toward the front of the frame and that
Anyway, so if you have confirmed that you need to loosen it counter clockwise which is normal for most bolts, then you will need to do what I did with sheldons tool. You can't really loosen the cup with the bolt and washers and nut from the outside the BB shell because all you will do is loosen up the nut and bolt before you ever get enough torque to loosen the cup.
So what you do is put a 1/2drive socket of appropriate size INSIDE the BB shell and then I used a short 2 inch 1/2 drive extension and then put a 1/2 inch drive breaker bar on the socket/extension combo. Then I used a pipe on the breaker bar and turned the whole assembly (sheldon's tool) CLOCKWISE which meant that it would tighten the bolt and nut assembly in the fixed cup. It also would be putting all the force in moving the cup counterclockwise when viewed from outside the frame as in your picture. Once I broke my cup free and took it out and removed the tool, it had exerted so much force on the washers that one of them was bent into a concave shape against the cup and the nut had made a solid impression in the washer. That is how much force was needed to finally break the cup free.
02-18-13 | 05:56 PM
#46

Old fart


Joined: Nov 2004
Posts: 26,350
Likes: 5,262
From: Appleton WI
Bikes: Several, mostly not name brands.
If what you are drawing is the "fixed cup", then something is odd. Normally the fixed cup has the solid ring around the end of the threads to lock it down against the BB shell when it is fully tightened. What you have pictured is that the threads extend all the way to the end of the cup with no lip.

or the BikeSmithDesign bottom bracket tool work best:
 02-25-13 | 07:21 AM
#47
Thread Starter
Senior Member
Joined: Dec 2012
Posts: 117
Likes: 0
OK...here's the deal! After scaring my dog to death, teaching him some new words, making the neighbors think "WTF" is going on in my garage...I even learned some NEW and BETTER uses for numerous expletives that I must admit were VERY SOPHISTICATED  , I have successfully "pulled out" I mean extracted the fixed cup from the bb shell of this old Hercules frame. With the proper "appendage", I mean piece of pipe on the rachet handle and persistence it just backed out! I even amaze myself sometimes! I do THAN ALL all for the words of instruction and "encouragement and I have to thank the numerous "malt based beverages" that contributed to my success in this "most excellent adventure" in leverage, patience and the proper use of a piece of pipe!
THANKS ALL AGAIN!
Now I'm sure that all of the participants in my success will be encouraged to know that there are certainly more questions to pose in this "Herculian" adventure.
, I have successfully "pulled out" I mean extracted the fixed cup from the bb shell of this old Hercules frame. With the proper "appendage", I mean piece of pipe on the rachet handle and persistence it just backed out! I even amaze myself sometimes! I do THAN ALL all for the words of instruction and "encouragement and I have to thank the numerous "malt based beverages" that contributed to my success in this "most excellent adventure" in leverage, patience and the proper use of a piece of pipe!THANKS ALL AGAIN!
Now I'm sure that all of the participants in my success will be encouraged to know that there are certainly more questions to pose in this "Herculian" adventure.
02-25-13 | 09:08 AM
#48
Thread Starter
Senior Member
Joined: Dec 2012
Posts: 117
Likes: 0
For and OLD GROUCHY GUY I discovered that a new threaded BB will probably NOT work on this Herculian project! After removing the fixed cup and cleaning the threads I came up with what appears to be pieces of thread! Hey...a country western song: "I unscrewed it and all I got was a couple of pieces of thread."
Seriously it appears that perhaps the cup was cross threaded and the mock up Sugino that threaded in nicely on the adj. side doesn't fit as nicely on the fixed(drive) side. There appears to be SLOP in the fitment. I am conducted technical discussions with VO about there threadless BB as a solution.
Are there any thoughts about this solution?
02-25-13 | 11:01 AM
#49
Not quite there yet
Joined: Feb 2013
Posts: 999
Likes: 2
From: Monkey Bottom, NC
Bikes: A bunch of old steel bikes + an ICE trike
I think it's worth an attempt to cleanup the threads by chasing them with the proper tap. Most good bike shops should have the necessary tools to do this.
Good luck.
Good luck.
02-25-13 | 11:24 AM
#50
Old fart
Joined: Nov 2004
Posts: 26,350
Likes: 5,262
From: Appleton WI
Bikes: Several, mostly not name brands.
Seriously it appears that perhaps the cup was cross threaded and the mock up Sugino that threaded in nicely on the adj. side doesn't fit as nicely on the fixed(drive) side. There appears to be SLOP in the fitment. I am conducted technical discussions with VO about there threadless BB as a solution.
Are there any thoughts about this solution?
Are there any thoughts about this solution?