


First Generation Suntour Cyclone Cage Switch
 02-03-20 | 08:58 PM
#1

Thread Starter
Senior Member


Joined: May 2012
Posts: 5,061
Likes: 4,953
From: Point Reyes Station, California
Bikes: Indeed!
First Generation Suntour Cyclone Cage Switch
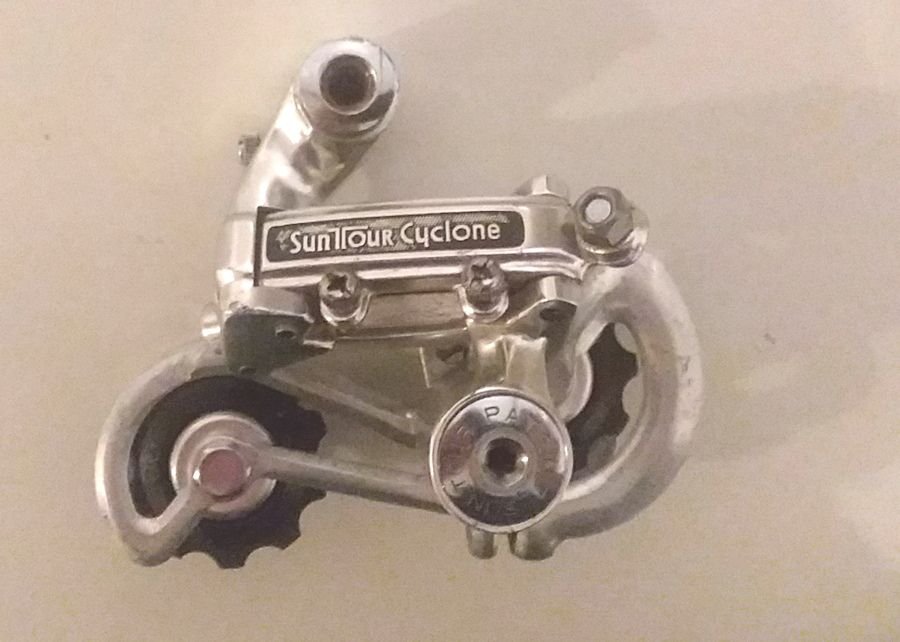
Switching long and short cages on the first generation Cyclone has been mentioned several times on this forum. I finally had a need to do so on a Raleigh Pro that I'm building for the California Eroica this year. I had a short cage black edition Cyclone that I wanted to outfit with the long cage. I recorded the steps for posterity and for those who might be encouraged by a few photos to attempt this rather simple procedure.
Start by unscrewing the limiting screws on both cages and allow the cages to unwind their spring tension.

I disassembled the long cage derailleur first. The bolt that attaches the cage to the body also holds the two sides of the cage together, sandwiching the upper pulley between the two cage plates. There is probably a special tool for removing the slotted nut but my snap ring pliers worked fine for the job.

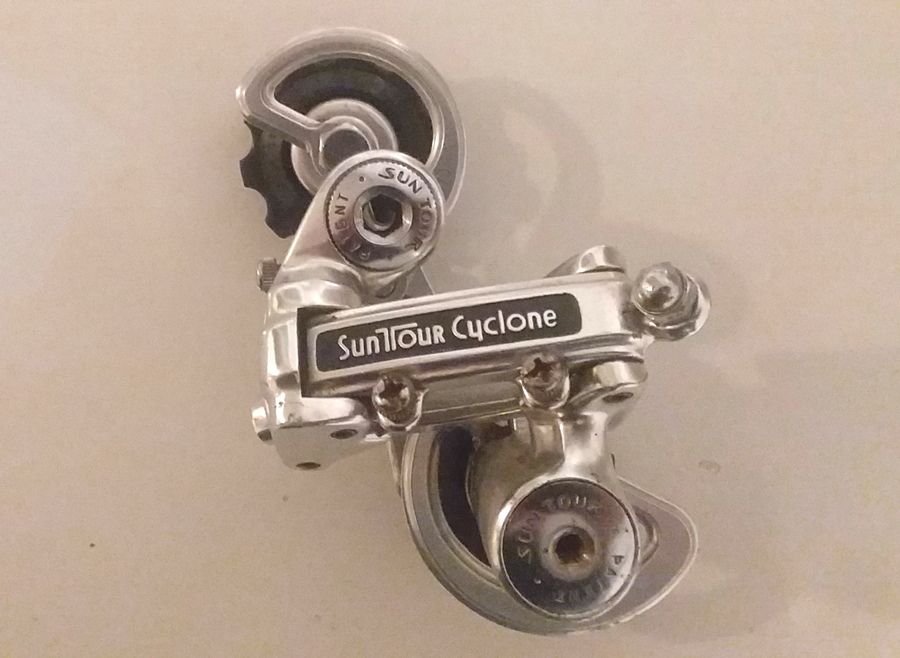
Here is the backside of the short cage derailleur for comparison. Notice that the cage is attached differently. The attaching bolt threads directly into the front cage plate. The pulley and rear cage plate are in the way of seeing where it attaches but you will see that in the disassembled view a little later.

Once you have removed the nut from the back of the cage you can unscrew the fixing bolt as shown.

The fixing bolt will now lift out of the barrel. With luck the spring will come with it, but if it seems stuck in place you can easily push it out of the little hole at the back of the barrel with a stout wire.


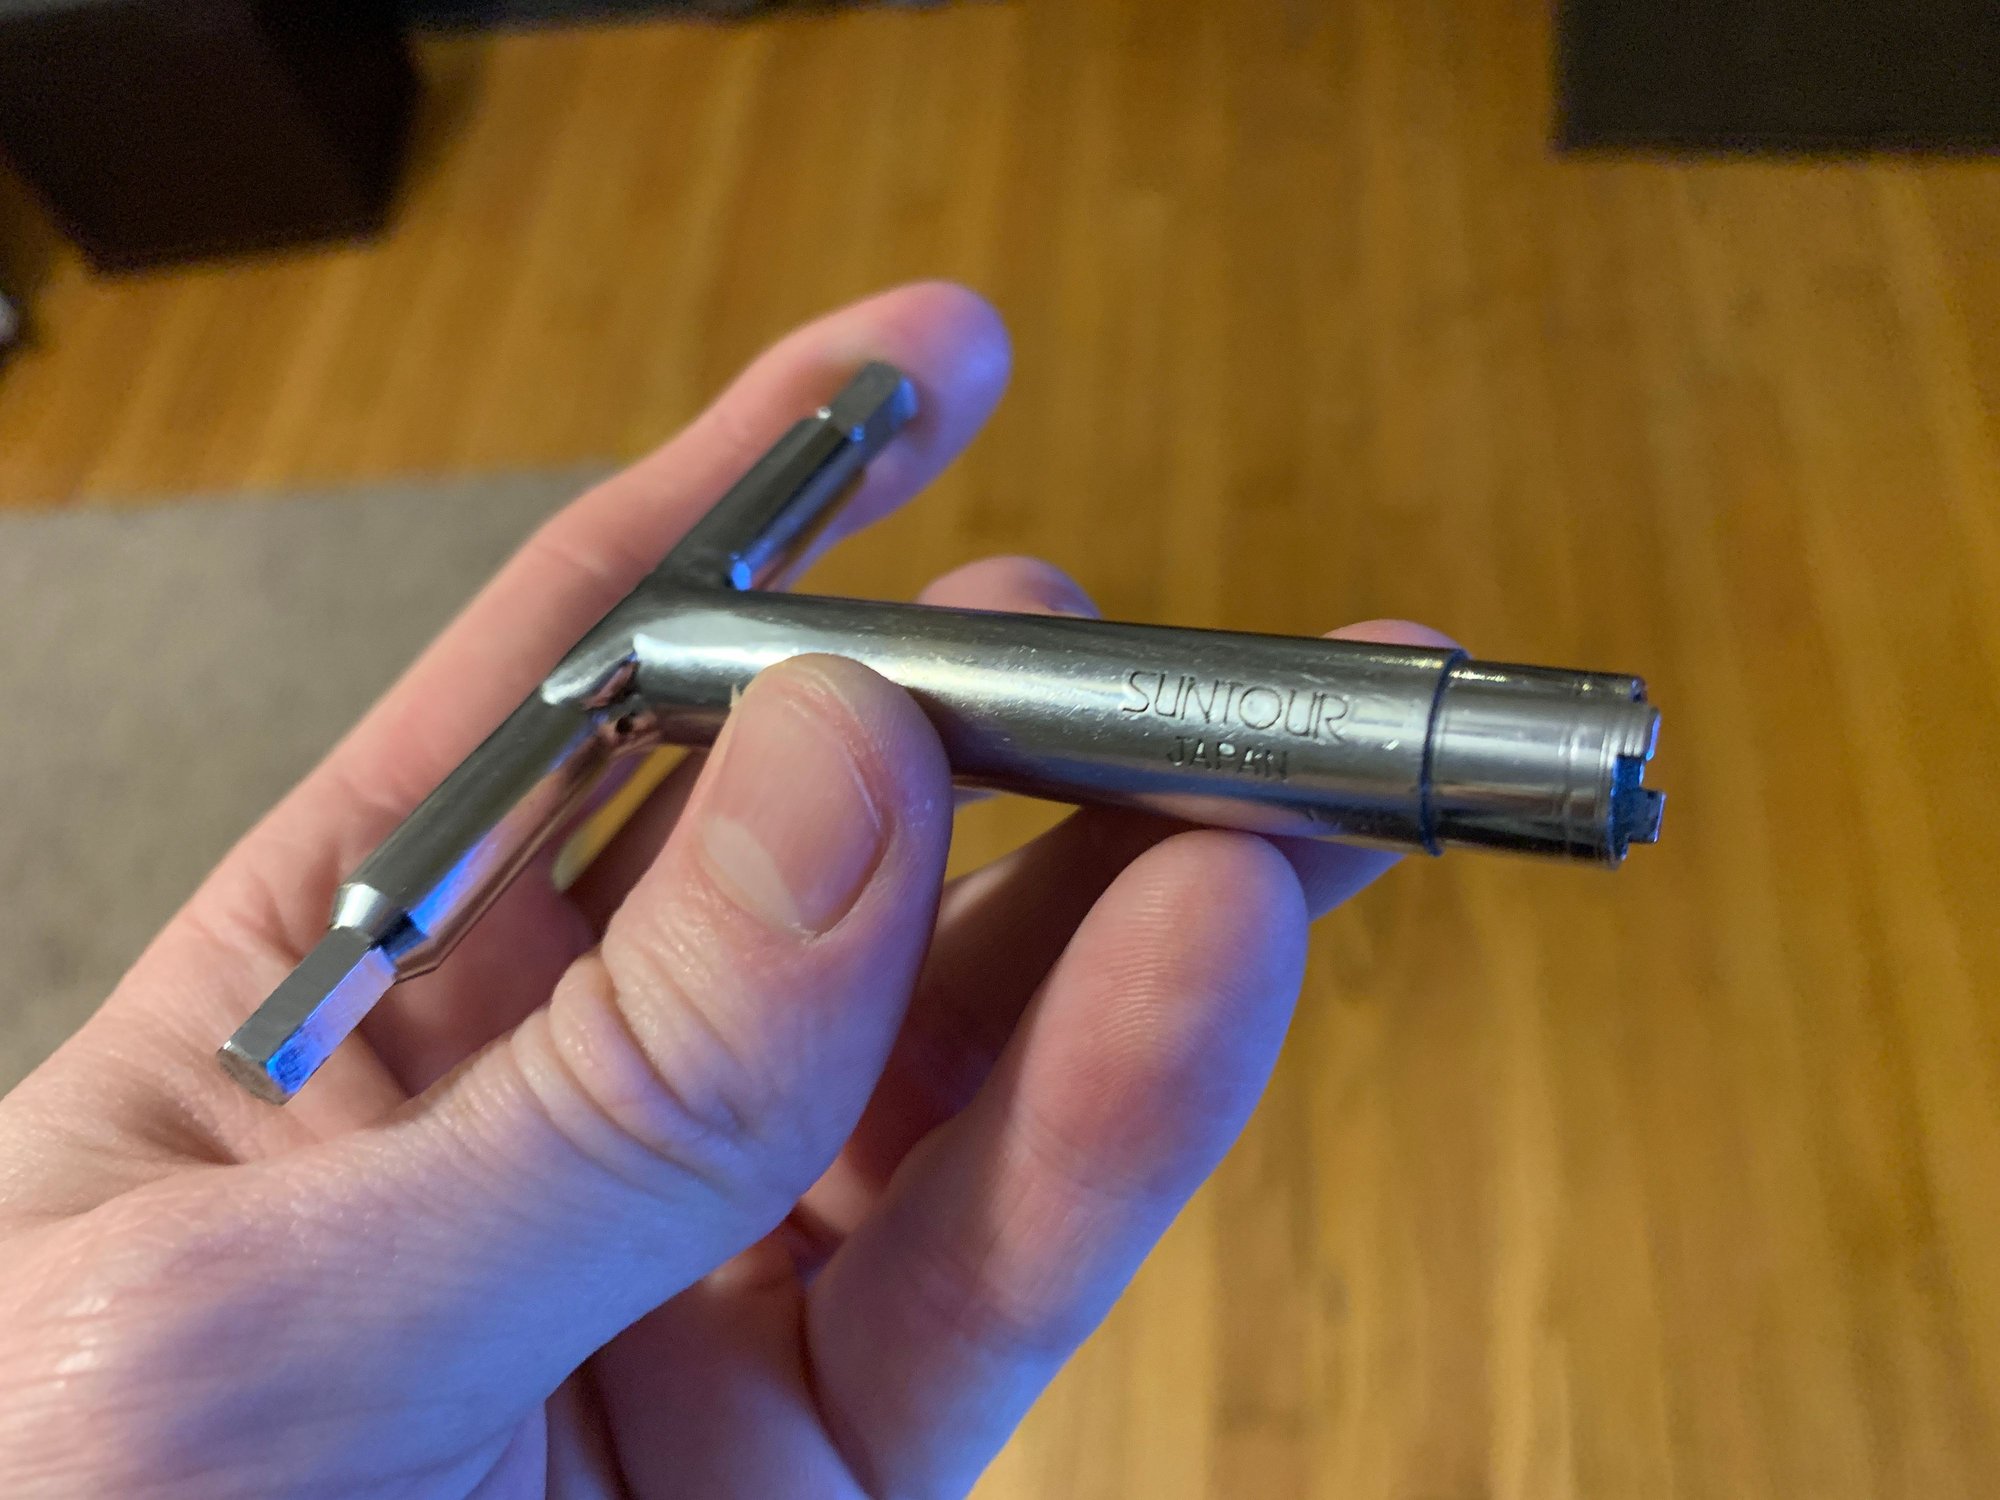
On to the short cage removal. Since there is no nut to remove from the cage you skip that step. Holding the cage in your hand or a vise you can again use your allen wrench to unscrew the bolt from the barrel but, surprise, this time it's not a bolt it's a cap under which lurks the real bolt and the spring. I'll bet there is a special tool for removing this bolt/spring retainer but I found that my Shimano chainring bolt tool worked just fine.

Here you see both derailleurs disassembled. I disassembled the short cage before removing it but that step turned out to be unnecessary.

Move the cages and all of the hardware from one body to the other. Reassembly is the opposite of disassembly, with a little grease thrown in for good measure.

I'm sure other members more experienced and knowledgeable than I can add some pointers here.
My thanks to jeirvine for the long cage derailleur.
Brent
Start by unscrewing the limiting screws on both cages and allow the cages to unwind their spring tension.
I disassembled the long cage derailleur first. The bolt that attaches the cage to the body also holds the two sides of the cage together, sandwiching the upper pulley between the two cage plates. There is probably a special tool for removing the slotted nut but my snap ring pliers worked fine for the job.
Here is the backside of the short cage derailleur for comparison. Notice that the cage is attached differently. The attaching bolt threads directly into the front cage plate. The pulley and rear cage plate are in the way of seeing where it attaches but you will see that in the disassembled view a little later.
Once you have removed the nut from the back of the cage you can unscrew the fixing bolt as shown.
The fixing bolt will now lift out of the barrel. With luck the spring will come with it, but if it seems stuck in place you can easily push it out of the little hole at the back of the barrel with a stout wire.
On to the short cage removal. Since there is no nut to remove from the cage you skip that step. Holding the cage in your hand or a vise you can again use your allen wrench to unscrew the bolt from the barrel but, surprise, this time it's not a bolt it's a cap under which lurks the real bolt and the spring. I'll bet there is a special tool for removing this bolt/spring retainer but I found that my Shimano chainring bolt tool worked just fine.
Here you see both derailleurs disassembled. I disassembled the short cage before removing it but that step turned out to be unnecessary.
Move the cages and all of the hardware from one body to the other. Reassembly is the opposite of disassembly, with a little grease thrown in for good measure.
I'm sure other members more experienced and knowledgeable than I can add some pointers here.
My thanks to jeirvine for the long cage derailleur.
Brent
 02-03-20 | 09:01 PM
#2


Thrifty Bill

Joined: Jan 2008
Posts: 23,645
Likes: 1,109
From: Mans of NC & SW UT Desert
Bikes: 86 Katakura Silk, 87 Prologue X2, 88 Cimarron LE, 1975 Sekai 4000 Professional, 73 Paramount, plus more
FWIW Suntour made a special tool for the nut on the GT models.
Nice write up!
Nice write up!
__________________
Please don't confuse ebay "asking" prices with "selling" prices. Many sellers never get their ask price. some are far from it. Value is determined once an item actually SELLS. Its easy enough to check SOLD prices.
Please don't confuse ebay "asking" prices with "selling" prices. Many sellers never get their ask price. some are far from it. Value is determined once an item actually SELLS. Its easy enough to check SOLD prices.
 02-03-20 | 09:06 PM
#4
Senior Member
Joined: Nov 2013
Posts: 1,970
Likes: 1,141
From: Southern California
Bikes: 1981 Univega Super Special, '80s Custom Chris Pauley, 1972 Fuji 'The Finest'
02-03-20 | 09:43 PM
#5

Senior Member
Joined: Sep 2011
Posts: 3,372
Likes: 598
From: Baltimore MD
Bikes: '72 Motobecane Grand Record, '72 Gitane tandem, '72 Raleigh Super Course, '73 Raleigh Gran Sport, '73 Colnago Super, '76 Fiorelli Coppi, '78 Raleigh SBDU Team Pro, '78 Trek 930, '81 Holdsworth Special 650B, '86 Masi GC, ’94 Bridgestone RB-T
Nice instructable!
Only thing I'd add is that you have a choice of where to slot the spring into the castellated bolt (#20). Do this after first attaching the bolt to the cage. You can get more or less spring tension, depending. Too much tension can result in a snapped spring.
Oh, and you can also use a Vx-S or Vx-T cage for a medium cage Cyclone.
__________________
The man who dies with the most toys�is dead. - Rootboy
The man who dies with the most toys�is dead. - Rootboy


 02-04-20 | 10:38 AM
#8

Senior Member
Joined: Feb 2008
Posts: 5,321
Likes: 4,834
From: Peoria, IL
Thanks for the well documented story!
I've pulled my Cyclones apart for general maintenance and to replace a broken spring. As noted, there are a couple of challenges in the process.
My solution to unthreading the axle/bolt from the pulley cage plate is to slide the cage/bolt assembly back out of the derailleur housing, which exposes the bolt enough to just grab it with a vise-grips (locking pliers). If nothing else, it provides a bit more leverage than the chainring spanner that you used. There are probably other ways of doing it too.
A quick shot of my disassembled Cyclone, along with the broken spring.
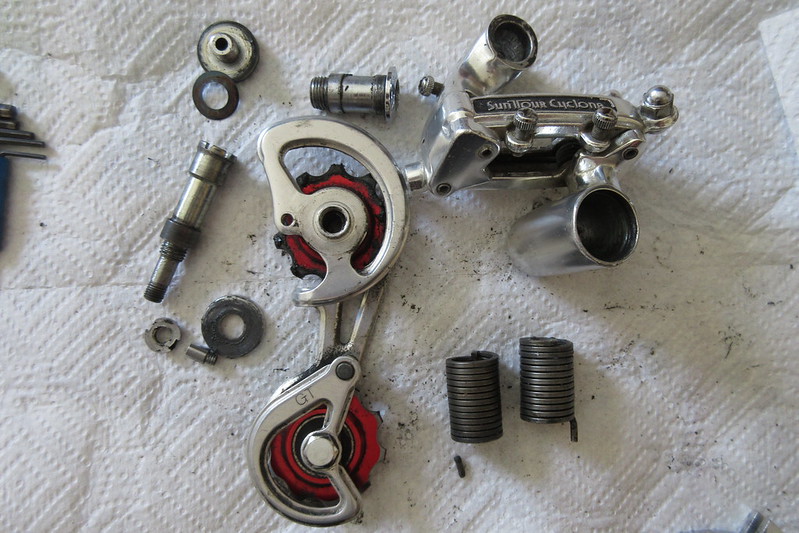
This is the second SunTour spring I've had break. The other is a somewhat similar coil spring on the XCD Pro cantilever brake. It also broke at the bend where the spring was supposed to engage with a locating hole.
Steve in Peoria
I've pulled my Cyclones apart for general maintenance and to replace a broken spring. As noted, there are a couple of challenges in the process.
My solution to unthreading the axle/bolt from the pulley cage plate is to slide the cage/bolt assembly back out of the derailleur housing, which exposes the bolt enough to just grab it with a vise-grips (locking pliers). If nothing else, it provides a bit more leverage than the chainring spanner that you used. There are probably other ways of doing it too.
A quick shot of my disassembled Cyclone, along with the broken spring.
This is the second SunTour spring I've had break. The other is a somewhat similar coil spring on the XCD Pro cantilever brake. It also broke at the bend where the spring was supposed to engage with a locating hole.
Steve in Peoria
02-04-20 | 11:26 AM
#9

Senior Member

Joined: Sep 2005
Posts: 3,491
Likes: 1,555
From: Oakland, CA
Bikes: '82 Univega Competizione, '72 Motobecane Grand Record, '83 Mercian KOM Touring, '85 Univega Alpina Uno, '76 Eisentraut Limited
I did this with a MKII Cyclone, using the cage from a ratty GT and the rest from a nice short cage to make a nicer looking GT. A quick note, though, that the generations cannot be mixed. The knuckle/pivot where the cage affixes is narrower on the MKII than the first gen.
02-04-20 | 11:43 AM
#10

Rustbelt Rider
Joined: Oct 2008
Posts: 9,105
Likes: 390
From: Canton, OH
Bikes: 1990 Trek 1420 - 1978 Raleigh Professional - 1973 Schwinn Collegiate - 1974 Schwinn Suburban
Nice write up! I could have used this a few days back when I was scratching my head with a cyclone.
Big question for me: How do you setup and judge spring tension when you reassemble? I want it to feel snappy, but how much is too much?
Big question for me: How do you setup and judge spring tension when you reassemble? I want it to feel snappy, but how much is too much?
__________________
|^^^^^^^^^^^^^^| ||
|......GO.BROWNS........| ||'|";, ___.
|_..._..._______===|=||_|__|..., ] -
"(@)'(@)"""''"**|(@)(@)*****''(@)
|^^^^^^^^^^^^^^| ||
|......GO.BROWNS........| ||'|";, ___.
|_..._..._______===|=||_|__|..., ] -
"(@)'(@)"""''"**|(@)(@)*****''(@)
02-04-20 | 12:46 PM
#11
Senior Member
Joined: Sep 2011
Posts: 3,372
Likes: 598
From: Baltimore MD
Bikes: '72 Motobecane Grand Record, '72 Gitane tandem, '72 Raleigh Super Course, '73 Raleigh Gran Sport, '73 Colnago Super, '76 Fiorelli Coppi, '78 Raleigh SBDU Team Pro, '78 Trek 930, '81 Holdsworth Special 650B, '86 Masi GC, ’94 Bridgestone RB-T
And here's a Cyclone-T, using a mid-cage from a Vx. You can swap in that, or a Vx-S cage, without needing the longer castellated bolt from a Cyclone GT. I haven't tested this, but I think it could be just the ticket on the right build:
__________________
The man who dies with the most toys�is dead. - Rootboy
The man who dies with the most toys�is dead. - Rootboy
02-04-20 | 01:03 PM
#12
Senior Member
Joined: Oct 2010
Posts: 8,841
Likes: 2,859
The cage on the elusive Suntour Superbe long cage FD-5800 and the cage on the Suntour XC are the same. The only difference is where the hole for the stop screw is drilled. So, you can buy a XC for cheap and make yourself a Surperbe long cage RD from a RD-5300. You'll need to drill/tap a new hole then move the stop screw.
VeloBase.com - Component: SunTour Superbe II (long-cage friction)
VeloBase.com - Component: SunTour XC
VeloBase.com - Component: SunTour Superbe II (long-cage friction)
VeloBase.com - Component: SunTour XC
