


Basso Loto
 12-02-24 | 07:01 PM
#51

Senior Member


Joined: Jul 2006
Posts: 11,512
Likes: 4,929
From: San Jose (Willow Glen) Ca
Bikes: Kirk Custom JK Special, 86 De Rosa Pro, '84 Team Miyata,(dura ace old school) 80?? SR Semi-Pro 600 Arabesque
Well now that the Ochsner has been dismantled I am leaning toward taking the Campy group that was originally on it, and using it on the Basso. The NR group is a bit prior to the 1990 type frame but should fit quite nicely on the bike. I will have to build a new wheel set for it. And that is gonna be a tutorial for teaching Jdawgs how to build a wheel. I'm gonna hang the NR stuff on it first and then start the wheel build. Smiles, MH
I really like the little calculator the show how even the wheel tension is....even if it has made be go back and redo things a couple of times
just finished lacing GP4 to front campy hub,.using this, ..rear is next
__________________
Life is too short not to ride the best bike you have, as much as you can.
Life is too short not to ride the best bike you have, as much as you can.
 12-02-24 | 08:07 PM
#52
Thread Starter
Senior Member


Joined: May 2019
Posts: 3,984
Likes: 3,226
From: Bloomington, IN
Bikes: Paramount, Faggin, Ochsner, Rossin, Ciocc
@squirtdad,
Same process I use with just a few variations, It is pretty much the simplified Jobst Brandt method but without the single side build and then the second side. There is some simple ideas involved but it works and has held up for plenty of long distance wheels for me. Smiles, MH
Same process I use with just a few variations, It is pretty much the simplified Jobst Brandt method but without the single side build and then the second side. There is some simple ideas involved but it works and has held up for plenty of long distance wheels for me. Smiles, MH
12-03-24 | 12:04 PM
#53
Thread Starter
Senior Member
Joined: May 2019
Posts: 3,984
Likes: 3,226
From: Bloomington, IN
Bikes: Paramount, Faggin, Ochsner, Rossin, Ciocc
Another snow day and working in the shop. Seat post seems to be a bit tight when a 27.0 is inserted, so I get out the junkyard tools for the repair. SLX tubing should be 27.2 and when I get the 27.0 past the first inch it is sloppy so I figure i might have compressed the binder area with the re-weld of the stay. A heavier grade of reaming paper and a few minutes of work and the 27.2 post goes in to within an inch of the post head. Pics of the junkyard tool:
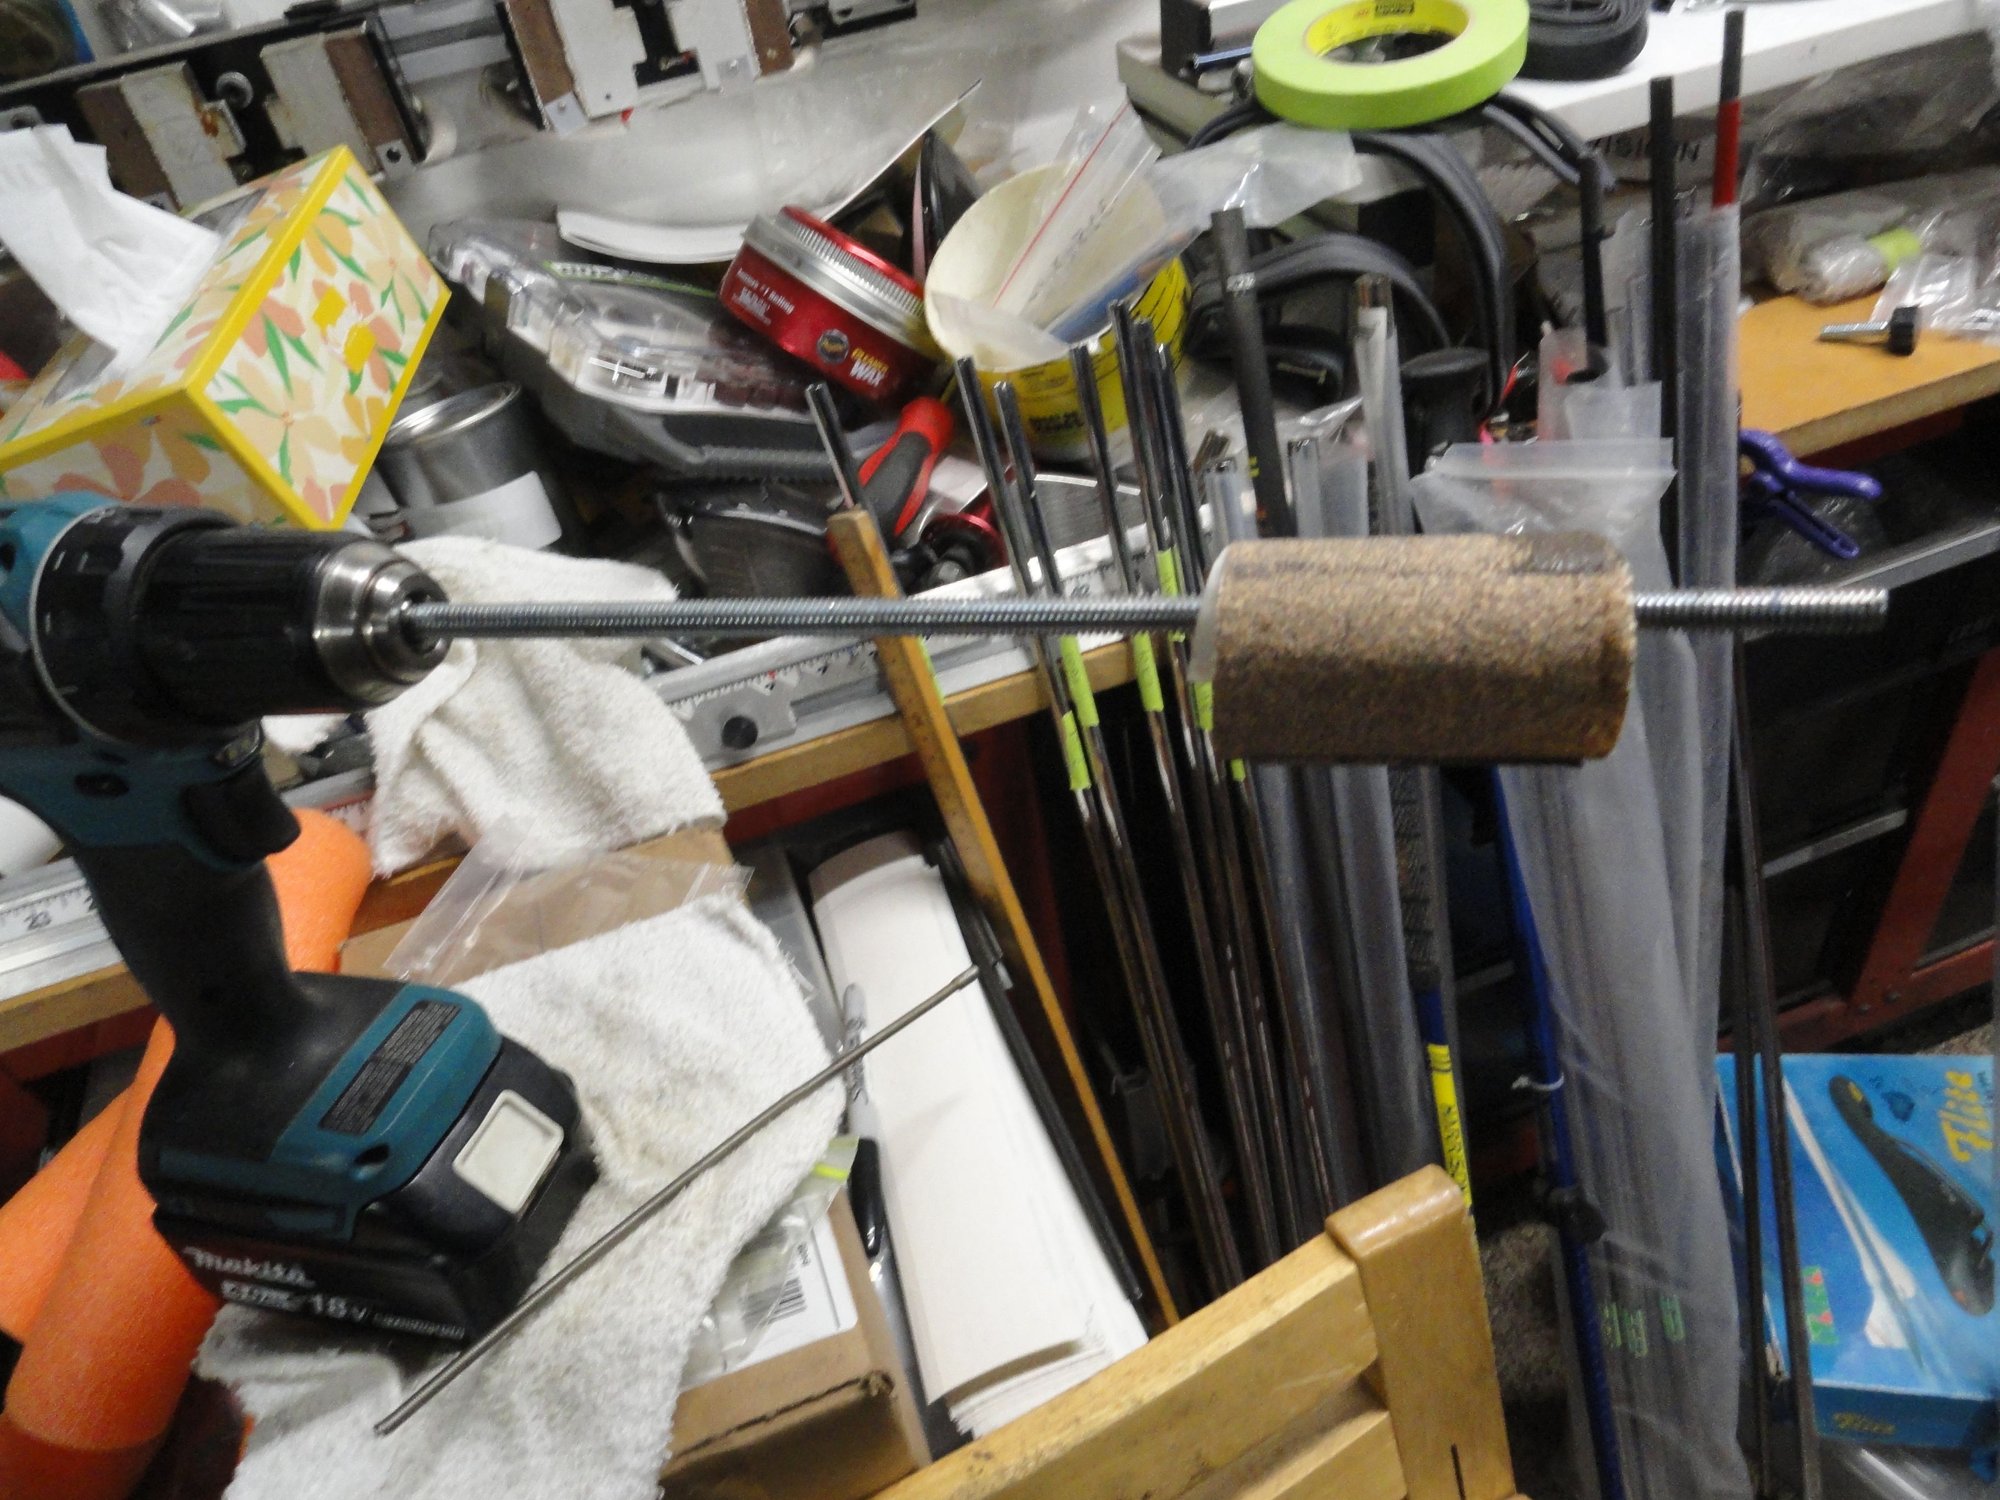
The tool is a spool of wood mounted on an all thread rod, and used with a drill for creating a circular motion of the grit paper.
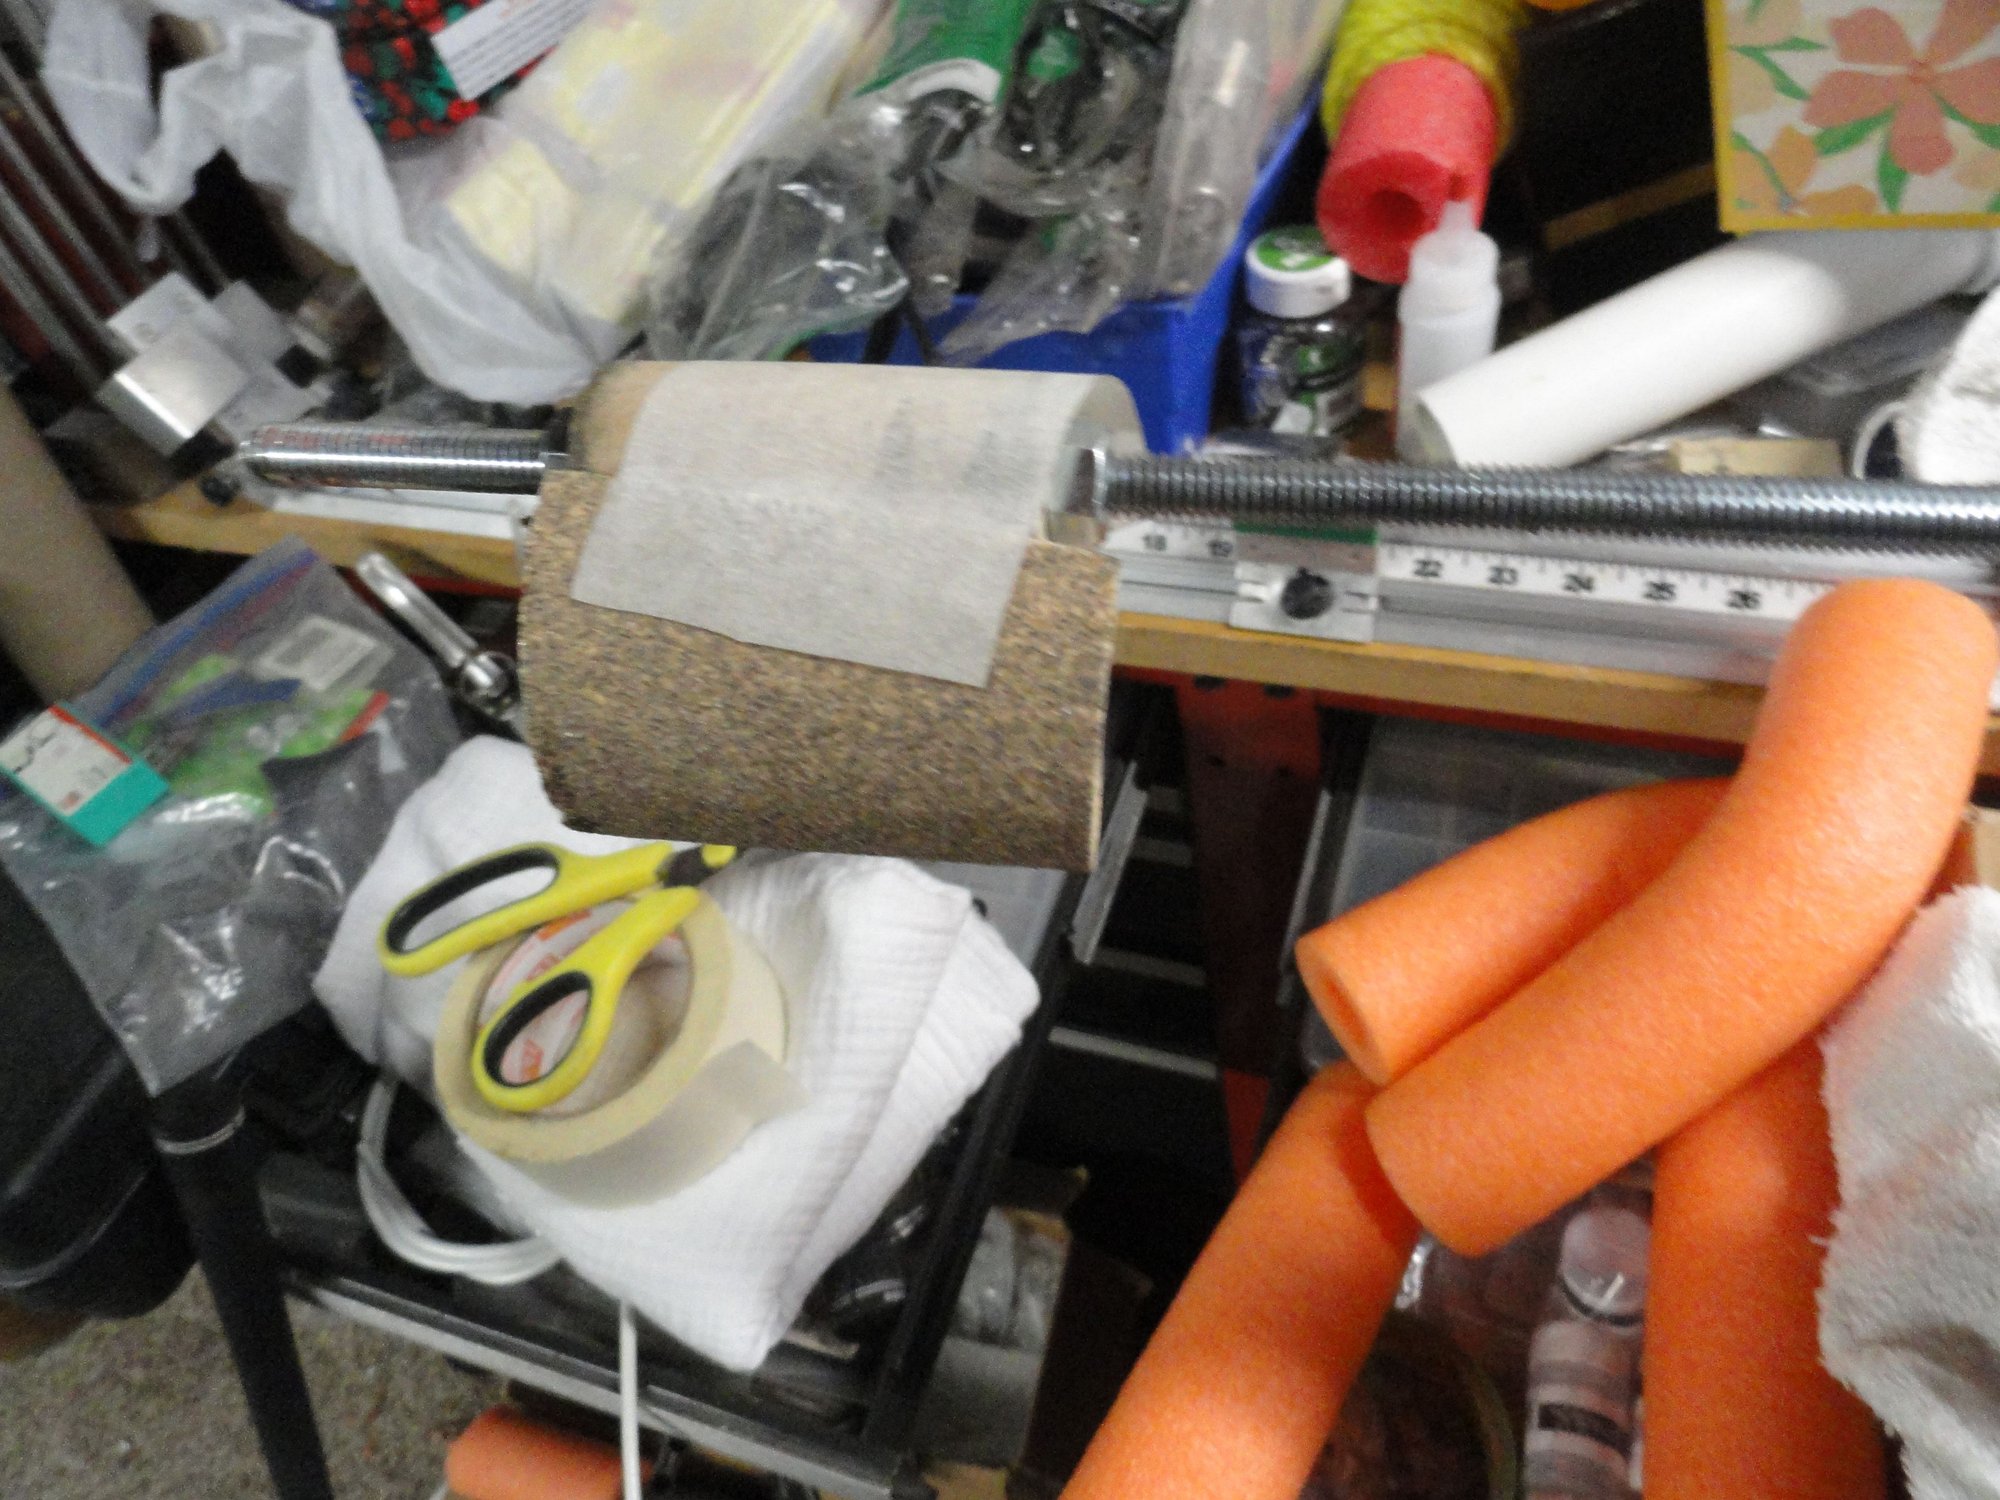
The paper is mounted with a piece of masking tape and the length of the paper determines the thickness of the reaming diameter.
Smiles, MH
The tool is a spool of wood mounted on an all thread rod, and used with a drill for creating a circular motion of the grit paper.
The paper is mounted with a piece of masking tape and the length of the paper determines the thickness of the reaming diameter.
Smiles, MH
01-13-25 | 06:49 PM
#54
Thread Starter
Senior Member
Joined: May 2019
Posts: 3,984
Likes: 3,226
From: Bloomington, IN
Bikes: Paramount, Faggin, Ochsner, Rossin, Ciocc
Finally got some time for this build today. I got a pretty cool blue anodized Modolo caliper and it came with a drop bolt for a Campy style brake. So off to the stash to get a caliper that was marked for parts in the stash and put together a rear brake for a recessed bolt with the correct parts. A bit of hassle but the results are going to work out fine. Pics of the finished caliper:

I think the blue anodized looks like a close match and I will go to the Kool Stop inventory to find a suitable pair of pads for the build.
These two compound pad style of brake pad holders are pretty nice and have the replaceable pads for the long haul.
Smiles, MH
I think the blue anodized looks like a close match and I will go to the Kool Stop inventory to find a suitable pair of pads for the build.
These two compound pad style of brake pad holders are pretty nice and have the replaceable pads for the long haul.
Smiles, MH
01-14-25 | 01:17 AM
#55

Edumacator

Joined: Jan 2018
Posts: 9,705
Likes: 5,196
From: Goose Creek, SC
Bikes: More than the people who ride them...oy.
Finally got some time for this build today. I got a pretty cool blue anodized Modolo caliper and it came with a drop bolt for a Campy style brake. So off to the stash to get a caliper that was marked for parts in the stash and put together a rear brake for a recessed bolt with the correct parts. A bit of hassle but the results are going to work out fine. Pics of the finished caliper:
I think the blue anodized looks like a close match and I will go to the Kool Stop inventory to find a suitable pair of pads for the build.
These two compound pad style of brake pad holders are pretty nice and have the replaceable pads for the long haul.
Smiles, MH
I think the blue anodized looks like a close match and I will go to the Kool Stop inventory to find a suitable pair of pads for the build.
These two compound pad style of brake pad holders are pretty nice and have the replaceable pads for the long haul.
Smiles, MH
__________________
1987 Crest C'dale, 1987 Basso Gap, 1992 Rossin EL, 1990 Van Tuyl, 1985 Trek 670, 2003 Pinarello Surprise, 1990ish MBK Atlantique, 1987 Peugeot Isoard, 1987 Nishiki Tri-A, 1981 Faggin, 1996 C'dale M500, 1984 Mercian Pro, 1982 AD SuperLeicht, 1985 Massi ?, 1988 Daccordi Griffe , 1989 Fauxsin MTB, 1981 Ciocc Mockba, 1992 Bianchi Giro, 1977 Colnago Super, 1971 Raleigh Internat'l, 1998 Corratec U+D, 1991 Peugeot Slimestone, 1987 Bianchi Volpe, 1995 Trek 750
1987 Crest C'dale, 1987 Basso Gap, 1992 Rossin EL, 1990 Van Tuyl, 1985 Trek 670, 2003 Pinarello Surprise, 1990ish MBK Atlantique, 1987 Peugeot Isoard, 1987 Nishiki Tri-A, 1981 Faggin, 1996 C'dale M500, 1984 Mercian Pro, 1982 AD SuperLeicht, 1985 Massi ?, 1988 Daccordi Griffe , 1989 Fauxsin MTB, 1981 Ciocc Mockba, 1992 Bianchi Giro, 1977 Colnago Super, 1971 Raleigh Internat'l, 1998 Corratec U+D, 1991 Peugeot Slimestone, 1987 Bianchi Volpe, 1995 Trek 750
01-14-25 | 11:08 AM
#56
Thread Starter
Senior Member
Joined: May 2019
Posts: 3,984
Likes: 3,226
From: Bloomington, IN
Bikes: Paramount, Faggin, Ochsner, Rossin, Ciocc
Naw Dawg,
I do have one that had damage to the finish that I could likely paint in the same blue as the touch up. I am not so much about matchy-matchy than as rideability. But the blue stuff does look pretty cool. I will dig through the for parts bag and see if I can create a front caliper with the spare parts. Smiles, MH
I do have one that had damage to the finish that I could likely paint in the same blue as the touch up. I am not so much about matchy-matchy than as rideability. But the blue stuff does look pretty cool. I will dig through the for parts bag and see if I can create a front caliper with the spare parts. Smiles, MH
Last edited by Mad Honk; 09-24-25 at 07:25 PM.
09-17-25 | 08:55 PM
#57
Thread Starter
Senior Member
Joined: May 2019
Posts: 3,984
Likes: 3,226
From: Bloomington, IN
Bikes: Paramount, Faggin, Ochsner, Rossin, Ciocc
Well folks,
My problems with balance have forced me to send this project along to a new owner and now we can follow along as Erin will turn this frame into a complete bike. I will follow along with everyone else to see how she finishes it. I think Ben has found the elusive front brake caliper and when it come in, I will send it along to her. It has been a fun ride so far and I can't wait to see what Erin does with it. So as the Basso moves to a new home I will pass this thread along to Erin. Please welcome her to the group and help encourage her with this build. Signing off now, Smiles, MH
My problems with balance have forced me to send this project along to a new owner and now we can follow along as Erin will turn this frame into a complete bike. I will follow along with everyone else to see how she finishes it. I think Ben has found the elusive front brake caliper and when it come in, I will send it along to her. It has been a fun ride so far and I can't wait to see what Erin does with it. So as the Basso moves to a new home I will pass this thread along to Erin. Please welcome her to the group and help encourage her with this build. Signing off now, Smiles, MH
09-21-25 | 10:52 AM
#59
Edumacator
Joined: Jan 2018
Posts: 9,705
Likes: 5,196
From: Goose Creek, SC
Bikes: More than the people who ride them...oy.
This is awesome! I look forward to seeing the build!
__________________
1987 Crest C'dale, 1987 Basso Gap, 1992 Rossin EL, 1990 Van Tuyl, 1985 Trek 670, 2003 Pinarello Surprise, 1990ish MBK Atlantique, 1987 Peugeot Isoard, 1987 Nishiki Tri-A, 1981 Faggin, 1996 C'dale M500, 1984 Mercian Pro, 1982 AD SuperLeicht, 1985 Massi ?, 1988 Daccordi Griffe , 1989 Fauxsin MTB, 1981 Ciocc Mockba, 1992 Bianchi Giro, 1977 Colnago Super, 1971 Raleigh Internat'l, 1998 Corratec U+D, 1991 Peugeot Slimestone, 1987 Bianchi Volpe, 1995 Trek 750
1987 Crest C'dale, 1987 Basso Gap, 1992 Rossin EL, 1990 Van Tuyl, 1985 Trek 670, 2003 Pinarello Surprise, 1990ish MBK Atlantique, 1987 Peugeot Isoard, 1987 Nishiki Tri-A, 1981 Faggin, 1996 C'dale M500, 1984 Mercian Pro, 1982 AD SuperLeicht, 1985 Massi ?, 1988 Daccordi Griffe , 1989 Fauxsin MTB, 1981 Ciocc Mockba, 1992 Bianchi Giro, 1977 Colnago Super, 1971 Raleigh Internat'l, 1998 Corratec U+D, 1991 Peugeot Slimestone, 1987 Bianchi Volpe, 1995 Trek 750
09-22-25 | 04:40 PM
#60
Thread Starter
Senior Member
Joined: May 2019
Posts: 3,984
Likes: 3,226
From: Bloomington, IN
Bikes: Paramount, Faggin, Ochsner, Rossin, Ciocc
Well Dawg,
A small glitch caused by some street re-routing seems to have delayed the NBD for Erin. The current estimates are for delivery tomorrow so a small delay causing the extra day of anticipation. Smiles, MH
A small glitch caused by some street re-routing seems to have delayed the NBD for Erin. The current estimates are for delivery tomorrow so a small delay causing the extra day of anticipation. Smiles, MH
09-23-25 | 05:13 PM
#62
Senior Member

Joined: Jul 2022
Posts: 595
Likes: 399
From: Central Massachusetts
Bikes: 1987 Miyata 615gt, 1980/81 Lotus Eclair, Trek 420, 1975 Motobecane Grand Jubile
It�s hereeee
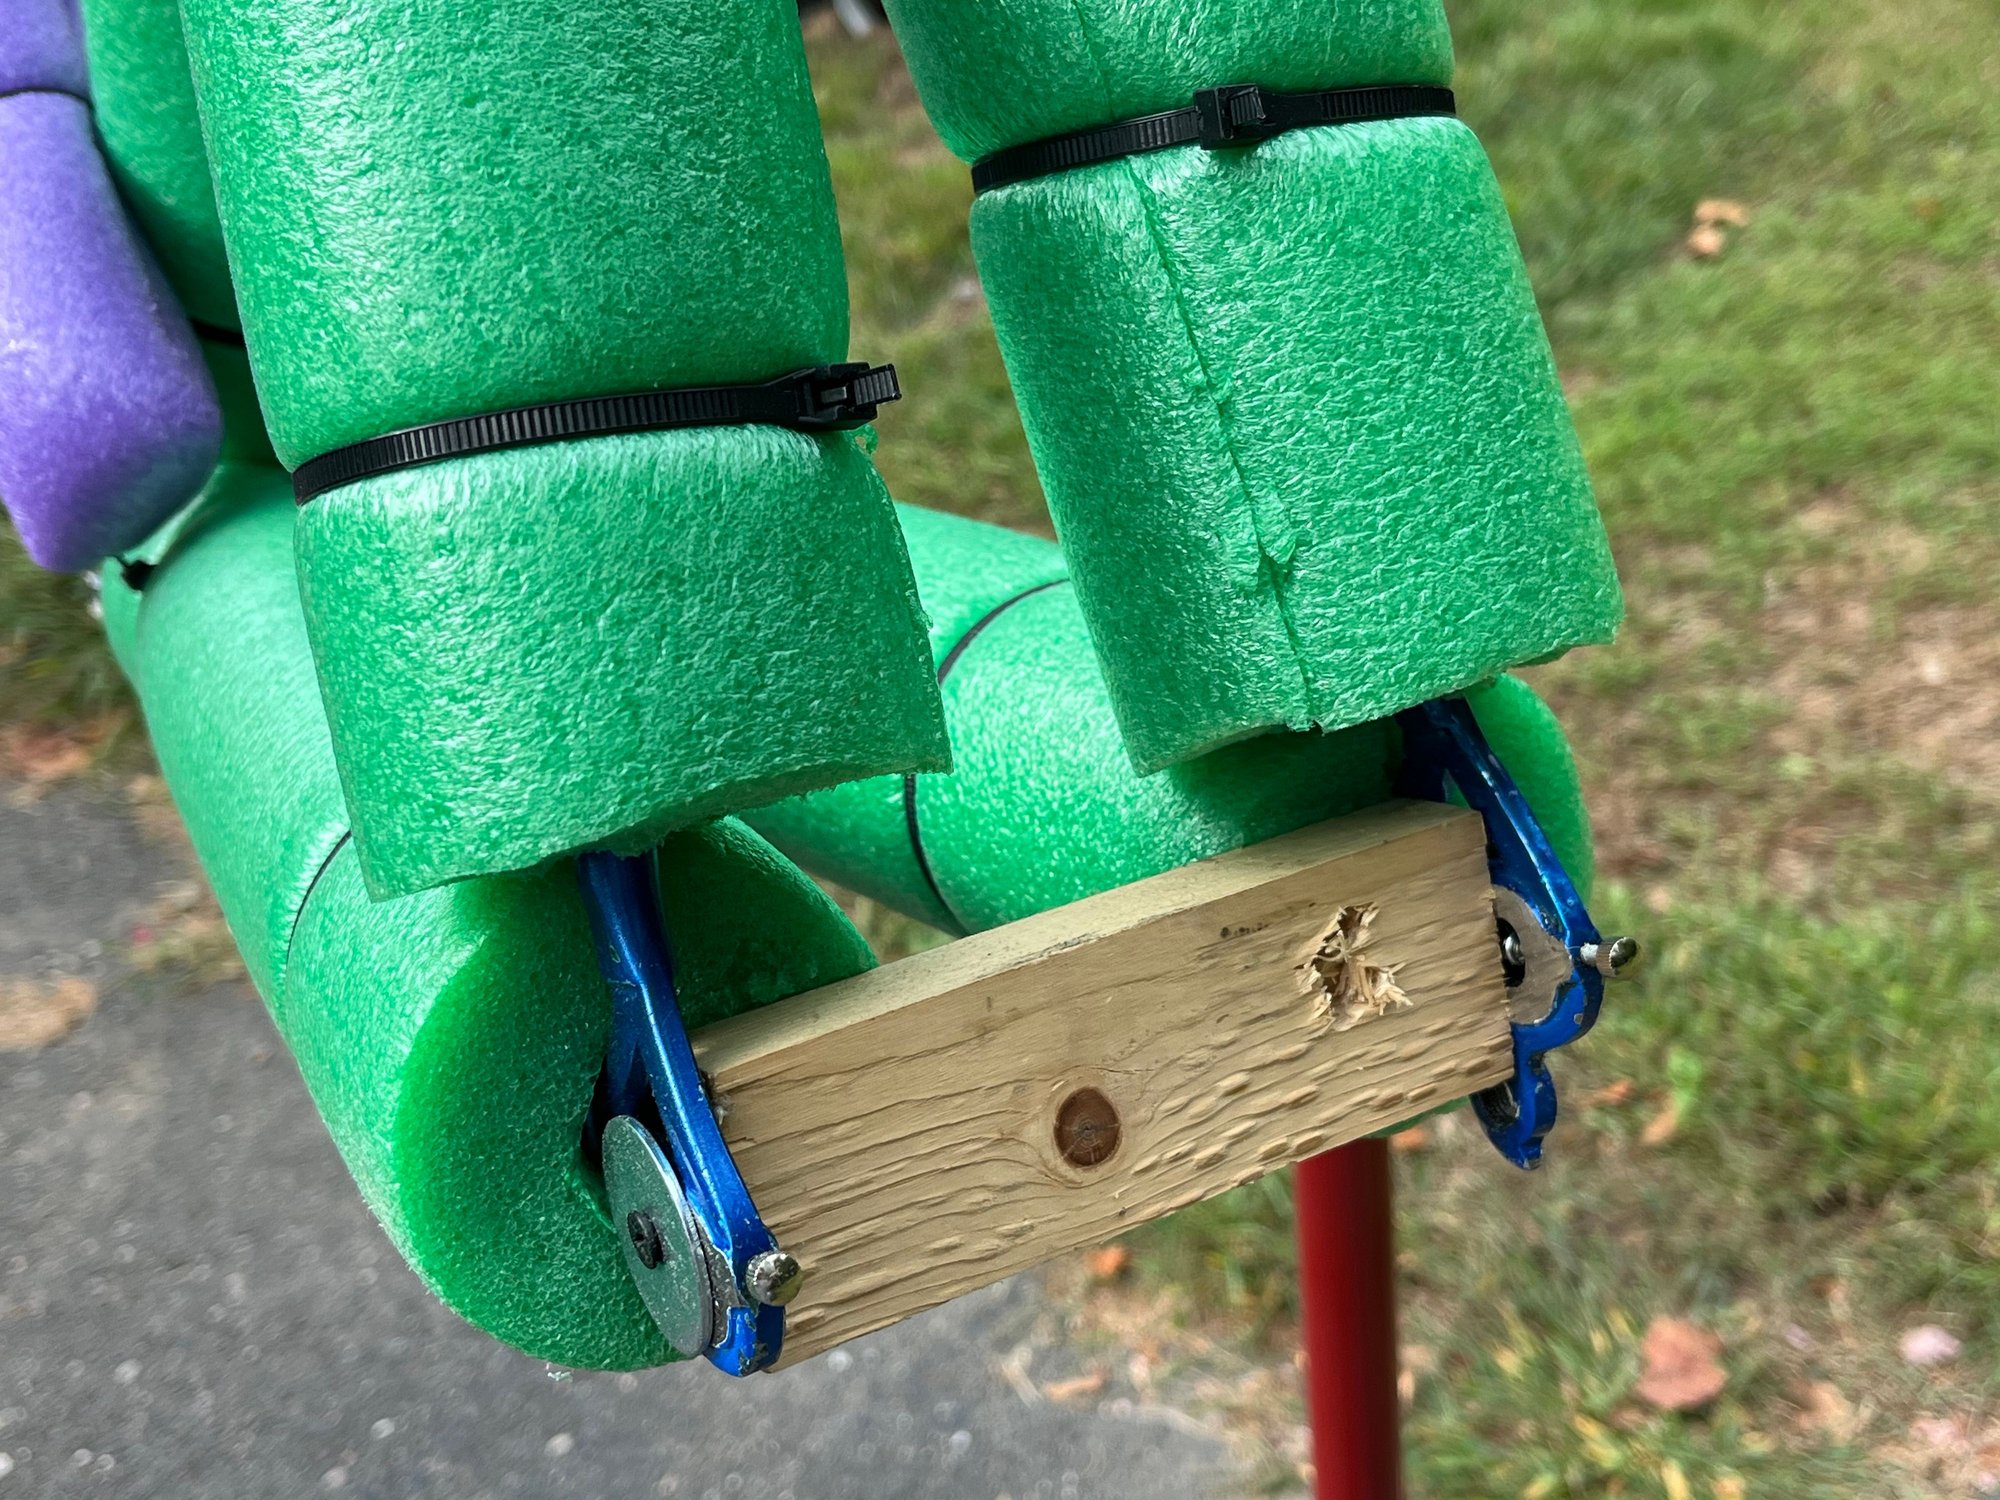
The Loto was delivered today when I was on my way home from work and I was very impressed with the packing, took lots of pictures and saved all the pool noodles in case I ever need to send a bike to someone.


It came with a box of goodies, the derailleurs, noodle brake, crankset, cables, housing, a bead jack! �..
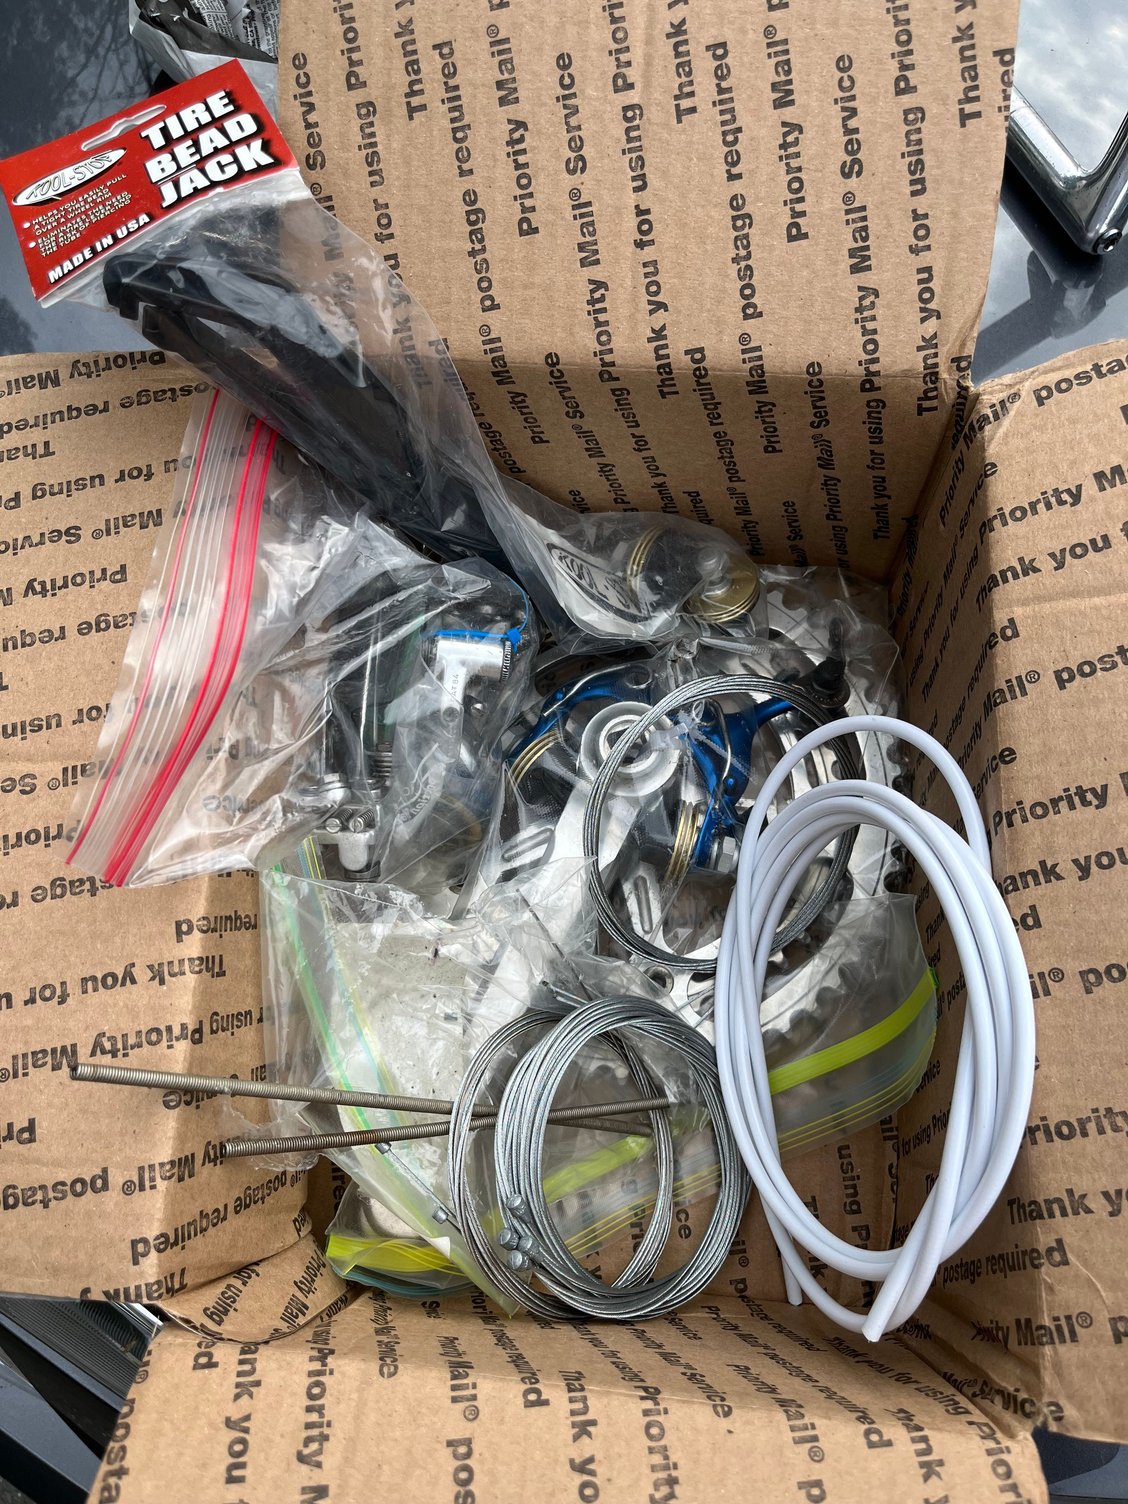
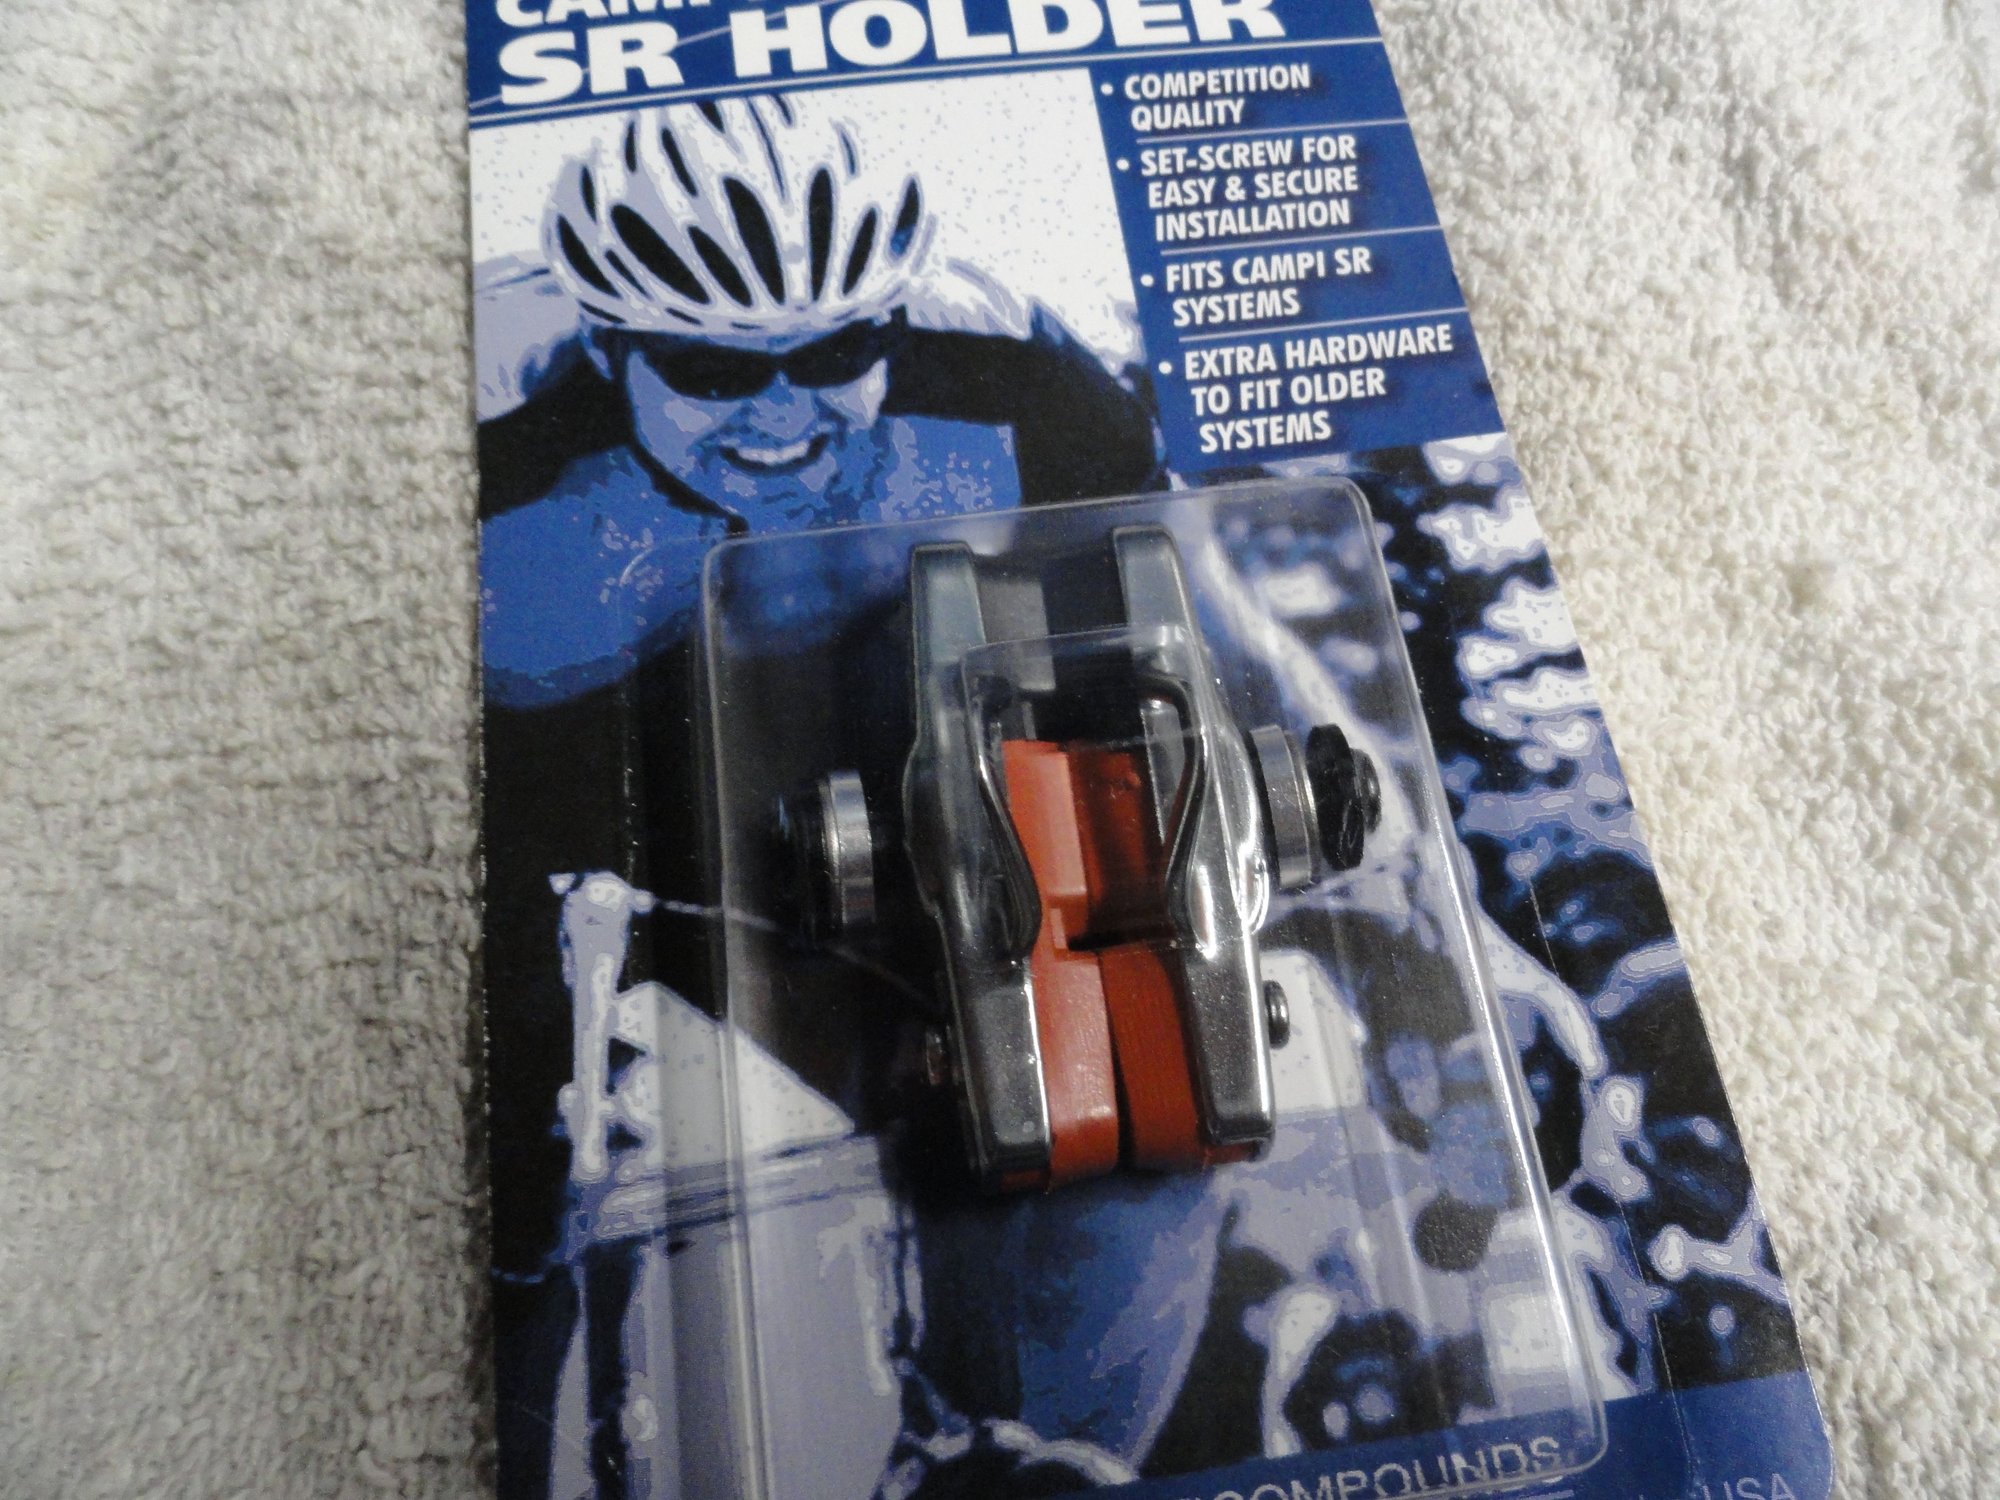
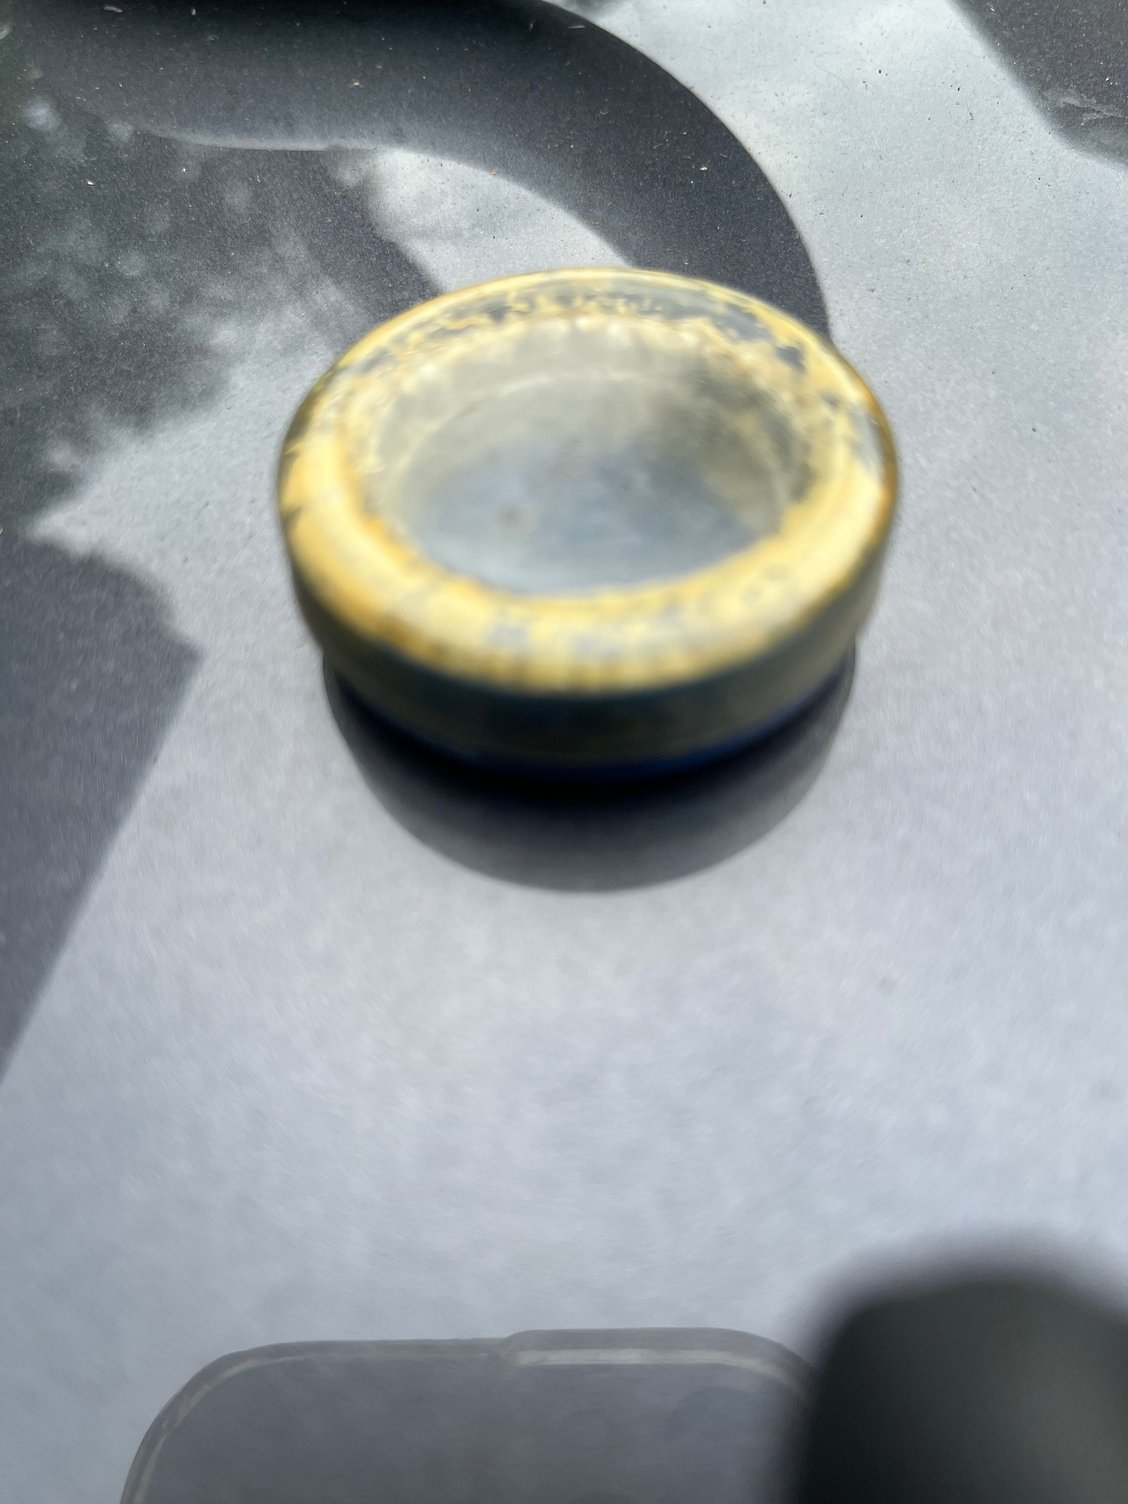
And one of my favorite little things: the headset bearings, already greased, and in the perfect little container to hold them. How cute is this little headset bearing holder? I didn�t even know this existed 😁

Only hiccup I came across was the stem wedge bolt must�ve fallen out of the box during shipping but I was able to dig around in my growing stash of parts and I found a stem wedge bolt that would work � but then I decided to change the stem to a little shorter one � but that stem didn�t have a clamp bolt �.. so one thing I learned today: there might just be as many variations of stem clamp bolts as there are variations of seatpost sizes... But, after much searching I finally found one that would work!
And here�s my progress so far:
Installed the headset, stem and handlebars, put on the wheels from my mystery Raleigh, and put the seatpost in and got it all somewhat close to where I like things. One thing about spending a lot of time working on bikes: you get really good at making bikes fit you. After putting this much together I sat on the bike to test the fit and I can already tell it�s going to be a great fit. Plus, look how pretty it is!!! 😍 Blue is my favorite color, I love all blues, and out of all the different shades of blue this bike is exactly my favorite color of blue, cerulean. Honestly I fell in love with this bike the first time I saw MadHonk�s ad and I have to say, it�s even prettier in person. The pearlish white with the cerulean blue, it�s just 😙🤌 perfect!
Next thing to do is add the crankset, derailleurs, cables and housing, brakes and pedals. But I already have most of that thanks to MadHonk, so I think I should be able to get this done in the next few days after work. I�ll post more pictures as I progress. Can�t wait to ride it though, the frame set was so light, I feel like I�m going to fly on this bike!

It came with a box of goodies, the derailleurs, noodle brake, crankset, cables, housing, a bead jack! �..
And one of my favorite little things: the headset bearings, already greased, and in the perfect little container to hold them. How cute is this little headset bearing holder? I didn�t even know this existed 😁
Only hiccup I came across was the stem wedge bolt must�ve fallen out of the box during shipping but I was able to dig around in my growing stash of parts and I found a stem wedge bolt that would work � but then I decided to change the stem to a little shorter one � but that stem didn�t have a clamp bolt �.. so one thing I learned today: there might just be as many variations of stem clamp bolts as there are variations of seatpost sizes... But, after much searching I finally found one that would work!
And here�s my progress so far:
Installed the headset, stem and handlebars, put on the wheels from my mystery Raleigh, and put the seatpost in and got it all somewhat close to where I like things. One thing about spending a lot of time working on bikes: you get really good at making bikes fit you. After putting this much together I sat on the bike to test the fit and I can already tell it�s going to be a great fit. Plus, look how pretty it is!!! 😍 Blue is my favorite color, I love all blues, and out of all the different shades of blue this bike is exactly my favorite color of blue, cerulean. Honestly I fell in love with this bike the first time I saw MadHonk�s ad and I have to say, it�s even prettier in person. The pearlish white with the cerulean blue, it�s just 😙🤌 perfect!
Next thing to do is add the crankset, derailleurs, cables and housing, brakes and pedals. But I already have most of that thanks to MadHonk, so I think I should be able to get this done in the next few days after work. I�ll post more pictures as I progress. Can�t wait to ride it though, the frame set was so light, I feel like I�m going to fly on this bike!
Last edited by Esos1; 09-23-25 at 05:37 PM.
09-23-25 | 05:38 PM
#63
Thread Starter
Senior Member
Joined: May 2019
Posts: 3,984
Likes: 3,226
From: Bloomington, IN
Bikes: Paramount, Faggin, Ochsner, Rossin, Ciocc
Erin,
Glad you like it! The cable ferrules went out today, so as you get more work done they should be there in time for the final cable set up. And that pesky front caliper is still a thing in limbo. Sorry about the stem part I thought it would stay on during the short trip to your place. Smiles, MH
Glad you like it! The cable ferrules went out today, so as you get more work done they should be there in time for the final cable set up. And that pesky front caliper is still a thing in limbo. Sorry about the stem part I thought it would stay on during the short trip to your place. Smiles, MH
09-23-25 | 06:38 PM
#64
Senior Member
Joined: Jul 2022
Posts: 595
Likes: 399
From: Central Massachusetts
Bikes: 1987 Miyata 615gt, 1980/81 Lotus Eclair, Trek 420, 1975 Motobecane Grand Jubile
Erin,
Glad you like it! The cable ferrules went out today, so as you get more work done they should be there in time for the final cable set up. And that pesky front caliper is still a thing in limbo. Sorry about the stem part I thought it would stay on during the short trip to your place. Smiles, MH
Glad you like it! The cable ferrules went out today, so as you get more work done they should be there in time for the final cable set up. And that pesky front caliper is still a thing in limbo. Sorry about the stem part I thought it would stay on during the short trip to your place. Smiles, MH
09-23-25 | 06:46 PM
#65
Senior Member
Joined: Jul 2022
Posts: 595
Likes: 399
From: Central Massachusetts
Bikes: 1987 Miyata 615gt, 1980/81 Lotus Eclair, Trek 420, 1975 Motobecane Grand Jubile
Decided to get a little more done before bed, got the crankset on, derailleurs, shifter cables, brakes �. still not sure if I want to do mismatched for now or if I want to go with another set until I can get the front blue modolo brake�


09-23-25 | 06:48 PM
#66
Thread Starter
Senior Member
Joined: May 2019
Posts: 3,984
Likes: 3,226
From: Bloomington, IN
Bikes: Paramount, Faggin, Ochsner, Rossin, Ciocc
Erin,
You will need the ferrule when you put the cable into the cable stop on the frame for the RD. You can also use it for the RD even though the stainless housing should not need a ferrule at that point. Smiles, MH
You will need the ferrule when you put the cable into the cable stop on the frame for the RD. You can also use it for the RD even though the stainless housing should not need a ferrule at that point. Smiles, MH
09-23-25 | 06:54 PM
#67
Senior Member
Joined: Jul 2022
Posts: 595
Likes: 399
From: Central Massachusetts
Bikes: 1987 Miyata 615gt, 1980/81 Lotus Eclair, Trek 420, 1975 Motobecane Grand Jubile
09-27-25 | 10:58 AM
#69
Senior Member
Joined: Jul 2022
Posts: 595
Likes: 399
From: Central Massachusetts
Bikes: 1987 Miyata 615gt, 1980/81 Lotus Eclair, Trek 420, 1975 Motobecane Grand Jubile
Ok a little more work done and looking for some advice too�
I finally got the chain length figured out and derailleurs tuned. The wheelset I put on (taken from a donor bike) has a 28 in the back which I understand from reading posts here can work with this nuovo record derailleur just needs a short chain. So I started conservative and took off one full link at a time and maybe did that three or four times, testing each time to see if it would work. I landed on this length. Any longer and it�s too long on the small/small. Unfortunately it�s too short at this length to go into the big/big but I�m not too worried about that as I don�t see myself using that? I don�t know, feel free to tell me if you think I�m wrong!
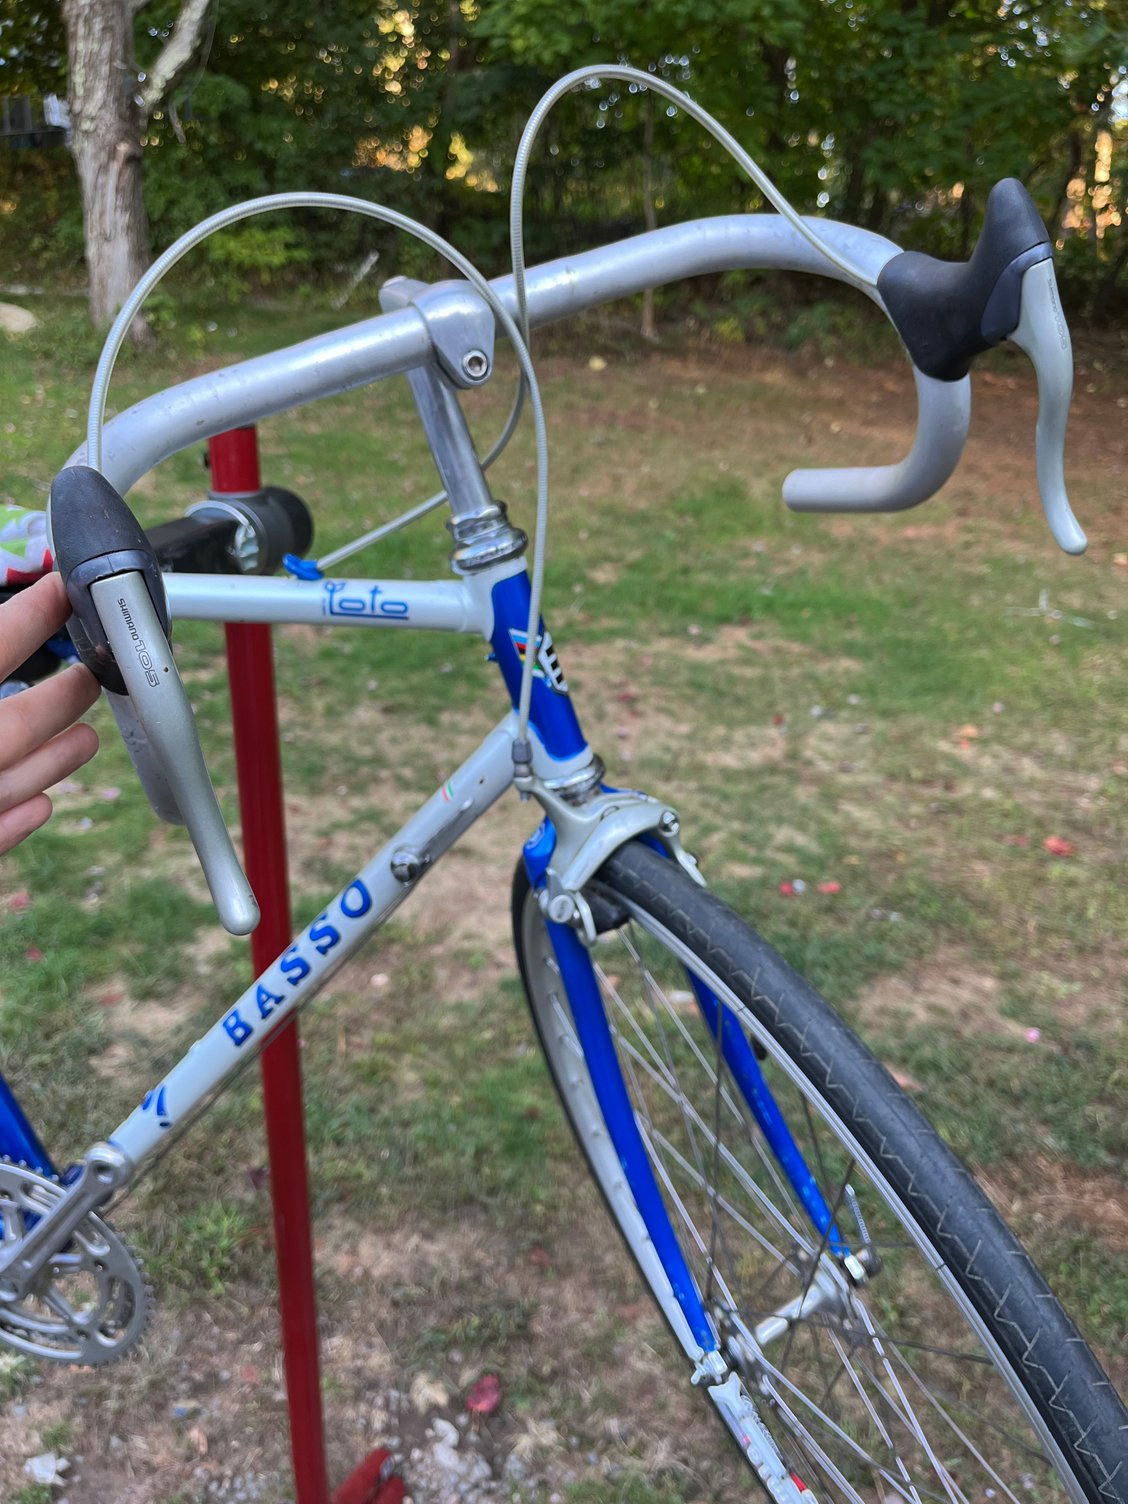
My next step was brakes. I put on 105 calipers and levers from yet another donor bike and adjusted the pads to hit the rim.
Now for the advice needed: Brake housing. I tried white but it didn�t quite look right to me even though I really thought it would. So then I tried grey/silver and also blue�.. and now I can�t decide which one looks best 😂 what do you think?
I finally got the chain length figured out and derailleurs tuned. The wheelset I put on (taken from a donor bike) has a 28 in the back which I understand from reading posts here can work with this nuovo record derailleur just needs a short chain. So I started conservative and took off one full link at a time and maybe did that three or four times, testing each time to see if it would work. I landed on this length. Any longer and it�s too long on the small/small. Unfortunately it�s too short at this length to go into the big/big but I�m not too worried about that as I don�t see myself using that? I don�t know, feel free to tell me if you think I�m wrong!
My next step was brakes. I put on 105 calipers and levers from yet another donor bike and adjusted the pads to hit the rim.
Now for the advice needed: Brake housing. I tried white but it didn�t quite look right to me even though I really thought it would. So then I tried grey/silver and also blue�.. and now I can�t decide which one looks best 😂 what do you think?
09-27-25 | 04:12 PM
#70
Thread Starter
Senior Member
Joined: May 2019
Posts: 3,984
Likes: 3,226
From: Bloomington, IN
Bikes: Paramount, Faggin, Ochsner, Rossin, Ciocc
A small tip on the handlebar taping. A quick layer of stretch wrap over the bars before the adhesive tape. It prevents tape residue if the bars need re-taping and is very cheap compared to solvent and cloth to keep the bars from having lumps in the final wraps. HTH, Smiles, MH
09-27-25 | 05:31 PM
#71
Senior Member
Joined: Jul 2022
Posts: 595
Likes: 399
From: Central Massachusetts
Bikes: 1987 Miyata 615gt, 1980/81 Lotus Eclair, Trek 420, 1975 Motobecane Grand Jubile
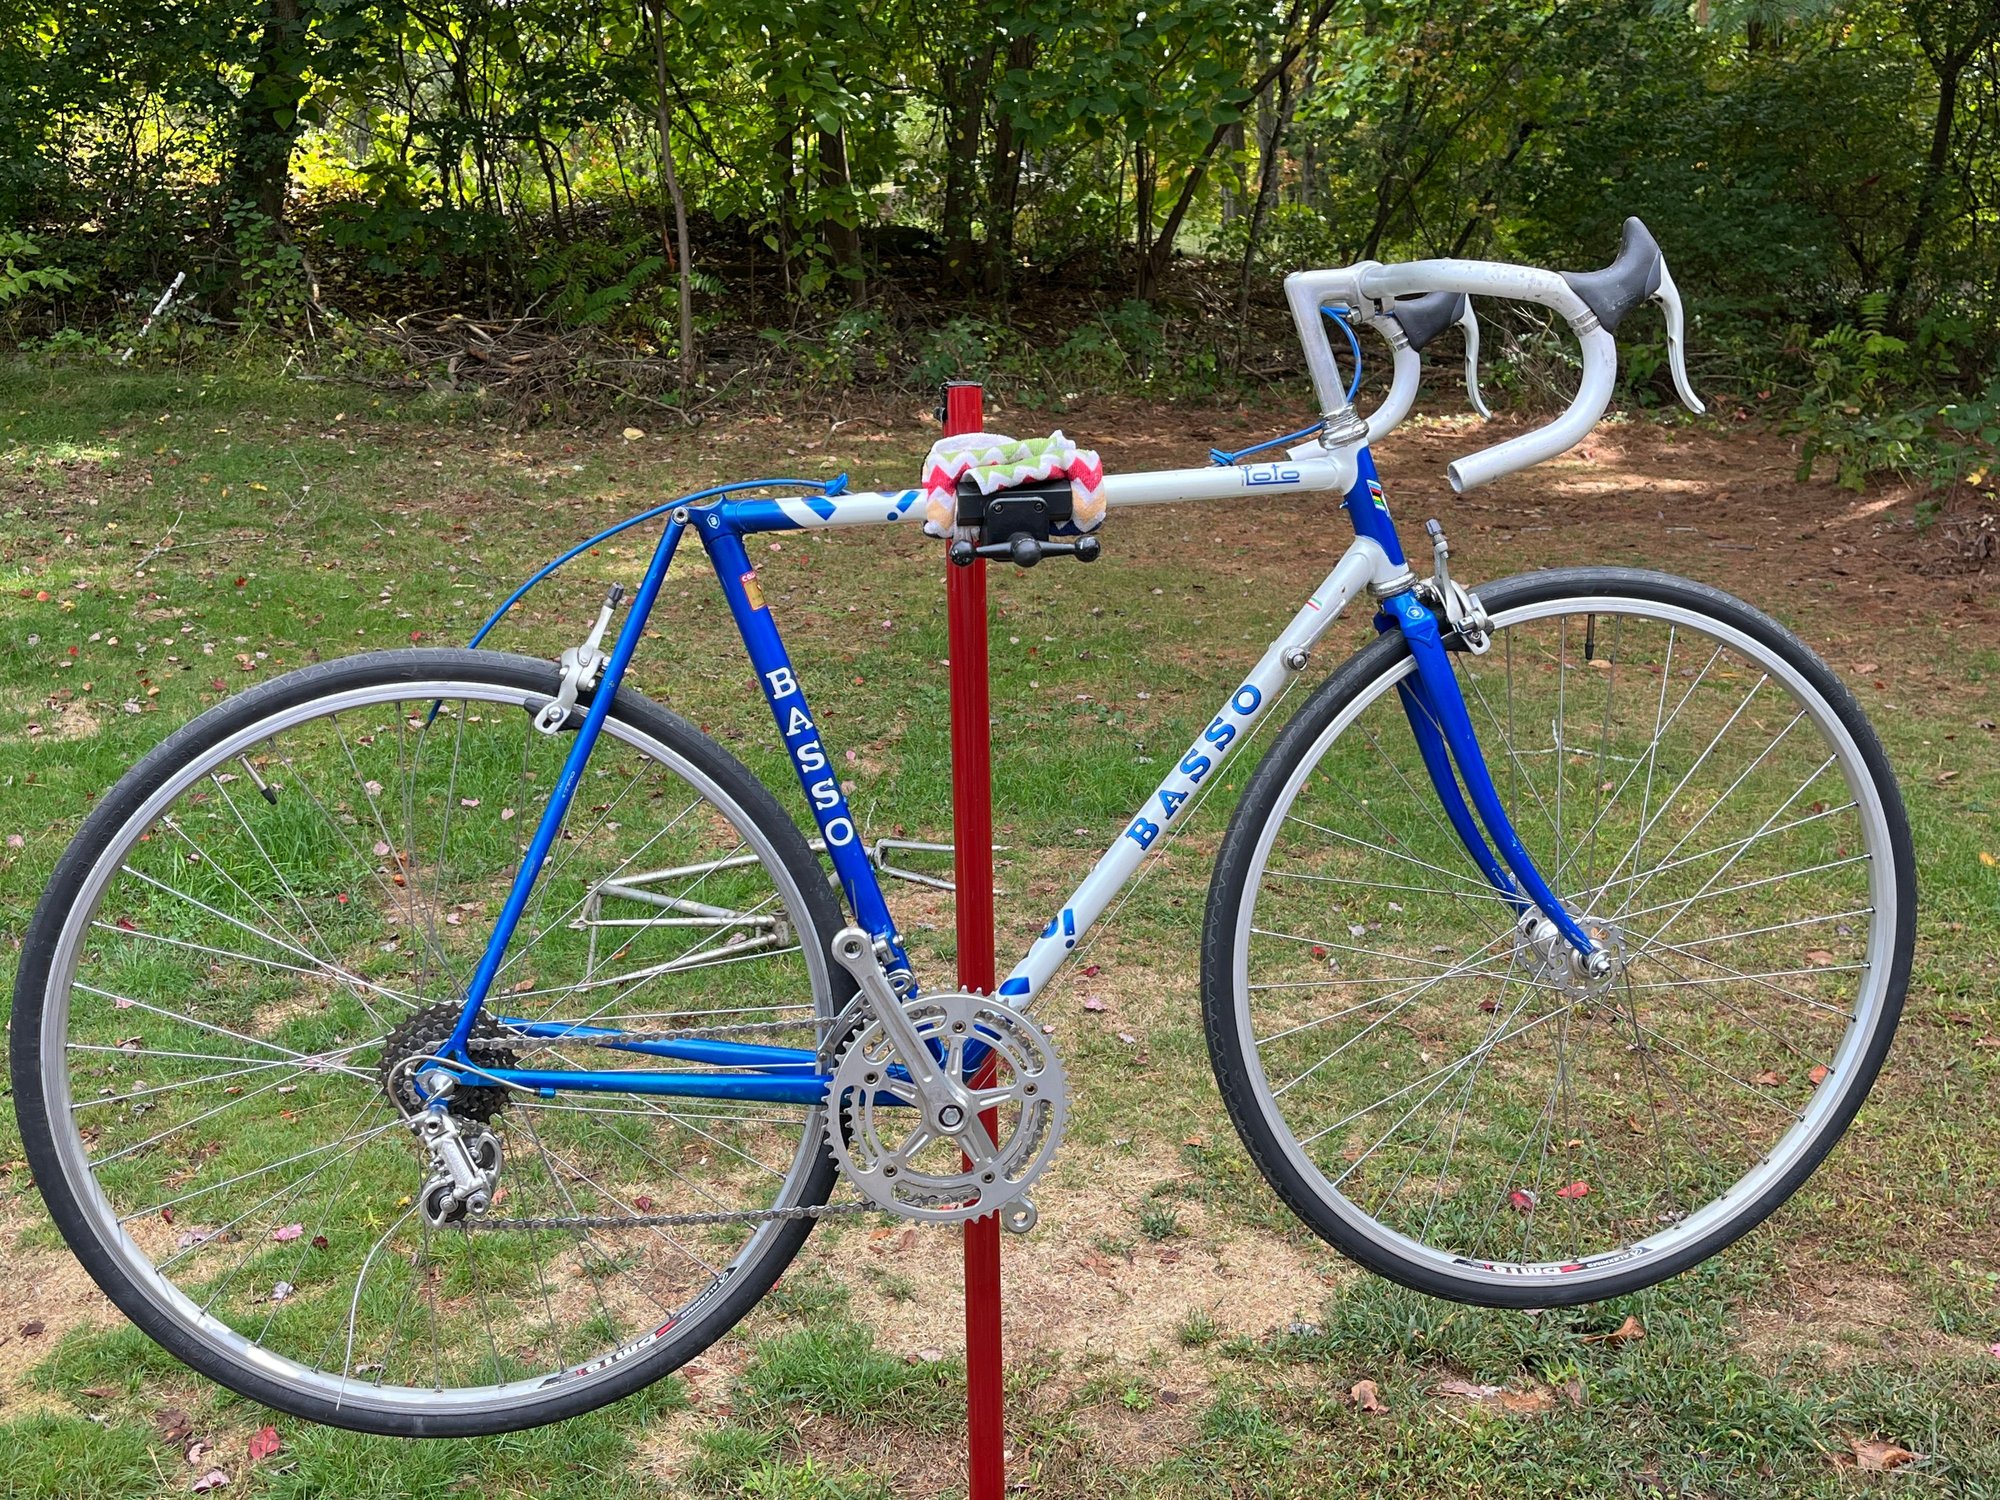
Ok so in a rather predictable move I decided to go with blue housing AND blue tape. And then I loaded the bike up to take for a shakedown ride on the local MUP. We get to the MUP and I take off like a bullet! This bike feels so light and nimble and then I notice a little wobbliness? in the pedals. So I stop and check the bottom bracket and it�s completely loose!  So then I walk, coast my way back to the car (which was a lot farther than I thought it was because I never walk this path) and I get home and this is what I find
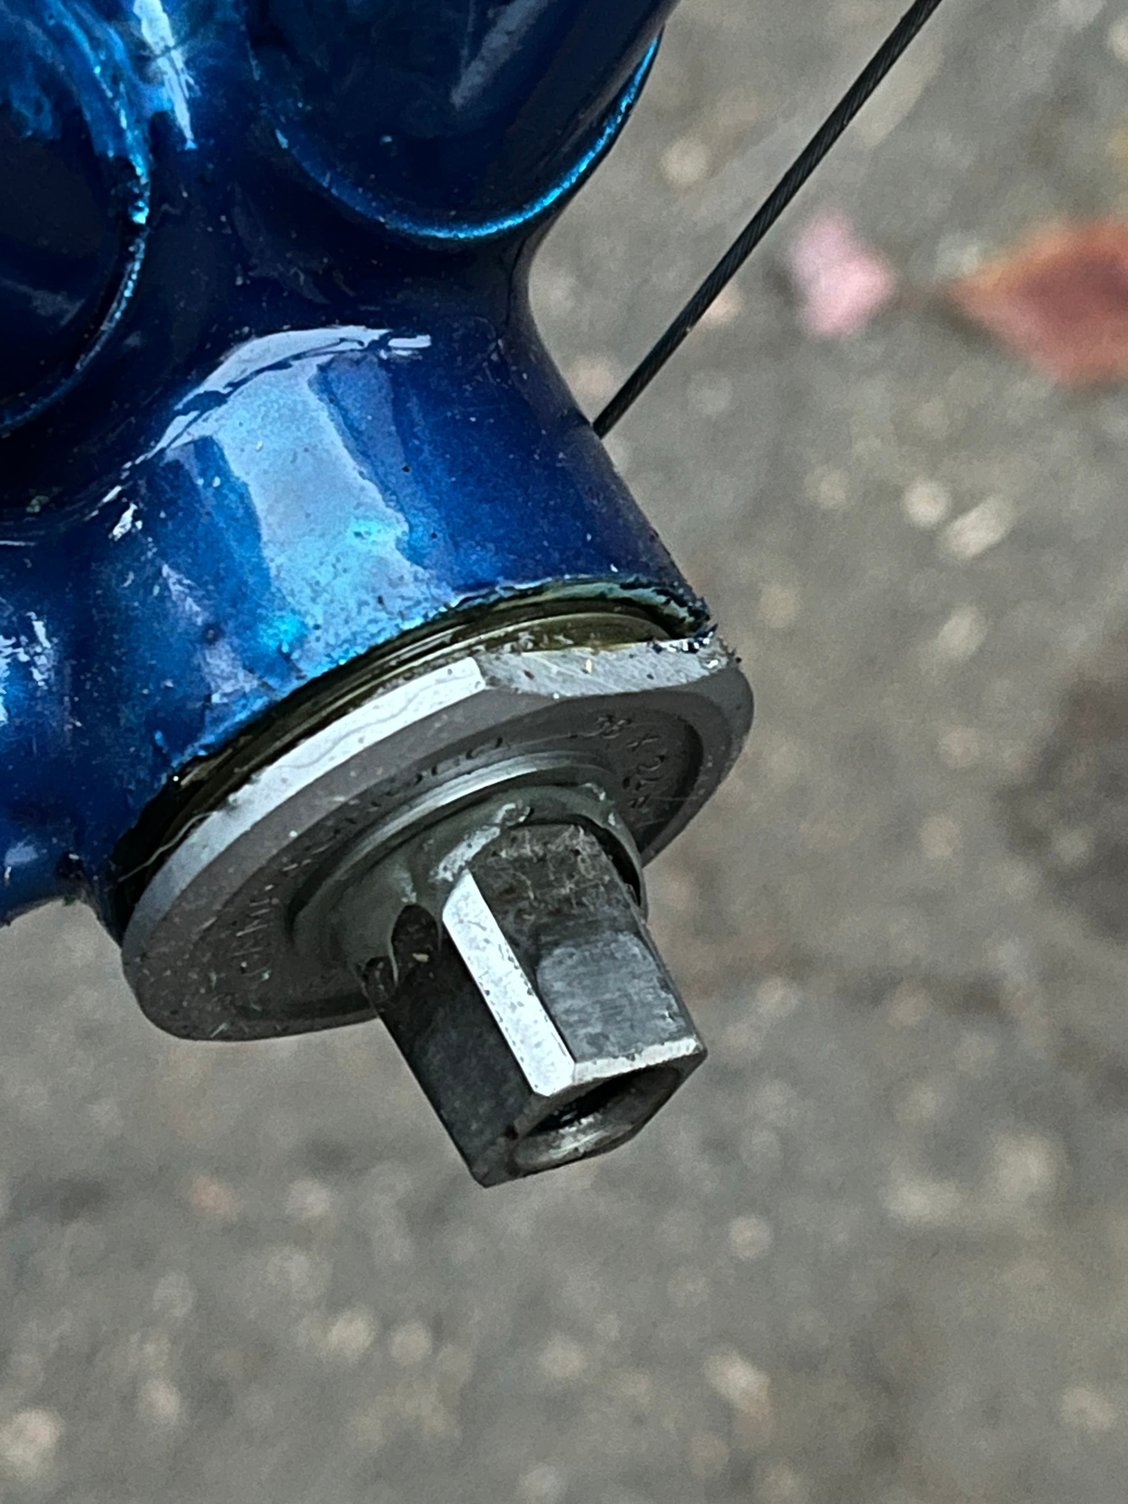

the fixed cup came loose! I�ve actually never had this happen, I�ve never even removed a fixed cup�
So I tightened it as much as I could � which is maybe not enough, not sure how to do it to the right torque honestly, I�ve never installed a fixed cup on a bottom bracket before� and then I adjusted the other side, got it where it needs to be. But now I�m wondering what happened�.
I will say I didn�t use my torque wrench like I usually do when installing the crank arms, I was being lazy and used what I thought was about the same amount of pressure I use every other time with the torque wrench, but maybe the crank arms were a little loose. Also, and this is a big one, I didn�t check the adjustable cup at all, I just assumed it was on there tight because I checked for play at one point when the crank arms were on and I didn�t feel anything so I assumed everything was tightened up �.. so now I�m feeling kind of dumb for this and I�m hoping I haven�t done any damage to the bottom bracket�. 😬.
I haven�t put the crank arms back on yet because I want to make sure the fixed cup is tight enough first but when I do I will definitely be using the torque wrench! And yeah, I probably should always be checking the bottom bracket lock ring and adjustable cup for looseness before riding a new bike too, that�s something else I�ll definitely be doing going forward.
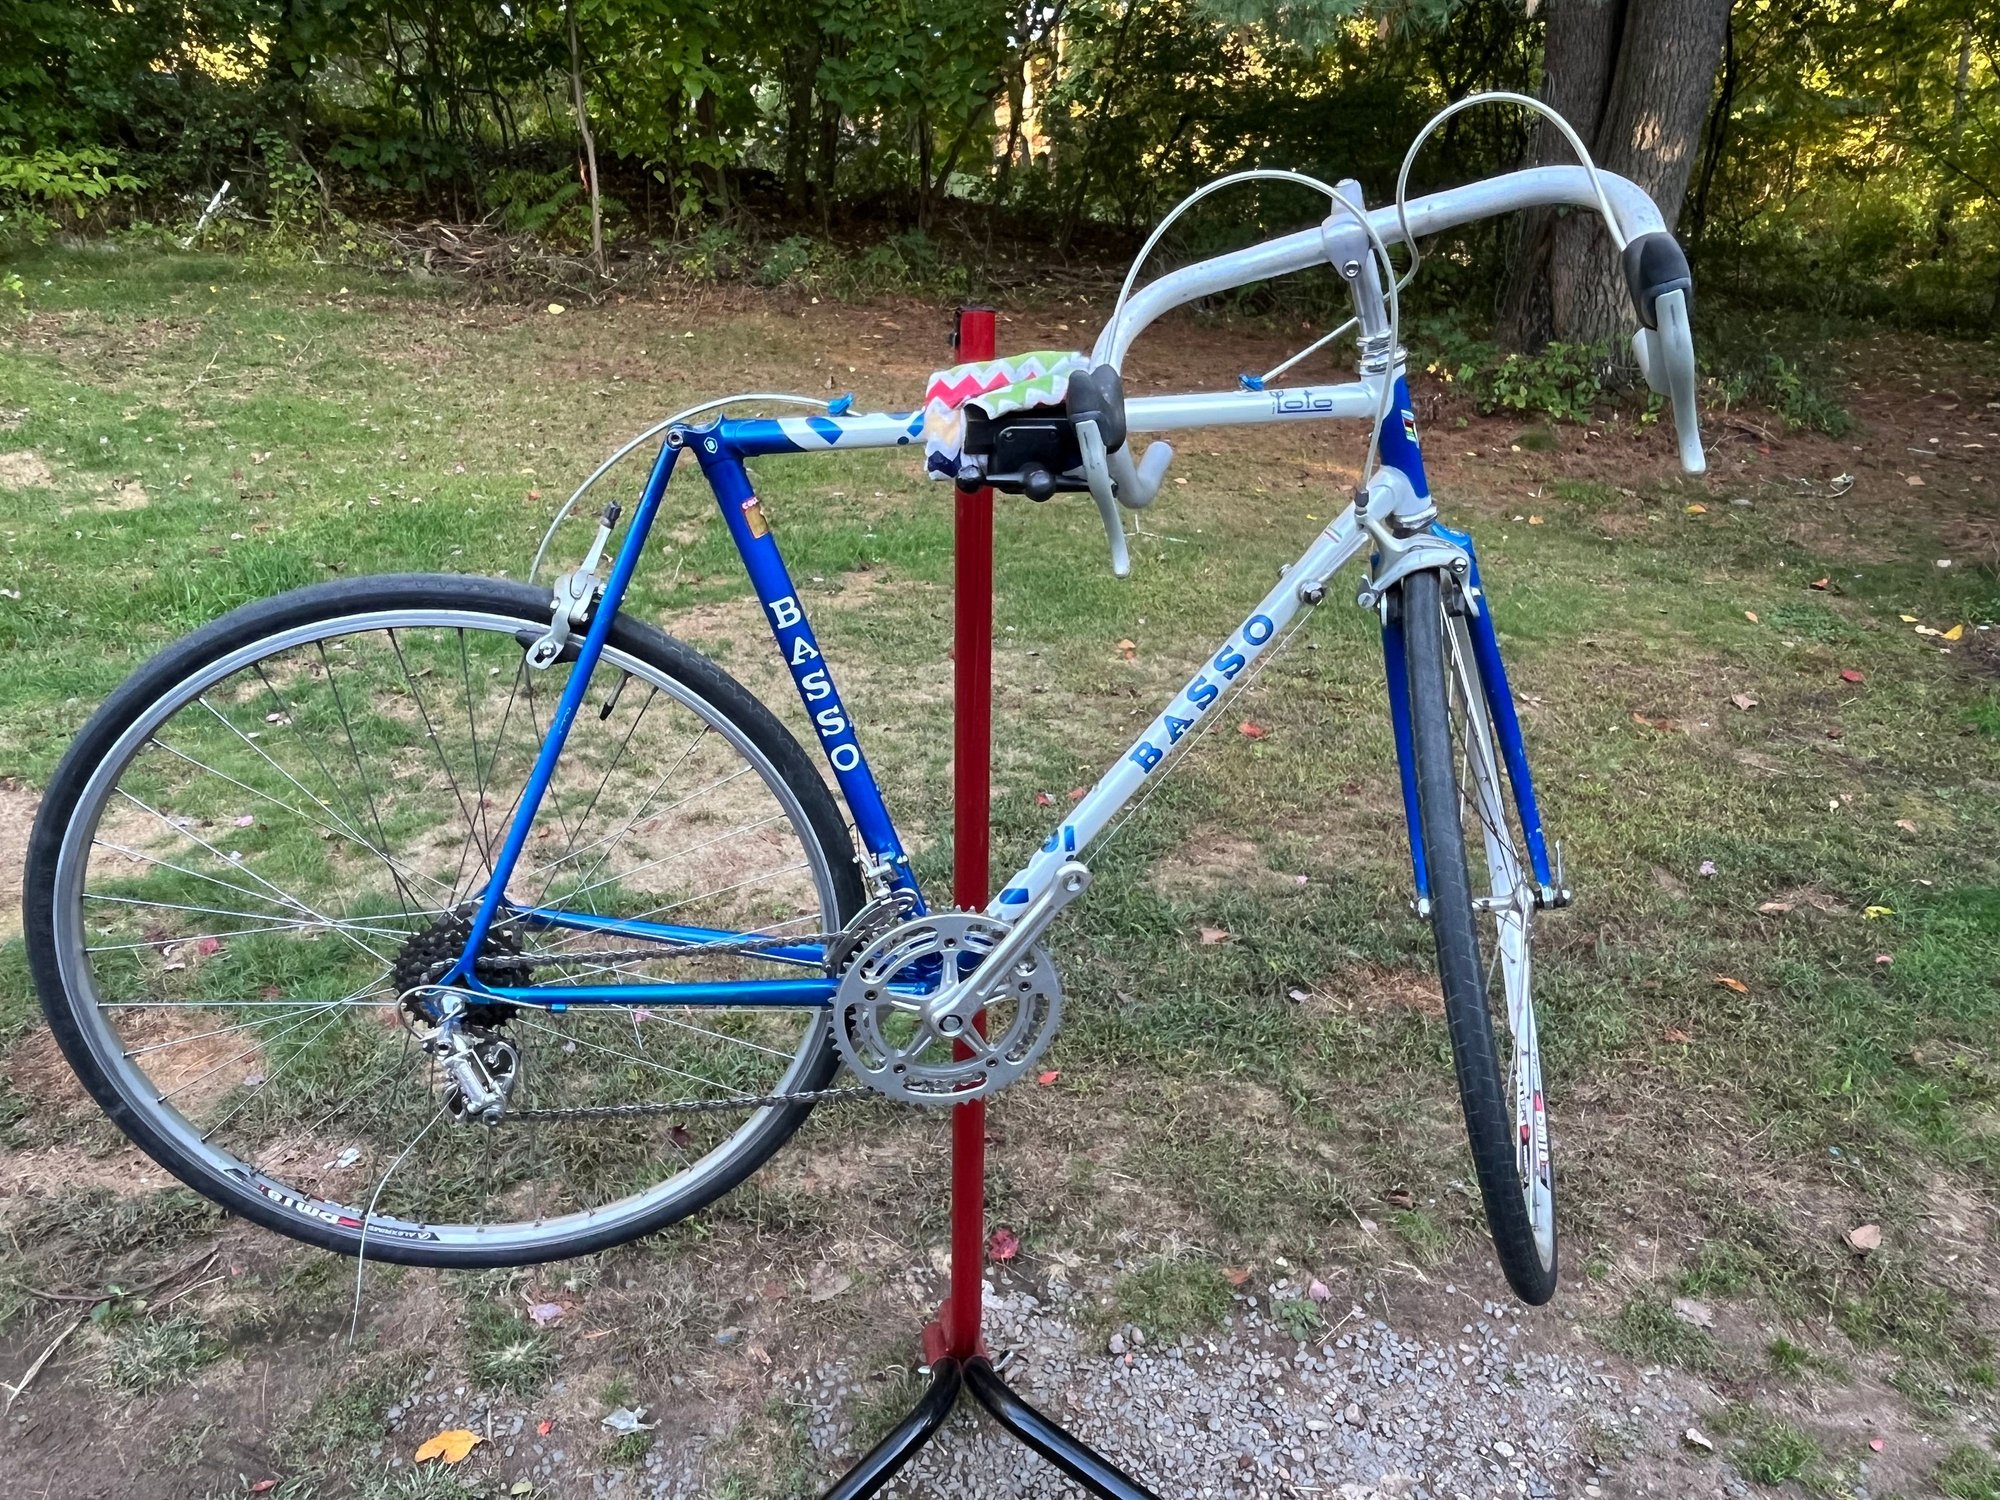
I still did manage to get a few glamour shots of my bike on my ride though, because you know, priorities


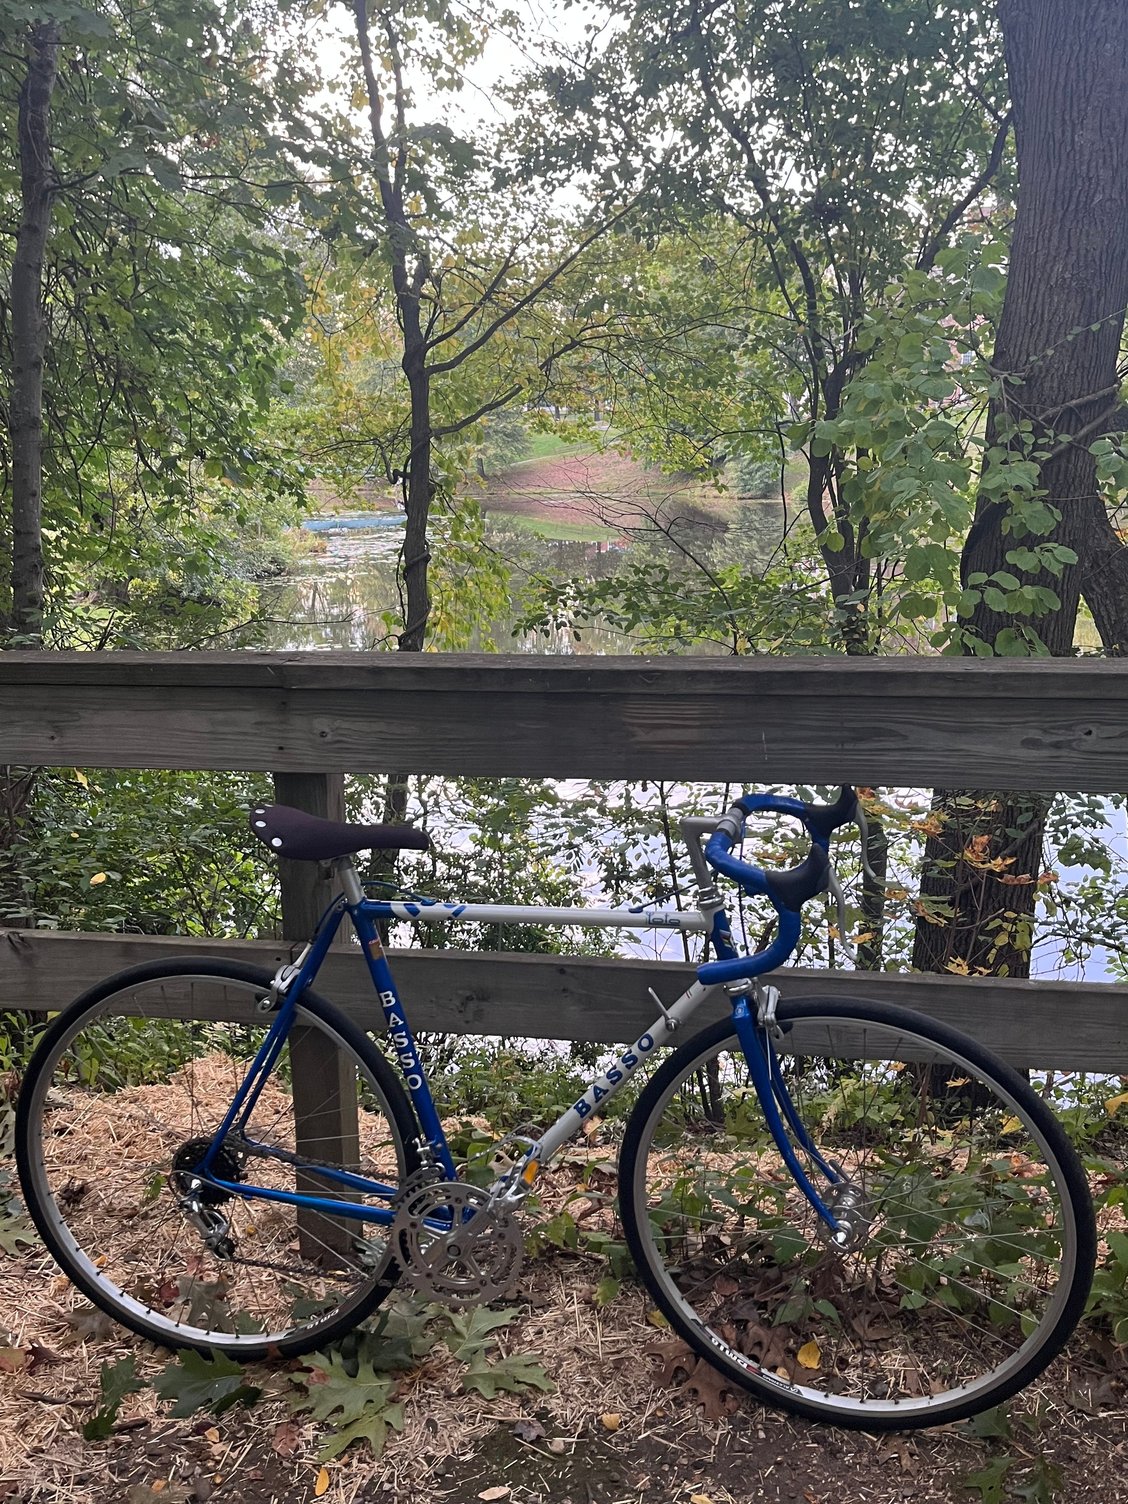
I was planning on posting these to the bikes on bridges thread but my husband says I can�t because this was on an isthmus") so I guess I�ll post them here. She sure is purrty!
so I guess I�ll post them here. She sure is purrty!
So then I walk, coast my way back to the car (which was a lot farther than I thought it was because I never walk this path) and I get home and this is what I find the fixed cup came loose! I�ve actually never had this happen, I�ve never even removed a fixed cup�
So I tightened it as much as I could � which is maybe not enough, not sure how to do it to the right torque honestly, I�ve never installed a fixed cup on a bottom bracket before� and then I adjusted the other side, got it where it needs to be. But now I�m wondering what happened�.
I will say I didn�t use my torque wrench like I usually do when installing the crank arms, I was being lazy and used what I thought was about the same amount of pressure I use every other time with the torque wrench, but maybe the crank arms were a little loose. Also, and this is a big one, I didn�t check the adjustable cup at all, I just assumed it was on there tight because I checked for play at one point when the crank arms were on and I didn�t feel anything so I assumed everything was tightened up �.. so now I�m feeling kind of dumb for this and I�m hoping I haven�t done any damage to the bottom bracket�. 😬.
I haven�t put the crank arms back on yet because I want to make sure the fixed cup is tight enough first but when I do I will definitely be using the torque wrench! And yeah, I probably should always be checking the bottom bracket lock ring and adjustable cup for looseness before riding a new bike too, that�s something else I�ll definitely be doing going forward.
I still did manage to get a few glamour shots of my bike on my ride though, because you know, priorities
I was planning on posting these to the bikes on bridges thread but my husband says I can�t because this was on an isthmus
so I guess I�ll post them here. She sure is purrty!
09-27-25 | 05:35 PM
#72
Senior Member
Joined: Jul 2022
Posts: 595
Likes: 399
From: Central Massachusetts
Bikes: 1987 Miyata 615gt, 1980/81 Lotus Eclair, Trek 420, 1975 Motobecane Grand Jubile
A small tip on the handlebar taping. A quick layer of stretch wrap over the bars before the adhesive tape. It prevents tape residue if the bars need re-taping and is very cheap compared to solvent and cloth to keep the bars from having lumps in the final wraps. HTH, Smiles, MH
10-11-25 | 05:03 PM
#73
Thread Starter
Senior Member
Joined: May 2019
Posts: 3,984
Likes: 3,226
From: Bloomington, IN
Bikes: Paramount, Faggin, Ochsner, Rossin, Ciocc
Erin,
The post office came through with a gift from Ben, and I am pretty sure you are going to like it! It will of course need to be cleaned and given some TLC but it is going to be a perfect match. Smiles, MH

The elusive anodized blue brake caliper!
The post office came through with a gift from Ben, and I am pretty sure you are going to like it! It will of course need to be cleaned and given some TLC but it is going to be a perfect match. Smiles, MH
The elusive anodized blue brake caliper!
10-11-25 | 05:27 PM
#74
Senior Member
Joined: Jul 2022
Posts: 595
Likes: 399
From: Central Massachusetts
Bikes: 1987 Miyata 615gt, 1980/81 Lotus Eclair, Trek 420, 1975 Motobecane Grand Jubile
10-12-25 | 04:34 PM
#75
Thread Starter
Senior Member
Joined: May 2019
Posts: 3,984
Likes: 3,226
From: Bloomington, IN
Bikes: Paramount, Faggin, Ochsner, Rossin, Ciocc
So a bit of cleaning time today while watching the games; The caliper had some crud and needed a few parts upgrades to get it more presentable. The pictures:
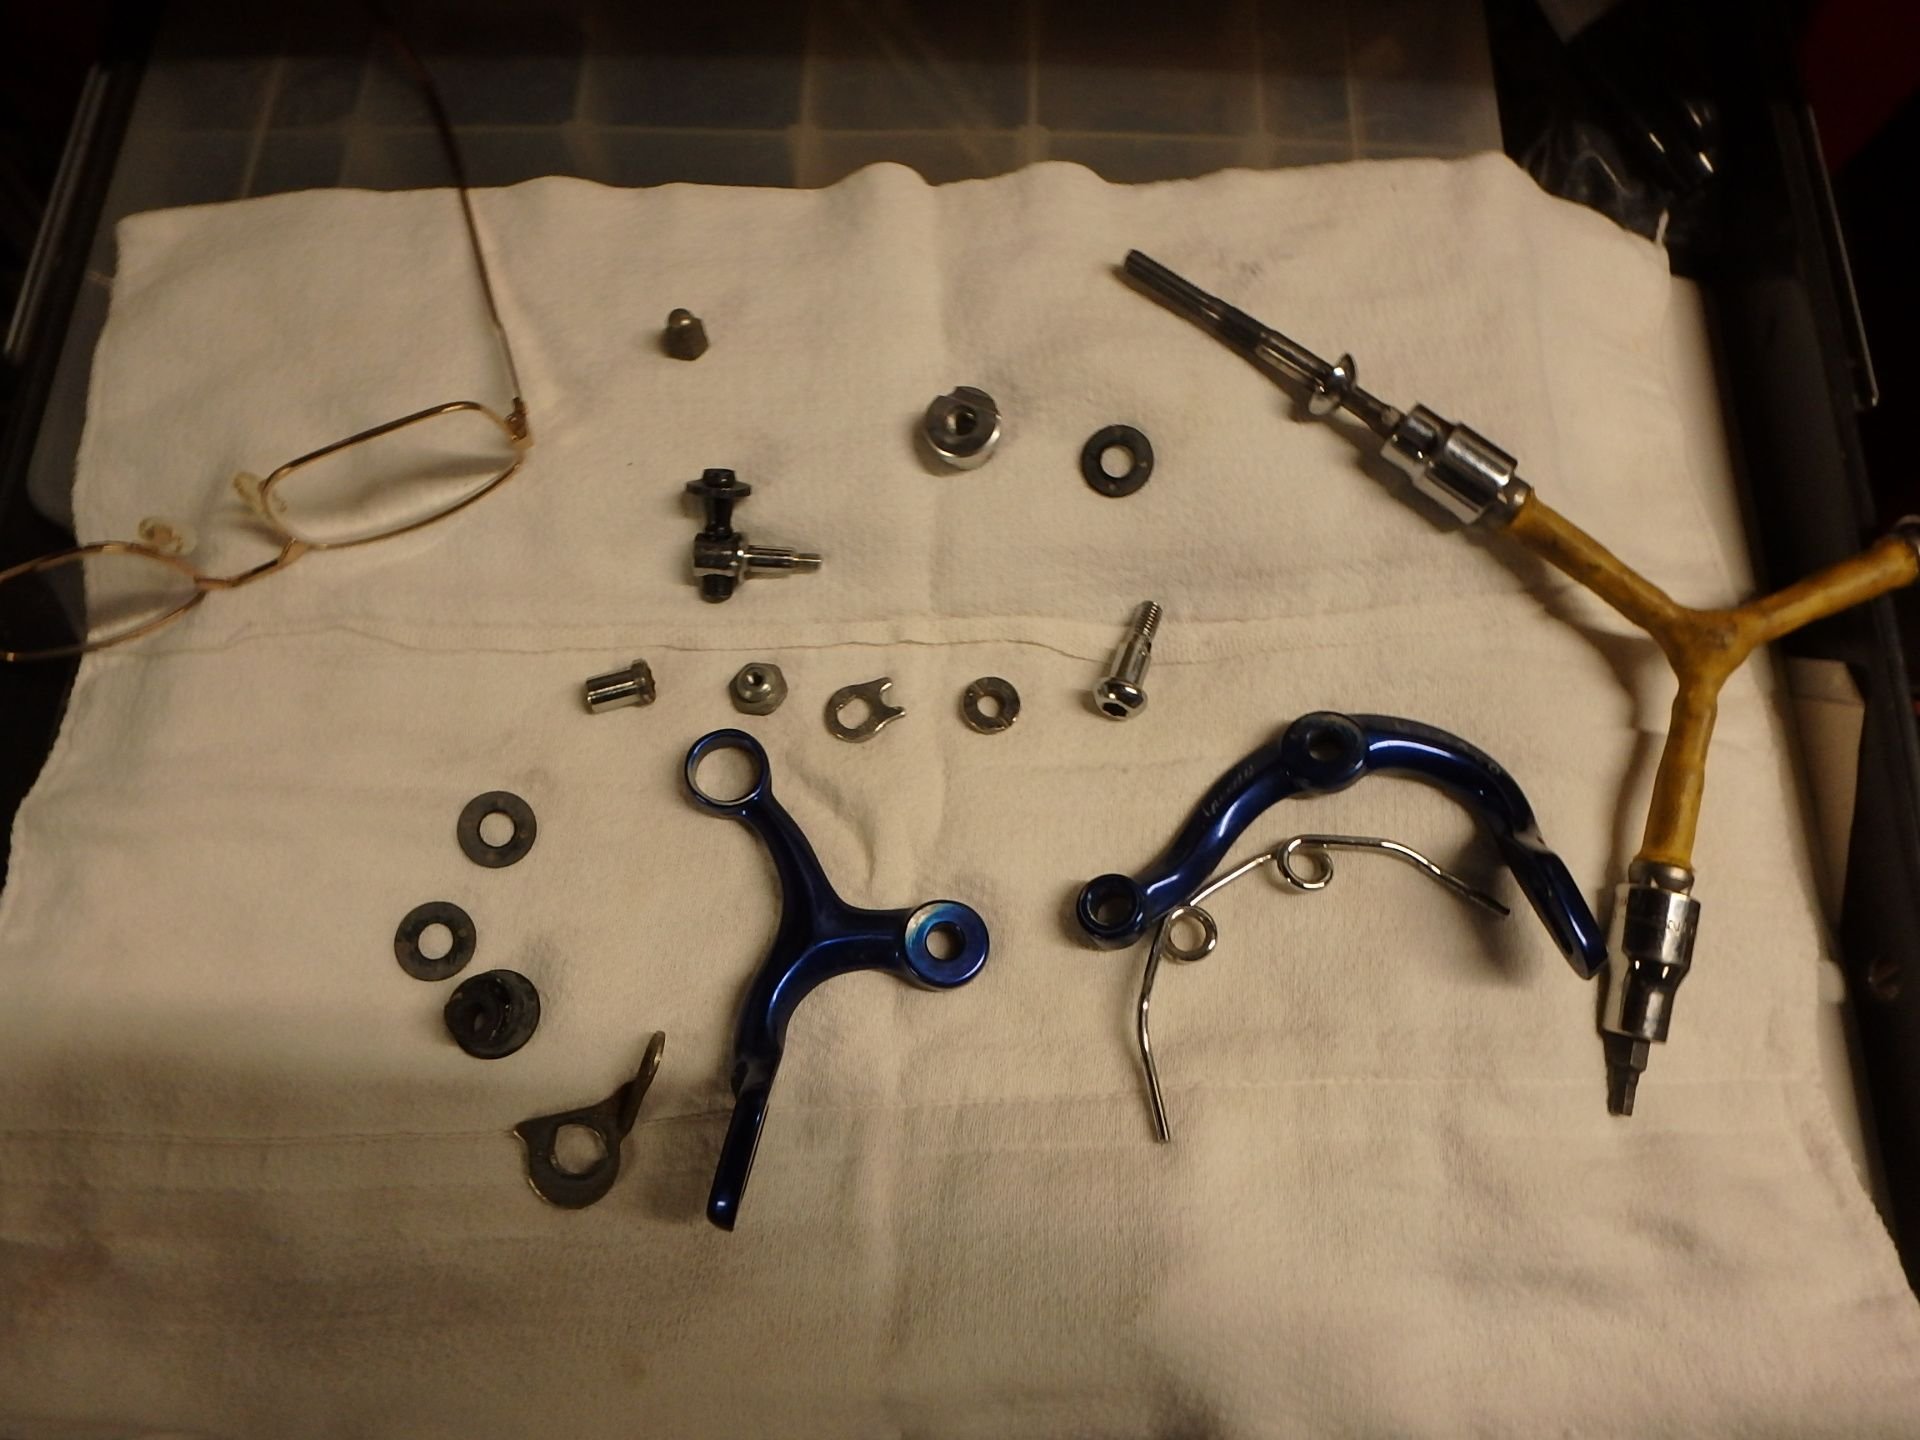
The caliper in pieces after cleaning, a few items were rust damaged or bent.
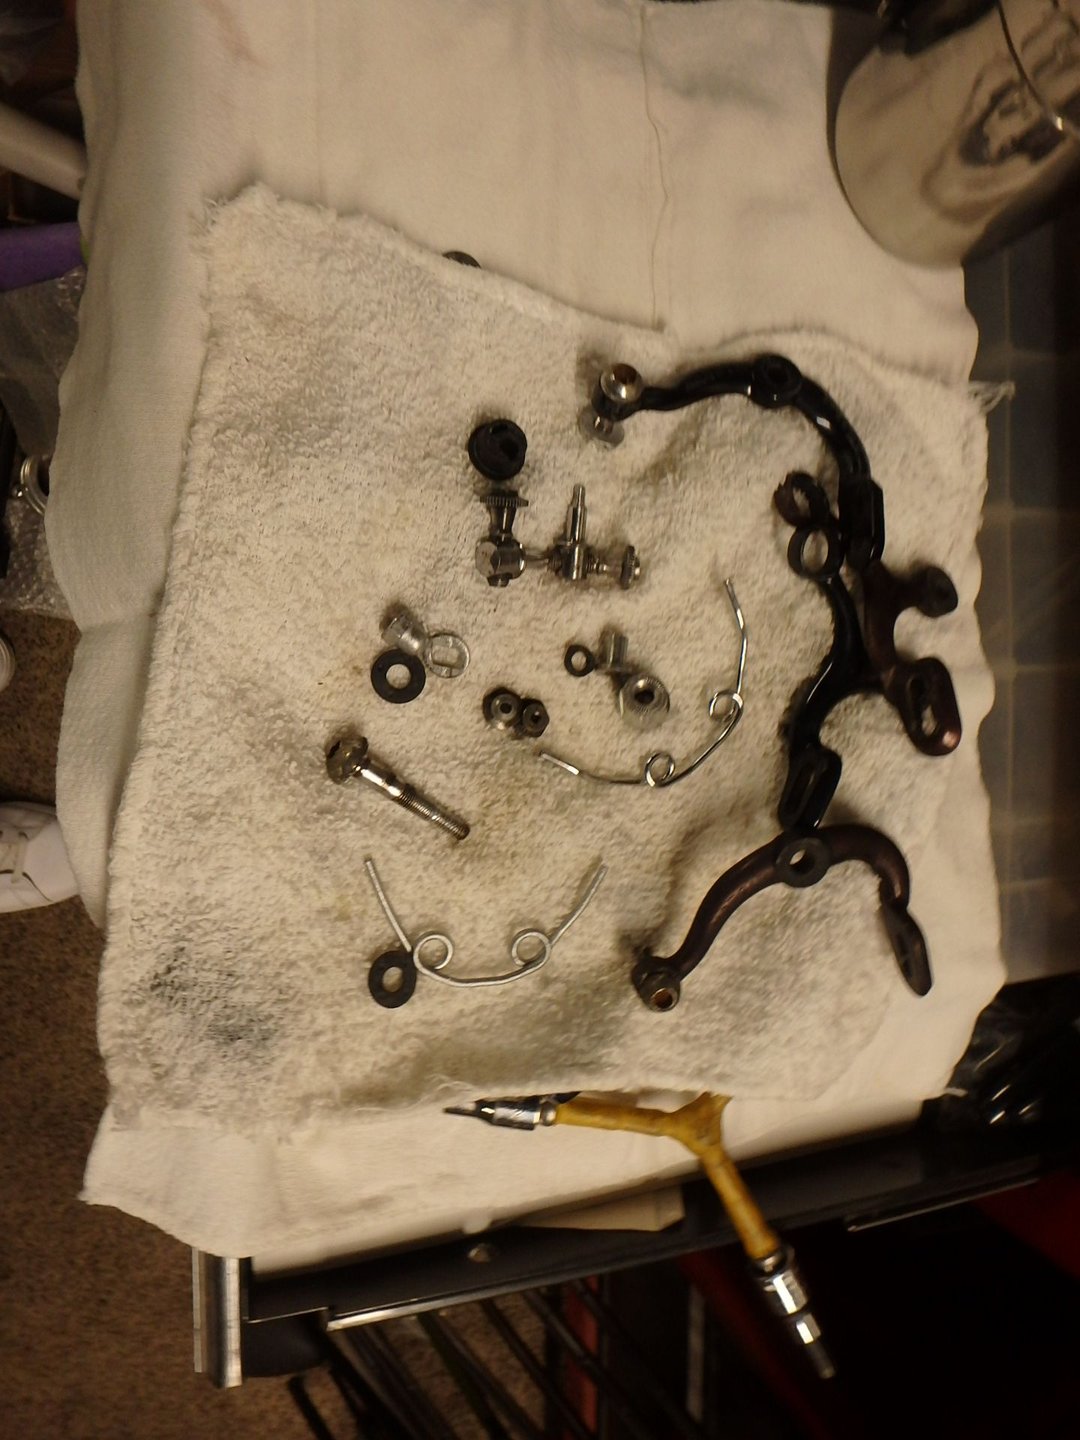
Brought out the Modolo stash of spare parts to find the right replacement items.

Almost finished, waiting for the clear coat to dry before putting the previously rusted parts back on the caliper.
It will go into the postal system Tuesday, and a huge tip of the hat to Ben for finding this rather rare item to fit on the Basso Loto. Smiles, MH
The caliper in pieces after cleaning, a few items were rust damaged or bent.
Brought out the Modolo stash of spare parts to find the right replacement items.
Almost finished, waiting for the clear coat to dry before putting the previously rusted parts back on the caliper.
It will go into the postal system Tuesday, and a huge tip of the hat to Ben for finding this rather rare item to fit on the Basso Loto. Smiles, MH
Last edited by Mad Honk; 10-12-25 at 09:44 PM.