


Campy pedal overhaul
 02-14-25 | 12:02 PM
#1
Thread Starter
Senior Member


Joined: May 2019
Posts: 3,976
Likes: 3,216
From: Bloomington, IN
Bikes: Paramount, Faggin, Ochsner, Rossin, Ciocc
Campy pedal overhaul
ThomasOmalley and squirtdad ,
This is for you guys. I am going to do a clean up and show the steps to help Thomas out. Hope this helps!
Started with a pretty crusty looking set of pedals that show a lot of neglect, but the plan is to get them back on the road for S-dad. Pics with comments under them for the process.
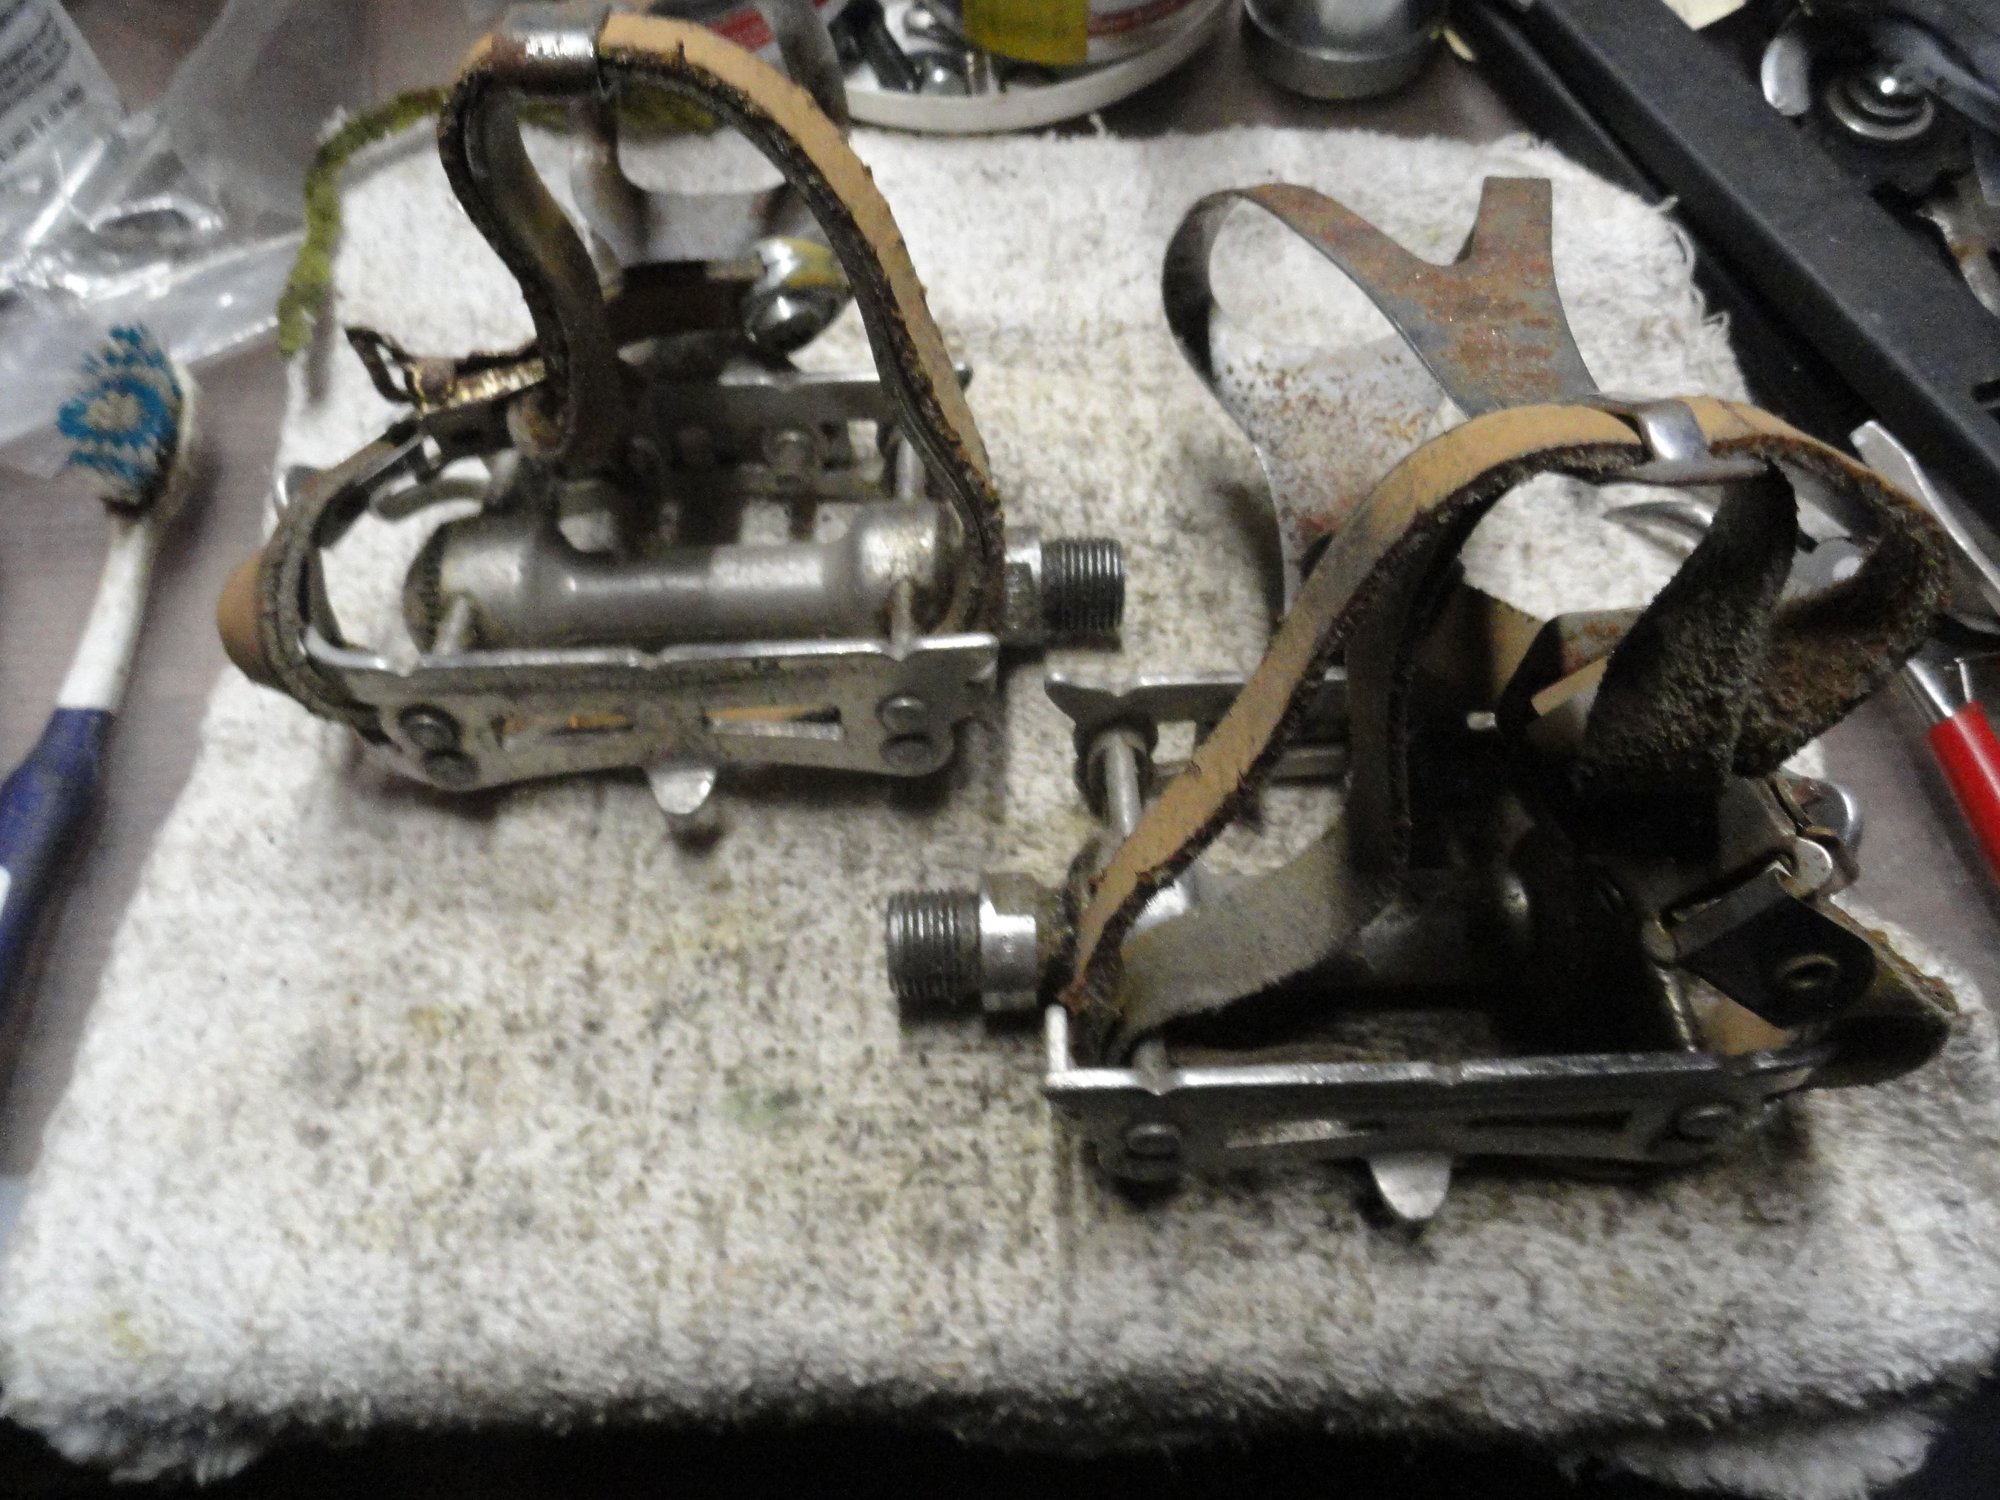
Pedals as they came out of the stash. Rusty toe clips and delaminated Binda straps. First part is to get down to the pedal itself, so everything comes off.
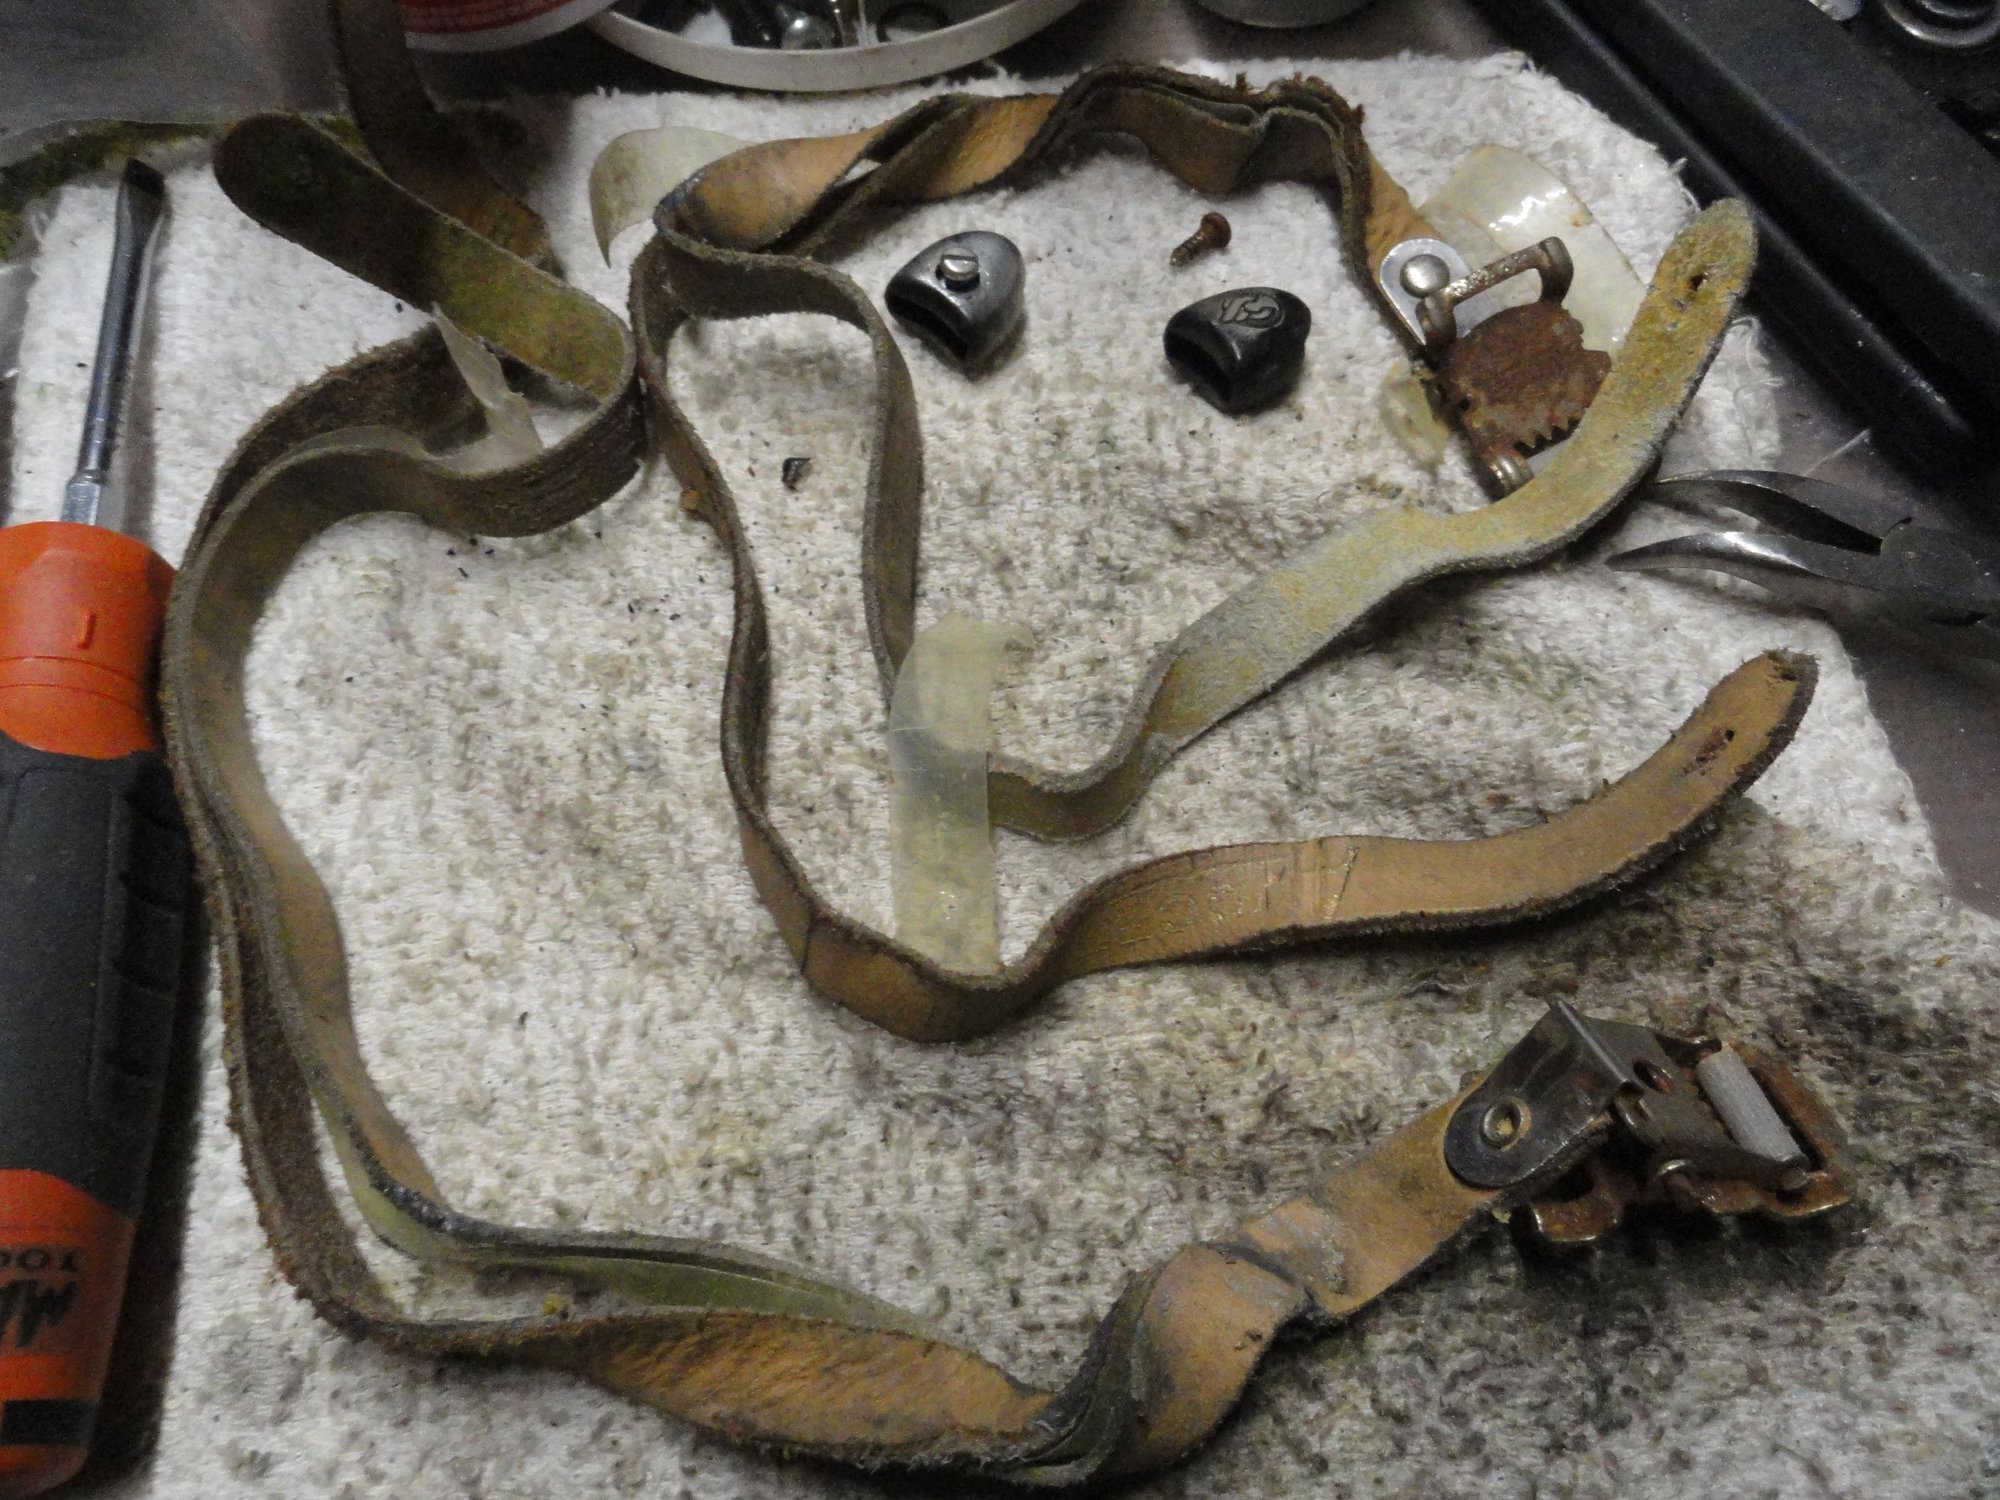
Alfredo Binda straps after fifty years of damage.
Toe clips come off and are set aside. Old screws are discarded and new Stainless button head screws will be installed.
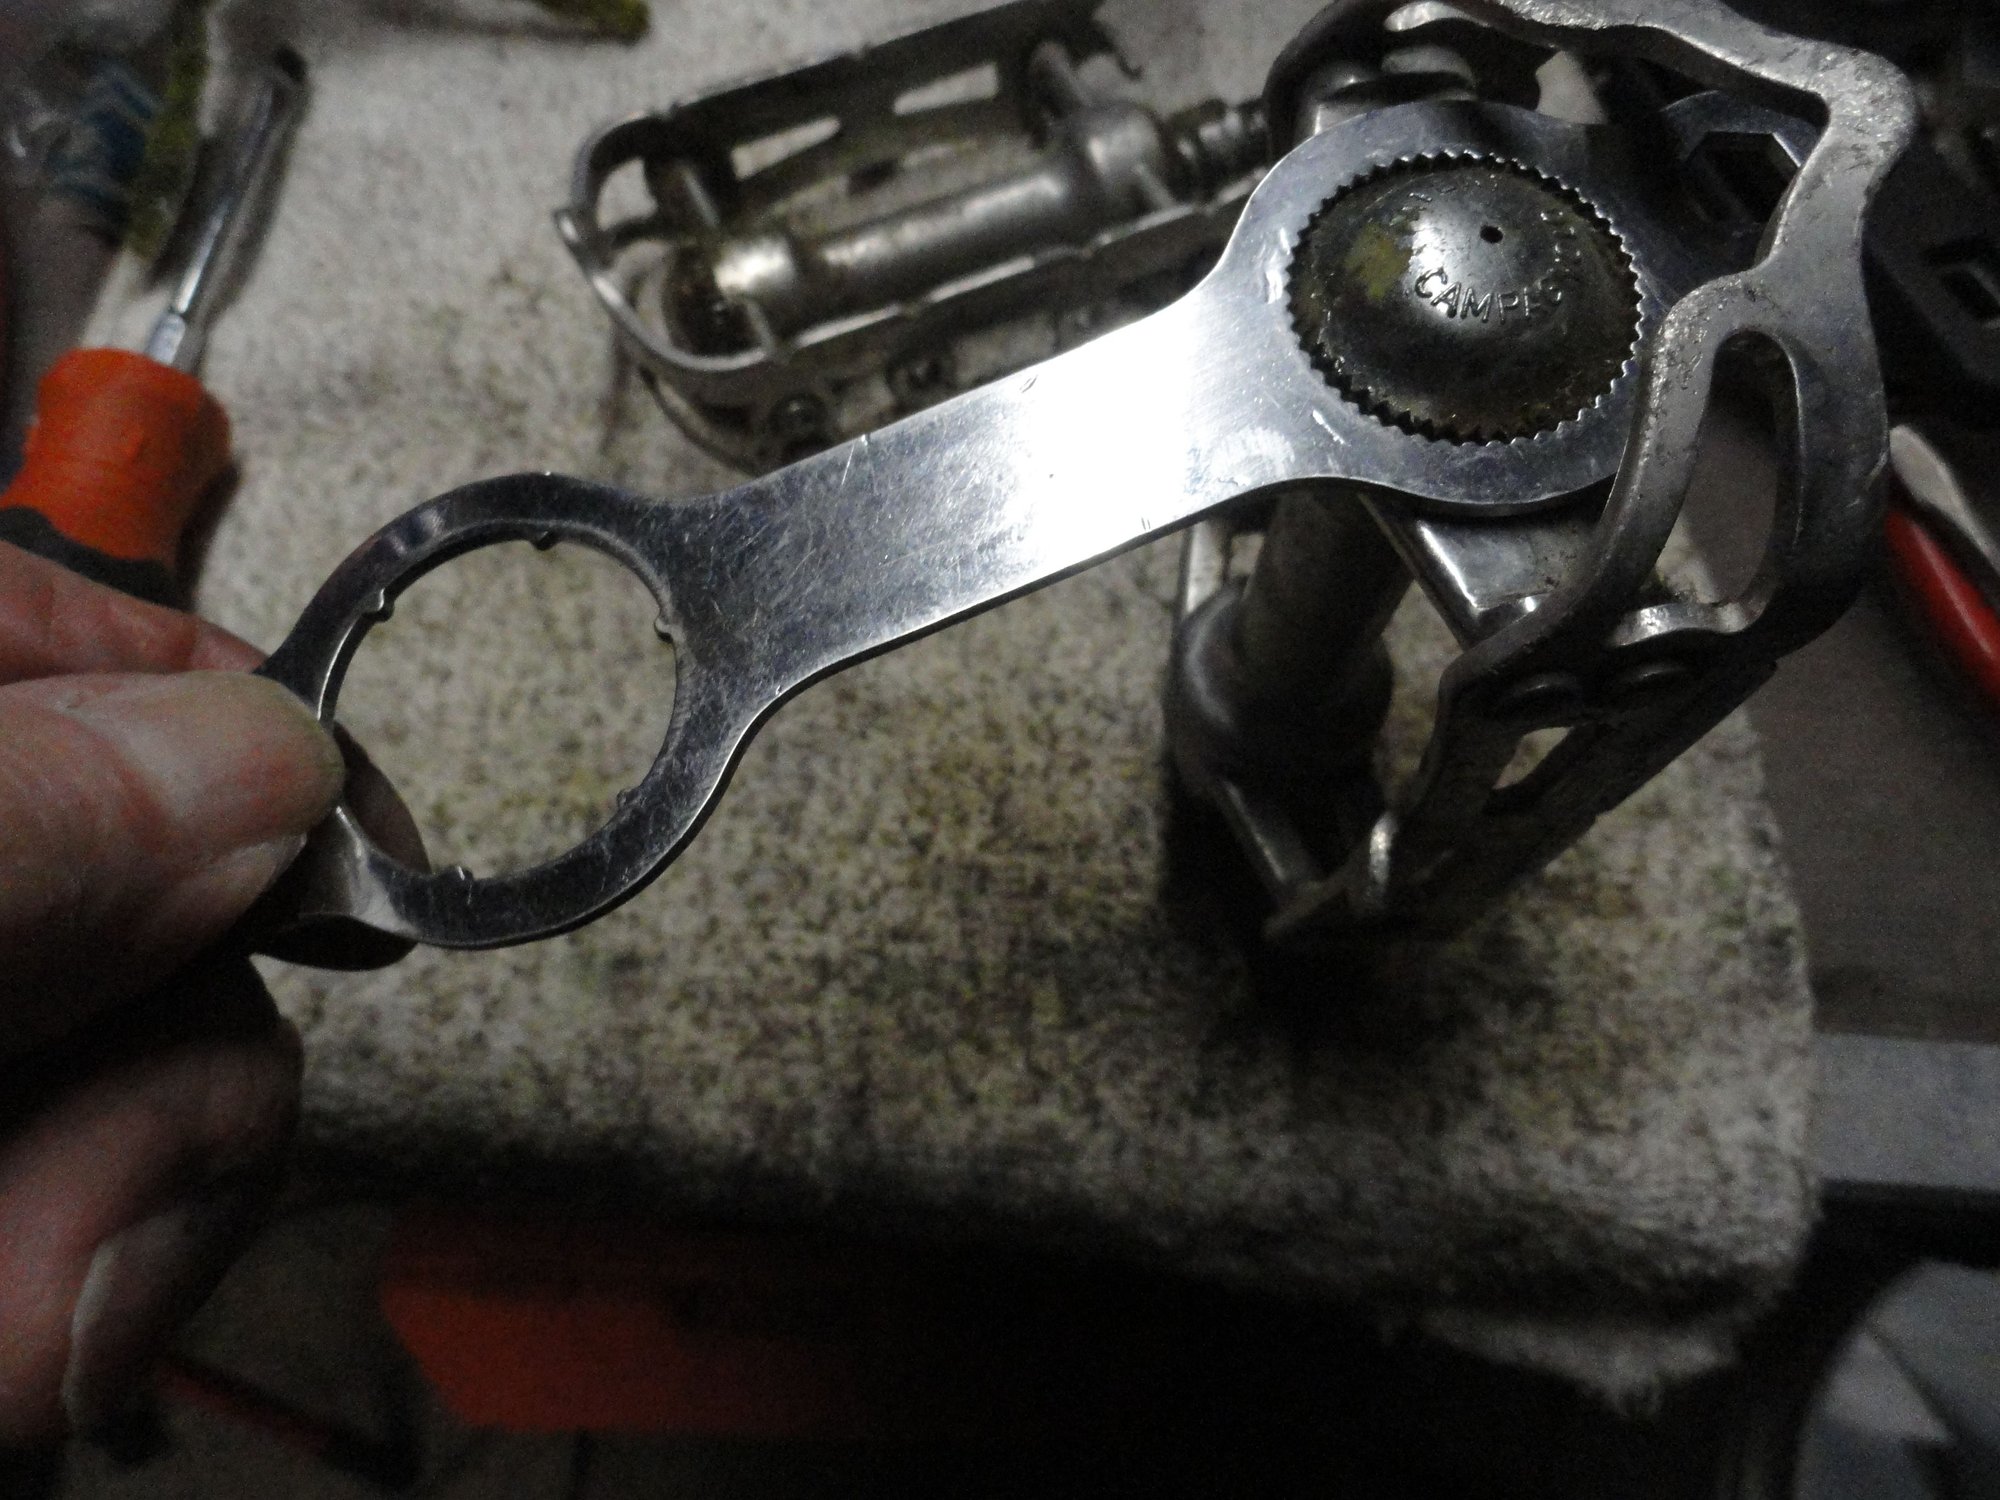
Dust cap removal tool, fits a handful of dust-caps. If you don't have one a pair of needle nose pliers can be used to grip the cap by the knurled section. The are right hand thread and should not be locked down very hard.
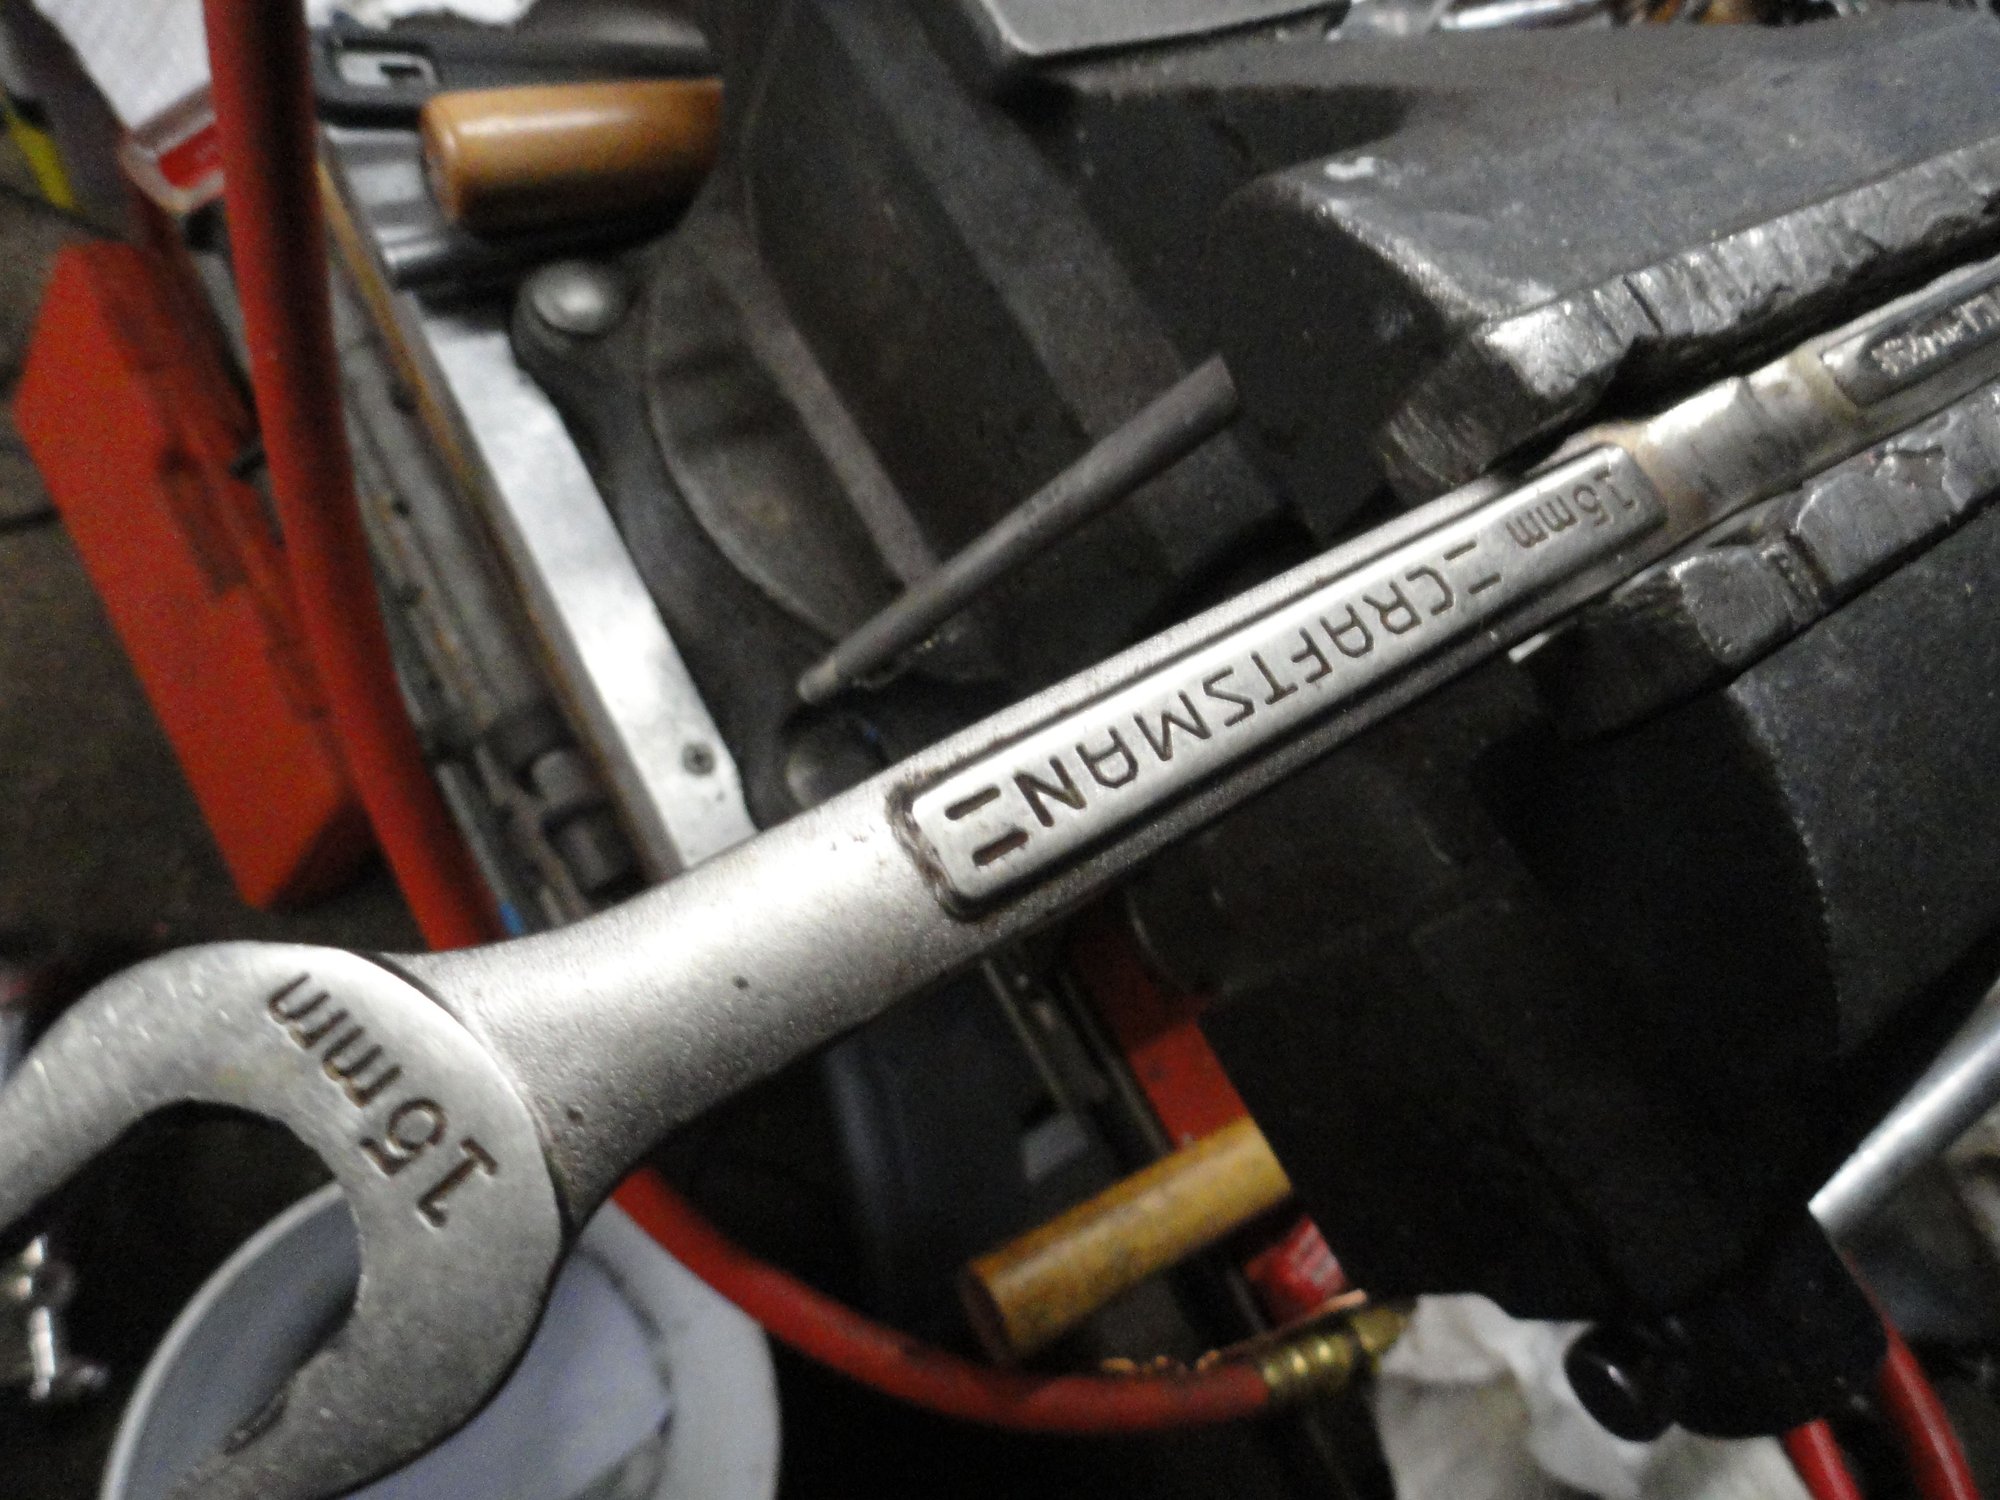
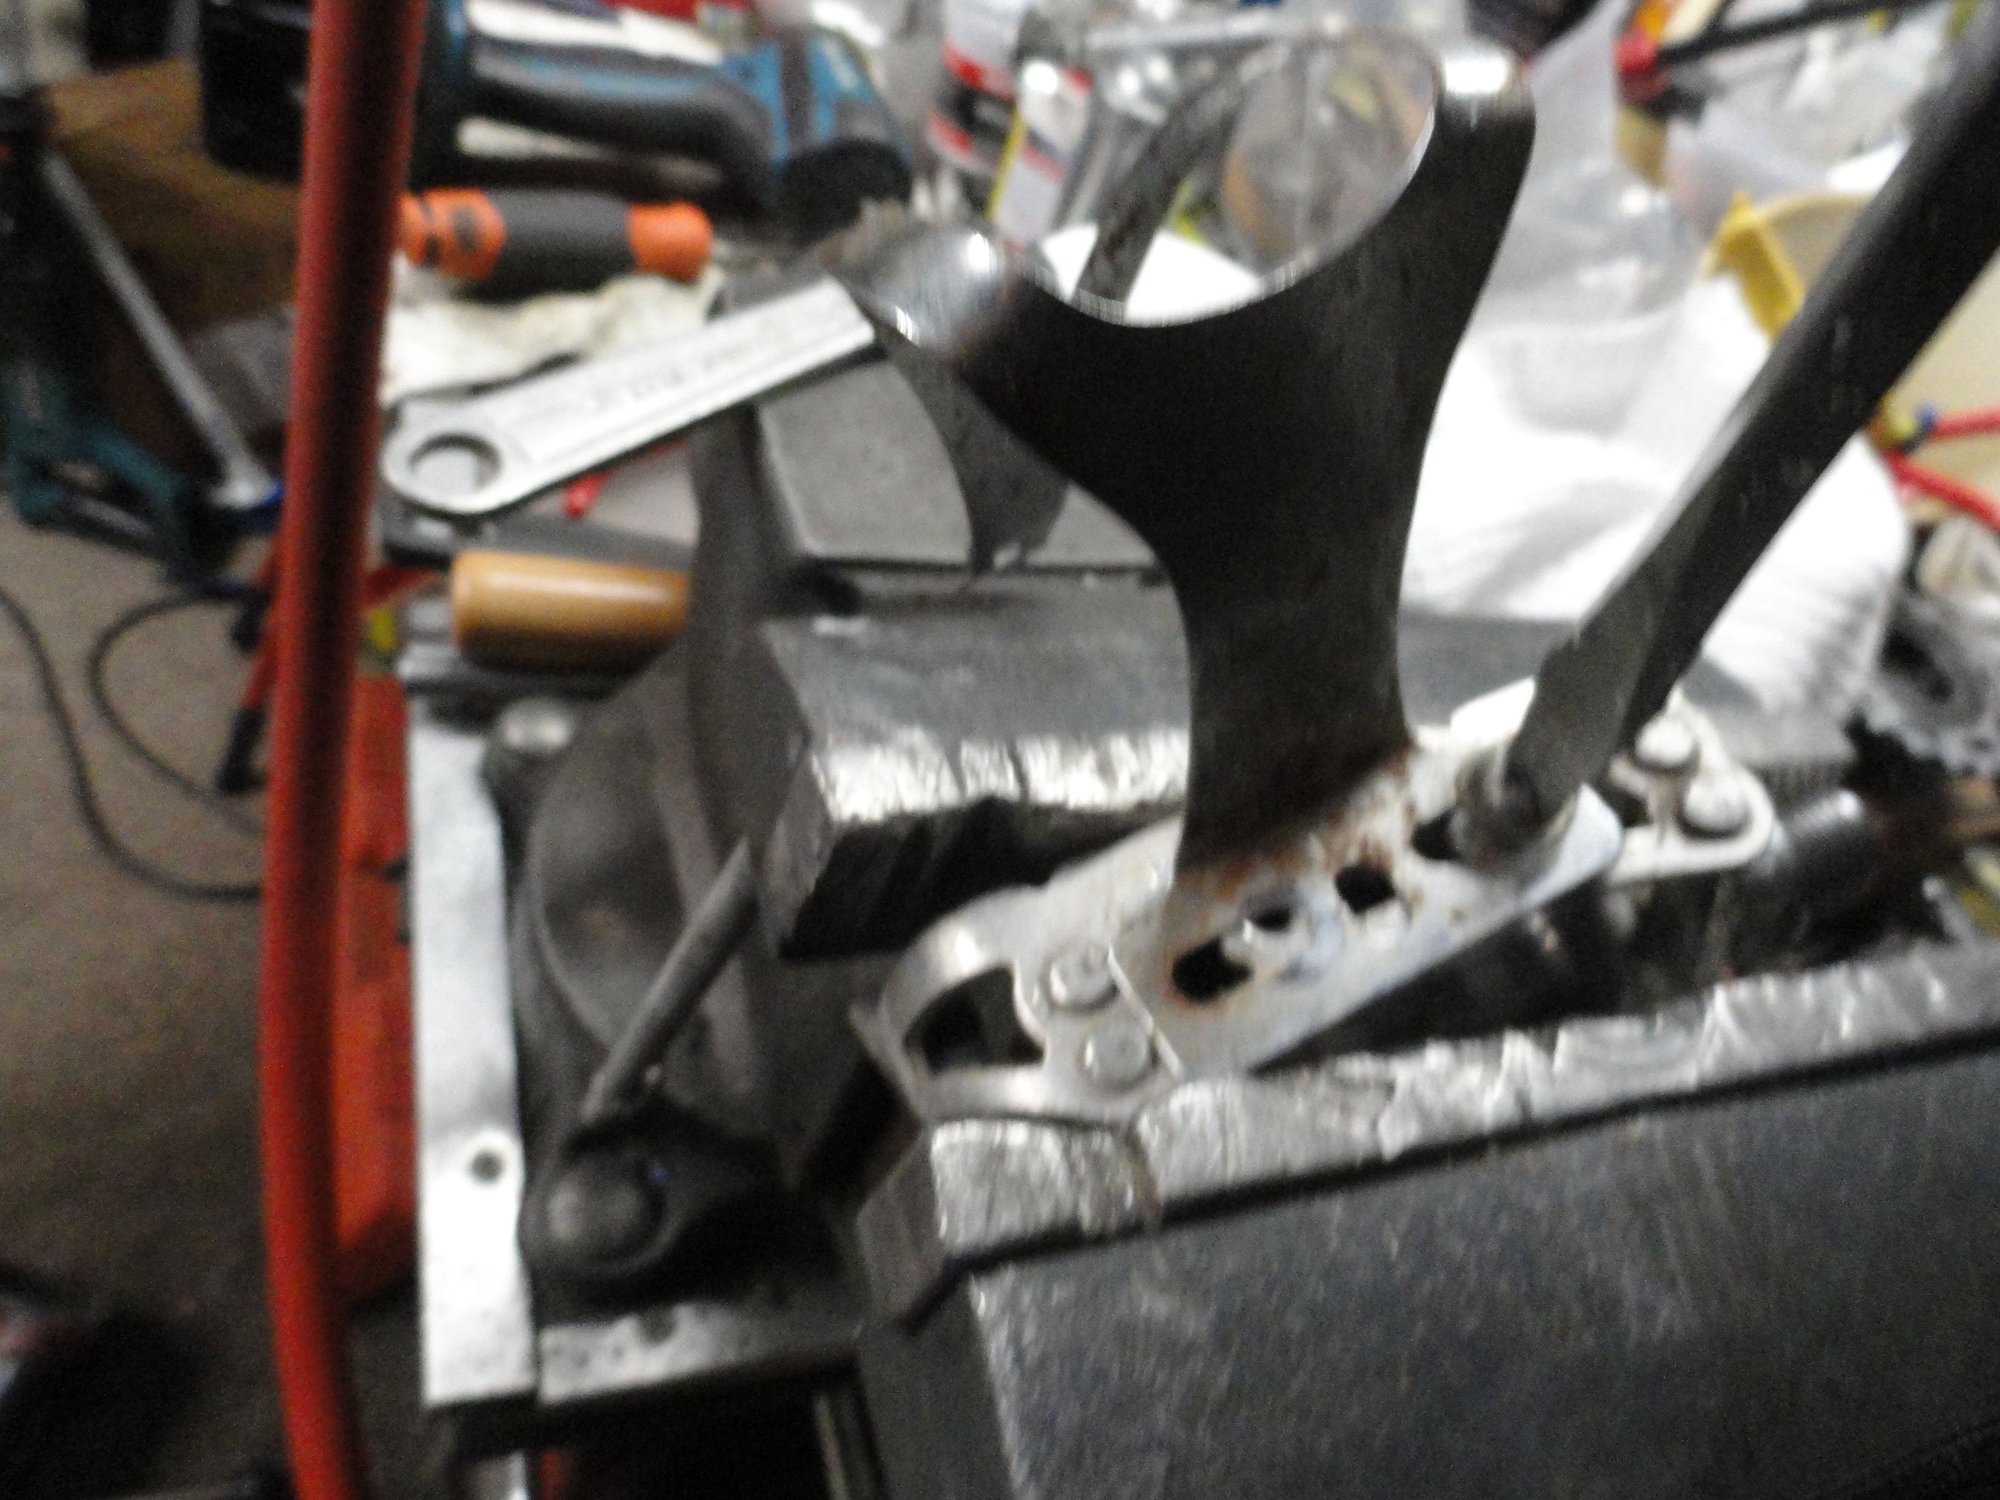
My junkyard pedal wrench three wrenches welded together to get the needed leverage sometimes needed to remove the pedals. Locked into the vise so I can use the flats of the spindle to break the cone nuts free.
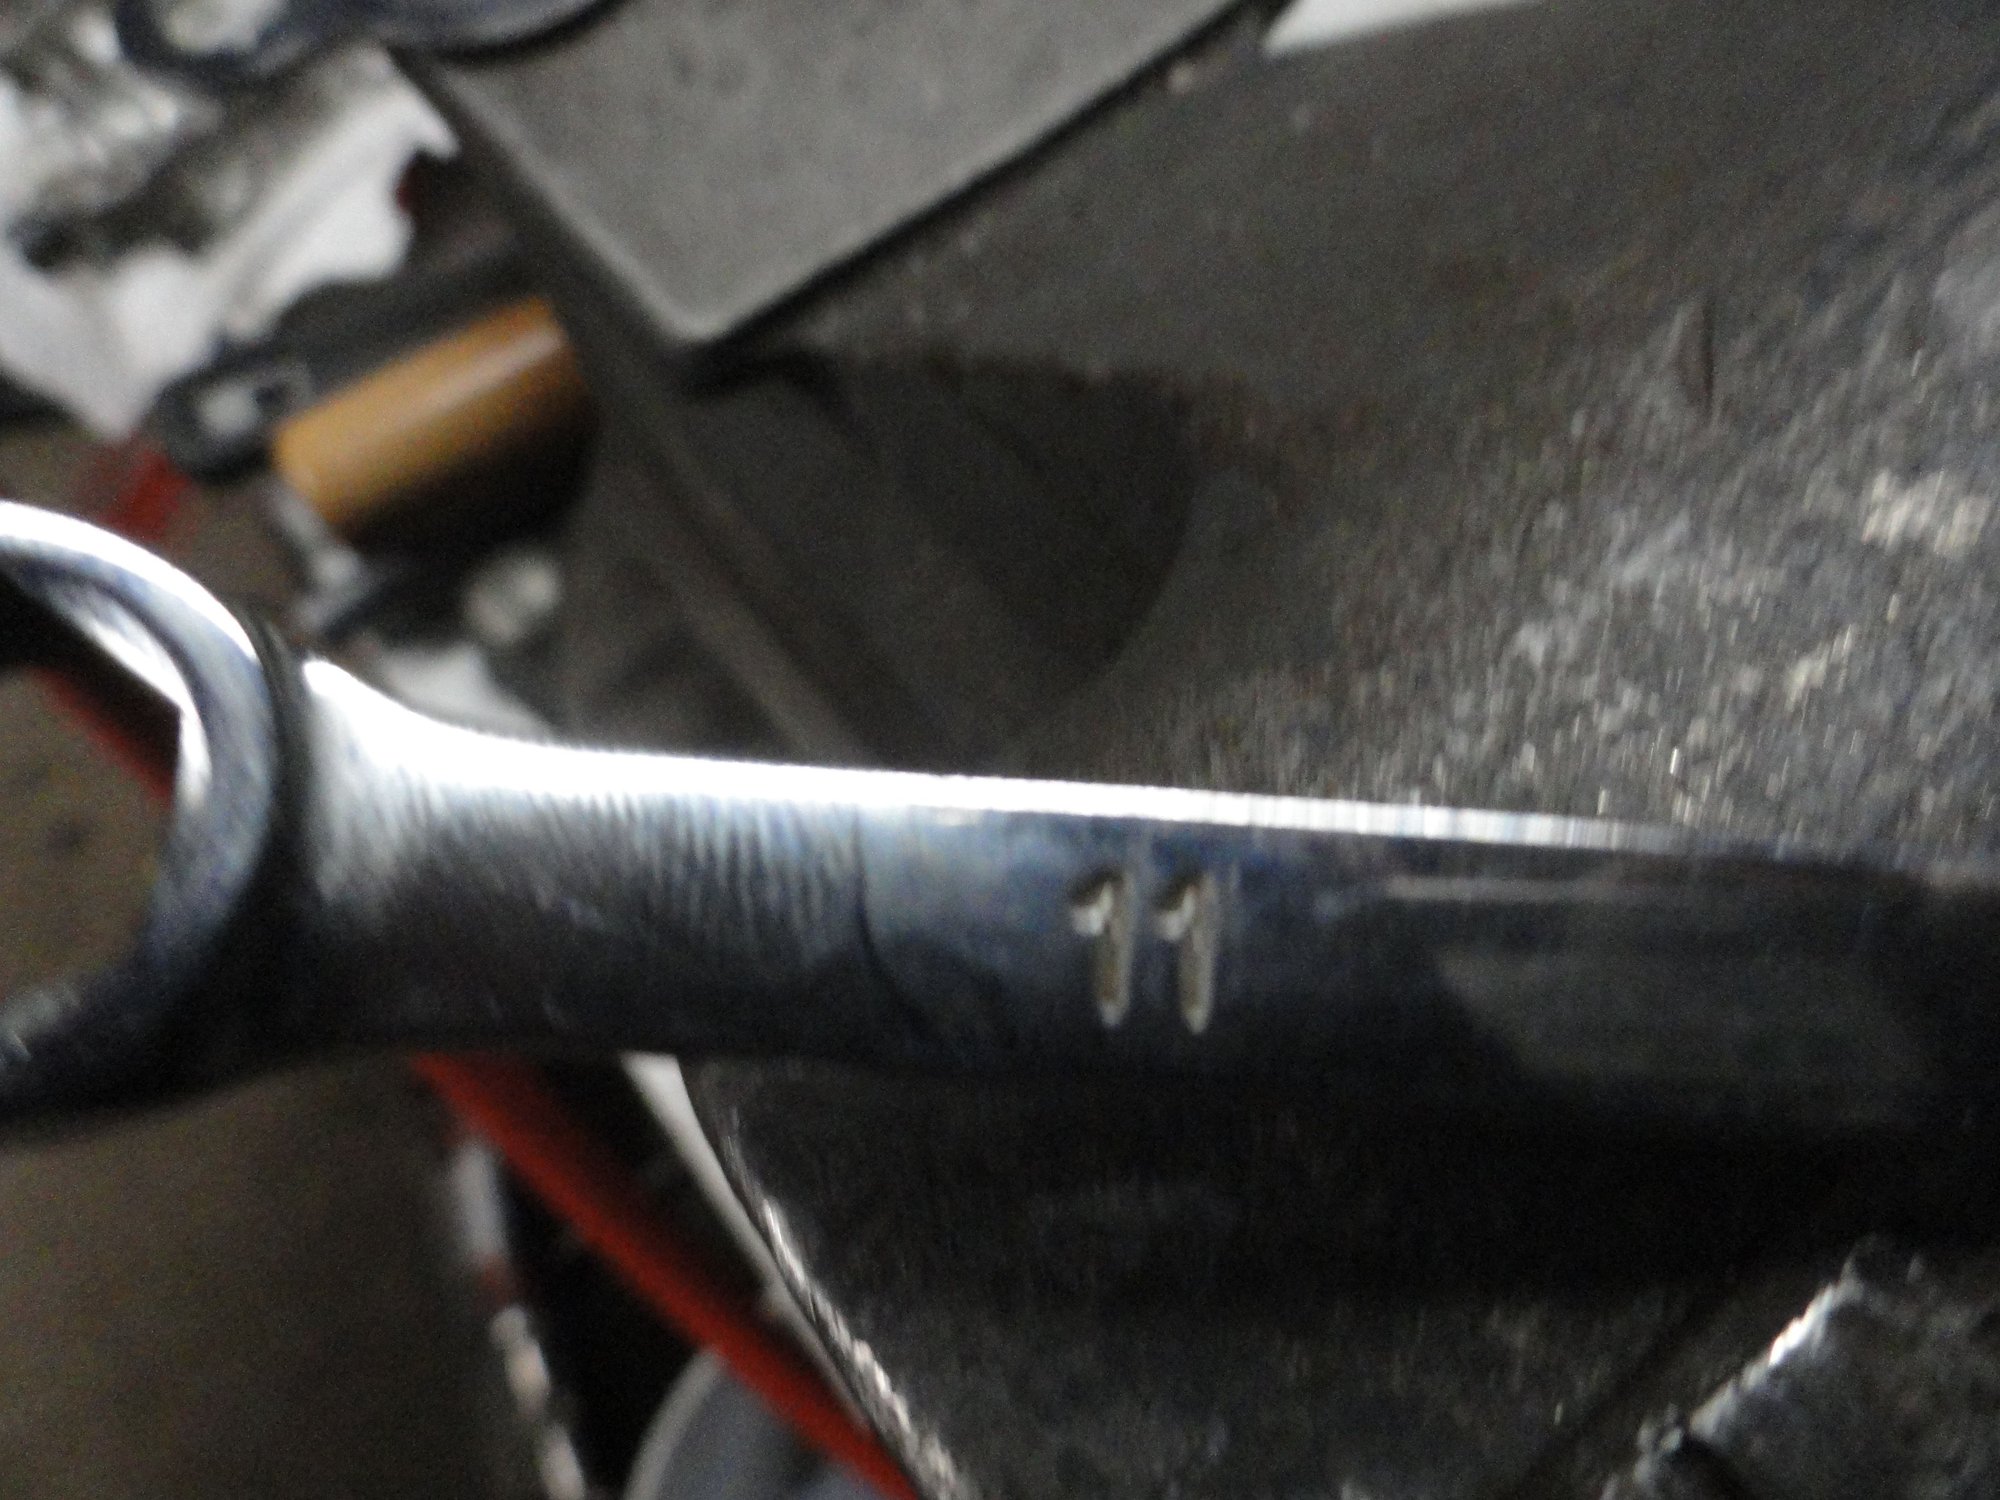
The correct size of wrench for the cone lock nut. My preference is for the 6 point box end for better grip and no slipping.

Everything taken apart and the parts are cleaned. I use a six inch screwdriver to push a small section of cloth through the shell to get all the old grease out. Note the cloth under the shell for size and what came out of the shell.
I have taken the liberty to show the necessary steps. The dust caps are nylon and chrome painted so they were hand cleaned with a not so strong solvent, and then set aside for re-assembly.
The pedals have 5/32" bearings so be careful to not loose them or get a few new ones before taking the pedals apart. You will need about 50 bearings if you cannot re-use the old ones. These don't very often show burning of the balls but do check each bearing for any discoloration or damage. I did not remove the inner dust cap but if needed, it takes a blind bore bearing removal tool and it is pricey. Try to clean the pedal shell without removing the inner cap. A small brush like a tooth brush will get into the space and clean it pretty well. A petroleum solvent like mineral spirits usually works well If you don't have another solution for cleaning.
I will post next the parts after cleaning and the process for re-assembly. Smiles, MH
This is for you guys. I am going to do a clean up and show the steps to help Thomas out. Hope this helps!
Started with a pretty crusty looking set of pedals that show a lot of neglect, but the plan is to get them back on the road for S-dad. Pics with comments under them for the process.
Pedals as they came out of the stash. Rusty toe clips and delaminated Binda straps. First part is to get down to the pedal itself, so everything comes off.
Alfredo Binda straps after fifty years of damage.
Toe clips come off and are set aside. Old screws are discarded and new Stainless button head screws will be installed.
Dust cap removal tool, fits a handful of dust-caps. If you don't have one a pair of needle nose pliers can be used to grip the cap by the knurled section. The are right hand thread and should not be locked down very hard.
My junkyard pedal wrench three wrenches welded together to get the needed leverage sometimes needed to remove the pedals. Locked into the vise so I can use the flats of the spindle to break the cone nuts free.
The correct size of wrench for the cone lock nut. My preference is for the 6 point box end for better grip and no slipping.
Everything taken apart and the parts are cleaned. I use a six inch screwdriver to push a small section of cloth through the shell to get all the old grease out. Note the cloth under the shell for size and what came out of the shell.
I have taken the liberty to show the necessary steps. The dust caps are nylon and chrome painted so they were hand cleaned with a not so strong solvent, and then set aside for re-assembly.
The pedals have 5/32" bearings so be careful to not loose them or get a few new ones before taking the pedals apart. You will need about 50 bearings if you cannot re-use the old ones. These don't very often show burning of the balls but do check each bearing for any discoloration or damage. I did not remove the inner dust cap but if needed, it takes a blind bore bearing removal tool and it is pricey. Try to clean the pedal shell without removing the inner cap. A small brush like a tooth brush will get into the space and clean it pretty well. A petroleum solvent like mineral spirits usually works well If you don't have another solution for cleaning.
I will post next the parts after cleaning and the process for re-assembly. Smiles, MH
Last edited by Mad Honk; 02-14-25 at 12:06 PM.







 02-14-25 | 12:31 PM
#2

Senior Member

Joined: Feb 2013
Posts: 15,369
Likes: 4,393
From: Alta California
-----
beautiful job with the tutorial!
looking at the pictures reminded me of a set of Record pedals repacked for a customer back in the mid-eighties
his mount was early sixties and the pedals had never been touched...and he rode A LOT
the factory grease had turned to something akin to linoleum in hardness - it just laughed at parts clearer solution, had to be dug out mechanically
-----
beautiful job with the tutorial!
looking at the pictures reminded me of a set of Record pedals repacked for a customer back in the mid-eighties
his mount was early sixties and the pedals had never been touched...and he rode A LOT
the factory grease had turned to something akin to linoleum in hardness - it just laughed at parts clearer solution, had to be dug out mechanically
-----
02-14-25 | 01:42 PM
#3

-----
beautiful job with the tutorial!
looking at the pictures reminded me of a set of Record pedals repacked for a customer back in the mid-eighties
his mount was early sixties and the pedals had never been touched...and he rode A LOT
the factory grease had turned to something akin to linoleum in hardness - it just laughed at parts clearer solution, had to be dug out mechanically
-----
beautiful job with the tutorial!
looking at the pictures reminded me of a set of Record pedals repacked for a customer back in the mid-eighties
his mount was early sixties and the pedals had never been touched...and he rode A LOT
the factory grease had turned to something akin to linoleum in hardness - it just laughed at parts clearer solution, had to be dug out mechanically
-----
tobacco pipe cleaners can be bent to get under the inboard debris shields.
note that Super Record pedals use smaller bearing balls also.
02-14-25 | 01:55 PM
#4

Senior Member

Joined: Dec 2006
Posts: 2,863
Likes: 856
I've overhauled way too many pedals in my past. Now, my approach is if the bearings seem fine, and the preload is good, then I just inject new grease through the handy grease injection port. Less than 5 minute operation.
All of the old grease gets pushed out inboard for cleanup with a rag. A lot faster and it reduces the risk of the locknut/cone getting loose, and playing havoc with the pedal internals. IIRC, on the right side, the cone will unwind and spill balls on the road. On the left, the cone will tighten up until the pedal locks up and the balls and cones are destroyed.
All of the old grease gets pushed out inboard for cleanup with a rag. A lot faster and it reduces the risk of the locknut/cone getting loose, and playing havoc with the pedal internals. IIRC, on the right side, the cone will unwind and spill balls on the road. On the left, the cone will tighten up until the pedal locks up and the balls and cones are destroyed.
 02-14-25 | 02:01 PM
#5
Senior Member
Joined: Feb 2020
Posts: 4,035
Likes: 2,356
There's a trick to getting these off easily.
When (often) it's not easy, it is because the screw and nut bind together and if you don't hold the nut, turning the screw turns both.
And rather than fumble trying to hold the pedal, screwdriver, and spanner with only two hands, set the screwdriver point upwards in the vice, put the screw head slot on that, and loosen the nut - after that all you should need is your fingers.
When (often) it's not easy, it is because the screw and nut bind together and if you don't hold the nut, turning the screw turns both.
And rather than fumble trying to hold the pedal, screwdriver, and spanner with only two hands, set the screwdriver point upwards in the vice, put the screw head slot on that, and loosen the nut - after that all you should need is your fingers.
02-14-25 | 02:34 PM
#6

Senior Member
Joined: Dec 2018
Posts: 932
Likes: 1,822
From: Southeast TX
Bikes: Several
-----looking at the pictures reminded me of a set of Record pedals repacked for a customer back in the mid-eighties
his mount was early sixties and the pedals had never been touched...and he rode A LOT
the factory grease had turned to something akin to linoleum in hardness - it just laughed at parts clearer solution, had to be dug out mechanically
-----
his mount was early sixties and the pedals had never been touched...and he rode A LOT
the factory grease had turned to something akin to linoleum in hardness - it just laughed at parts clearer solution, had to be dug out mechanically
-----
__________________
My collection: 1947 Ciclo Piave, 1955 Liberia, 1969 Colnago Super, 1972 Legnano Olimpiade Record Specialissima, 1980 Mercian Vincitore, 1983 Gitane Interclub, 1985 Peugeot PGN10, 1985 Eddy Merckx Corsa, 1985 Hood Cycles Lo-pro, 1986 Bianchi Vittoria, 1987 De Rosa Professional, 1989 Vitus 979, 1989 Bianchi Super Leggera, 1990 Bianchi Axis, 1990 Specialized Sirrus, 2001 Colnago Dream B-Stay, 2007 Trek 1000
My collection: 1947 Ciclo Piave, 1955 Liberia, 1969 Colnago Super, 1972 Legnano Olimpiade Record Specialissima, 1980 Mercian Vincitore, 1983 Gitane Interclub, 1985 Peugeot PGN10, 1985 Eddy Merckx Corsa, 1985 Hood Cycles Lo-pro, 1986 Bianchi Vittoria, 1987 De Rosa Professional, 1989 Vitus 979, 1989 Bianchi Super Leggera, 1990 Bianchi Axis, 1990 Specialized Sirrus, 2001 Colnago Dream B-Stay, 2007 Trek 1000
02-14-25 | 04:14 PM
#8
Thread Starter
Senior Member
Joined: May 2019
Posts: 3,976
Likes: 3,216
From: Bloomington, IN
Bikes: Paramount, Faggin, Ochsner, Rossin, Ciocc
Well folks,
Took a lunch break and now back at it. Buffett tunes in the background and time for re-assembly. Same deal a bunch of pictures with captions.

All the parts cleaned and ready for re-assembly. You can see all of the dirt on the rags that came off this pedal. Just a quirk of mine, but the white shows the dirt and leftover grease pretty well.

A tub of MH secret sauce, Valvoline high speed and Lucas oil to keep it from hardening.

Inner race filled lubrication. Bearings added and spindle slipped in place to seat the bearings in place in the lube.
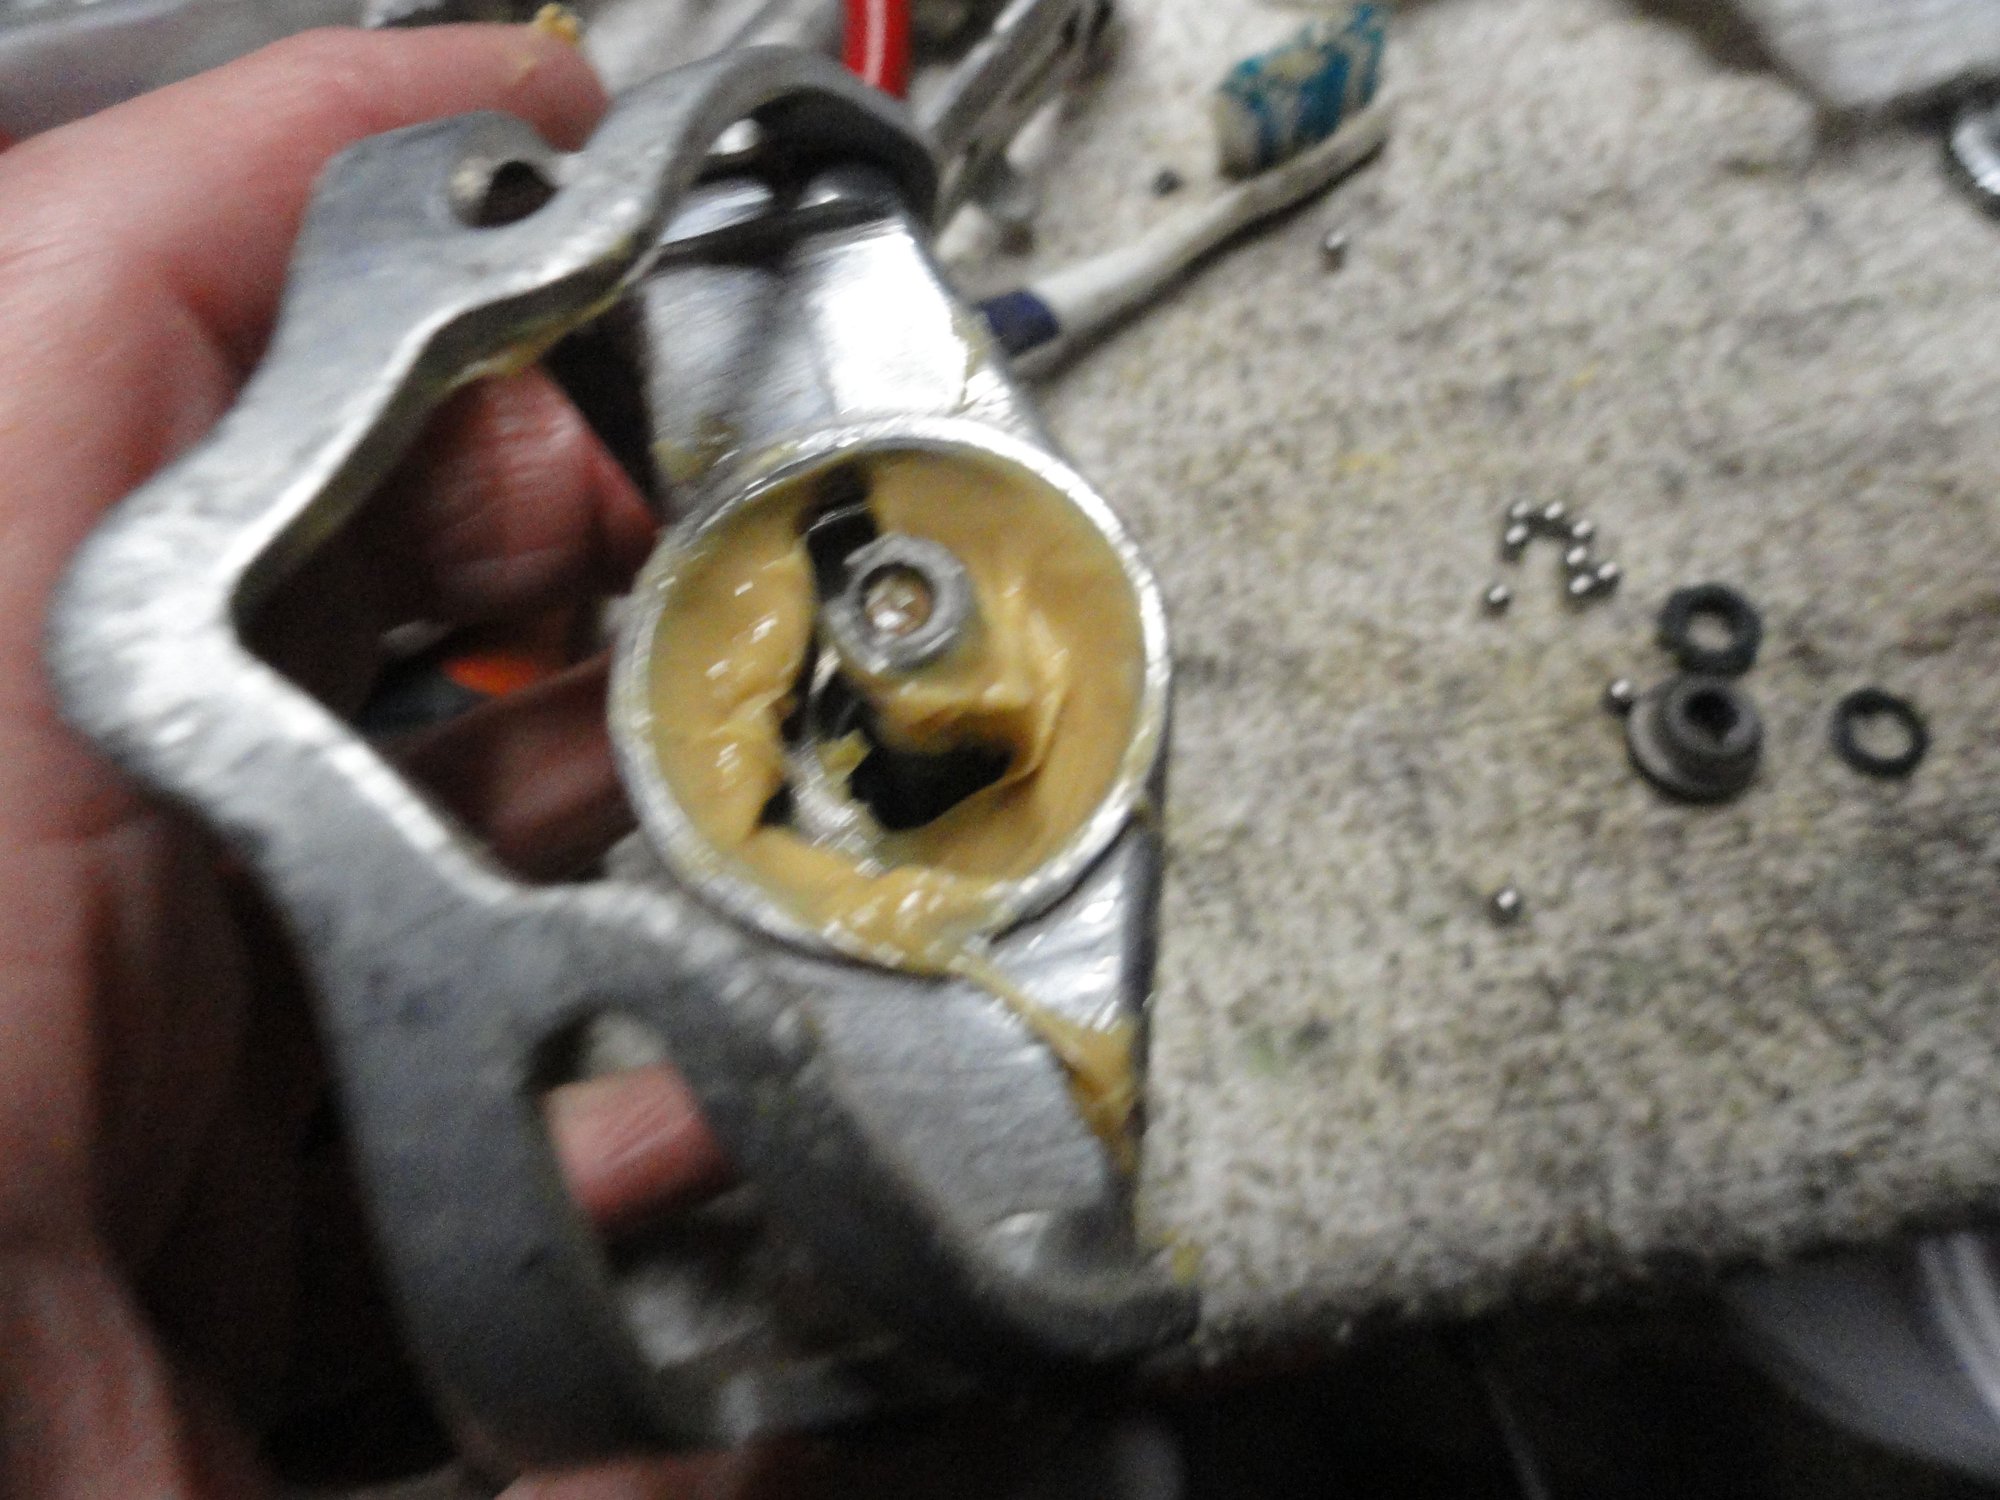
With the spindle still in place it keeps the bearings for the outer race until you can put the cone on the spindle. A tip is to push the cone into the bearings to seat them and spin the spindle into the cone.
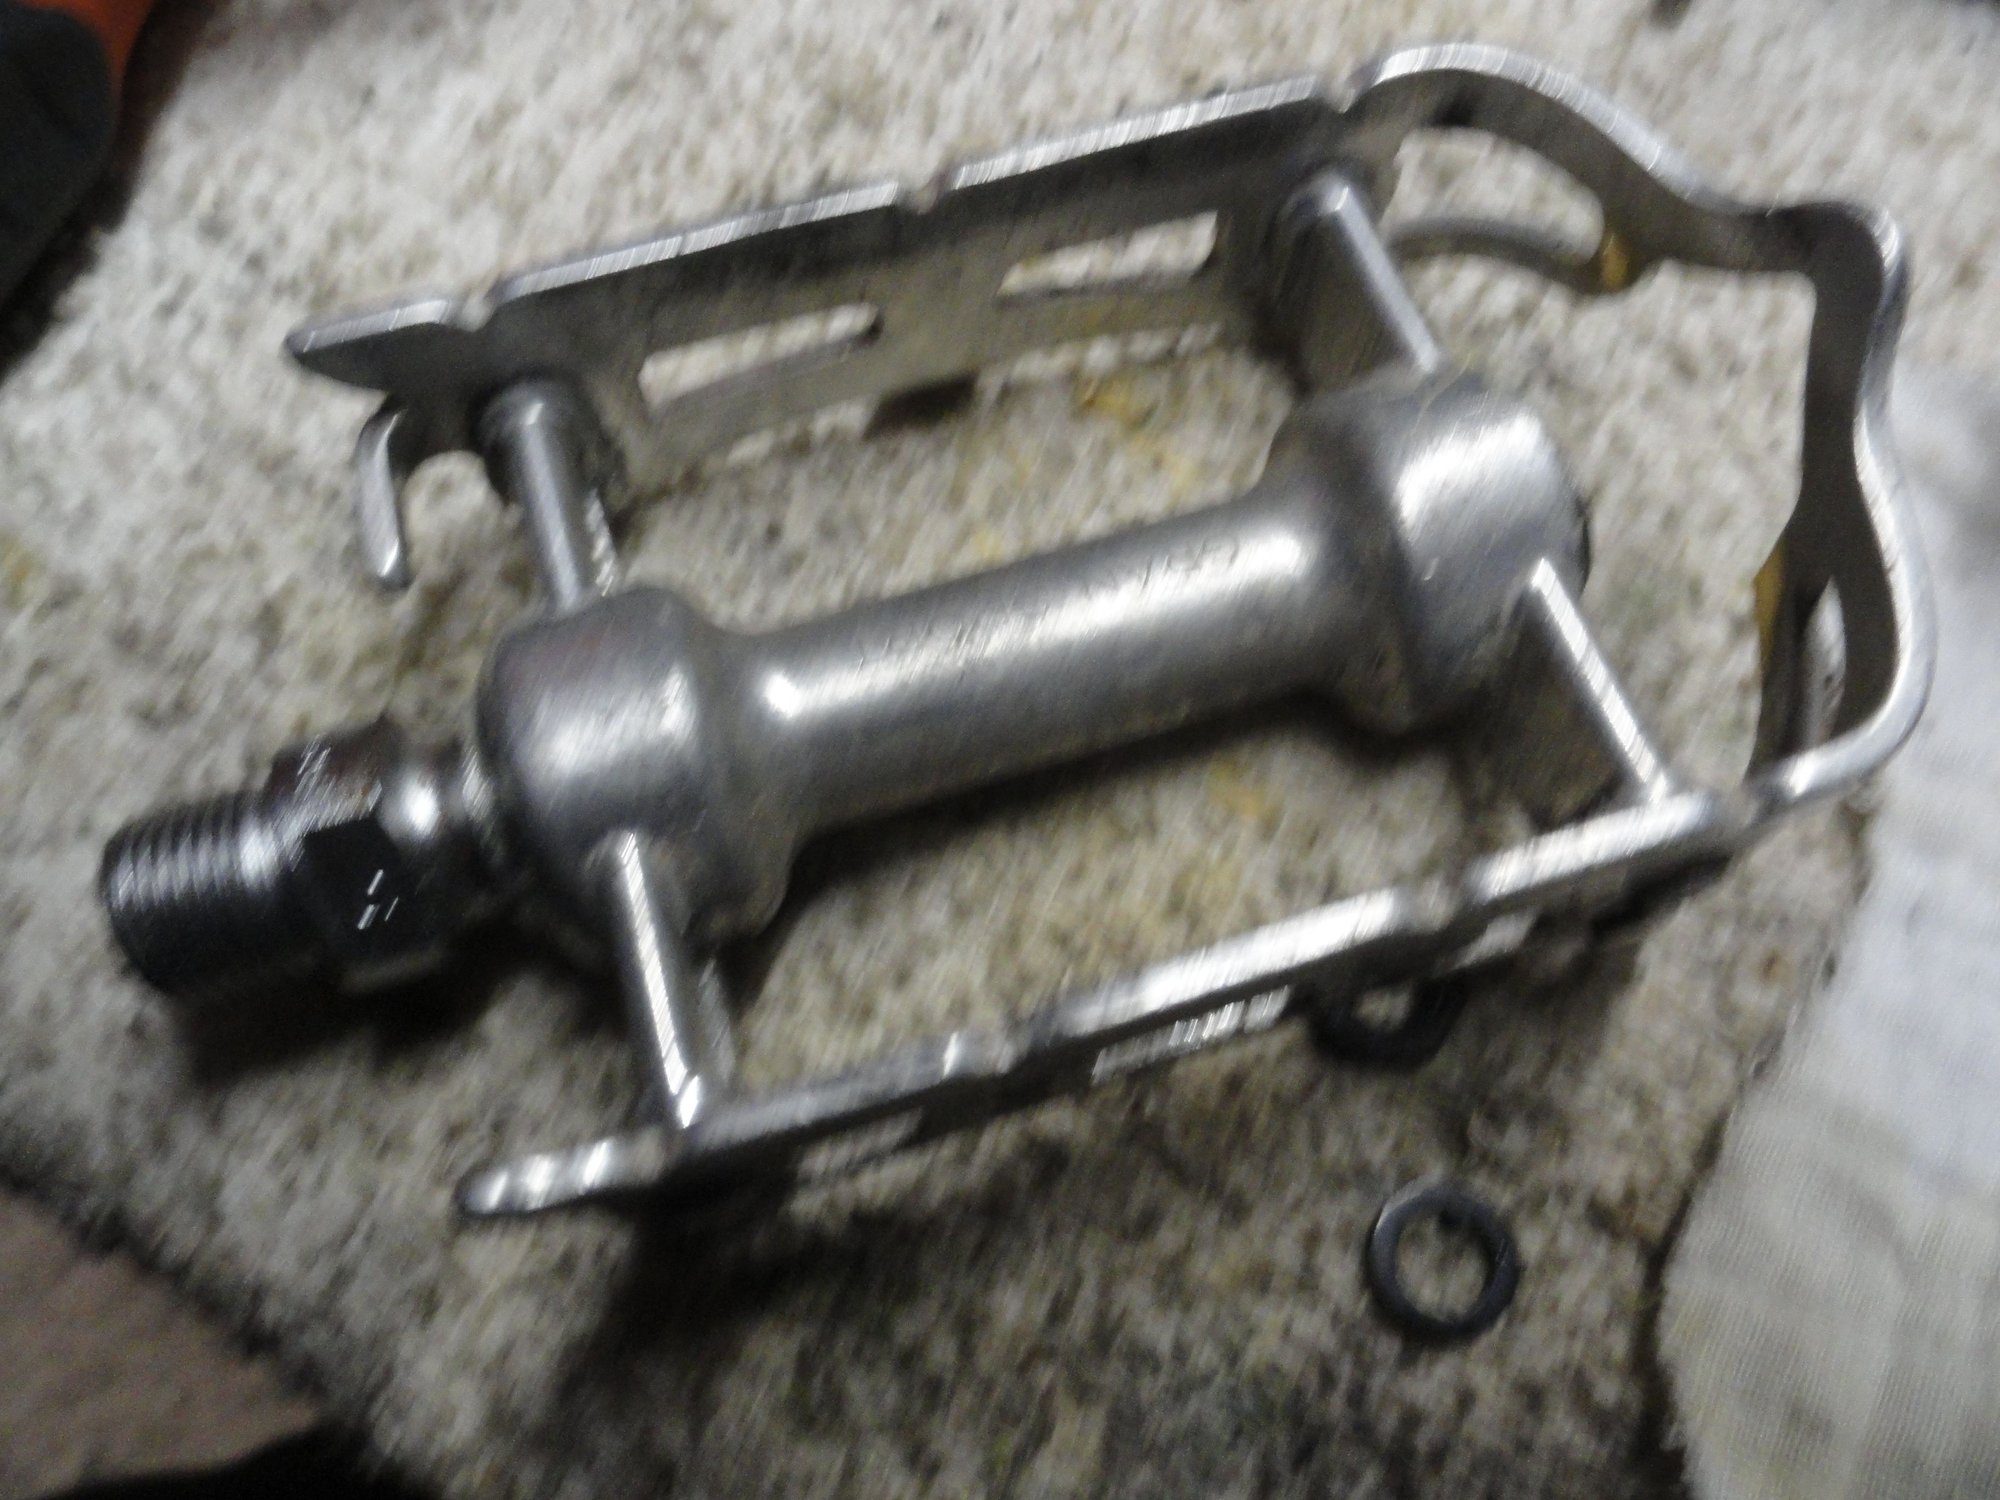
Spindle and cone started together. Now to set the bearing lash and add the washer and lock nut.
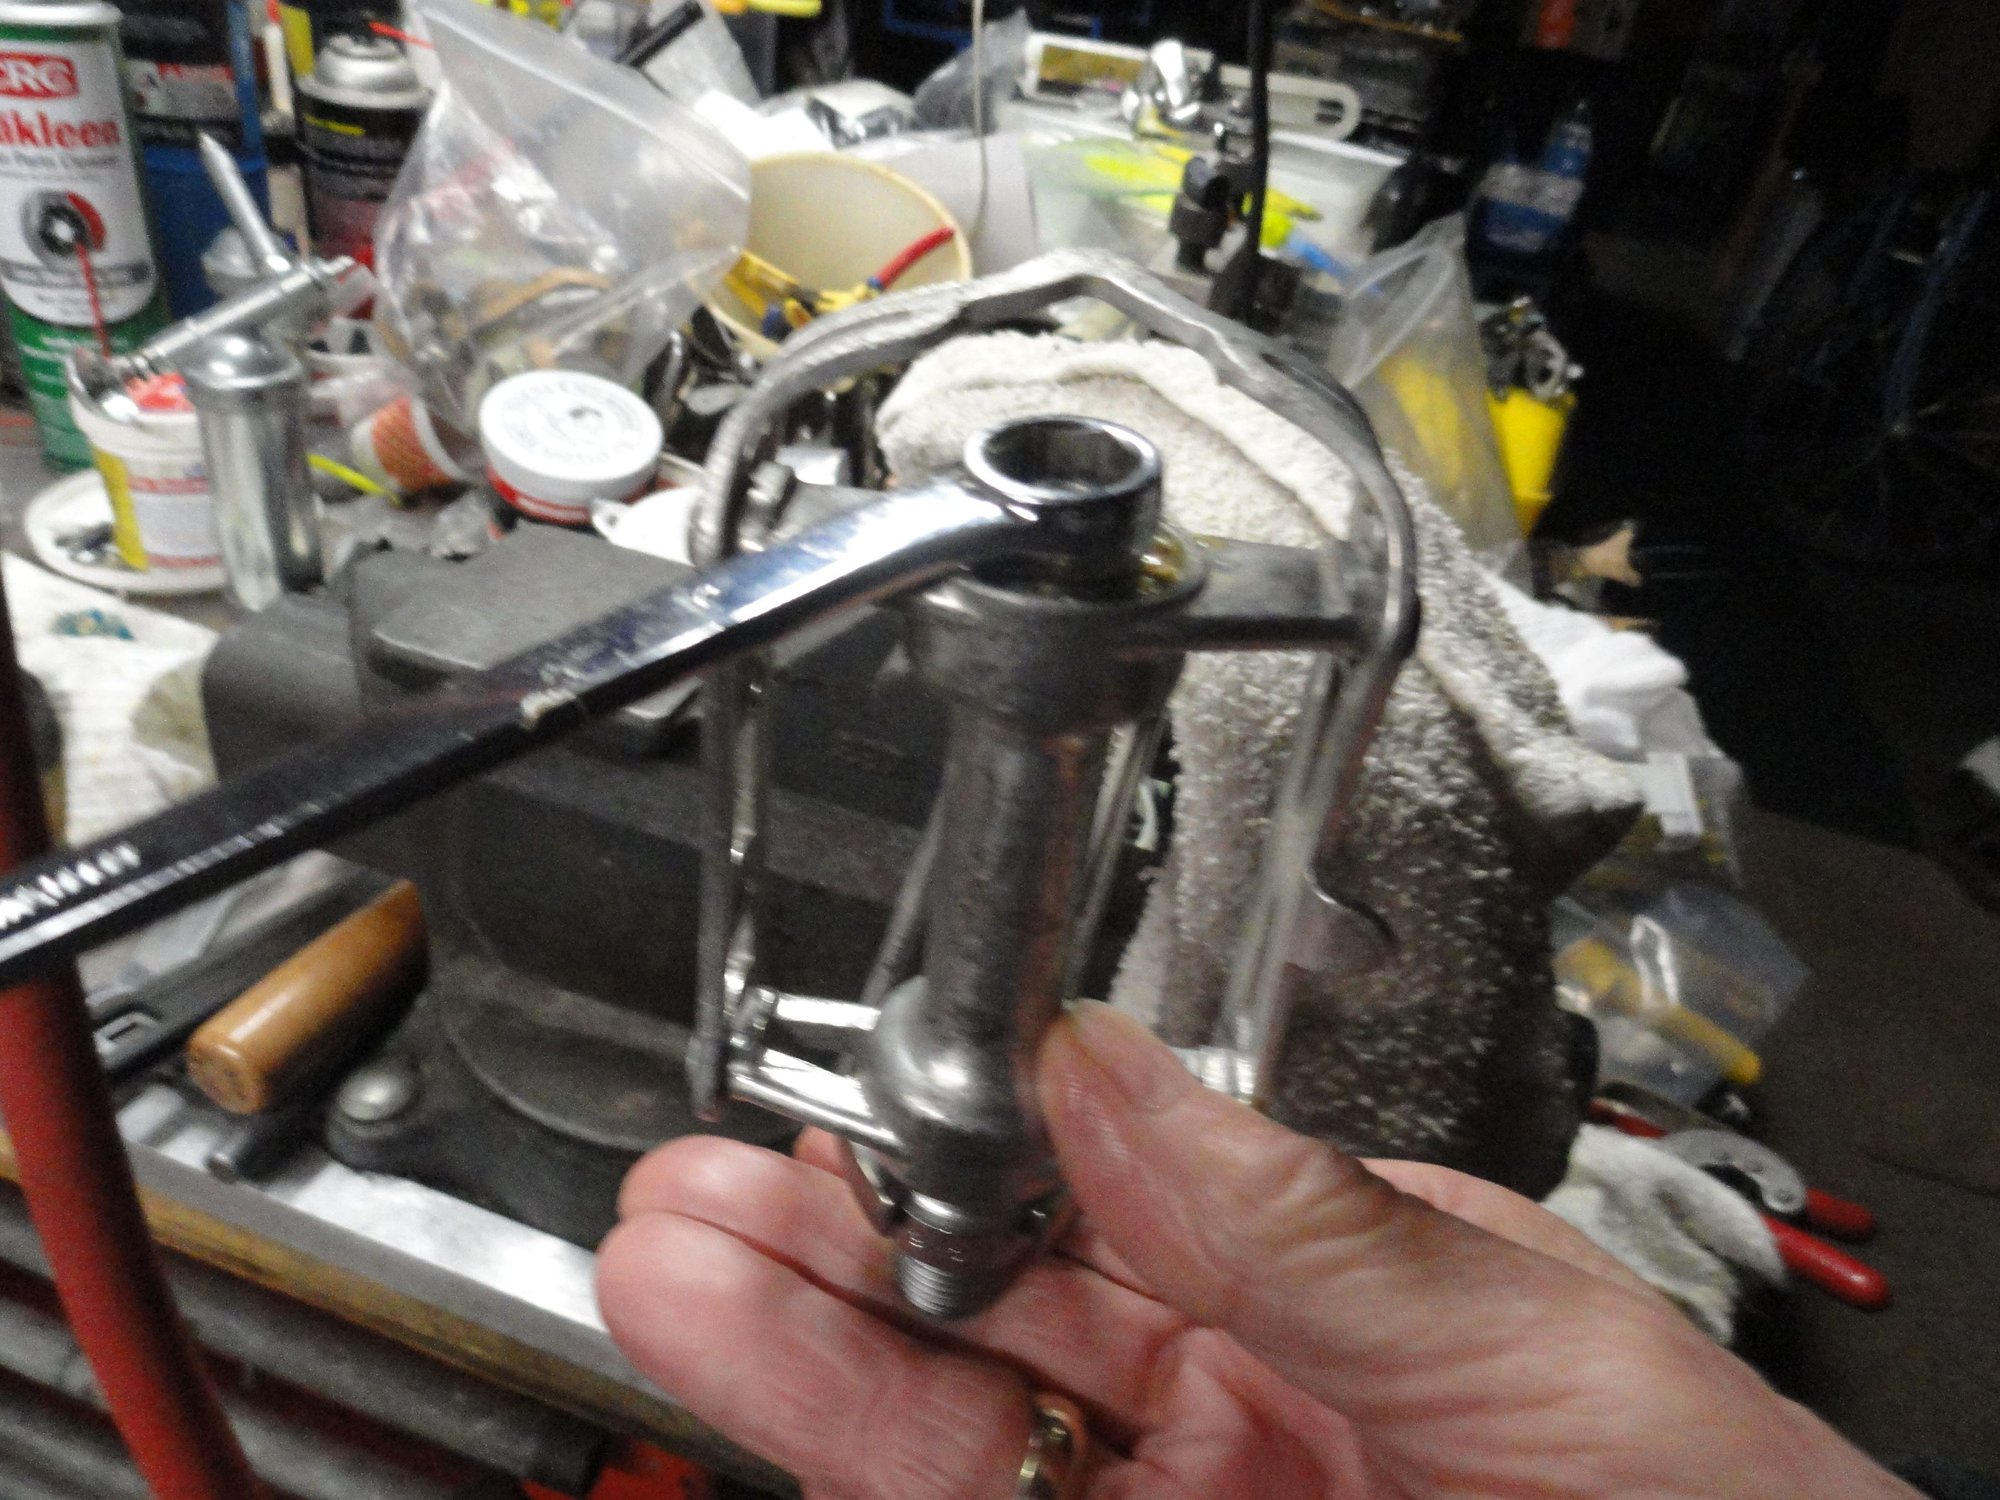
Back to my junkyard pedal wrench for the last bit. I hold the spindle in place in the wrench and set the locknut. The wrench in the vise helps me get things tight with little effort.
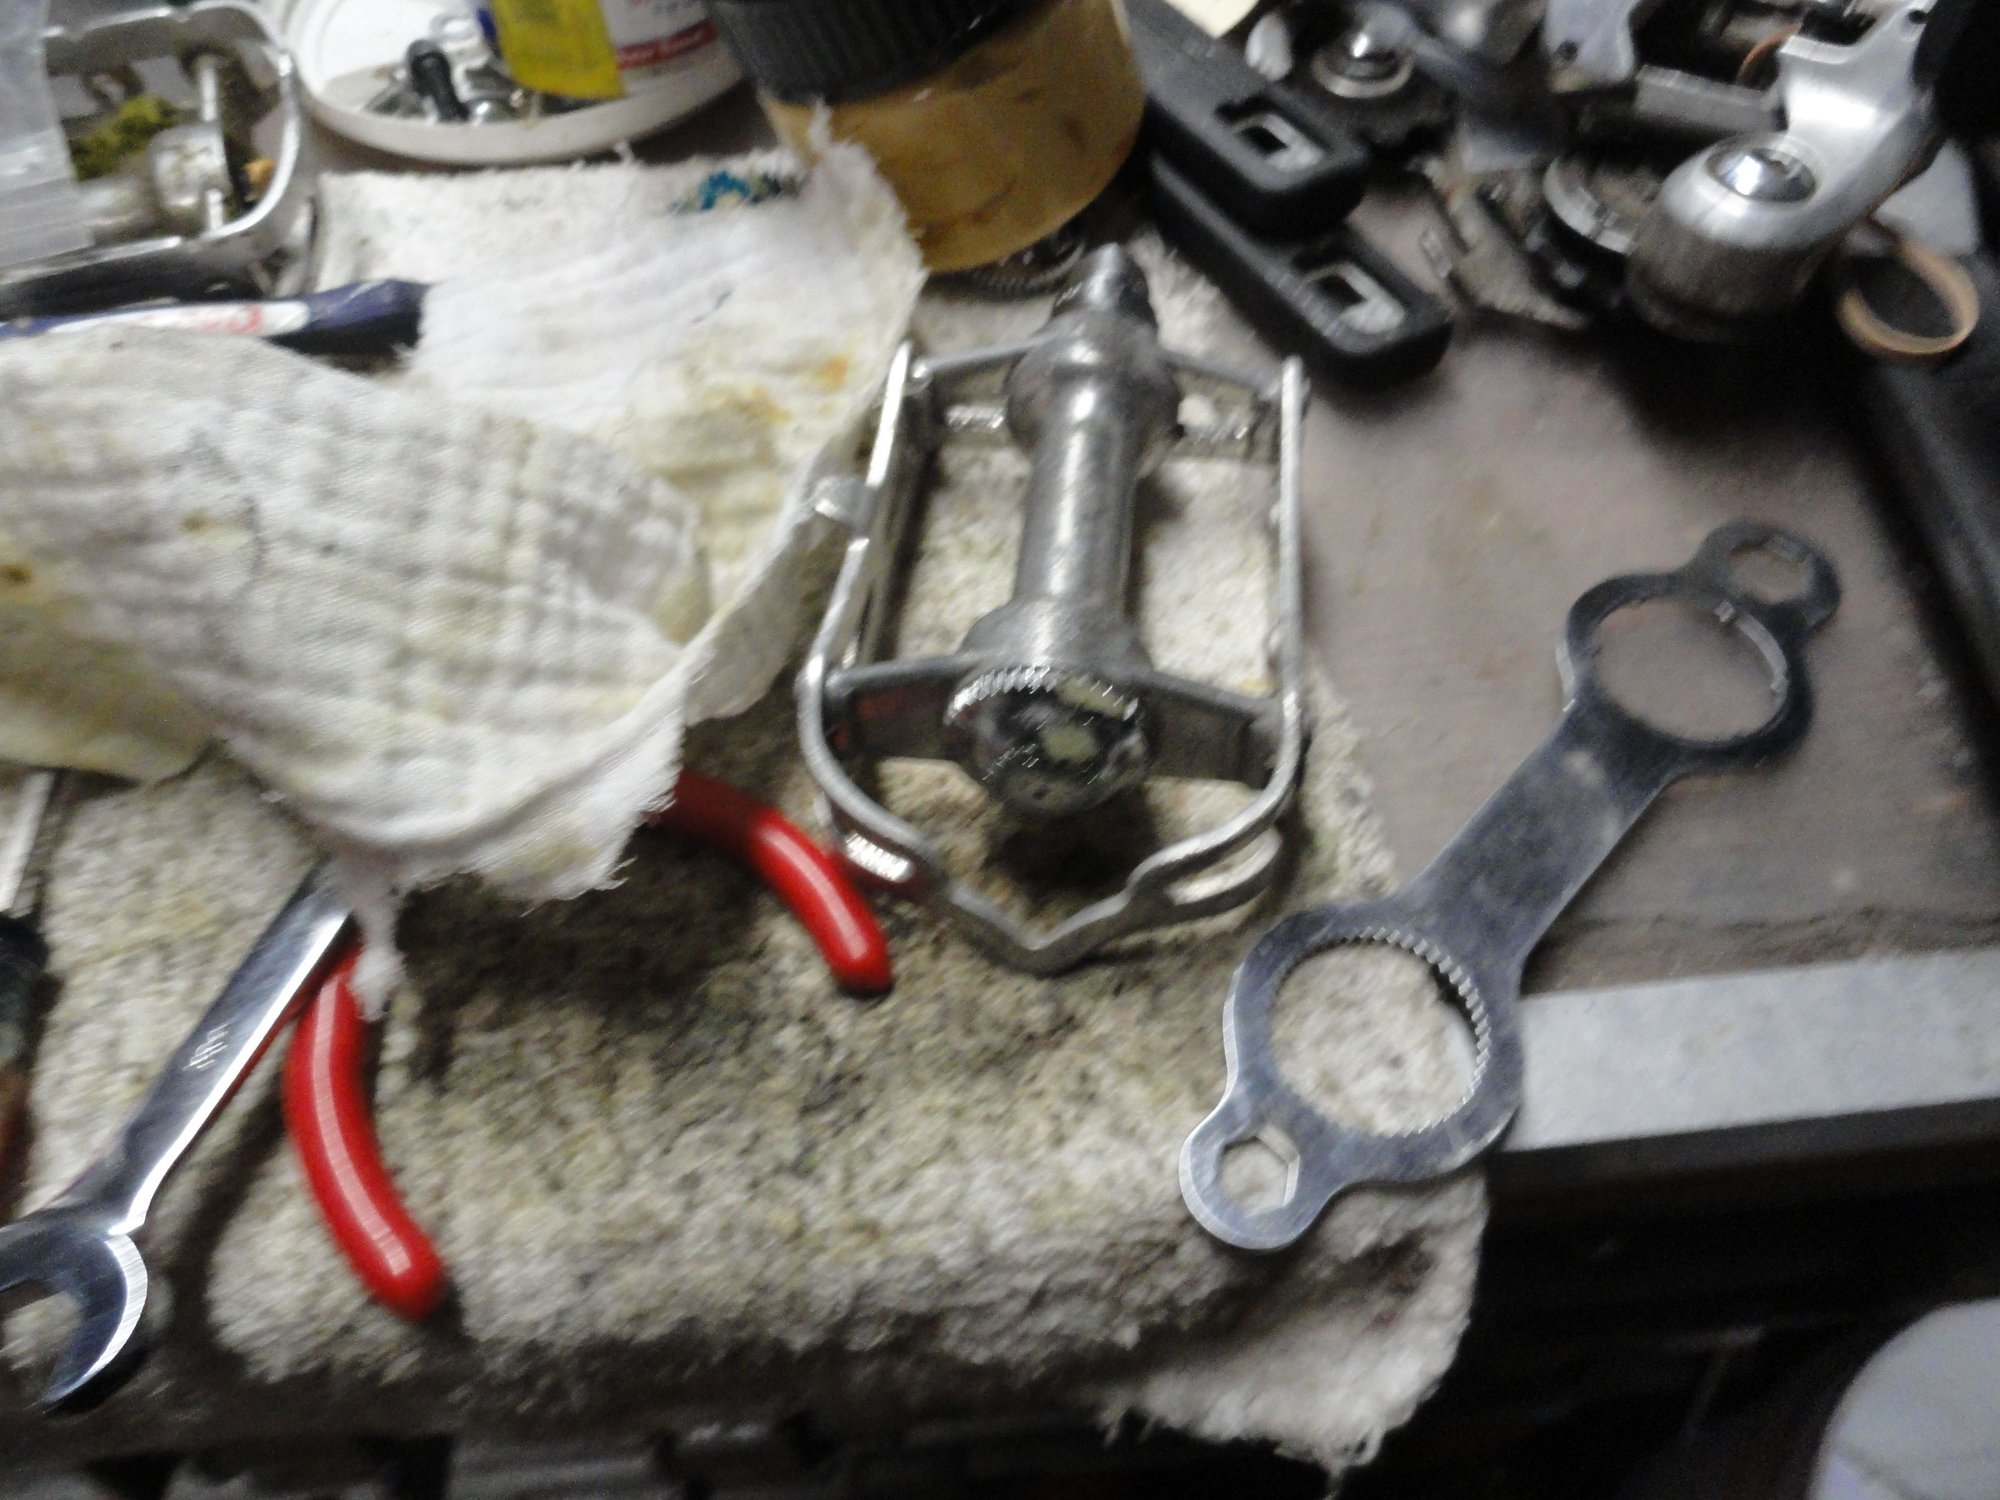
Put the dust cap back on and tighten down.
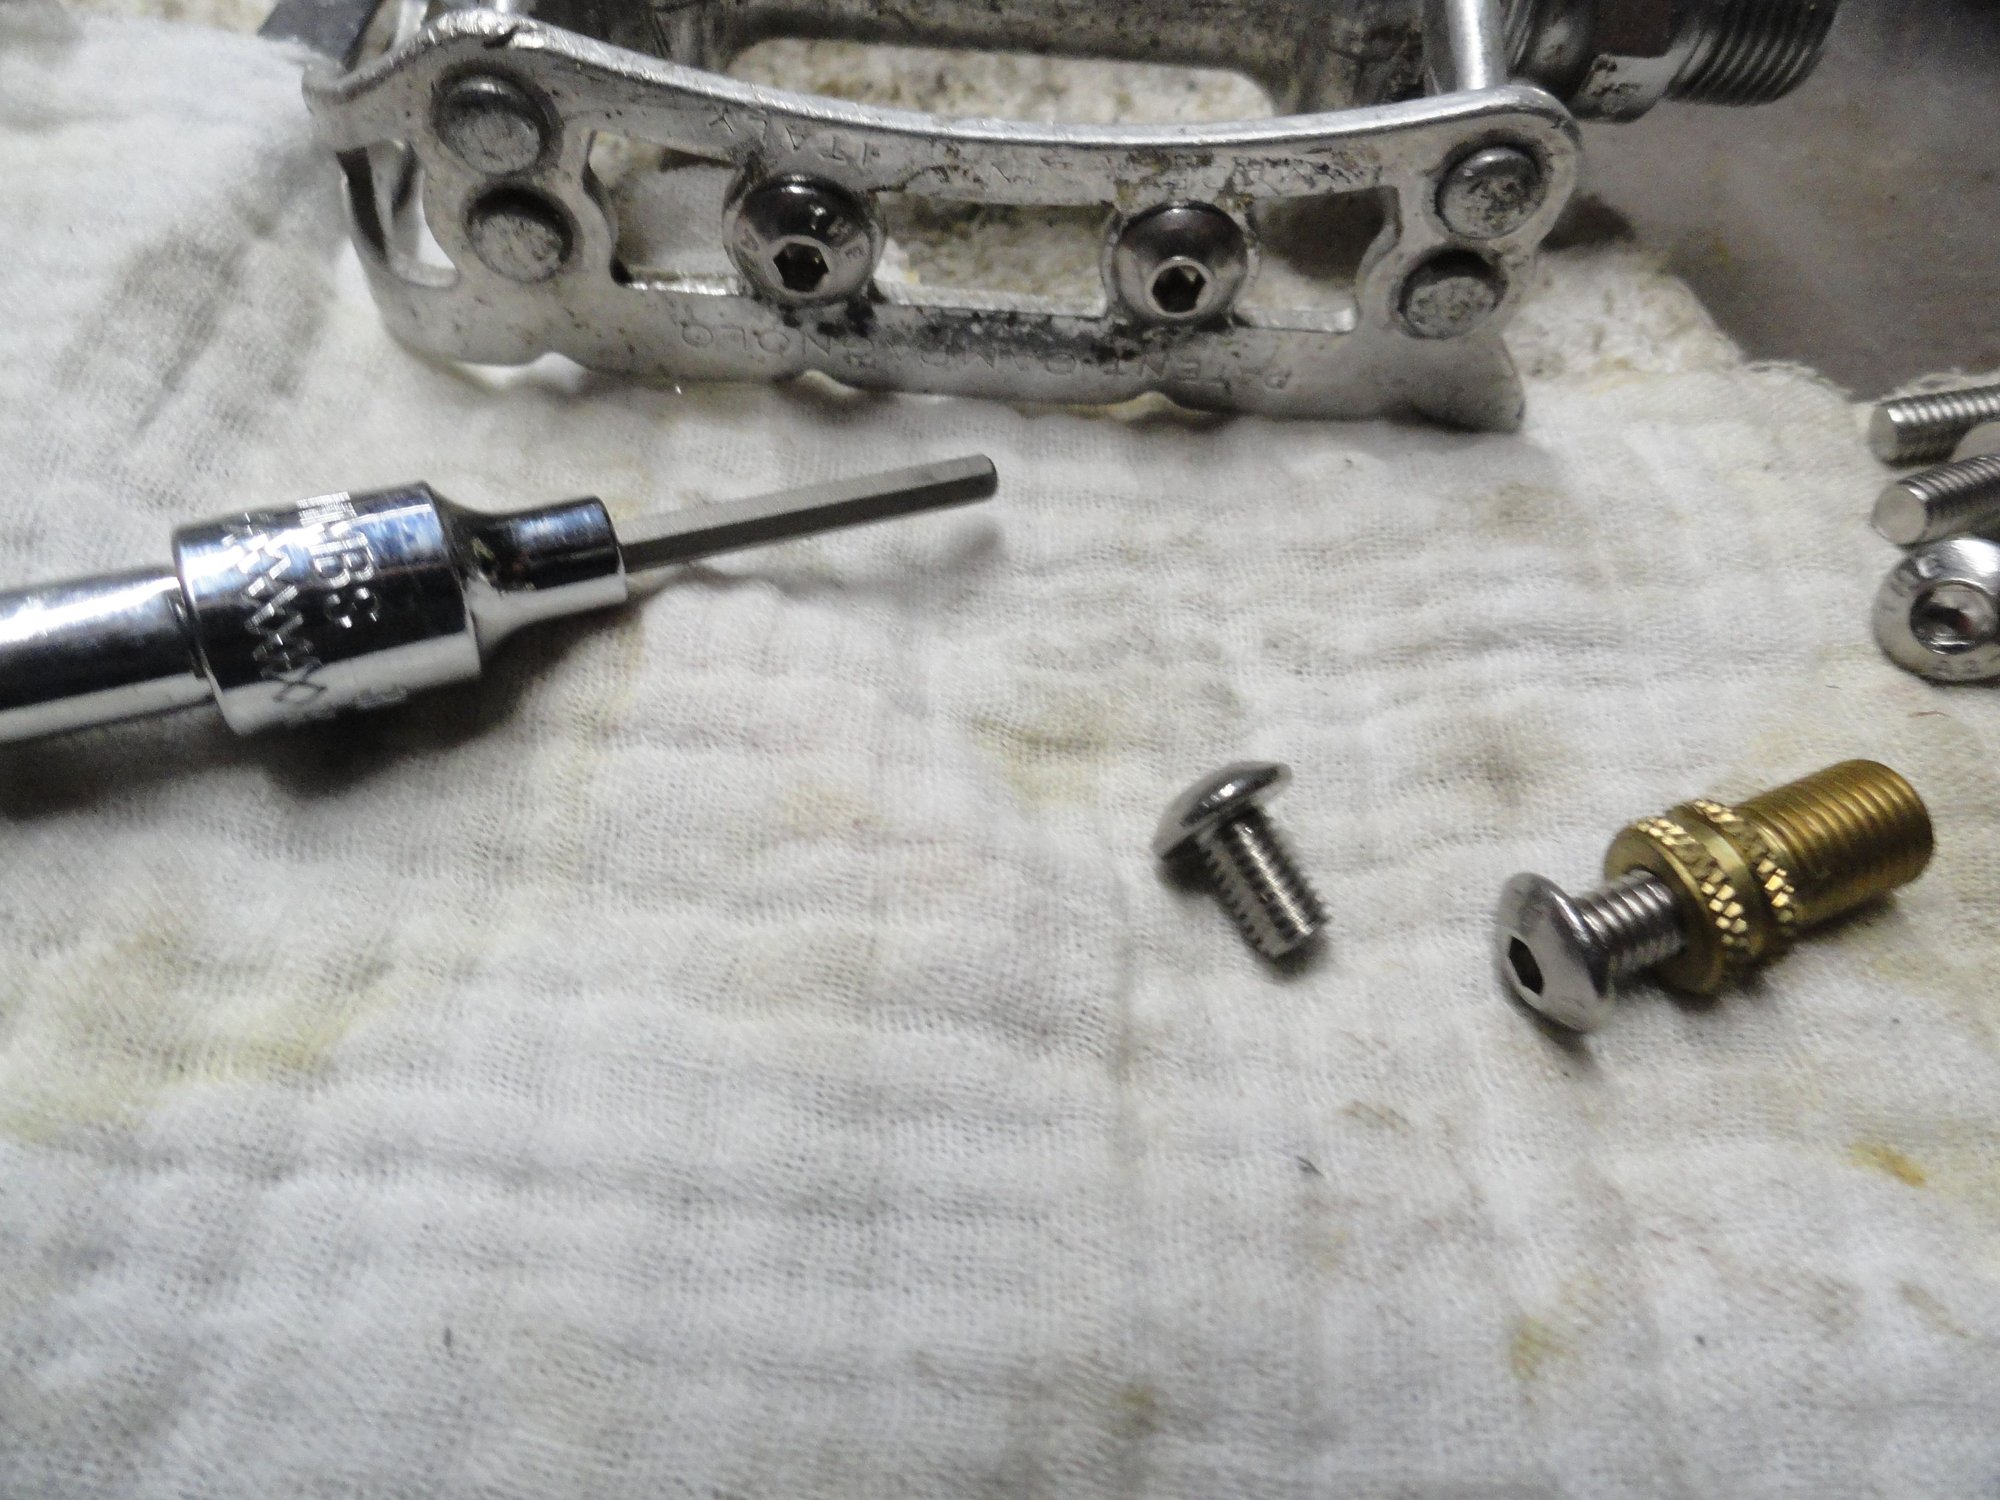
And the final touch, the button head stainless screws to hold the pedal clips. And for those who are new to dis: The valve adapter from presta to schraeder fits on the back side of the screw so you always have a spare with you.
This is the end of the process for one pedal. The advice here is to do them one at a time, I have seen the time when a mechanic switched the spindles and got the pedal bodies backward when put on the bike. This set of pedals could use aa good rub down with some SimiChrome or Mothers Mag polish. I clamp down a rag in the vise apply a bunch of polish and run the end of the rag through the small holes to clean every bit of the pedal body. I'm gonna leave that step to the new owner on the Left Coast. HTH, Smiles, MH
Took a lunch break and now back at it. Buffett tunes in the background and time for re-assembly. Same deal a bunch of pictures with captions.
All the parts cleaned and ready for re-assembly. You can see all of the dirt on the rags that came off this pedal. Just a quirk of mine, but the white shows the dirt and leftover grease pretty well.
A tub of MH secret sauce, Valvoline high speed and Lucas oil to keep it from hardening.
Inner race filled lubrication. Bearings added and spindle slipped in place to seat the bearings in place in the lube.
With the spindle still in place it keeps the bearings for the outer race until you can put the cone on the spindle. A tip is to push the cone into the bearings to seat them and spin the spindle into the cone.
Spindle and cone started together. Now to set the bearing lash and add the washer and lock nut.
Back to my junkyard pedal wrench for the last bit. I hold the spindle in place in the wrench and set the locknut. The wrench in the vise helps me get things tight with little effort.
Put the dust cap back on and tighten down.
And the final touch, the button head stainless screws to hold the pedal clips. And for those who are new to dis: The valve adapter from presta to schraeder fits on the back side of the screw so you always have a spare with you.
This is the end of the process for one pedal. The advice here is to do them one at a time, I have seen the time when a mechanic switched the spindles and got the pedal bodies backward when put on the bike. This set of pedals could use aa good rub down with some SimiChrome or Mothers Mag polish. I clamp down a rag in the vise apply a bunch of polish and run the end of the rag through the small holes to clean every bit of the pedal body. I'm gonna leave that step to the new owner on the Left Coast. HTH, Smiles, MH
Last edited by Mad Honk; 02-14-25 at 05:29 PM.
02-14-25 | 04:30 PM
#9

Old fart

Joined: Nov 2004
Posts: 26,401
Likes: 5,333
From: Appleton WI
Bikes: Several, mostly not name brands.
The pedals have 5/32" bearings so be careful to not loose them or get a few new ones before taking the pedals apart. You will need about 50 bearings if you cannot re-use the old ones. These don't very often show burning of the balls but do check each bearing for any discoloration or damage.

I did not remove the inner dust cap but if needed, it takes a blind bore bearing removal tool and it is pricey. Try to clean the pedal shell without removing the inner cap. A small brush like a tooth brush will get into the space and clean it pretty well. A petroleum solvent like mineral spirits usually works well If you don't have another solution for cleaning.
02-14-25 | 05:13 PM
#10
Thread Starter
Senior Member
Joined: May 2019
Posts: 3,976
Likes: 3,216
From: Bloomington, IN
Bikes: Paramount, Faggin, Ochsner, Rossin, Ciocc
Yeah John,
I forgot to note that it takes 12 bearings per side, so this is kind of an addendum. They are indeed GS, but the innerds are all identical. The pair is finished and ready for a new user. The parting shot:
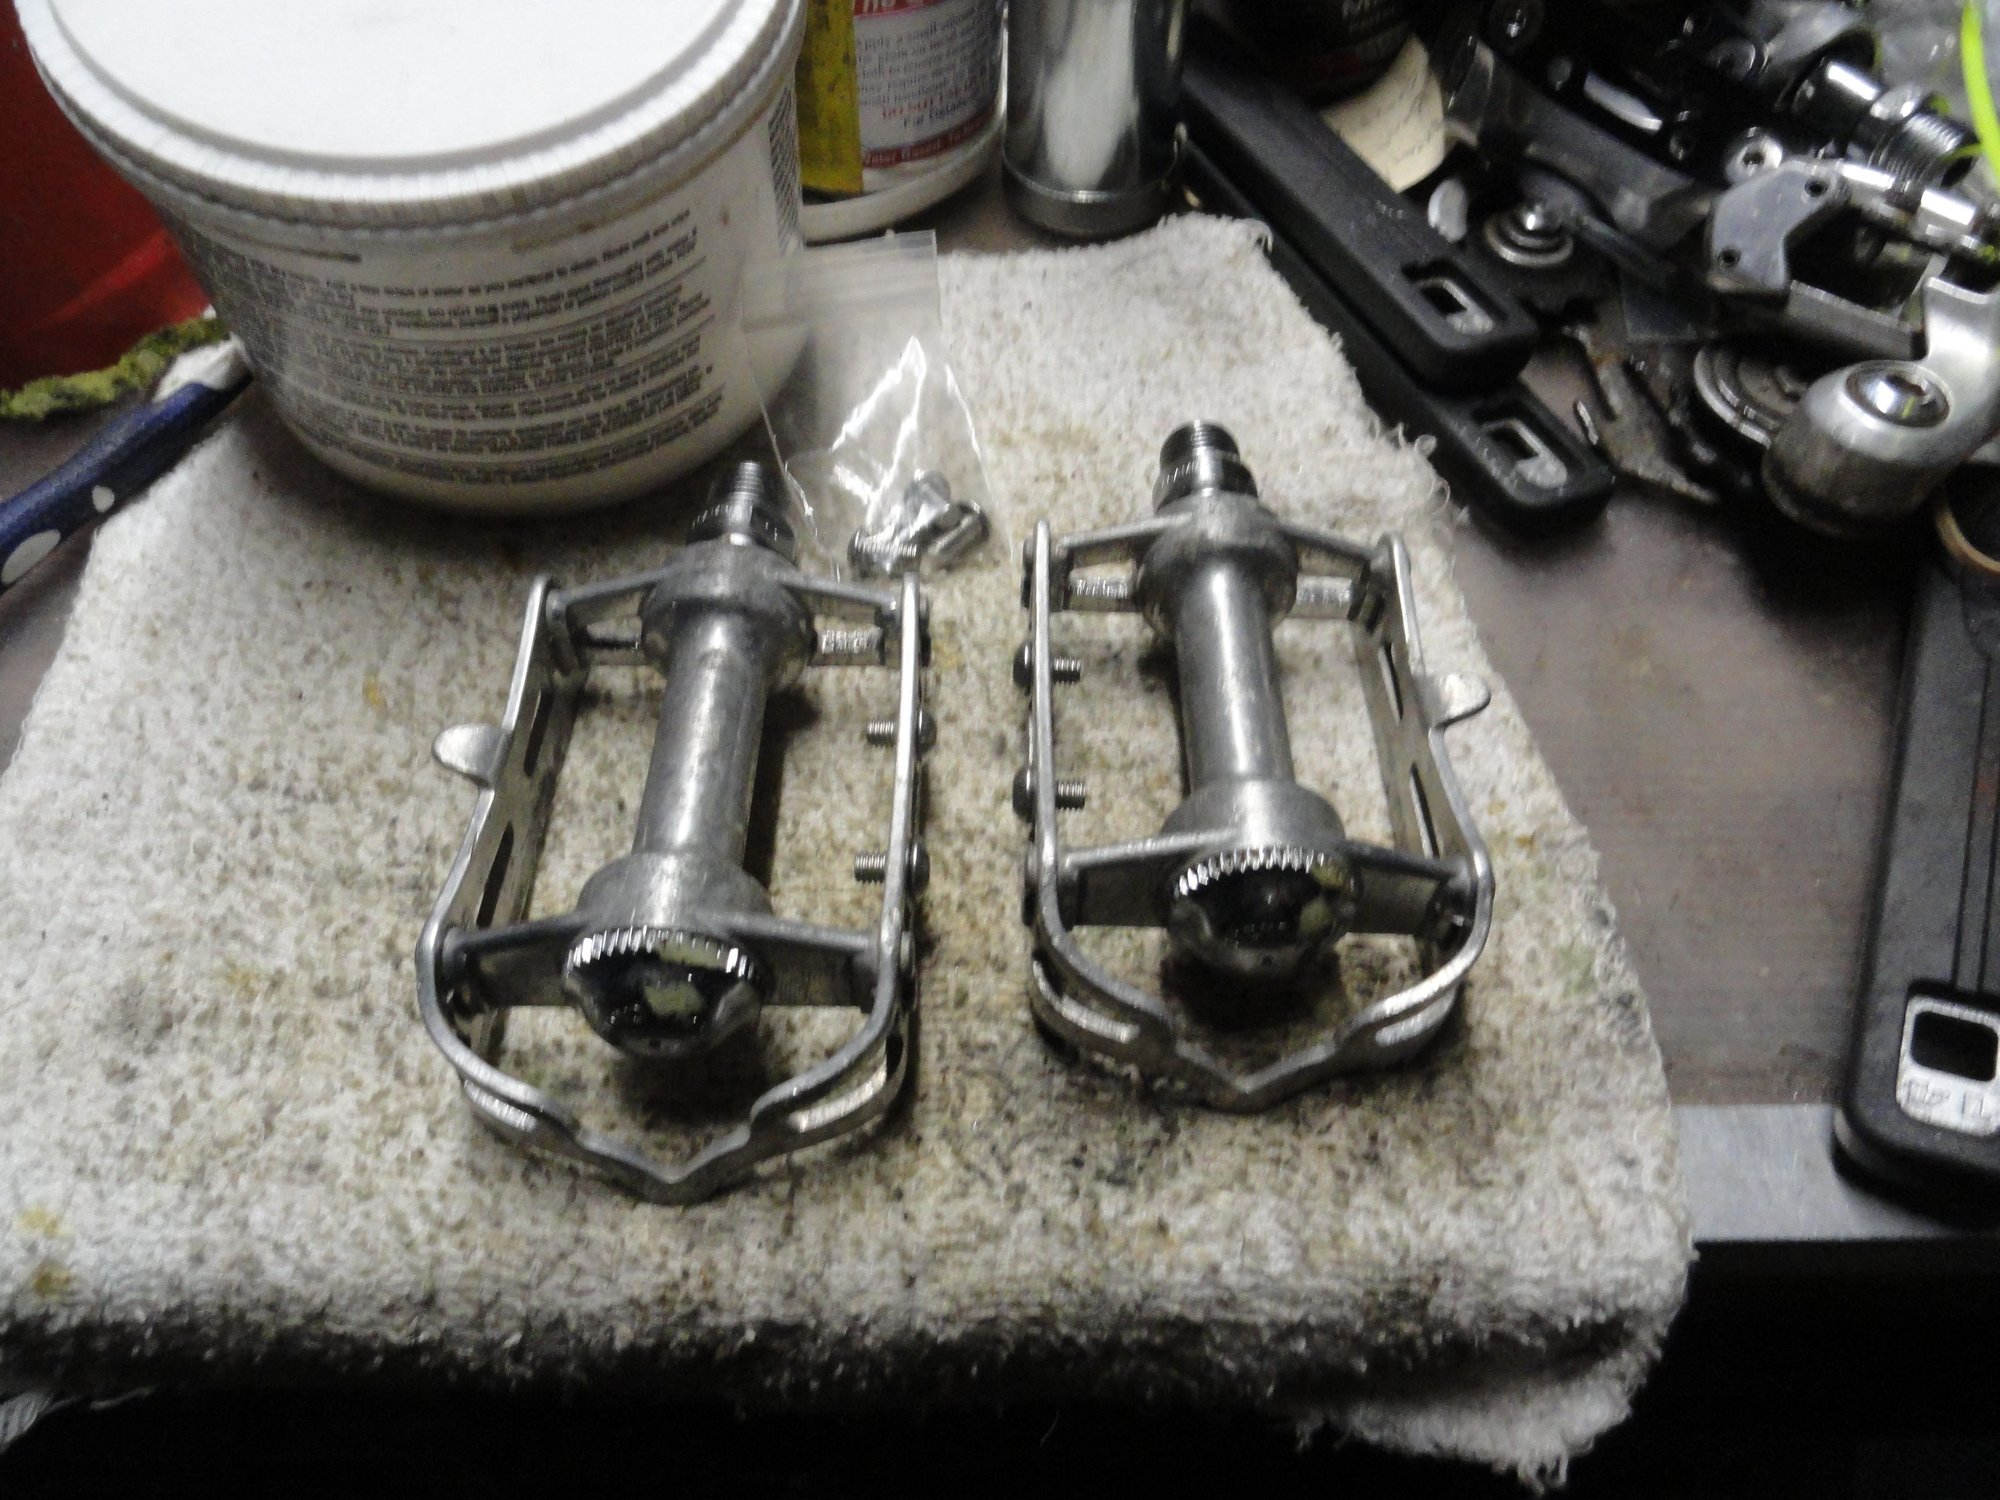
Both sides done and ready for more miles. Extra clip bolts for plastic bodied clips.
any questions or needed tips, gimme a PM. Smiles, MH
I forgot to note that it takes 12 bearings per side, so this is kind of an addendum. They are indeed GS, but the innerds are all identical. The pair is finished and ready for a new user. The parting shot:
Both sides done and ready for more miles. Extra clip bolts for plastic bodied clips.
any questions or needed tips, gimme a PM. Smiles, MH
02-14-25 | 05:41 PM
#11
Well folks,
Took a lunch break and now back at it. Buffett tunes in the background and time for re-assembly. Same deal a bunch of pictures with captions.
All the parts cleaned and ready for re-assembly. You can see all of the dirt on the rags that came off this pedal. Just a quirk of mine, but the white shows the dirt and leftover grease pretty well.
A tub of MH secret sauce, Valvoline high speed and Lucas oil to keep it from hardening.
Inner race filled lubrication. Bearings added and spindle slipped in place to seat the bearings in place in the lube.
With the spindle still in place it keeps the bearings for the outer race until you can put the cone on the spindle. A tip is to push the cone into the bearings to seat them and spin the spindle into the cone.
Spindle and cone started together. Now to set the bearing lash and add the washer and lock nut.
Back to my junkyard pedal wrench for the last bit. I hold the spindle in place in the wrench and set the locknut. The wrench in the vise helps me get things tight with little effort.
Put the dust cap back on and tighten down.
And the final touch, the button head stainless screws to hold the pedal clips. And for those who are new to dis: The valve adapter from presta to schraeder fits on the back side of the screw so you always have a spare with you.
This is the end of the process for one pedal. The advice here is to do them one at a time, I have seen the time when a mechanic switched the spindles and got the pedal bodies backward when put on the bike. This set of pedals could use aa good rub down with some SimiChrome or Mothers Mag polish. I clamp down a rag in the vise apply a bunch of polish and run the end of the rag through the small holes to clean every bit of the pedal body. I'm gonna leave that step to the new owner on the Left Coast. HTH, Smiles, MH
Took a lunch break and now back at it. Buffett tunes in the background and time for re-assembly. Same deal a bunch of pictures with captions.
All the parts cleaned and ready for re-assembly. You can see all of the dirt on the rags that came off this pedal. Just a quirk of mine, but the white shows the dirt and leftover grease pretty well.
A tub of MH secret sauce, Valvoline high speed and Lucas oil to keep it from hardening.
Inner race filled lubrication. Bearings added and spindle slipped in place to seat the bearings in place in the lube.
With the spindle still in place it keeps the bearings for the outer race until you can put the cone on the spindle. A tip is to push the cone into the bearings to seat them and spin the spindle into the cone.
Spindle and cone started together. Now to set the bearing lash and add the washer and lock nut.
Back to my junkyard pedal wrench for the last bit. I hold the spindle in place in the wrench and set the locknut. The wrench in the vise helps me get things tight with little effort.
Put the dust cap back on and tighten down.
And the final touch, the button head stainless screws to hold the pedal clips. And for those who are new to dis: The valve adapter from presta to schraeder fits on the back side of the screw so you always have a spare with you.
This is the end of the process for one pedal. The advice here is to do them one at a time, I have seen the time when a mechanic switched the spindles and got the pedal bodies backward when put on the bike. This set of pedals could use aa good rub down with some SimiChrome or Mothers Mag polish. I clamp down a rag in the vise apply a bunch of polish and run the end of the rag through the small holes to clean every bit of the pedal body. I'm gonna leave that step to the new owner on the Left Coast. HTH, Smiles, MH
these pedals were good, I did not like the solid outer body web that altered the strap path.
in SoCal the lack of the reverse spiraling did not mean too much. Few were willing to ride in the rain. It is still that way.
02-14-25 | 08:02 PM
#12

Senior Member

Joined: Apr 2009
Posts: 3,785
Likes: 5,636
From: Seattle
Maybe I'm quibbling but...
While the rebuild instructions are identical, most of the parts are different. The pressed-in cups on Record are heat-treated and precision ground, vs. the stamped-steel cups on the GS.
This is very unimportant in use though, since GS pedals normally last approximately forever and are plenty smooth, so the extra "goodness" of a Record is pretty theoretical.
I started to write that none of the internals are identical, but then I looked it up. Turns out the cone, locknut and tongue washer are identical (same part numbers anyway). Everything else is different, and mo betta on Record (theoretically!)
Somehow I ended up with a pair of the Record pressed cups, part # 672:
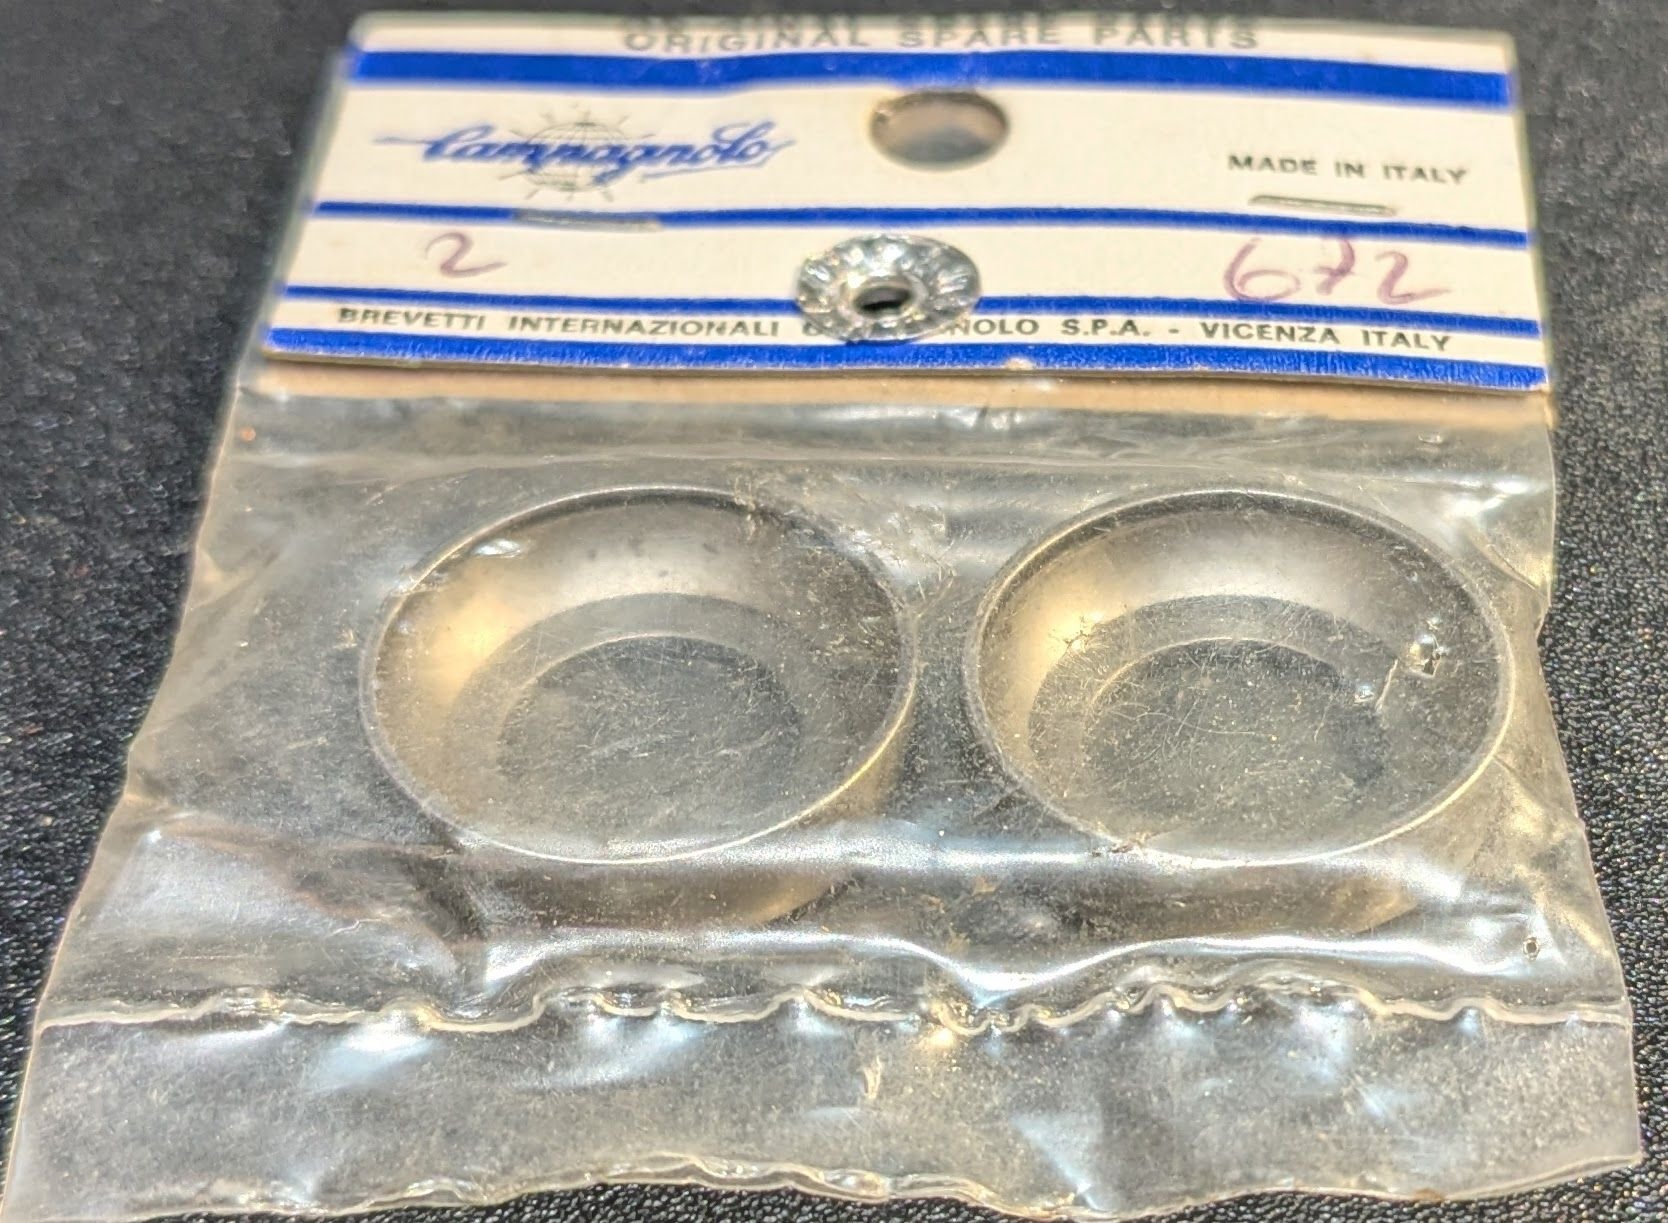
Inner and outer cups are identical, so this is one pedal's worth. I never would have sought or ordered these, since I have never seen one worn out, so this must have been part of a "lot" that I got somewhen, lost in the mists of time.
The difference between Record and GS pedal cups is the same as between Record and Nuovo Tipo hubs, except with hubs it does matter, Tipo hub cups do wear out sometimes.
While the rebuild instructions are identical, most of the parts are different. The pressed-in cups on Record are heat-treated and precision ground, vs. the stamped-steel cups on the GS.
This is very unimportant in use though, since GS pedals normally last approximately forever and are plenty smooth, so the extra "goodness" of a Record is pretty theoretical.
I started to write that none of the internals are identical, but then I looked it up. Turns out the cone, locknut and tongue washer are identical (same part numbers anyway). Everything else is different, and mo betta on Record (theoretically!)
Somehow I ended up with a pair of the Record pressed cups, part # 672:
Inner and outer cups are identical, so this is one pedal's worth. I never would have sought or ordered these, since I have never seen one worn out, so this must have been part of a "lot" that I got somewhen, lost in the mists of time.
The difference between Record and GS pedal cups is the same as between Record and Nuovo Tipo hubs, except with hubs it does matter, Tipo hub cups do wear out sometimes.
 02-14-25 | 08:05 PM
#13

Senior Member
Joined: Jul 2006
Posts: 11,495
Likes: 4,912
From: San Jose (Willow Glen) Ca
Bikes: Kirk Custom JK Special, 86 De Rosa Pro, '84 Team Miyata,(dura ace old school) 80?? SR Semi-Pro 600 Arabesque
nice thread
__________________
Life is too short not to ride the best bike you have, as much as you can.
Life is too short not to ride the best bike you have, as much as you can.
02-14-25 | 08:26 PM
#14

Full Member
Joined: Aug 2024
Posts: 420
Likes: 737
Mad honk,
I finished the first pedal with just enough light to put away my tools. This was a tremendous help.
They spun really nicely but knowing what the bottom bracket and headset looked like, I knew it needed to be done. As you can see, the grease was solidifying in many places. I’m glad I repacked them before putting mileage on them.
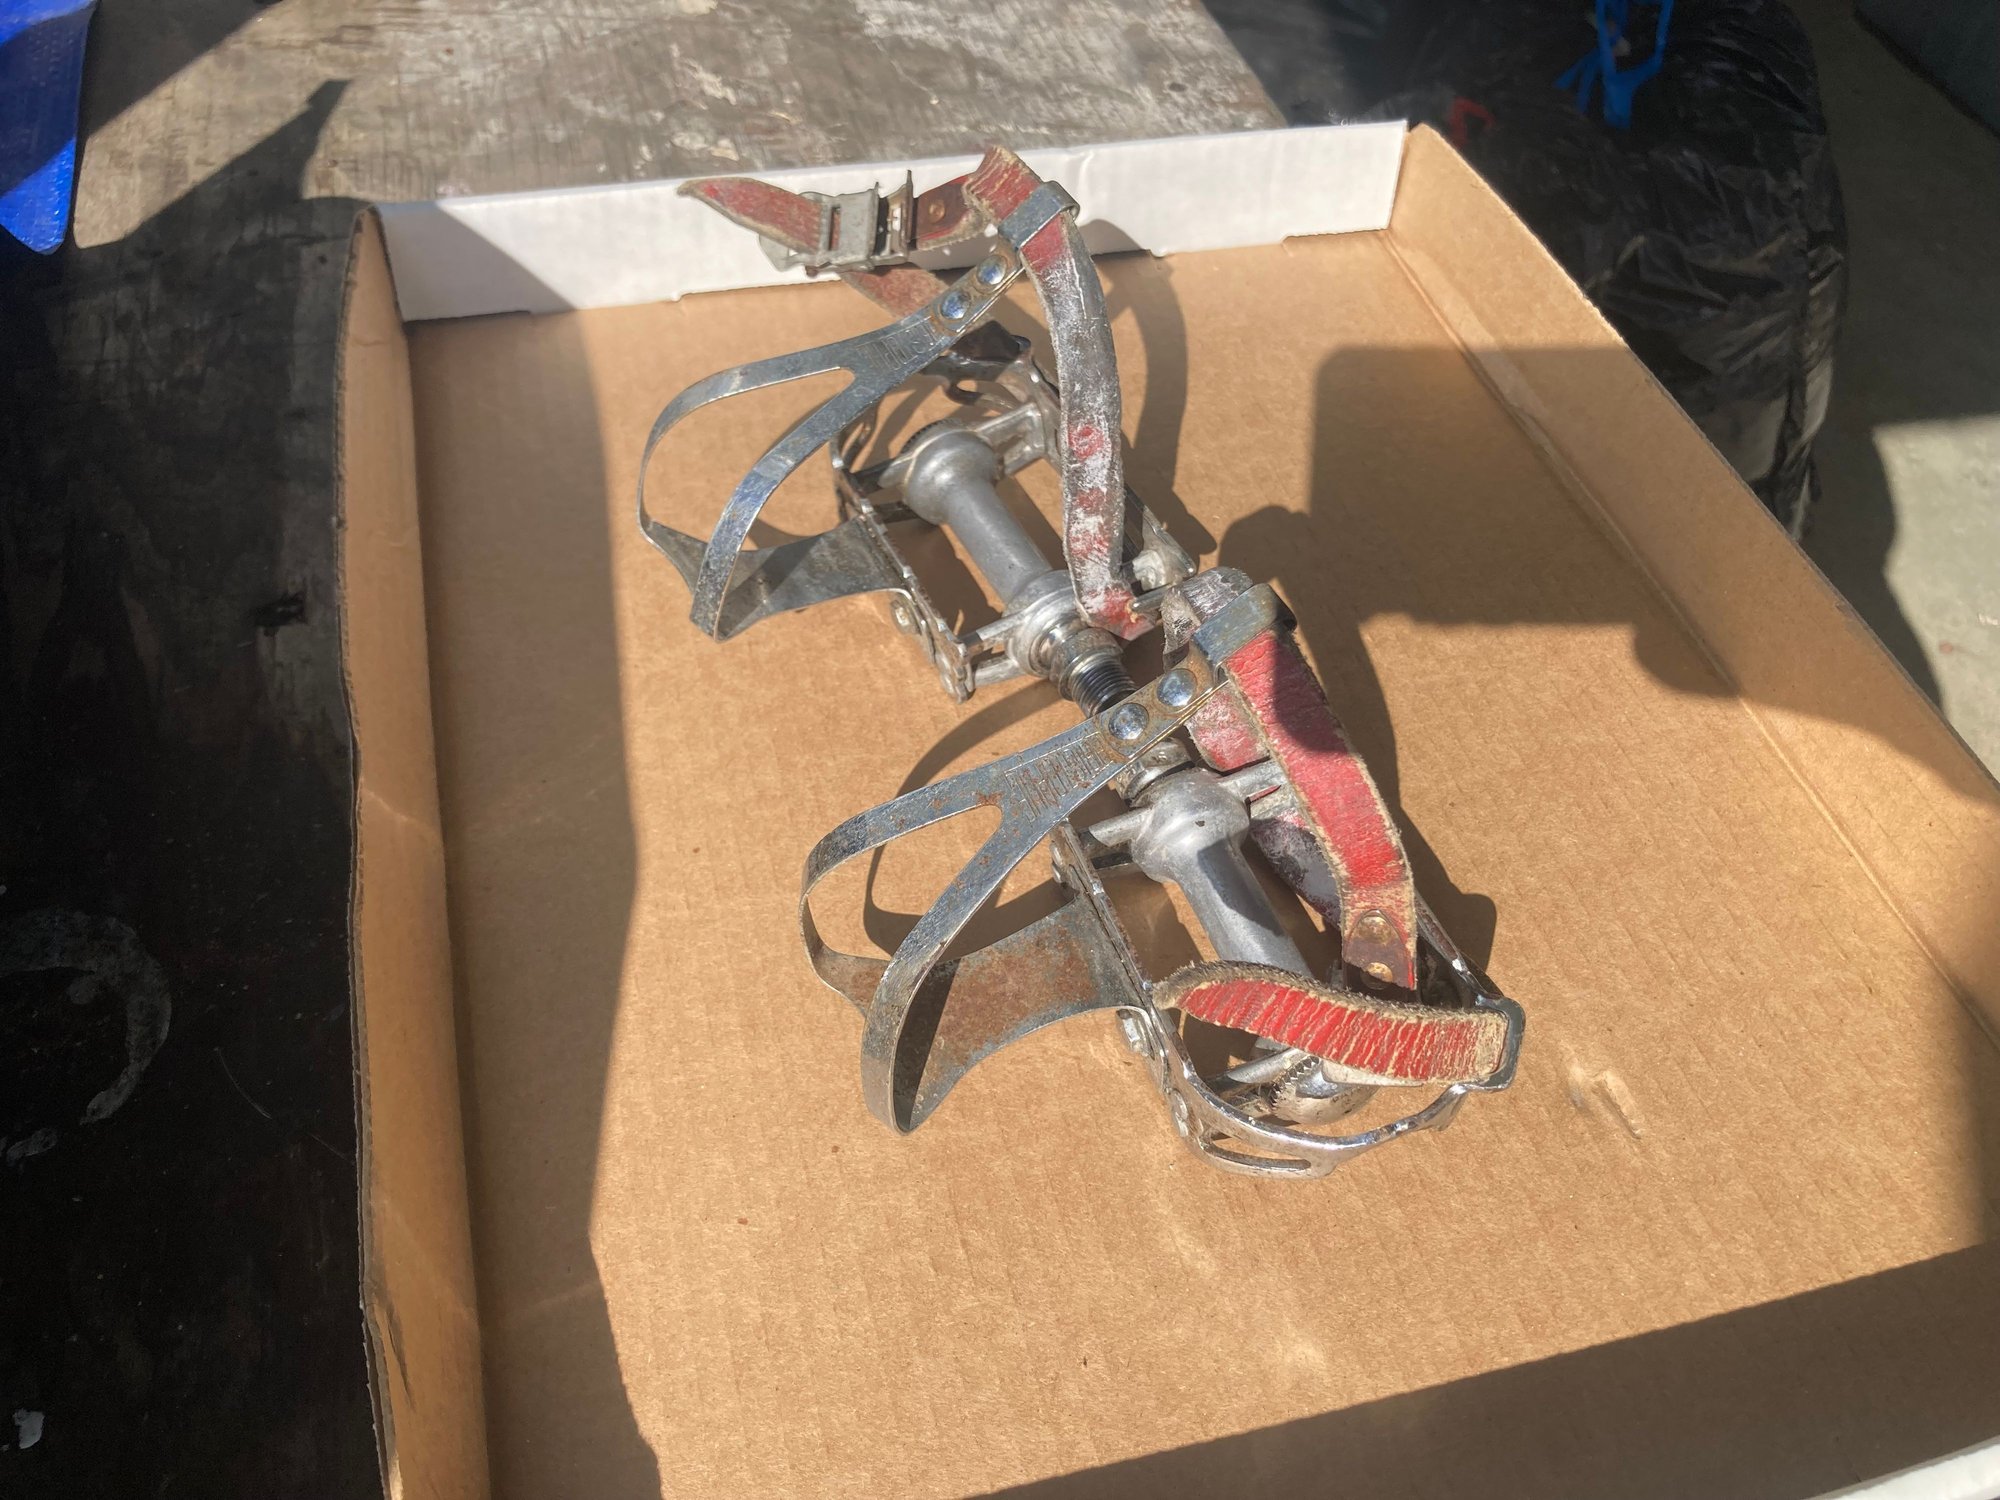
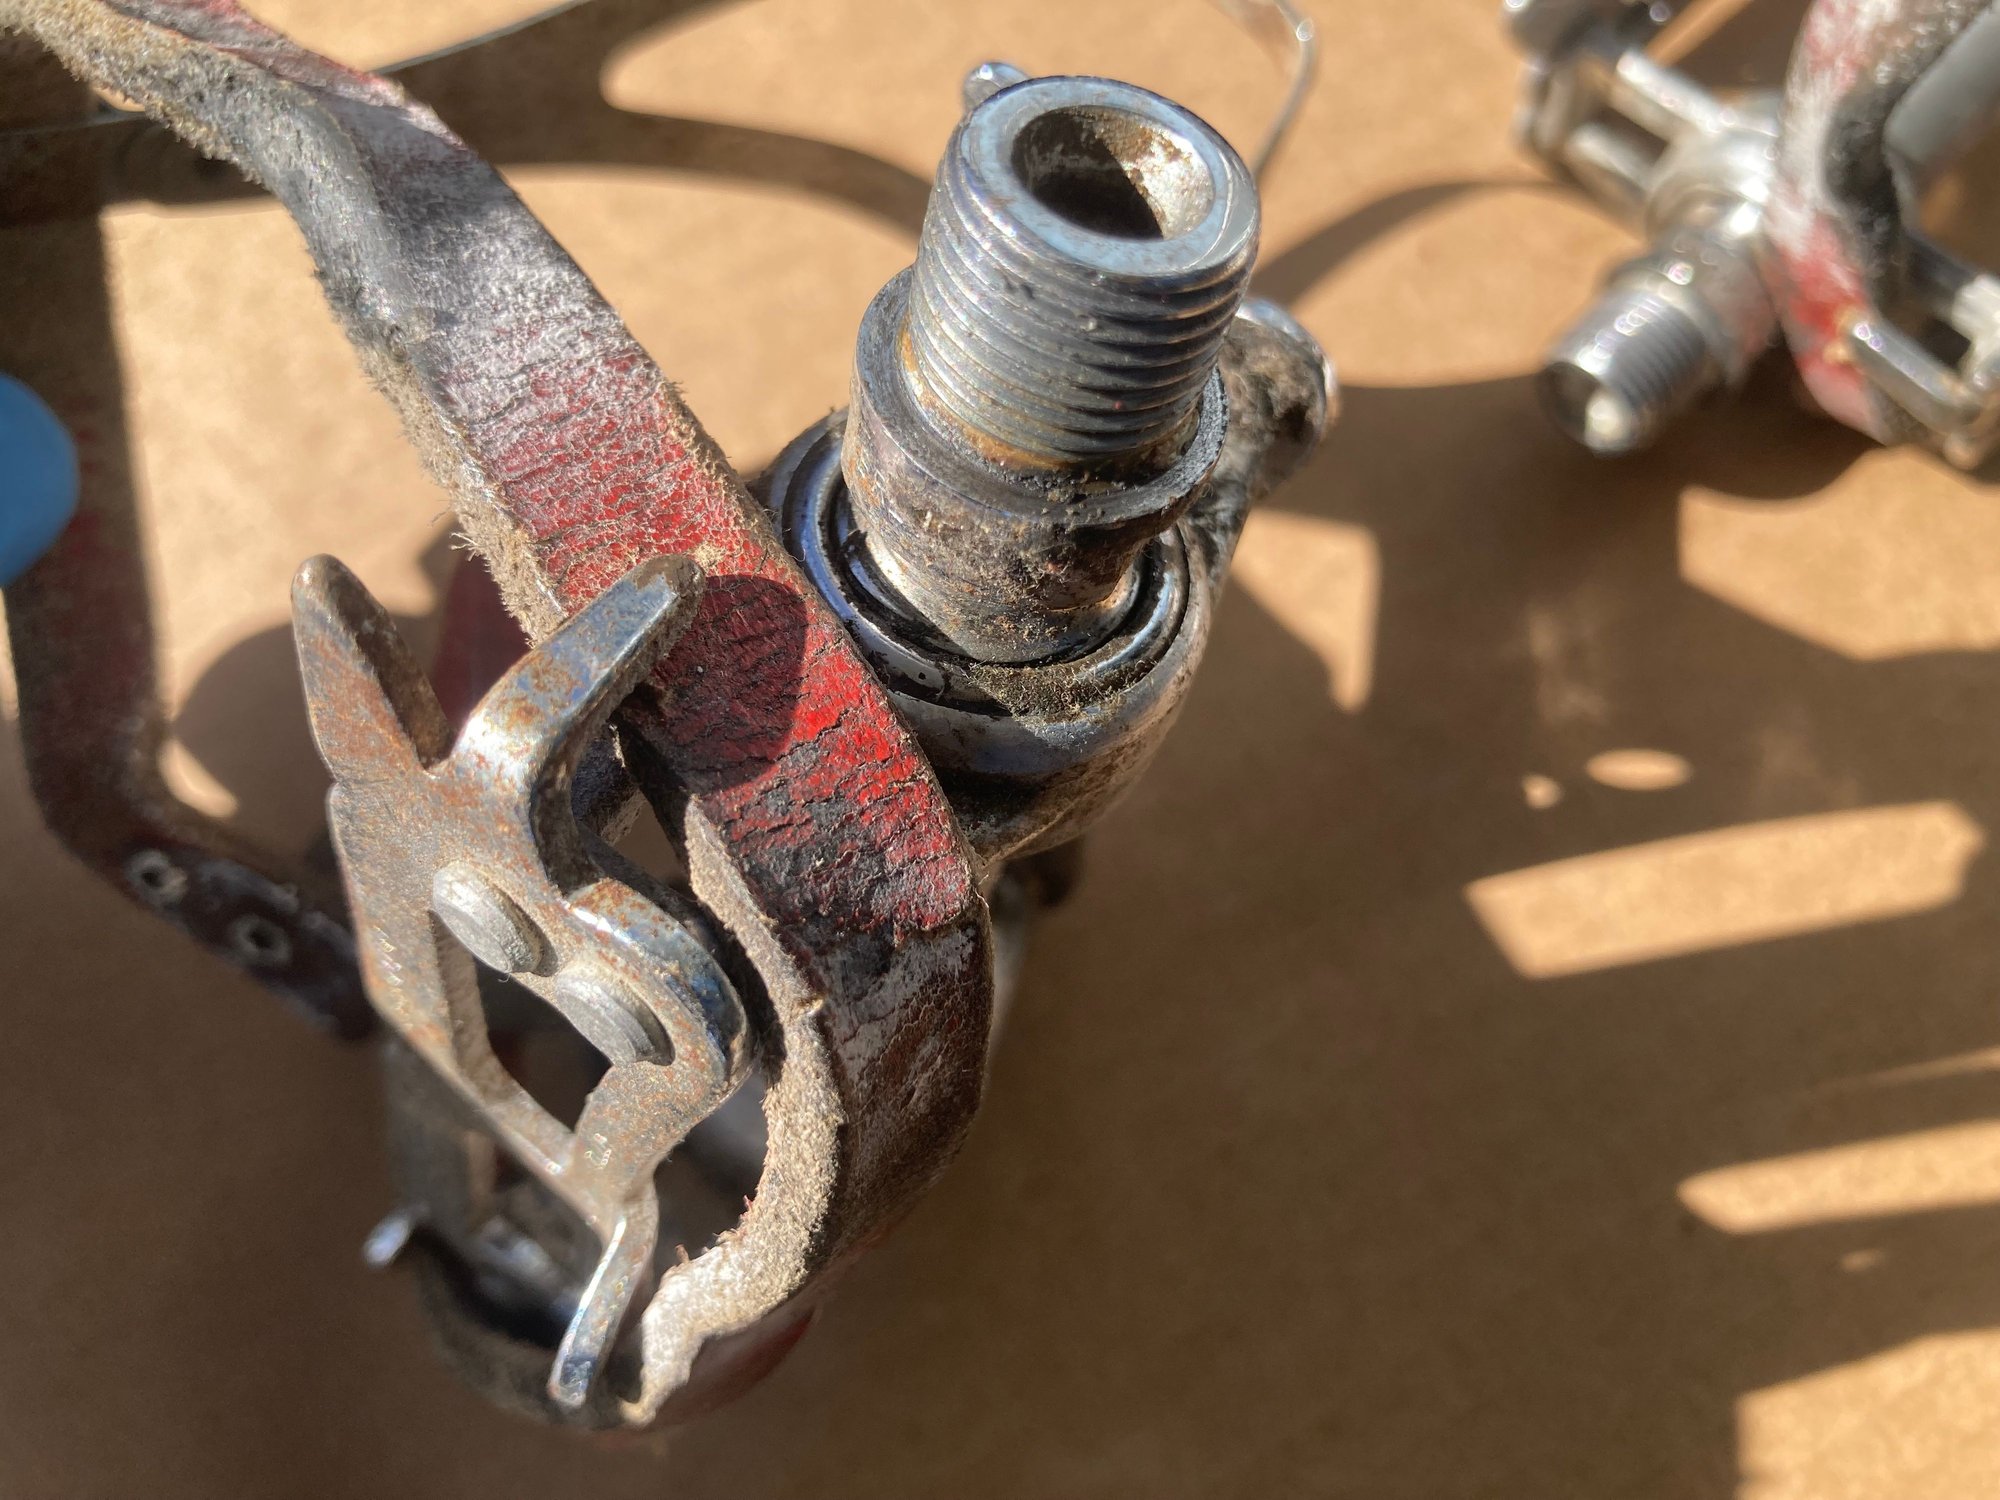
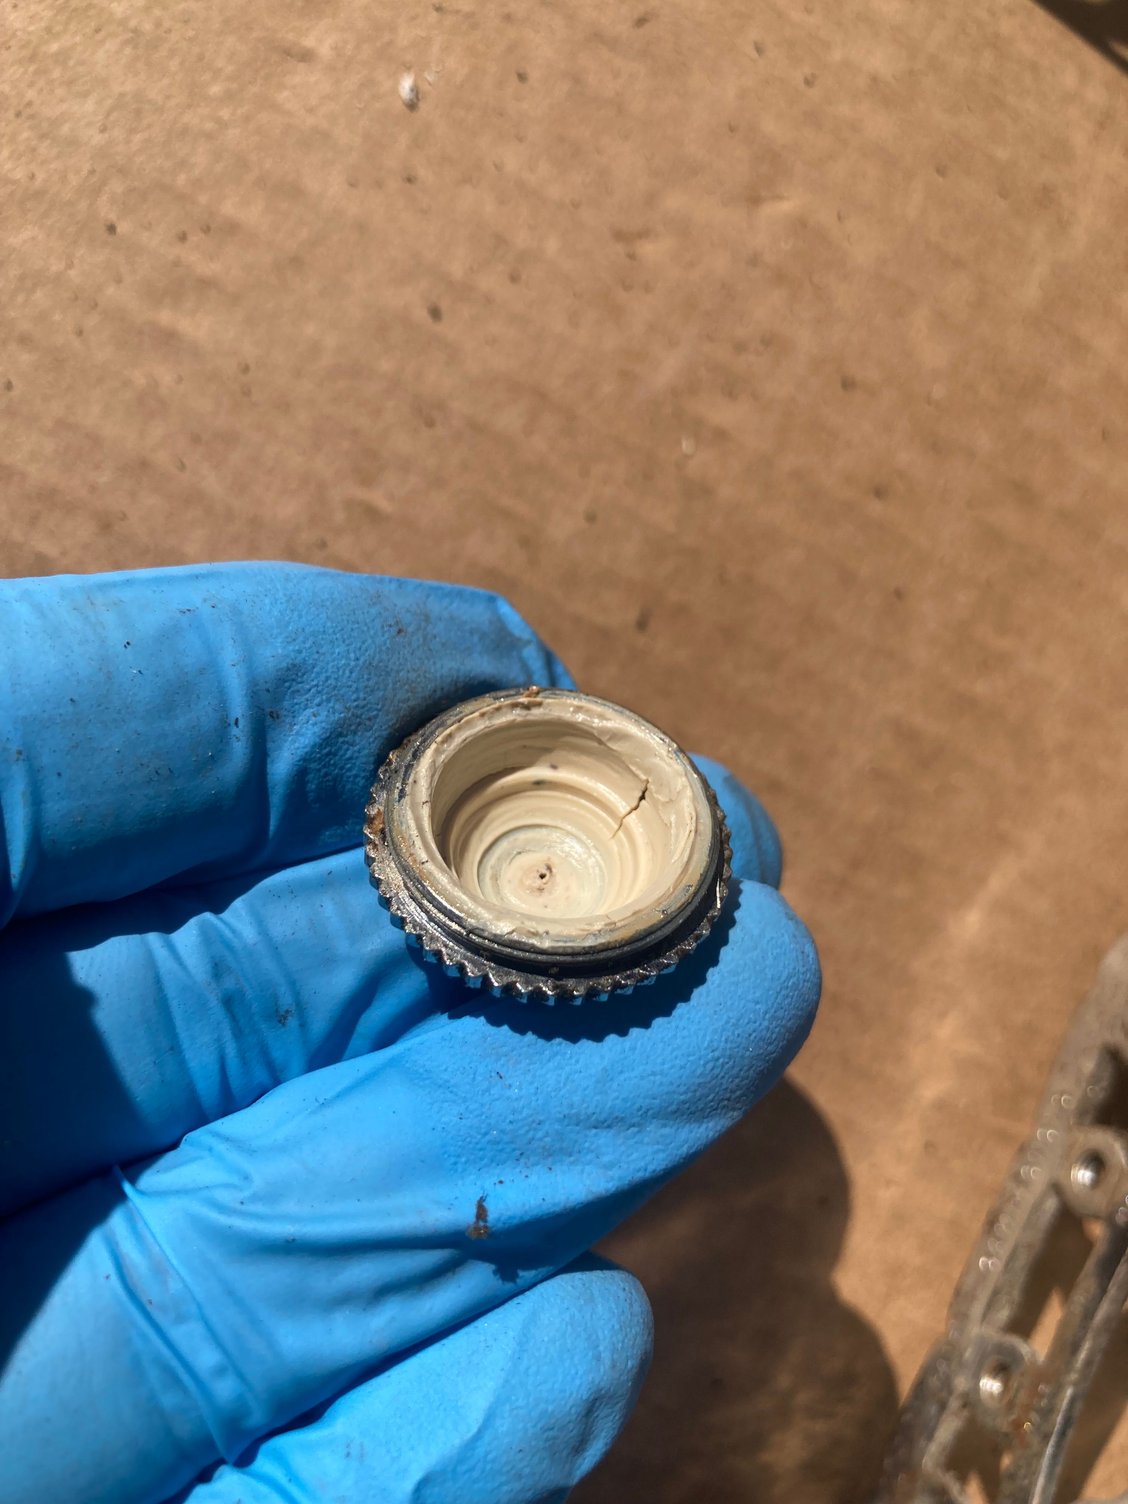
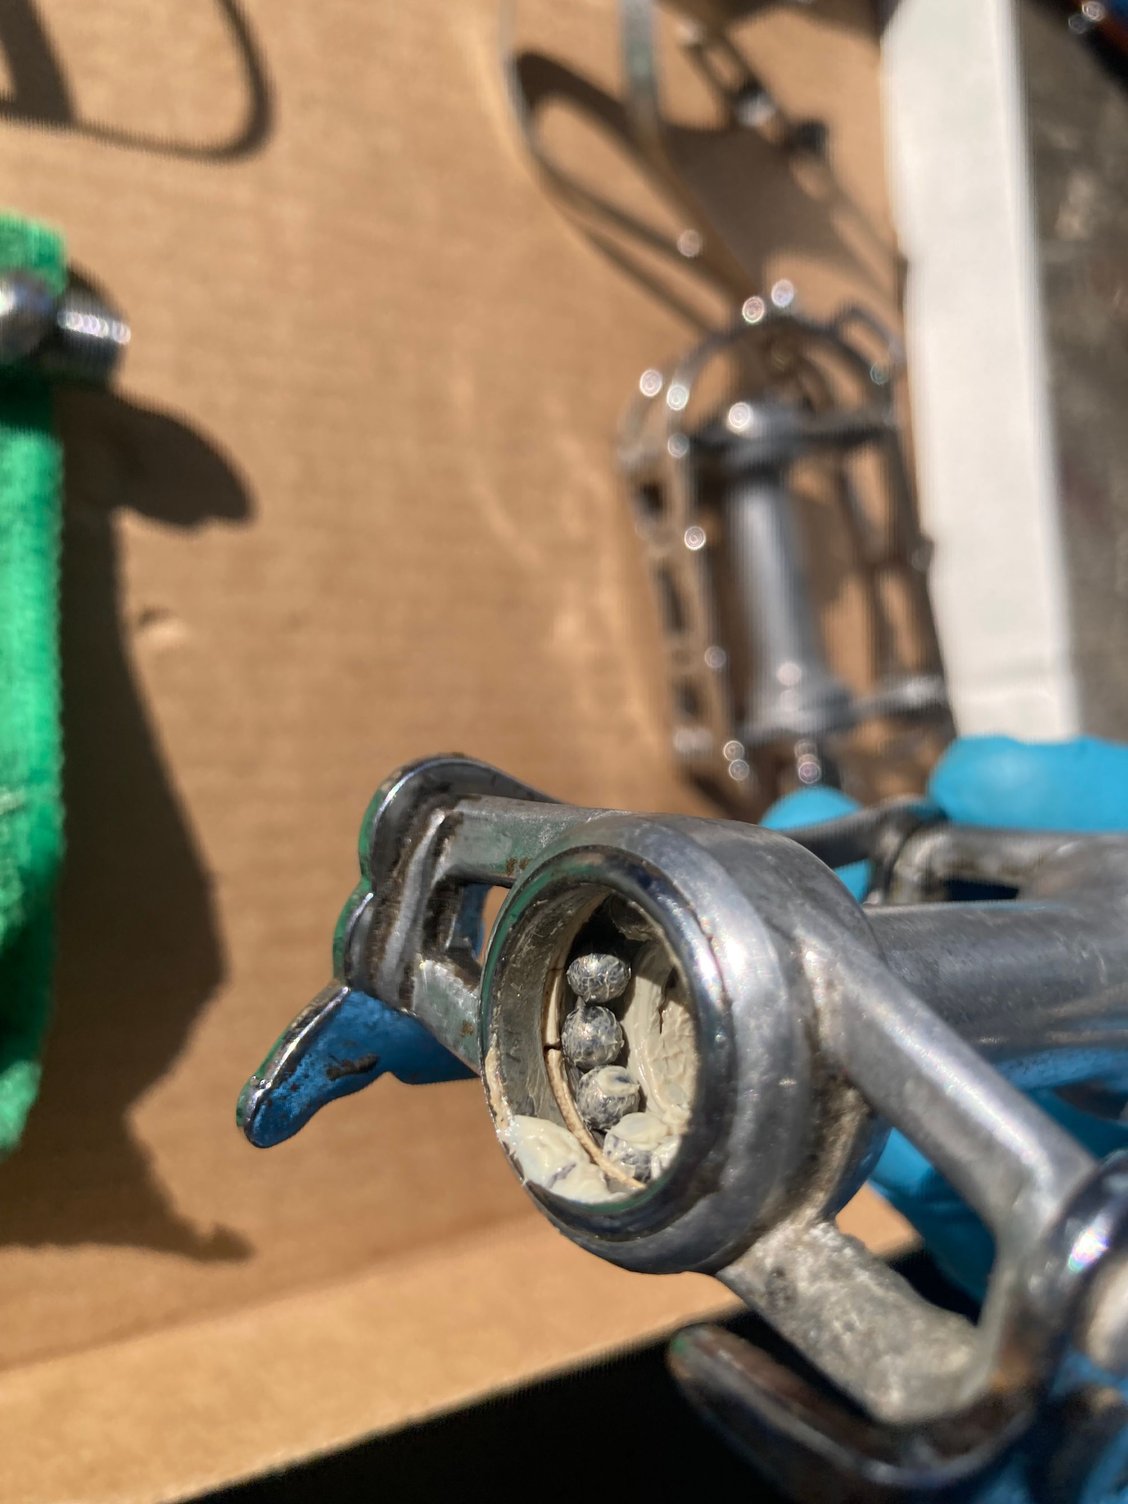
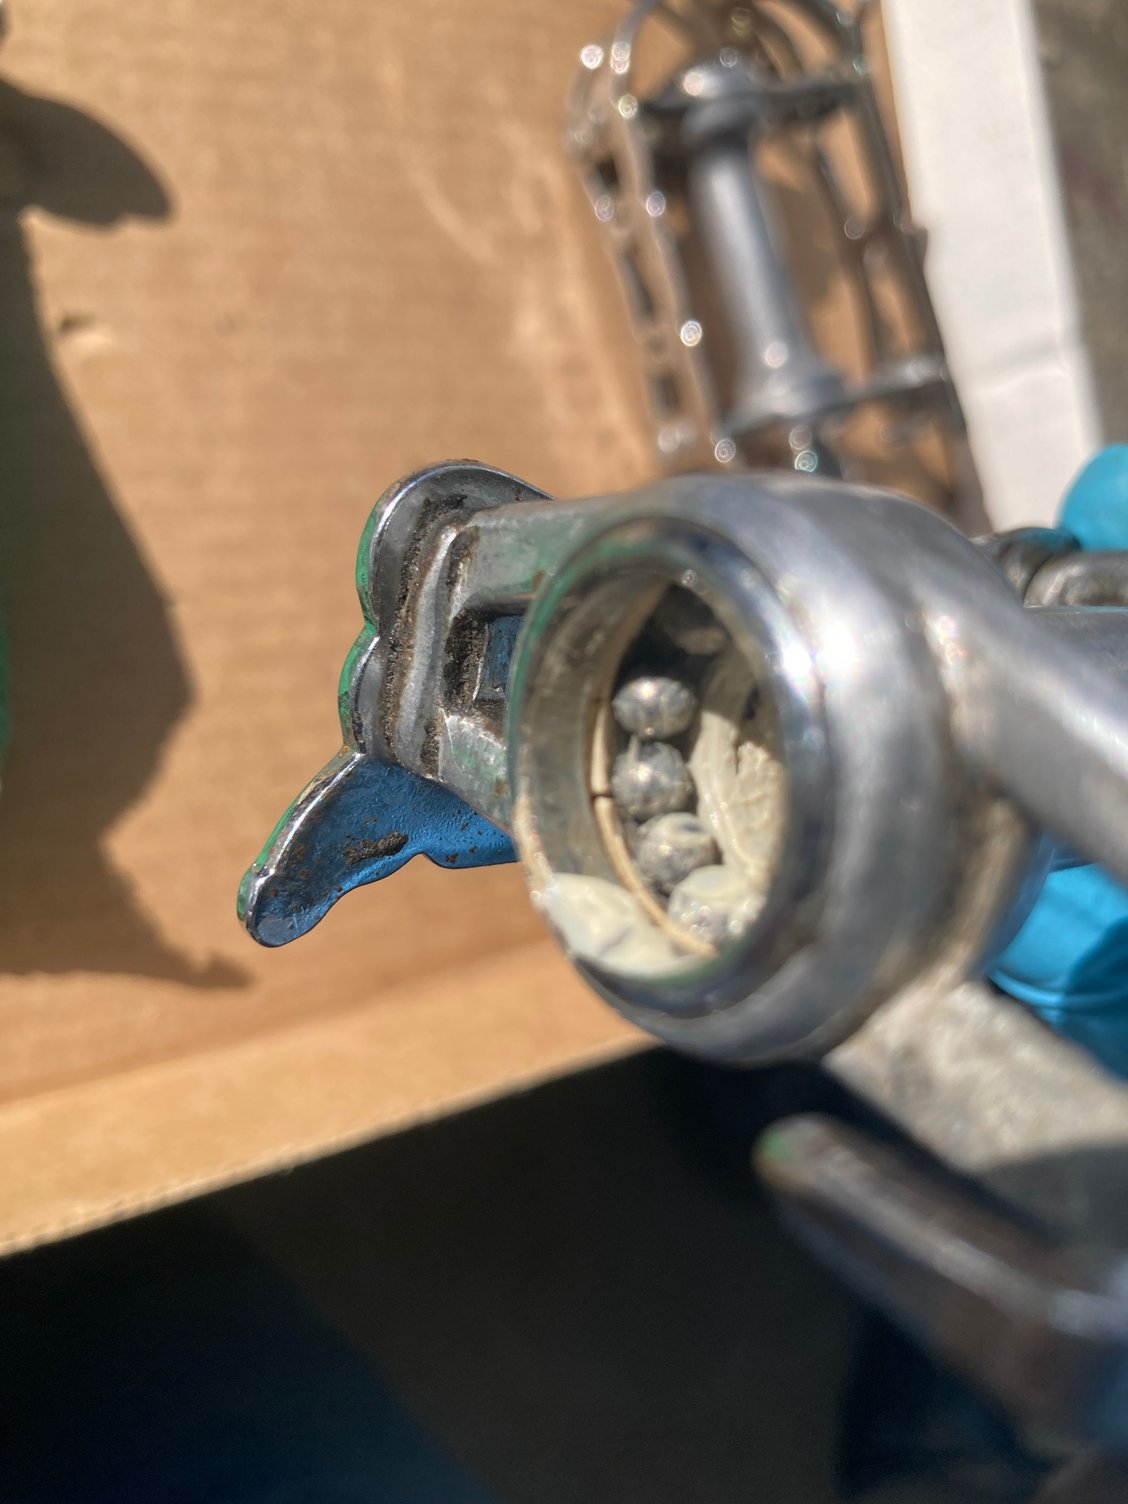
The races were clean but I did find one spot of putting. Hopefully it won’t chew up the balls. I inspected each one and they were all clean. No gouge marks and no burn marks. I used a piece of a TP roll bent strategically to clean behind the dust cap. Worked very well and no chance of harming anything.

Reassembly was a breeze. Getting the balanced between tight on the balls and slop took a little back and forth but so does most everything. No matter. Here it is repacked before dust cap. I’ll totally keep my eye out for that tool next time I go to a swap meet.
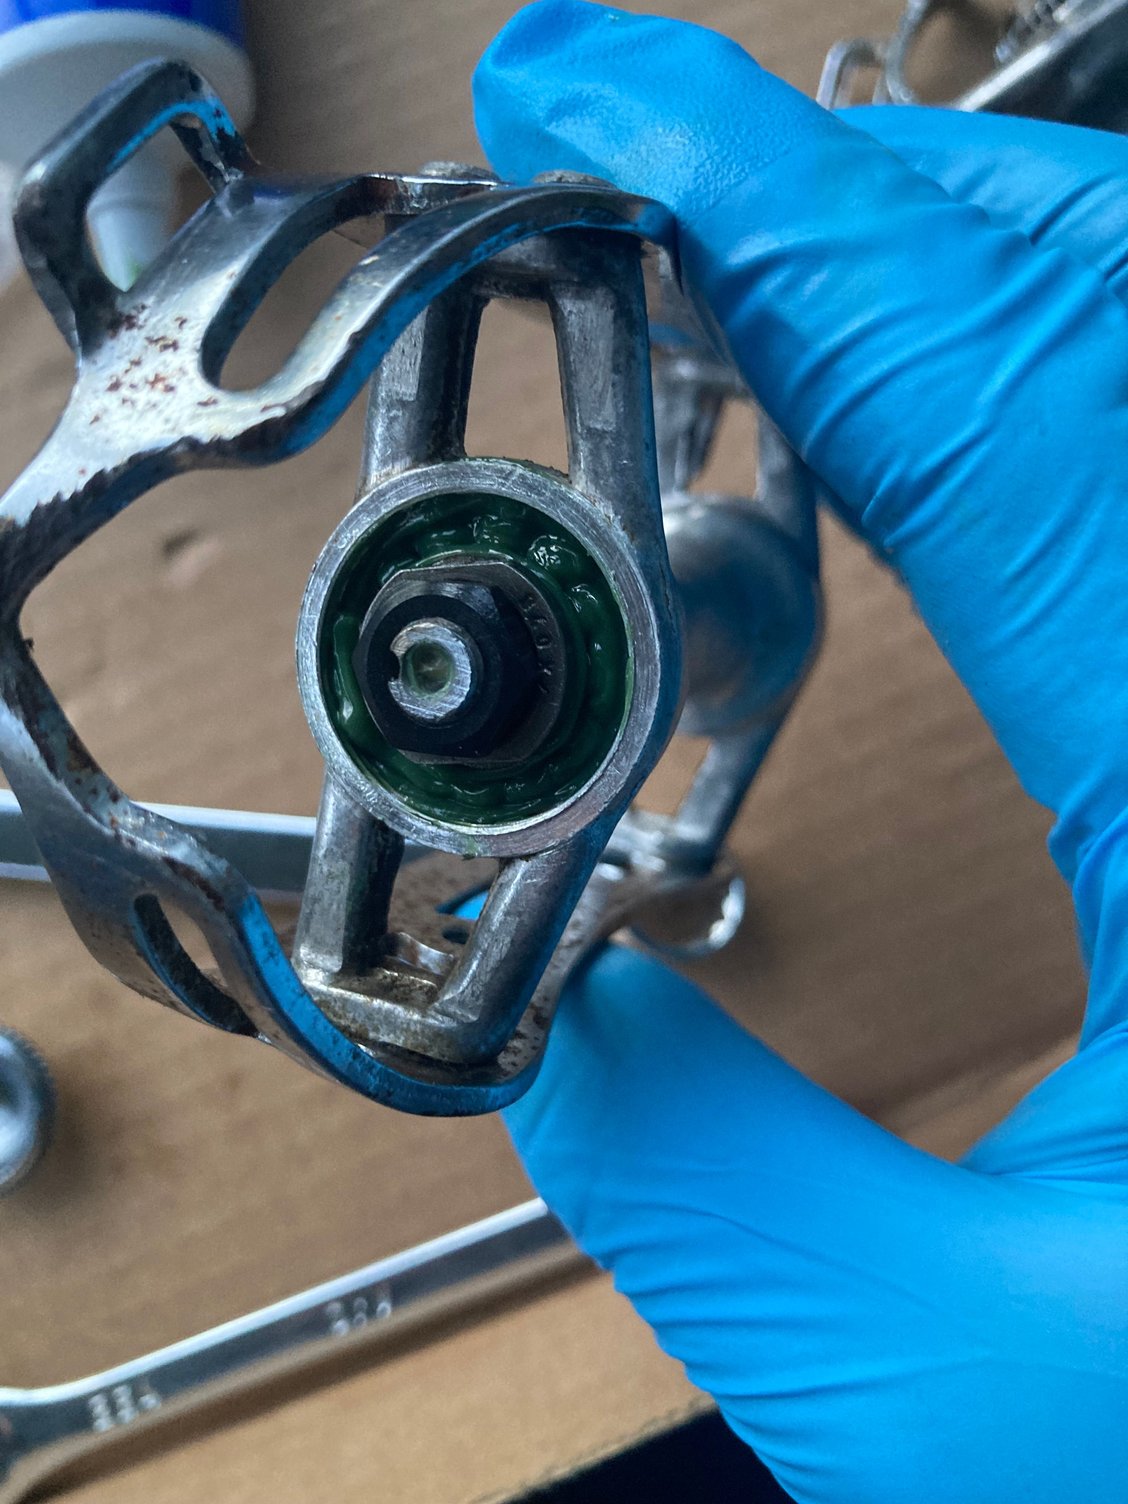
I’ll do the next pedal tomorrow! Along with the hardware store for longer bolts and the bike shop for a valve adapter! I love tricks like that! Thanks again mad honk! I appreciate you taking the time to lay this out.
I finished the first pedal with just enough light to put away my tools. This was a tremendous help.
They spun really nicely but knowing what the bottom bracket and headset looked like, I knew it needed to be done. As you can see, the grease was solidifying in many places. I’m glad I repacked them before putting mileage on them.
The races were clean but I did find one spot of putting. Hopefully it won’t chew up the balls. I inspected each one and they were all clean. No gouge marks and no burn marks. I used a piece of a TP roll bent strategically to clean behind the dust cap. Worked very well and no chance of harming anything.
Reassembly was a breeze. Getting the balanced between tight on the balls and slop took a little back and forth but so does most everything. No matter. Here it is repacked before dust cap. I’ll totally keep my eye out for that tool next time I go to a swap meet.
I’ll do the next pedal tomorrow! Along with the hardware store for longer bolts and the bike shop for a valve adapter! I love tricks like that! Thanks again mad honk! I appreciate you taking the time to lay this out.

 02-14-25 | 08:52 PM
#15
Senior Member
Joined: Feb 2013
Posts: 15,369
Likes: 4,393
From: Alta California
Last year I restored a Masi GC for a commercial airline pilot. He'd had an airline mechanic regrease his bottom bracket about 10 years ago and I have no idea what he used for grease. When it aged, it dried HARD. You had to physically push the crankarm around. Once apart, all parts were difficult to clean with anything I had and had to be scraped clean. It's perfect now.

we actually have a professional aircraft mechanic who is a regular poster on the forum
velomateo who works on cargo aircraft
-----
02-14-25 | 10:42 PM
#16
Thread Starter
Senior Member
Joined: May 2019
Posts: 3,976
Likes: 3,216
From: Bloomington, IN
Bikes: Paramount, Faggin, Ochsner, Rossin, Ciocc
Well Thomas,
Good on ya for doing the work. And even though some will quibble with me, I suspect this thread may inspire more young folks to venture into the very fine world of C&V. My work in the bike industry was at one time at the top of the industry, but I got away from it. It is a very long story and not very interesting, but I am back here trying to help some young folks out. I do volunteer at a local co-op and do teaching there. For me it is fun to be here helping young mechanics out and trying to clarify the mysteries of bike mechanisms. I am currently on a break from my job as a Golf Professional which pays the bills, but I am still trying to stay in the bike world. Smiles, MH
Good on ya for doing the work. And even though some will quibble with me, I suspect this thread may inspire more young folks to venture into the very fine world of C&V. My work in the bike industry was at one time at the top of the industry, but I got away from it. It is a very long story and not very interesting, but I am back here trying to help some young folks out. I do volunteer at a local co-op and do teaching there. For me it is fun to be here helping young mechanics out and trying to clarify the mysteries of bike mechanisms. I am currently on a break from my job as a Golf Professional which pays the bills, but I am still trying to stay in the bike world. Smiles, MH
Last edited by Mad Honk; 02-15-25 at 10:37 AM.
02-15-25 | 07:01 AM
#17
Senior Member
Joined: Feb 2020
Posts: 4,035
Likes: 2,356
This way you can control the cone with one hand and the locknut with the other, instead of hoping that the keyed washer will actually work this time.
(I like this method to the point that for pedals with flanges I made a set of slip-on jaws that are a wee bit smaller than the flats.)
02-15-25 | 08:31 AM
#18
Senior Member♣️
Joined: Jan 2016
Posts: 4,075
Likes: 3,004
I have done both steel and Ti versions of the Superleggeri pedals , I’ve only had one set of GS pedals . The only ones that were a bit challenging were the Ti spindle pedals , because of the tiny freaking balls! Sp rewarding though , to have buttery smooth pedals . Once done , they should last for e very long time . The last set , on my Colnago that is my main ride , I just checked after having a dust cap fail ( plastic was cracked at the threads ) . It had been since Eroica a few years ago and they looked just as if I had done them yesterday. Good job on the instructions , I have the Campy wrench that has the lock nut cut out on the opposite side of the dust wrench and it is very handy.
02-15-25 | 12:31 PM
#19
For the Super Record pedals, I too had issues with the tiny bearings.
my solution was a 9/16” bore into a dense hardwood block, big enough to be stable on the bench or smaller that allowed to be clamped into a vise. One really needs a drill press as one wants a secure fit. Hand held drilling won’t cut it.
inserting the spindle end bearings up allows loading the bearing balls effectively and using tweezers to manipulate. The shallow races really make this job more of a challenge that it should be. Campagnolo could have used the typical bearing diameter on the outboard end.
load the cone and finish adjustment.
my solution was a 9/16” bore into a dense hardwood block, big enough to be stable on the bench or smaller that allowed to be clamped into a vise. One really needs a drill press as one wants a secure fit. Hand held drilling won’t cut it.
inserting the spindle end bearings up allows loading the bearing balls effectively and using tweezers to manipulate. The shallow races really make this job more of a challenge that it should be. Campagnolo could have used the typical bearing diameter on the outboard end.
load the cone and finish adjustment.
02-16-25 | 01:51 AM
#20
Full Member
Joined: Aug 2024
Posts: 420
Likes: 737
Well Thomas,
Good on ya for doing the work. And even though some will quibble with me, I suspect this thread may inspire more young folks to venture into the very fine world of C&V. My work in the bike industry was at one time at the top of the industry, but I got away from it. It is a very long story and not very interesting, but I am back here trying to help some young folks out. I do volunteer at a local co-op and do teaching there. For me it is fun to be here helping young mechanics out and trying to clarify the mysteries of bike mechanisms. I am currently on a break from my job as a Golf Professional which pays the bills, but I am still trying to stay in the bike world. Smiles, MH
Good on ya for doing the work. And even though some will quibble with me, I suspect this thread may inspire more young folks to venture into the very fine world of C&V. My work in the bike industry was at one time at the top of the industry, but I got away from it. It is a very long story and not very interesting, but I am back here trying to help some young folks out. I do volunteer at a local co-op and do teaching there. For me it is fun to be here helping young mechanics out and trying to clarify the mysteries of bike mechanisms. I am currently on a break from my job as a Golf Professional which pays the bills, but I am still trying to stay in the bike world. Smiles, MH
My other pedal was not as lucky as the first. The balls seemed fine but the (second?) races on the medial(toward the center of the bike) side of the pedal had a ring burnt into them. They feel ok, I packed them and I’ll ride them as soon as my knee heals up. Hopefully very soon!
02-16-25 | 02:44 AM
#21

Edumacator

Joined: Jan 2018
Posts: 9,691
Likes: 5,176
From: Goose Creek, SC
Bikes: More than the people who ride them...oy.
Great job and love the junkyard mechanic references and tool.
__________________
1987 Crest C'dale, 1987 Basso Gap, 1992 Rossin EL, 1990 Van Tuyl, 1985 Trek 670, 2003 Pinarello Surprise, 1990ish MBK Atlantique, 1987 Peugeot Isoard, 1987 Nishiki Tri-A, 1981 Faggin, 1996 C'dale M500, 1984 Mercian Pro, 1982 AD SuperLeicht, 1985 Massi ?, 1988 Daccordi Griffe , 1989 Fauxsin MTB, 1981 Ciocc Mockba, 1992 Bianchi Giro, 1977 Colnago Super, 1971 Raleigh Internat'l, 1998 Corratec U+D, 1991 Peugeot Slimestone, 1987 Bianchi Volpe, 1995 Trek 750
1987 Crest C'dale, 1987 Basso Gap, 1992 Rossin EL, 1990 Van Tuyl, 1985 Trek 670, 2003 Pinarello Surprise, 1990ish MBK Atlantique, 1987 Peugeot Isoard, 1987 Nishiki Tri-A, 1981 Faggin, 1996 C'dale M500, 1984 Mercian Pro, 1982 AD SuperLeicht, 1985 Massi ?, 1988 Daccordi Griffe , 1989 Fauxsin MTB, 1981 Ciocc Mockba, 1992 Bianchi Giro, 1977 Colnago Super, 1971 Raleigh Internat'l, 1998 Corratec U+D, 1991 Peugeot Slimestone, 1987 Bianchi Volpe, 1995 Trek 750
02-16-25 | 04:16 AM
#22

Senior Member
Joined: Oct 2015
Posts: 16,174
Likes: 9,549
From: PDX
Bikes: Merz x 5 + Specialized Merz Allez x 2, Strawberry/Newlands/DiNucci/Ti x3, Gordon, Fuso/Moulton x2, Bornstein, Paisley,1958-74 Paramounts x3, 3rensho, 74 Moto TC, 73-78 Raleigh Pro's x5, Marinoni x2, 1960 Cinelli SC, 1980 Bianchi SC, PX-10 X 2
There has been a few threads like this that have really helped me get to the bottom of an issue or give me a good foundation to step forward with something. So even though im not at your local co-op, it really is a helping hand!
My other pedal was not as lucky as the first. The balls seemed fine but the (second?) races on the medial(toward the center of the bike) side of the pedal had a ring burnt into them. They feel ok, I packed them and I’ll ride them as soon as my knee heals up. Hopefully very soon!
My other pedal was not as lucky as the first. The balls seemed fine but the (second?) races on the medial(toward the center of the bike) side of the pedal had a ring burnt into them. They feel ok, I packed them and I’ll ride them as soon as my knee heals up. Hopefully very soon!

I have for a long time now used new balls and regular thick auto wheel bearing grease for these, light grease is fine for cups, cones and races with very little or no scoring.
But the ones that are in trouble should be given every advantage they can to fight on for as long as they can, thick grease is a big help and can make them go another lifetime.
Growing up in rain soaked PDX, we learned quickly and rudely that we needed more than Phil or Lubriplate if we didn't want to have to overhaul things every month in the rainy season, September to June or longer many of the years.
 02-16-25 | 07:11 AM
#23
Senior Member
Joined: Feb 2020
Posts: 4,035
Likes: 2,356
02-16-25 | 10:30 AM
#24
02-16-25 | 10:32 AM
#25
the thrust was to position the pedal steady and keeping both hands free.