


Decal adventures. Post 'em here.
 11-05-12 | 02:18 PM
#1

Thread Starter
Senior Member
Joined: Apr 2005
Posts: 16,748
Likes: 138
From: Wherever
Decal adventures. Post 'em here.
Applied decals? Post your experiences, adventures, techniques and fubars here.
I recently acquired another French bike. Pretty good condition. But as is common with bikes from the mid 70's, the Reynolds decals were shot. One of the fork blade decals was OK, but the other was mostly gone. I made the decision to replace them.


These are the vinyl replacements I ordered. To be blunt, I found these less than acceptable. My intention is not to bash the supplier here, someone we all know, but I just couldn't see putting these on a fine bike. Printed badly out of register and the line width on the lettering all over the place. One of the fork decals off center. I suppose 95% of people would probably just stick these on and forget it. I'm quite particular. To his credit, the vendor offered to send replacements.


I'm usually very particular about "period correct" too, but despite the fact that the decals below were incorrect for the bike, a few years early, I decided to use these. They were just so superior and they are water slide decals, as were the originals. I obtained these from H. Lloyd cycles a year or so ago not really knowing what I'd do with them. Then this bike came along.

Water slide decals are a bit tricky to work with. Very delicate compared with vinyl stickers, and they definitely require a clear coat to protect them. I applied them then went about trying to figure out what to coat them with. In the instructions Nick at Lloyd's recommends oil based varnish only for water slide decals. I ended up using Winsor Newton clear gloss artist's varnish and sprayed it through my airbrush. Kind of a white knuckle moment as the varnish needed to be thinned a bit to run through the airbrush and with solvents in the varnish one never knows if that first coat is going to lift or crinkle the decal. The trick is to make the first coat a light mist coat and let it dry thoroughly before applying additional coats. I masked off the frame and sprayed. I applied three light coats then one last wet one without the masking.


Yeah. They're wrong for the bike. And the seat tube decal is even in the wrong place compared to the original. Something I normally wouldn't do. An intentional departure. But they're nice and look so much more "authentic" than vinyl stickers. To me. They look a little glossy, and I may knock the gloss back a tad with ultra fine polishing compound when completely dry. In a month or so.

I recently acquired another French bike. Pretty good condition. But as is common with bikes from the mid 70's, the Reynolds decals were shot. One of the fork blade decals was OK, but the other was mostly gone. I made the decision to replace them.
These are the vinyl replacements I ordered. To be blunt, I found these less than acceptable. My intention is not to bash the supplier here, someone we all know, but I just couldn't see putting these on a fine bike. Printed badly out of register and the line width on the lettering all over the place. One of the fork decals off center. I suppose 95% of people would probably just stick these on and forget it. I'm quite particular. To his credit, the vendor offered to send replacements.
I'm usually very particular about "period correct" too, but despite the fact that the decals below were incorrect for the bike, a few years early, I decided to use these. They were just so superior and they are water slide decals, as were the originals. I obtained these from H. Lloyd cycles a year or so ago not really knowing what I'd do with them. Then this bike came along.
Water slide decals are a bit tricky to work with. Very delicate compared with vinyl stickers, and they definitely require a clear coat to protect them. I applied them then went about trying to figure out what to coat them with. In the instructions Nick at Lloyd's recommends oil based varnish only for water slide decals. I ended up using Winsor Newton clear gloss artist's varnish and sprayed it through my airbrush. Kind of a white knuckle moment as the varnish needed to be thinned a bit to run through the airbrush and with solvents in the varnish one never knows if that first coat is going to lift or crinkle the decal. The trick is to make the first coat a light mist coat and let it dry thoroughly before applying additional coats. I masked off the frame and sprayed. I applied three light coats then one last wet one without the masking.
Yeah. They're wrong for the bike. And the seat tube decal is even in the wrong place compared to the original. Something I normally wouldn't do. An intentional departure. But they're nice and look so much more "authentic" than vinyl stickers. To me. They look a little glossy, and I may knock the gloss back a tad with ultra fine polishing compound when completely dry. In a month or so.
Last edited by rootboy; 11-05-12 at 02:34 PM.
 11-05-12 | 02:47 PM
#3
Senior Member

Joined: May 2006
Posts: 2,180
Likes: 16
Looks good!
I wonder why solvent based? The adhesive is activated by water (probably albumin) but once dry takes a LOT of moisture to release, the inks on the other hand are definitely solvent based and you have to be very careful not to melt your decal, glad that this worked!!
I agree with the new repro decals, have bought a few sets on the bay, and pretty disappointed with the quality/accuracy.
11-05-12 | 02:50 PM
#4

Lotus Monomaniac
Joined: Mar 2011
Posts: 1,032
Likes: 4
From: Pennsylvania
 11-05-12 | 02:51 PM
#5
Senior Member
Joined: Jul 2009
Posts: 11,128
Likes: 39
Bikes: 1986 Alan Record Carbonio, 1985 Vitus Plus Carbone 7, 1984 Peugeot PSV, 1972 Line Seeker, 1986(est.) Medici Aerodynamic (Project), 1985(est.) Peugeot PY10FC
Yah.....the apostrophe at the end of "REYNOLDS".......It should not be there,......but you can barely notice it anyway. Maybe one can always paint it over with some black modeler's paint.
I suspect it was done to avoid copyright problems with Reynolds TI.
Chombi
I suspect it was done to avoid copyright problems with Reynolds TI.
Chombi
 11-05-12 | 03:21 PM
#7

MIKE is my name!

Joined: Mar 2012
Posts: 2,846
Likes: 21
From: finland,baltimore
Bikes: hans lutz, , puch mistral ultima,2x Austro Daimler Smoked chrome Ultima,Austro Daimler Mixte,Austro Daimler 531 mixte, flying arrow,F Moser,
I bought 2 sets of NOS reynolds 531 decals this year, one set is on the PUCH, the other is for the future.
decal tricks.
My Moser junior I noticed had the lower band decal exactly where the campagnolo deraileur will go,
(I am replacing the crankset from ofmega 36t to campy 48)
as the frame was bare, I mounted the bike in the vise, put the electric heatgun down the seat tube-and vented out the BB
I waited untill the tube was nice and toasty, then I could just start to losen the lower decal, I got a razor blade under the edge, and slowly working with temp and patience removed the band, it is in perfect condition-
I will mount up the cranks and deraileur and then use adheasive to re-locate the decal slightly higher then where it was.
wow- this is a 33 year old frame and i could remove the original decal intact!
11-05-12 | 05:30 PM
#9

Senior Member
Joined: Aug 2012
Posts: 93
Likes: 0
From: Buenos Aires, Argentina
Bikes: 2012 Cannondale Flash Carbon 1, 1948 Raleigh Golden Arrow
I set my H Lloyds decals last monday. Unfortunately I didn�t take pics of the process, it wasn�t a process im proud of anyways. Lots of try and error. I set the waterslide decals using Humbrol Decal Fix to wet the designated area on the frame. This decals are really easy to break and I found out if you want to move them as to correct the possition you must get them wet again with the decal fix or waters, as as soon as the dry they become the most breakable material ever. After drying a whole night i sprayed them with "Testors All purpose DullCote" which was easy to apply. I bought both on a model shop in Argentina so they must be pretty findable around the world. I�ll upload pictures as soon as i get my dimples chromed.
11-05-12 | 05:42 PM
#10
Senior Member


Joined: Sep 2008
Posts: 8,904
Likes: 2,987
From: Elwood Indiana
Bikes: they change so much I'm tired of updating this
I was so proud when I set my colnago d/t decals on a freshly painted frame, several coats of clear. Then someone pointed out that they were to low. I centered them on the tube and didnt realize they are suppose to be raised a bit. Now it bugs the hell out of me.
__________________
Semper fi
Semper fi

 11-05-12 | 05:47 PM
#12
Thread Starter
Senior Member
Joined: Apr 2005
Posts: 16,748
Likes: 138
From: Wherever
Actually, Chombi, H. Lloyd's is the only repro outfit that is licensed by Reynolds to do re-pops. That "apostrophe" is on both sides of the 531. I think it's proper for some mid to late sixties Reynolds decals. Maybe in to the early 70's. I know I've seen them before but can't remember at the moment. If he had produced the mid '70s gold band decals in water slides I certainly would have used those but, he only does them in vinyl now so I opted for these, which I think are excellent despite being too early for the bike. The greens are too green, darker than the "531"s on my other French bikes , but the quality of the print is very good.
Last edited by rootboy; 11-05-12 at 05:56 PM.
11-05-12 | 05:52 PM
#13
Thread Starter
Senior Member
Joined: Apr 2005
Posts: 16,748
Likes: 138
From: Wherever

In short, Snydermann, I just scraped them off. There were only remnants and even that fairly intact fork decal was dry and brittle. I used an extremely dull forty year old pocket knife and just sort of chipped them off, then finished up with Goof Off. Cleaned up very well.
Last edited by rootboy; 11-05-12 at 06:48 PM.
11-05-12 | 06:12 PM
#14
Thread Starter
Senior Member
Joined: Apr 2005
Posts: 16,748
Likes: 138
From: Wherever
11-05-12 | 06:23 PM
#15
Thread Starter
Senior Member
Joined: Apr 2005
Posts: 16,748
Likes: 138
From: Wherever
Looks good!
I wonder why solvent based? The adhesive is activated by water (probably albumin) but once dry takes a LOT of moisture to release, the inks on the other hand are definitely solvent based and you have to be very careful not to melt your decal, glad that this worked!!
I wonder why solvent based? The adhesive is activated by water (probably albumin) but once dry takes a LOT of moisture to release, the inks on the other hand are definitely solvent based and you have to be very careful not to melt your decal, glad that this worked!!
So I just took a shot with the clear artist's varnish. High quality, meant for oil paintings, but perhaps not as durable as a poly clear.
I thinned it just a bit with distilled turpentine rather than mineral spirits, again, afraid of melting the decal. But with a couple of light, dry-ish mist coats, it worked fine.
11-05-12 | 06:26 PM
#16
Senior Member
Joined: Nov 2005
Posts: 5,768
Likes: 10
Bikes: Cinelli, Paramount, Raleigh, Carlton, Zeus, Gemniani, Frejus, Legnano, Pinarello, Falcon
11-05-12 | 06:35 PM
#17
Thread Starter
Senior Member
Joined: Apr 2005
Posts: 16,748
Likes: 138
From: Wherever
Yeah, that's it. Any idea what era? I'm thinking sixties?
Like I said, I wouldn't normally think of putting 60's decals on a 70's bike but, got frustrated and went ahead. I just may order a set of Nick's mid 70's gold band vinyls just to see how they look and if good...some day...may re-do these. I love to tinker.
Like I said, I wouldn't normally think of putting 60's decals on a 70's bike but, got frustrated and went ahead. I just may order a set of Nick's mid 70's gold band vinyls just to see how they look and if good...some day...may re-do these. I love to tinker.
11-05-12 | 06:42 PM
#18

Senior Member
Joined: Dec 2006
Posts: 7,475
Likes: 559
Oh btw, I guess my avatar speaks for my relationship to decals. Although I do have a replacement set floating around...they're different than the original ones, so I guess I fail on all counts.
Last edited by due ruote; 11-05-12 at 06:54 PM.
11-05-12 | 06:43 PM
#19
Thread Starter
Senior Member
Joined: Apr 2005
Posts: 16,748
Likes: 138
From: Wherever
Not for the faint of heart. I've decal-ed lots of model airplanes, but that was 45 years ago!
11-05-12 | 07:08 PM
#20

Senior Member
Joined: Apr 2010
Posts: 3,081
Likes: 10
From: vermont
Bikes: Many
Wow, that is good info and nice frame. The Legnano got new downtube decals (supplied by Velocal). I also purchased the stickers for the stem but chose to use the stem with worn original stickers and keep the repops for another project. I was able to buy these DT stickers with a gloss coating that resembles the factory gloss.
I followed the instructions and it was easy and they came out flawless. I have applied thousands of stickers to bikes but was actually pretty freaked out during this process but it was fun and quite rewarding to see the end result.
I followed the instructions and it was easy and they came out flawless. I have applied thousands of stickers to bikes but was actually pretty freaked out during this process but it was fun and quite rewarding to see the end result.
11-05-12 | 07:09 PM
#21
Thread Starter
Senior Member
Joined: Apr 2005
Posts: 16,748
Likes: 138
From: Wherever
Thanks due ruote. I was bewitched by the silver lilac Le Champion when I first saw one. A beautiful color. Hope to get it together while I still have a chance to ride it.
11-05-12 | 07:35 PM
#22
Senior Member
Joined: May 2005
Posts: 577
Likes: 115
From: S.F. Bay Area
Bikes: Motobecane Grand Record, Colnago Super, Mondia Super, Mondia Special, Mondia Prestige (for sale 55cm),Titan Star, Titan Exklusiv, Windsor
Having recently getting a '79 Mondia frame that was repainted...it came w/o decals. I ordered the appropo one's from Cyclomondo, as well as several Reynolds tubing decals to go along w/ the period correct & tubing type of decals. At first I was struggling w/ the process, but through several emails w/ Greg I found that getting them off the backing paper wasn't as difficult as I was making it out to be....peel & stick!
A day or two later, after putting them on, I found that some were in the wrong spot or didn't meet up just right or weren't spaced correctly...back to Cyclomondo for more...lol. What I did find out was, I could actually peel off the first one's I put on w/o too much difficulty, by being careful when lifting them off, then re-applying them once again. I did this a few times w/o destroying them till I got it right...
Since I already have another Mondia, a guideline was there for me to follow & the main decal placement went easily. I did wet the area w/ water prior to putting the bigger decals on, so proper placement is facilitaed. It was the smaller one's that posed the problem w/ location, location, location.
11-05-12 | 09:31 PM
#23


59'er
Joined: Oct 2005
Posts: 3,307
Likes: 12
From: Alexandria, IN
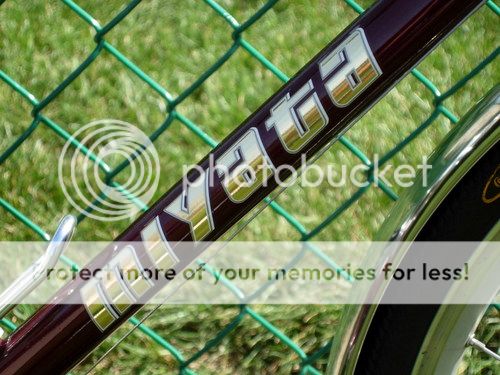
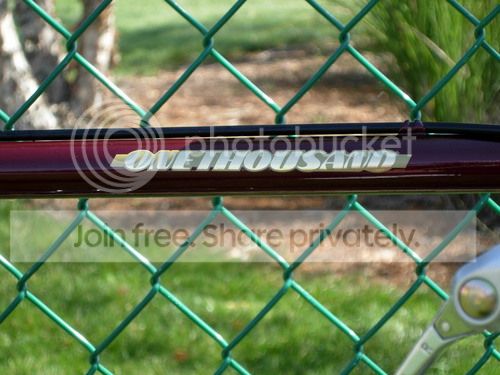
Bikes: LeMond Maillot Jaune, Vintage Trek 520 (1985), 1976 Schwinn Voyageur 2, Miyata 1000 (1985)
I really liked this one!
__________________

11-05-12 | 09:54 PM
#24
Senior Member
Joined: Sep 2005
Posts: 643
Likes: 1
From: The Peninsula
Bikes: '62 Peugeot UO8, '63 Schwinn Superior, ;72 Peugeot PX-10, '74 Motobecane LeChampion, '74 Peugeot UO18
Since I couldn't find the correct decal for an early '60's Peugeot, I finally resorted to making my own waterside for the down tube. Here it is. I haven't clearcoated it, but maybe I will sometime.
I haven't had any problems clearcoating decals after applying them to the bike. I have experimented with clearcoat on waterslides that have not yet been applied and have ended up wrinkling the decal.

I haven't had any problems clearcoating decals after applying them to the bike. I have experimented with clearcoat on waterslides that have not yet been applied and have ended up wrinkling the decal.
11-05-12 | 10:22 PM
#25
