Nice rack...
 07-28-23, 08:10 AM
#1
Junior Member
Thread Starter
Join Date: Sep 2022
Location: Delaware USA
Posts: 132
Bikes: '23 Specialized Roll 3.0 low entry, 'Lectric Lite folding bike, beater mountain bike
Mentioned: 4 Post(s)
Tagged: 0 Thread(s)
Quoted: 34 Post(s)
Liked 103 Times
in
43 Posts
Nice rack...
Hi there, slightly embarrassing question here but what hardware do I need in order to install a rear rack properly? I ask because every time I attempt to attach mine with a bolt and nut, the nut invariably prevents me from shifting to the smallest rear cog or off of it. Pictures of your setup are much appreciated and I thank you for entertaining my newb-ness. 
 07-28-23, 09:27 AM
#2
Senior Member
Join Date: Dec 2010
Location: northern Deep South
Posts: 8,905
Bikes: Fuji Touring, Novara Randonee
Mentioned: 36 Post(s)
Tagged: 0 Thread(s)
Quoted: 2604 Post(s)
Liked 1,934 Times
in
1,213 Posts
Mine are attached with (I think) M5 bolts, and my dropouts are threaded to match. I've had a longer than necessary bolt that I cut off with a Dremel so it wouldn't interfere.
Likes For pdlamb:
07-28-23, 10:55 AM
#3
Newbie

Join Date: Jul 2023
Location: Virginia
Posts: 22
Bikes: 2002 Cannondale R2000, 1984 Basso Gap, Surly Crosscheck and LHT, an unidentified road bike that was the subject of some C&V forum speculation, and some mountain bike or other
Mentioned: 0 Post(s)
Tagged: 0 Thread(s)
Quoted: 4 Post(s)
Liked 11 Times
in
8 Posts
same. On my commuter, I installed the rack and cut off the end of the bolt leaving a few threads in case it starts backing out and I don�t catch it right away.
07-28-23, 11:01 AM
#4
Newbie
I don't think you need the nut. The attachment point should be threaded itself, so it doesn't need a nut on the back end. You just screw right into it.
07-28-23, 11:08 AM
#5

Senior Member

Join Date: May 2010
Location: Bastrop Texas
Posts: 4,491
Bikes: Univega, Peu P6, Peu PR-10, Ted Williams, Peu UO-8, Peu UO-18 Mixte, Peu Dolomites
Mentioned: 13 Post(s)
Tagged: 0 Thread(s)
Quoted: 970 Post(s)
Liked 1,635 Times
in
1,049 Posts
Don't get discouraged. Setting up a rack can be tricky. Take your time. It may take more then a few tries ta get it right...
Make sure you use Stainless Steel bolts and lock-nuts. Most put the lock nuts facing out. Many have had to drill out a threaded lug to adapt a better fit.
Make sure you use Stainless Steel bolts and lock-nuts. Most put the lock nuts facing out. Many have had to drill out a threaded lug to adapt a better fit.
__________________
 No matter where you're at... There you are... Δf:=f(1/2)-f(-1/2)
07-29-23, 08:28 PM
#6
Pedalin' Erry Day

Another alternative if you can't readily cut your bolt shorter, or find a shorter one to use, is to add a washer or extra nut on the outer side to shorten its effective length.
07-29-23, 09:12 PM
#7
Disco Infiltrator

Join Date: May 2013
Location: Folsom CA
Posts: 13,446
Bikes: Stormchaser, Paramount, Tilt, Samba tandem
Mentioned: 72 Post(s)
Tagged: 0 Thread(s)
Quoted: 3126 Post(s)
Liked 2,105 Times
in
1,369 Posts
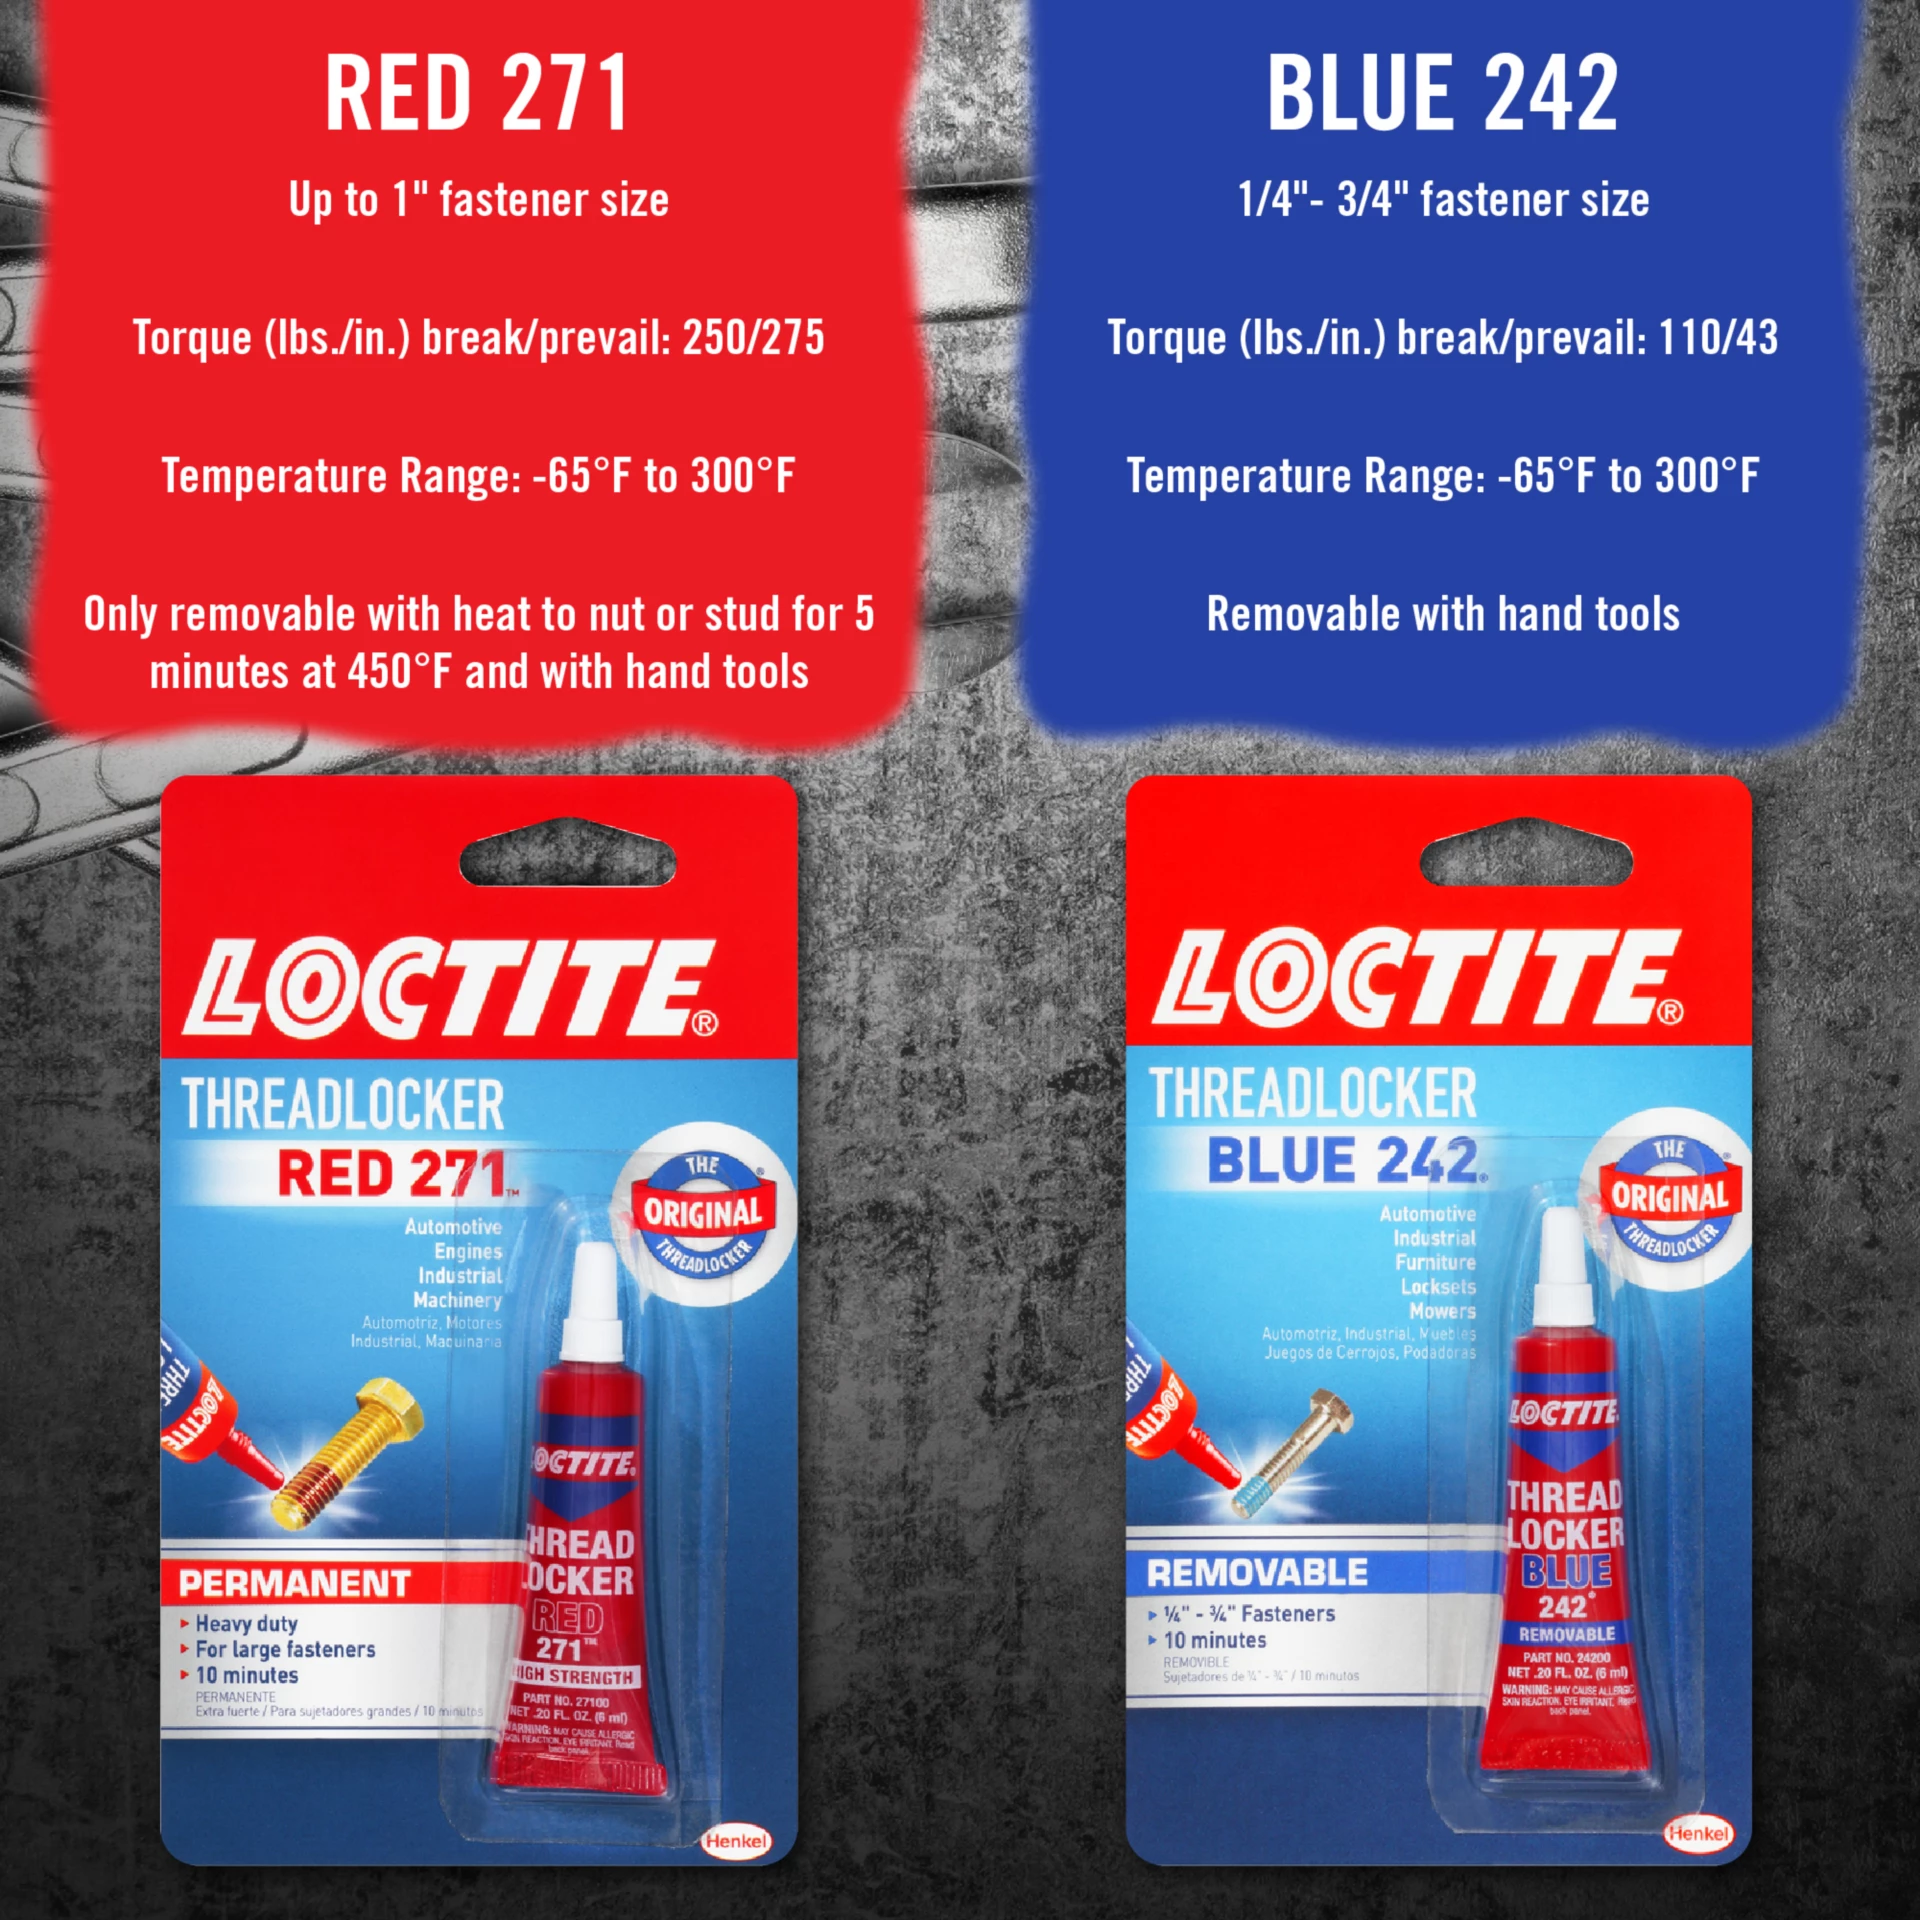
Blue loctite (it comes in a red tube which is always confusing) and split washers
__________________
Genesis 49:16-17
Genesis 49:16-17
07-29-23, 09:15 PM
#8
Disco Infiltrator
Join Date: May 2013
Location: Folsom CA
Posts: 13,446
Bikes: Stormchaser, Paramount, Tilt, Samba tandem
Mentioned: 72 Post(s)
Tagged: 0 Thread(s)
Quoted: 3126 Post(s)
Liked 2,105 Times
in
1,369 Posts
OP has a classic bike so the threads might be long gone destroyed by some prior owner
__________________
Genesis 49:16-17
Genesis 49:16-17
07-29-23, 09:53 PM
#9
Senior Member
Join Date: Dec 2019
Location: South Shore of Long Island
Posts: 2,801
Bikes: 2010 Carrera Volans, 2015 C-Dale Trail 2sl, 2017 Raleigh Rush Hour, 2017 Blue Proseccio, 1992 Giant Perigee, 80s Gitane Rallye Tandem
Mentioned: 12 Post(s)
Tagged: 0 Thread(s)
Quoted: 1088 Post(s)
Liked 1,028 Times
in
724 Posts
I've your mounting holes aren't threaded, then you can put a cap head bolt in from the inside and use a nylon lock nut on the outside to keep it from coming loose. The smaller, rounded head of the bolt will help to reduce or prevent interference with the chain. Otherwise, the design of having threaded mounting holes is to just have the bolt barely come through the other side, no lock nut needed just a lock washer between the bolt and rack.
07-30-23, 12:12 PM
#10


Randomhead
Join Date: Aug 2008
Location: Happy Valley, Pennsylvania
Posts: 24,402
Mentioned: 0 Post(s)
Tagged: 0 Thread(s)
Quoted: 4 Post(s)
Liked 3,702 Times
in
2,522 Posts
I make my own racks now, and they have an eyelet built in for the fenders. I got that idea from Tubus, but I'm not sure which of their racks have the rack mounted eyelet.
07-31-23, 07:24 PM
#11
Junior Member
Thread Starter
Join Date: Sep 2022
Location: Delaware USA
Posts: 132
Bikes: '23 Specialized Roll 3.0 low entry, 'Lectric Lite folding bike, beater mountain bike
Mentioned: 4 Post(s)
Tagged: 0 Thread(s)
Quoted: 34 Post(s)
Liked 103 Times
in
43 Posts
reading through now, thanks for these ideas!
08-02-23, 12:44 PM
#13
Disco Infiltrator
Join Date: May 2013
Location: Folsom CA
Posts: 13,446
Bikes: Stormchaser, Paramount, Tilt, Samba tandem
Mentioned: 72 Post(s)
Tagged: 0 Thread(s)
Quoted: 3126 Post(s)
Liked 2,105 Times
in
1,369 Posts
Whether the backside nut, the threadlock, the lock washer, or anything else works depends on how your frame was done in the first place and how it is now after a long service life already. You might not need all of them but you could...

belt and suspenders
belt and suspenders
08-02-23, 12:49 PM
#14
Junior Member
Thread Starter
Join Date: Sep 2022
Location: Delaware USA
Posts: 132
Bikes: '23 Specialized Roll 3.0 low entry, 'Lectric Lite folding bike, beater mountain bike
Mentioned: 4 Post(s)
Tagged: 0 Thread(s)
Quoted: 34 Post(s)
Liked 103 Times
in
43 Posts
Gotta have all the bases covered, I guess, except for a shirt. Too funny!
Last edited by jaxy357; 08-02-23 at 12:50 PM. Reason: forgot to add something about his shirt
08-03-23, 06:39 AM
#16
Miles to Go

You can use a bolt with a flat head on it and reverse it so the nut is sticking out the other side.
Likes For timdow:
08-05-23, 07:42 AM
#17
Senior Member
Join Date: Sep 2014
Posts: 3,893
Mentioned: 20 Post(s)
Tagged: 0 Thread(s)
Quoted: 1062 Post(s)
Liked 665 Times
in
421 Posts
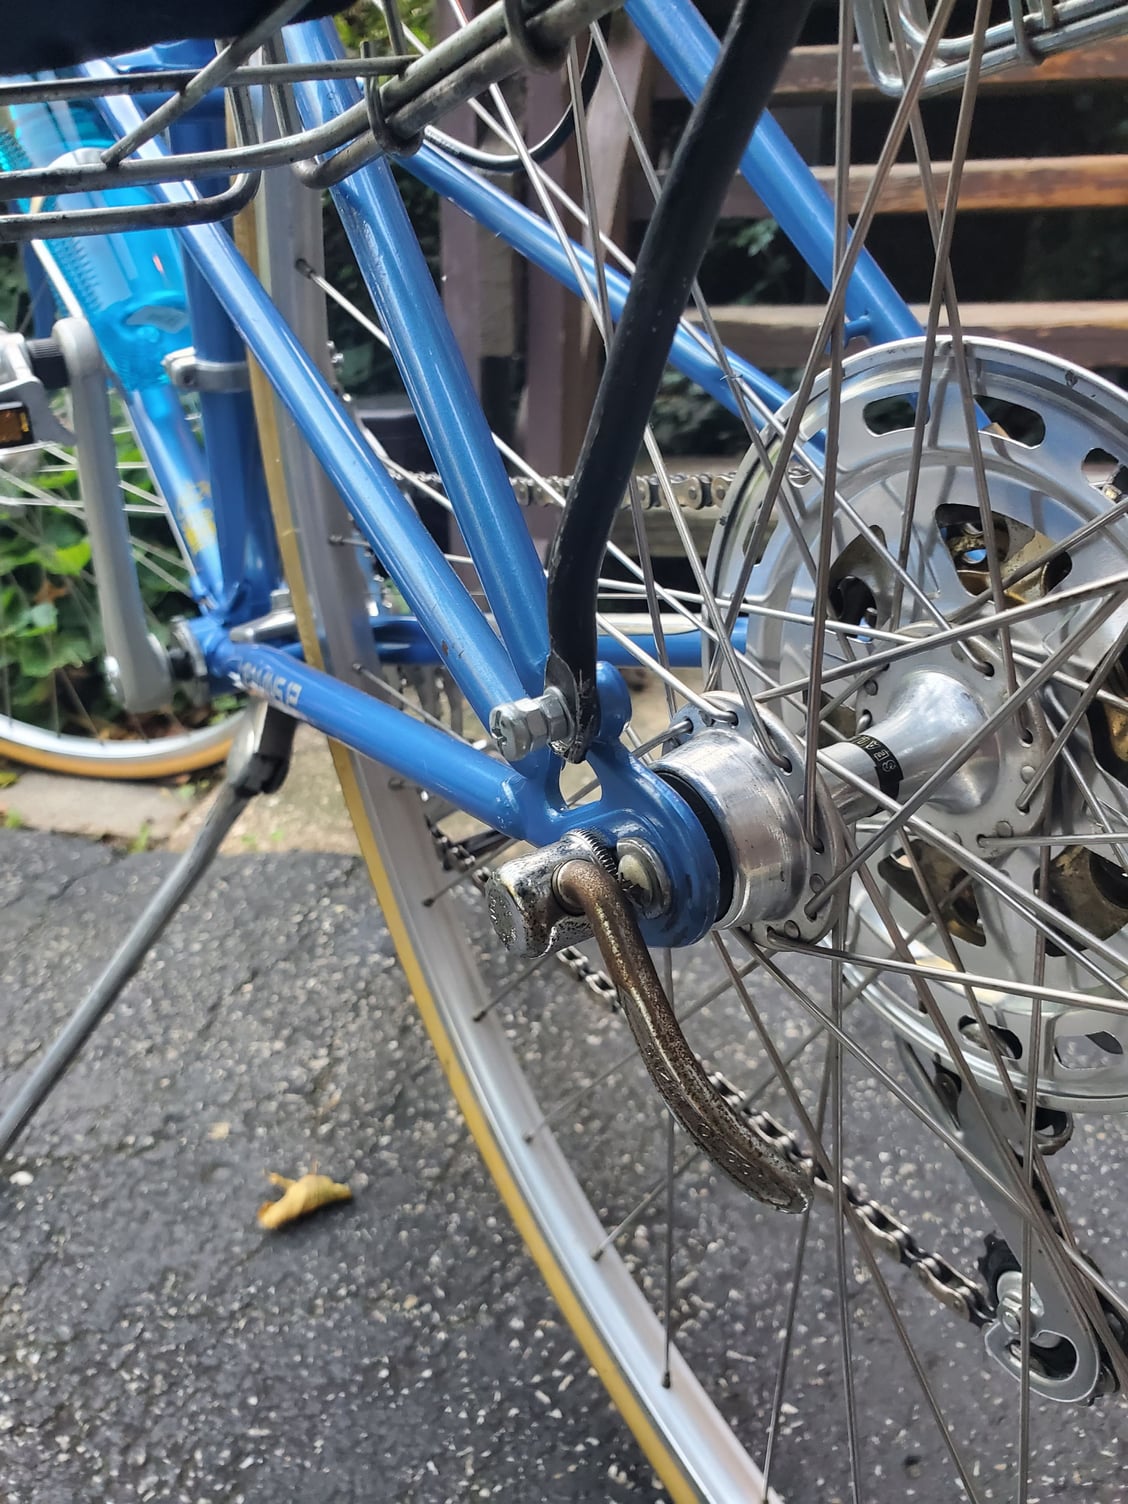
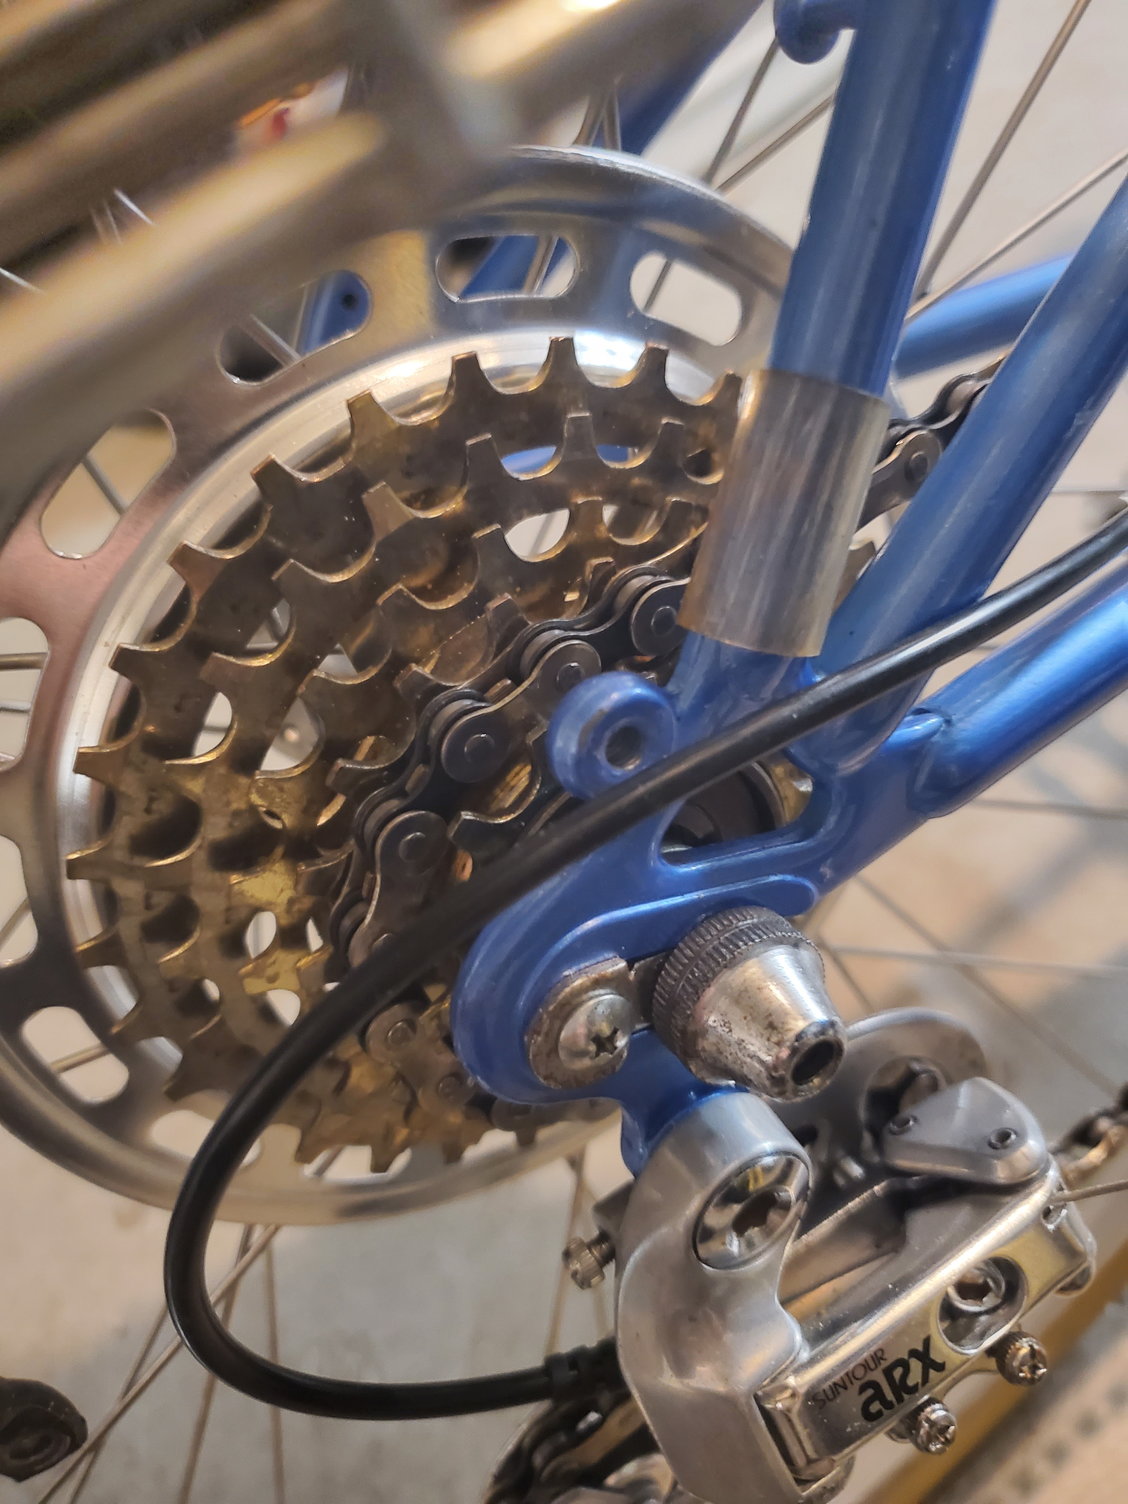
A pic of your specific setup might be helpful. There's no standardization of how bikes are configured for racks, so it could come down to dealing with your particular bike.

 08-06-23, 07:33 AM
#19
Senior Member
Join Date: Sep 2014
Posts: 3,893
Mentioned: 20 Post(s)
Tagged: 0 Thread(s)
Quoted: 1062 Post(s)
Liked 665 Times
in
421 Posts
Not a lot of space between the frame and the cog. You could try what @timdow suggests. Otherwise, get a longer screw with a nut, thread the screw through until it just sticks out the other side, then tighten with the nut.
Or a slightly longer screw and progressively add more and more washers until it's just right.
This is a place where you want full thread engagement because racks tend to wiggle, and the screws will want to come loose.
Or a slightly longer screw and progressively add more and more washers until it's just right.
This is a place where you want full thread engagement because racks tend to wiggle, and the screws will want to come loose.
08-06-23, 07:56 PM
#20
Pennylane Splitter
Join Date: Sep 2012
Location: Orange County, California
Posts: 1,879
Bikes: Yes
Mentioned: 14 Post(s)
Tagged: 0 Thread(s)
Quoted: 1807 Post(s)
Liked 1,448 Times
in
995 Posts
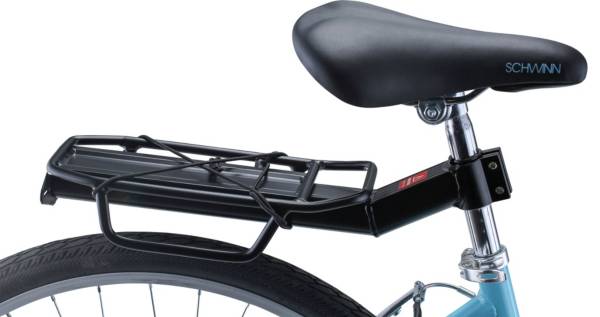
If you're just commuting and not carrying a lot of weight maybe try a seatpost rack? They simple attache to the exposed seatpost, there are no struts going down from the rack to be attached to eyelets near the rear dropouts. They'll hold about 15 lbs IIRC (no weight limit on mine).
Likes For skidder:
08-07-23, 07:00 AM
#21
Miles to Go
Seatpost rack is a good idea.
If you end up wanting a standard rack, as I suggested above you can put a bolt like this one in backward:
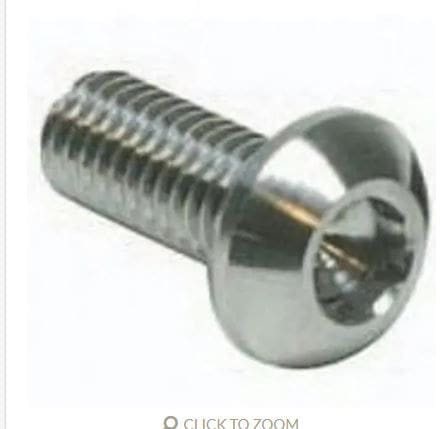
You will probably have to pull the wheel to do it. Cheap and easy solution.
If you end up wanting a standard rack, as I suggested above you can put a bolt like this one in backward:
You will probably have to pull the wheel to do it. Cheap and easy solution.
08-10-23, 06:01 PM
#22
Full Member
 08-10-23, 08:37 PM
#23
Disco Infiltrator
Join Date: May 2013
Location: Folsom CA
Posts: 13,446
Bikes: Stormchaser, Paramount, Tilt, Samba tandem
Mentioned: 72 Post(s)
Tagged: 0 Thread(s)
Quoted: 3126 Post(s)
Liked 2,105 Times
in
1,369 Posts
I think it's time for you to stop asking us, go to the hardware aisle and figure it out
__________________
Genesis 49:16-17
Genesis 49:16-17
08-18-23, 09:43 PM
#24
Senior Member

Join Date: Feb 2022
Location: GMT-5
Posts: 946
Mentioned: 1 Post(s)
Tagged: 0 Thread(s)
Quoted: 542 Post(s)
Liked 417 Times
in
275 Posts
I take it that you require a nut because these holes are not tapped?
Your situation doesn't get better if you were to reverse a bolt inserted from the cogs' side.
It is always a bad idea to have anything and I mean anything in-between the dropouts, even if there is clearance.
Get those untapped holes properly tapped either M5 or M6, and then use screws of exact length so that it flushes to the inside of the drops.
That bike rack has holes big enough for either screw.
08-20-23, 05:50 AM
#25
Junior Member
Thread Starter
Join Date: Sep 2022
Location: Delaware USA
Posts: 132
Bikes: '23 Specialized Roll 3.0 low entry, 'Lectric Lite folding bike, beater mountain bike
Mentioned: 4 Post(s)
Tagged: 0 Thread(s)
Quoted: 34 Post(s)
Liked 103 Times
in
43 Posts
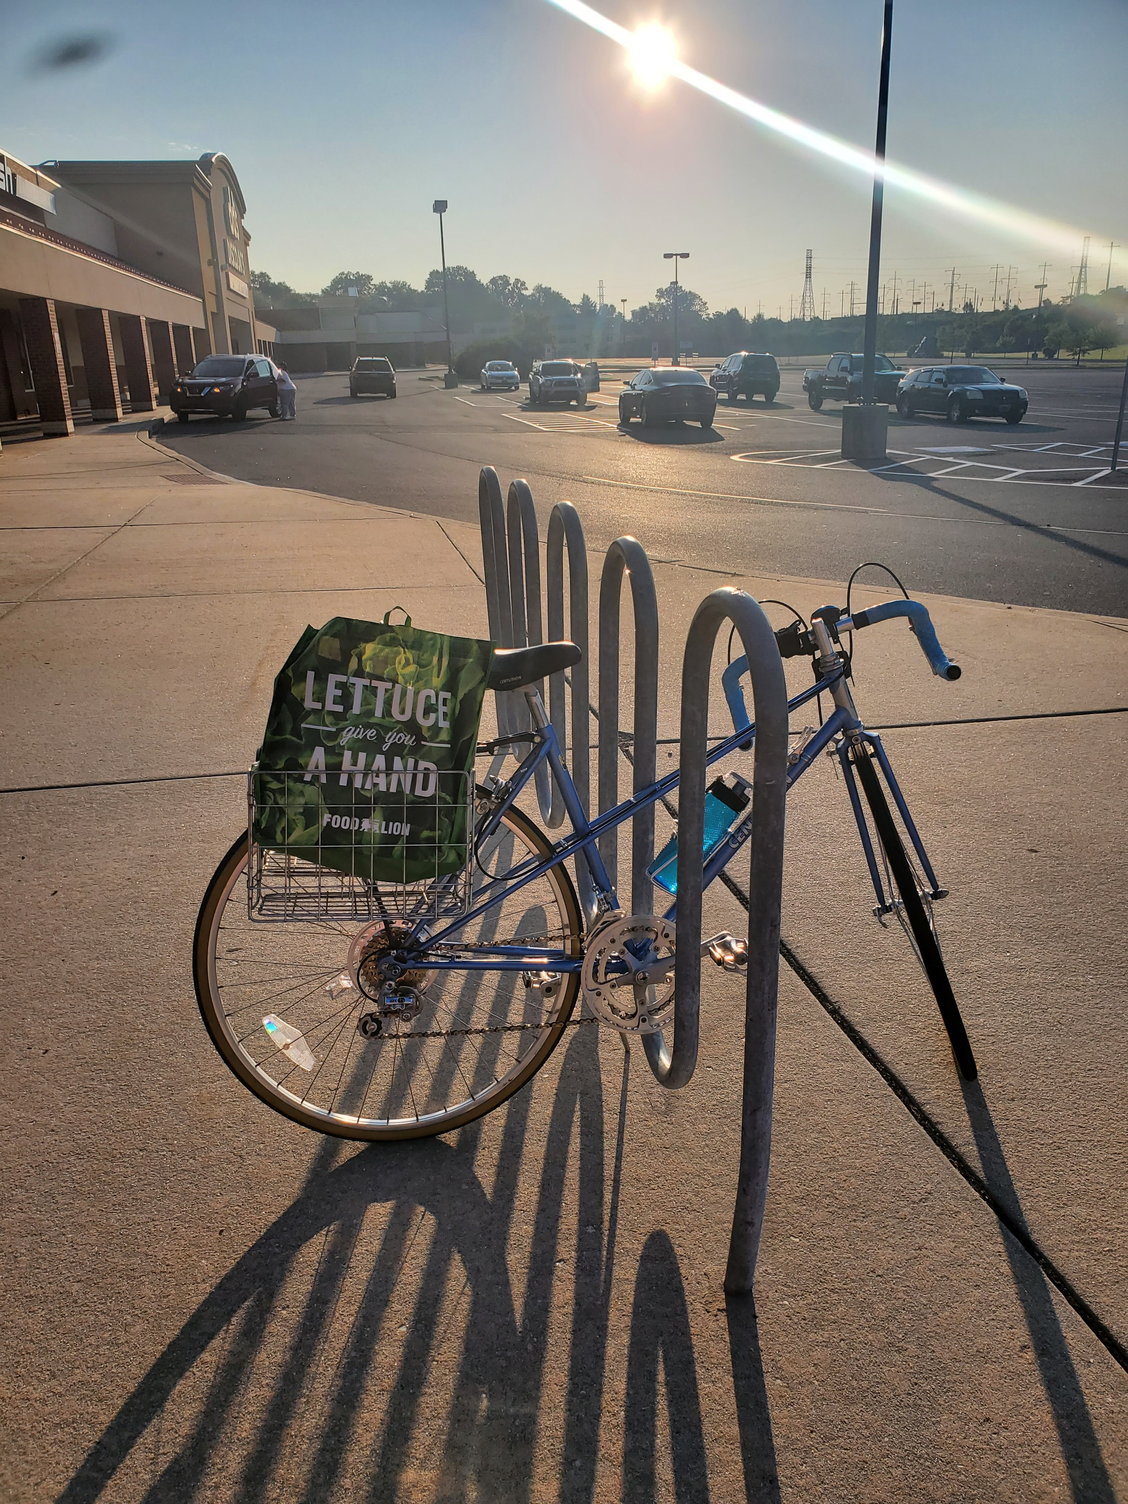
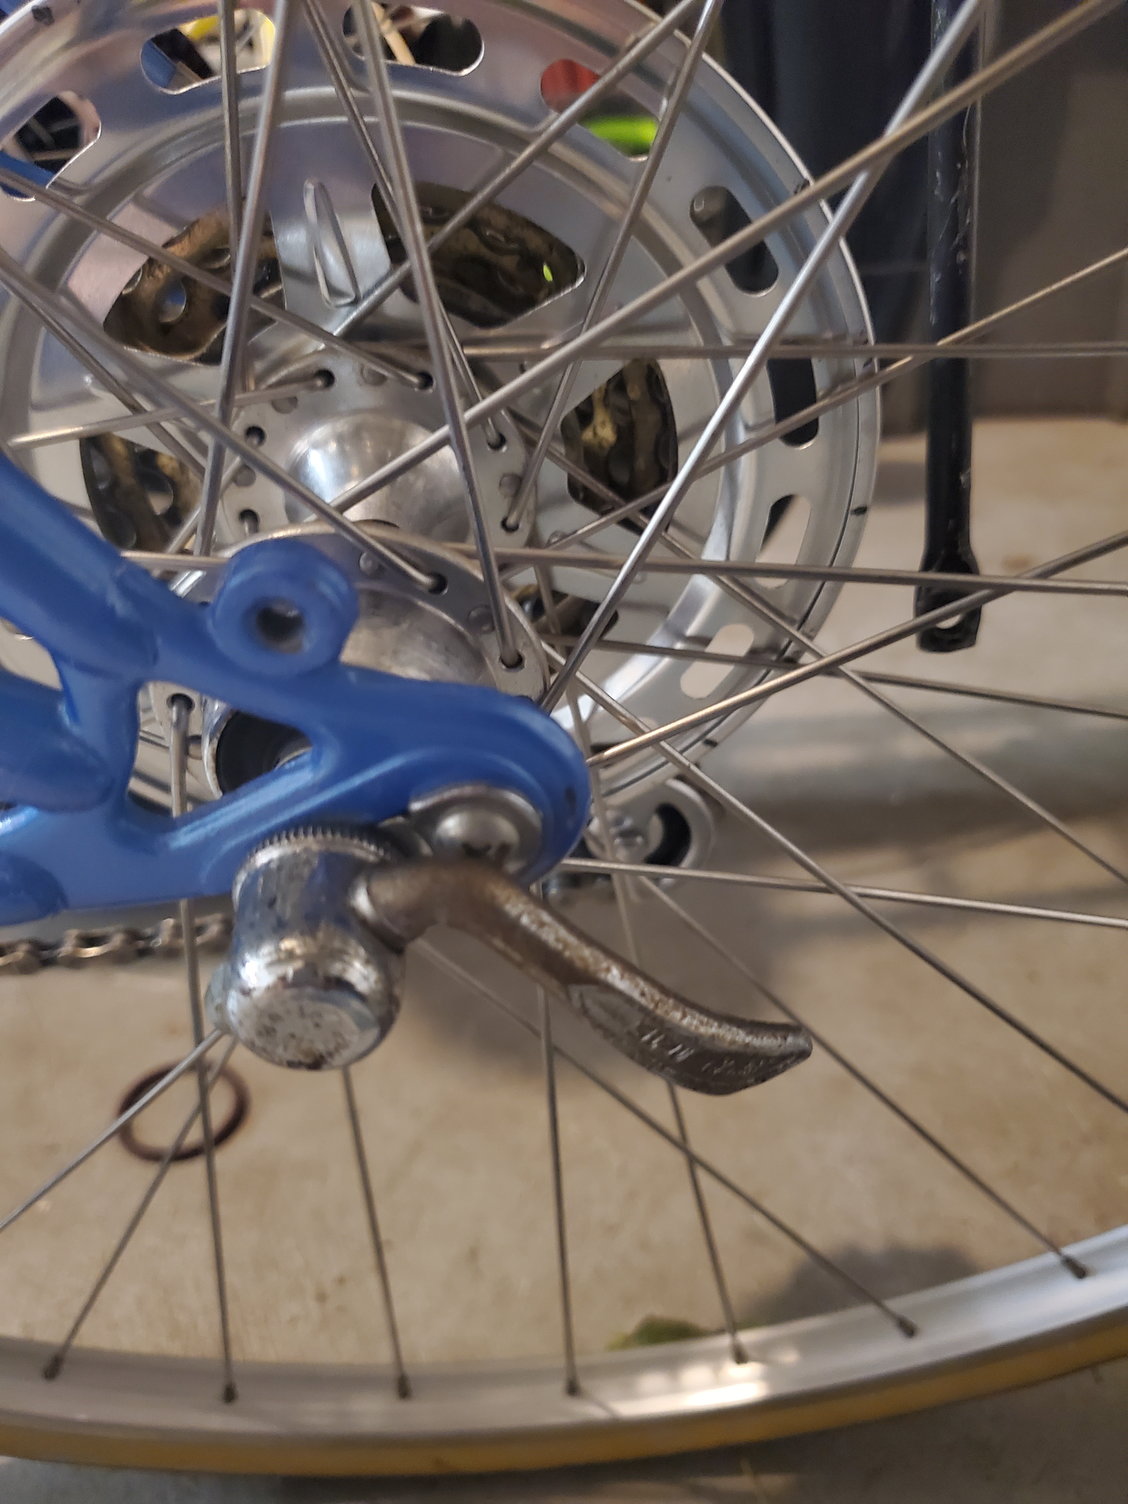
Sorry for the radio silence. Hubby did this for now and no issues after 15 or so miles.