


Decal Trick
 05-11-25 | 09:19 PM
#1
Thread Starter
Senior Member


Joined: Feb 2012
Posts: 19,344
Likes: 5,461
From: Rochester, NY
Bikes: Stewart S&S coupled sport tourer, Stewart Sunday light, Stewart Commuting, Stewart Touring, Co Motion Tandem, Stewart 3-Spd, Stewart Track, Fuji Finest, Mongoose Tomac ATB, GT Bravado ATB, JCP Folder, Stewart 650B ATB
Decal Trick
So yesterday I decaled the unicycle (it's a practice painting project) before I sanded for tomorrow's clear coats. The decals are SSSink made, DryAp (a rub on style). The unicycle fork blades are 3/4" diameter.
The first leg's decals was almost completely rubbed on and the paper backing moved... This has happened before with other decaling attempts and I expect to waste a decal for evert two I apply on the average. This specific situation was a bit more challenging as the length along the tube was a lot and the tube was smaller in diameter than the usual. Acetone dissolved the decal away and i got the second one right. Onto the other leg and the same thing happened again, the backing paper shifted before the decal was completely rubbed on. UGH! I really hate making the same mistake a second time.
The problem was holding the decal, still on the backing paper, held down tight onto the tube and maintain the decal's alignment while traveling along the backing paper's back side with your rubbing device (a plastic tire lever in my case). The rubbing and the keeping your fingers away and then reposition to rub hidden areas is when the movement or shifting happened for me. So how to hold the backing paper in place is the challenge.
I usually will rub down the centerline of the decal, along the tube's length, first then start traveling down one side of the length. Carefully wrapping the backing paper around the tube as the rubbing thingie presses another "strip" of decal down till all the bottom half is applied. At this point the decal has released form the backing paper on this lower half but not yet the top half. The backing paper will curl up and away from the tube as the decal is transferred. It is this curling up and off the tube of the backing paper that helps to allow it to shift about when moving to rubbing the other half.
My light bulb idea was to attach a strip of scotch tape to the backing paper lower edge. Just enough overlap so I could rub the decal fully just before starting to rub the tape's overlapped edge. I started to rub the decal onto the tube as before, doing the bottom half first. And just before the rubbing was all the way down the half I pressed the tape onto the tube and finished the bottom half's rubbing. I went to the top half and carefully rubbed the rest onto the tube with no shifting or movement. Way easier and far more solid feeling throughout the process.
Here's a couple of shots to this. Here the decal alignment marking tapes are in place, the backing paper center lines lined up and that trick of scotch tape is pressed onto the tube. You can see the rub marks on the backing paper surface.
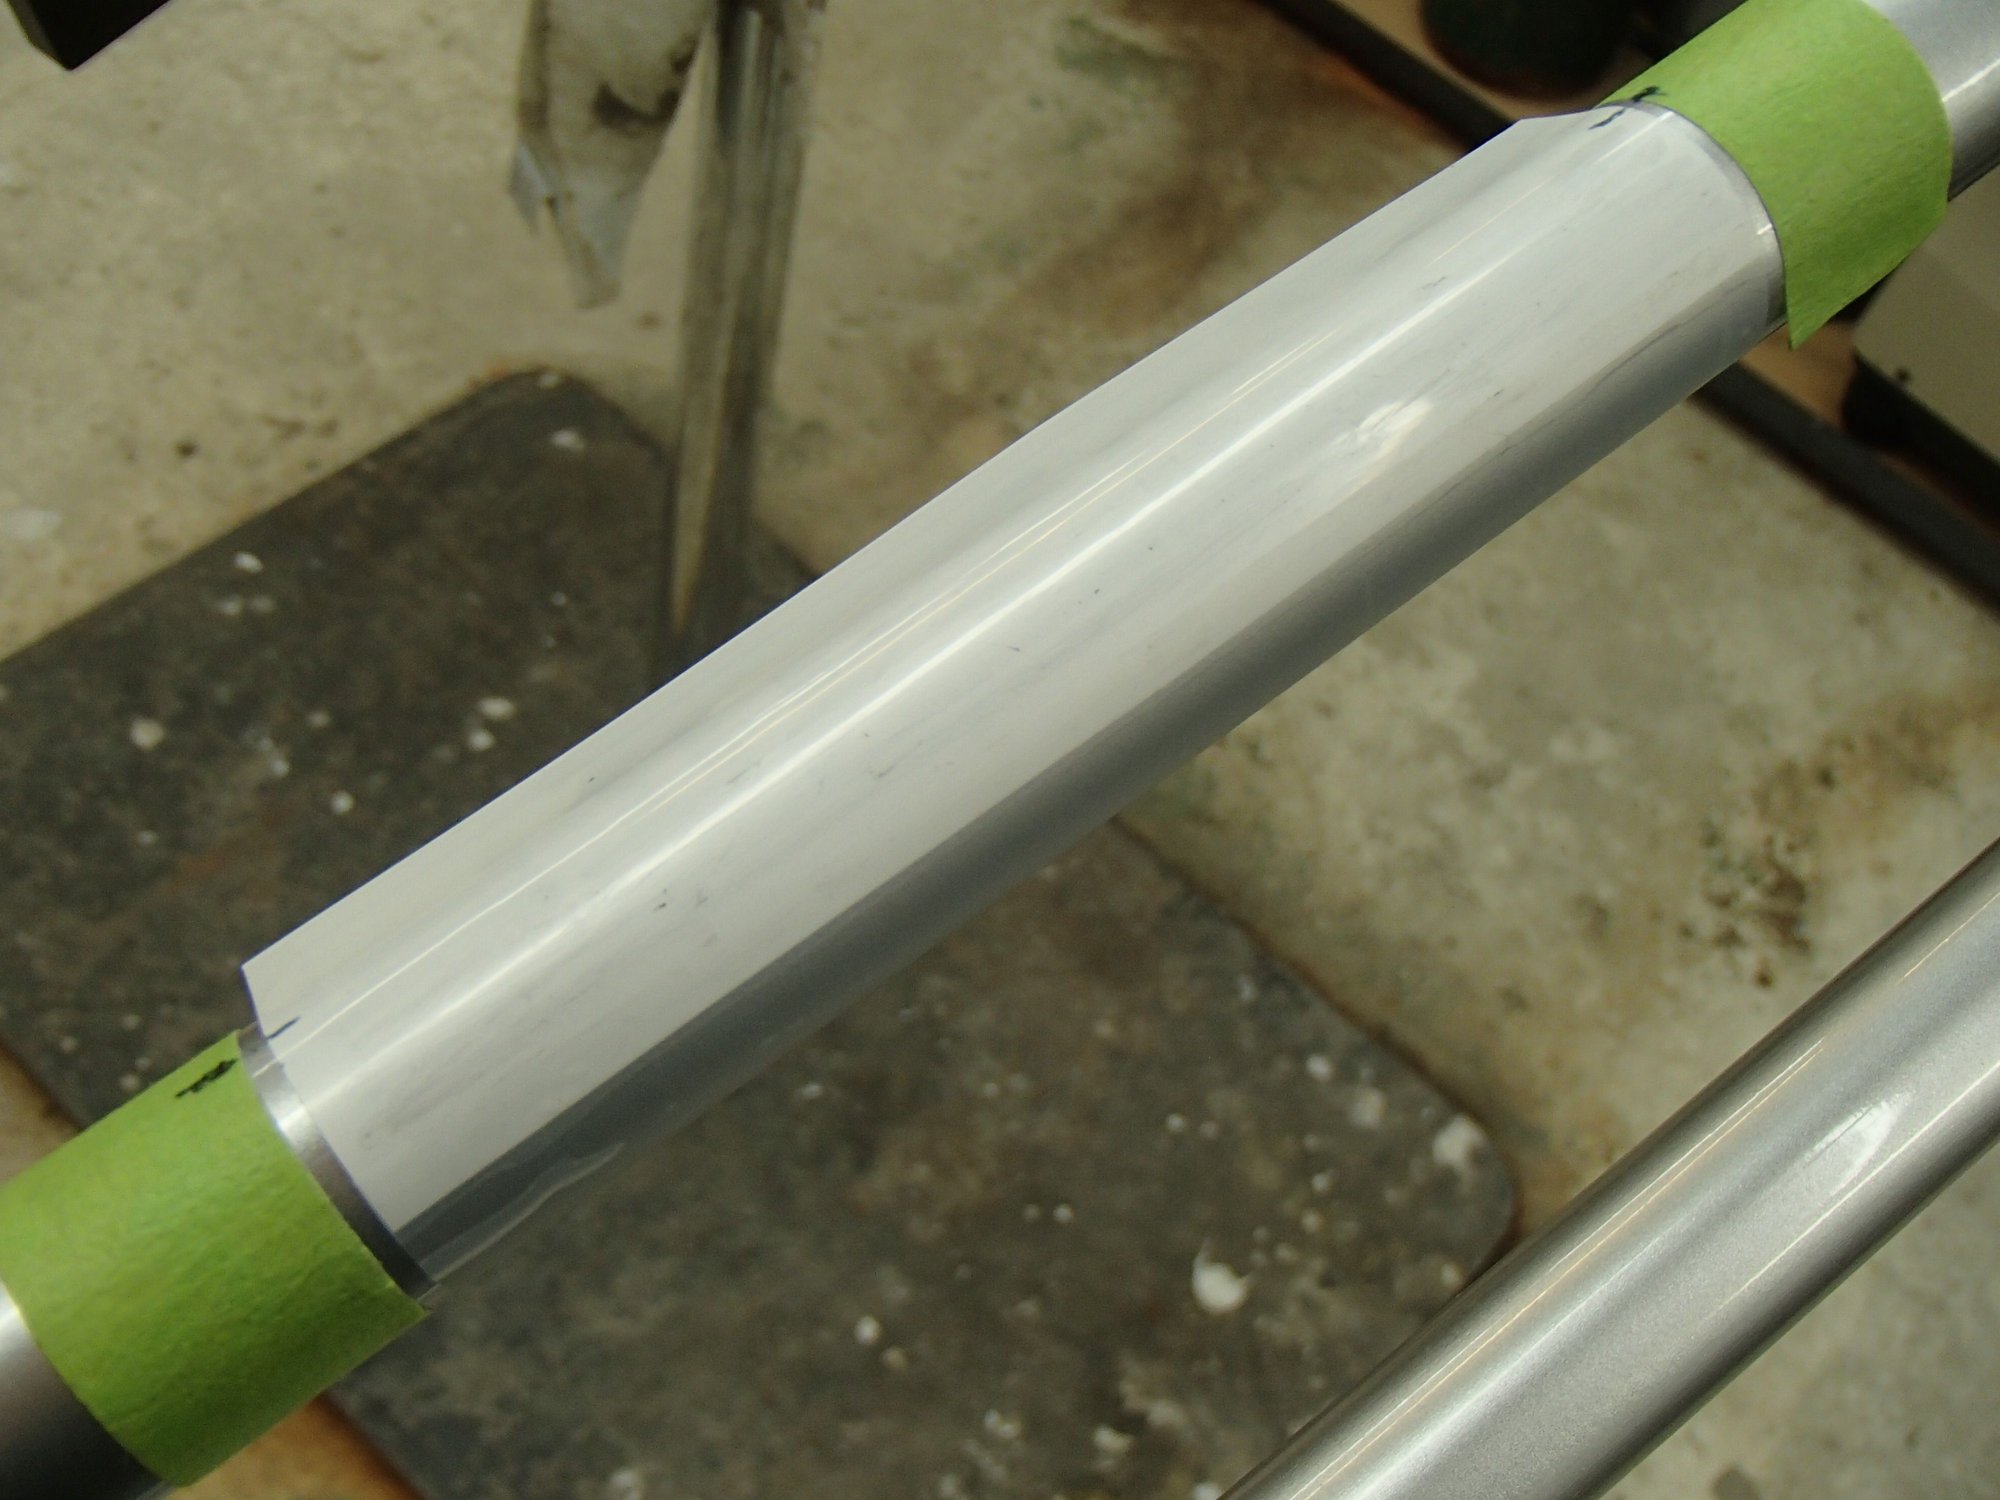
Second shot shows the backing paper pealed back fully with only the scotch tape holding it onto the frame. Both times the backing paper shifted it was just the boarder strip left to apply...

I will likely use this trick soon again. Andy
The first leg's decals was almost completely rubbed on and the paper backing moved... This has happened before with other decaling attempts and I expect to waste a decal for evert two I apply on the average. This specific situation was a bit more challenging as the length along the tube was a lot and the tube was smaller in diameter than the usual. Acetone dissolved the decal away and i got the second one right. Onto the other leg and the same thing happened again, the backing paper shifted before the decal was completely rubbed on. UGH! I really hate making the same mistake a second time.
The problem was holding the decal, still on the backing paper, held down tight onto the tube and maintain the decal's alignment while traveling along the backing paper's back side with your rubbing device (a plastic tire lever in my case). The rubbing and the keeping your fingers away and then reposition to rub hidden areas is when the movement or shifting happened for me. So how to hold the backing paper in place is the challenge.
I usually will rub down the centerline of the decal, along the tube's length, first then start traveling down one side of the length. Carefully wrapping the backing paper around the tube as the rubbing thingie presses another "strip" of decal down till all the bottom half is applied. At this point the decal has released form the backing paper on this lower half but not yet the top half. The backing paper will curl up and away from the tube as the decal is transferred. It is this curling up and off the tube of the backing paper that helps to allow it to shift about when moving to rubbing the other half.
My light bulb idea was to attach a strip of scotch tape to the backing paper lower edge. Just enough overlap so I could rub the decal fully just before starting to rub the tape's overlapped edge. I started to rub the decal onto the tube as before, doing the bottom half first. And just before the rubbing was all the way down the half I pressed the tape onto the tube and finished the bottom half's rubbing. I went to the top half and carefully rubbed the rest onto the tube with no shifting or movement. Way easier and far more solid feeling throughout the process.
Here's a couple of shots to this. Here the decal alignment marking tapes are in place, the backing paper center lines lined up and that trick of scotch tape is pressed onto the tube. You can see the rub marks on the backing paper surface.
Second shot shows the backing paper pealed back fully with only the scotch tape holding it onto the frame. Both times the backing paper shifted it was just the boarder strip left to apply...
I will likely use this trick soon again. Andy
__________________
AndrewRStewart
AndrewRStewart
 05-12-25 | 05:59 AM
#2
semi-retired framebuilder

Joined: Dec 2007
Posts: 145
Likes: 580
From: Halifax, Nova Scotia, Canada
Bikes: twenty-three at last count
My dry transfer decals are from SSSink too. Not sure if they are the same ones or not. But on mine, I peel away the decal from the opaque white backing so I am holding a clear thin film with the decal on it, which I then position and rub on. They do make several types of decals so check the instructions that came with yours - apologies if yours are a different type.
05-12-25 | 07:07 AM
#3
Thread Starter
Senior Member
Joined: Feb 2012
Posts: 19,344
Likes: 5,461
From: Rochester, NY
Bikes: Stewart S&S coupled sport tourer, Stewart Sunday light, Stewart Commuting, Stewart Touring, Co Motion Tandem, Stewart 3-Spd, Stewart Track, Fuji Finest, Mongoose Tomac ATB, GT Bravado ATB, JCP Folder, Stewart 650B ATB
Mark- Mine have the thick paper with a release surface that the decal is held onto that I have to rub. There is a glassine like protective "paper" that I remove first to expose the decal's sticky side. This glassine tissue is quite translucent and the backing I wish the decals were rubbed off of as it would make lining up the decals a lot easier. I'll take a shot of the decal and post it to show later. Andy
__________________
AndrewRStewart
AndrewRStewart


