Ishiwata Trek Fat Tire Project
#26
Senior Member
Join Date: Apr 2005
Location: Ann Arbor, MI
Posts: 16,880
Bikes: 1980 Masi, 1984 Mondonico, 1984 Trek 610, 1980 Woodrup Giro, 2005 Mondonico Futura Leggera ELOS, 1967 PX10E, 1971 Peugeot UO-8
Mentioned: 49 Post(s)
Tagged: 0 Thread(s)
Quoted: 1858 Post(s)
Liked 664 Times
in
506 Posts
More progress!
Drilled the front and rear brake bridges to allow recessed nutted brakes. Usual process, no problem with the right tools.
I have had sets of the TRP mid reach brakes in black, but never a pair in silver until today. dang. these are really elegant, nicely finished brakes. big fan!

Drilled the front and rear brake bridges to allow recessed nutted brakes. Usual process, no problem with the right tools.
I have had sets of the TRP mid reach brakes in black, but never a pair in silver until today. dang. these are really elegant, nicely finished brakes. big fan!

#27
Senior Member
Join Date: Apr 2005
Location: Ann Arbor, MI
Posts: 16,880
Bikes: 1980 Masi, 1984 Mondonico, 1984 Trek 610, 1980 Woodrup Giro, 2005 Mondonico Futura Leggera ELOS, 1967 PX10E, 1971 Peugeot UO-8
Mentioned: 49 Post(s)
Tagged: 0 Thread(s)
Quoted: 1858 Post(s)
Liked 664 Times
in
506 Posts
More progress!
Drilled the front and rear brake bridges to allow recessed nutted brakes. Usual process, no problem with the right tools.
I have had sets of the TRP mid reach brakes in black, but never a pair in silver until today. dang. these are really elegant, nicely finished brakes. big fan!

Drilled the front and rear brake bridges to allow recessed nutted brakes. Usual process, no problem with the right tools.
I have had sets of the TRP mid reach brakes in black, but never a pair in silver until today. dang. these are really elegant, nicely finished brakes. big fan!

#28
Lost
Thread Starter
Drilled from the seat tube side. I used a right angle or "close quarters" drill and I cut the drill bit down to be very short, about an inch sticking out of the drill chuck. Just enough clearance to get the job done.
__________________
https://less-than-epic.blogspot.com/
https://less-than-epic.blogspot.com/
#29
Stop reading my posts!
Join Date: Sep 2004
Posts: 12,584
Mentioned: 90 Post(s)
Tagged: 0 Thread(s)
Quoted: 1444 Post(s)
Liked 1,064 Times
in
788 Posts
Isnít it an even cheaper solution to cut a pair of brake cable outer housings (or just one if you only really need to guide the FD?), hold it under the BB shell, thread in the FD or RD cable, and attach the cable and adjust it? Youíll still need a bottom cable housing stop at the end of the DS chainstay. But if you kept scraps of outer brake cable and bought the lined stuff, like Jagwire, that part of the project should be essentially free
Anybody care to give firsthand reports if you've done just that?
I would be a little more confident that you could get away with the "unsecured" housing for the FD cable IF you used a FD with built-in housing stop, such as the old Sun Tour the OP has shown. At least that's going to anchor the housing a little bit on one end.
#30
Senior Member
Join Date: Jan 2004
Location: Madison, WI USA
Posts: 6,157
Mentioned: 50 Post(s)
Tagged: 0 Thread(s)
Quoted: 2364 Post(s)
Liked 1,751 Times
in
1,193 Posts
I'm still confused whether there's even an issue. As said in post # 7, the original FD is bottom-pull, using the existing DT-mounted housing stop (it's actually a stop for the FD and a guide for the RD), and a housing stop on the FD itself. Why will that not work? You seem to conflate bottom-pull with under-BB routing, and the two have nothing to do with one another. The entry- and mid-level Treks up to about '82 had bottom-pull above-the-BB cabling, as did many others of that period.
#31
Lost
Thread Starter
drill baby drill!
2nd bottle cage successfully installed! A little unnerving to take a centering punch and drill to a bike frame, but progress and all.


2nd bottle cage successfully installed! A little unnerving to take a centering punch and drill to a bike frame, but progress and all.


__________________
https://less-than-epic.blogspot.com/
https://less-than-epic.blogspot.com/
Likes For AngryScientist:
#32
Lost
Thread Starter
I'm still confused whether there's even an issue. As said in post # 7, the original FD is bottom-pull, using the existing DT-mounted housing stop (it's actually a stop for the FD and a guide for the RD), and a housing stop on the FD itself. Why will that not work? You seem to conflate bottom-pull with under-BB routing, and the two have nothing to do with one another. The entry- and mid-level Treks up to about '82 had bottom-pull above-the-BB cabling, as did many others of that period.
__________________
https://less-than-epic.blogspot.com/
https://less-than-epic.blogspot.com/
#33
Lost
Thread Starter
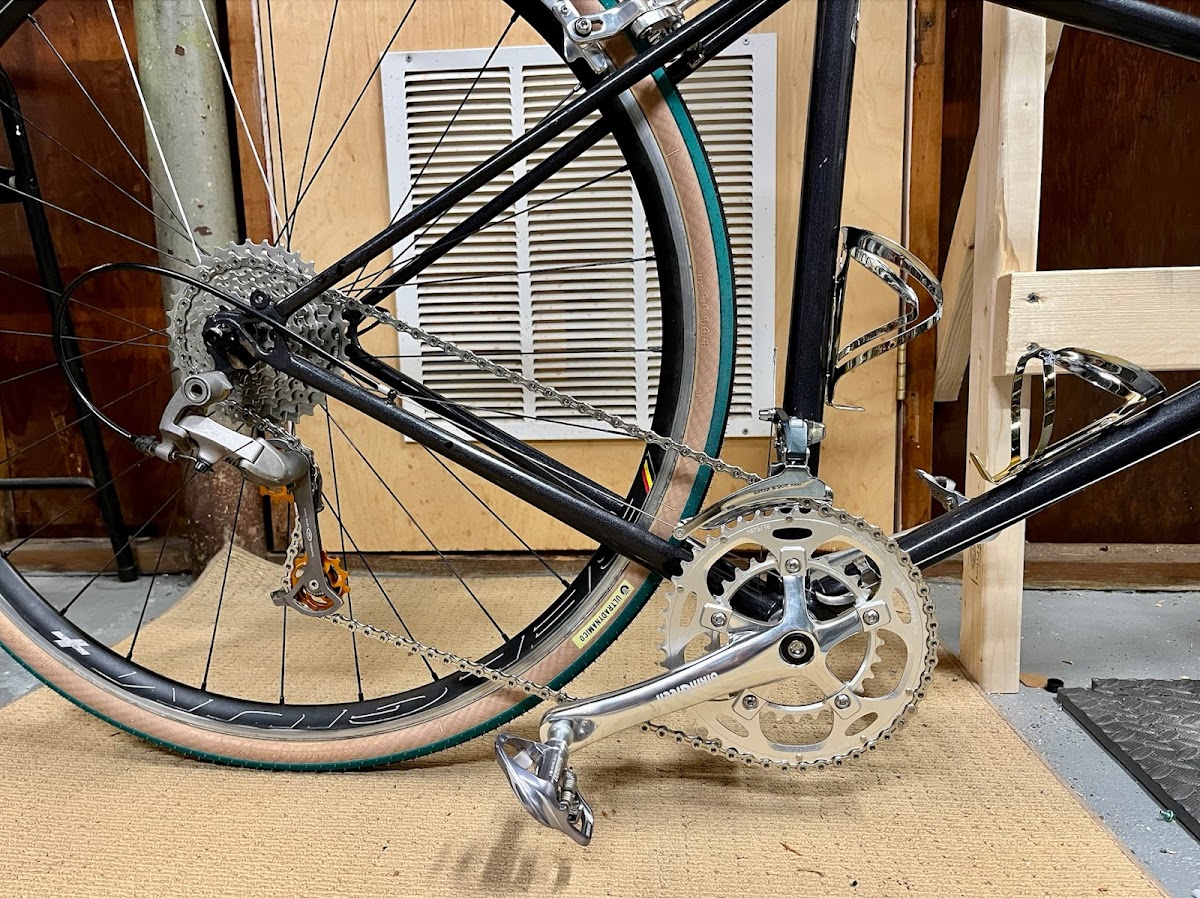
The shifty bits are sorted!
>Big barrel DT shifters
>XTR RD loaded with upsized Hope jockey wheels
>Suntour FD
This brings the tally of holes drilled in the frame up to 6
1+2) ST bottle cage mounts
3) Fork crown
4) Rear brake bridge
5) Drilled and tapped hole for under BB cable guide
6) Drain hole for BB
Next up: Brake levers and cable routing once parts arrive.
Getting close to the road!

__________________
https://less-than-epic.blogspot.com/
https://less-than-epic.blogspot.com/
#34
Lost
Thread Starter
And this one is done. Came out pretty well I would have to say. Just under 20# complete.


__________________
https://less-than-epic.blogspot.com/
https://less-than-epic.blogspot.com/
Likes For AngryScientist:


