


Applying decals
 03-28-20 | 06:24 AM
#1
Thread Starter
Senior Member


Joined: May 2008
Posts: 10,106
Likes: 2,757
From: Fredericksburg, Va
Bikes: ? Proteous, '65 Frejus TDF, '73 Bottecchia Giro d'Italia, '83 Colnago Superissimo, '84 Trek 610, '84 Trek 760, '88 Pinarello Veneto, '88 De Rosa Pro, '89 Pinarello Montello, 'Litespeed Catalyst'94 Burley Duet, 97 Specialized RockHopper, 2010 Langster
Applying decals
When I was youg, I was into car models, AMT 3 in 1. Occasionally, I would apply the water transfers, which were easy to do with simple slide on after making them wet. Well that was like 30+ years ago., Today I am faced with applying vinyl transfers and at a loss how to do it easily.
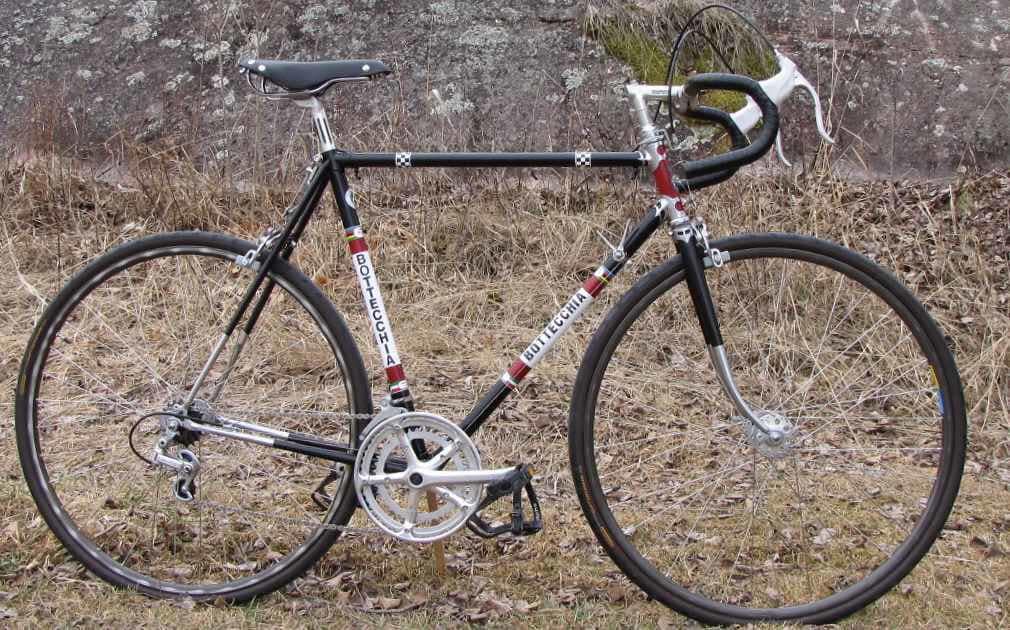
The issues is the curve of the tubes and how to temporarily anchor the transfer before applying. The transfers in question are large panels for the Bottecchia seat and down tube. I have a good idea where they need to go but not how to get them there. The others are small enough that I believe I can transfer them easily. I think they should go on last after placing the large panels for desired spacing. I have the directions that include using masking tape as an anchor but no detail beyond a picture and then removing the backing Do I trim the vinyl to the edge all the way around so I can anchor and easily remove the backing? Do I start by anchoring the long edge, which would be on the back side of the tube?
So what is your process?
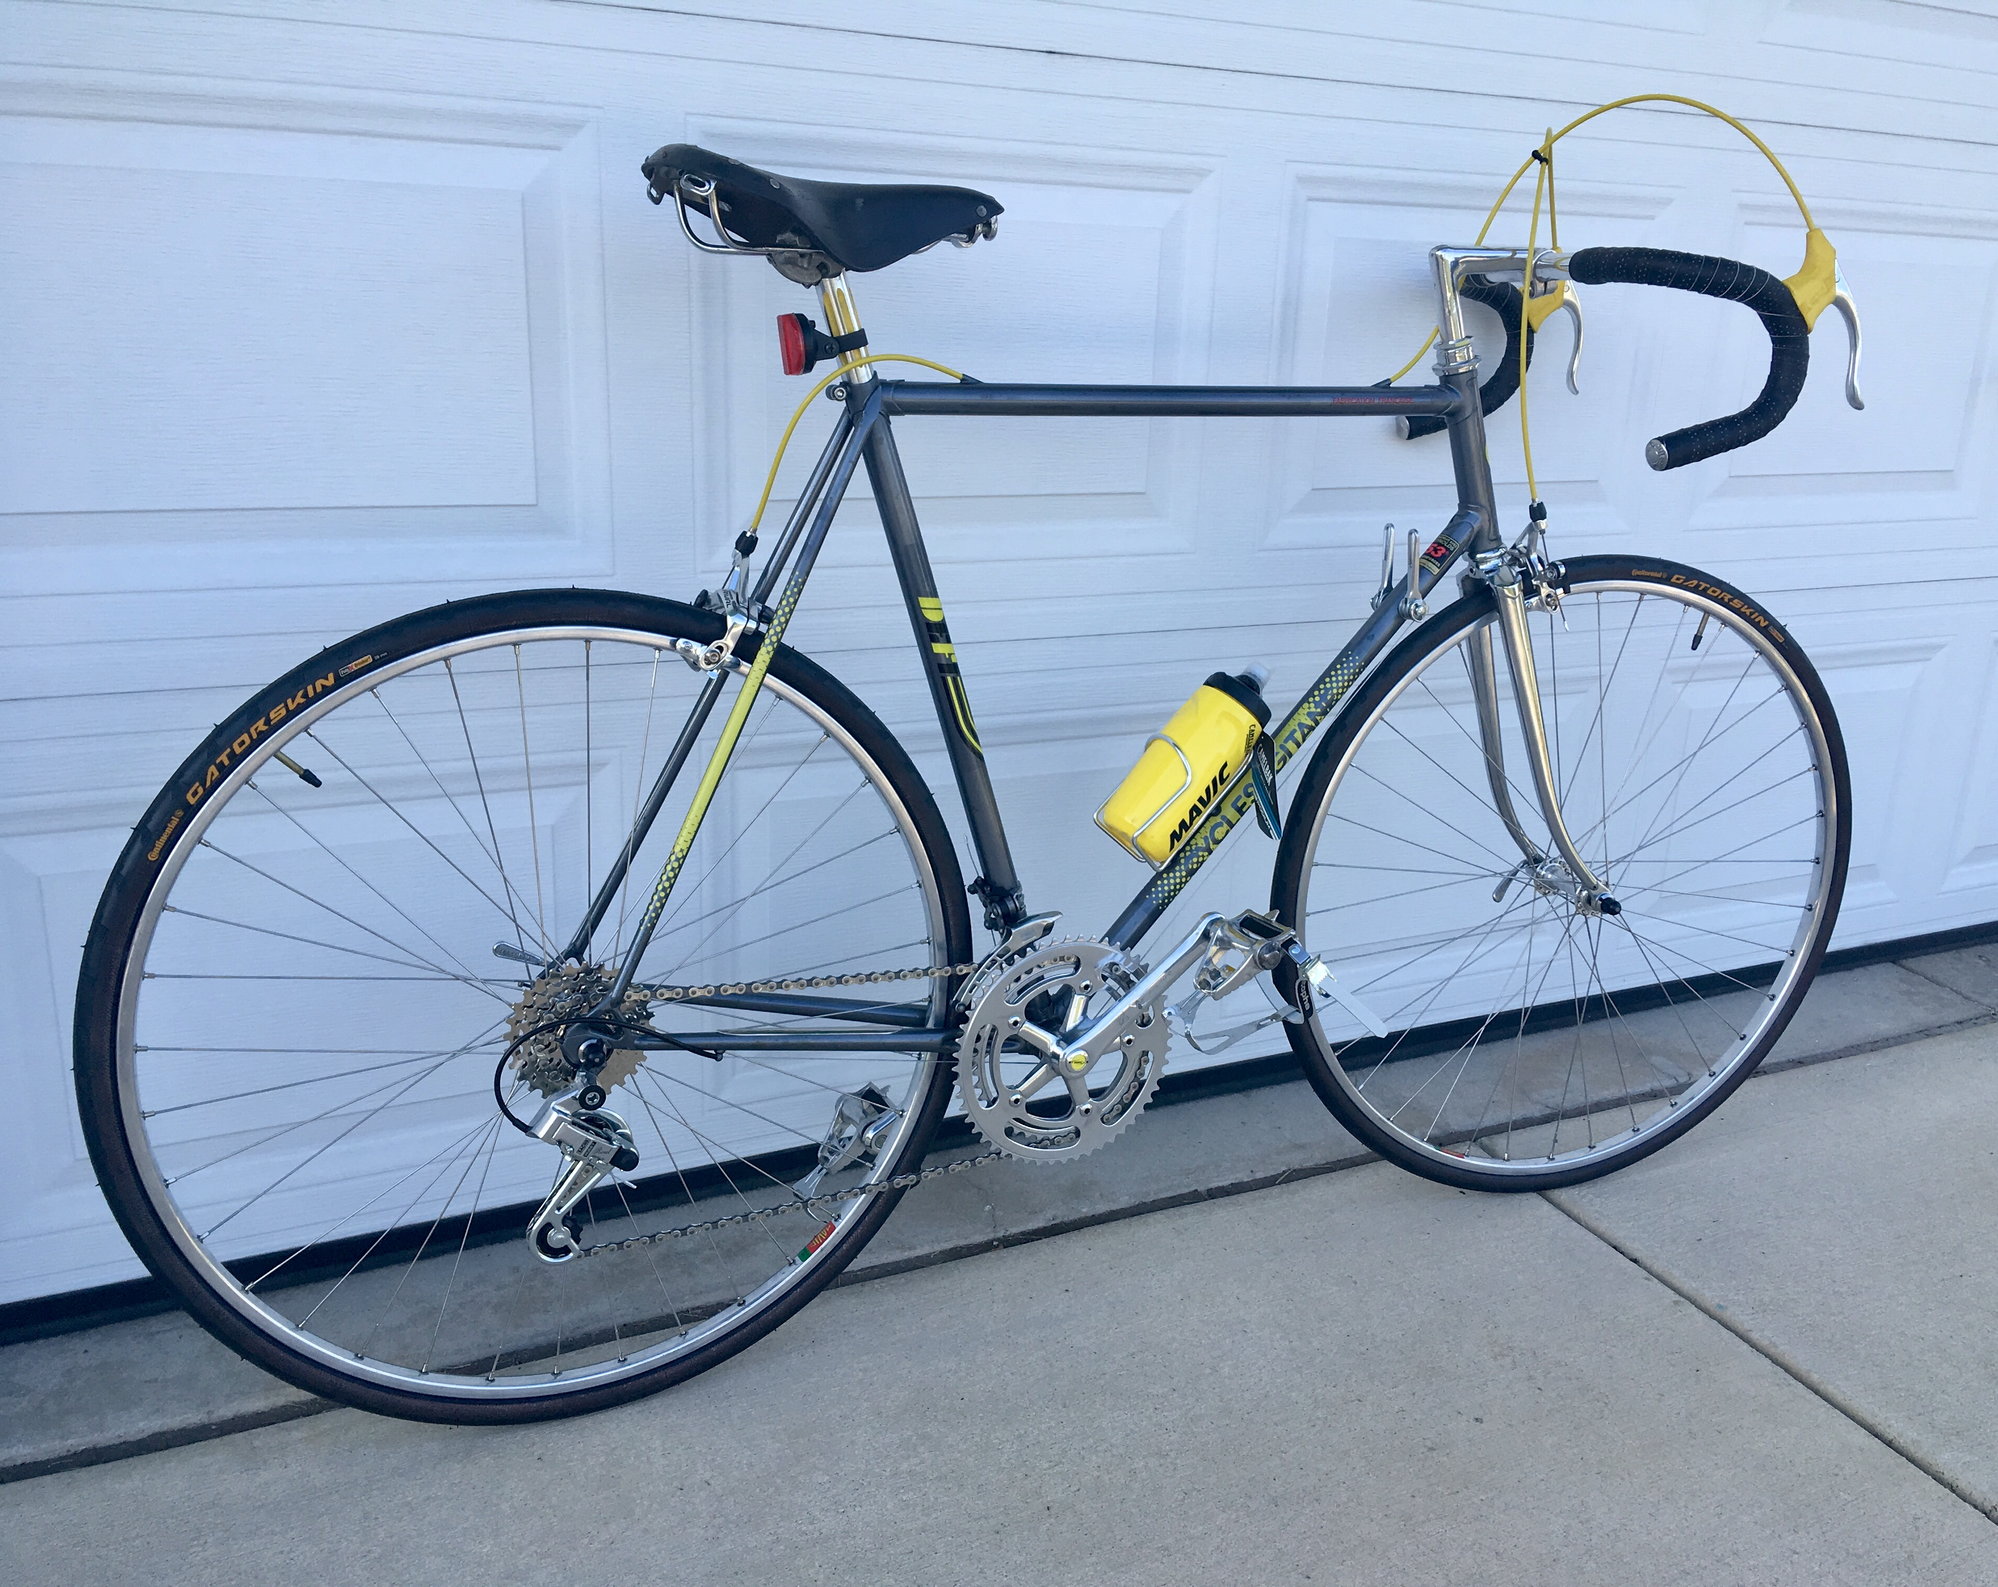
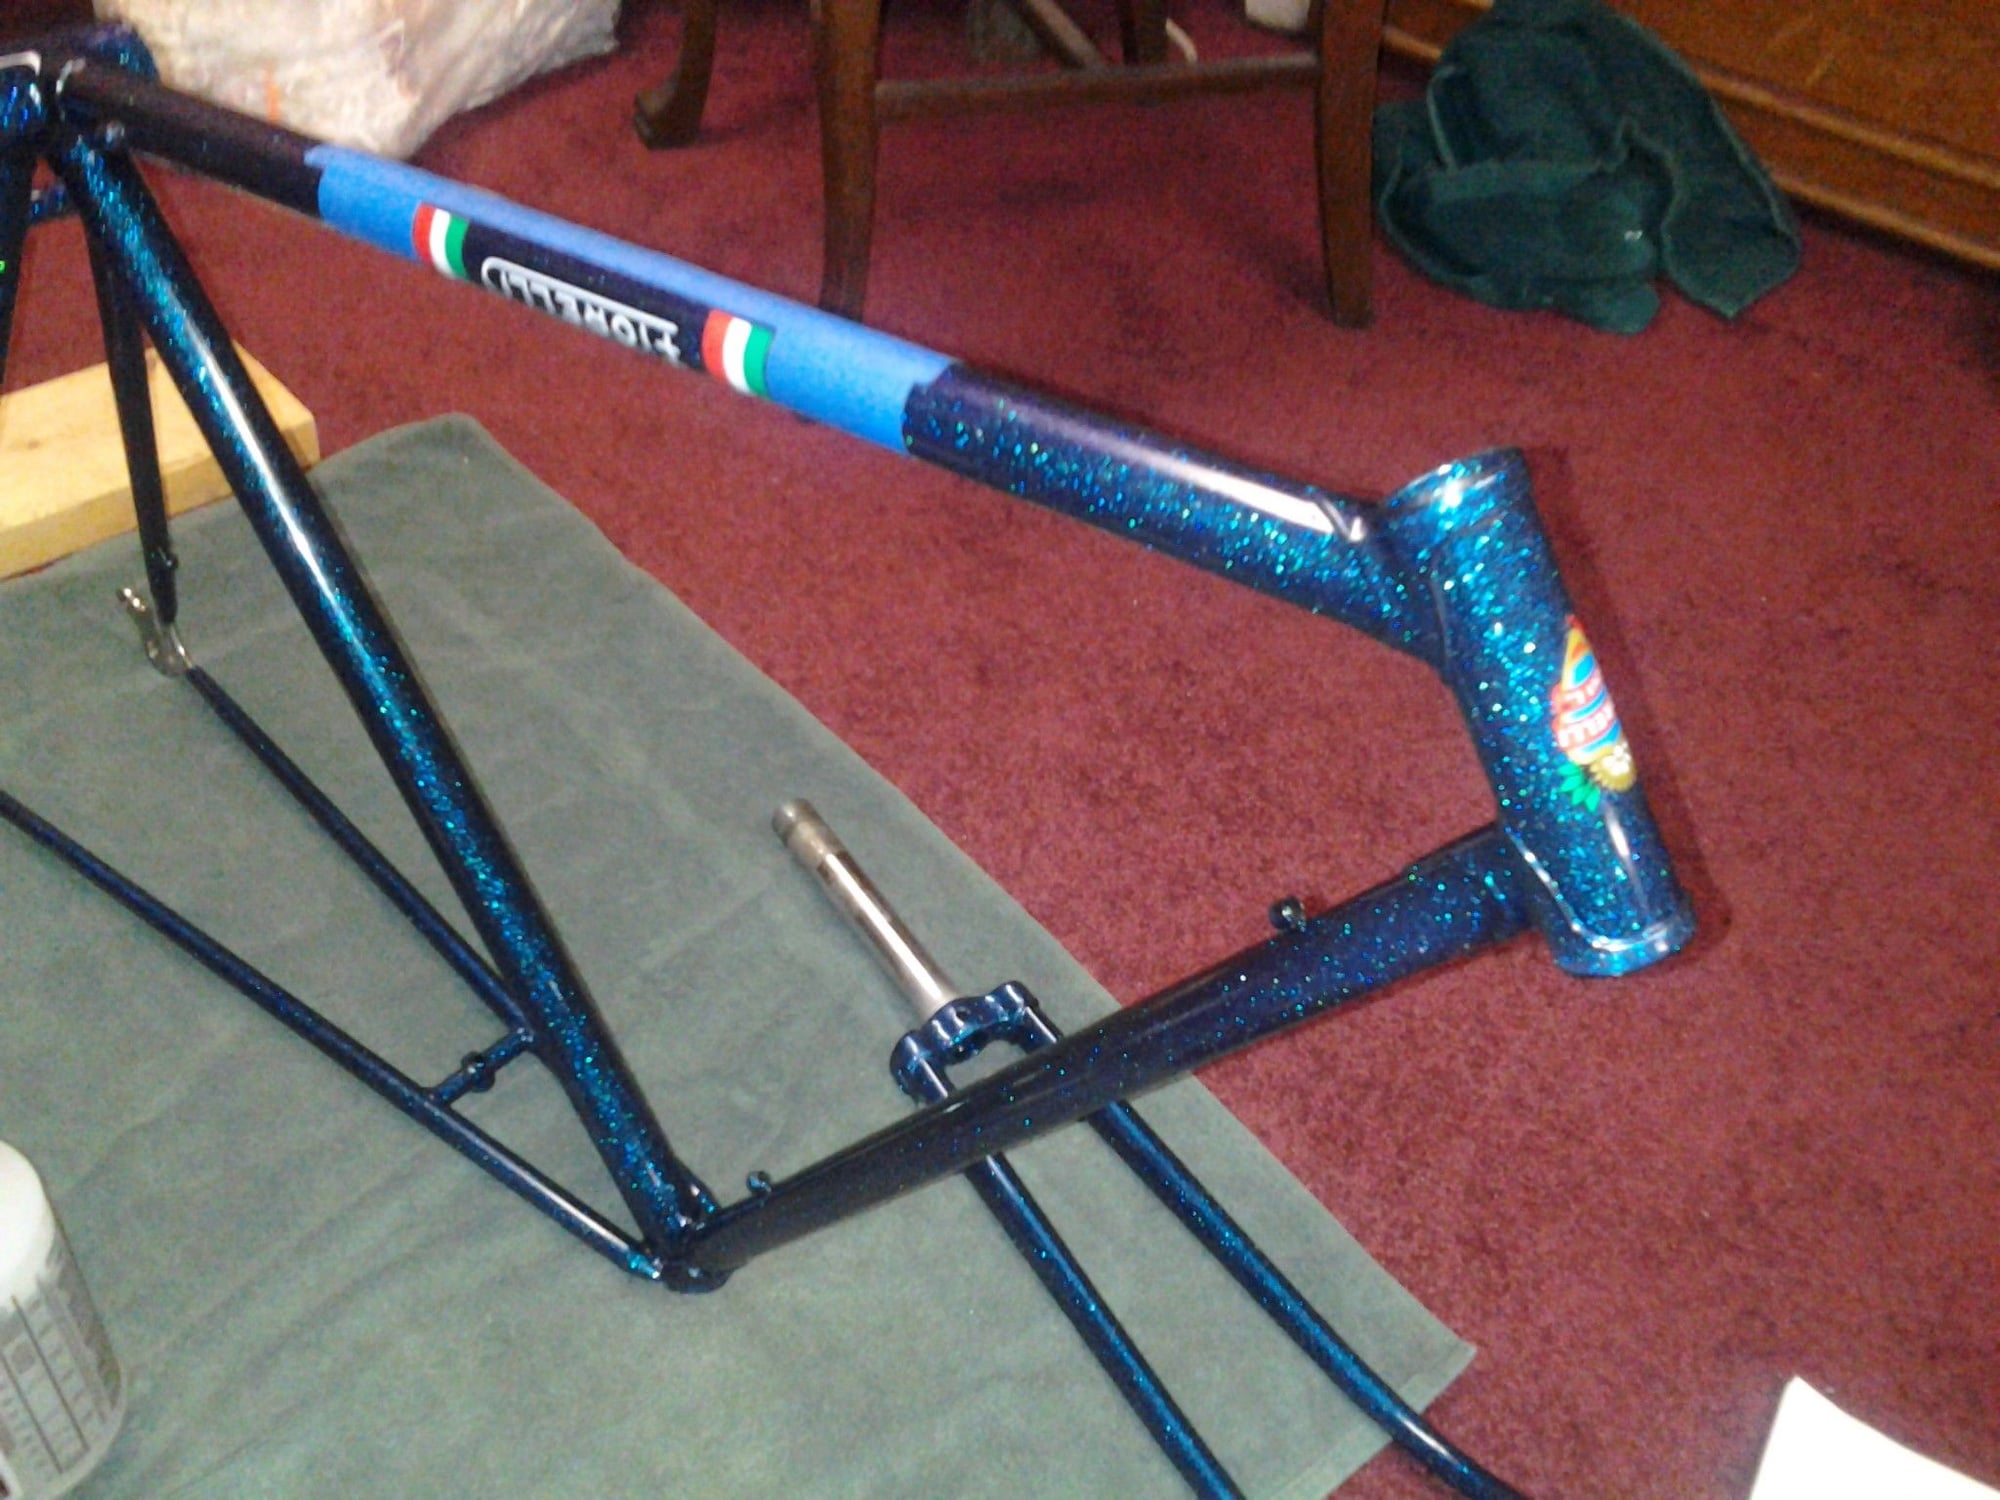
Here is the frame in question
 WP_20160322_007, on Flickr
 P1030103, on Flickr
The issues is the curve of the tubes and how to temporarily anchor the transfer before applying. The transfers in question are large panels for the Bottecchia seat and down tube. I have a good idea where they need to go but not how to get them there. The others are small enough that I believe I can transfer them easily. I think they should go on last after placing the large panels for desired spacing. I have the directions that include using masking tape as an anchor but no detail beyond a picture and then removing the backing Do I trim the vinyl to the edge all the way around so I can anchor and easily remove the backing? Do I start by anchoring the long edge, which would be on the back side of the tube?
So what is your process?
Here is the frame in question
WP_20160322_007, on FlickrP1030103, on Flickr
__________________
Bikes don't stand alone. They are two tired.
Bikes don't stand alone. They are two tired.
Last edited by SJX426; 03-28-20 at 06:46 AM.
 03-28-20 | 08:54 AM
#2
Senior Member
Joined: Nov 2010
Posts: 1,229
Likes: 287
From: Magnolia State, 100� with 110% humidity
Bikes: American, Italian, and Japanese.. in no particular order.
I�m no expert but if it were me, I would mock the decals in place with a couple of small pieces of painters tape. I would then apply a long strip of painters tape to create a reference line to butt the decal�s vertical edge to. Once the decal application is underway, the reference tape can be removed and the decal application can be completed. You may want to research the use of water mist to facilitate minor alignment maneuvering.
Last edited by tyler_fred; 03-28-20 at 08:58 AM.
03-28-20 | 09:25 AM
#3
framebuilder
Joined: Dec 2009
Posts: 1,788
Likes: 2,707
From: Niles, Michigan
I"m a bit lazy to write all the steps necessary to get decals on straight where they belong. It's a lot of detailed writing and editing to make sure the entire process is clearly understood. Call me, I'd rather tell you over the phone. PM or email me if you don't have my #. The process starts with the right tools. I use a section of 3/4" aluminum angle I bought at the hardware store. This is a guide when placed along a tube for making sure a decal is straight without climbing up or descending. The other most valuable tool to me is a half section of tube with a squared end. This is for getting decals straight across from each other and/or not being twisted. For example checking that a seat or head tube decal is not crooked. Since I am a frame builder/painter I have just the right size tubes in both wall thickness (0.058" is best) and diameters. For example if your seat tube is 1 1/8" in � than a 1 1/4" OD tube with a wall thickness of 0.058" split longways in half will fit perfectly over your seat tube. Before I cut the tube in half and file off any sharp edges, I square the end of a whole tube on my belt sander or use my lathe. Tubing with thinner walls can work okay too.
The 3rd and 4th tool required is masking tape and a pencil. The angle and half tube can help you place your masking tape in just exactly the right position before marking on it to show where the decals need to be placed next to it. You will also probably need to make tiny marks on your decals (before taking off the backing paper) to indicate centers or some other reference in relation to the marks you put on your masking tape now on your frame. Once you have those tools in your position, call me and I'll give you much more detailed instructions. Or maybe someone will post that has more patience writing than me .
.
The 3rd and 4th tool required is masking tape and a pencil. The angle and half tube can help you place your masking tape in just exactly the right position before marking on it to show where the decals need to be placed next to it. You will also probably need to make tiny marks on your decals (before taking off the backing paper) to indicate centers or some other reference in relation to the marks you put on your masking tape now on your frame. Once you have those tools in your position, call me and I'll give you much more detailed instructions. Or maybe someone will post that has more patience writing than me
.
03-28-20 | 09:32 AM
#4

Freshman Member


Joined: Mar 2014
Posts: 5,867
Likes: 4,154
From: City of Angels
Bikes: A few too many
SJX426,
On the vertical ones on the down tube...always the most difficult to do.
1. First measure the length of the decal
2. Cut the decal from the sheet leaving the paper on...leave enough space at the top and bottom so that you can handle the decal without leaving fingerprints when later positioning it.
3. Place the decal with paper backing on the tube and mark a centerline on both the decal and the tube, you can use a dot no need to draw a line....I use a wax pencil, again you only need a small mark to center the decal on the tube.
4. Carefully peel the decal from top to bottom (the extra space left on the edges will facilitate the placement)
5. Start at the top by lining up the centerline dots....position the decal and eye up with the bottom line and you are good to go.
Do a dry run with the paper left on in order to get the feel of it, the directions make it seem more difficult than it is.
Good Luck, Ben
Looks like you have another way to do it posted while I was typing...see which you prefer, not that difficult it will work out
03-28-20 | 10:01 AM
#5
Senior Member

Joined: Oct 2018
Posts: 1,042
Likes: 1,301
From: Whittier
Bikes: 1973 Colnago Super, Litespeed Classic , Pinarello Gavia TSX,Eddy Merckx Corsa Extra,Eddy Merckx EMX-5 , Eddy Merckx AXM , Vitus 979 KAS. Diamant SLX,60's Meteor , Giordana Gravel Bike mod
Ive done several before.. The most important thing,,Be patient.
03-28-20 | 10:05 AM
#6
Thread Starter
Senior Member
Joined: May 2008
Posts: 10,106
Likes: 2,757
From: Fredericksburg, Va
Bikes: ? Proteous, '65 Frejus TDF, '73 Bottecchia Giro d'Italia, '83 Colnago Superissimo, '84 Trek 610, '84 Trek 760, '88 Pinarello Veneto, '88 De Rosa Pro, '89 Pinarello Montello, 'Litespeed Catalyst'94 Burley Duet, 97 Specialized RockHopper, 2010 Langster
Doug Fattic xiaoman1 Thank you both for responding. Looks like the approach is the same just different "tools". I am thinking that the long edge needs to be applied then wrap the rest around the tool. Two risks come to mind, the "twist" and centering of the decal at the center both in length and width. I get the half tube tool. Good overall explanation, Doug Fattic .
The vinyl is already cut without cutting the backing. So I assume that if I am starting along the length to apply, the extra space would be along the top and bottom.
I cant see trying to place the vinyl any other way, unless it tis to mount it along the center marks of the middle and hope to apply the rest without wrinkles, or is that where the extra space is?
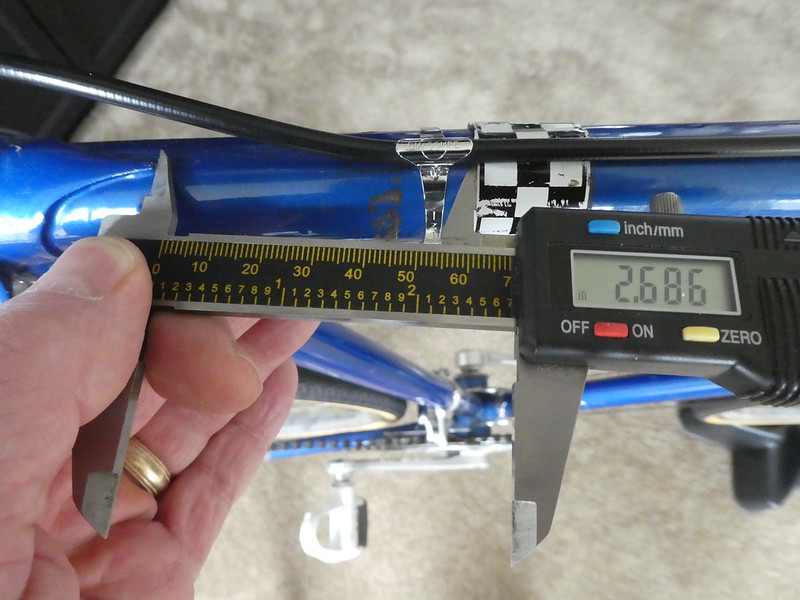
The instructions do say to use a soap water solution prior to application. I thought I would level the bike first along the top tube then use the level to mark where the DT decal starts in alignment with the ST decal. Most of the pictures of this bike with decals shows the back side of the decal about even with the brake bridge. the front of the decal would then be slightly higher as it wraps around the tube. the Carnlelli is about half way between the TT and the ST decal edge. The Olympic rings are still on the bike but mostly gone.
The vinyl is already cut without cutting the backing. So I assume that if I am starting along the length to apply, the extra space would be along the top and bottom.
I cant see trying to place the vinyl any other way, unless it tis to mount it along the center marks of the middle and hope to apply the rest without wrinkles, or is that where the extra space is?
The instructions do say to use a soap water solution prior to application. I thought I would level the bike first along the top tube then use the level to mark where the DT decal starts in alignment with the ST decal. Most of the pictures of this bike with decals shows the back side of the decal about even with the brake bridge. the front of the decal would then be slightly higher as it wraps around the tube. the Carnlelli is about half way between the TT and the ST decal edge. The Olympic rings are still on the bike but mostly gone.
__________________
Bikes don't stand alone. They are two tired.
Bikes don't stand alone. They are two tired.
03-28-20 | 10:07 AM
#7
Senior Member
Joined: Dec 2015
Posts: 1,952
Likes: 1,239
From: Menomonee Falls, WI
Bikes: 1984 Schwinn Supersport, 1988 Trek 400T, 1977 Trek TX900, 1982 Bianchi Champione del Mondo, 1978 Raleigh Supercourse, 1986 Trek 400 Elance, 1991 Waterford PDG OS Paramount, 1971 Schwinn Sports Tourer, 1985 Trek 670
Use the wet method, just like you did with car models years ago. VeloCals makes some premixed application fluid that works quite well on vinyl stickers. I’ve also made up my own, using 3Ms guide for wet method application. Doing it this way is similar to applying water slide decals, except you peel off the backing, then liberally coat the decal with the wetting fluid, also liberally coat the surface you are applying it to, this allows you to move the decal around till you get it just right. Then pat it dry with a towel to remove the moisture. This method worked really well on a Gitane Defi I restored for a friend, those decals were huge, no way you could have just stuck those on, and got it right!
Tim
Tim
03-28-20 | 10:36 AM
#8
Thread Starter
Senior Member
Joined: May 2008
Posts: 10,106
Likes: 2,757
From: Fredericksburg, Va
Bikes: ? Proteous, '65 Frejus TDF, '73 Bottecchia Giro d'Italia, '83 Colnago Superissimo, '84 Trek 610, '84 Trek 760, '88 Pinarello Veneto, '88 De Rosa Pro, '89 Pinarello Montello, 'Litespeed Catalyst'94 Burley Duet, 97 Specialized RockHopper, 2010 Langster
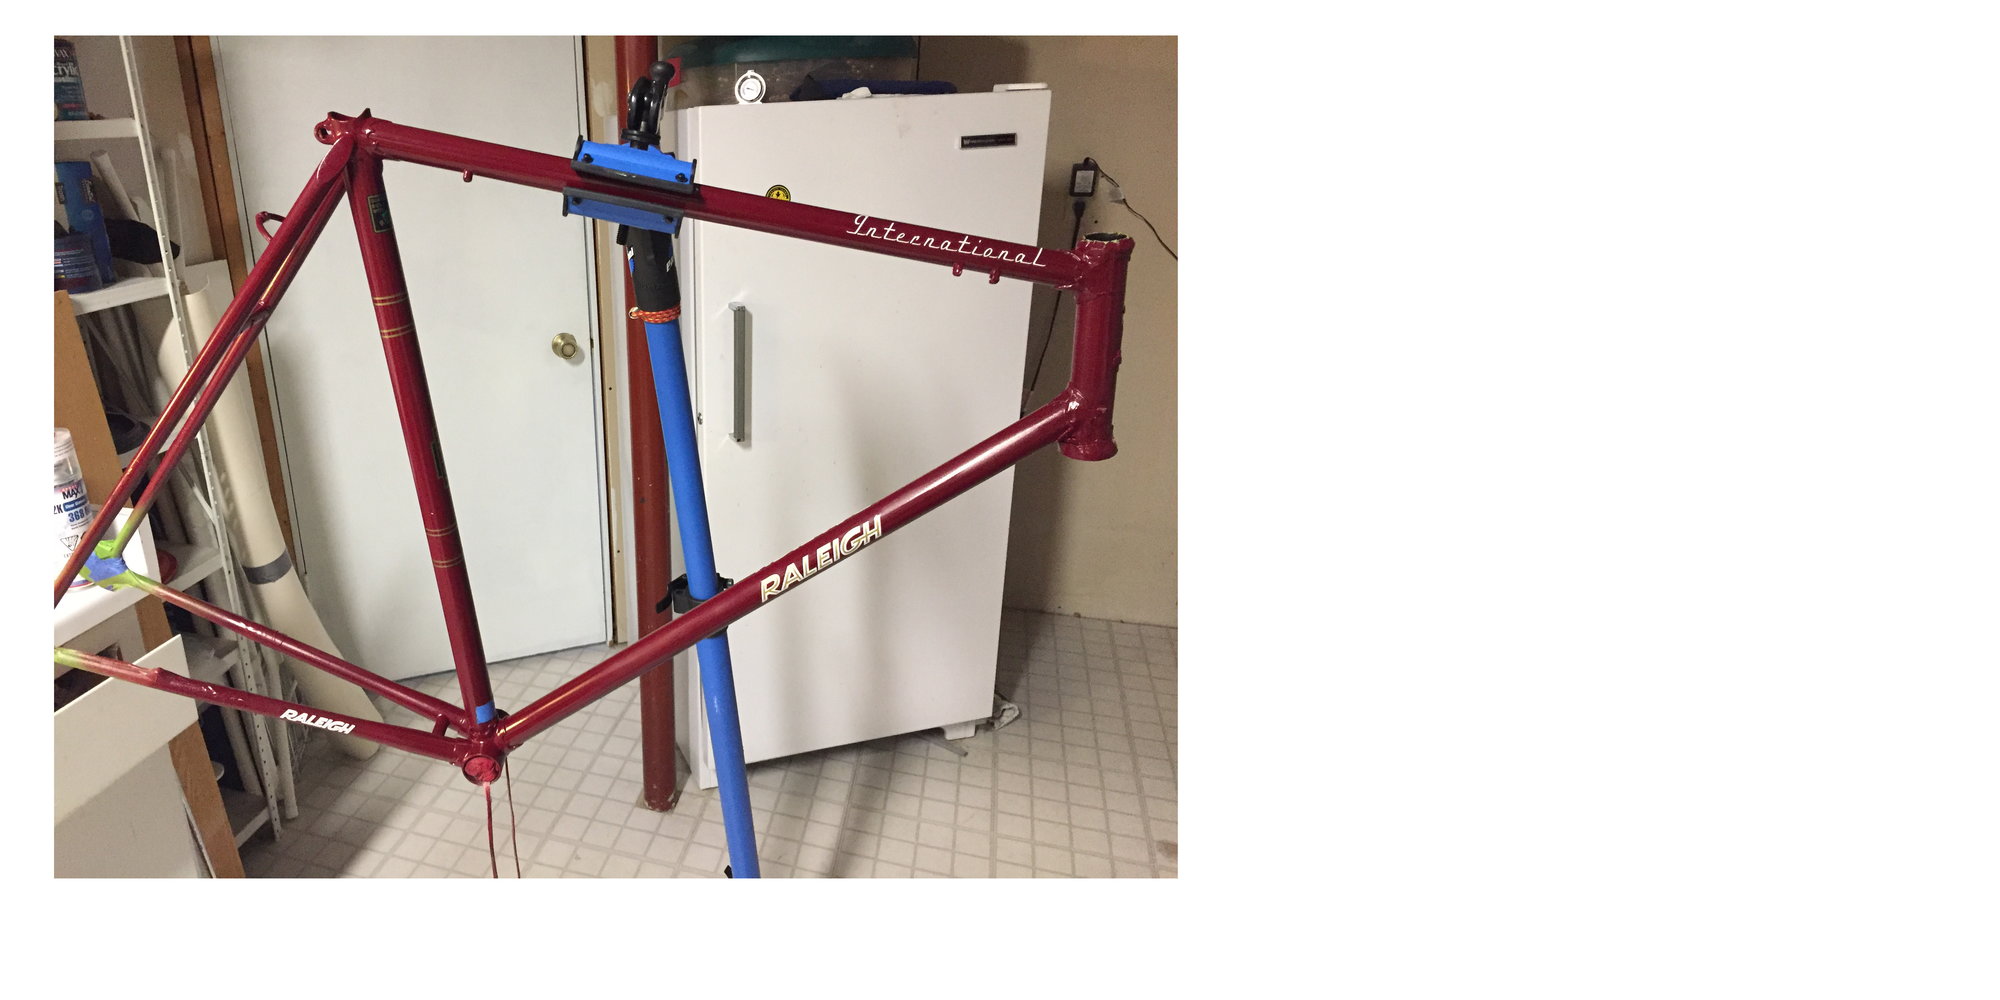
Doug Fattic Given this is a production run of the boom era, I don't expect to find the workmanship you most likely set as a standard! Not the quality of the originals:
 P1030110, on Flickr
 P1030108, on Flickr
Will mineral spirits be a good prep cleaning solution? I also have denatured alcohol. The frame was waxed 6 years ago and not touched since.
P1030110, on FlickrP1030108, on FlickrWill mineral spirits be a good prep cleaning solution? I also have denatured alcohol. The frame was waxed 6 years ago and not touched since.
__________________
Bikes don't stand alone. They are two tired.
Bikes don't stand alone. They are two tired.
03-28-20 | 10:37 AM
#9
framebuilder
Joined: Dec 2009
Posts: 1,788
Likes: 2,707
From: Niles, Michigan
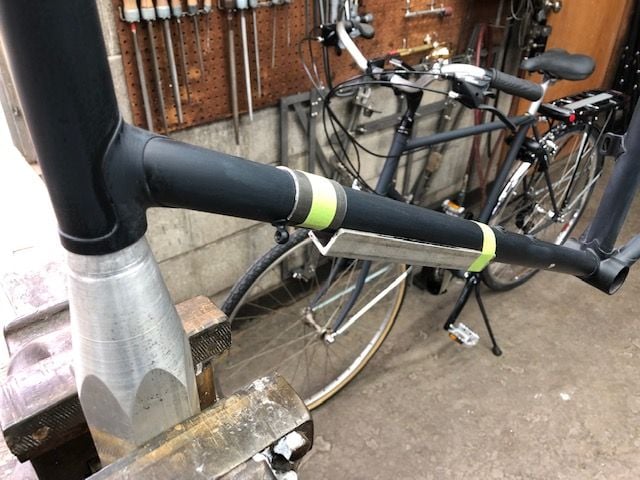
Here is a picture of my 2 tools I use to make sure decals go on straight. Just to be clear I usually use them to lay masking tape that will be the guide where to place the decals. I'll often hold the tools in place with masking tape as well so I have 2 hands free to place the masking tape. In addition it can be helpful to mark on my placed masking tape where the center of the tube will be so the decals don't end up off center.
03-28-20 | 10:50 AM
#10
Thread Starter
Senior Member
Joined: May 2008
Posts: 10,106
Likes: 2,757
From: Fredericksburg, Va
Bikes: ? Proteous, '65 Frejus TDF, '73 Bottecchia Giro d'Italia, '83 Colnago Superissimo, '84 Trek 610, '84 Trek 760, '88 Pinarello Veneto, '88 De Rosa Pro, '89 Pinarello Montello, 'Litespeed Catalyst'94 Burley Duet, 97 Specialized RockHopper, 2010 Langster
tkamd73 - Very helpful. I will definitely use wetting in the process. Instructions state 3 drops of dish soap to 1 pint of water.
__________________
Bikes don't stand alone. They are two tired.
Bikes don't stand alone. They are two tired.
Last edited by SJX426; 03-28-20 at 10:54 AM.
03-28-20 | 10:52 AM
#11
Thread Starter
Senior Member
Joined: May 2008
Posts: 10,106
Likes: 2,757
From: Fredericksburg, Va
Bikes: ? Proteous, '65 Frejus TDF, '73 Bottecchia Giro d'Italia, '83 Colnago Superissimo, '84 Trek 610, '84 Trek 760, '88 Pinarello Veneto, '88 De Rosa Pro, '89 Pinarello Montello, 'Litespeed Catalyst'94 Burley Duet, 97 Specialized RockHopper, 2010 Langster
Doug Fattic Very close to the way I envisioned the "fixturing!" I assume the tape at the bottom only serves to hold the angle in place.
__________________
Bikes don't stand alone. They are two tired.
Bikes don't stand alone. They are two tired.
03-28-20 | 11:00 AM
#12
framebuilder
Joined: Dec 2009
Posts: 1,788
Likes: 2,707
From: Niles, Michigan
Doug Fattic Very close to the way I envisioned the "fixturing!" I assume the tape at the bottom only serves to hold the angle in place.
03-28-20 | 11:46 AM
#13
Senior Member
Joined: Dec 2015
Posts: 1,952
Likes: 1,239
From: Menomonee Falls, WI
Bikes: 1984 Schwinn Supersport, 1988 Trek 400T, 1977 Trek TX900, 1982 Bianchi Champione del Mondo, 1978 Raleigh Supercourse, 1986 Trek 400 Elance, 1991 Waterford PDG OS Paramount, 1971 Schwinn Sports Tourer, 1985 Trek 670
tkamd73 - Very helpful. I will definitely use wetting in the process. Instructions state 3 drops of dish soap to 1 pint of water.
4 drops of liquid dishwashing detergent, (not soap) in a pint (1/2 liter) solution of 25% isopropyl alcohol, and 75% distilled water.
Good luck, have fun
Tim
03-28-20 | 11:57 AM
#14
Freshman Member
Joined: Mar 2014
Posts: 5,867
Likes: 4,154
From: City of Angels
Bikes: A few too many
I find it much easier to do a dry run to set things up whether waterslide or adhesive and often use my "good" eye as a guide..don't overthink it....what do they say? "measure twice cut once"
Ben
Ben
03-28-20 | 03:58 PM
#15
framebuilder
Joined: Dec 2009
Posts: 1,788
Likes: 2,707
From: Niles, Michigan
I've also found times when thin cloth measuring tape is easier to use (when measuring distances for decal placement) than either roll up metal tape or a stiff ruler. I'll add that my angle piece can also be used to find and mark the front center of the seat tube as well as the top of the down tube for decal placement using the point of the lugs and water bottle bosses. For example the bottom of the seat lug and the point of a bottom bracket shell (if it has a point) can be where one end of the angle iron is placed and the other end used to make a pencil mark where it comes in contact with your placed masking tape. Of course you have to do this on both sides in case the points are off a bit.
03-28-20 | 05:45 PM
#16

aka Tom Reingold

Joined: Jan 2009
Posts: 44,160
Likes: 6,381
From: New York, NY, and High Falls, NY, USA
Bikes: 1962 Rudge Sports, 1971 Raleigh Super Course, 1971 Raleigh Pro Track, 1974 Raleigh International, 1975 Viscount Fixie, 1982 McLean, 1996 Lemond (Ti), 2002 Burley Zydeco tandem
I have not applied decals yet.
__________________
Tom Reingold, tom@noglider.com
New York City and High Falls, NY
Blogs: The Experienced Cyclist; noglider's ride blog
�When man invented the bicycle he reached the peak of his attainments.� � Elizabeth West, US author
Please email me rather than PM'ing me. Thanks.
Tom Reingold, tom@noglider.com
New York City and High Falls, NY
Blogs: The Experienced Cyclist; noglider's ride blog
�When man invented the bicycle he reached the peak of his attainments.� � Elizabeth West, US author
Please email me rather than PM'ing me. Thanks.
03-28-20 | 08:21 PM
#17
Mr. Anachronism
Joined: Jan 2013
Posts: 2,110
Likes: 293
From: Somewhere west of Tobie's
Bikes: fillet-brazed Chicago Schwinns, and some other stuff
I just posted this photo in another thread, showing how I use masking tape to box in where the decal will go.
__________________
"My only true wisdom is in knowing I have none" -Socrates
"My only true wisdom is in knowing I have none" -Socrates
03-29-20 | 01:52 PM
#18
Senior Member

Joined: Jul 2004
Posts: 928
Likes: 103
From: Twin Cities
I’ve been following the decal and clear coat threads closely since that’s where I’m at with two of my projects. Today I applied the decals to my 1974 Raleigh International, and it was a nerve-wracking couple of hours. My original goal was to get the bike looking good from the 10-foot range, but the more I got into it, I became more exacting. One problem I faced was that the decal placement seems to be all over the place - there’s no real precise set of locations for some of the decals. I followed the Velocals instructions, and they worked well enough. The process wasn’t too difficult, and the mistakes I made probably wouldn’t be noticed by most riders. For instance, the Carlton decal isn’t centered between the gold bands on the seat tube, and one of the Raleigh decals on the downtube could have been positioned a little differently. Pretty minor stuff, though. My advice is to go slowly, cut the decals with a straight edge, get your tape and marks exactly where you want them, and forge ahead. Now for the clear coat.
__________________
Some days, it's not even worth gnawing through the restraints.
Some days, it's not even worth gnawing through the restraints.
03-29-20 | 02:45 PM
#19
framebuilder
Joined: Dec 2009
Posts: 1,788
Likes: 2,707
From: Niles, Michigan
My tip for down tube name placement on classic era frames is that it is usually located between the top water bottle boss and shift lever or derailleur cable stop (unless it is a very long name). Otherwise when you are looking at it from the drive side the lettering looks too close to the big chainring. Also there is a tendency for people that haven't thought about decal placement to put the name on the very side of the frame. However one looks down on an assembled bicycle so the decals need to be rotated up so one can read the whole name without kneeing down. This means that the space between the tops of the letters is fairly close together and there is a lot of space underneath the frame between the bottom of the letters. How rotated depends on the size of the letters but 3/8ths of an inch is a rough approximation. That distance varies deeding on the style of font used and whether it has upper and/or lower case letters.
This rotation also applies for any letting on the top tube too. Another rough rule of thumb is that the bottom of the letters are usually right on the side middle of the tube (unless they are fairly better letters). It is easy to find the very side of a tube using tape that when pressed against leaves a mark. I cut a piece of semi translucent tape and place it crosswise on the top tube near the head tube. I take a metal straight edge (usually a ruler) and make sure the edges are touching both the top and down tube at the same time. When I run the ruler over the tape it will leave a mark right on the side. I then place my aluminum angle along the tube tube using my newly created mark as a rotation guide. The angle piece serves as a guide to place masking tape along the tube in a perfectly straight line. The masking tape of course is the guide for placing the decals.
This rotation also applies for any letting on the top tube too. Another rough rule of thumb is that the bottom of the letters are usually right on the side middle of the tube (unless they are fairly better letters). It is easy to find the very side of a tube using tape that when pressed against leaves a mark. I cut a piece of semi translucent tape and place it crosswise on the top tube near the head tube. I take a metal straight edge (usually a ruler) and make sure the edges are touching both the top and down tube at the same time. When I run the ruler over the tape it will leave a mark right on the side. I then place my aluminum angle along the tube tube using my newly created mark as a rotation guide. The angle piece serves as a guide to place masking tape along the tube in a perfectly straight line. The masking tape of course is the guide for placing the decals.
03-31-20 | 10:18 AM
#20

Senior Member
Joined: Apr 2007
Posts: 12,565
Likes: 2,739
From: Thunder Bay, Ontario, Canada - burrrrr!
Bikes: 1958 Rabeneick 120D, 1968 Legnano Gran Premio, 196? Torpado Professional, 2000 Marinoni Piuma
It just occurred to me that a fellow forum member used the exact same decal/sticker set on a Bottecchia he got from me, a few years ago...
__________________
"98% of the bikes I buy are projects".
"98% of the bikes I buy are projects".
12-29-20 | 12:17 PM
#21
Patina Avoider
Joined: Apr 2011
Posts: 3,279
Likes: 1,072
From: Maryland, USA
Bikes: Drysdale/Gitane/Zeus/Masi/Falcon/Palo Alto/Vitus
The process starts with the right tools. I use a section of 3/4" aluminum angle I bought at the hardware store. This is a guide when placed along a tube for making sure a decal is straight without climbing up or descending. The other most valuable tool to me is a half section of tube with a squared end. This is for getting decals straight across from each other and/or not being twisted. .
Lucky for me, I was straightening up in the basement today and found: a length of 3/4" aluminum angle!
__________________
Larry:1958 Drysdale, 1961 Gitane Gran Sport, 1974 Zeus track, 1988 Masi Gran Corsa, 1974 Falcon, 1980 Palo Alto, 198? Vitus 979. Susan: 1976 Windsor Profesional.
Larry:1958 Drysdale, 1961 Gitane Gran Sport, 1974 Zeus track, 1988 Masi Gran Corsa, 1974 Falcon, 1980 Palo Alto, 198? Vitus 979. Susan: 1976 Windsor Profesional.
12-29-20 | 02:58 PM
#22
framebuilder
Joined: Dec 2009
Posts: 1,788
Likes: 2,707
From: Niles, Michigan
The purpose of 0.058" wall tubing is because they are a slip fit that can create telescoping tubing with just the right amount of clearance so the smaller tube can fit and move inside a bigger one. I don't know anything about and have never tried to use plastic tubing. It will work if a split piece fits snuggly on top of a tube. Of course I have all the right tools fo make tool #2. I have wood blocks to hold the tubing while it is cut. I have a lathe and/or a belt sander to square the ends of the tubing stub before I split it lengthwise in half.
12-29-20 | 03:42 PM
#23
Patina Avoider
Joined: Apr 2011
Posts: 3,279
Likes: 1,072
From: Maryland, USA
Bikes: Drysdale/Gitane/Zeus/Masi/Falcon/Palo Alto/Vitus
I did not even know they made masking tape only 1/8" wide. Thank you, Amazon!
(A) This idea of using water on the surface even with a self-adhesive �decal�, is this relatively universal, beyond Cyclomondo, Velocals, etc? I have one set sent by the Palo Alto bicycle shop in CA, peel-n-stick, for all I know the decals are 40 years old like the P.A. frame. I�d like to think those would not need a different application process.
(B) Wow, wondering if I should be thinking about a Plan B. Making up a jig makes sense when doing multiple bikes (five for me), I think I�m reading that I need tools to make tools. I just hit that aviation website, the steel is not all that expensive. But, despite having so many packages arriving for these projects I probably should have a conveyor belt installed at the front door, not sure I can justify to my wife a lathe and a metal cutting bandsaw (bummer, I wouldn�t mind having both)!
(A) This idea of using water on the surface even with a self-adhesive �decal�, is this relatively universal, beyond Cyclomondo, Velocals, etc? I have one set sent by the Palo Alto bicycle shop in CA, peel-n-stick, for all I know the decals are 40 years old like the P.A. frame. I�d like to think those would not need a different application process.
While it is possible to use frame tubing (of course as a framebuilding teacher I have hundreds of short pieces of scraps), they are a bit of a sloppy fit. The very best option is to use steel tubing that has a wall thickness of 0.058". The outside diameter (�) will be 1/8" larger than the tube you are placing this tool on top of. For example if you are using the tool on a 1 1/8" down tube, the tool itself would have an OD of 1 3/8" with a wall thickness of 0.058". This is commonly available tubing from steel tubing suppliers. For example Wicks Aircraft or Airport Spruce are 2 examples of places that sell 4130 tubing in those wall thickness. They sell it by the foot (or more). The purpose of 0.058" wall tubing is because they are a slip fit that can create telescoping tubing with just the right amount of clearance so the smaller tube can fit and move inside a bigger one. I don't know anything about and have never tried to use plastic tubing. It will work if a split piece fits snuggly on top of a tube. Of course I have all the right tools fo make tool #2. I have wood blocks to hold the tubing while it is cut. I have a lathe and/or a belt sander to square the ends of the tubing stub before I split it lengthwise in half.
__________________
Larry:1958 Drysdale, 1961 Gitane Gran Sport, 1974 Zeus track, 1988 Masi Gran Corsa, 1974 Falcon, 1980 Palo Alto, 198? Vitus 979. Susan: 1976 Windsor Profesional.
Larry:1958 Drysdale, 1961 Gitane Gran Sport, 1974 Zeus track, 1988 Masi Gran Corsa, 1974 Falcon, 1980 Palo Alto, 198? Vitus 979. Susan: 1976 Windsor Profesional.
01-12-21 | 03:54 PM
#24
Patina Avoider
Joined: Apr 2011
Posts: 3,279
Likes: 1,072
From: Maryland, USA
Bikes: Drysdale/Gitane/Zeus/Masi/Falcon/Palo Alto/Vitus
I thought about moving it down into the water boss area but--
DT diameter is 1.1305" so circumference is about 3-9/16". Two decals at 1-3/8" high means only about 3/8" open space between decals at the top, and again at the bottom. It's gonna be fun measuring that accurately as it is. But if I slide down into the bottle boss area, the boss measures 27/64", I'm right on an "interference fit". and, anyway, the decal will be visually "obscured" more the closer to a water bottle it gets.
Inclined to mount the decals in the higher position.
I think I need a drink!
__________________
Larry:1958 Drysdale, 1961 Gitane Gran Sport, 1974 Zeus track, 1988 Masi Gran Corsa, 1974 Falcon, 1980 Palo Alto, 198? Vitus 979. Susan: 1976 Windsor Profesional.
Larry:1958 Drysdale, 1961 Gitane Gran Sport, 1974 Zeus track, 1988 Masi Gran Corsa, 1974 Falcon, 1980 Palo Alto, 198? Vitus 979. Susan: 1976 Windsor Profesional.
01-14-21 | 05:37 PM
#25
Senior Member
Joined: May 2019
Posts: 3,958
Likes: 3,185
From: Bloomington, IN
Bikes: Paramount, Faggin, Ochsner, Rossin, Ciocc
I am currently restoring eight bikes that were damaged by a house fire a few years ago. I have been lucky in finding decals and the detergent and water system seems to work for me when applying the decals. My go to for some decals has been a lacquer overspray clear coat. But with the Velocals decals they recommend a lesser paint, so I have used an enamel clear for the latest set. I would recommend that very light coats multiple times to get the best results. The current Paramount project will take up to three days to get the clear coat right. In the past I have rushed the process and wound up with horrible results. Go slow and take your time is the best advice I can give for this process. Smiles, MH