


Retro roadies- old frames with STI's or Ergos
 05-29-17, 04:43 AM
#6351
Senior Member
Join Date: Aug 2015
Location: Midlands
Posts: 94
Bikes: Hetchins, Dawes, Raleigh, Holdsworth, Standard Cycle Co, and others
Mentioned: 1 Post(s)
Tagged: 0 Thread(s)
Quoted: 34 Post(s)
Likes: 0
Liked 6 Times
in
2 Posts
Restoring a Vintage Saddle
I was asked to get a 1951 Raleigh ladies cycle working. It has been lying in a garage for over 30 years, and was badly rusted, and everything had dried out.
As with old bikes, every nut and bolt came apart easily - unlike modern bikes, and with a bit of grease and WD40, it worked perfectly. The weight was lowered by the number of spders nests I removed!
The one bat bit was the saddle. When I was asked to complete the restoration, I thought I could not save the saddle.
I went to Wrights who are now part of Brooks, and they didnt have the parts to restore it, or so they said.
I had been watching a programme where an old teddy bear was fixed, and I realised that I could do the same with the saddle.
I carefully unpicked all the stiching, and went off to buy some leather, only to discover that it was leathercloth on the original, with horsehair as the padding.
Using each piece I made a template and allowed that the small stretch in the material would be used to get a tight fit if I used an exact templete of shrunken components.
The secret is to template one piece at a time, then use the needle holes in the original to show how to sew the new piece.
The two gussets were the hardest they were very tricky to sew. Despite having a wife who is a leather expert, and a daughter that regularly makes clothes, neither offered to sew, being afraid to get it wrong. That is why on close examination the stiching quality is not great!
I cleaned up the rear badge, then repainted and wiped off to give an old look. I then used laquer over the top.
The back strip has to be stiff. The original was fibreboard but had perished. I substituted a piece of Corrx which is plastic corrugated board used for display. I inserted two old spokes cut to length which allowed it to curve smoothly.
Sewing this was tricky at each end as the ends folded down to the rear rivets.
Once this was done, it was time to rivet. I had the originals or what was left of them, and they were a form of split rivet. Unfortunately I didnt have the special tool needed to work in a confined space, so I used stainless countersunk bolts cut to length, washers on both sides.
Once everything was bolted together, two flaps have to be sewn underneath then tacked to the horsehair. I used spray glue as well.
The vent holes were undamaged so nthey just went back in.
The seat has been tested for comfort, and passed.
It looks well preserved rather than new, and that is the effect I wanted.
The frame has been powder coated, except for the chainguard which turned out to be soldered, so this is being hand sprayed. There are no decals, just lots of red pinstripes.
I will try to post photos. Being blocked by some glitch at the moment.
 06-01-17, 02:37 AM
#6353
Junior Member
Join Date: Jan 2017
Location: Kill, Co. Kildare
Posts: 10
Bikes: Orbea Loki, On-one Inbred, Gazelle Champion Mondial, Kinesis Pro6, Scott S20
Mentioned: 0 Post(s)
Tagged: 0 Thread(s)
Quoted: 3 Post(s)
Likes: 0
Liked 0 Times
in
0 Posts
06-01-17, 06:35 AM
#6354
Senior Member
Join Date: May 2016
Posts: 52
Mentioned: 0 Post(s)
Tagged: 0 Thread(s)
Quoted: 22 Post(s)
Likes: 0
Liked 0 Times
in
0 Posts
Yea no kidding eh? I've been lurking on this forum for the better part of a year only started posting recently. I should be at 10 by the time this bike is done!
06-02-17, 03:53 AM
#6355
Senior Member
I'm riding L'Etape du Tour in 6 weeks (gulp) so the Ron has been prepared with a 12-28 cassette, and matching shiny new chain, to help me up Col D'Izoard (gulp).

06-02-17, 07:21 AM
#6356
Junior Member
Join Date: Jan 2017
Location: Kill, Co. Kildare
Posts: 10
Bikes: Orbea Loki, On-one Inbred, Gazelle Champion Mondial, Kinesis Pro6, Scott S20
Mentioned: 0 Post(s)
Tagged: 0 Thread(s)
Quoted: 3 Post(s)
Likes: 0
Liked 0 Times
in
0 Posts
[QUOTE=PhilPub;19626309]I'm riding L'Etape du Tour in 6 weeks (gulp) so the Ron has been prepared with a 12-28 cassette, and matching shiny new chain, to help me up Col D'Izoard (gulp).
Great looking bike and good luck at the Etape!
Great looking bike and good luck at the Etape!
06-02-17, 07:30 AM
#6357

Sunshine

Join Date: Aug 2014
Location: Des Moines, IA
Posts: 16,617
Bikes: '18 class built steel roadbike, '19 Fairlight Secan, '88 Schwinn Premis , Black Mountain Cycles Monstercross V4, '89 Novara Trionfo
Mentioned: 123 Post(s)
Tagged: 0 Thread(s)
Quoted: 10970 Post(s)
Liked 7,497 Times
in
4,193 Posts
Best of luck and I hope you are able to stay in the moment and appreciate where you are!
06-02-17, 08:37 AM
#6358
Senior Member
Thanks both! I've got some idea of what's involved from a week in Mallorca, where 34-25 got me up most things without too much stress including the infamous Sa Calobra, but I can remember wishing for a smaller gear once or twice. A warm-up ride three days earlier up Alpe D'Huez might give me a clue whether I've made the right choice. Will report back. Cannot wait!

 06-03-17, 11:45 AM
#6360
Junior Member
Join Date: Jun 2015
Posts: 24
Mentioned: 0 Post(s)
Tagged: 0 Thread(s)
Quoted: 1 Post(s)
Likes: 0
Liked 0 Times
in
0 Posts
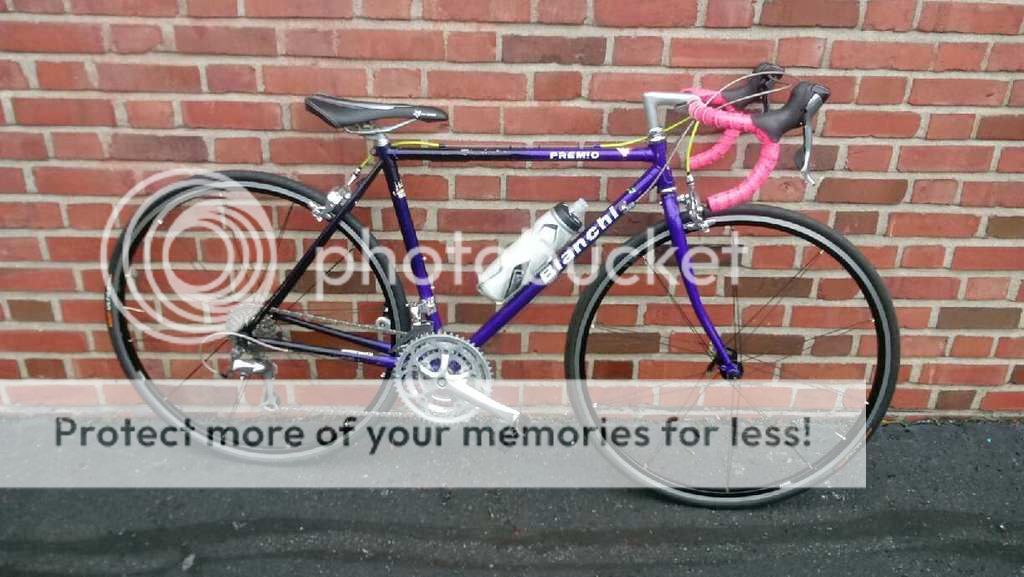
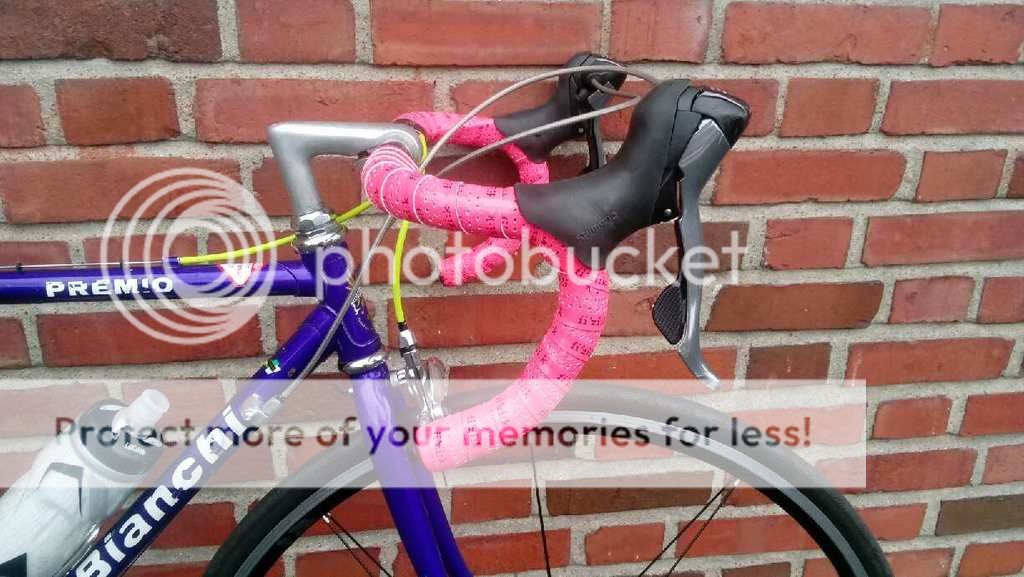
Small Bianchi I picked up for my wife. Switched over to 105 drive
IMG_20170520_135315_01_zpsvjr4zzyt.jpg Photo by sdrudolph | Photobucket


IMG_20170520_135315_01_zpsvjr4zzyt.jpg Photo by sdrudolph | Photobucket
06-08-17, 10:45 AM
#6361
Senior Member

Join Date: Dec 2008
Location: Seattle, WA
Posts: 649
Mentioned: 16 Post(s)
Tagged: 0 Thread(s)
Quoted: 81 Post(s)
Liked 221 Times
in
65 Posts
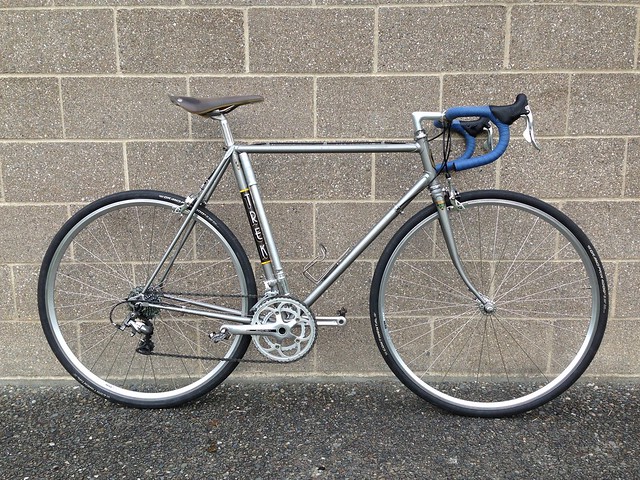
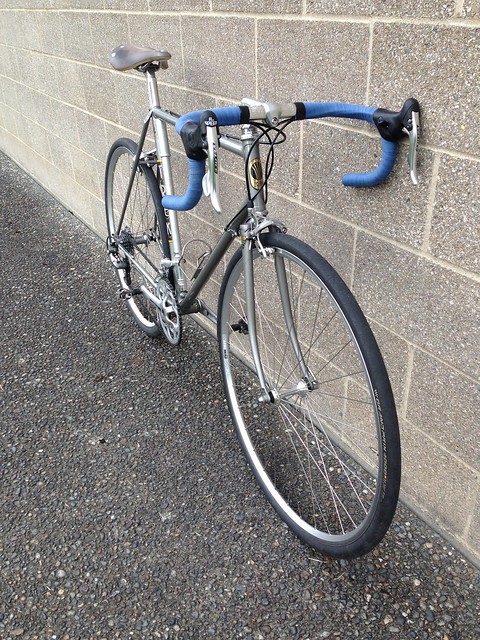
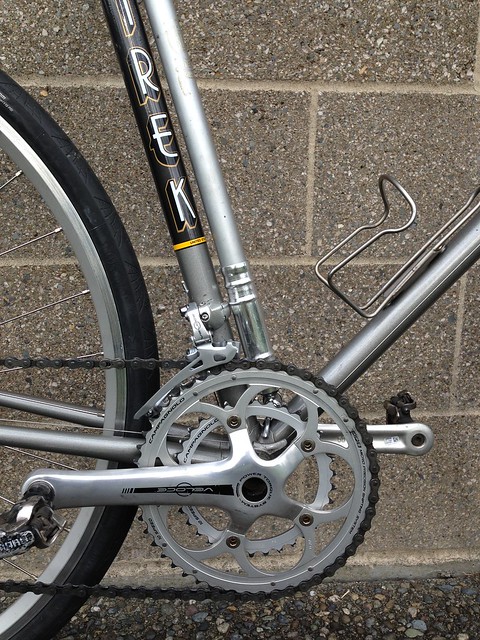
I picked up this '82 Trek 710 a few months ago. I had been riding it with its original components but it just didn't have the magic, so I decided to do a retro roadie build with parts I have lying around. Now I'm loving it!
It's currently set up with an 8 speed Shimergo drive train, but the plan is to eventually go full Campy Veloce 10 speed.
Also, the blue bar tape is a bit jarring right now but it will soon get a few coats of shellac that should tame the color.
It's currently set up with an 8 speed Shimergo drive train, but the plan is to eventually go full Campy Veloce 10 speed.
Also, the blue bar tape is a bit jarring right now but it will soon get a few coats of shellac that should tame the color.
 06-08-17, 11:59 PM
#6363
Junior Member

Join Date: Feb 2017
Posts: 16
Mentioned: 1 Post(s)
Tagged: 0 Thread(s)
Quoted: 12 Post(s)
Likes: 0
Liked 0 Times
in
0 Posts
 06-09-17, 12:44 AM
#6364
Senior Member

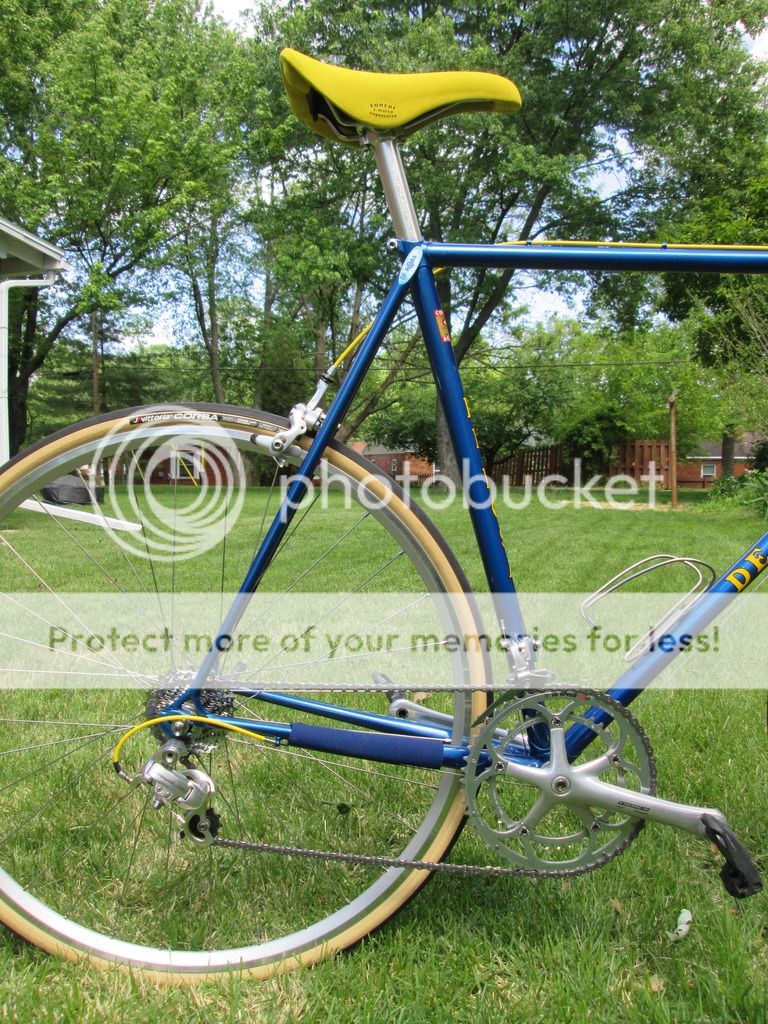
Back in the day I seemed to be happy enough with either a Turbo or Rolls, but only decades later realised that the Concor is much more friendly to my rear and I've happily done 100+ miles on it. And it looks smart.
06-09-17, 06:55 AM
#6365
Senior Member

Join Date: Jun 2008
Location: Louisville, KY
Posts: 13,447
Mentioned: 33 Post(s)
Tagged: 0 Thread(s)
Quoted: 4236 Post(s)
Liked 2,949 Times
in
1,808 Posts
 06-12-17, 01:56 AM
#6366
Senior Member
Join Date: Aug 2015
Location: Midlands
Posts: 94
Bikes: Hetchins, Dawes, Raleigh, Holdsworth, Standard Cycle Co, and others
Mentioned: 1 Post(s)
Tagged: 0 Thread(s)
Quoted: 34 Post(s)
Likes: 0
Liked 6 Times
in
2 Posts
Unless there is real pressure to keep downshifters I grind then off then replace with cable guides. There are really good handlebat shifters.
a
a
Great thread, great bikes. I'm in a quandry about my 80's Pinarello. Somebody put downtube cable stops where the shifters went and I recently bought a 2006 Campy Record crankset. What all do I need to go Campy with downtube shifters? Or should I just go with the ergo levers and keep the drivetrain modern?
I do not have fond memories of friction shifters but figured it was due to riding Muffy bikes. I'd really hate to spend a lot of time and money to go through the old push, push, push, there it is, gear shifting again.
I do not have fond memories of friction shifters but figured it was due to riding Muffy bikes. I'd really hate to spend a lot of time and money to go through the old push, push, push, there it is, gear shifting again.
06-12-17, 05:00 AM
#6367
Member
Join Date: Feb 2017
Posts: 32
Mentioned: 0 Post(s)
Tagged: 0 Thread(s)
Quoted: 9 Post(s)
Likes: 0
Liked 0 Times
in
0 Posts
That is exactly what Joe Bell did with my Sachs frame (see my earlier post on this thread) during his restoration/repaint. He put the cable guides on the head tube, no more cable rub on the paint. And the down tube looks very clean.
06-12-17, 09:06 AM
#6368
Senior Member

Join Date: Sep 2015
Location: Madison, WI
Posts: 2,701
Mentioned: 52 Post(s)
Tagged: 0 Thread(s)
Quoted: 1136 Post(s)
Liked 650 Times
in
336 Posts
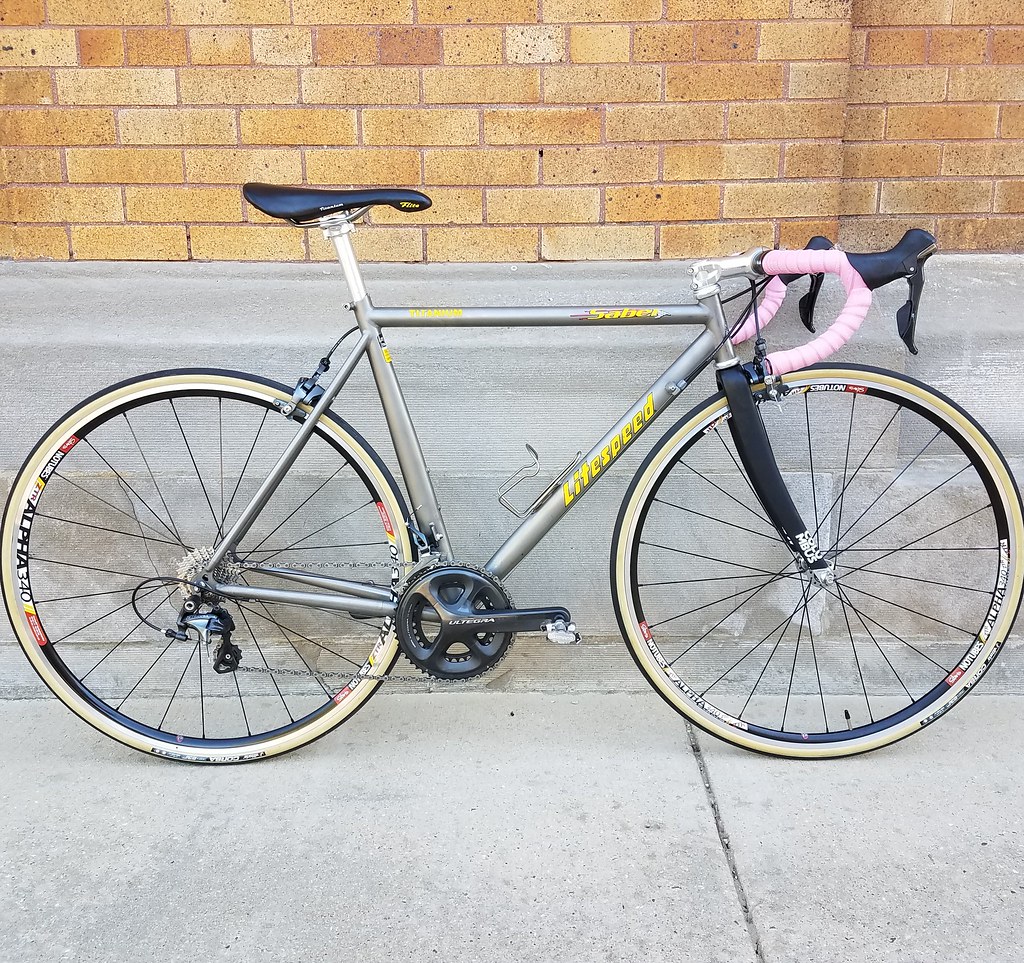
Recent cockpit updates to the '94 Litespeed. Weighs in at 17lb 5oz with the SPDs.
Last edited by TenGrainBread; 06-12-17 at 09:15 AM.
06-13-17, 03:10 PM
#6369
Junior Member

Join Date: Jun 2017
Location: Tempe
Posts: 11
Bikes: SWorks Venge, Crux, 429SL, Hard Eddie
Mentioned: 0 Post(s)
Tagged: 0 Thread(s)
Quoted: 4 Post(s)
Likes: 0
Liked 0 Times
in
0 Posts
Obviously there is no right or wrong way to do a RetroMod restoration. I really have loved looking through all the pages of this thread and seeing all the amazing examples that have been built. While the modern working, and retro looking bikes are definitely eye candy, I'm not sure I want the drawbacks.
I am heading into restoring my old Bob Jackson 753. I won many races on this bike in the early 90's and have had it stored for 20+ years. Here are the goals I have. I want to jump on this bike and have it feel and work just like a modern bike other than frame. I think this means modern component group, modern bar and stem, and modern wheels.
Anyone have any wisdom or thoughts on this route or goal?
06-14-17, 07:27 AM
#6370
aka Tom Reingold

Join Date: Jan 2009
Location: New York, NY, and High Falls, NY, USA
Posts: 40,506
Bikes: 1962 Rudge Sports, 1971 Raleigh Super Course, 1971 Raleigh Pro Track, 1974 Raleigh International, 1975 Viscount Fixie, 1982 McLean, 1996 Lemond (Ti), 2002 Burley Zydeco tandem
Mentioned: 511 Post(s)
Tagged: 0 Thread(s)
Quoted: 7352 Post(s)
Liked 2,479 Times
in
1,439 Posts
That's what this thread is all about. I like modern drivetrains, and I like old frames, and it isn't usually too much work to put them together. I'm about to switch my last old drivetrain out to modern.
__________________
Tom Reingold, tom@noglider.com
New York City and High Falls, NY
Blogs: The Experienced Cyclist; noglider's ride blog
�When man invented the bicycle he reached the peak of his attainments.� � Elizabeth West, US author
Please email me rather than PM'ing me. Thanks.
Tom Reingold, tom@noglider.com
New York City and High Falls, NY
Blogs: The Experienced Cyclist; noglider's ride blog
�When man invented the bicycle he reached the peak of his attainments.� � Elizabeth West, US author
Please email me rather than PM'ing me. Thanks.
06-14-17, 08:53 PM
#6371
Senior Member

Join Date: Aug 2015
Location: Kingdom of Hawai'i
Posts: 1,201
Bikes: Peugeot, Legnano, Fuji, Zunow, De Rosa, Miyata, Bianchi, Pinarello, Specialized, Bridgestone, Cinelli, Merckx
Mentioned: 17 Post(s)
Tagged: 0 Thread(s)
Quoted: 430 Post(s)
Liked 476 Times
in
219 Posts
Finally getting the Team Fuji details ironed out. Shimano 600 tricolor throughout, and 9spd Shimano brifters.
The rear derailleur isn't as responsive as I'd like, but otherwise this is a quick machine.

The rear derailleur isn't as responsive as I'd like, but otherwise this is a quick machine.
06-14-17, 09:30 PM
#6372
Junior Member
Join Date: Nov 2012
Location: Port Townsend, WA
Posts: 105
Mentioned: 3 Post(s)
Tagged: 0 Thread(s)
Quoted: 11 Post(s)
Likes: 0
Liked 8 Times
in
3 Posts
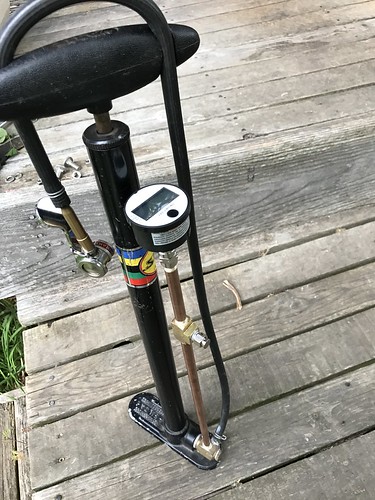
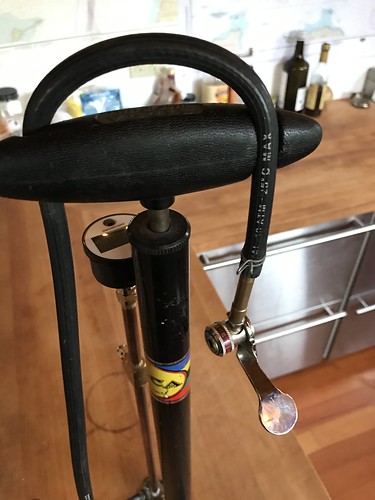
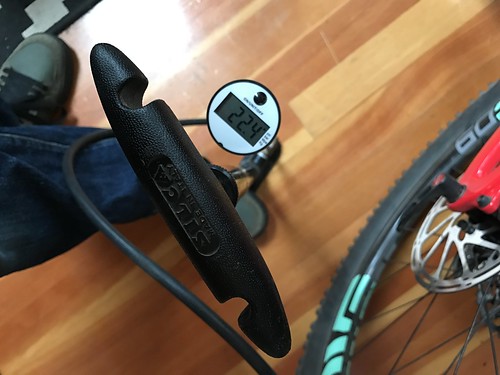
I've been pretty much exclusively riding and spending my moneys on cyclocross and mountain bikes the past few years. Both sports benefit from you running low and precise air pressure. I was having problems finding pumps that could do the job without having to have a tire gauge as well, so I decided to do the neo-retro mods to my old Silca track pump. I put a Hirame chuck, a bleeder valve, and a digital gauge accurate to 1% of the reading on it. I still have to take it into work tomorrow to make a bracket to support the gauge hard line. I works great!
 IMG_1925 by leland gibson, on Flickr
 IMG_1921 by leland gibson, on Flickr
 IMG_1924 by leland gibson, on Flickr
 IMG_1923 by leland gibson, on Flickr
IMG_1925 by leland gibson, on FlickrIMG_1921 by leland gibson, on FlickrIMG_1924 by leland gibson, on FlickrIMG_1923 by leland gibson, on Flickr
06-14-17, 09:47 PM
#6373
Senior Member

Join Date: May 2012
Location: Point Reyes Station, California
Posts: 4,529
Bikes: Indeed!
Mentioned: 92 Post(s)
Tagged: 0 Thread(s)
Quoted: 1508 Post(s)
Liked 3,480 Times
in
1,133 Posts
@kylarr
Very nice pump mod! The two silca gauges I''ve bought in the last ten years were both very inaccurate. What was your source for the bleeder valve and the gauge?
Brent
Very nice pump mod! The two silca gauges I''ve bought in the last ten years were both very inaccurate. What was your source for the bleeder valve and the gauge?
Brent
06-14-17, 10:11 PM
#6374
Junior Member
Join Date: Nov 2012
Location: Port Townsend, WA
Posts: 105
Mentioned: 3 Post(s)
Tagged: 0 Thread(s)
Quoted: 11 Post(s)
Likes: 0
Liked 8 Times
in
3 Posts
@kylarr
Very nice pump mod! The two silca gauges I''ve bought in the last ten years were both very inaccurate. What was your source for the bleeder valve and the gauge?
Brent
Very nice pump mod! The two silca gauges I''ve bought in the last ten years were both very inaccurate. What was your source for the bleeder valve and the gauge?
Brent
Thanks Brent! Not only was the gauge that was on the pump inaccurate, it has such a large scale that the needle itself is about three pounds.
I got everything from Grainger. One can spend crazy money on pressure gauges, well into the thousands. They also are are all over the map with their range and accuracy options. This one hit the spot with a 0-145 psi range and good accuracy for bikes at $45. the searchable product number is KCDG158145. Any 1/8 NPT bleeder valve will work. I don't know if it changed over the years but the check valve at the bottom of my pump was 1/8 NPT, it made all the rest easy, just order any fittings you want in that size.
Leland
