


Show us your builds
 06-21-22, 03:41 AM
#451
Senior Member
Join Date: Dec 2019
Posts: 957
Mentioned: 3 Post(s)
Tagged: 0 Thread(s)
Quoted: 321 Post(s)
Liked 263 Times
in
212 Posts
Well done for tackling Ti! Welds don't have to be the perfect stacks of dimes (although of course we'd all like that ngl). I'd be a bit more concerned about the places where it looks a bit like you might have some gaps or discontinuities, although it's hard to see from the photos.
Important for getting a perfect stack is good fit-up. But the skill to do a good weld with a slightly imperfect fit-up is also a useful one to have.
Important for getting a perfect stack is good fit-up. But the skill to do a good weld with a slightly imperfect fit-up is also a useful one to have.
 06-21-22, 06:45 AM
#452
Junior Member
Join Date: Sep 2020
Posts: 75
Mentioned: 0 Post(s)
Tagged: 0 Thread(s)
Quoted: 18 Post(s)
Likes: 0
Liked 39 Times
in
24 Posts
While things might not look super pretty, Ron Sutphin was observing/ inspecting and Mike DeSalvo was teaching and helping as well. If anything seemed like it was a structural issue, I'm sure they would have mentioned it and had me redo. This was all after a BB/Seat tube weld/break test (on scrap parts) to confirm that I was getting good penetration. So, hopefully, no failures in the coming years/miles. Some of the weird looking places were 'fixed' later in the process and some are just shadows where a lumpy area is making an OK area look like a gap. Not totally pretty, but as my dad would say, "at least people will look at it and believe you welded it." =P
Last edited by sdodd; 06-21-22 at 06:52 AM.
Likes For sdodd:
06-21-22, 07:48 AM
#453
Senior Member
Join Date: Dec 2019
Posts: 957
Mentioned: 3 Post(s)
Tagged: 0 Thread(s)
Quoted: 321 Post(s)
Liked 263 Times
in
212 Posts
Thanks for the comments! Yes- lots of discontinuity in all of my stops and starts. And, a hole or two filled and some burned edges on the miter of some of the similarly sized tubes. Though, surprisingly, I was able to get decent welds between the top tube and down tube on my headtube with a big cup and a long stick out of the electrode. I had more of a problem continually bonking my head trying to see around the tubes.
While things might not look super pretty, Ron Sutphin was observing/ inspecting and Mike DeSalvo was teaching and helping as well. If anything seemed like it was a structural issue, I'm sure they would have mentioned it and had me redo. This was all after a BB/Seat tube weld/break test (on scrap parts) to confirm that I was getting good penetration. So, hopefully, no failures in the coming years/miles. Some of the weird looking places were 'fixed' later in the process and some are just shadows where a lumpy area is making an OK area look like a gap. Not totally pretty, but as my dad would say, "at least people will look at it and believe you welded it." =P
While things might not look super pretty, Ron Sutphin was observing/ inspecting and Mike DeSalvo was teaching and helping as well. If anything seemed like it was a structural issue, I'm sure they would have mentioned it and had me redo. This was all after a BB/Seat tube weld/break test (on scrap parts) to confirm that I was getting good penetration. So, hopefully, no failures in the coming years/miles. Some of the weird looking places were 'fixed' later in the process and some are just shadows where a lumpy area is making an OK area look like a gap. Not totally pretty, but as my dad would say, "at least people will look at it and believe you welded it." =P
I think stops and starts are actually good to do. Some people pride themselves on being able to weld 1/4 of the way round a tube or more without stopping. But you might be better just to do 1/2" or so and then move around the frame to distribute the heat and let things cool down. This is usually what I do. And wherever things are a bit sketchy, use the minimum heat you can to get a bead on there, even if it's sitting up a bit, and then just burn it in with a second pass. As soon as there is some weld there you won't get holes nearly so easily.
06-21-22, 10:50 AM
#454


Randomhead
Join Date: Aug 2008
Location: Happy Valley, Pennsylvania
Posts: 24,402
Mentioned: 0 Post(s)
Tagged: 0 Thread(s)
Quoted: 4 Post(s)
Liked 3,701 Times
in
2,521 Posts
Likes For unterhausen:
07-14-22, 04:22 AM
#455
Junior Member
E-bike first build
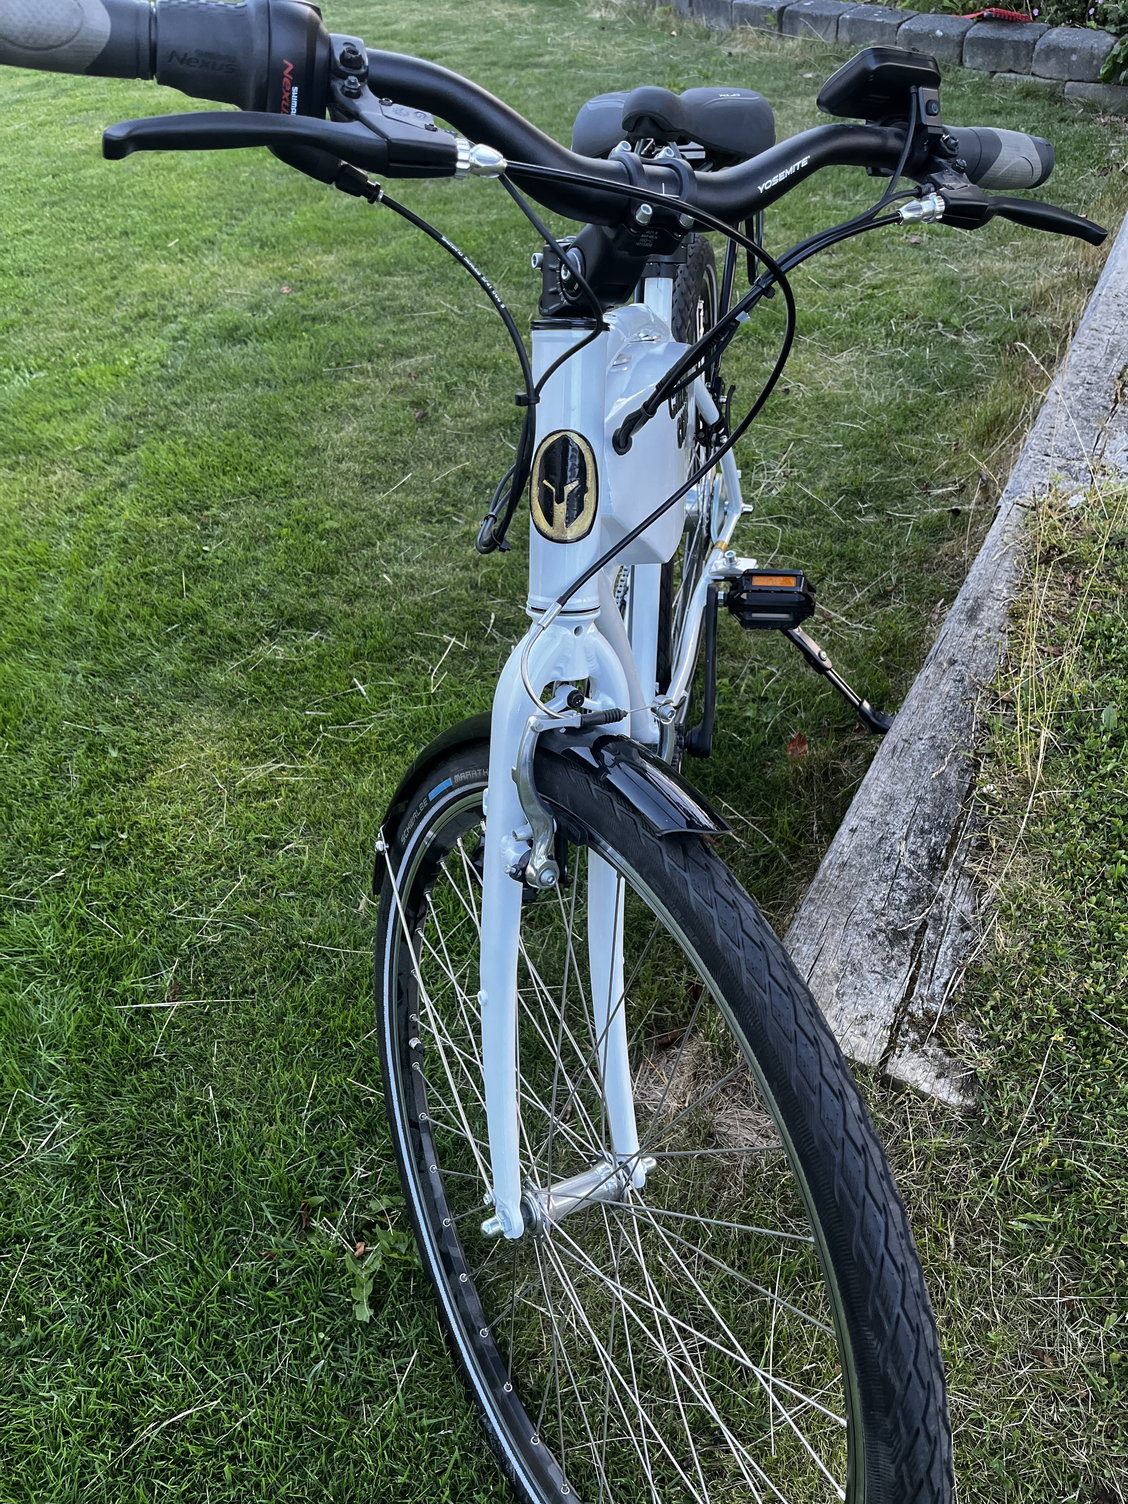
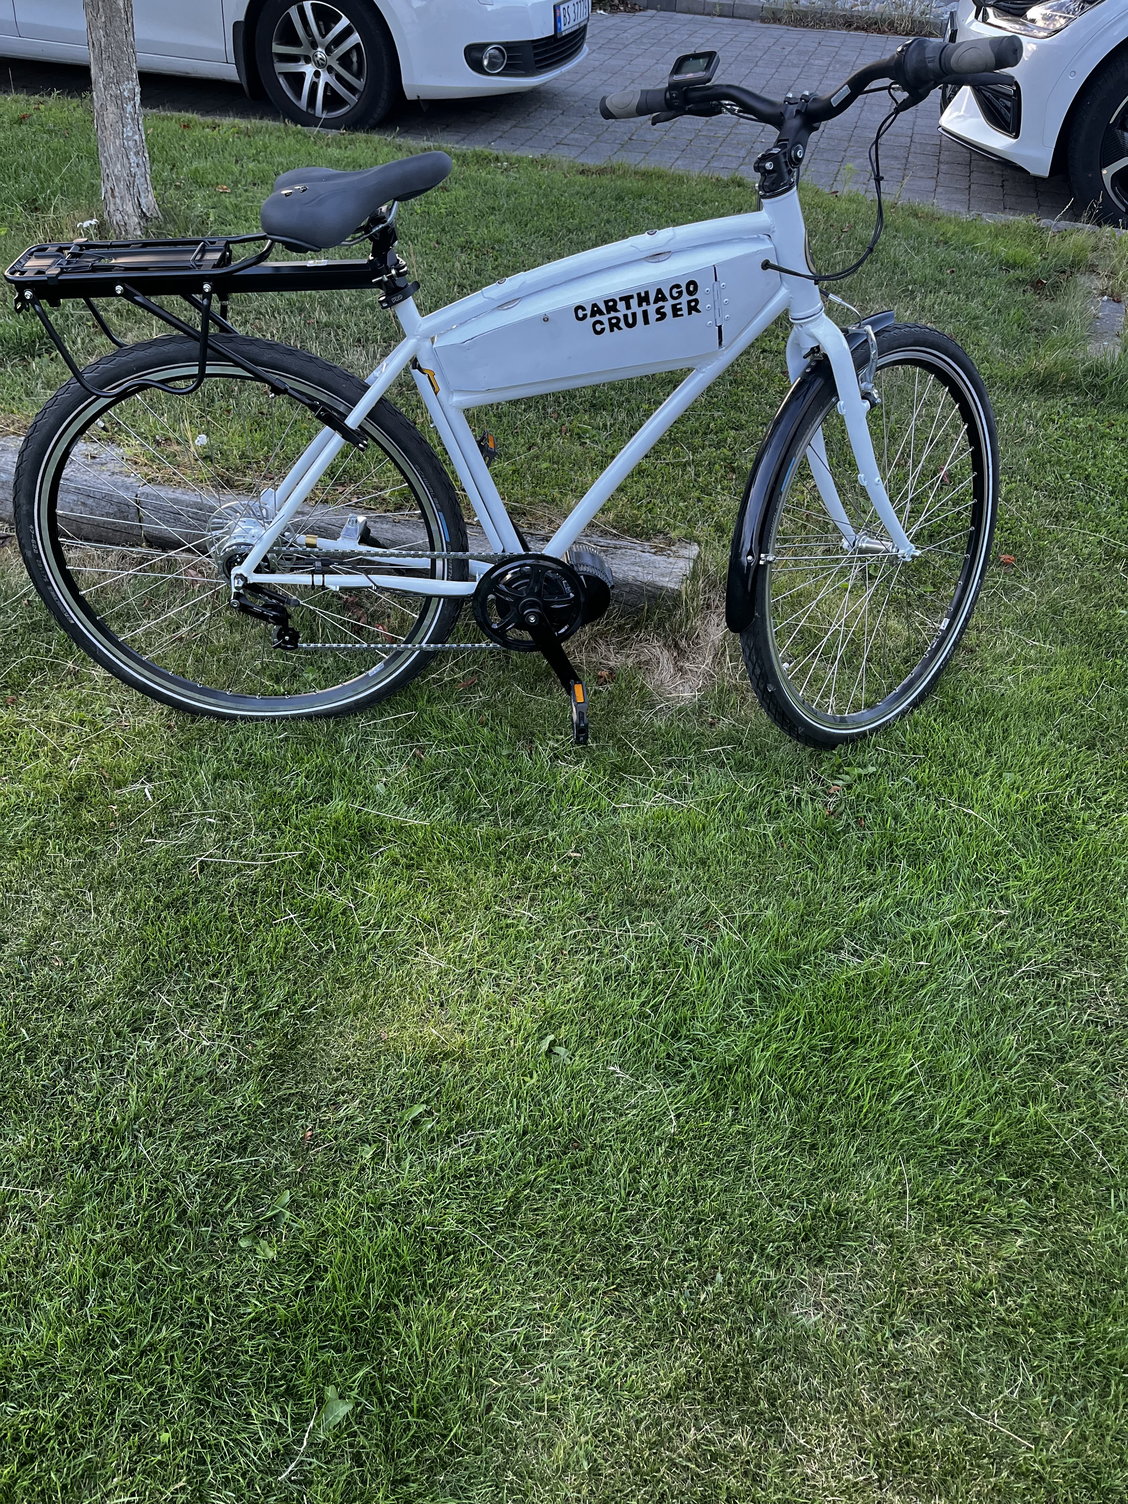
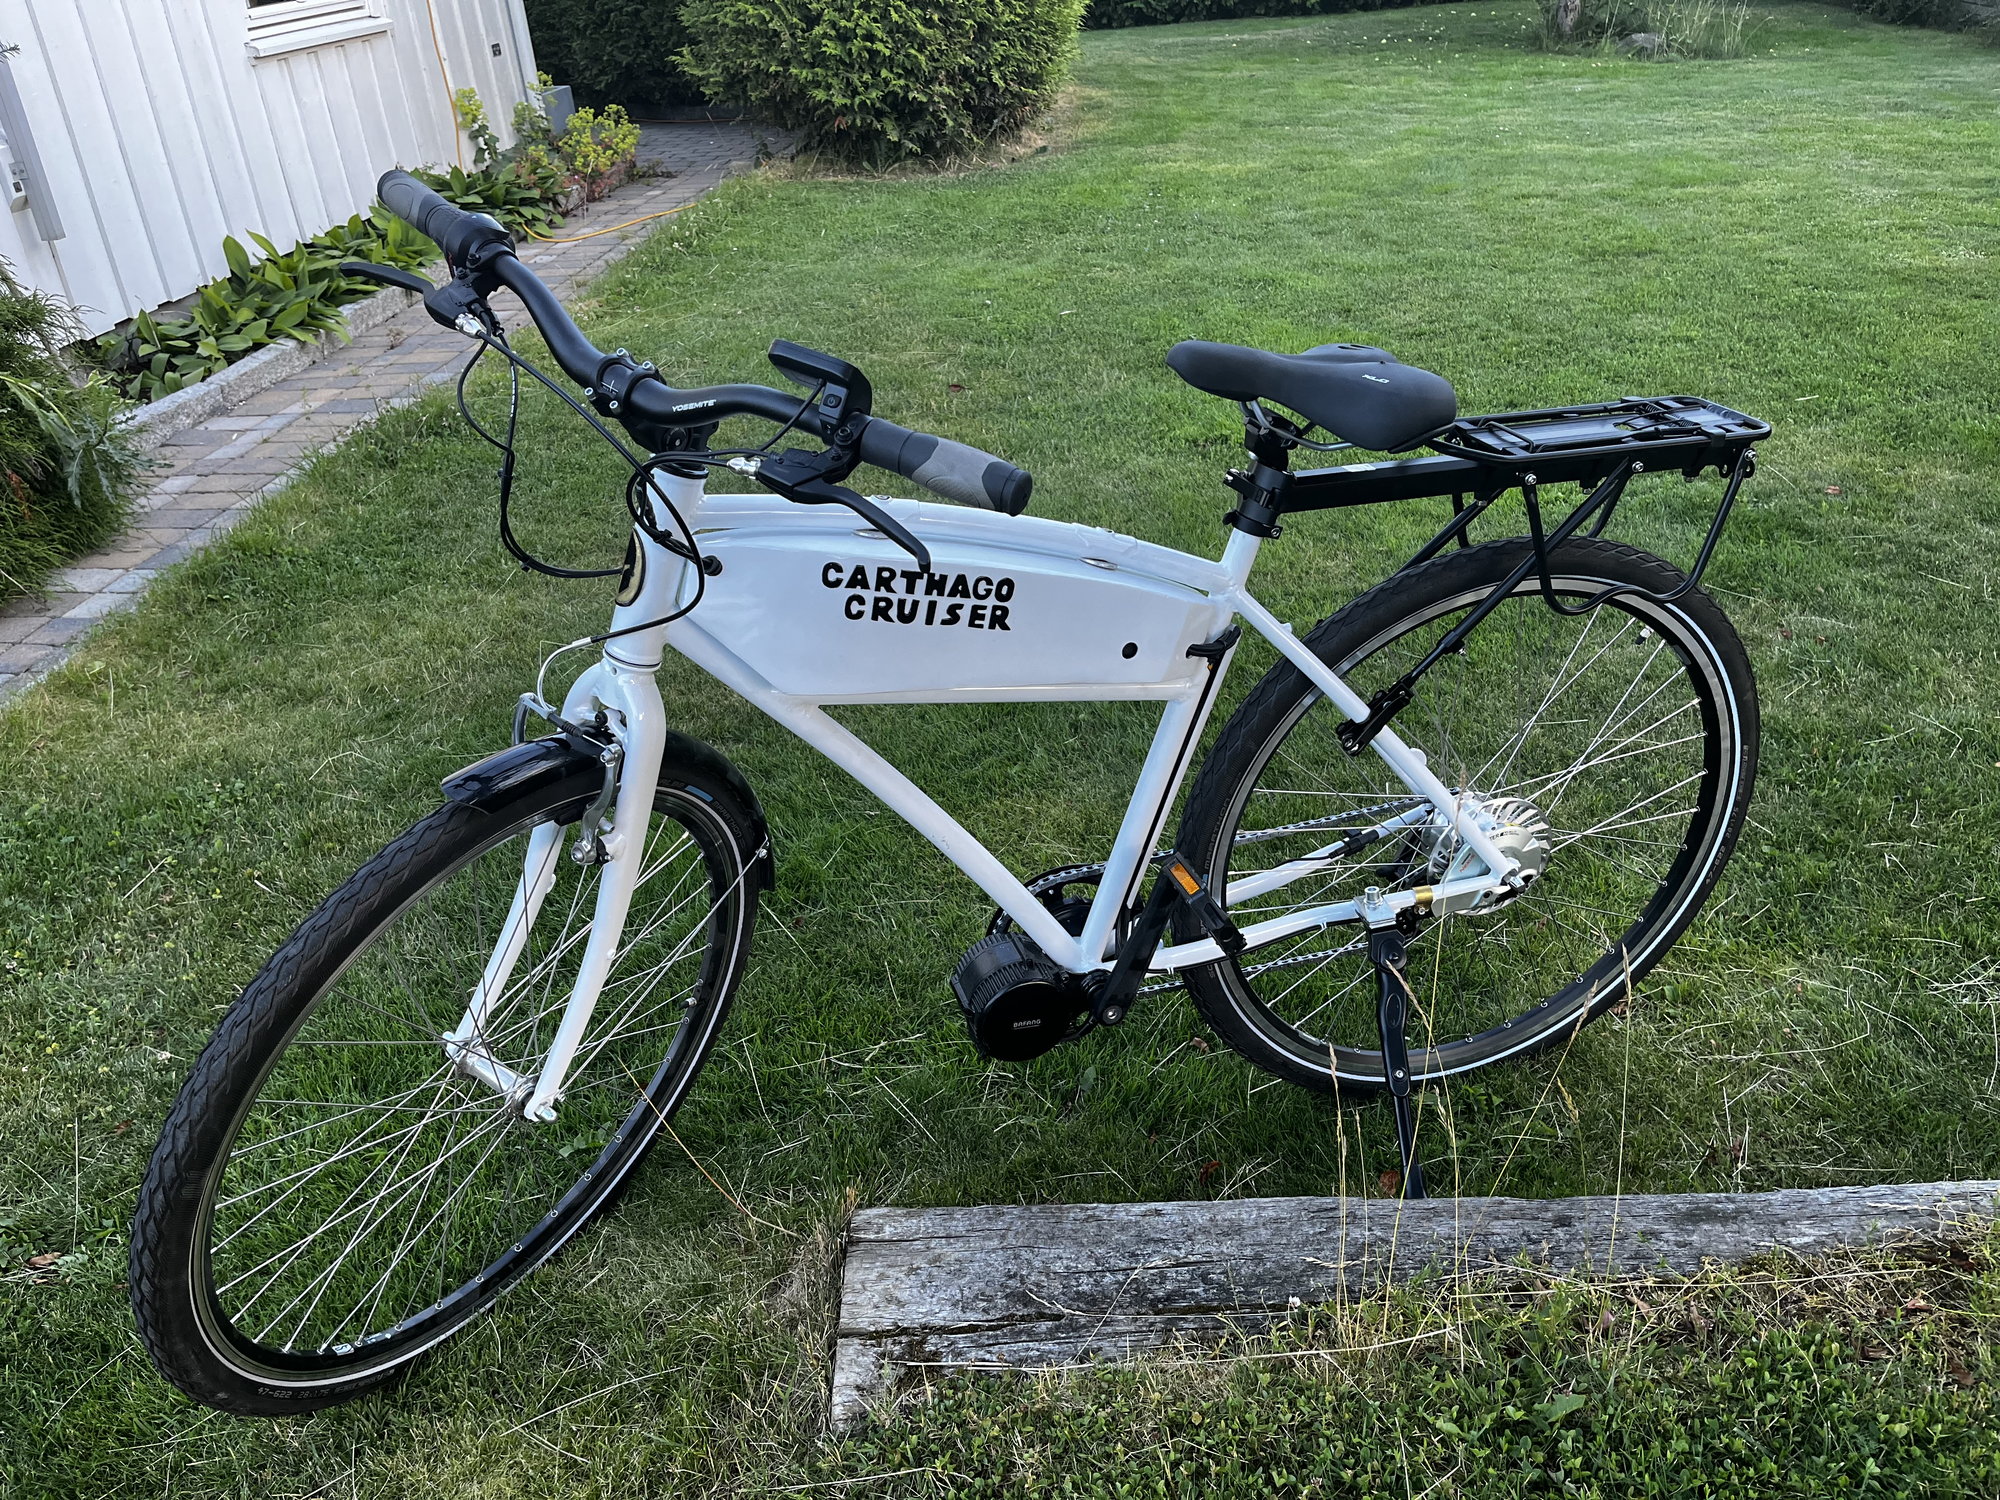
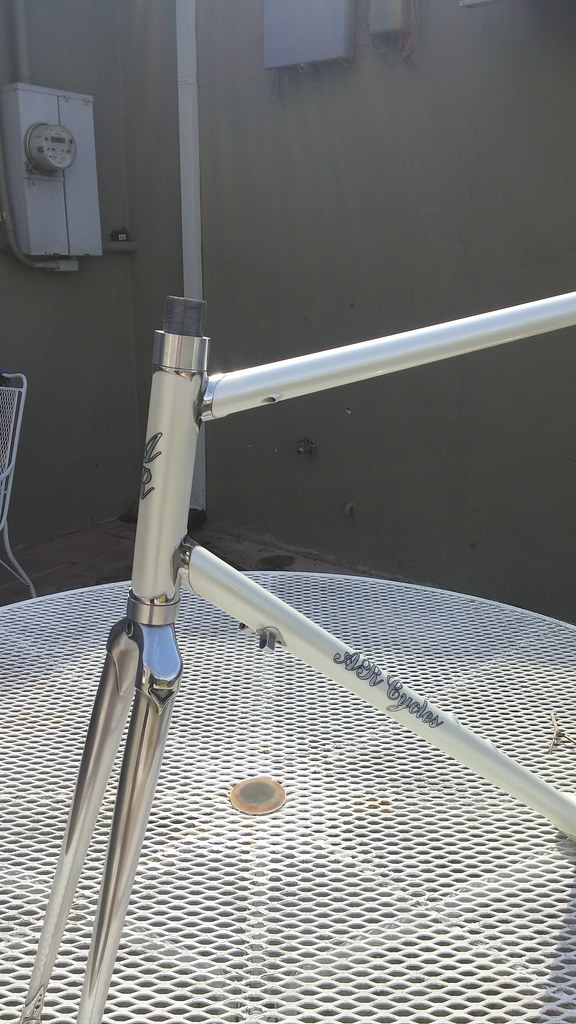
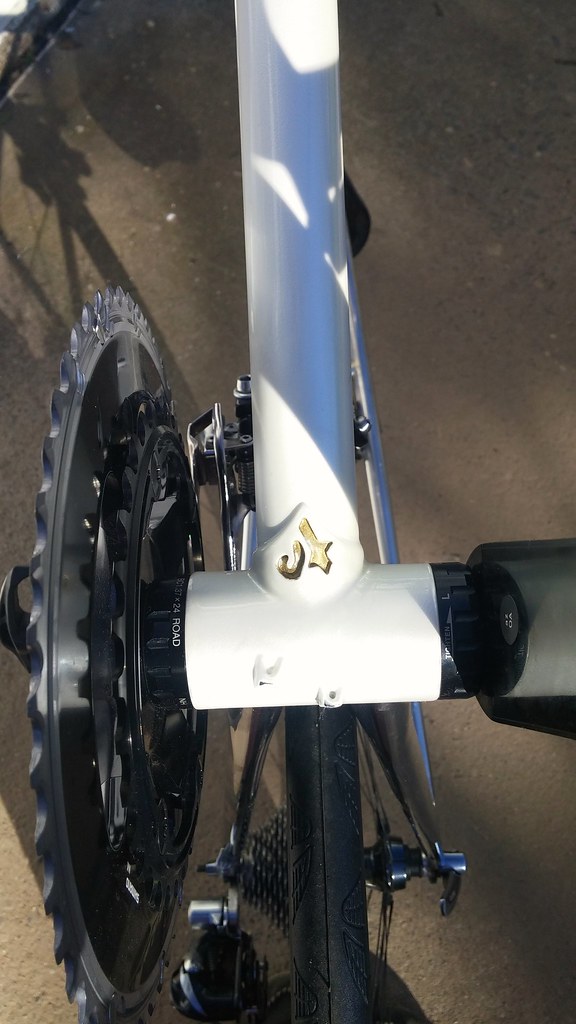
So, this is my first framebuild. Used Reynolds 631 for this and a Bafang kit G340 with Nexus 7 and Shimano roller brake to keep it simple. The frame is TIG welded. The �tank� is used to hide the battery. Logo in brass and etched. Letters in thin alu.
As a prototype i am happy with this. Handles great. Mainly used when out on trips with our RV ergo the name Carthago.
Next build will be a lady model with out the �tank� and with disc brakes.

As a prototype i am happy with this. Handles great. Mainly used when out on trips with our RV ergo the name Carthago.
Next build will be a lady model with out the �tank� and with disc brakes.
Likes For lejo:
07-14-22, 11:03 PM
#456
Newbie
Join Date: Jan 2019
Location: North Shore, BC
Posts: 17
Bikes: 2022 'Eventyr Ravn' Custom Ti Touring Bike, 2017 Norco VFR4 (Drop Bar Conversion), 2009 Specialized Crosstrail Elite
Mentioned: 0 Post(s)
Tagged: 0 Thread(s)
Quoted: 9 Post(s)
Likes: 0
Liked 3 Times
in
2 Posts
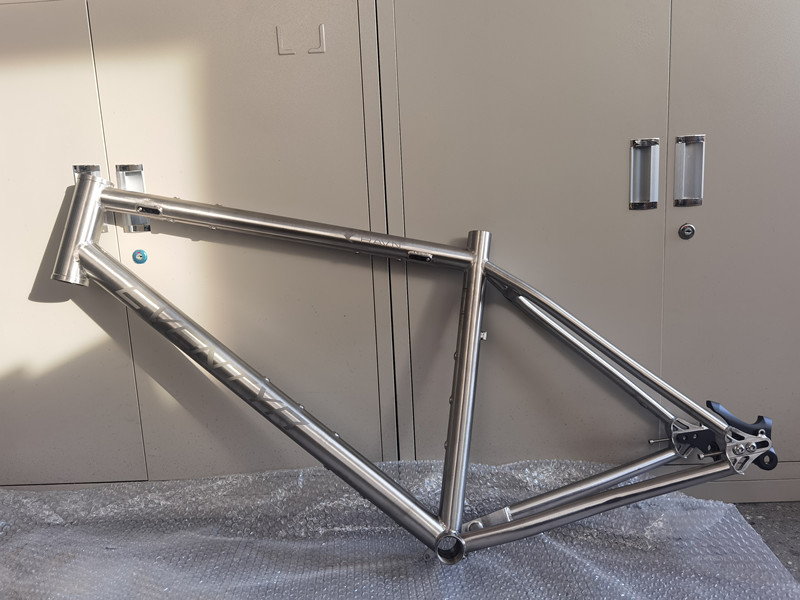
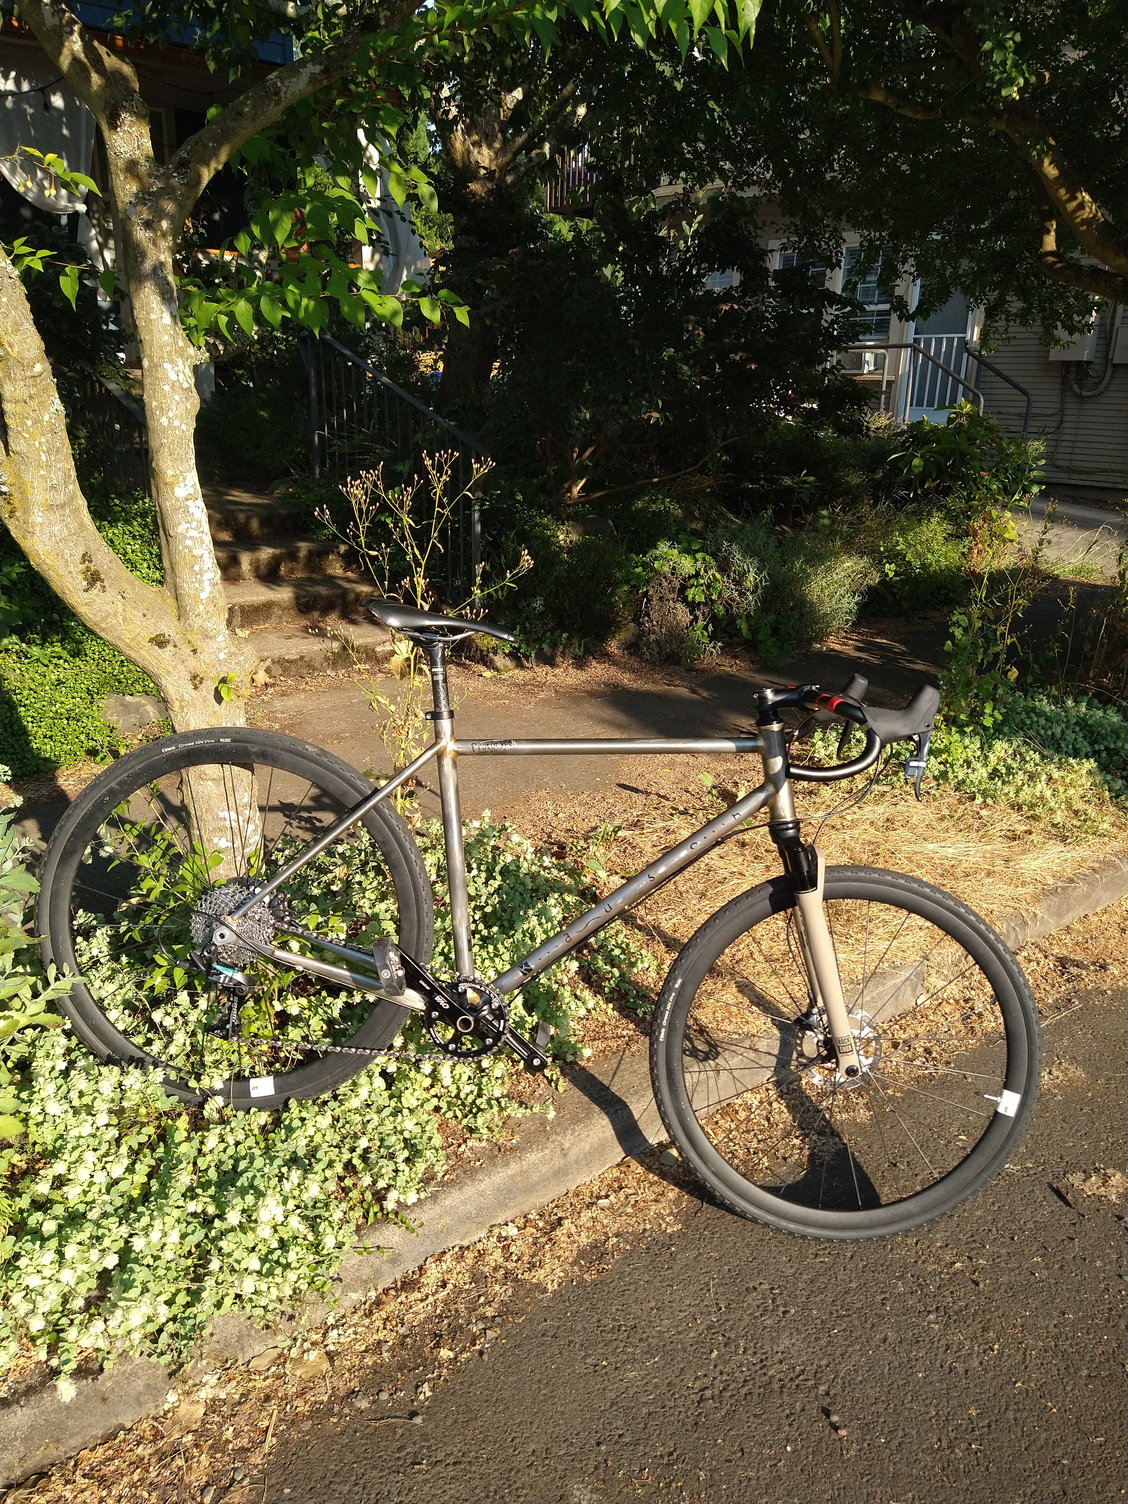
Not sure if I'll be celebrated or skinned alive for posting this here, but this is the closest I'll ever get to the wizardry that is framebuilding:
My custom touring bike, designed by yours truly and built by Titan Cycles, out of Xi'an, China.
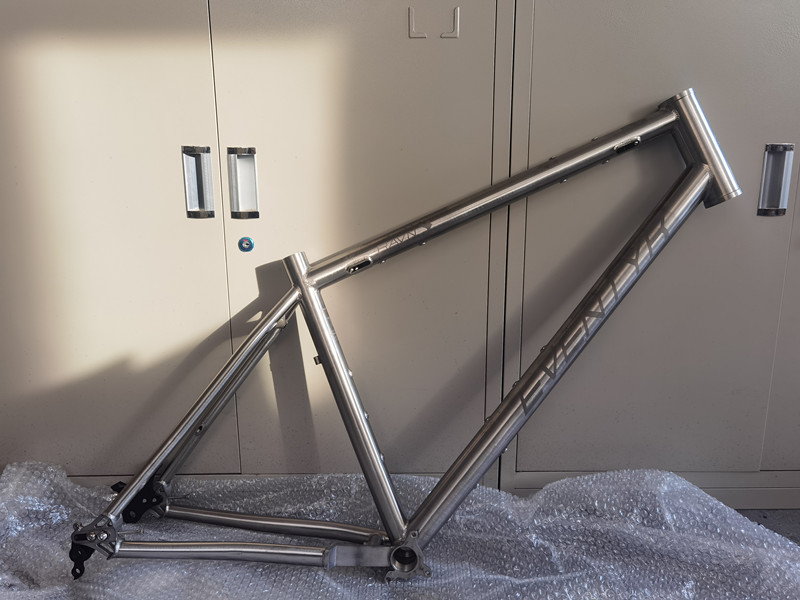
Isn't she beautiful?
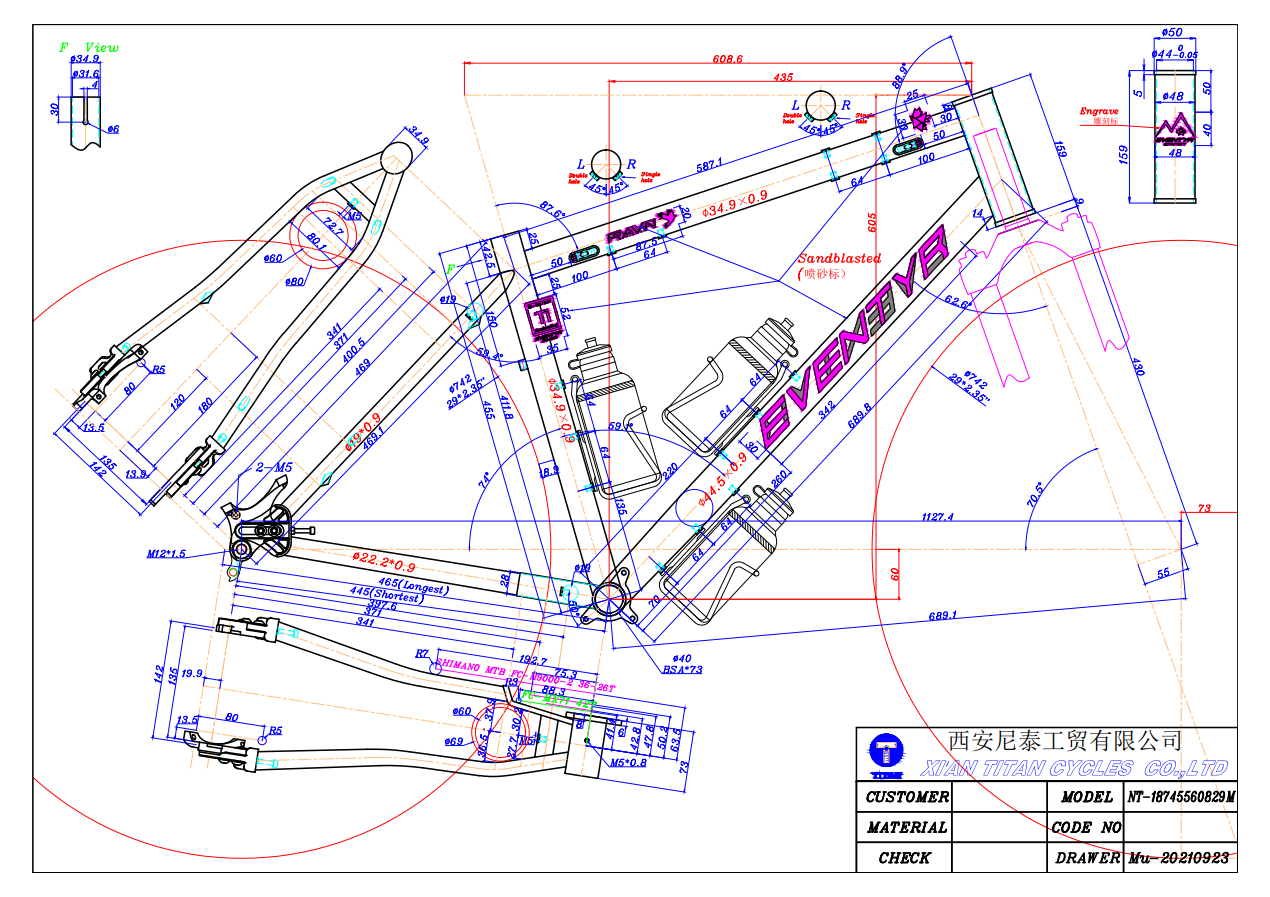
Final Design Drawing - Almost prettier than the frame...
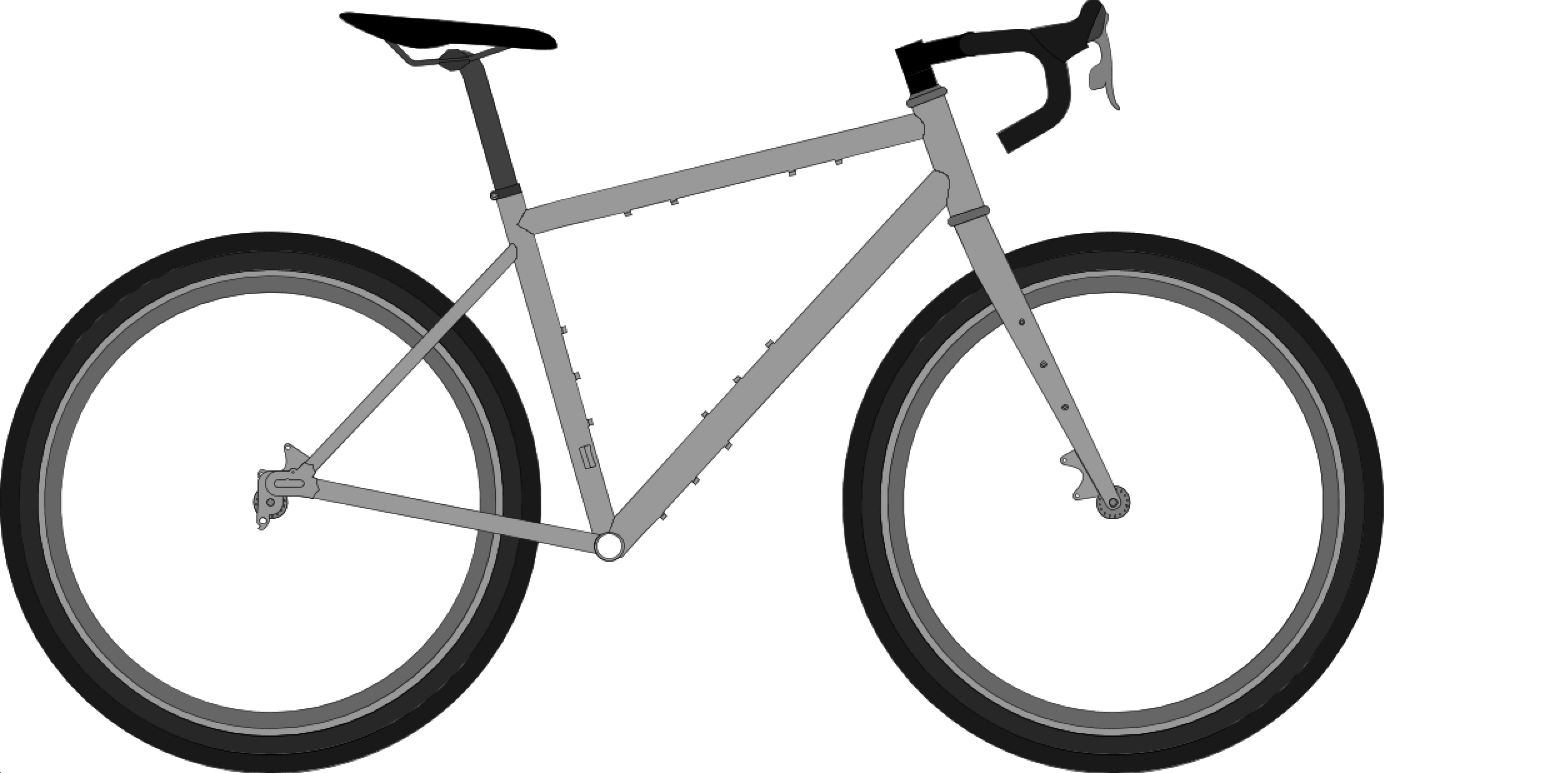
Very rough sketch in BikeCAD - more importantly, this sketch helped me decide on my geo numbers
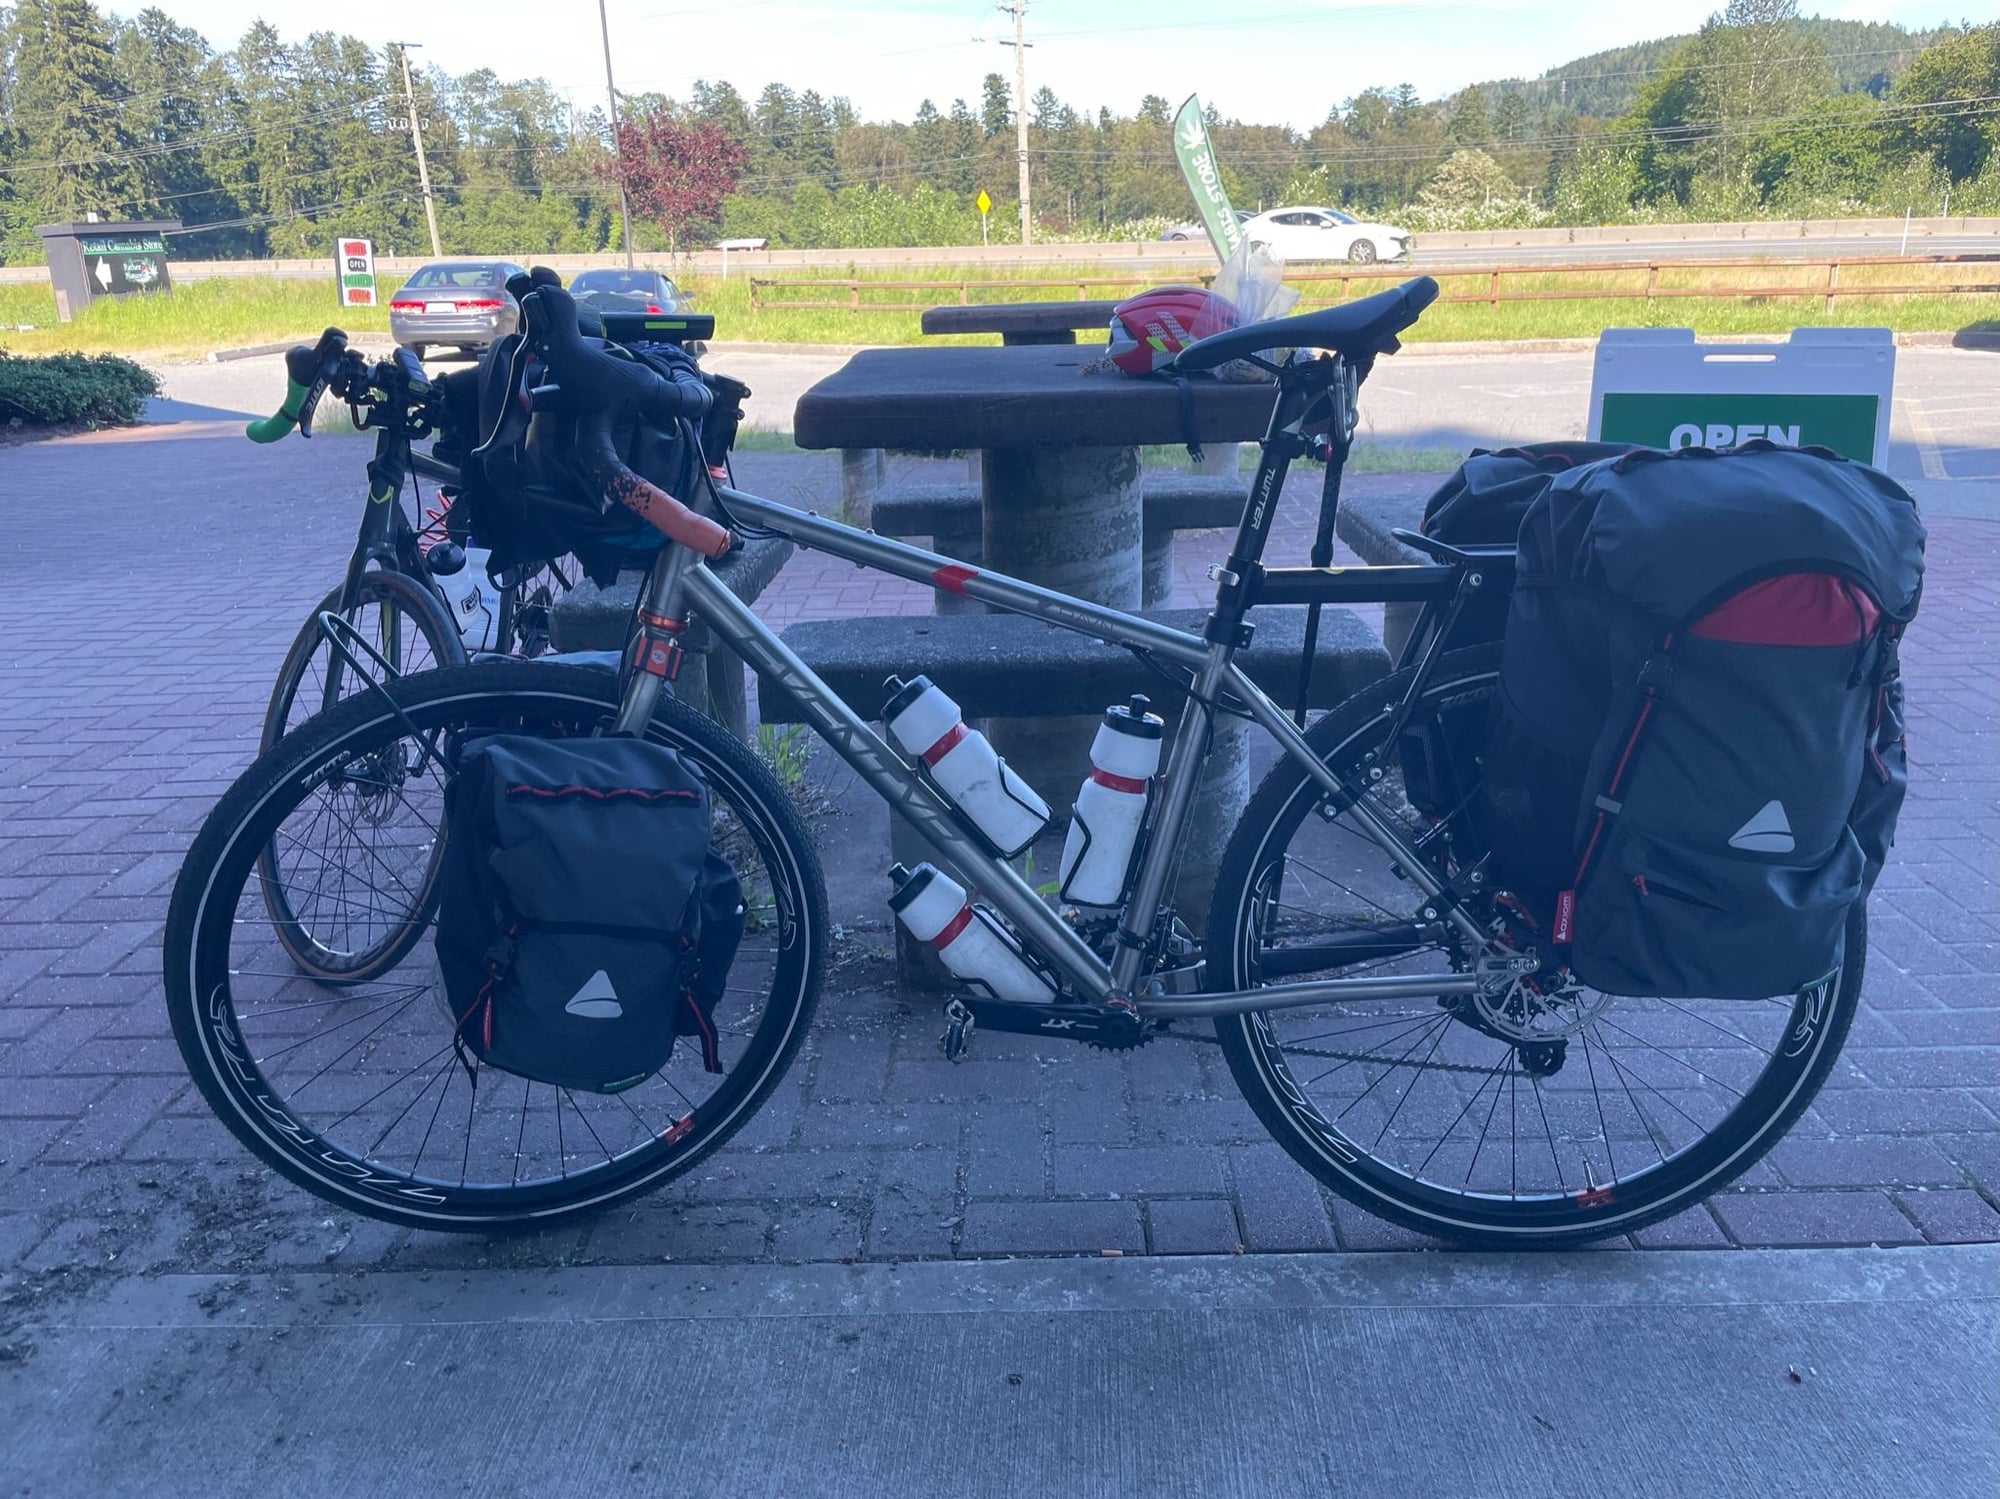
Bad photo, I know. Fully loaded/fitted for testing - not final parts spec
I'll mostly be riding on-road with this bike, but have futureproofed this bike with the ability to run 29x2.0" tires (or even 27.5x3.0" if I wanted to), adding sliding dropouts (for an IGH someday?), and relaxing the geometry slightly to increase the capability offroad. Going with a 70.5 degree head tube angle and a 60mm BB drop was probably not the smartest idea for a solely on-road touring bike (and I definitely notice it, especially the BB Drop), but the extra clearance and stability that provides is worth it to me.
I based the bike's geometry on a combination of bikes: think of this as a Kona Sutra mixed with a Moots Routt, with elements of Trek 520 and Surly LRT thrown in. I was also chasing an MTB-esque sloped top tube - partially for the additional exposed seatpost (more flex), and partially because I think it looks really cool. I'm still figuring things out fit-wise, but I really love the geometry - it fits me like a glove.
Due to Shimano's parts shortage (and the difficulty in finding legit parts in Canada), I've just thrown on a bunch of old/knockoff parts I had lying around. They fit on okay, and allowed me to stress-test the frame on a fully loaded 120km ride on Vancouver Island. I put a total of 115lb of gear on the frame, sat my 260lb rear-end on the saddle, and towed my 130lb sister and her 55lb bike up the hills - I'm proud to say that the only thing limiting my bike was my quadriceps and my lung capacity. Lateral stiffness was amazing!
Let me know what you guys think - I can't really alter the geometry (duh), but if you have any tips/noticed some glaring issue I missed, please let me know! As I said - I'm not a true framebuilder, but I'm proud of the job nonetheless.
Cheers
My custom touring bike, designed by yours truly and built by Titan Cycles, out of Xi'an, China.
Isn't she beautiful?
Final Design Drawing - Almost prettier than the frame...
Very rough sketch in BikeCAD - more importantly, this sketch helped me decide on my geo numbers
Bad photo, I know. Fully loaded/fitted for testing - not final parts spec
I'll mostly be riding on-road with this bike, but have futureproofed this bike with the ability to run 29x2.0" tires (or even 27.5x3.0" if I wanted to), adding sliding dropouts (for an IGH someday?), and relaxing the geometry slightly to increase the capability offroad. Going with a 70.5 degree head tube angle and a 60mm BB drop was probably not the smartest idea for a solely on-road touring bike (and I definitely notice it, especially the BB Drop), but the extra clearance and stability that provides is worth it to me.
I based the bike's geometry on a combination of bikes: think of this as a Kona Sutra mixed with a Moots Routt, with elements of Trek 520 and Surly LRT thrown in. I was also chasing an MTB-esque sloped top tube - partially for the additional exposed seatpost (more flex), and partially because I think it looks really cool. I'm still figuring things out fit-wise, but I really love the geometry - it fits me like a glove.
Due to Shimano's parts shortage (and the difficulty in finding legit parts in Canada), I've just thrown on a bunch of old/knockoff parts I had lying around. They fit on okay, and allowed me to stress-test the frame on a fully loaded 120km ride on Vancouver Island. I put a total of 115lb of gear on the frame, sat my 260lb rear-end on the saddle, and towed my 130lb sister and her 55lb bike up the hills - I'm proud to say that the only thing limiting my bike was my quadriceps and my lung capacity.
Lateral stiffness was amazing!Let me know what you guys think - I can't really alter the geometry (duh), but if you have any tips/noticed some glaring issue I missed, please let me know! As I said - I'm not a true framebuilder, but I'm proud of the job nonetheless.
Cheers
07-24-22, 07:56 PM
#457
Newbie
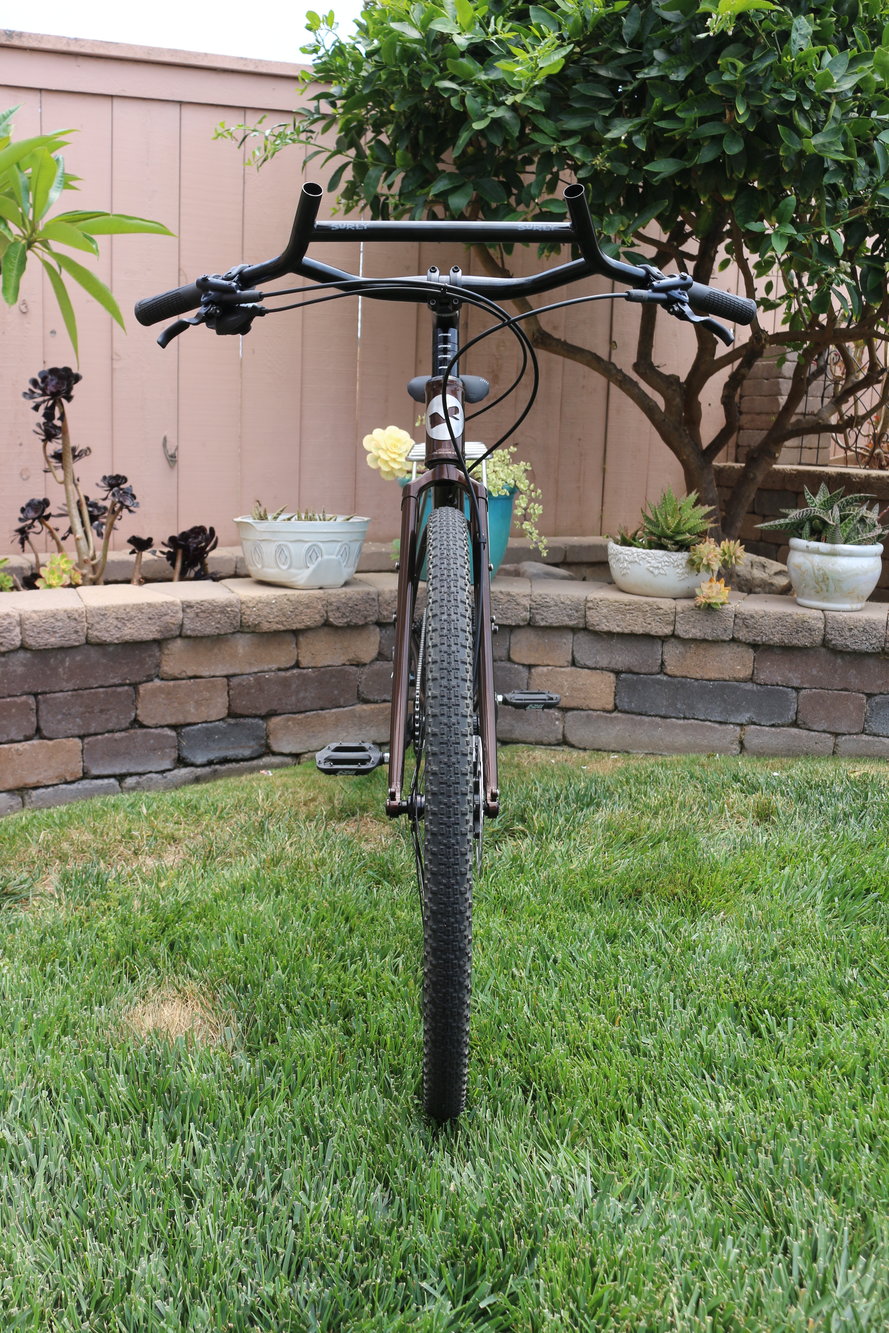
Bike number 2 is in the books. This is a bit gravel and a bit commuter with a little bike packing thrown in. It is all my friend said that he wanted. It was a fun project as I didn't have a clue how I was going to pull it off, but I'm really happy with how it came out!
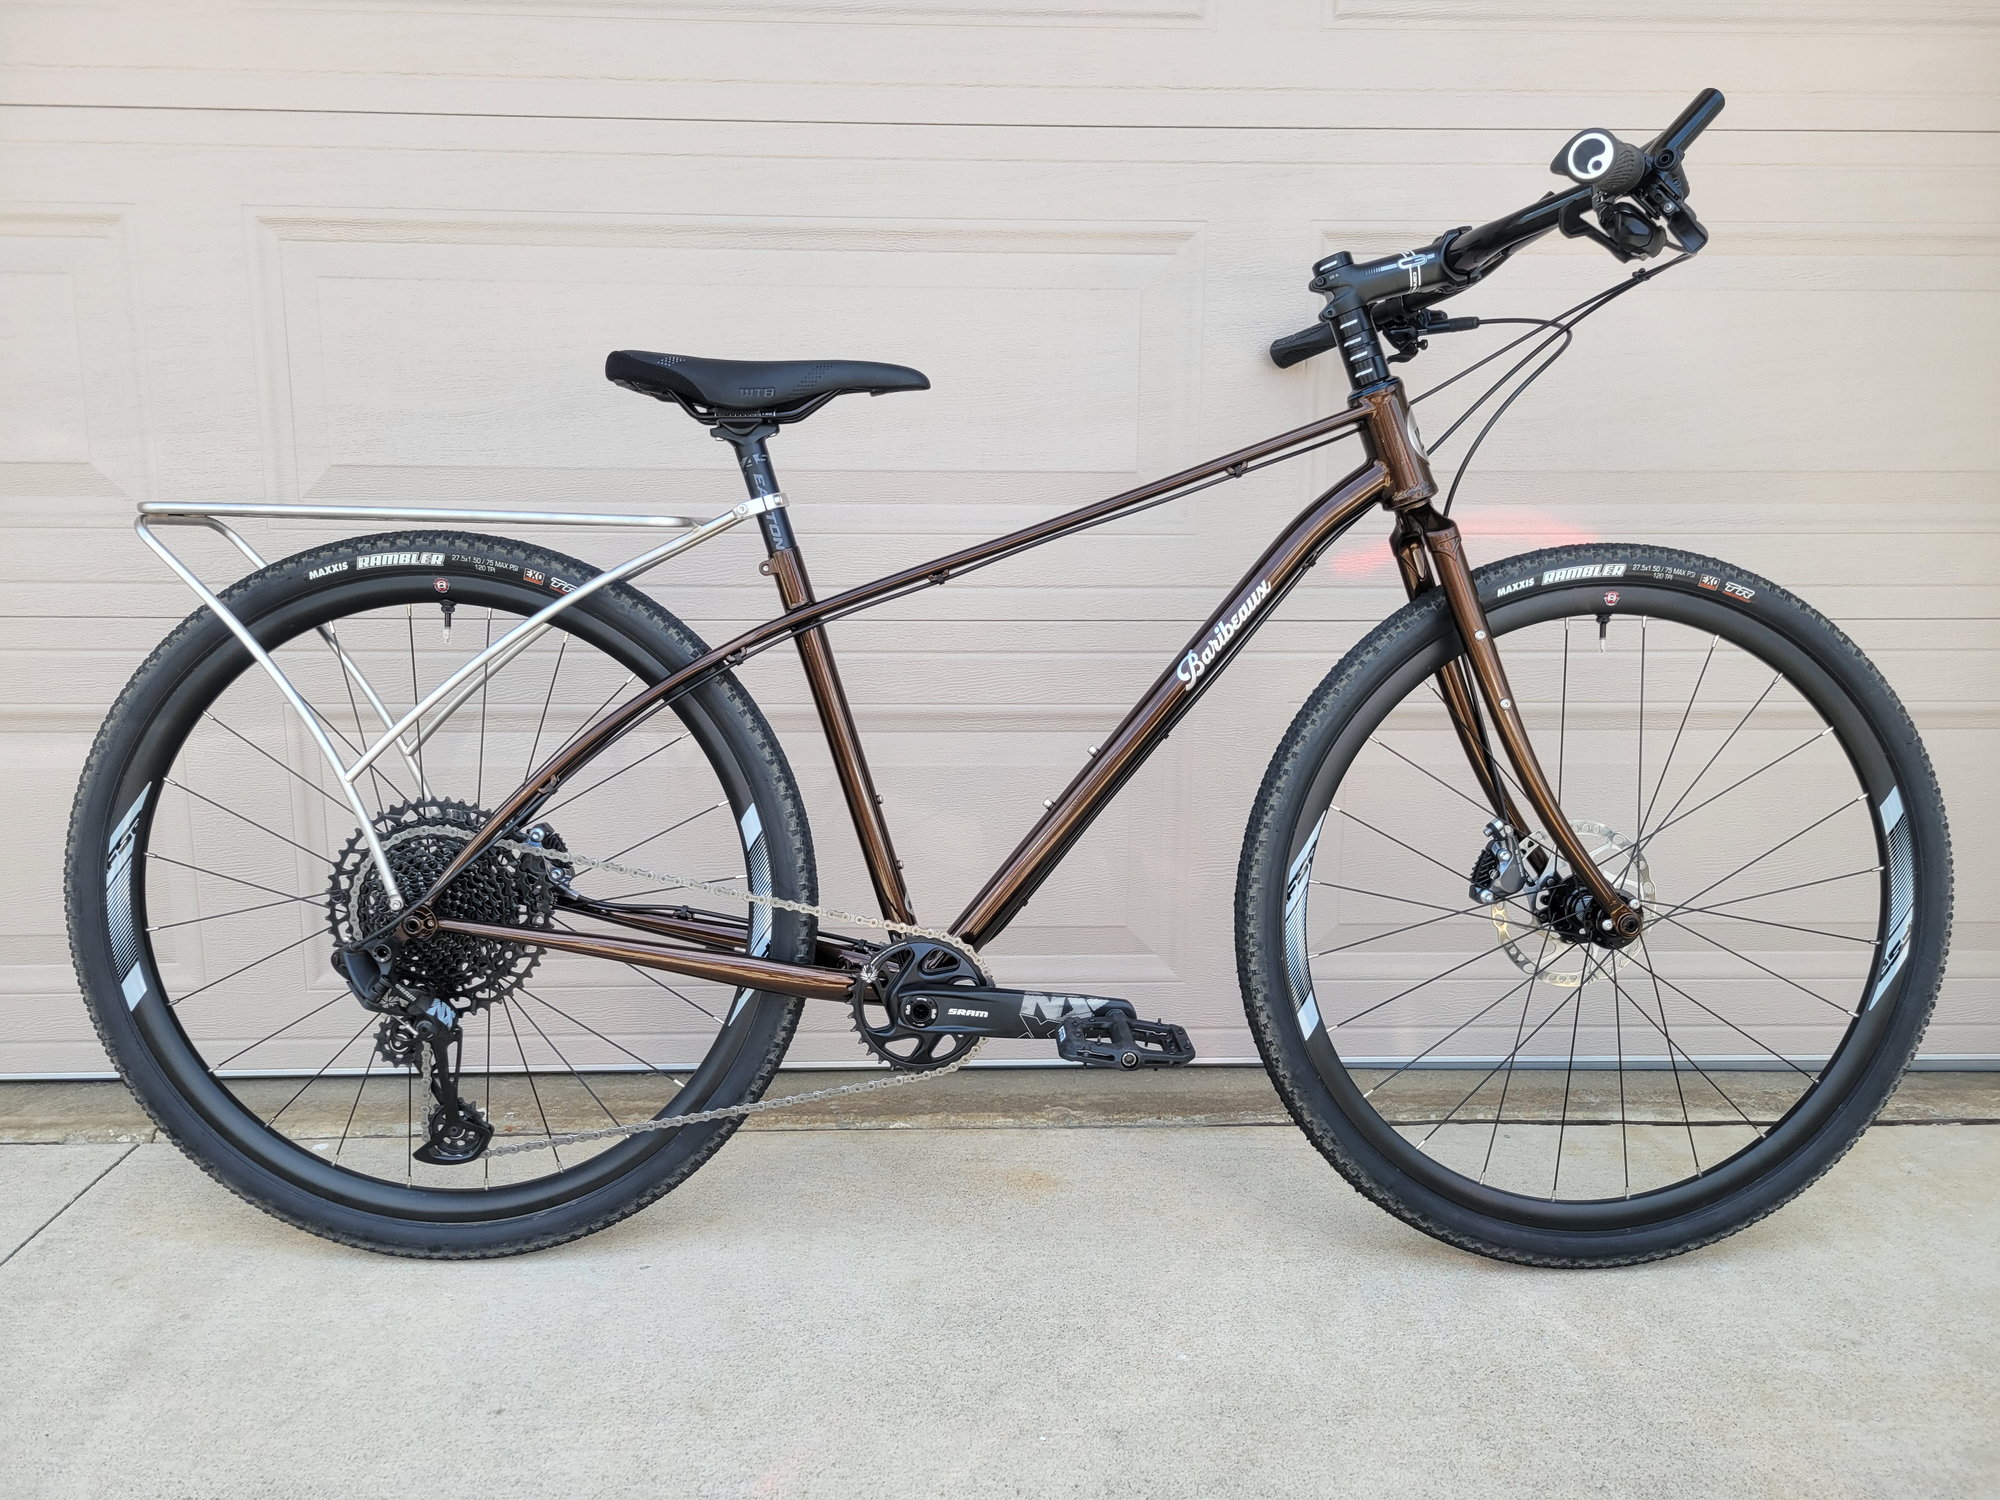
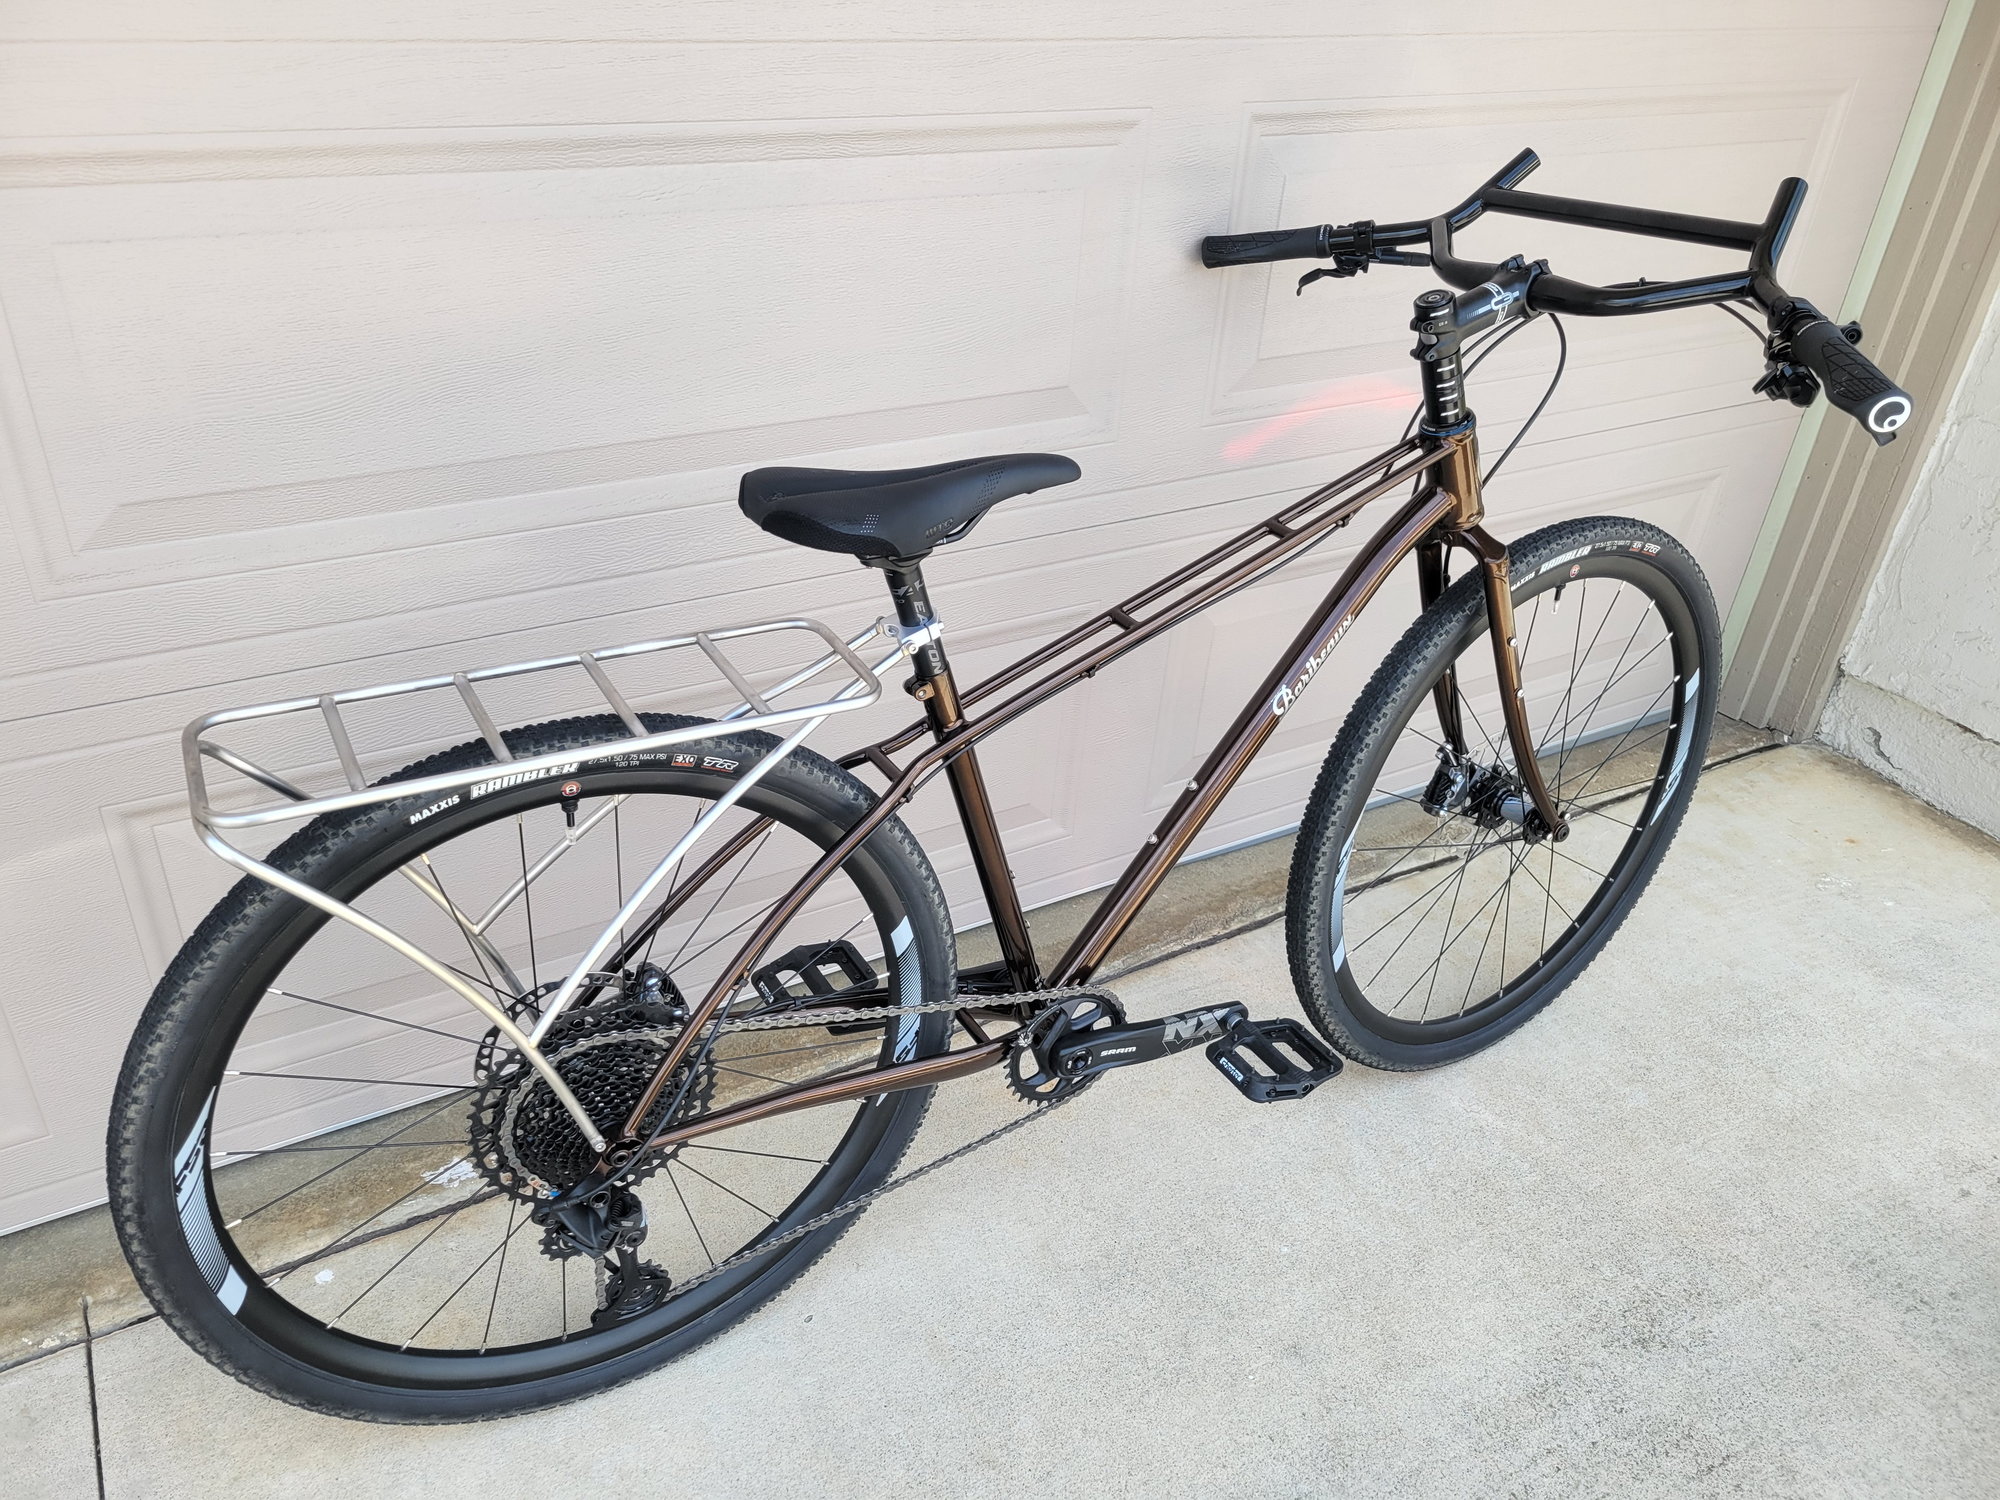
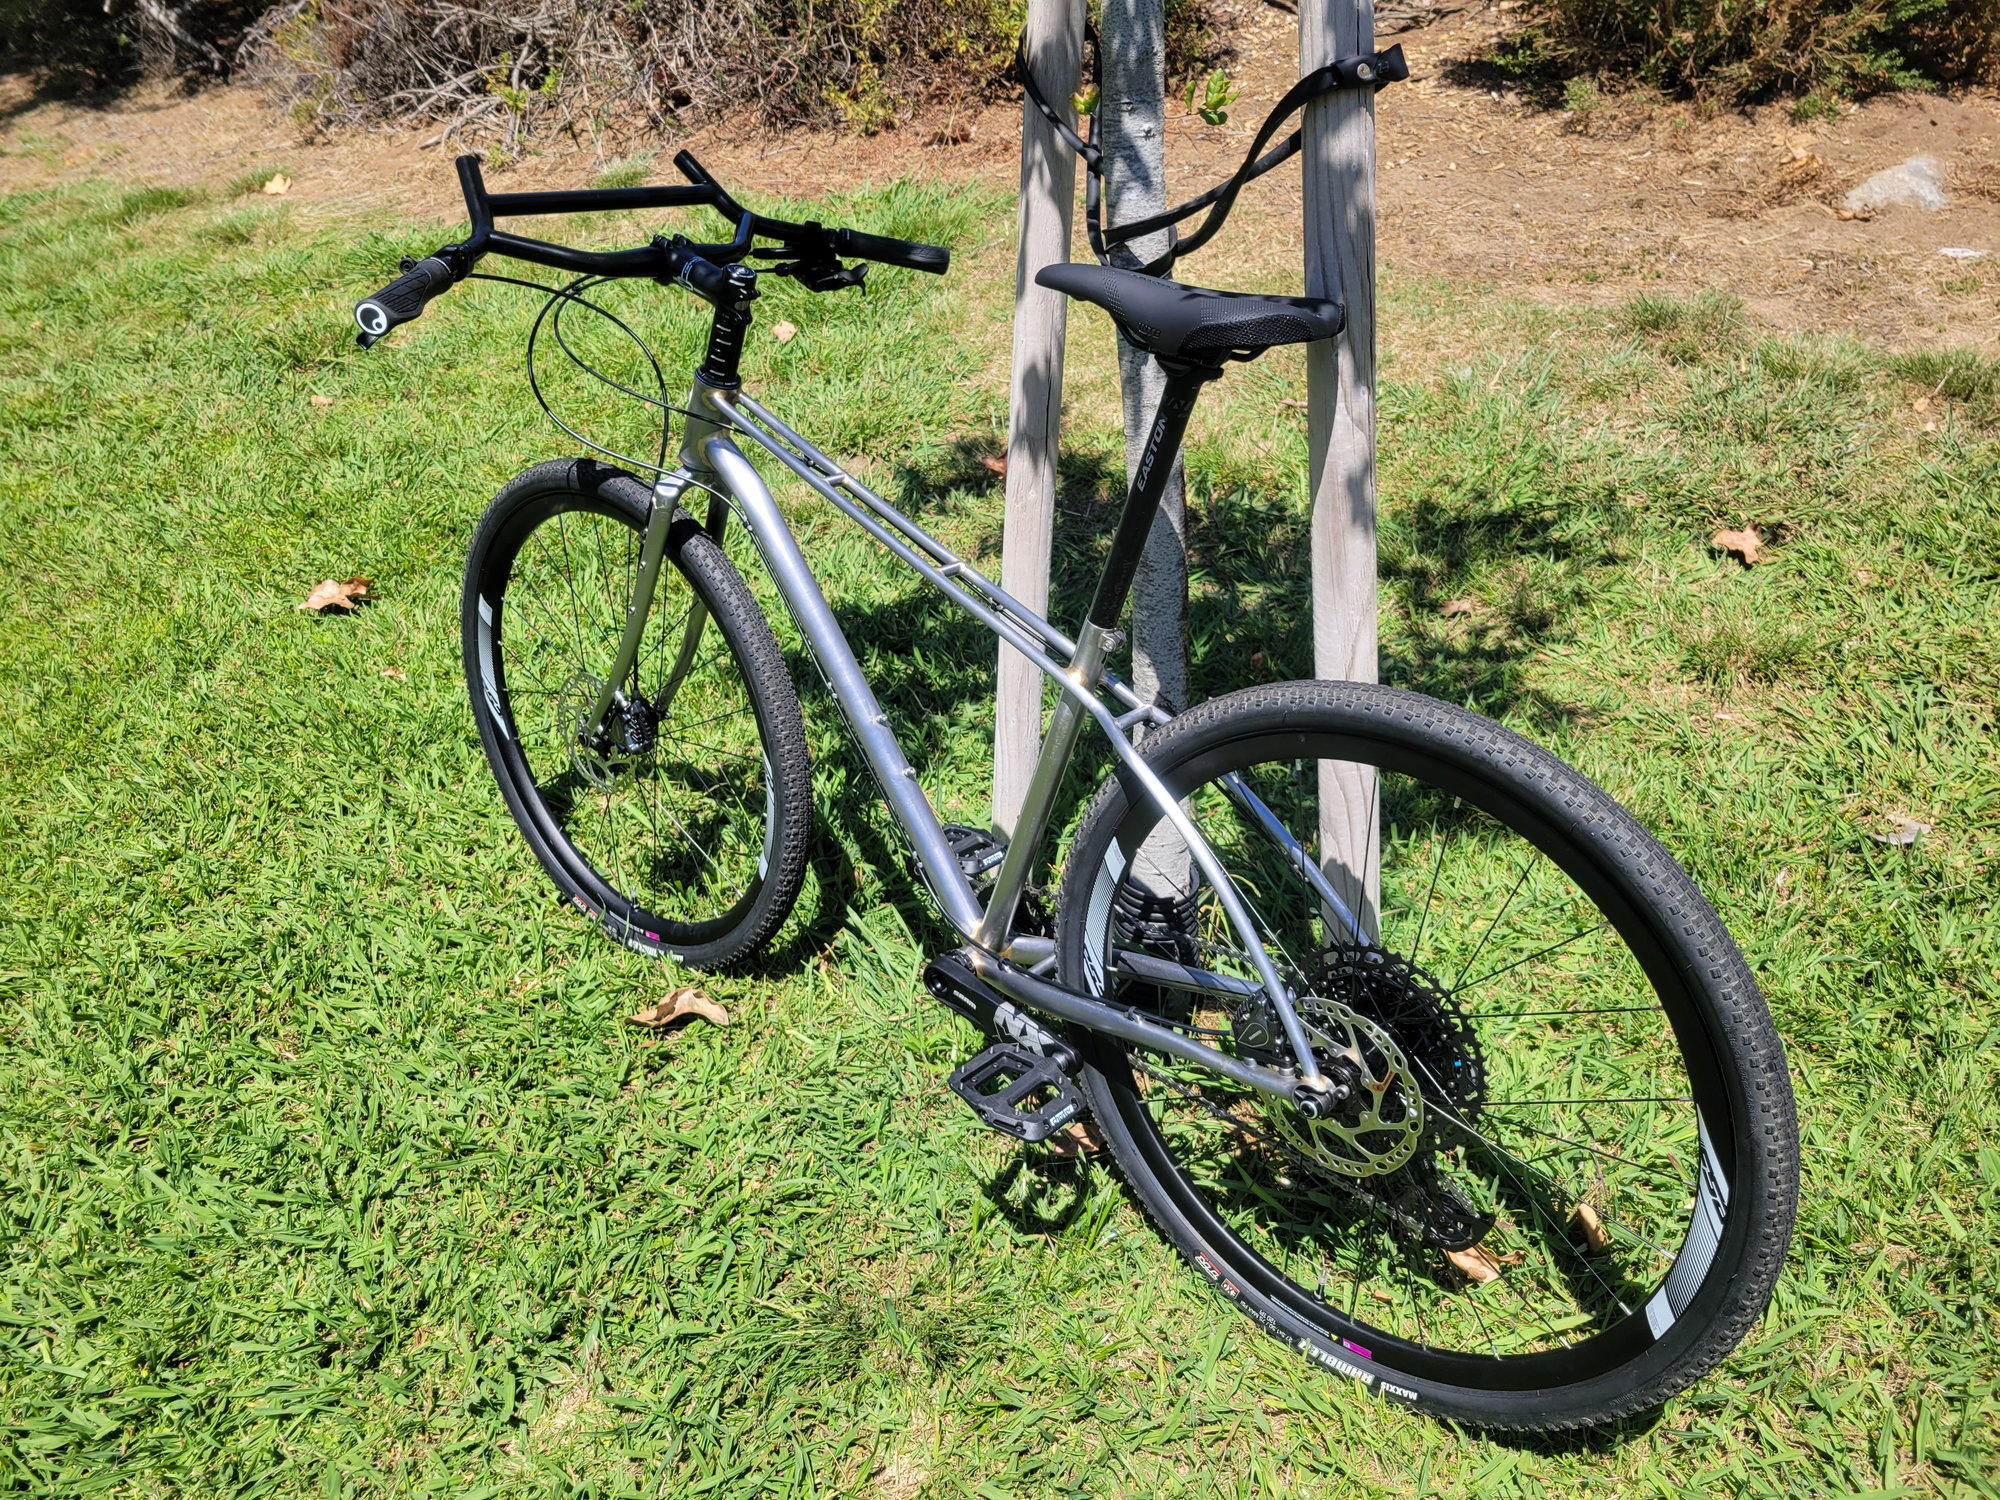
Before paint. Doing a little testing!
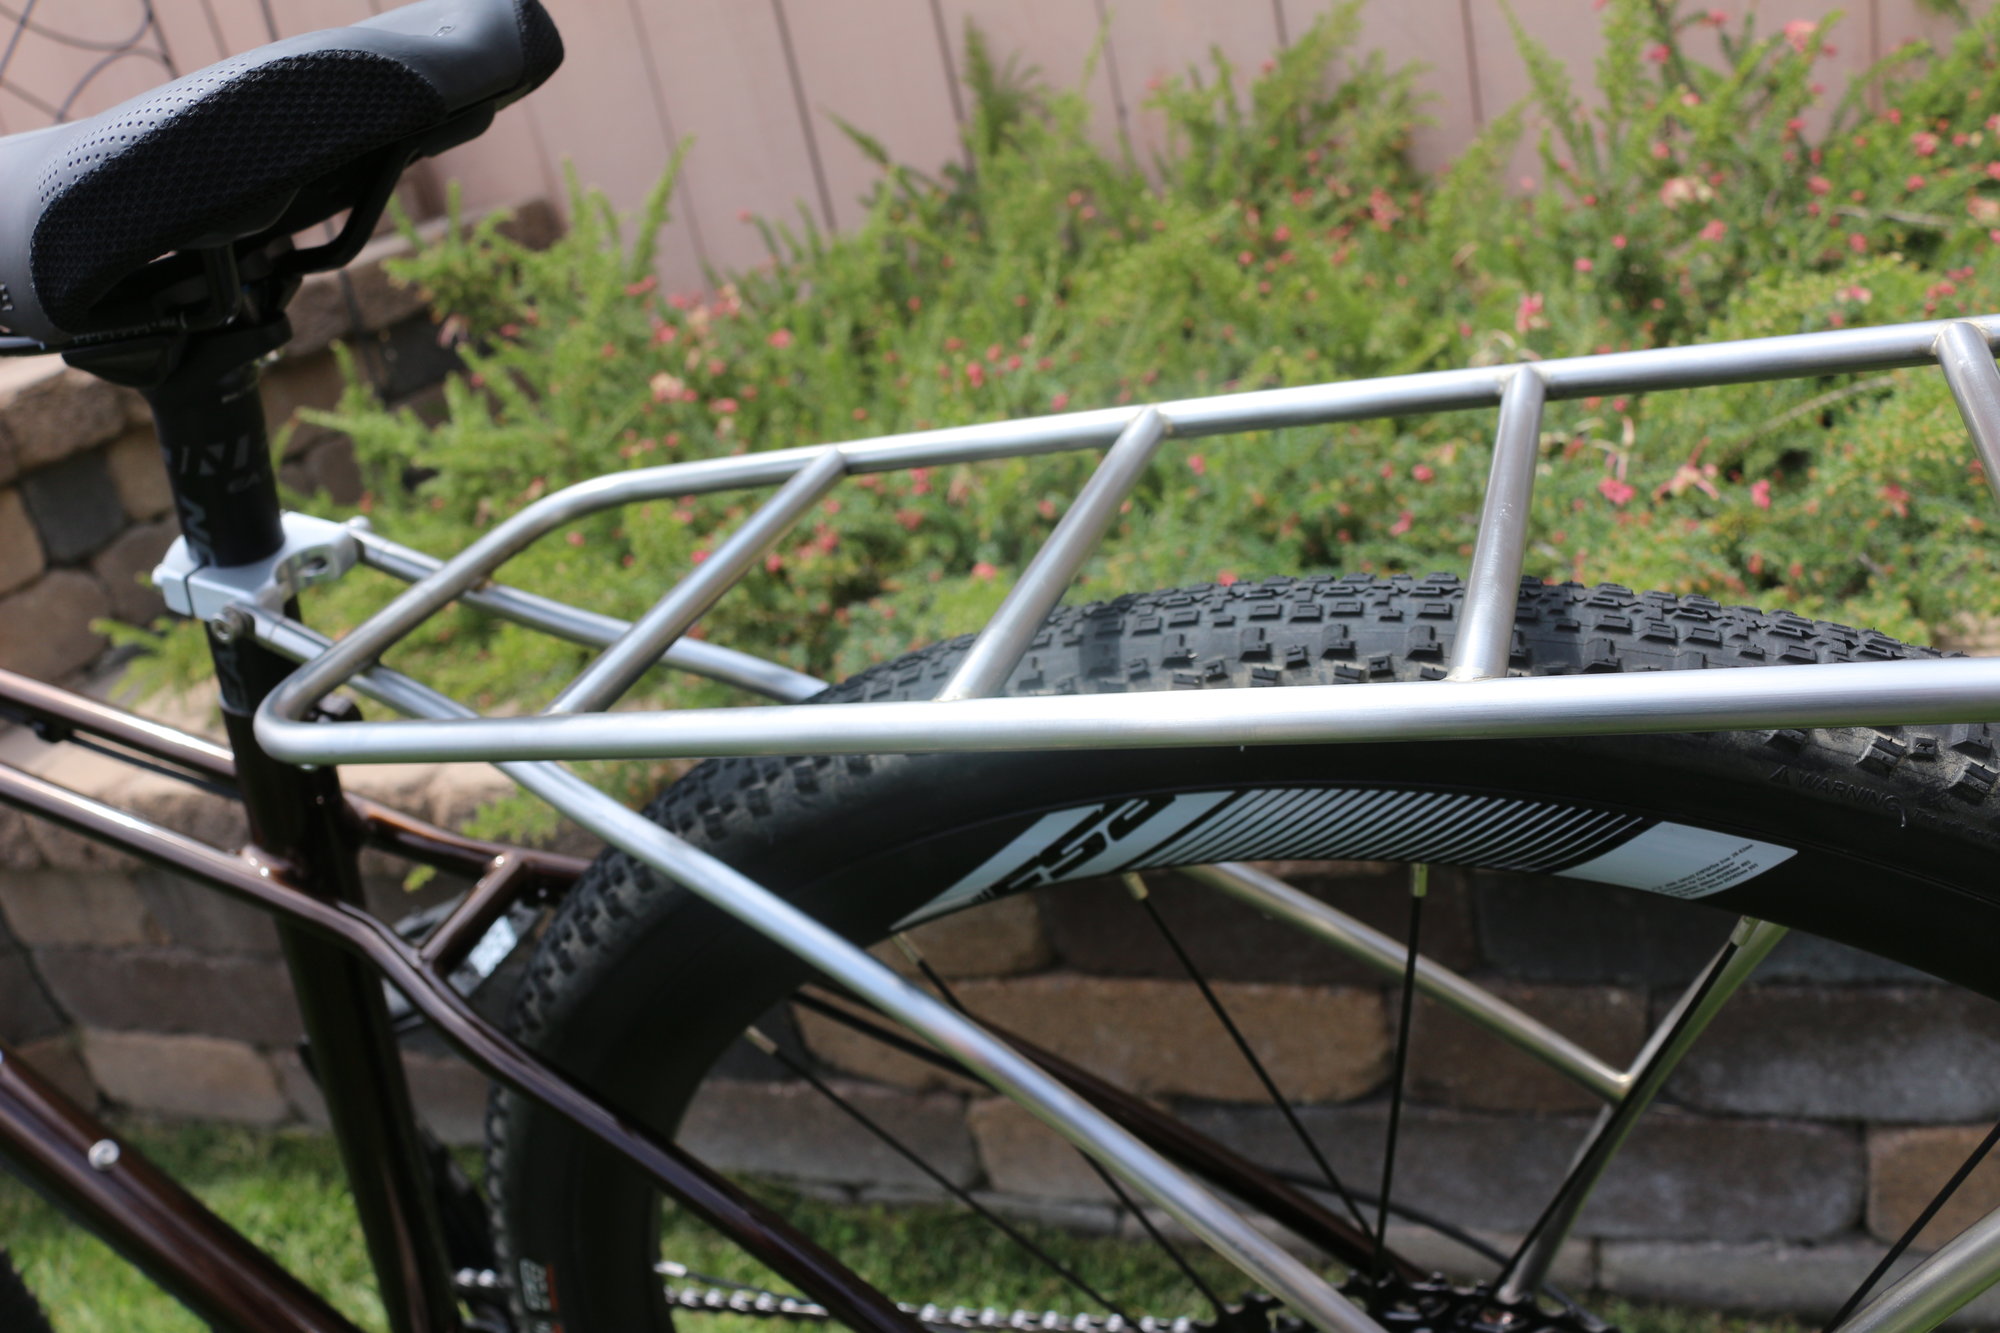
Custom bike gets a custom rack...
Before paint. Doing a little testing!
Custom bike gets a custom rack...
Likes For Devin Rickey:
08-01-22, 07:35 PM
#458

Junior Wingnut

Got my gravel frame to where I could finally ride it! It's ugly, but I kind of like it that way. Waiting on a better set of wheels to get built that will accommodate larger tires and then it will just need finishing touches!
03-18-23, 04:27 PM
#459
Steel is real

Join Date: Mar 2013
Location: Not far from Paris
Posts: 1,968
Bikes: 1992Giant Tourer,1992MeridaAlbon,1996Scapin,1998KonaKilaueua,1993Peugeot Prestige,1991RaleighTeamZ(to be upgraded),1998 Jamis Dragon,1992CTWallis(to be built),1998VettaTeam(to be built),1995Coppi(to be built),1993Grandis(to be built)
Mentioned: 2 Post(s)
Tagged: 0 Thread(s)
Quoted: 671 Post(s)
Liked 979 Times
in
650 Posts


 05-17-23, 11:19 PM
#460
Senior Member
Join Date: Oct 2015
Location: SE Wisconsin
Posts: 774
Bikes: Trek 970, Bianchi Volpe,Casati
Mentioned: 3 Post(s)
Tagged: 0 Thread(s)
Quoted: 358 Post(s)
Liked 122 Times
in
87 Posts
wow
I like the Curbdestroyer bike too.
Thought of a way to do tubes like that in carbon, ( sorry, if it works it'll be a "secret", if not I'll tell you.
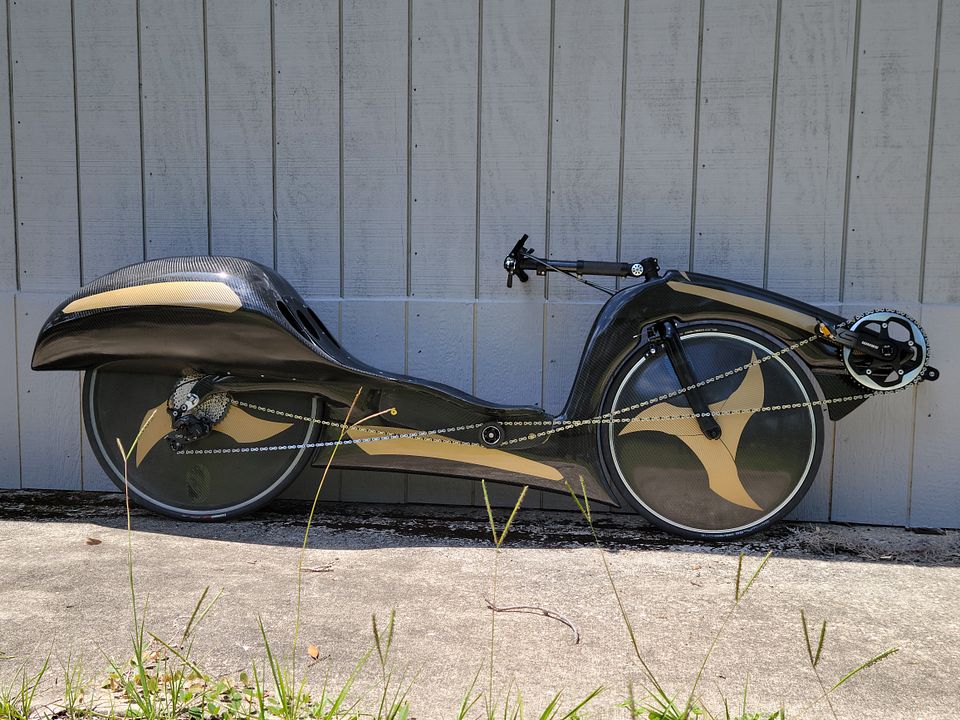
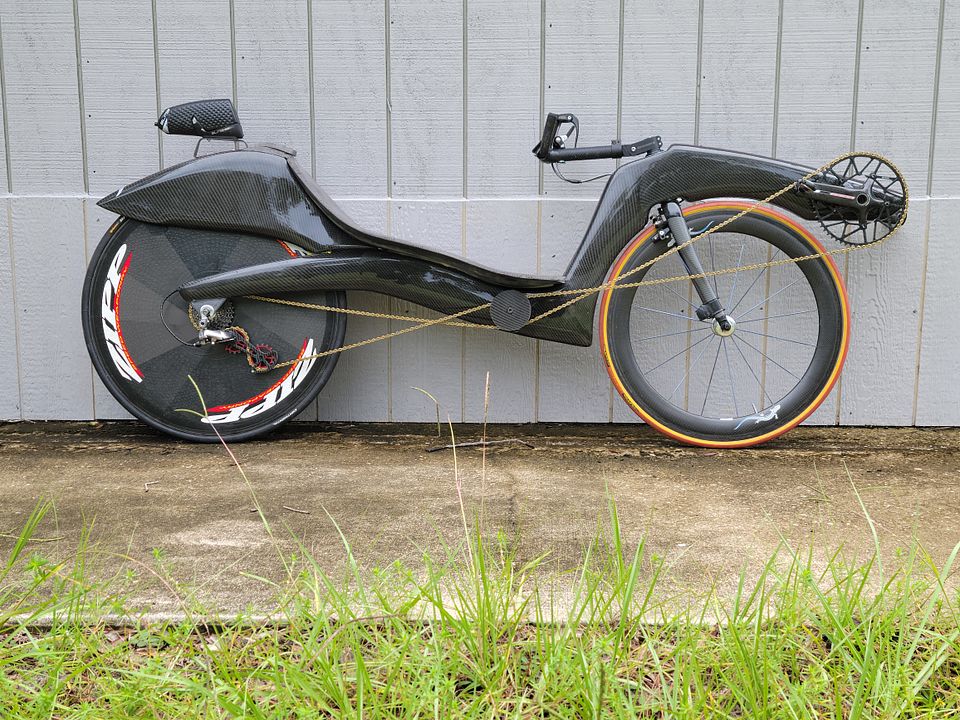
Ultraman; tubes are all mold/ mandrel or bladder molded. Sorry no shortcuts I know of. I did build the main triangle tubes in 6.5 hrs though. 2lbs structural foam was left in the chain and seatstays. 11g's each.
Latest builds and a finished Hammerhead;


JM
Thought of a way to do tubes like that in carbon, ( sorry, if it works it'll be a "secret", if not I'll tell you.
Ultraman; tubes are all mold/ mandrel or bladder molded. Sorry no shortcuts I know of. I did build the main triangle tubes in 6.5 hrs though. 2lbs structural foam was left in the chain and seatstays. 11g's each.
Latest builds and a finished Hammerhead;
JM
Likes For rossiny:
07-13-23, 05:24 PM
#461
Newbie
Join Date: Nov 2009
Posts: 23
Mentioned: 0 Post(s)
Tagged: 0 Thread(s)
Quoted: 3 Post(s)
Likes: 0
Liked 18 Times
in
8 Posts
Blasts from the past? Those are all from 2008-9'. Still build the dual 700 (Apache)
Here are some more recent models;

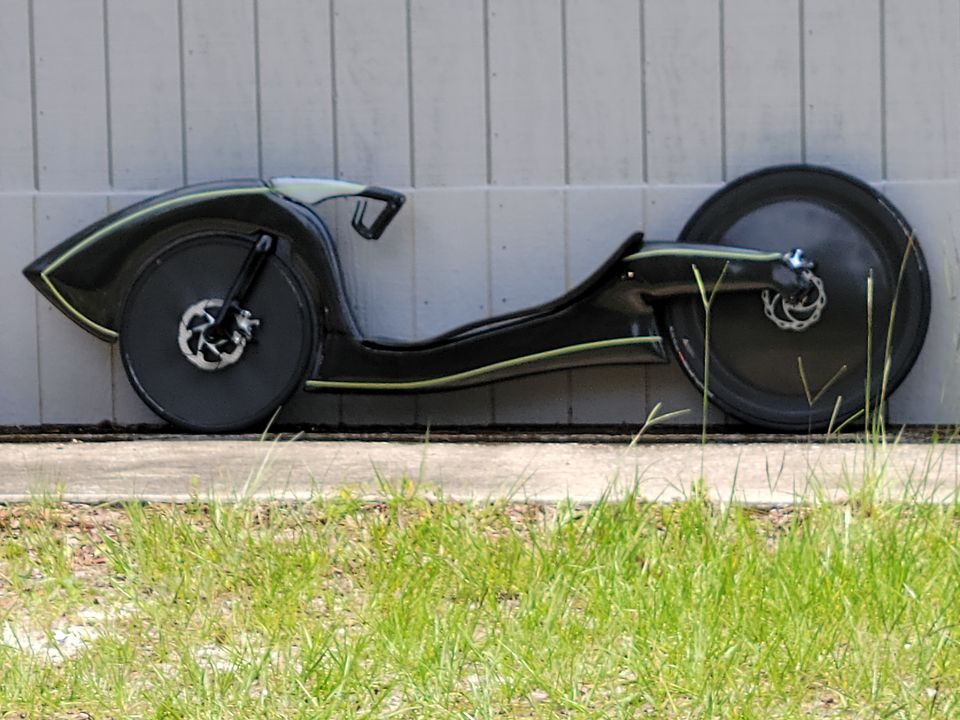
The Arrowhead (650 front wheel) is also from 2009.
Need to get out more.
JM

