


Which tool to remove this 25yr old BB?
 04-26-18 | 10:48 AM
#1

Thread Starter
Senior Member
Joined: Oct 2017
Posts: 259
Likes: 3
From: Devon, UK
Bikes: Marin Palisades Trail (1991)
Which tool to remove this 25yr old BB?
'sup wrenchsperts
I'm restoring a Marin Palisades Trail from 1992 and just finished stripping it right down today. But I'm stuck at the bottom bracket because it's the first time I've seen one like it and I don't know what tool I need to remove it.
I'm hoping y'all can tell me. And shall I expect to see an axle, cones and bearings or a cartridge once I get in?
Thanks in advance
[edit] BTW I've got the crank bolt back in there so I don't lose it in case you're wondering why it looks funny
 04-26-18 | 11:13 AM
#2
Senior Member
Joined: May 2011
Posts: 3,780
Likes: 17
From: Upstate NY
Bikes: Bianchi San Mateo and a few others
You (or someone) has already removed the locking. To remove the cup, the proper tool would be a pin spanner like the Park Tool SPA-1. You can improvise, though. You just need something that'll fit in the holes so you can turn the cup counter-clockwise. I've used needlenose pliers in a pinch. Open 'em up, put the tips in two different holes on the cup, and turn. It might not be so easy with all that corrosion, though.
04-26-18 | 11:17 AM
#3
Senior Member
Joined: Jul 2009
Posts: 786
Likes: 6
You (or someone) has already removed the locking. To remove the cup, the proper tool would be a pin spanner like the Park Tool SPA-1. You can improvise, though. You just need something that'll fit in the holes so you can turn the cup counter-clockwise. I've used needlenose pliers in a pinch. Open 'em up, put the tips in two different holes on the cup, and turn. It might not be so easy with all that corrosion, though.
04-26-18 | 11:38 AM
#4
Banned
Joined: Jun 2010
Posts: 43,586
Likes: 1,380
From: NW,Oregon Coast
Bikes: 8
Id suggest you probably will not re use it, since the current shimano cartridge BB are so cheap..
those Park type pin spanners are cheap, but the fixed cup wrench for the other side is much less so,
Consider letting the bike shop remove that rusty one, so you won't be buying tools you use once.
then after it comes back from the powder coat job, get the installation tool for the new stuff,?
....
those Park type pin spanners are cheap, but the fixed cup wrench for the other side is much less so,
Consider letting the bike shop remove that rusty one, so you won't be buying tools you use once.
then after it comes back from the powder coat job, get the installation tool for the new stuff,?
....
04-26-18 | 12:18 PM
#6
Senior Member
Joined: Jul 2009
Posts: 786
Likes: 6
04-26-18 | 12:22 PM
#7
Senior Member
Joined: May 2011
Posts: 3,780
Likes: 17
From: Upstate NY
Bikes: Bianchi San Mateo and a few others
...but if the fixed cup is in similar shape to the picture above, it could be a @#$%& to remove no matter what tool you're using. Set aside some time to do battle with that one.
AND BE AWARE THAT THE FIXED UP IS REVERSE-THREADED. It'll be even harder to turn if you're turning the wrong way. ;-)
Even with the tool concern aside, you might want to keep the shop's phone number handy if you need an assist. This one looks like it could be tough.
04-26-18 | 12:41 PM
#9
Full Member

Joined: May 2016
Posts: 242
Likes: 70
From: Duluth, Minnesota, USA
I have a VAR pin tool, from my days in the bike biz. It is a sturdy tool but I would not risk putting much force into it on that adjustable cup. I'd use PB Blaster and tap on it over the course of a few days. If a pin tool does not budge it (a likely prospect) I'd go the big vice-grips route suggested by redlude, above. Or take it to a bike shop.
04-26-18 | 01:29 PM
#10
Passista


Joined: Jul 2005
Posts: 8,248
Likes: 1,211
Bikes: 1998 Pinarello Asolo, 1992 KHS Monta�a pro, 1980 Raleigh DL-1, IGH Hybrid, IGH Utility
That cup shouldn't be tight once the lockring has been removed, in fact you probably could turn it with your fingers. But this one is rusted, better to apply some penetrating oil and wait at least overnight. You can then use a brass punch and a hammer to tap it back and forth until it breaks free. It won't damage the cup, but you will probably have to replace it anyway.
04-27-18 | 06:33 AM
#11

On Holiday
Joined: Apr 2017
Posts: 1,013
Likes: 15
Bikes: A bunch of old steel bikes
I second the recommendation to have a bike shop do it. A wimpy pin spanner is not going to budge that rusty cup and a proper tool may cost more than the shop will charge. I do have to say that the last time I encountered a bottom bracket that looked like that, I had to scrap the frame. The time before that, I spent close to 10 hours with heat, penetrant oil, drills, grinding tools, and hacksaw blades to remove the cups. I really hope that you have better luck. Let us know how it goes.
04-27-18 | 09:13 PM
#12

Generally bewildered

Joined: Aug 2015
Posts: 3,038
Likes: 344
From: Eastern PA, USA
Bikes: 2014 Trek Domane 6.9, 1999 LeMond Zurich, 1978 Schwinn Superior
04-27-18 | 09:52 PM
#13
Senior Member

Joined: Mar 2010
Posts: 1,795
Likes: 146

I look at that Park tool, SPA-1, and I already feel the pain and see the blood spatter. I've never used a tool like that without hurting myself. Looks like the Park HCW-4 might work. Sugino had one that's worked for me. Now the picture shows above the text. WUWT?
edit: I've removed some adjustable cups from some crappy, grungy frames, but have never tried one that was really stuck. Spanners like the Sugino and Park HCW-4 aren't intended, I don't think, to be used with a lot of torque.
Last edited by desconhecido; 04-27-18 at 09:56 PM.
04-27-18 | 11:44 PM
#15
Full Member
Joined: Sep 2008
Posts: 219
Likes: 17
From: Vancouver
Bikes: Camerotti ti roadbike, Old Sears Free Spirit Tange Hi-Ten Single Speed built from a 12 speed, 1997 Cannondale CAD3 r500 with Shimergo groupset
I look at that Park tool, SPA-1, and I already feel the pain and see the blood spatter. I've never used a tool like that without hurting myself. Looks like the Park HCW-4 might work. Sugino had one that's worked for me. Now the picture shows above the text. WUWT?
edit: I've removed some adjustable cups from some crappy, grungy frames, but have never tried one that was really stuck. Spanners like the Sugino and Park HCW-4 aren't intended, I don't think, to be used with a lot of torque.
__________________
All dogs want to be lap dogs doesn't matter the size
-Animal loving friend
All dogs want to be lap dogs doesn't matter the size
-Animal loving friend
04-28-18 | 12:42 AM
#16
Thread Starter
Senior Member
Joined: Oct 2017
Posts: 259
Likes: 3
From: Devon, UK
Bikes: Marin Palisades Trail (1991)
Thanks for your replies everyone. I'm going to have a crack at removing this sucker myself, having managed everything so far. Whoever built this bike packed the threads with grease/threadlock enough that so far the rust hasn't travelled so far in that I couldn't remove anything without wd40, heat and bloody determination.
I'm going to start on it today unless the heavens open again. Will report back as requested. Going to go in heavy with the wd40 and gently with improvised tools from existing stock (needle nose pliers to start).
I'm going to start on it today unless the heavens open again. Will report back as requested. Going to go in heavy with the wd40 and gently with improvised tools from existing stock (needle nose pliers to start).
04-28-18 | 01:07 AM
#17
Full Member
Joined: May 2016
Posts: 242
Likes: 70
From: Duluth, Minnesota, USA
If unscrewing it doesn't happen... you could hacksaw or sawzall the exposed cup, then remove the spindle, then sawzall the cup parallel to the spindle. Once you're through to the bottom bracket shell you might be able to curl the cup in on itself. Not quite the nuclear option; more like a protracted war of attrition.
04-28-18 | 09:06 AM
#18
Senior Member
Joined: Feb 2012
Posts: 19,356
Likes: 5,478
From: Rochester, NY
Bikes: Stewart S&S coupled sport tourer, Stewart Sunday light, Stewart Commuting, Stewart Touring, Co Motion Tandem, Stewart 3-Spd, Stewart Track, Fuji Finest, Mongoose Tomac ATB, GT Bravado ATB, JCP Folder, Stewart 650B ATB
Sometimes removing the other/fixed cup first is easier and offers better access to the adjustable cup. I also agree that corrosion is the likely cause of this cup's not turning easily with the simplest of tools, a nail and lever placed between the nail and axle. Good luck taking better care in the future. Andy
04-29-18 | 10:11 AM
#19
Thread Starter
Senior Member
Joined: Oct 2017
Posts: 259
Likes: 3
From: Devon, UK
Bikes: Marin Palisades Trail (1991)
So the adjustable cup came off pretty easily. Drenched it in wd40 a couple of times over a couple of days, then gently tapped it round with a screwdriver poked into one of the holes.
The other side is a bit more of an issue but as soon as I find some sprung washers, I've got the bolt & nut ready to make my removal tool.
You should have seen the state of it inside....
The other side is a bit more of an issue but as soon as I find some sprung washers, I've got the bolt & nut ready to make my removal tool.
You should have seen the state of it inside....
04-29-18 | 12:13 PM
#20
Generally bewildered
Joined: Aug 2015
Posts: 3,038
Likes: 344
From: Eastern PA, USA
Bikes: 2014 Trek Domane 6.9, 1999 LeMond Zurich, 1978 Schwinn Superior
So is the frame worth fixing?
04-29-18 | 03:01 PM
#21
Thread Starter
Senior Member
Joined: Oct 2017
Posts: 259
Likes: 3
From: Devon, UK
Bikes: Marin Palisades Trail (1991)
It's going to be a keeper assuming it passes the comfort/ fun test. If not, I'm still having fun regardless!
04-29-18 | 03:50 PM
#22
Generally bewildered
Joined: Aug 2015
Posts: 3,038
Likes: 344
From: Eastern PA, USA
Bikes: 2014 Trek Domane 6.9, 1999 LeMond Zurich, 1978 Schwinn Superior
There's the spirit. Let nothing be wasted. I found this thread about another Marin Palisades: Hello and can you help me
And also, this pic of a 1992 (below). Should look great when you're done. Good luck!
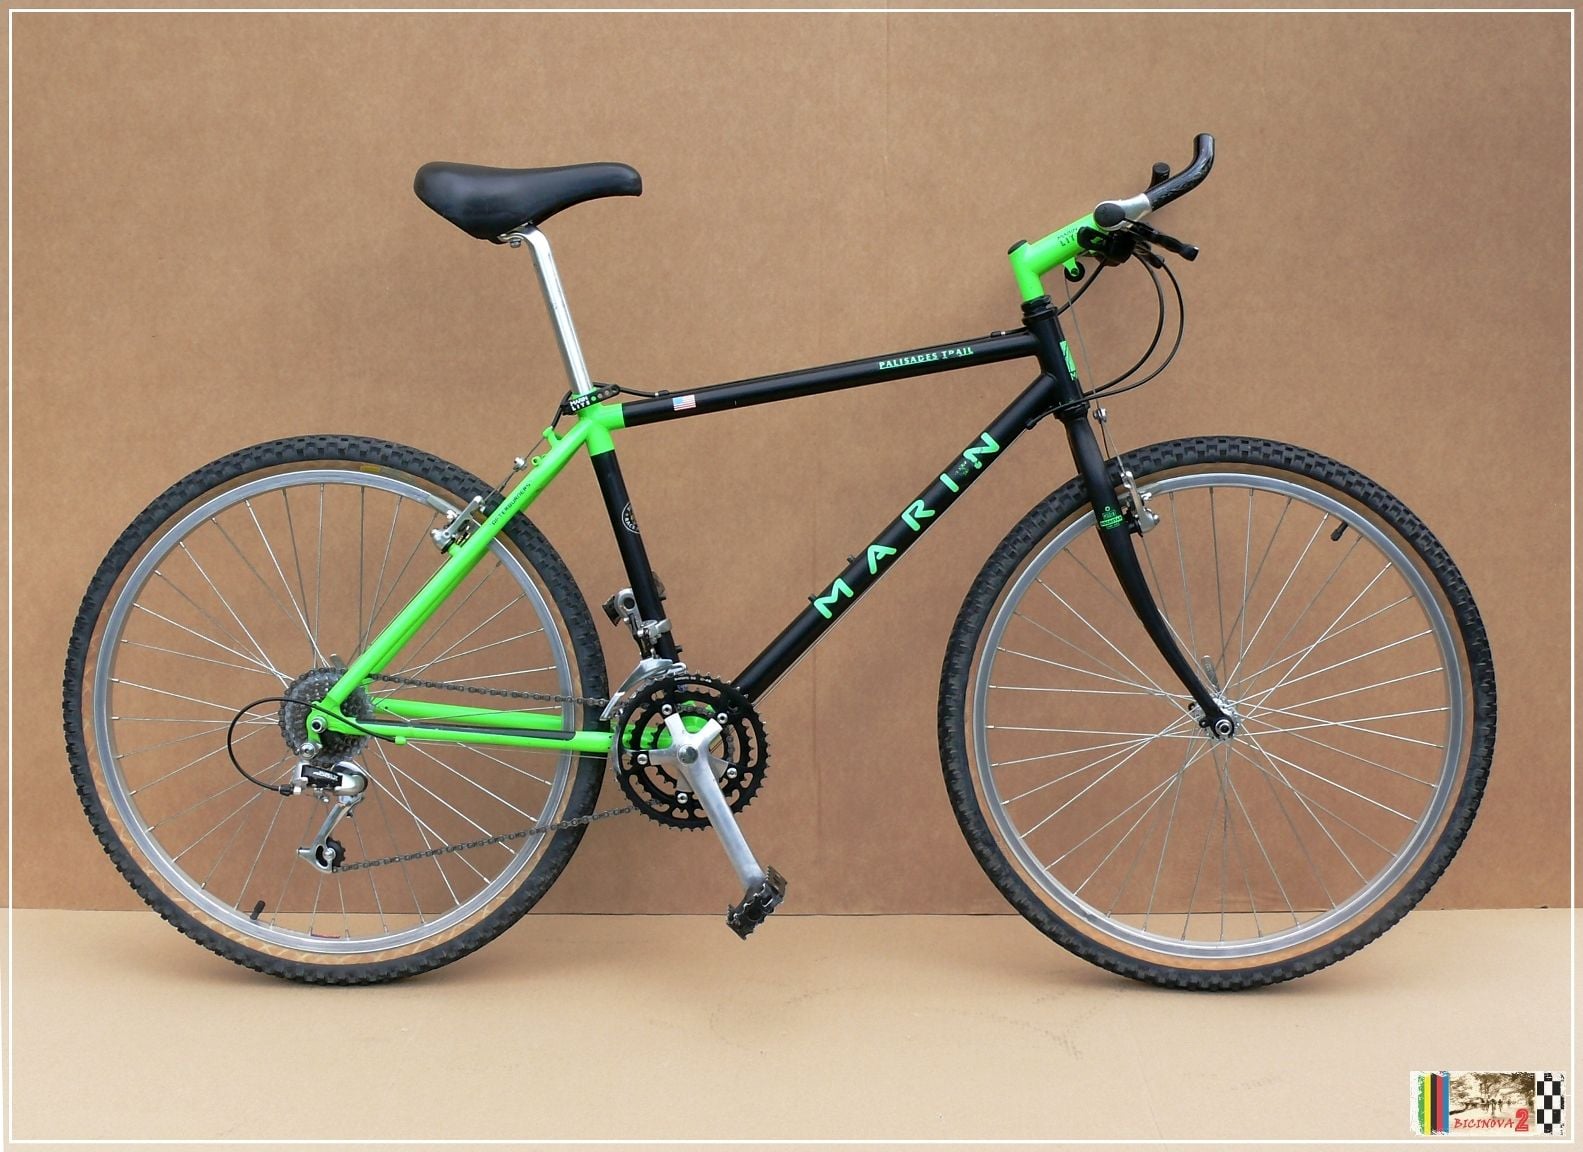
And also, this pic of a 1992 (below). Should look great when you're done. Good luck!
04-30-18 | 12:24 AM
#23
Thread Starter
Senior Member
Joined: Oct 2017
Posts: 259
Likes: 3
From: Devon, UK
Bikes: Marin Palisades Trail (1991)
Thanks Boz! Actually, I think I did my research wrong, or there were 2 versions of this bike in 92. I think mine is the one shown in the 91/92 catalogue in the grey and yellow. You can't really tell from the pics but only the fork, stem and bars have a glossy paint finish, the frame has a textured matt finish which I haven't seen on a bike before.


Thread
Thread Starter
Forum
Replies
Last Post
adamant628
Bicycle Mechanics
11
09-13-18 07:46 PM
mikemowbz
Bicycle Mechanics
7
02-28-12 11:10 AM
