


Hints and tricks thread
 06-27-17 | 07:19 AM
#601
Senior Member


Joined: Jul 2008
Posts: 30,506
Likes: 4,579
From: 25 miles northwest of Boston
Bikes: Bottecchia Sprint, GT Timberline 29r, Marin Muirwoods 29er, Trek FX Alpha 7.0
question #5 doesn't let us select more than one item
the question "How much would you pay for a safety device for your bike" is not specific enough, do you mean a light? a lock?
the question "How much would you pay for a safety device for your bike" is not specific enough, do you mean a light? a lock?
 06-28-17 | 09:44 AM
#602
Senior Member
Joined: Apr 2017
Posts: 1,272
Likes: 11
From: Ottawa,ON,Canada
Bikes: Schwinn Miranda 1990, Giant TCX 2 2012
When adjusting the rear derailleur with the help of the adjustment barrel, the derailleur will move in the same direction as the top of the barrel.
07-01-17 | 10:32 AM
#603

Full Member
Joined: Jun 2015
Posts: 432
Likes: 7
From: Houston, TX
Bikes: Trek 510, Dahon Classic III, Specialized Tricross, Raleigh Technium 460
This one is not really a bike maintenance tip but something useful for those with the base model Park Tool repair stand. You can 3d print your own add-ons (if you have a printer or know someone who does).
Leg clip for storage:
https://www.thingiverse.com/thing:1272344
Tool caddy:
https://www.thingiverse.com/thing:1275681
Hex wrench bracket:
https://www.thingiverse.com/thing:1695559
Misc tool holder:
https://www.thingiverse.com/thing:49227
My brother printed a leg clip for me and it works like a charm!
07-03-17 | 08:17 AM
#604

Keepin it Wheel


Joined: Aug 2011
Posts: 10,971
Likes: 5,264
From: San Diego
Bikes: Surly CrossCheck, Krampus
That's awesome! My local public library has a 3D printer for rent, I don't have a Park stand, but I'll look around at other thingiverse designs to see what might be useful
07-04-17 | 09:15 PM
#605
Senior Member
Joined: Sep 2012
Posts: 1,751
Likes: 7
Read up to make sure you know the difference between foot pounds and inch pounds and that you have the right torque wrench...before tightening those dinky bike bolts that seem to come loose at the wrong time if not tightened perfectly or break off if over tightened...
07-31-17 | 09:05 PM
#606
Senior Member
Joined: Jul 2017
Posts: 63
Likes: 1
From: California
Bikes: 2017 Trek DS 3 / 2016 Felt Z85
I like Caig products for electrical connections, batteries, lights, etc....they have a host of products for many electrical projects around the bike or whatever.
https://caig.com/
https://caig.com/
08-15-17 | 05:47 AM
#607
Junior Member
Joined: Apr 2017
Posts: 8
Likes: 0
From: Tel Aviv
U lock mounted on the bottom of the downtube
I couldn't find an example of anyone else doing this, so I thought I'd share it. I've been riding with the U lock attached this way for more than 100 miles and haven't had a problem. This way it's not taking up other useful space. There's no screw holes to attach accessories there on my bikes frame anyway.
 08-22-17 | 07:47 PM
#609
Senior Member

Joined: Apr 2009
Posts: 39,897
Likes: 3,865
From: New Rochelle, NY
Bikes: too many bikes from 1967 10s (5x2)Frejus to a Sumitomo Ti/Chorus aluminum 10s (10x2), plus one non-susp mtn bike I use as my commuter
I don't know what problem you see. I've carried camp stove fuel in just about the same place for decades and never had a problem.
However, the OP's lock extends pretty low, so I expect that he needs extra care if there are old style speed bumps where he rides, otherwise I'll venture that he never has issues with it.
However, the OP's lock extends pretty low, so I expect that he needs extra care if there are old style speed bumps where he rides, otherwise I'll venture that he never has issues with it.
__________________
FB
Chain-L site
An ounce of diagnosis is worth a pound of cure.
Just because I'm tired of arguing, doesn't mean you're right.
�One accurate measurement is worth a thousand expert opinions� - Adm Grace Murray Hopper - USN
WARNING, I'm from New York. Thin skinned people should maintain safe distance.
FB
Chain-L site
An ounce of diagnosis is worth a pound of cure.
Just because I'm tired of arguing, doesn't mean you're right.
�One accurate measurement is worth a thousand expert opinions� - Adm Grace Murray Hopper - USN
WARNING, I'm from New York. Thin skinned people should maintain safe distance.
08-27-17 | 08:56 PM
#610

Senior Member
Joined: Aug 2010
Posts: 899
Likes: 7
From: Coupeville, WA
Bikes: 84 Raleigh Technium- 89 Shogun Mt. Bike-96 Miyata 914
 08-29-17 | 02:40 PM
#611
Junior Member
Joined: Apr 2017
Posts: 8
Likes: 0
From: Tel Aviv
I don't know what problem you see. I've carried camp stove fuel in just about the same place for decades and never had a problem.
However, the OP's lock extends pretty low, so I expect that he needs extra care if there are old style speed bumps where he rides, otherwise I'll venture that he never has issues with it.
However, the OP's lock extends pretty low, so I expect that he needs extra care if there are old style speed bumps where he rides, otherwise I'll venture that he never has issues with it.
Besides using otherwise unused space, I really hated having the lock on the top tube or seat tube because it's free to swing on the mount. It would sometimes hit my legs when pedaling which was annoying.
08-29-17 | 03:08 PM
#612
Senior Member
Joined: Apr 2009
Posts: 39,897
Likes: 3,865
From: New Rochelle, NY
Bikes: too many bikes from 1967 10s (5x2)Frejus to a Sumitomo Ti/Chorus aluminum 10s (10x2), plus one non-susp mtn bike I use as my commuter
It doesn't extend lower than the pedals when they're vertical. It doesn't get nicked even when riding up onto curbs.
Besides using otherwise unused space, I really hated having the lock on the top tube or seat tube because it's free to swing on the mount. It would sometimes hit my legs when pedaling which was annoying.
Besides using otherwise unused space, I really hated having the lock on the top tube or seat tube because it's free to swing on the mount. It would sometimes hit my legs when pedaling which was annoying.
However, if that's not an issue for you, I can't see any other.
__________________
FB
Chain-L site
An ounce of diagnosis is worth a pound of cure.
Just because I'm tired of arguing, doesn't mean you're right.
�One accurate measurement is worth a thousand expert opinions� - Adm Grace Murray Hopper - USN
WARNING, I'm from New York. Thin skinned people should maintain safe distance.
FB
Chain-L site
An ounce of diagnosis is worth a pound of cure.
Just because I'm tired of arguing, doesn't mean you're right.
�One accurate measurement is worth a thousand expert opinions� - Adm Grace Murray Hopper - USN
WARNING, I'm from New York. Thin skinned people should maintain safe distance.
08-31-17 | 07:19 PM
#613
Senior Member
Joined: Sep 2012
Posts: 1,751
Likes: 7
Ingenuity for finding a personal use for dead space is well regarded here. Kudos.
Many of my touring bikes and tandems have water bottle braze on mounts on the bottom of the down-tube that would place that water bottle in the top half of the area holding the OP's lock-thing. Some others have pegs for old-school air pump down there. I really like having an extra bottle of water and have been often guilty of removing the bottom side pump pegs on bikes that aren't collectible or historically significant.
Many of my touring bikes and tandems have water bottle braze on mounts on the bottom of the down-tube that would place that water bottle in the top half of the area holding the OP's lock-thing. Some others have pegs for old-school air pump down there. I really like having an extra bottle of water and have been often guilty of removing the bottom side pump pegs on bikes that aren't collectible or historically significant.
09-04-17 | 04:04 PM
#614
Free wheel
Joined: Dec 2008
Posts: 41
Likes: 0
From: Omaha, Nebraska
Bikes: 1978 Schwinn Traveller III, 1985 Nishiki Prestige, 1986 Raleigh Technium 480
Rear wheel single speed install
Always tighten the nut on the brake lever side (left side) first. This will prevent the bearing nuts from loosening on the axle and goofing up the preload if the bearing nuts are'nt solidly backed with a locking nut, or even if they are.
09-04-17 | 04:50 PM
#615
Free wheel
Joined: Dec 2008
Posts: 41
Likes: 0
From: Omaha, Nebraska
Bikes: 1978 Schwinn Traveller III, 1985 Nishiki Prestige, 1986 Raleigh Technium 480
Reshaping bent seat tube collar
Had a bike delivered in a box and the seat tube collar was mangled and out of round. It was heavy guage steel and was not responding well to wedging with a small diameter pipe. Then it occurred to me that the bike had a powerful wedge in the handlebar downtube. I pull the handlebars off, slipped the hanblebar downtube into the seat tube just past the mangled spot. I then rotated the handlebar downtube so the wedge nut was located opposite the bent portion of the seat collar and tightened the handlebar wedge a bit. The bent part of the seat collar straightened predictably and after a couple of cycles of repositioning and tightening, the seat collar was rounded up nicely and the seat tube slid into place easily without scratching the finish. Tightened the seat collar quicklock, reinstalled the handlebars and moved on with
assembly.
assembly.
09-11-17 | 08:05 PM
#616
Senior Member
Joined: Sep 2012
Posts: 1,751
Likes: 7
Had a bike delivered in a box and the seat tube collar was mangled and out of round. It was heavy guage steel and was not responding well to wedging with a small diameter pipe. Then it occurred to me that the bike had a powerful wedge in the handlebar downtube. I pull the handlebars off, slipped the hanblebar downtube into the seat tube just past the mangled spot. I then rotated the handlebar downtube so the wedge nut was located opposite the bent portion of the seat collar and tightened the handlebar wedge a bit. The bent part of the seat collar straightened predictably and after a couple of cycles of repositioning and tightening, the seat collar was rounded up nicely and the seat tube slid into place easily without scratching the finish. Tightened the seat collar quicklock, reinstalled the handlebars and moved on with
assembly.
assembly.
 10-09-17 | 10:53 AM
#618
Senior Member
Joined: Apr 2012
Posts: 6,017
Likes: 925
From: Nor Cal
When patching an inner tube,
offending seam ridges can be sanded down by pinching the tube
so that the seam sticks up at the fold, also cleaning the rubber next to the seam.
Then use two coats of cement and compress the completed patch to set- I use a ball peen hammer.
offending seam ridges can be sanded down by pinching the tube
so that the seam sticks up at the fold, also cleaning the rubber next to the seam.
Then use two coats of cement and compress the completed patch to set- I use a ball peen hammer.
10-18-17 | 11:08 AM
#619
Senior Member
Joined: Nov 2014
Posts: 1,231
Likes: 1,181
From: Saratoga calif.
Bikes: 2 ezip electric bikes, trek 800 antelope, nishiki international, 1948 schwin new world, phillippe french boutique bike
When I find the puncture spot on a tube I take a sharpie and mark an x over the puncture after I clean and sand the area. Then when applying the patch I can center it effectively over the hole. Also, I like to clanp the tube lightly to the work bench on either side of the puncture so the affected spot stays right side up and doesn't move.
10-18-17 | 12:11 PM
#620
Keepin it Wheel
Joined: Aug 2011
Posts: 10,971
Likes: 5,264
From: San Diego
Bikes: Surly CrossCheck, Krampus
When I find a small puncture I mark it by sticking a sewing pin into it, which I keep in my patch kit. It marks the place, and also enlarges the hole just a little bit, making it easier to re-find if necessary, without making it less patchable.
10-25-17 | 09:18 AM
#621

Senior Member
Joined: Feb 2009
Posts: 782
Likes: 4
From: Southwest MO
Bikes: (2) 1994 Cannondale R900, red, Silver Trek hybrid
When I find the puncture spot on a tube I take a sharpie and mark an x over the puncture after I clean and sand the area. Then when applying the patch I can center it effectively over the hole. Also, I like to clanp the tube lightly to the work bench on either side of the puncture so the affected spot stays right side up and doesn't move.
04-27-18 | 04:08 PM
#622

Unreachable
Joined: Apr 2016
Posts: 1,742
Likes: 1,634
From: Jeddah, Saudi Arabia
Bikes: 1990 Raleigh Flyer; 2013 Trek 7.3 FX; 2014 Trek 7.6 FX; 2019 Dahon Mu D9.
Probably as a possible cost-cutting move (and perhaps I'm a cheapskate for having bought the thing in the first place,) Dahon must've thought it would be a good idea not to provide bottle cage bosses anywhere on the Vybe's frame.
Because I'm not brave enough to drill my own holes in the frame and tap them out, a third-party solution like Topeak's cage mount was handy for a while. With the only practical place to install it being the lower handlepost in a vertical position, though, the bottle tended to pop out if I hit a pothole hard enough, which is distracting and inconvenient, not to mention just plain ugly:


The bike already was up for sale. Being strapped for cash, I wasn't about to spend any money buying new gear, no matter how inexpensive. I needed to finnagle a setup using whatever I had lying around, and one that I could easily undo at any time.
Cannibalizing one of the other new Topeak cage mounts I had, I screwed together a strap that's long enough to go all the way around the main frame tube, avoiding damage to the brake and shifter cables that run along the bottom:

The four rubber pads kept the straps away from the cables, while ensuring that the two straps are screwed together at two points instead of one:


All I had to do next was screw the base down, locking the two ends of the straps together, attach the cage base, and screw on the cage:

The bottle was more secure, and at once more accessible and out of the way. It also looked better!
Despite having used some rubber strips, I still ended up scratching the finish, which is a bummer!
Because I'm not brave enough to drill my own holes in the frame and tap them out, a third-party solution like Topeak's cage mount was handy for a while. With the only practical place to install it being the lower handlepost in a vertical position, though, the bottle tended to pop out if I hit a pothole hard enough, which is distracting and inconvenient, not to mention just plain ugly:
The bike already was up for sale. Being strapped for cash, I wasn't about to spend any money buying new gear, no matter how inexpensive. I needed to finnagle a setup using whatever I had lying around, and one that I could easily undo at any time.
Cannibalizing one of the other new Topeak cage mounts I had, I screwed together a strap that's long enough to go all the way around the main frame tube, avoiding damage to the brake and shifter cables that run along the bottom:
The four rubber pads kept the straps away from the cables, while ensuring that the two straps are screwed together at two points instead of one:
All I had to do next was screw the base down, locking the two ends of the straps together, attach the cage base, and screw on the cage:
The bottle was more secure, and at once more accessible and out of the way. It also looked better!
Despite having used some rubber strips, I still ended up scratching the finish, which is a bummer!
Last edited by sjanzeir; 06-21-18 at 10:54 PM.
06-16-18 | 11:17 PM
#623
Full Member
Joined: Jun 2015
Posts: 432
Likes: 7
From: Houston, TX
Bikes: Trek 510, Dahon Classic III, Specialized Tricross, Raleigh Technium 460
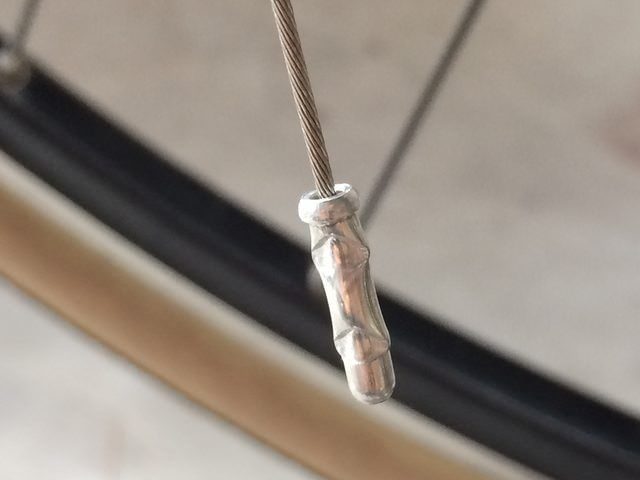
I don't know if this has been covered before but thought I'd mention a quick hack I did today. I installed new cables needed something to crimp the cable ends (my cable cutters don't have the crimper), so I made my own from an old pair of pliers. Just used the edge of a small file and worked in two grooves on opposite sides of each other. Make sure they line up pretty well and are cut deep enough. Only took a couple of minutes to do and worked like a charm!

06-17-18 | 08:42 AM
#624
Engineer
Joined: May 2010
Posts: 591
Likes: 1
From: Bucharest, Romania, Europe
Bikes: 1989 Krapf (with Dura-ace) road bike, 1973 Sputnik (made by XB3) road bike , 1961 Peugeot fixed gear, 2010 Trek 4400
