


Hints and tricks thread
 06-21-18 | 08:36 PM
#626
Clark W. Griswold


Joined: Mar 2014
Posts: 18,254
Likes: 6,627
From: ,location, location
Bikes: Foundry Chilkoot Ti W/Ultegra Di2, Salsa Timberjack Ti, Cinelli Mash Work RandoCross Fun Time Machine, 1x9 XT Parts Hybrid, Co-Motion Cascadia, Specialized Langster, Phil Wood Apple VeloXS Frame (w/DA 7400), R+M Supercharger2 Rohloff, Habanero Ti 26
That crimp pattern looks rather nice. If I don't have a crimper around I will just press it but that certainly looks a lot more trick and with some skills and patience or maybe a CNC machine you could probably come up with some different patterns!
 06-21-18 | 09:42 PM
#627

Unreachable

Joined: Apr 2016
Posts: 1,742
Likes: 1,626
From: Jeddah, Saudi Arabia
Bikes: 1990 Raleigh Flyer; 2013 Trek 7.3 FX; 2014 Trek 7.6 FX; 2019 Dahon Mu D9.
Last edited by sjanzeir; 06-21-18 at 09:46 PM.
06-27-18 | 03:12 AM
#628

Senior Member
Joined: Dec 2009
Posts: 9,563
Likes: 735
From: Melbourne, Oz
Bikes: https://weightweenies.starbike.com/forum/viewtopic.php?f=10&t=152015&p=1404231
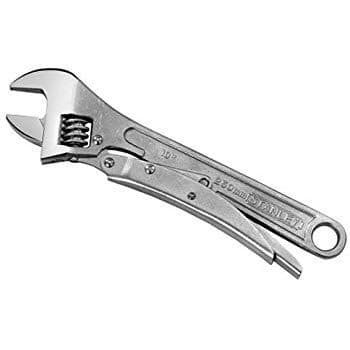
Hold post but currently going through some of them. Found this on Google, adjustable cone wrench 
Bicycle Cone Wrench

Bicycle Cone Wrench
 07-01-18 | 05:03 PM
#629
Full Member
Joined: Apr 2014
Posts: 216
Likes: 61
Using a vacuum to get spoke nipples out after they've fallen inside your rim
When spoke nipples fall inside a rim they are a nuisance to get out. What I find that works best to get them out is a vacuum. If you don't have a Shop-Vac or equivalent you will need to create a better vacuum inside the rim.
To create a better vacuum, first have all the nipples attached to the spokes and tightened, then cover the valve hole on the inner side of the rim with tape. Second, use a rim strip or something non-adhesive to cover the spoke holes on the outer side of the rim leaving the valve hole open (there is no need to do this with a Shop-Vac). Next, position the rim so the valve hole is at the bottom and shake the rim to move the nipples near the valve hole. Finally, place the vacuum over the valve hole and suck the nipples out.
I use a Shop-Vac because it has tremendous suction, but most household vacuum cleaners will work if you create a better vacuum inside the rim. Be sure to empty your vacuum cleaner before use to make it easier to find the nipples.
Last edited by hrdknox1; 07-01-18 at 06:46 PM.
07-02-18 | 09:47 AM
#631

Keepin it Wheel
Joined: Aug 2011
Posts: 10,964
Likes: 5,225
From: San Diego
Bikes: Surly CrossCheck, Krampus
Yeah, that's why they call it a quick release. In fact, many people (including my self) file off the 'lawer lips' on their front forks, so that quick release is also actually quick.
07-10-18 | 11:42 PM
#632
Senior Member
Joined: Dec 2009
Posts: 9,563
Likes: 735
From: Melbourne, Oz
Bikes: https://weightweenies.starbike.com/forum/viewtopic.php?f=10&t=152015&p=1404231
07-17-18 | 11:31 AM
#633
Senior Member
Joined: May 2016
Posts: 67
Likes: 0
From: Toronto, Ontario
Bikes: 1993 Pinarello Vuelta Retroroadie / 1974 Raleigh Sprite
To save yourself from having to clean the vaccuum cleaner first, use cheesecloth or grab a pair of pantyhoses from the dollarstore and put it over the vacuum tube held on by an elastic
08-12-18 | 05:05 PM
#634
Unreachable
Joined: Apr 2016
Posts: 1,742
Likes: 1,626
From: Jeddah, Saudi Arabia
Bikes: 1990 Raleigh Flyer; 2013 Trek 7.3 FX; 2014 Trek 7.6 FX; 2019 Dahon Mu D9.
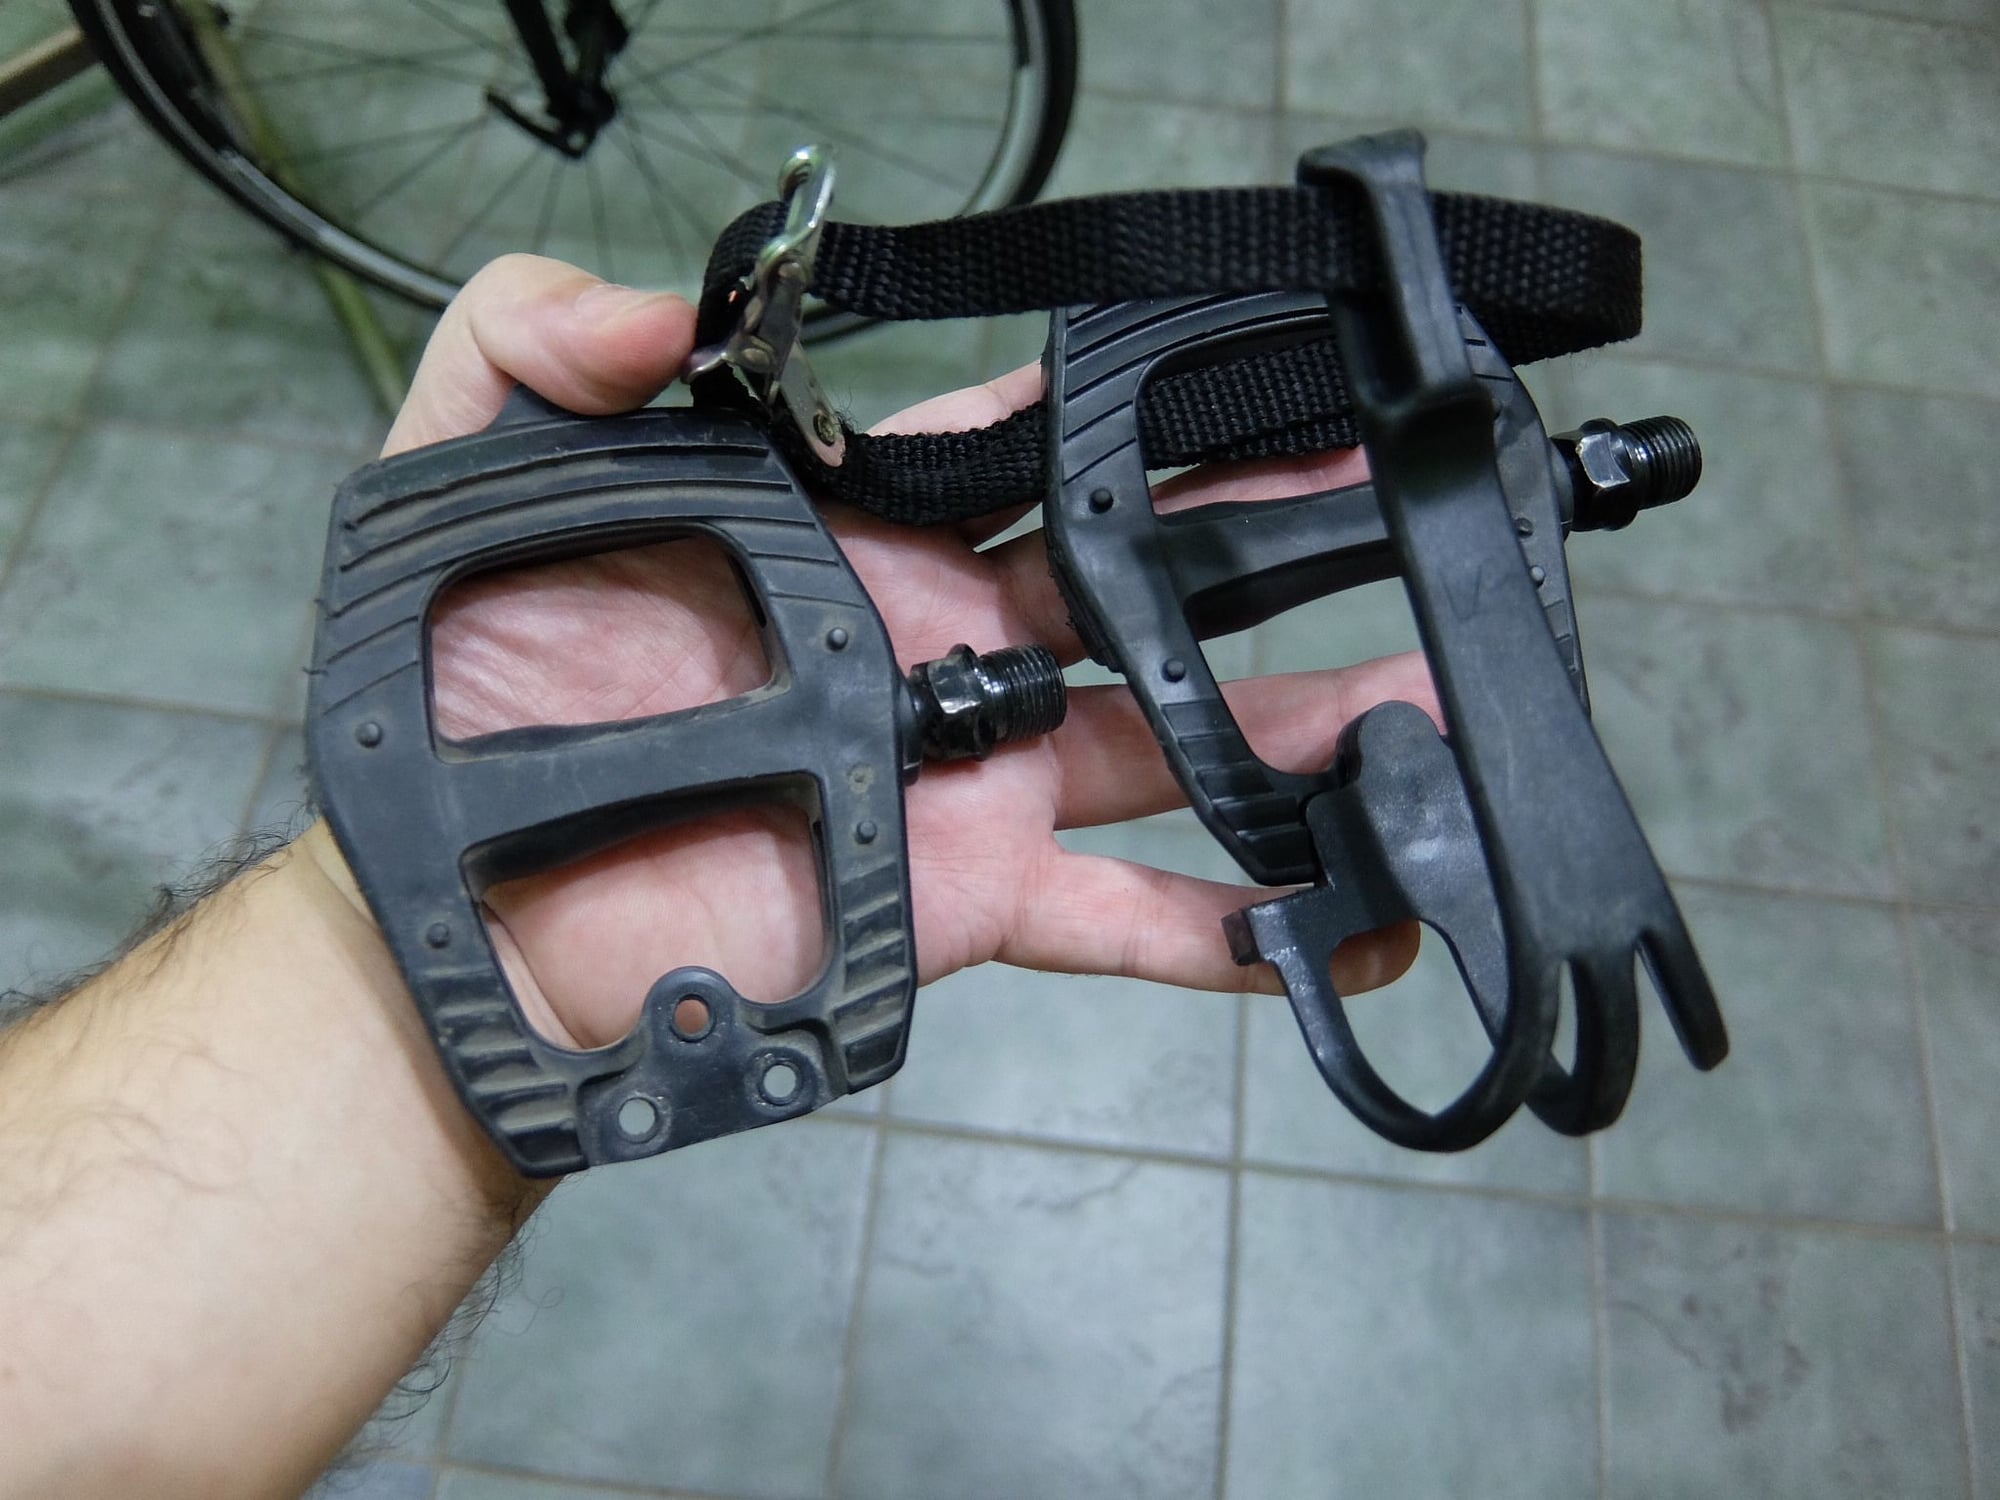
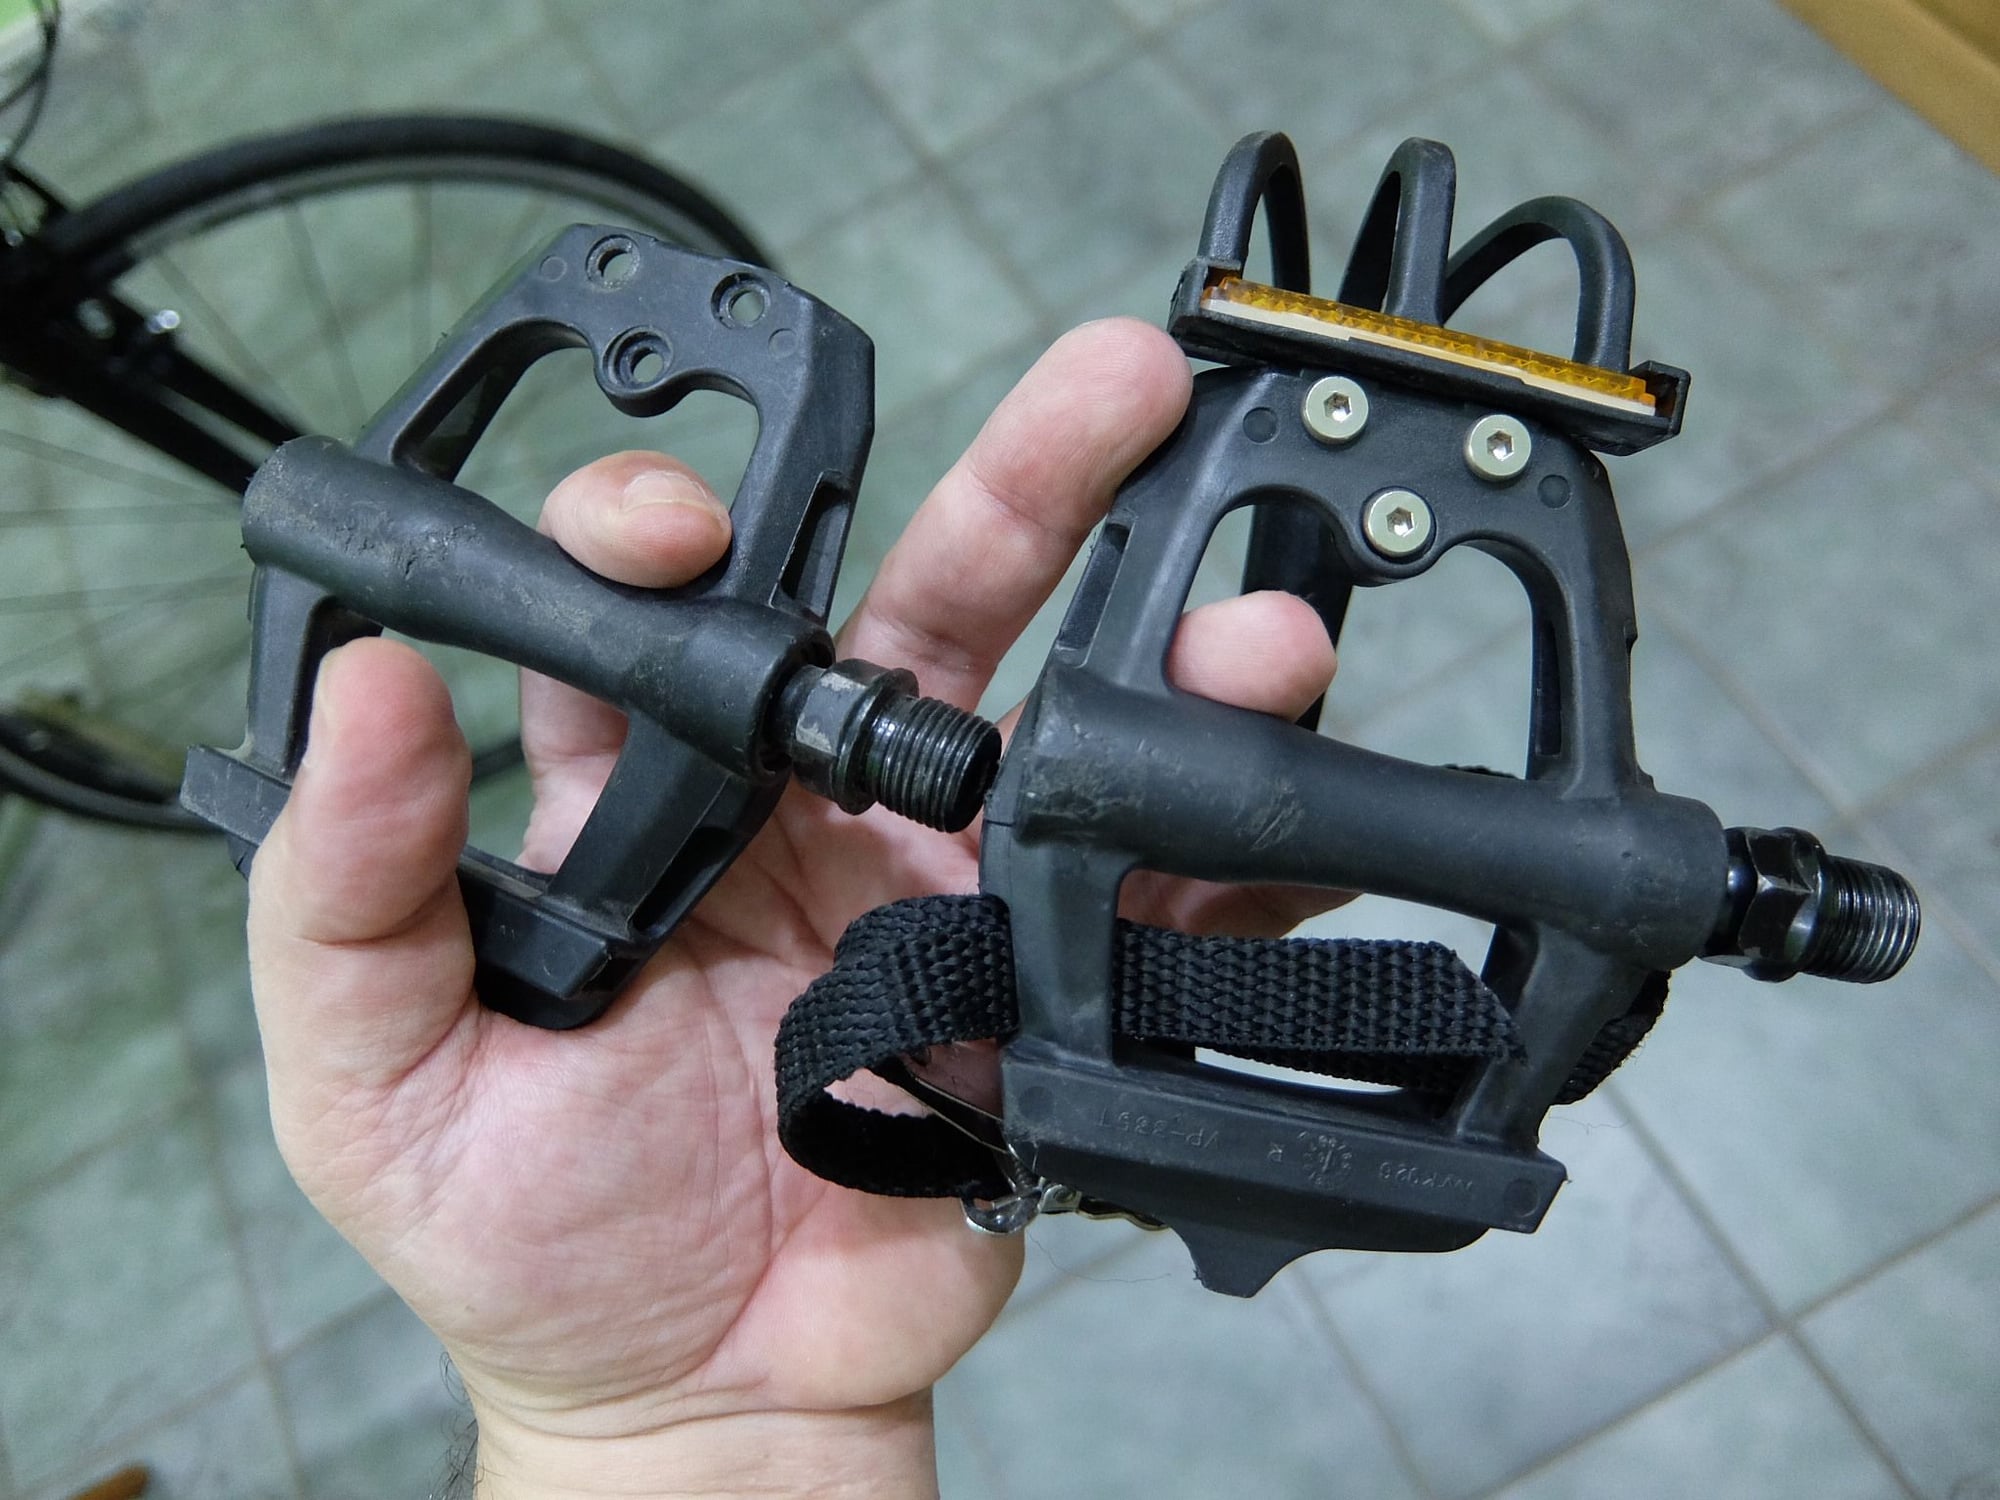
My 7.6FX's factory-installed Wellgo bear trap pedals didn't come with toe clips and straps. When I bought the bike, I picked up with it these VP pedals with straps built in:
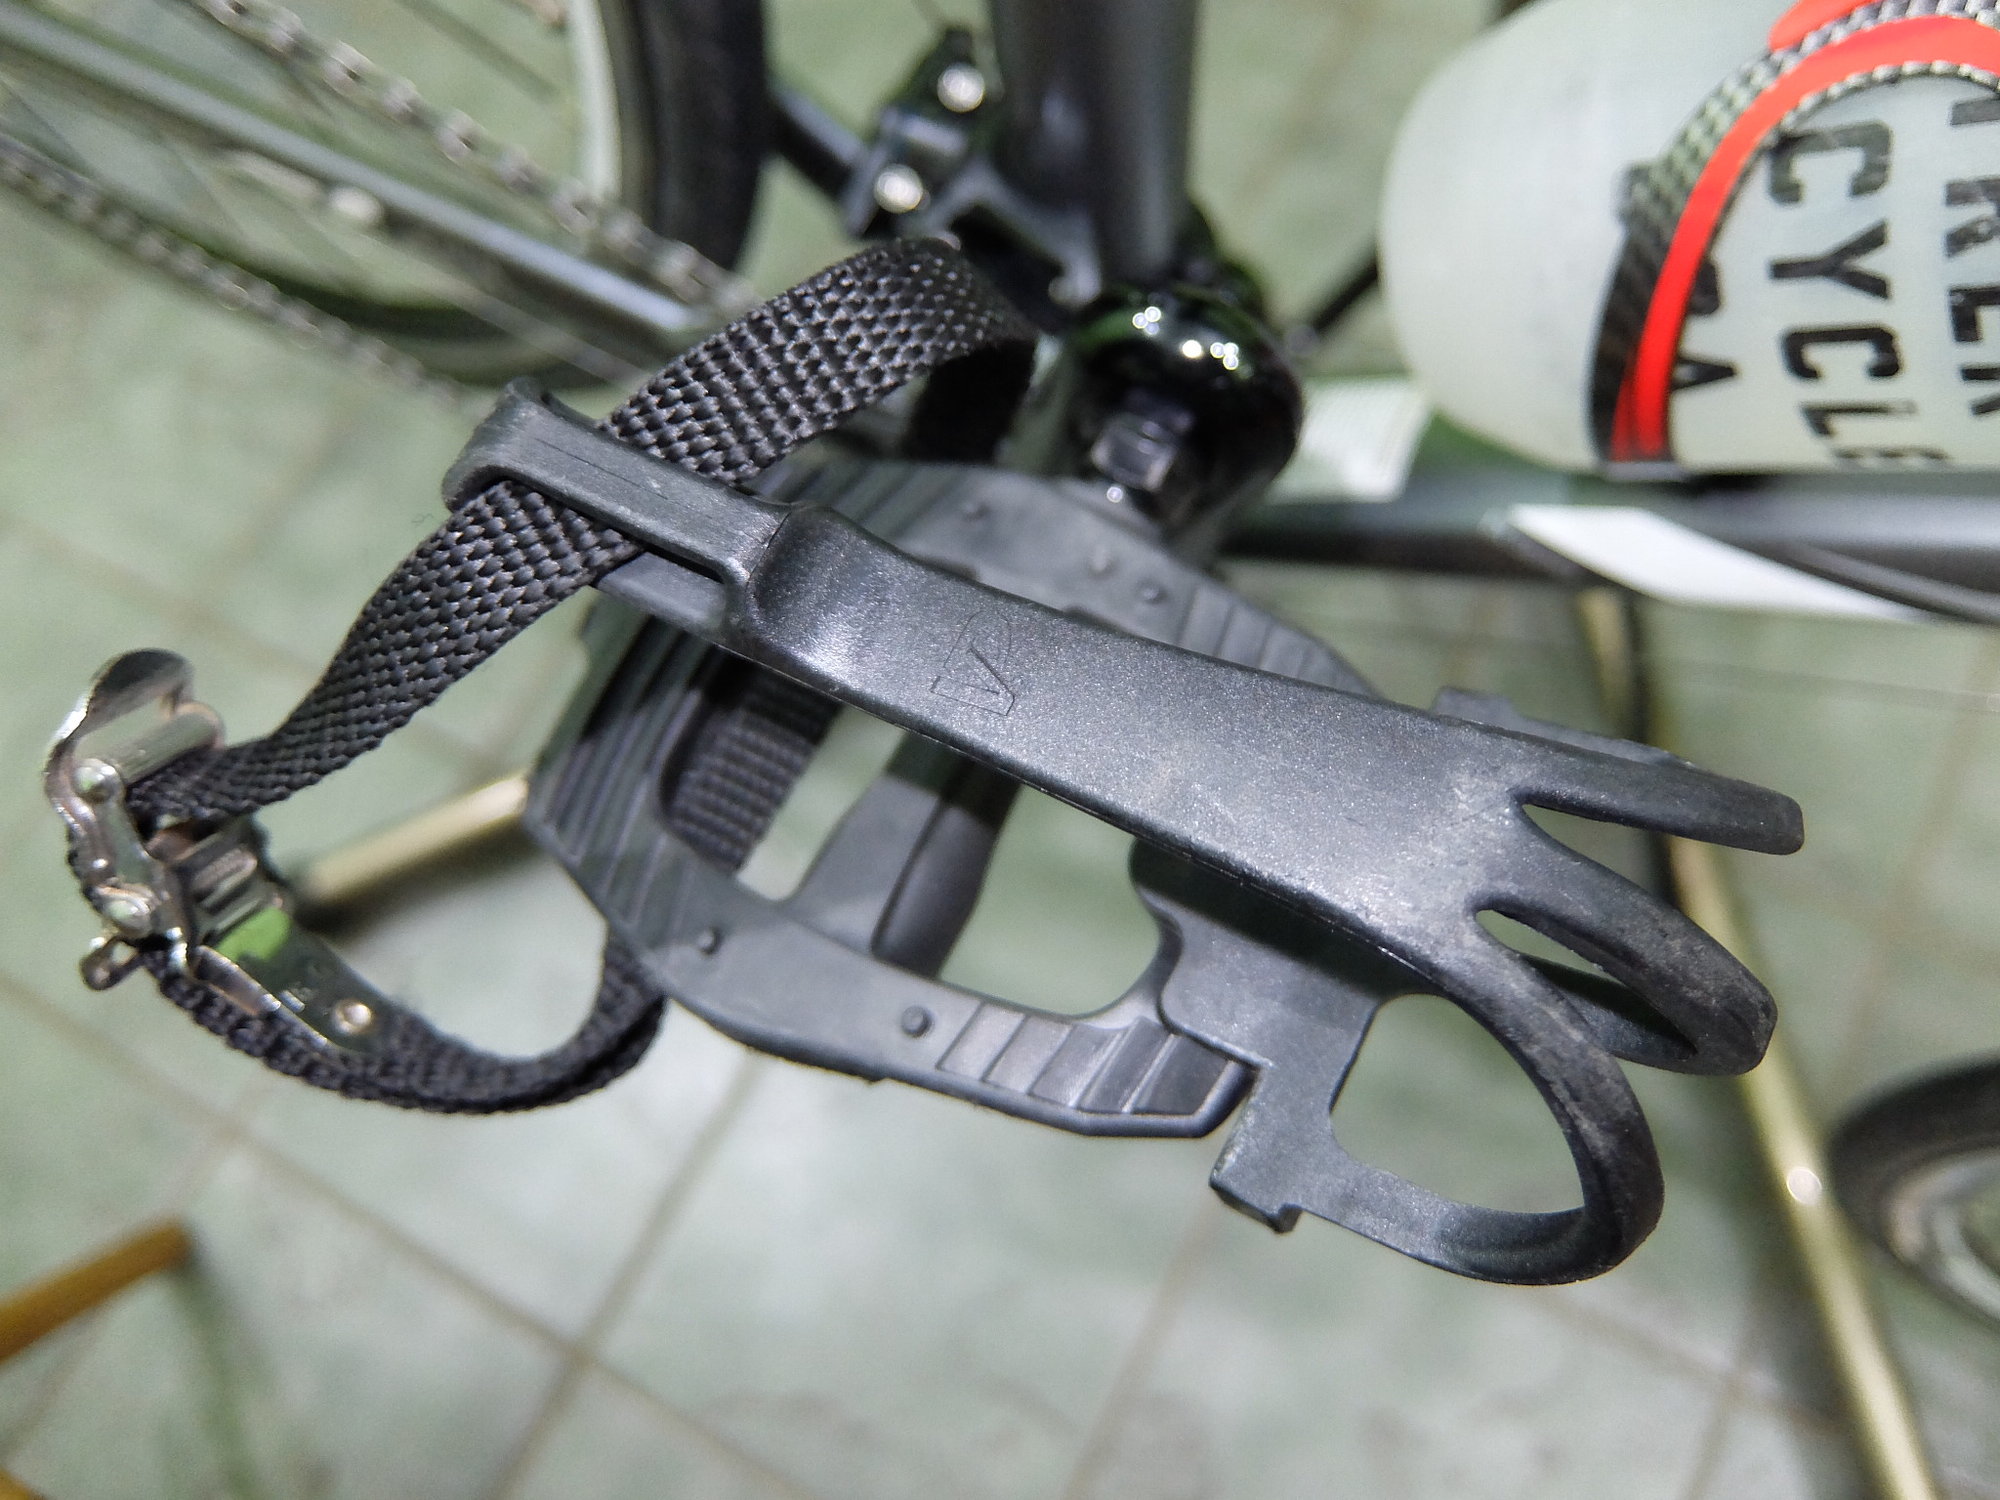
Problem is, even with the straps and toe clips, they were crap for holding my feet straight. The originals, on the other hand, are great for keeping my feet in place, but not all that great on the upstroke.
Thing is, being broke and all, I couldn't spend money I haven't got to order straps online, nor were aftermarket toe clips available for me to buy at any of the local shops. I had a second pair of the same VP pedals lying around in a drawer, the spindle of one of which was bent and wobbly, so I decided to see if I could cannibalize them for the toe clips and find a way to bolt them to the Wellgos somehow. It turned out well enough.
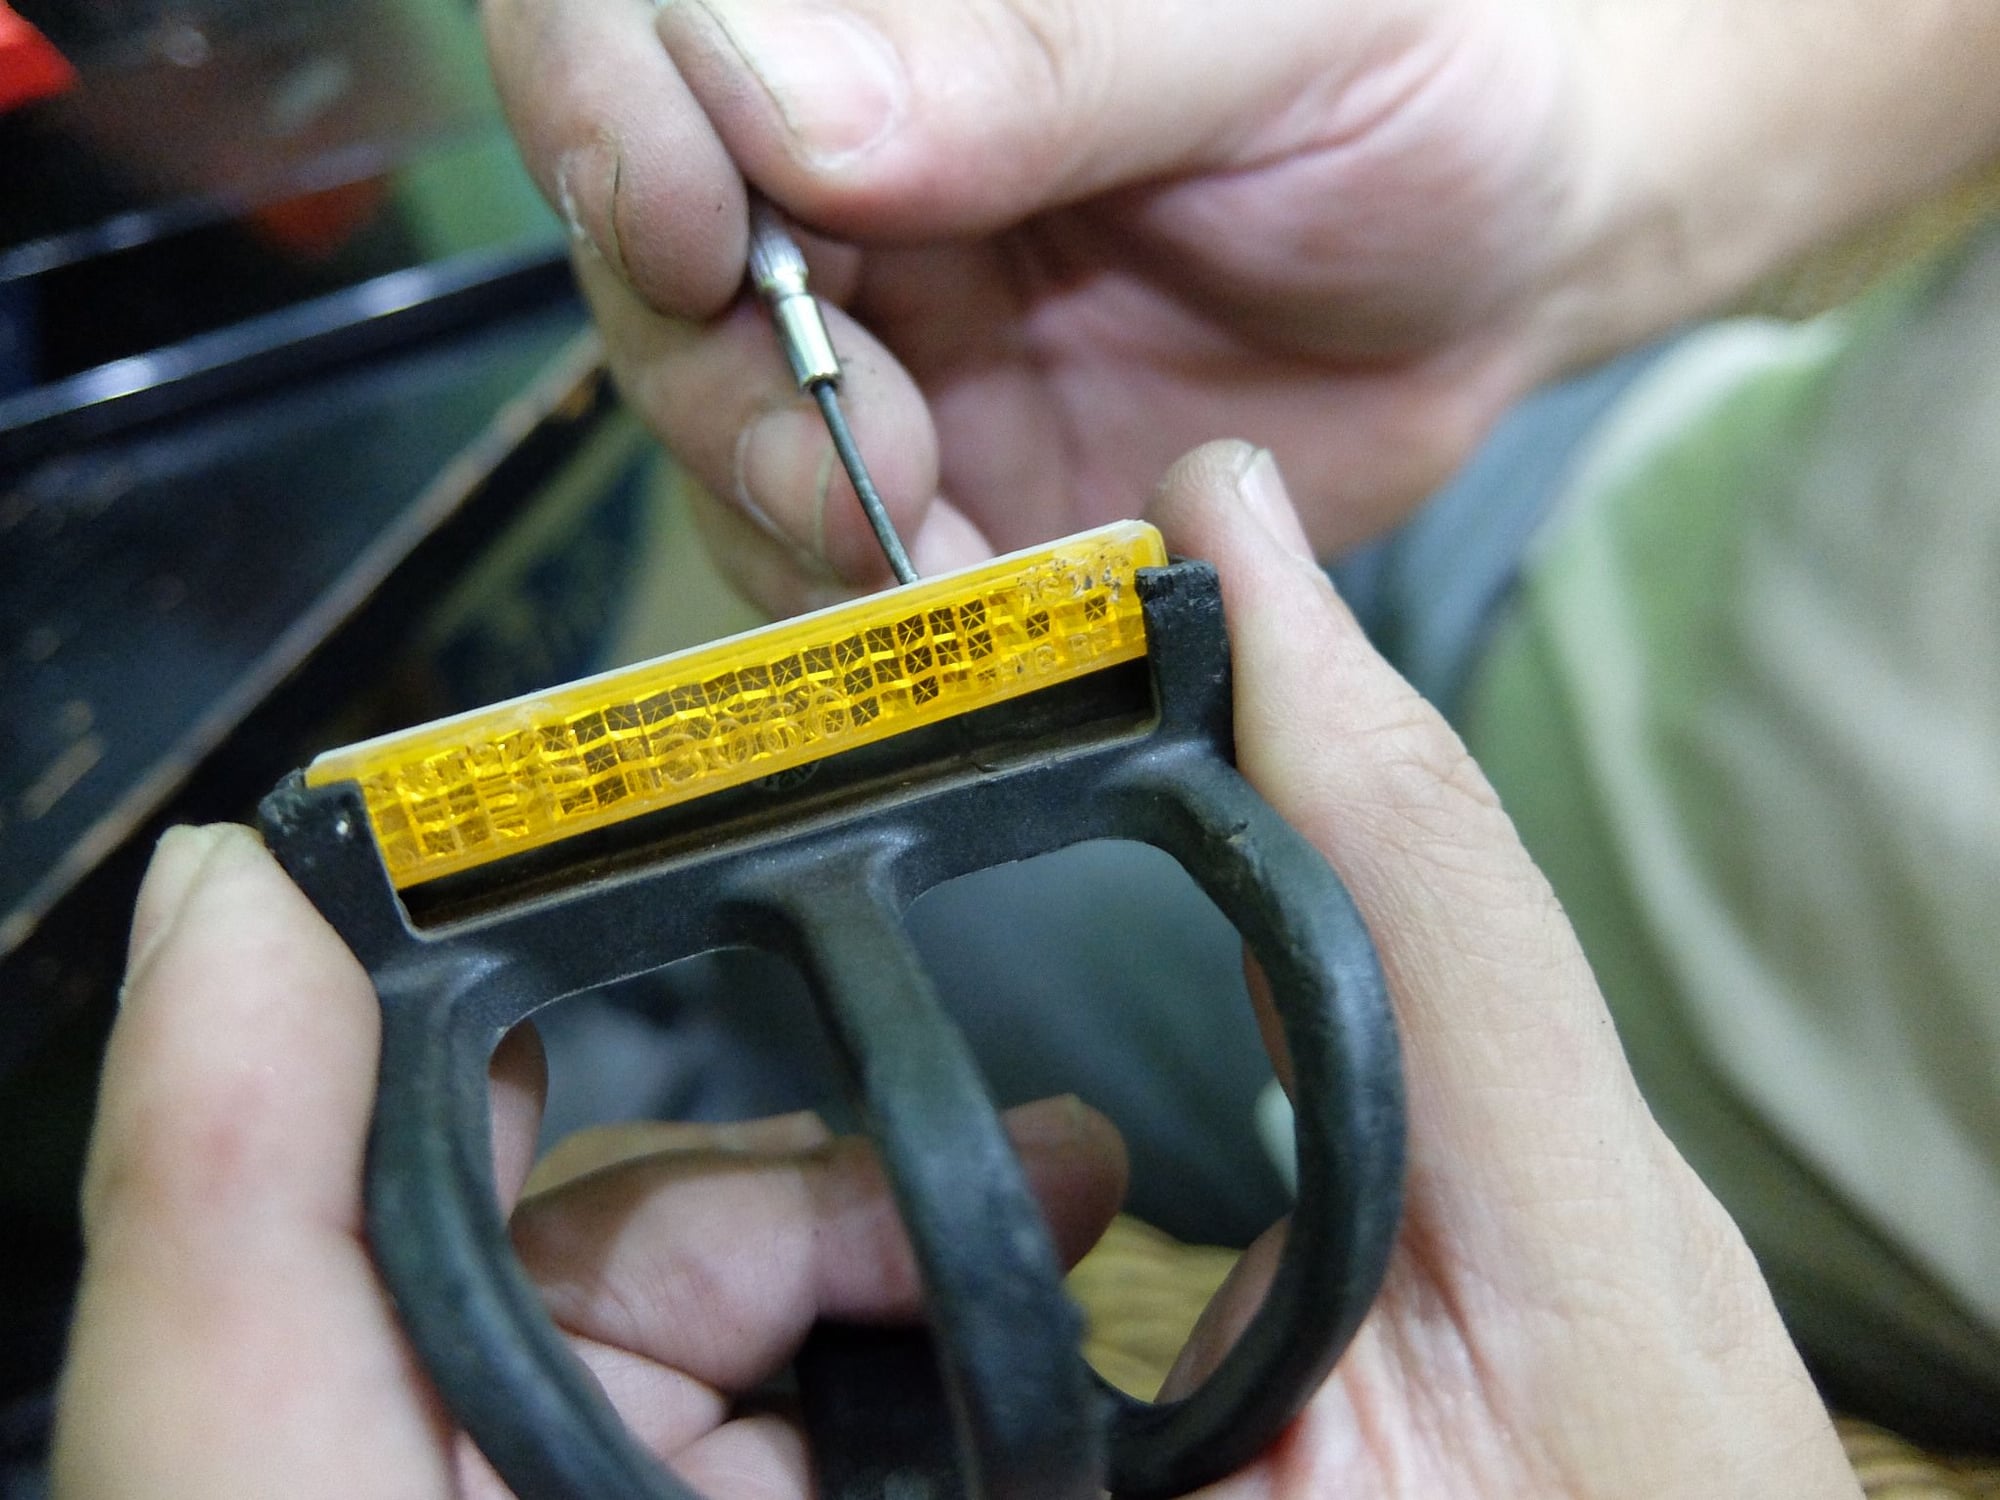
I started with unscrewing the toe clips from the VPs:
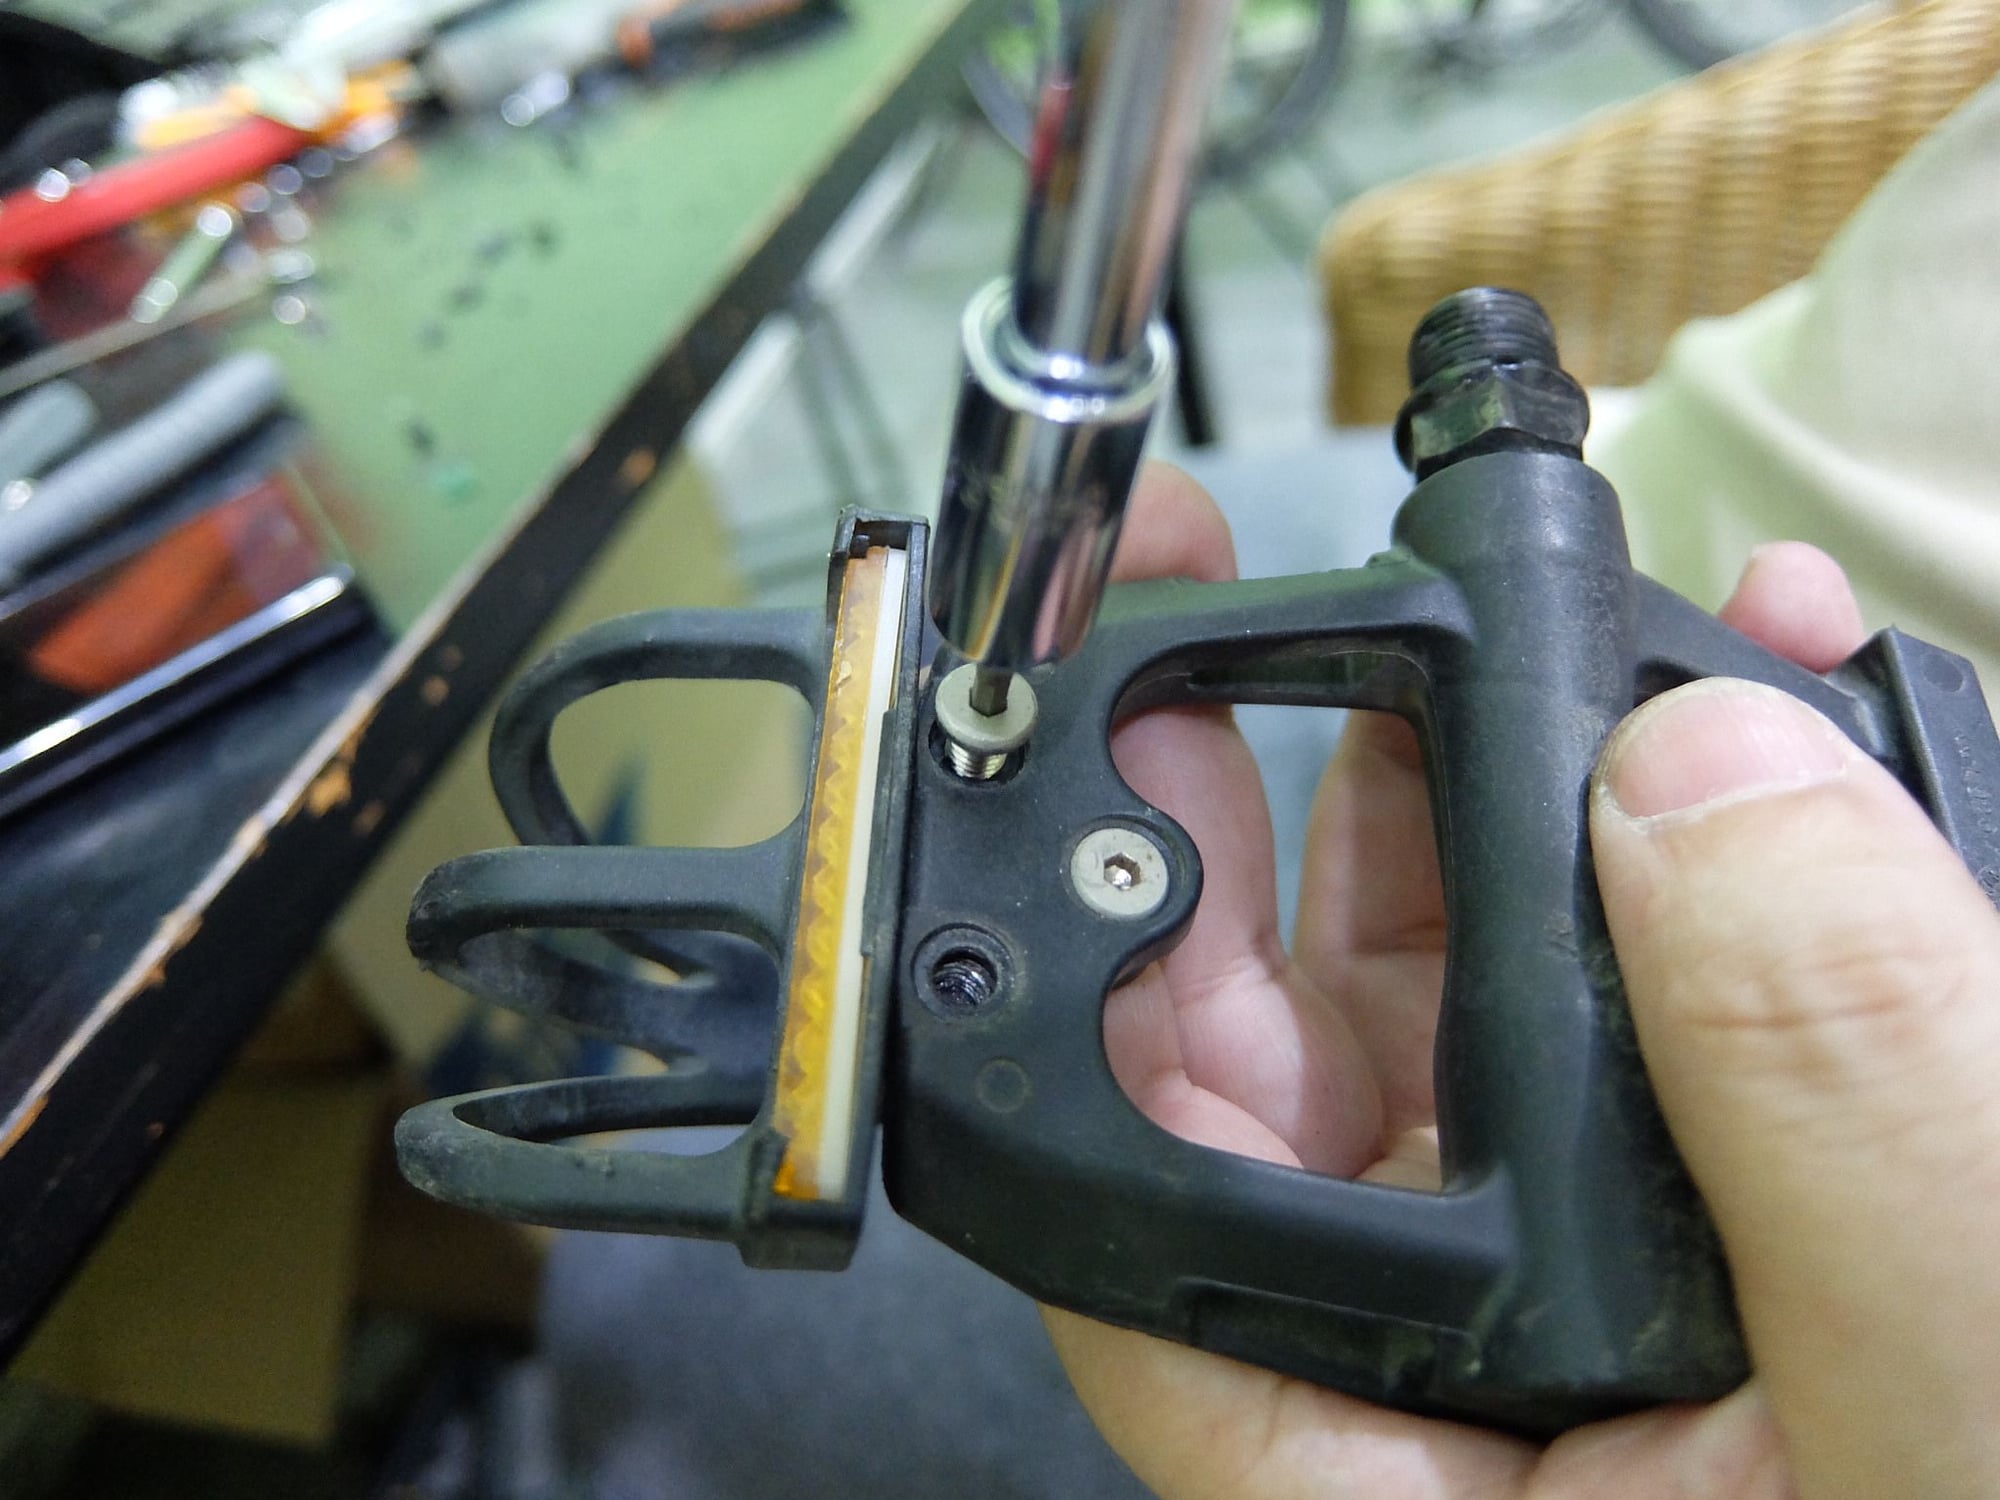
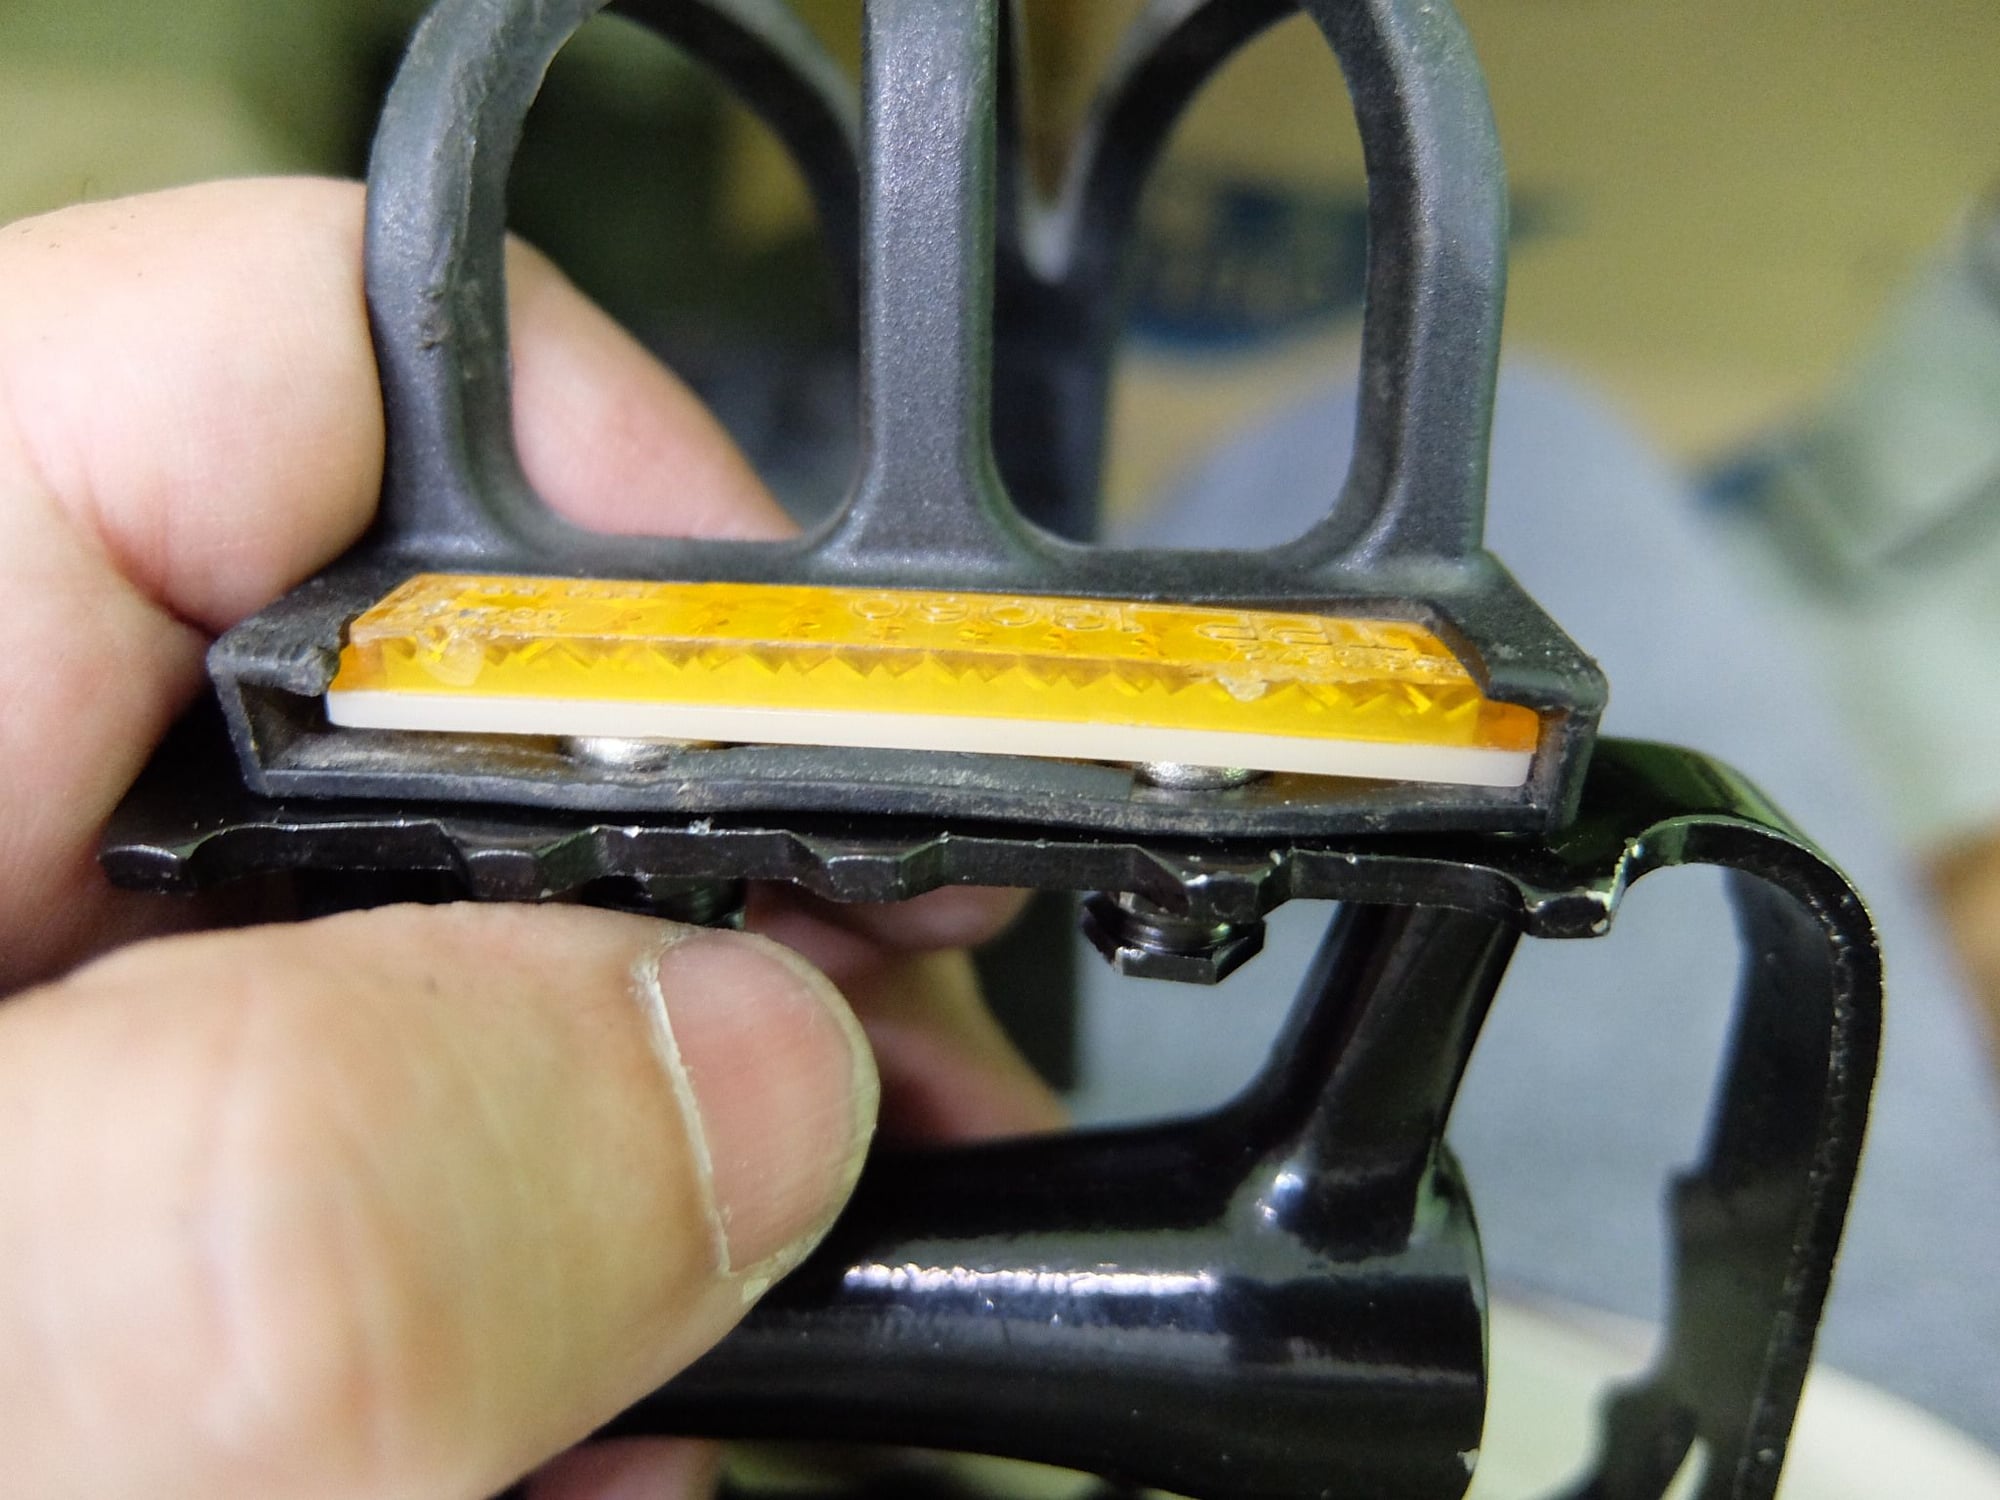
Then pried out the reflector at the base of the toe clip:
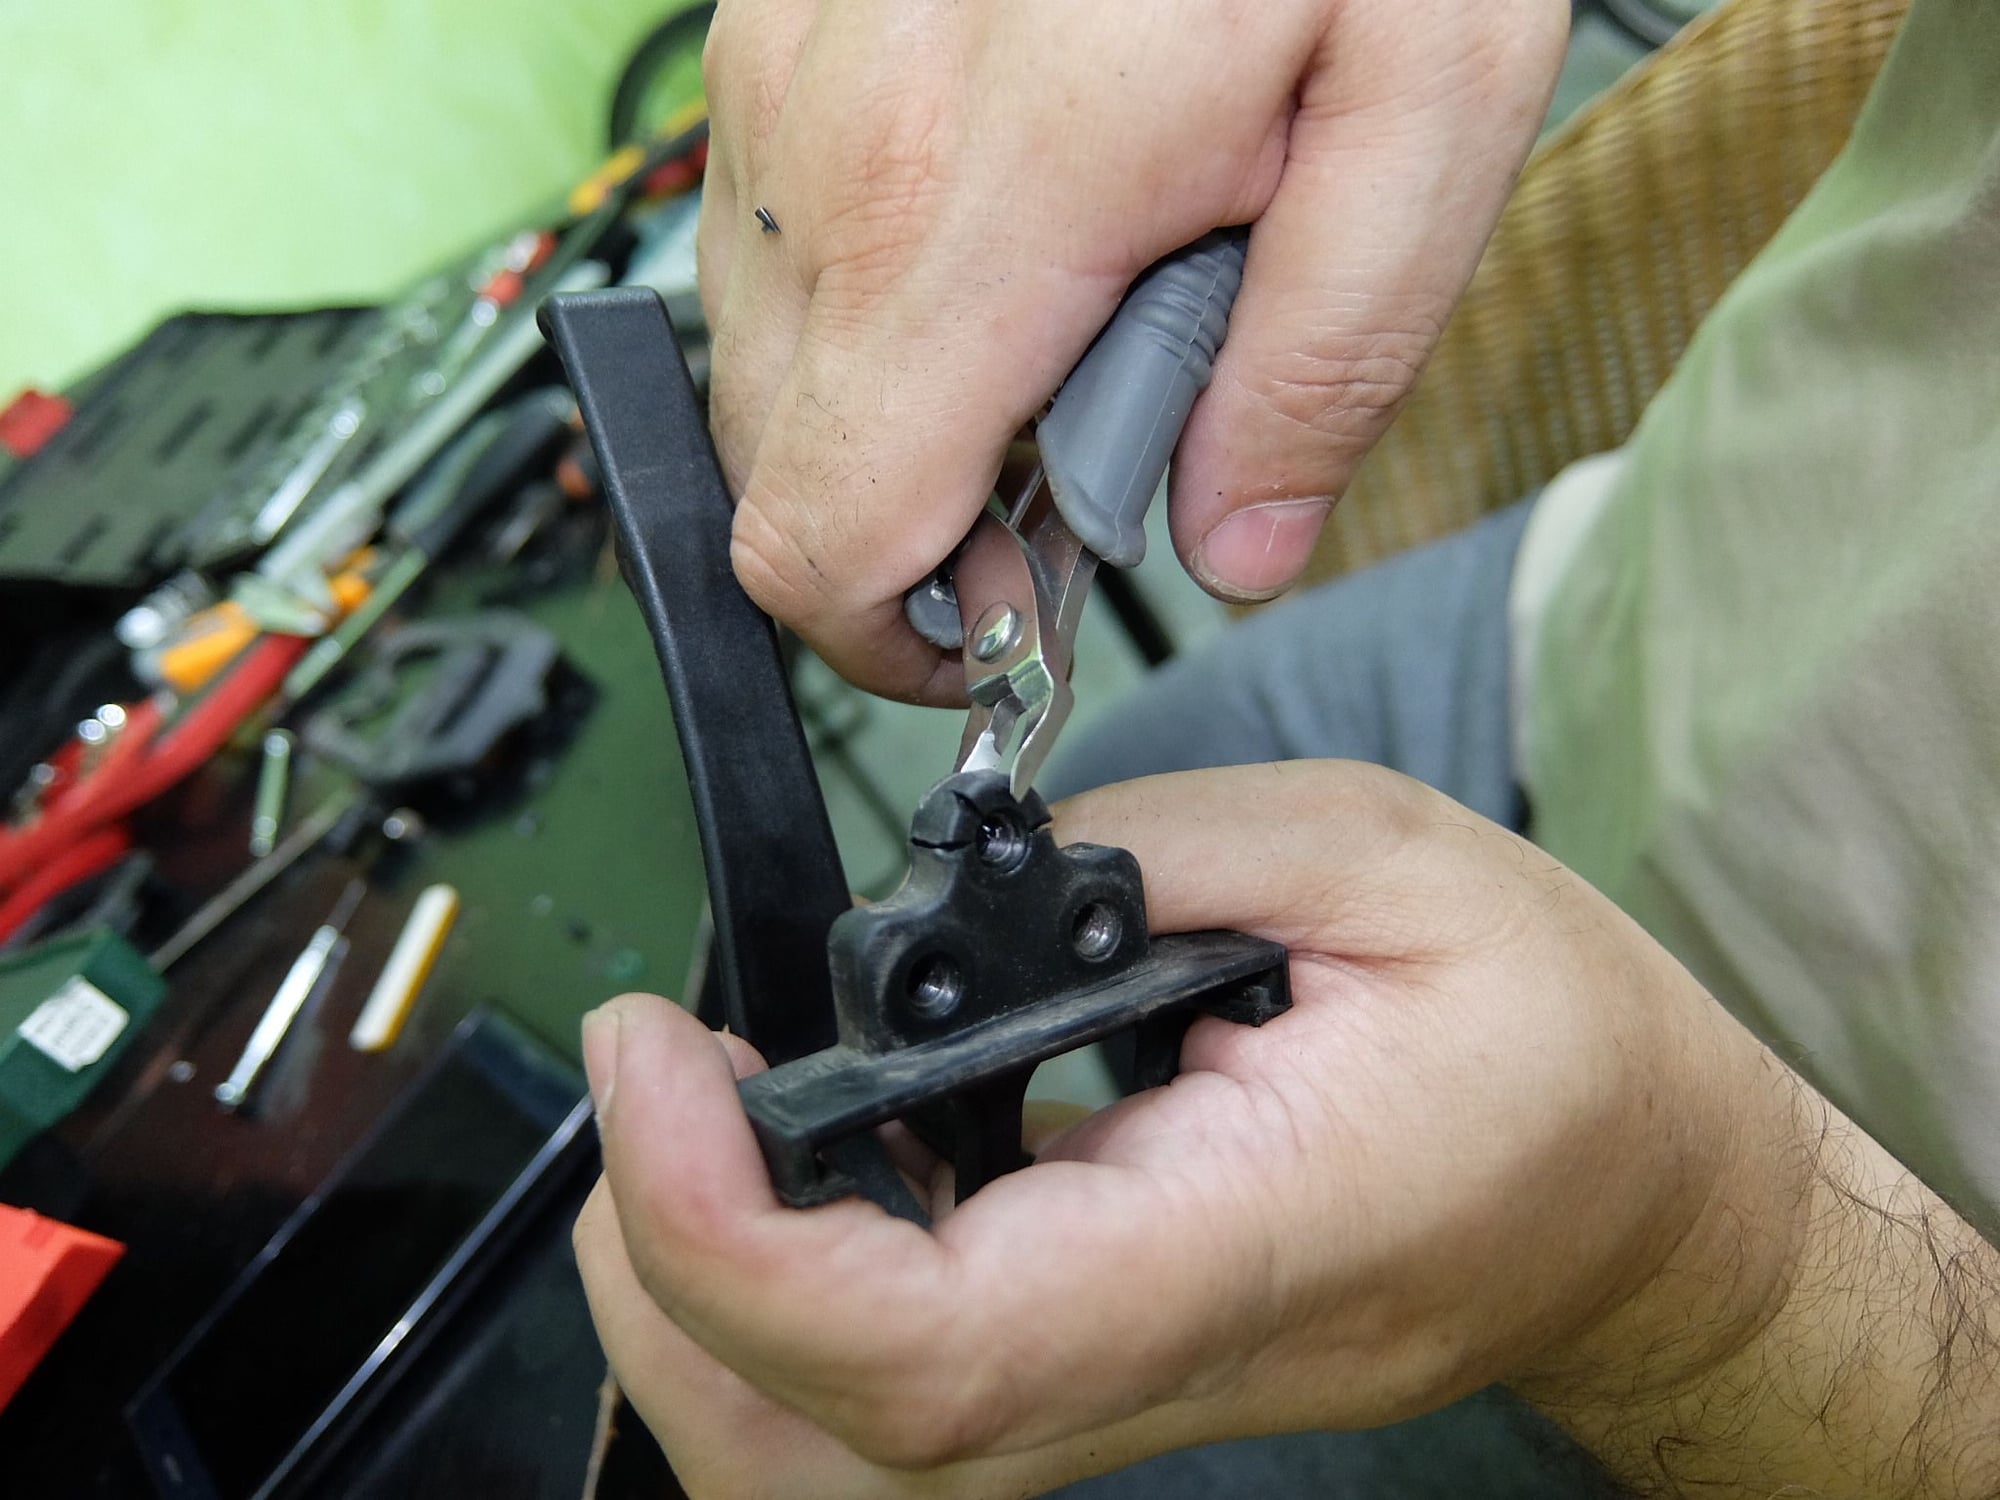
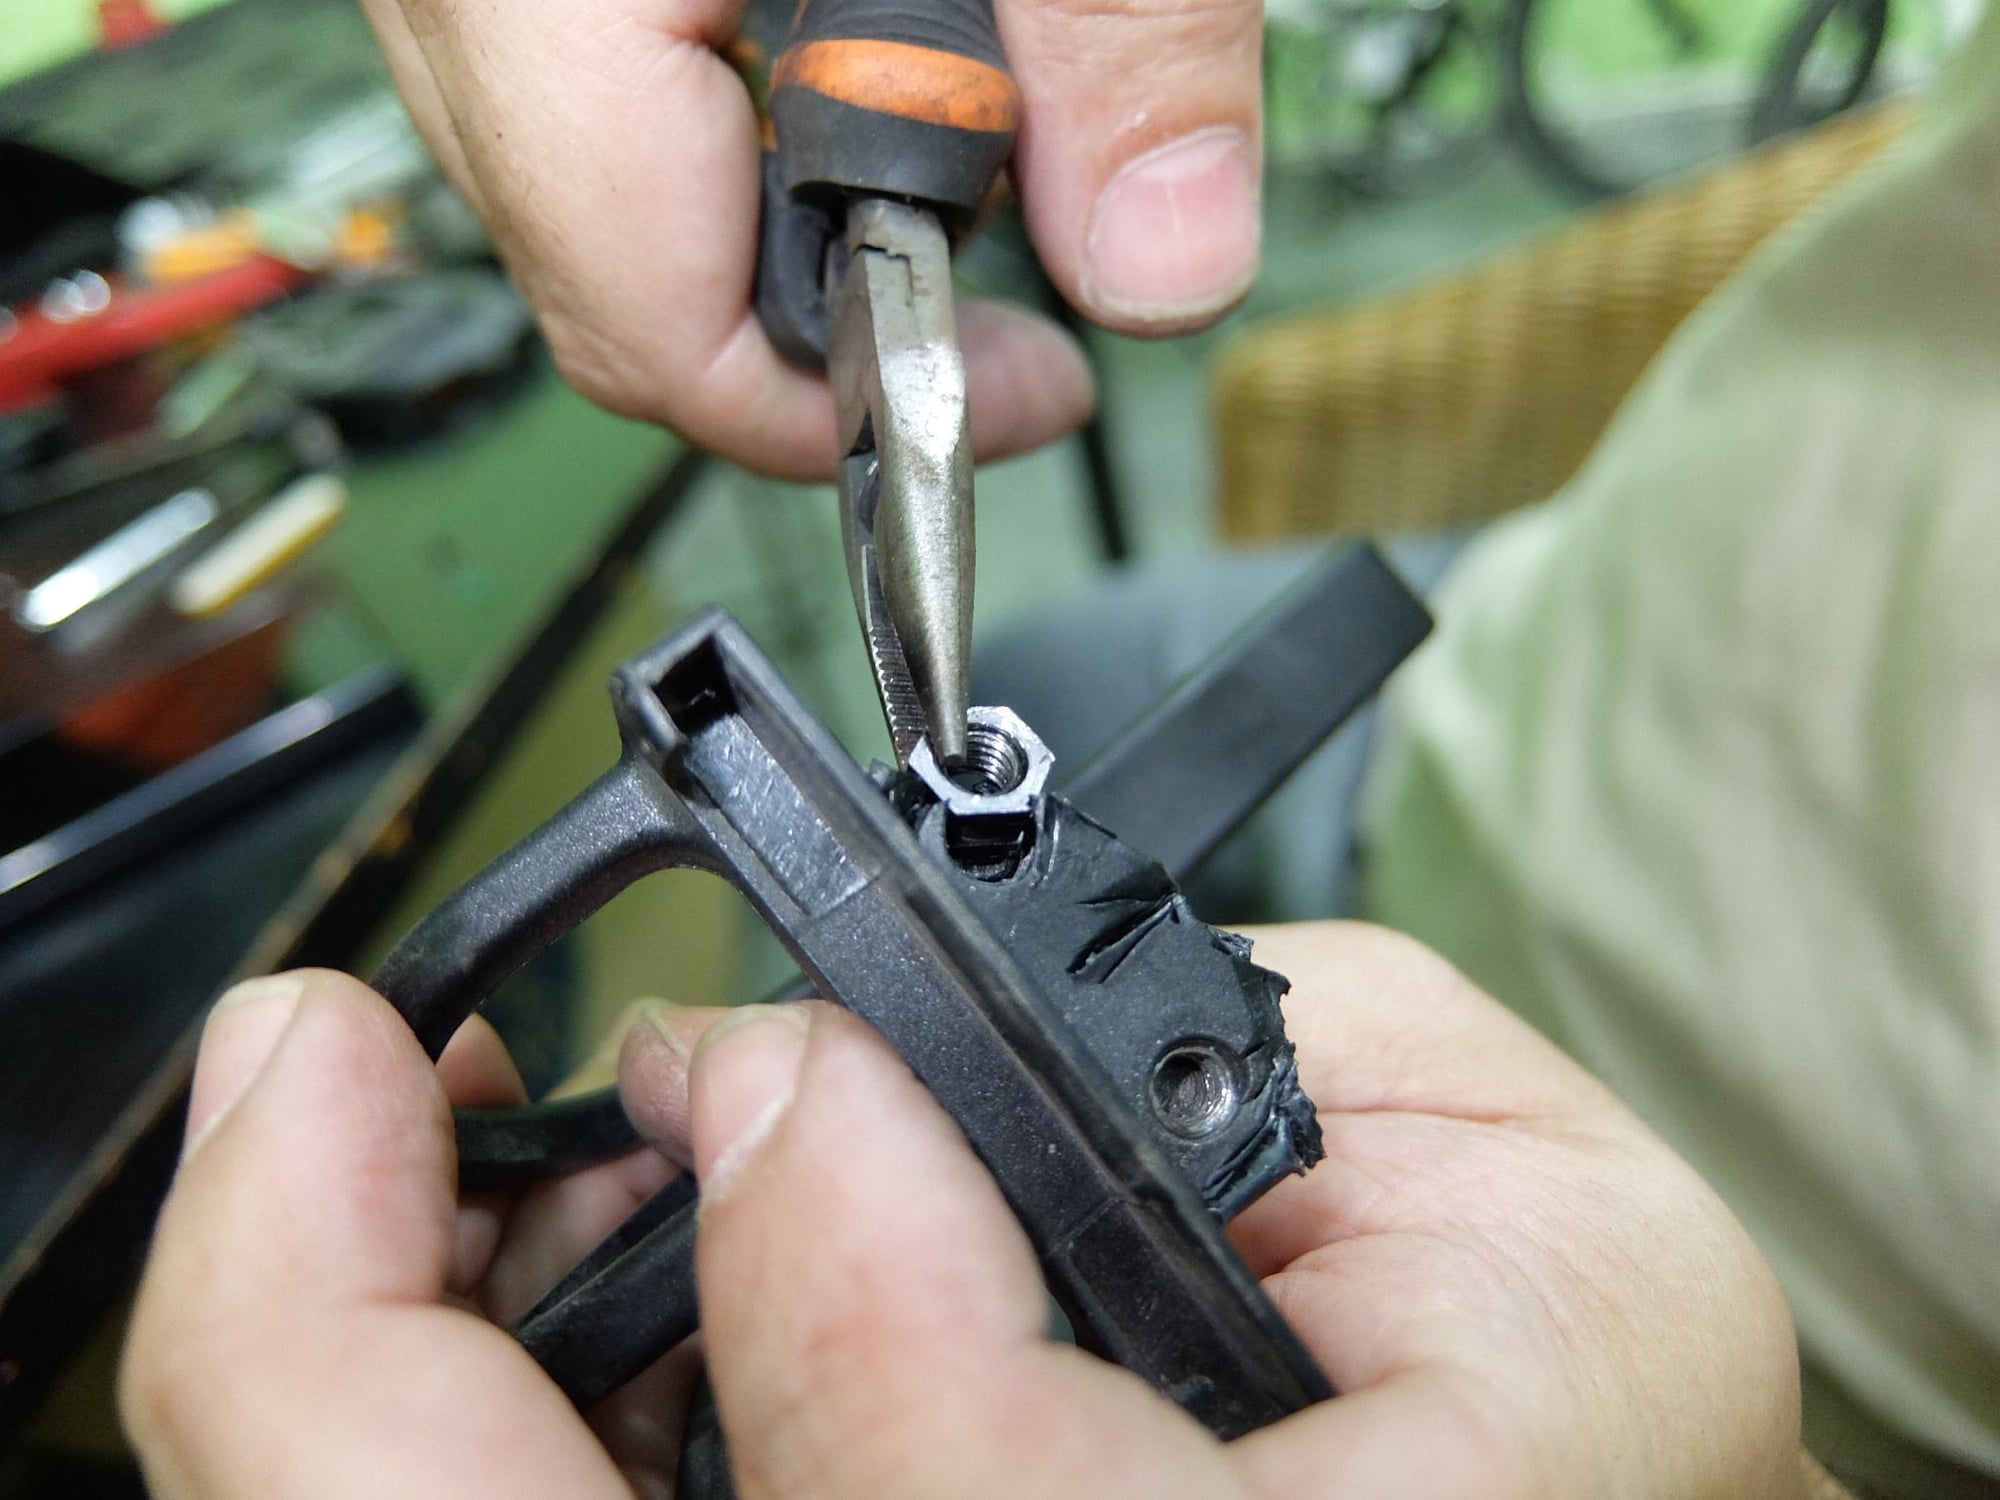
Now, there were three nuts molded into the resin of the toe clip, so I had to cut these out so as to use two of them later to bolt the toe clip to the cage of the Wellgo (see next post):
Now on to cutting off all the excess resin:
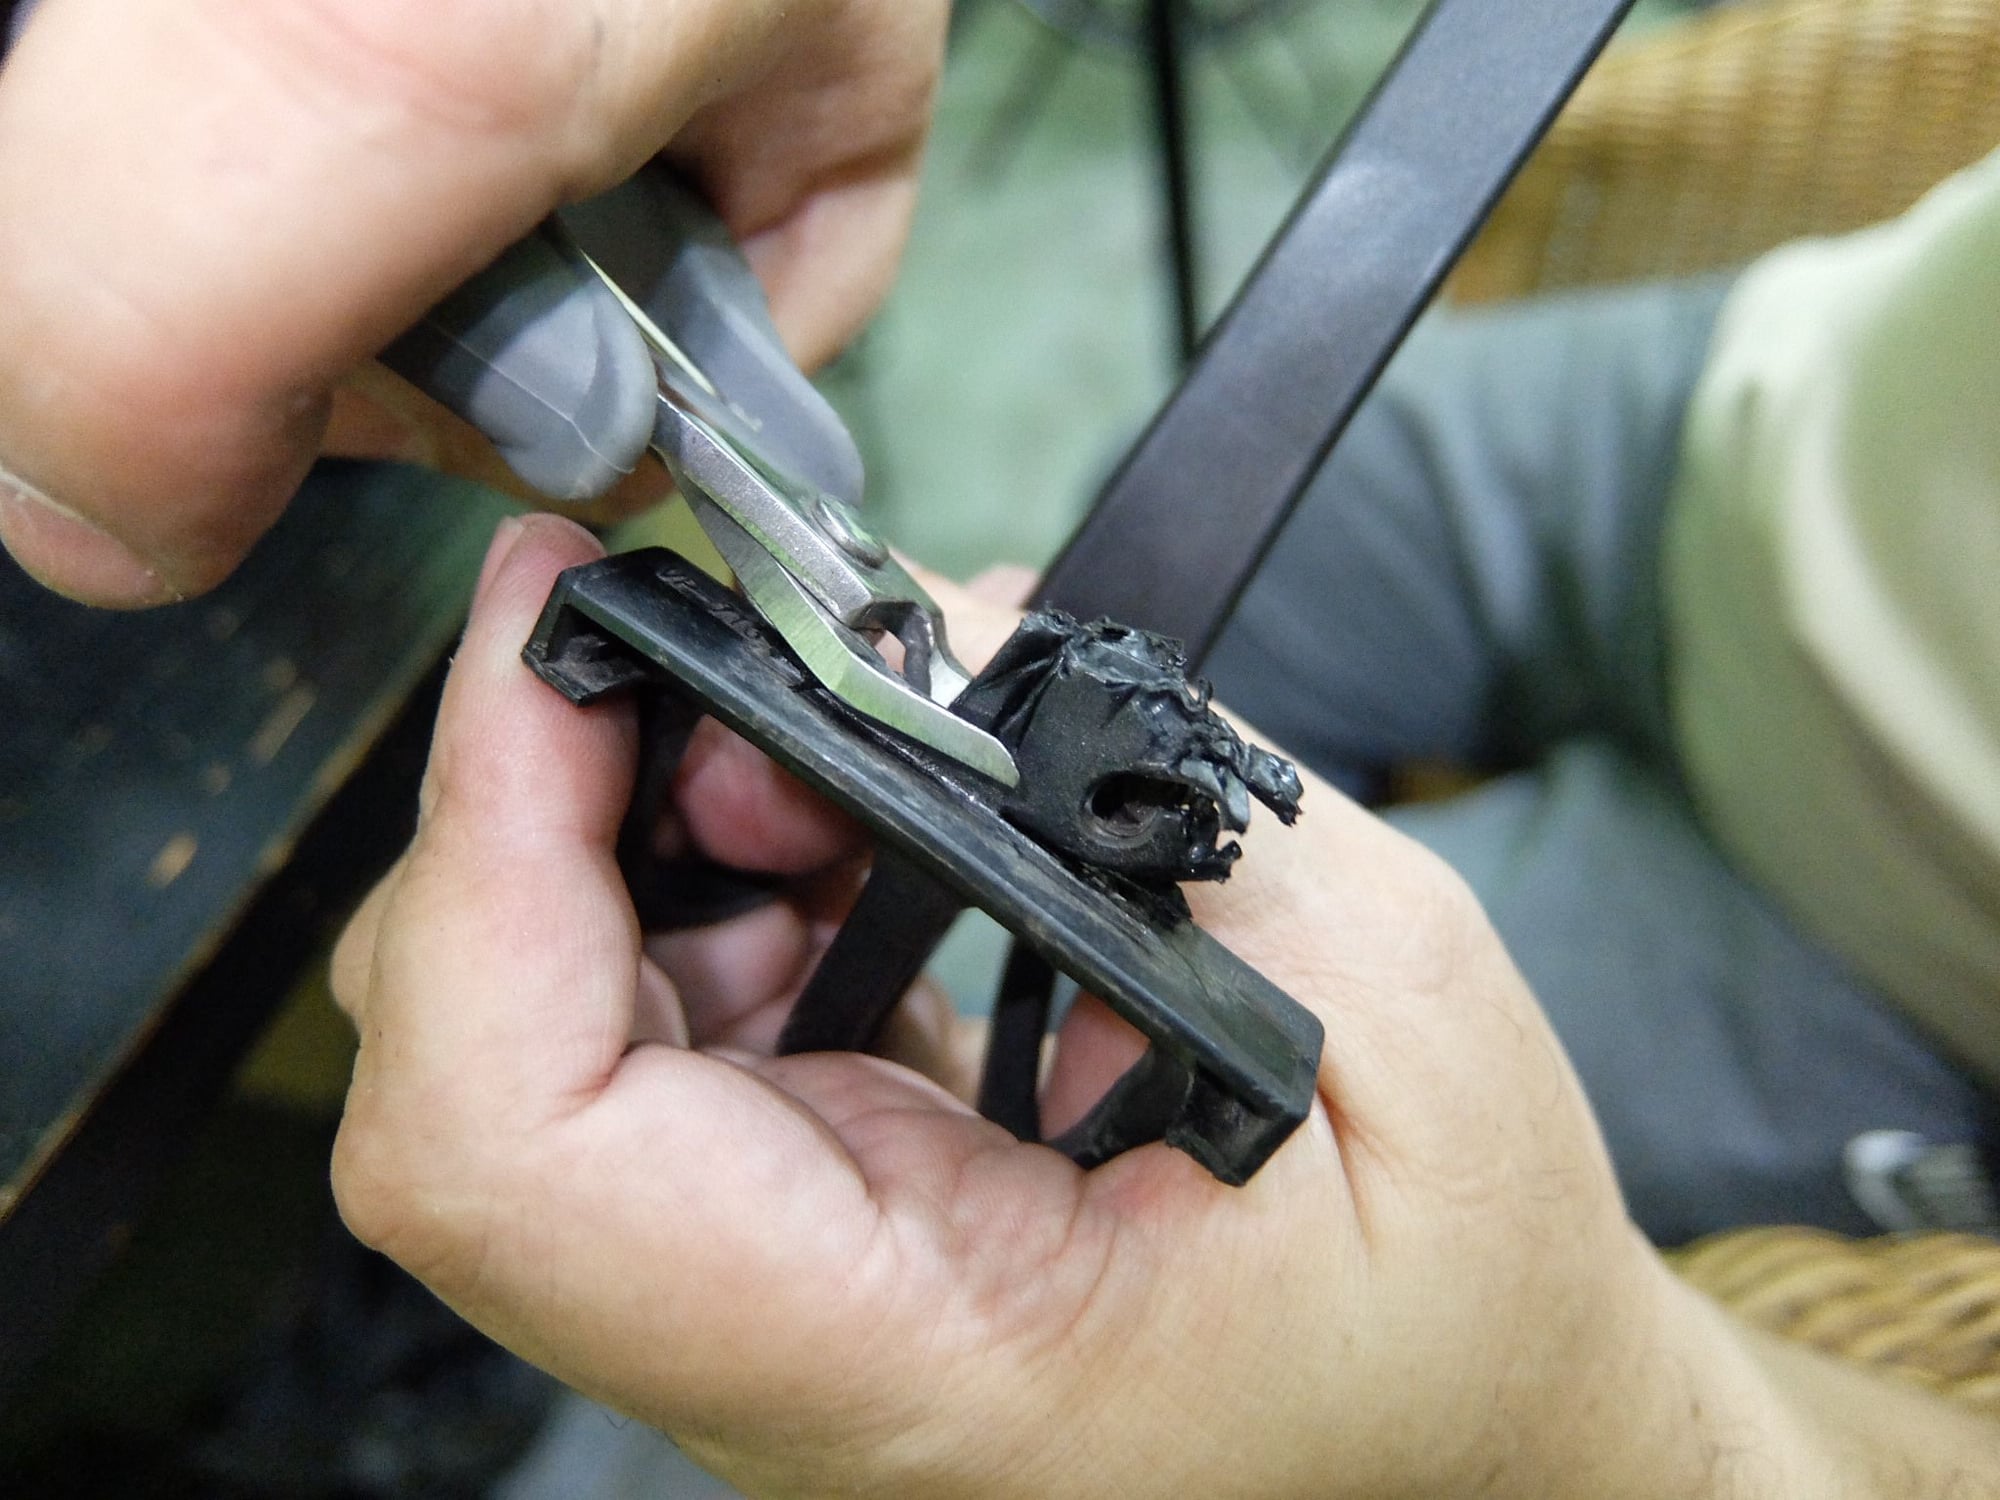
(Continued below.)
Problem is, even with the straps and toe clips, they were crap for holding my feet straight. The originals, on the other hand, are great for keeping my feet in place, but not all that great on the upstroke.
Thing is, being broke and all, I couldn't spend money I haven't got to order straps online, nor were aftermarket toe clips available for me to buy at any of the local shops. I had a second pair of the same VP pedals lying around in a drawer, the spindle of one of which was bent and wobbly, so I decided to see if I could cannibalize them for the toe clips and find a way to bolt them to the Wellgos somehow. It turned out well enough.
I started with unscrewing the toe clips from the VPs:
Then pried out the reflector at the base of the toe clip:
Now, there were three nuts molded into the resin of the toe clip, so I had to cut these out so as to use two of them later to bolt the toe clip to the cage of the Wellgo (see next post):
Now on to cutting off all the excess resin:
(Continued below.)
Last edited by sjanzeir; 08-16-18 at 01:56 PM.
08-12-18 | 05:06 PM
#635
Unreachable
Joined: Apr 2016
Posts: 1,742
Likes: 1,626
From: Jeddah, Saudi Arabia
Bikes: 1990 Raleigh Flyer; 2013 Trek 7.3 FX; 2014 Trek 7.6 FX; 2019 Dahon Mu D9.
(Continued)
Making the necessary measurements and drilling the requisite holes (by hand; no need to hook up a power drill, as the resin material is soft enough):
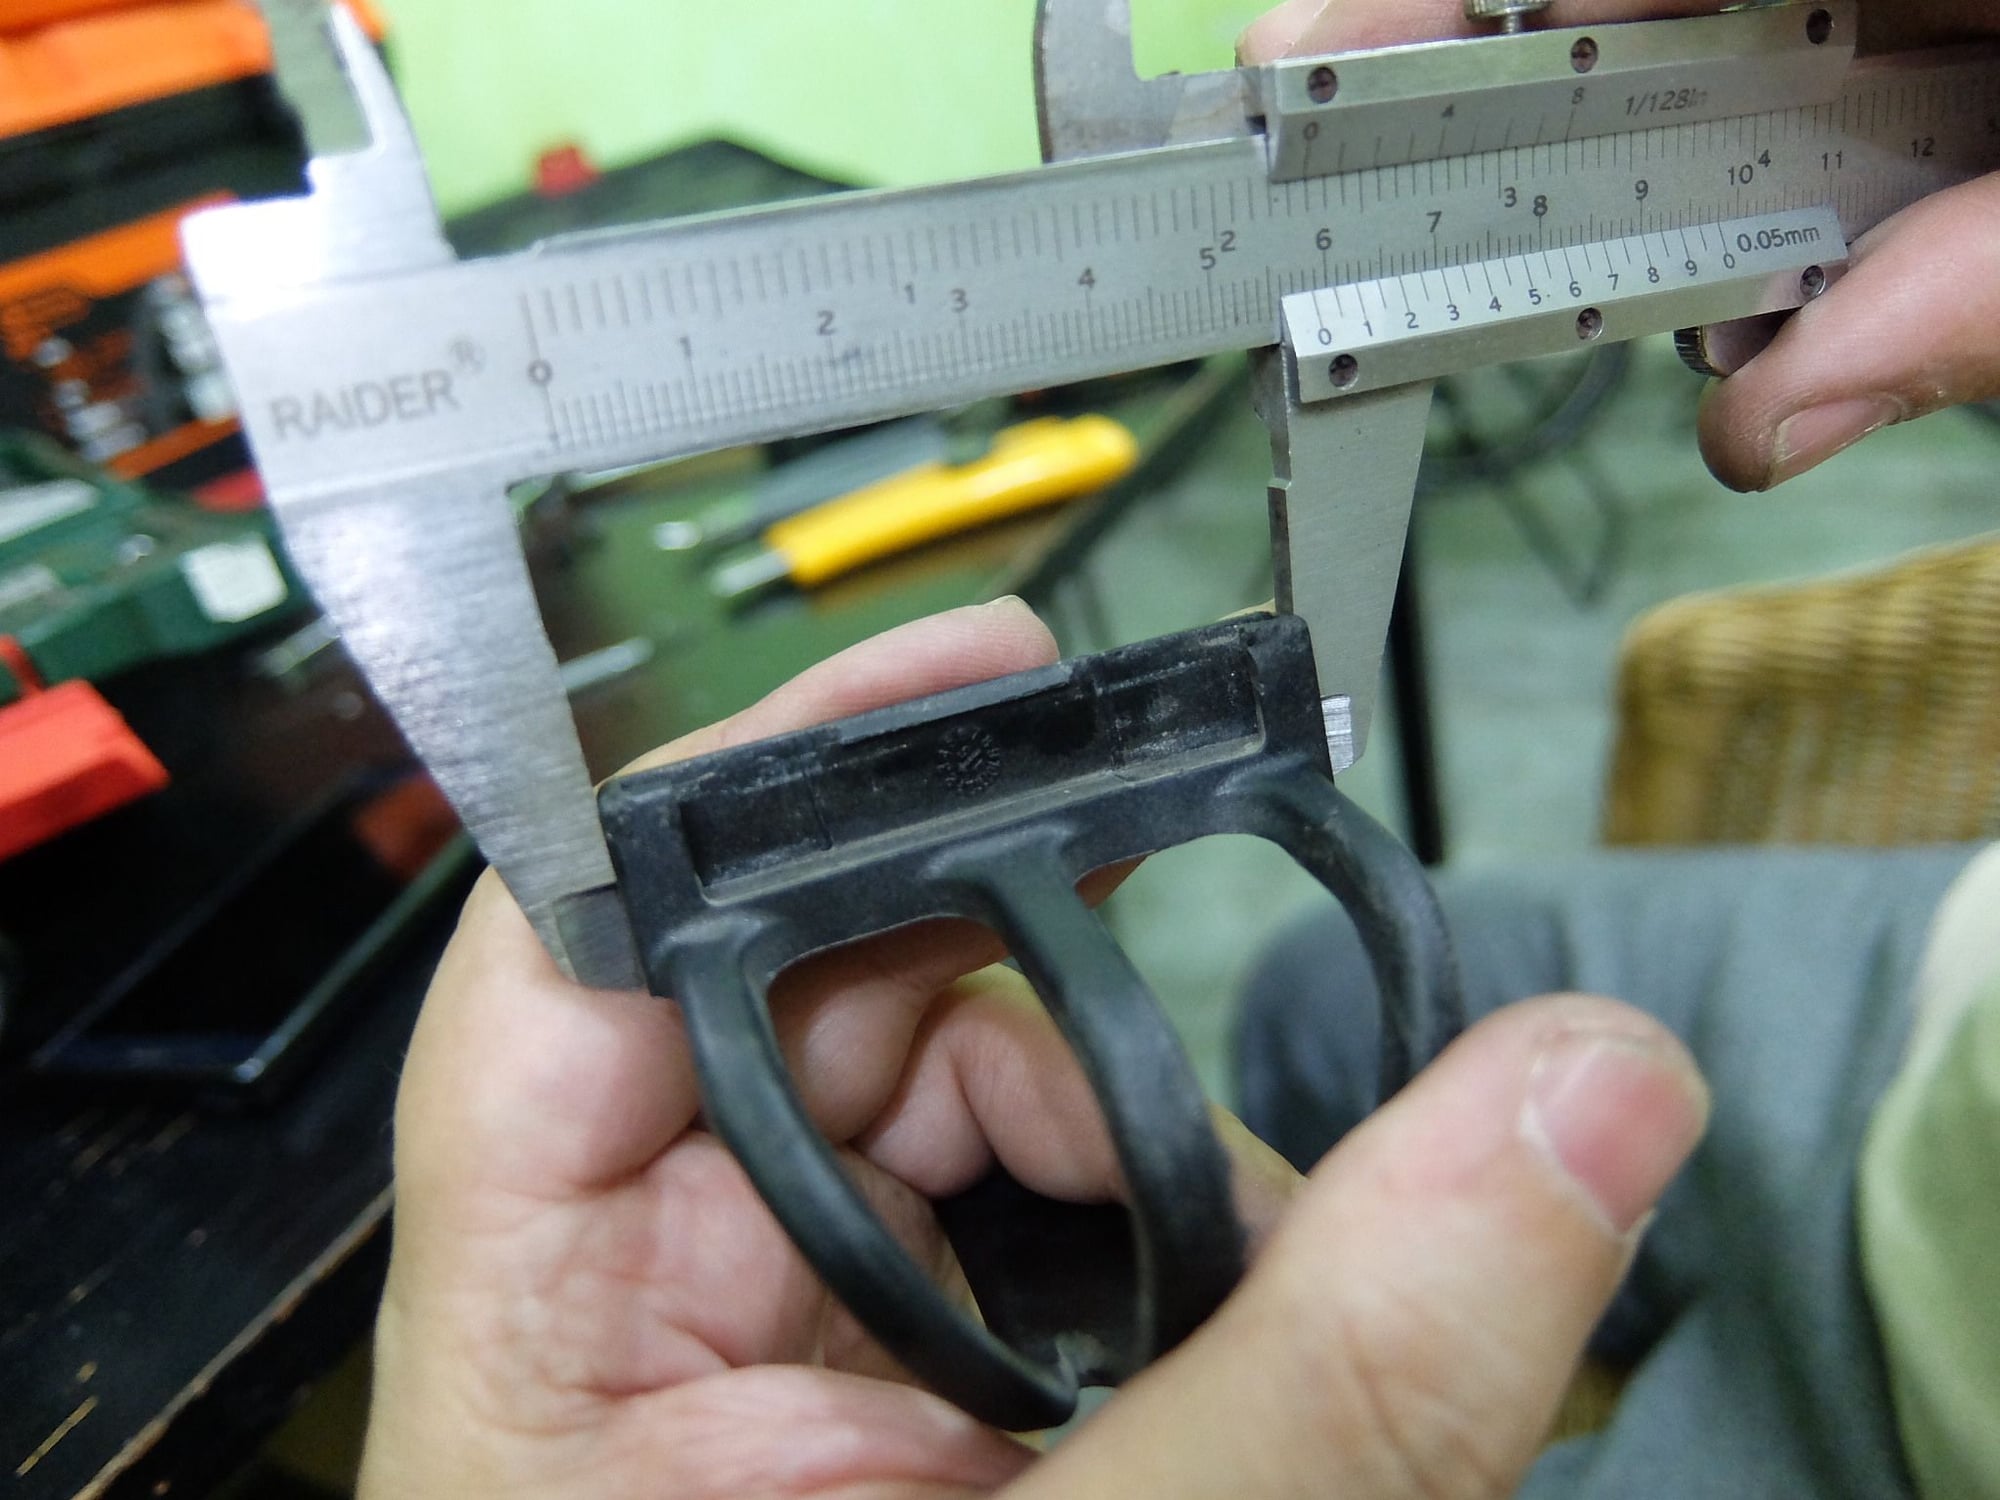
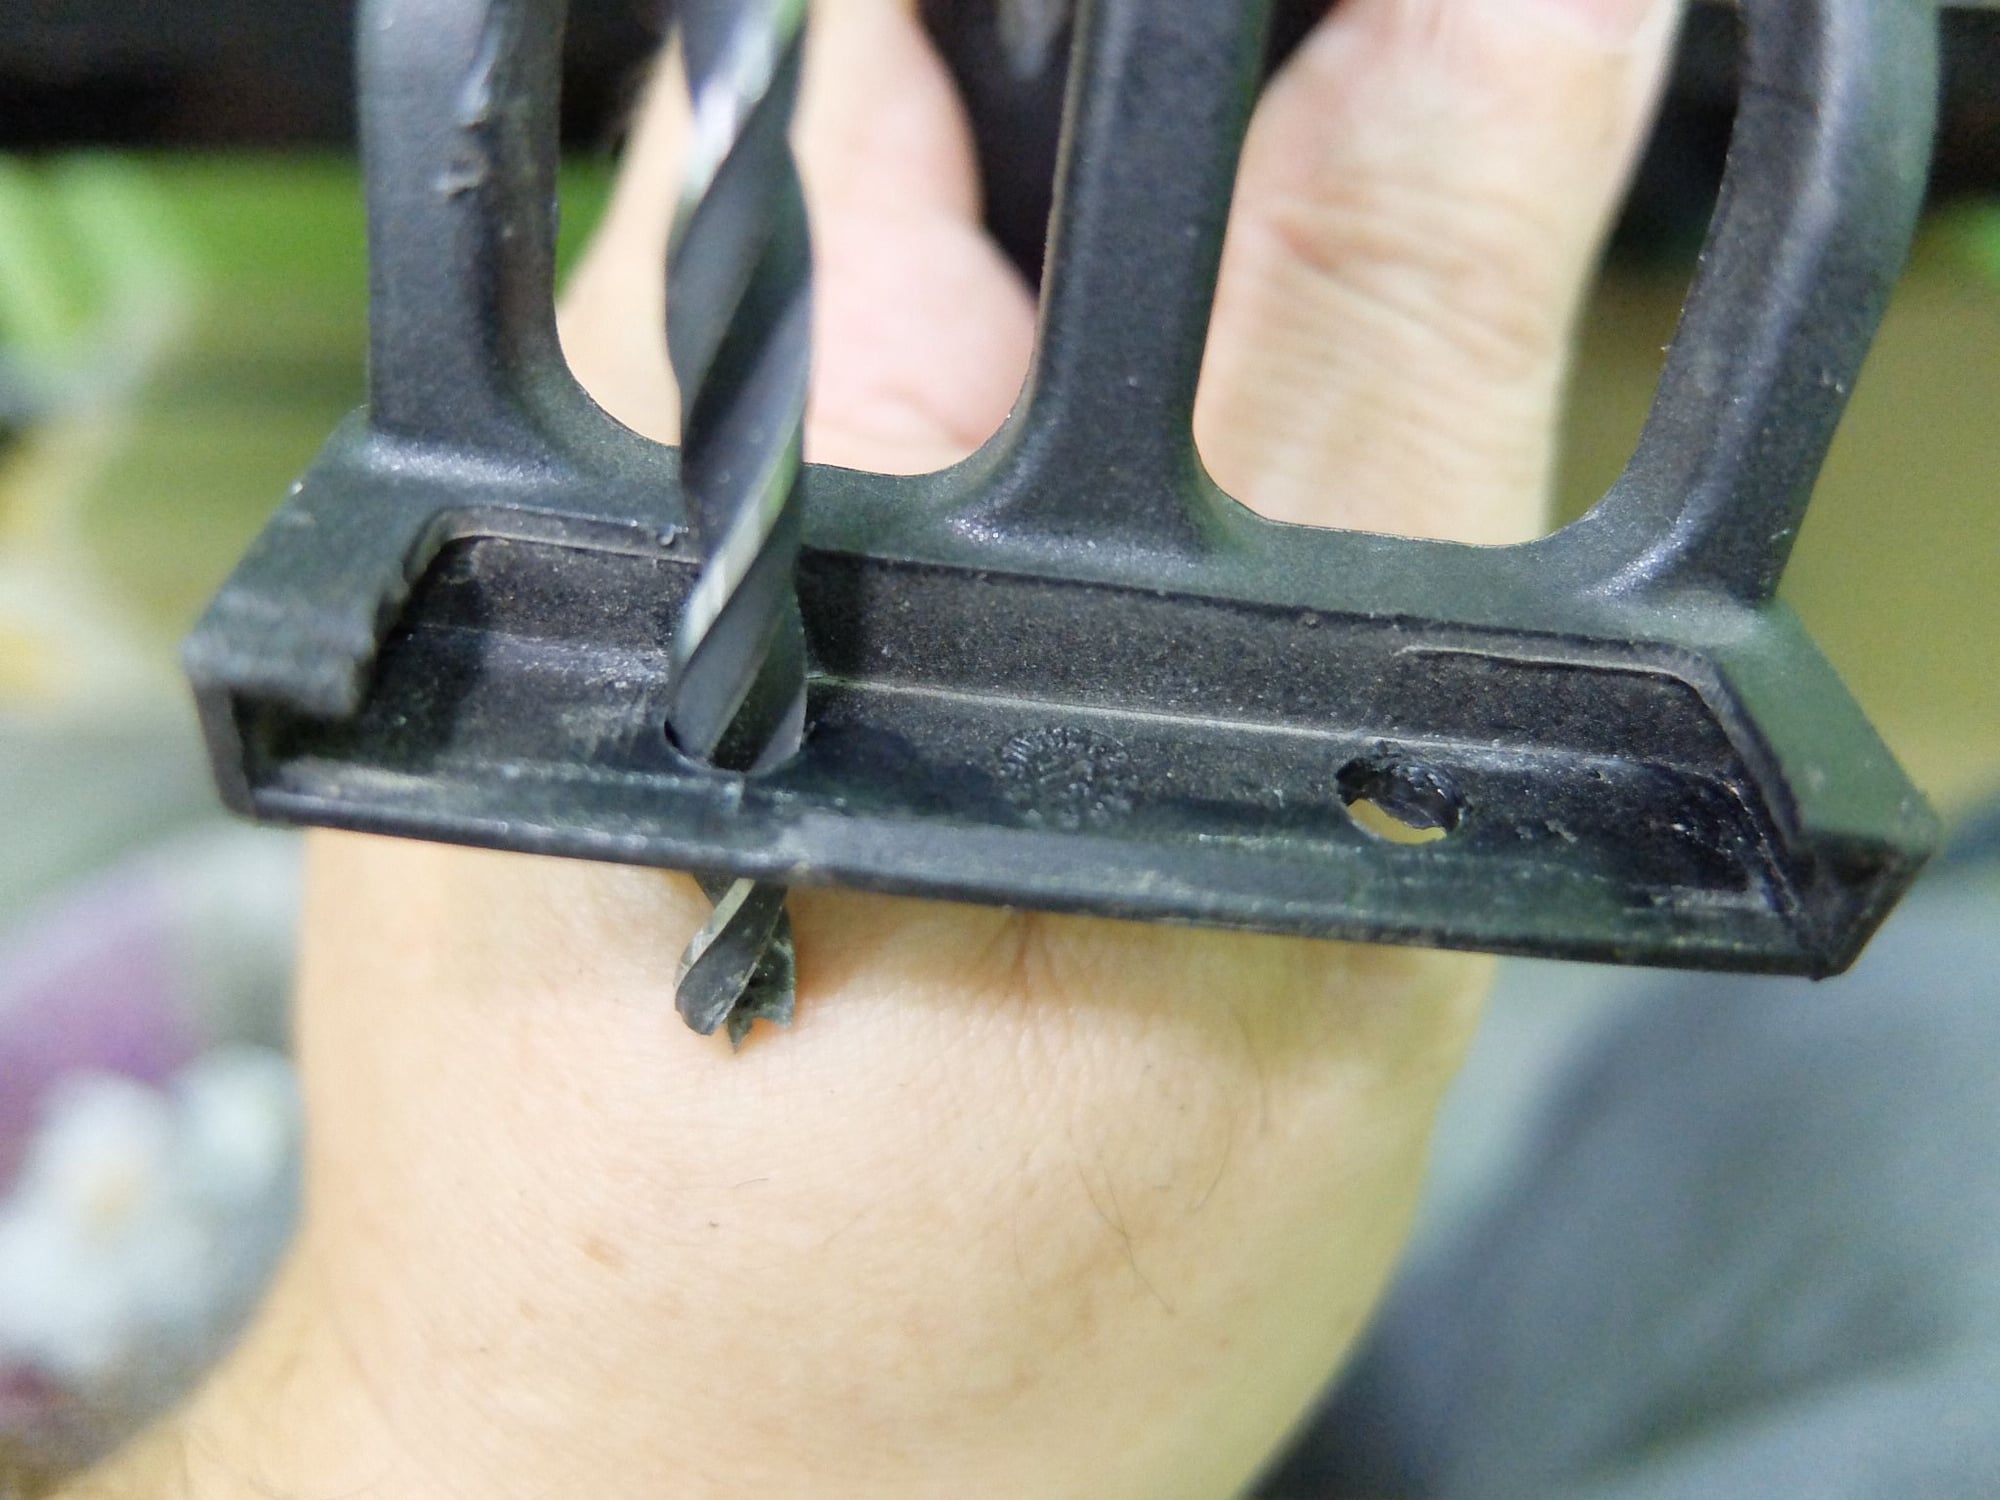
The base is 58.5mm wide. The screw holes on the Wellgo pedal where the the toe clip will sit (in place of the original reflector) are exactly one inch/25.4mm apart. I measured 16.5mm from each side in and 4mm down from the thick part of the base (the screw head is 8mm in diameter) and marked out where to drill.
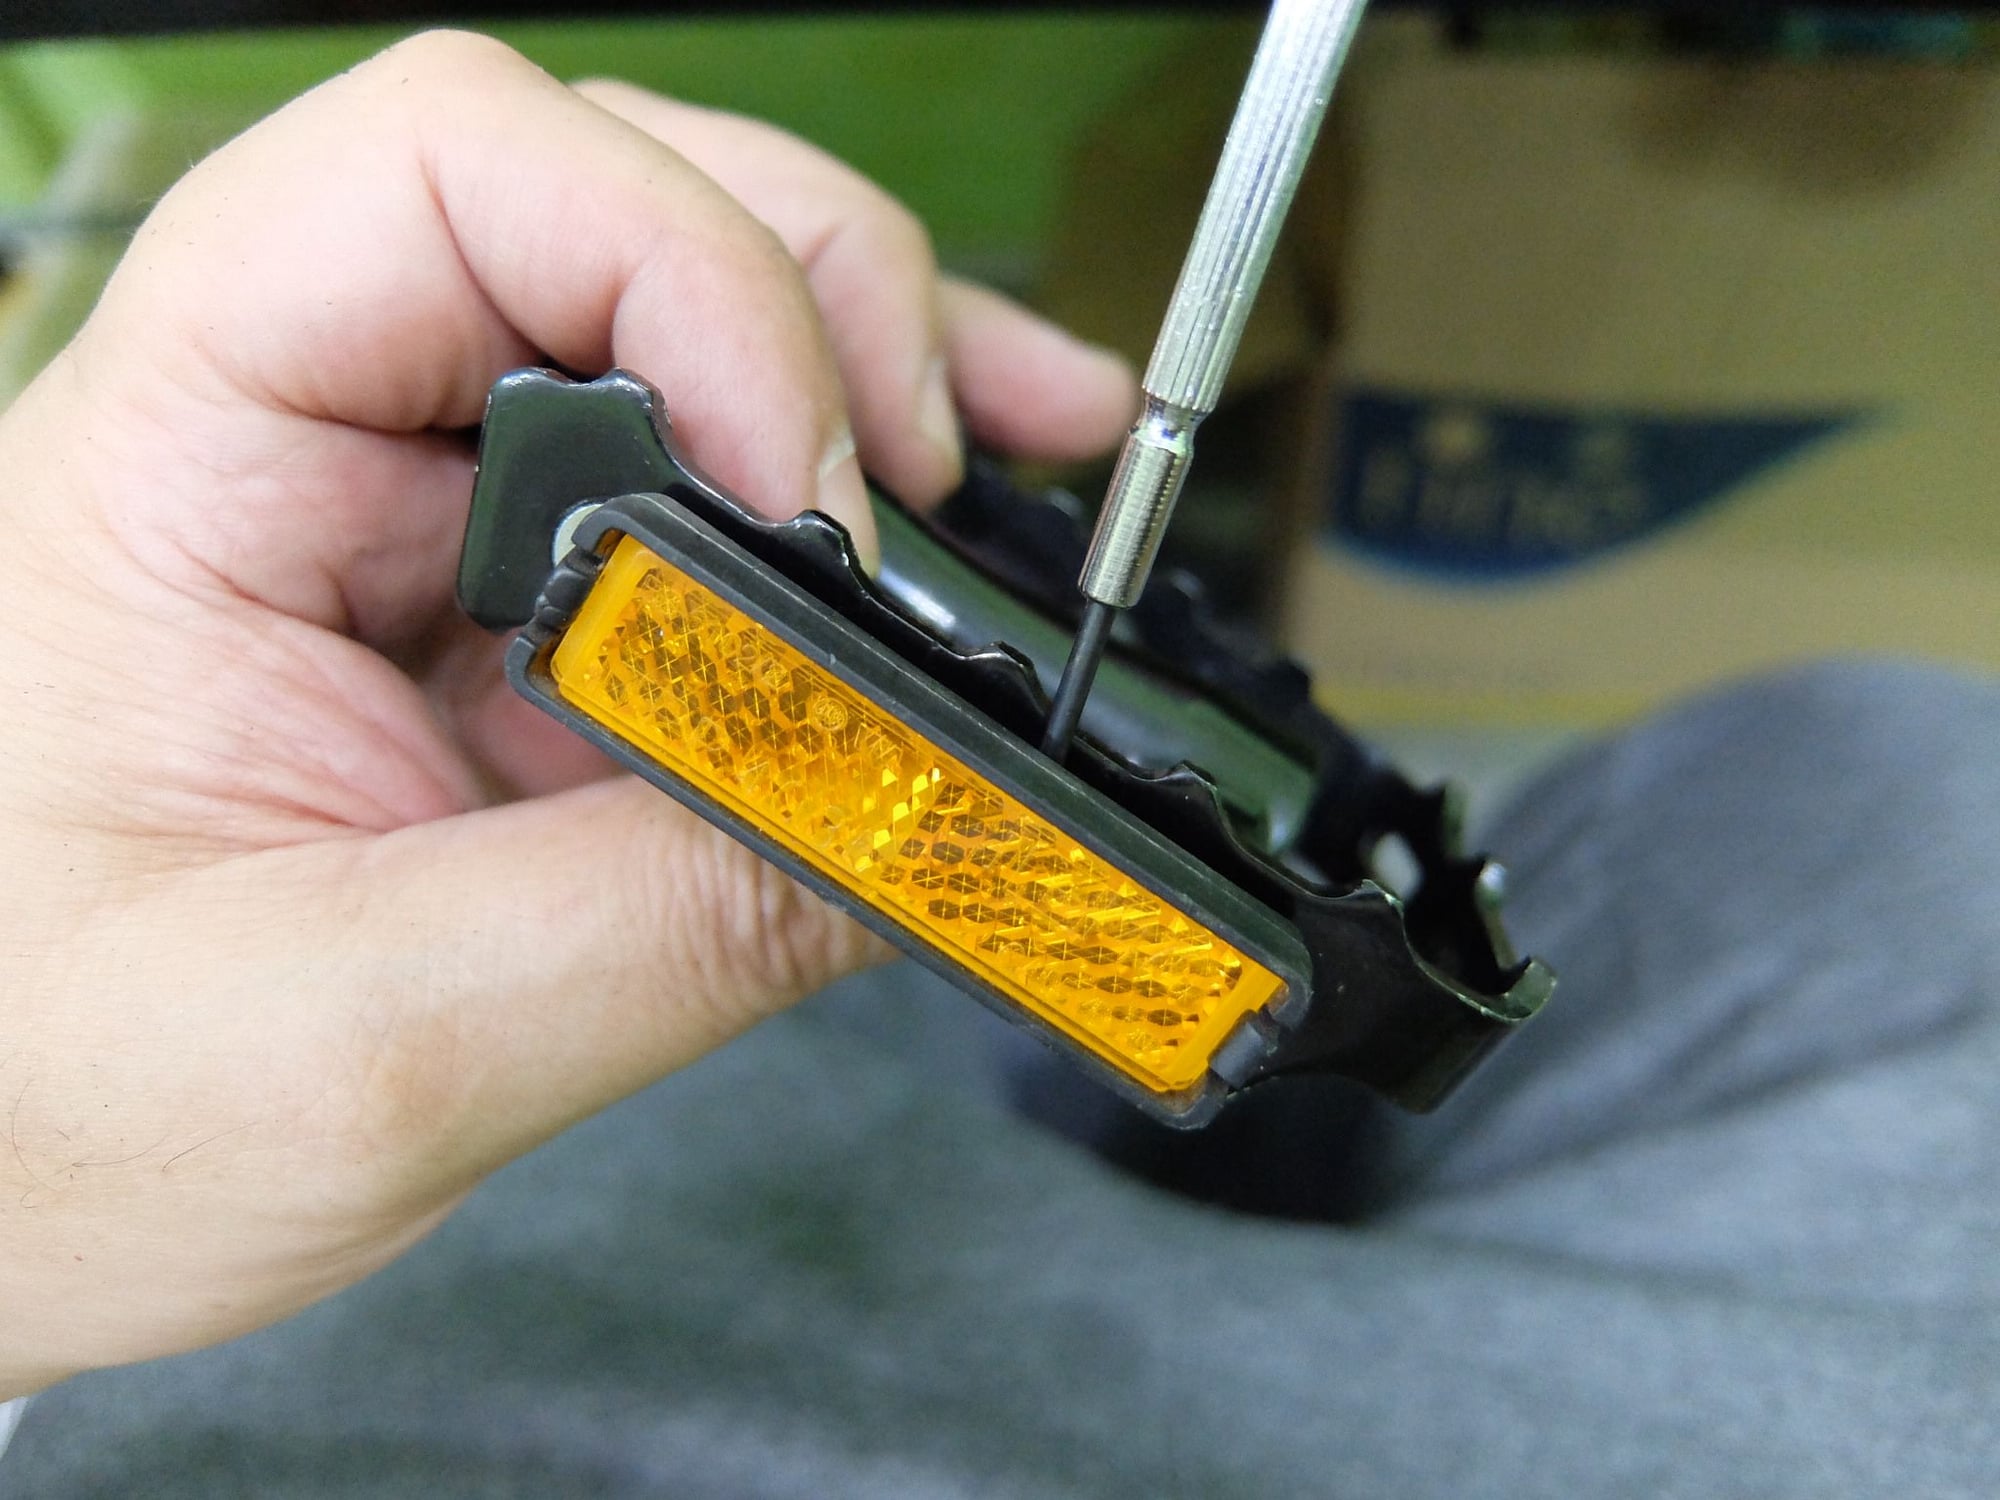
Now, prying the reflector off of the front side of the Wellgo (the hole where the strap goes into the body of the pedal, and the corresponding "tongue" in the cage, indicate the back side of the pedal):
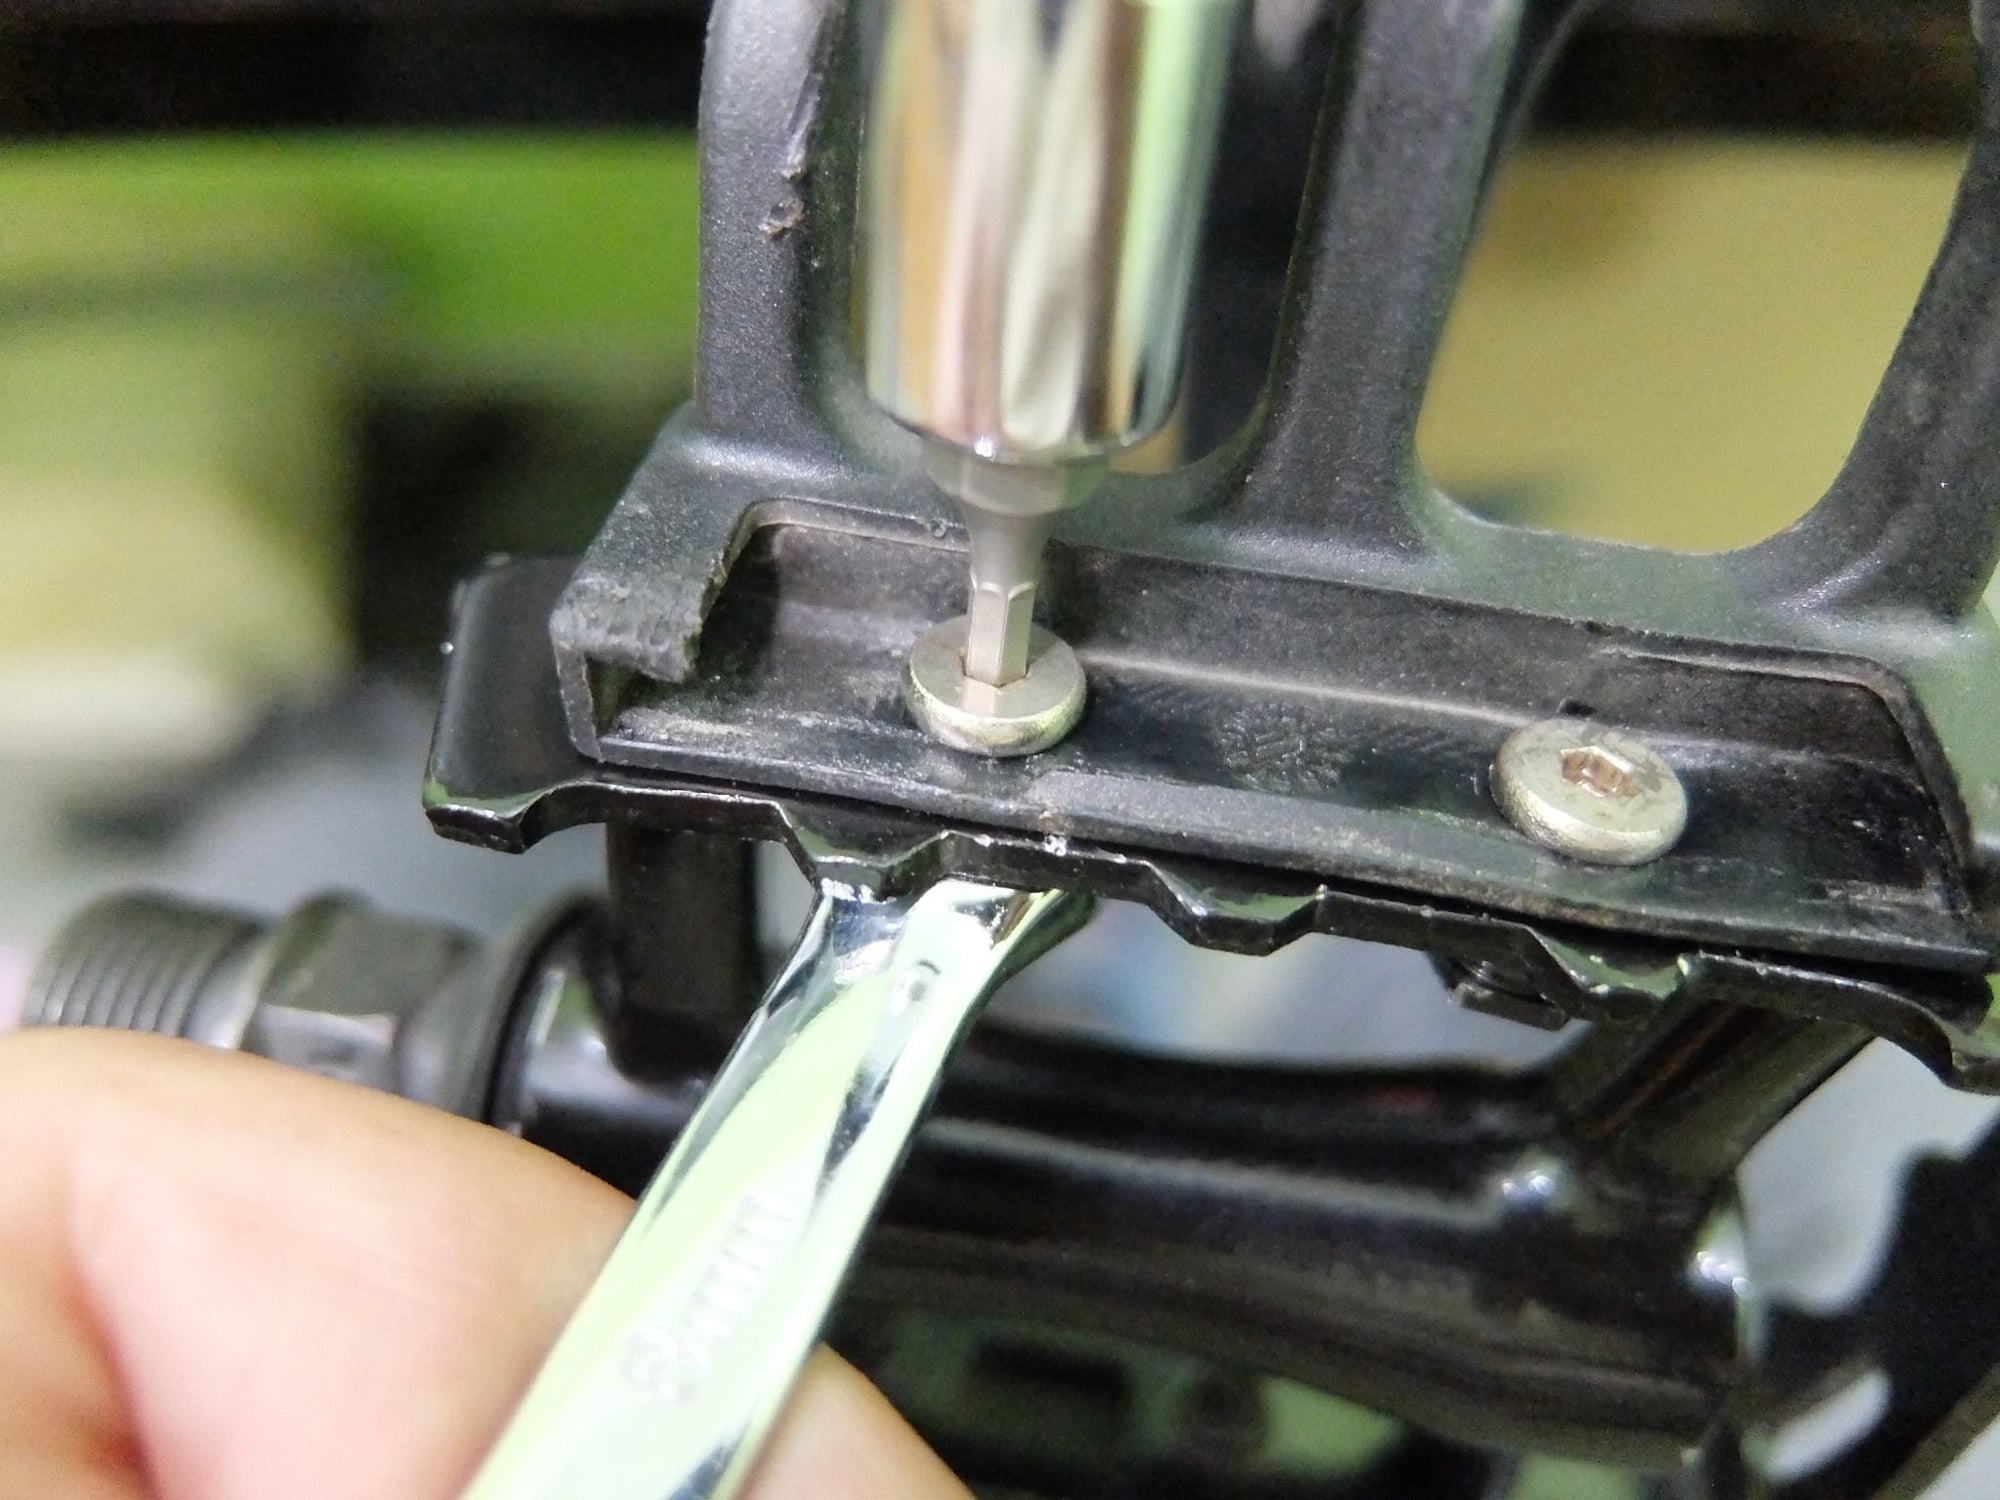
Now, screwing the toe clip to the same holes where the reflector used to fit, using the same bolts that used to hold the toe clip to its original VP body (and the same nuts seen earlier):
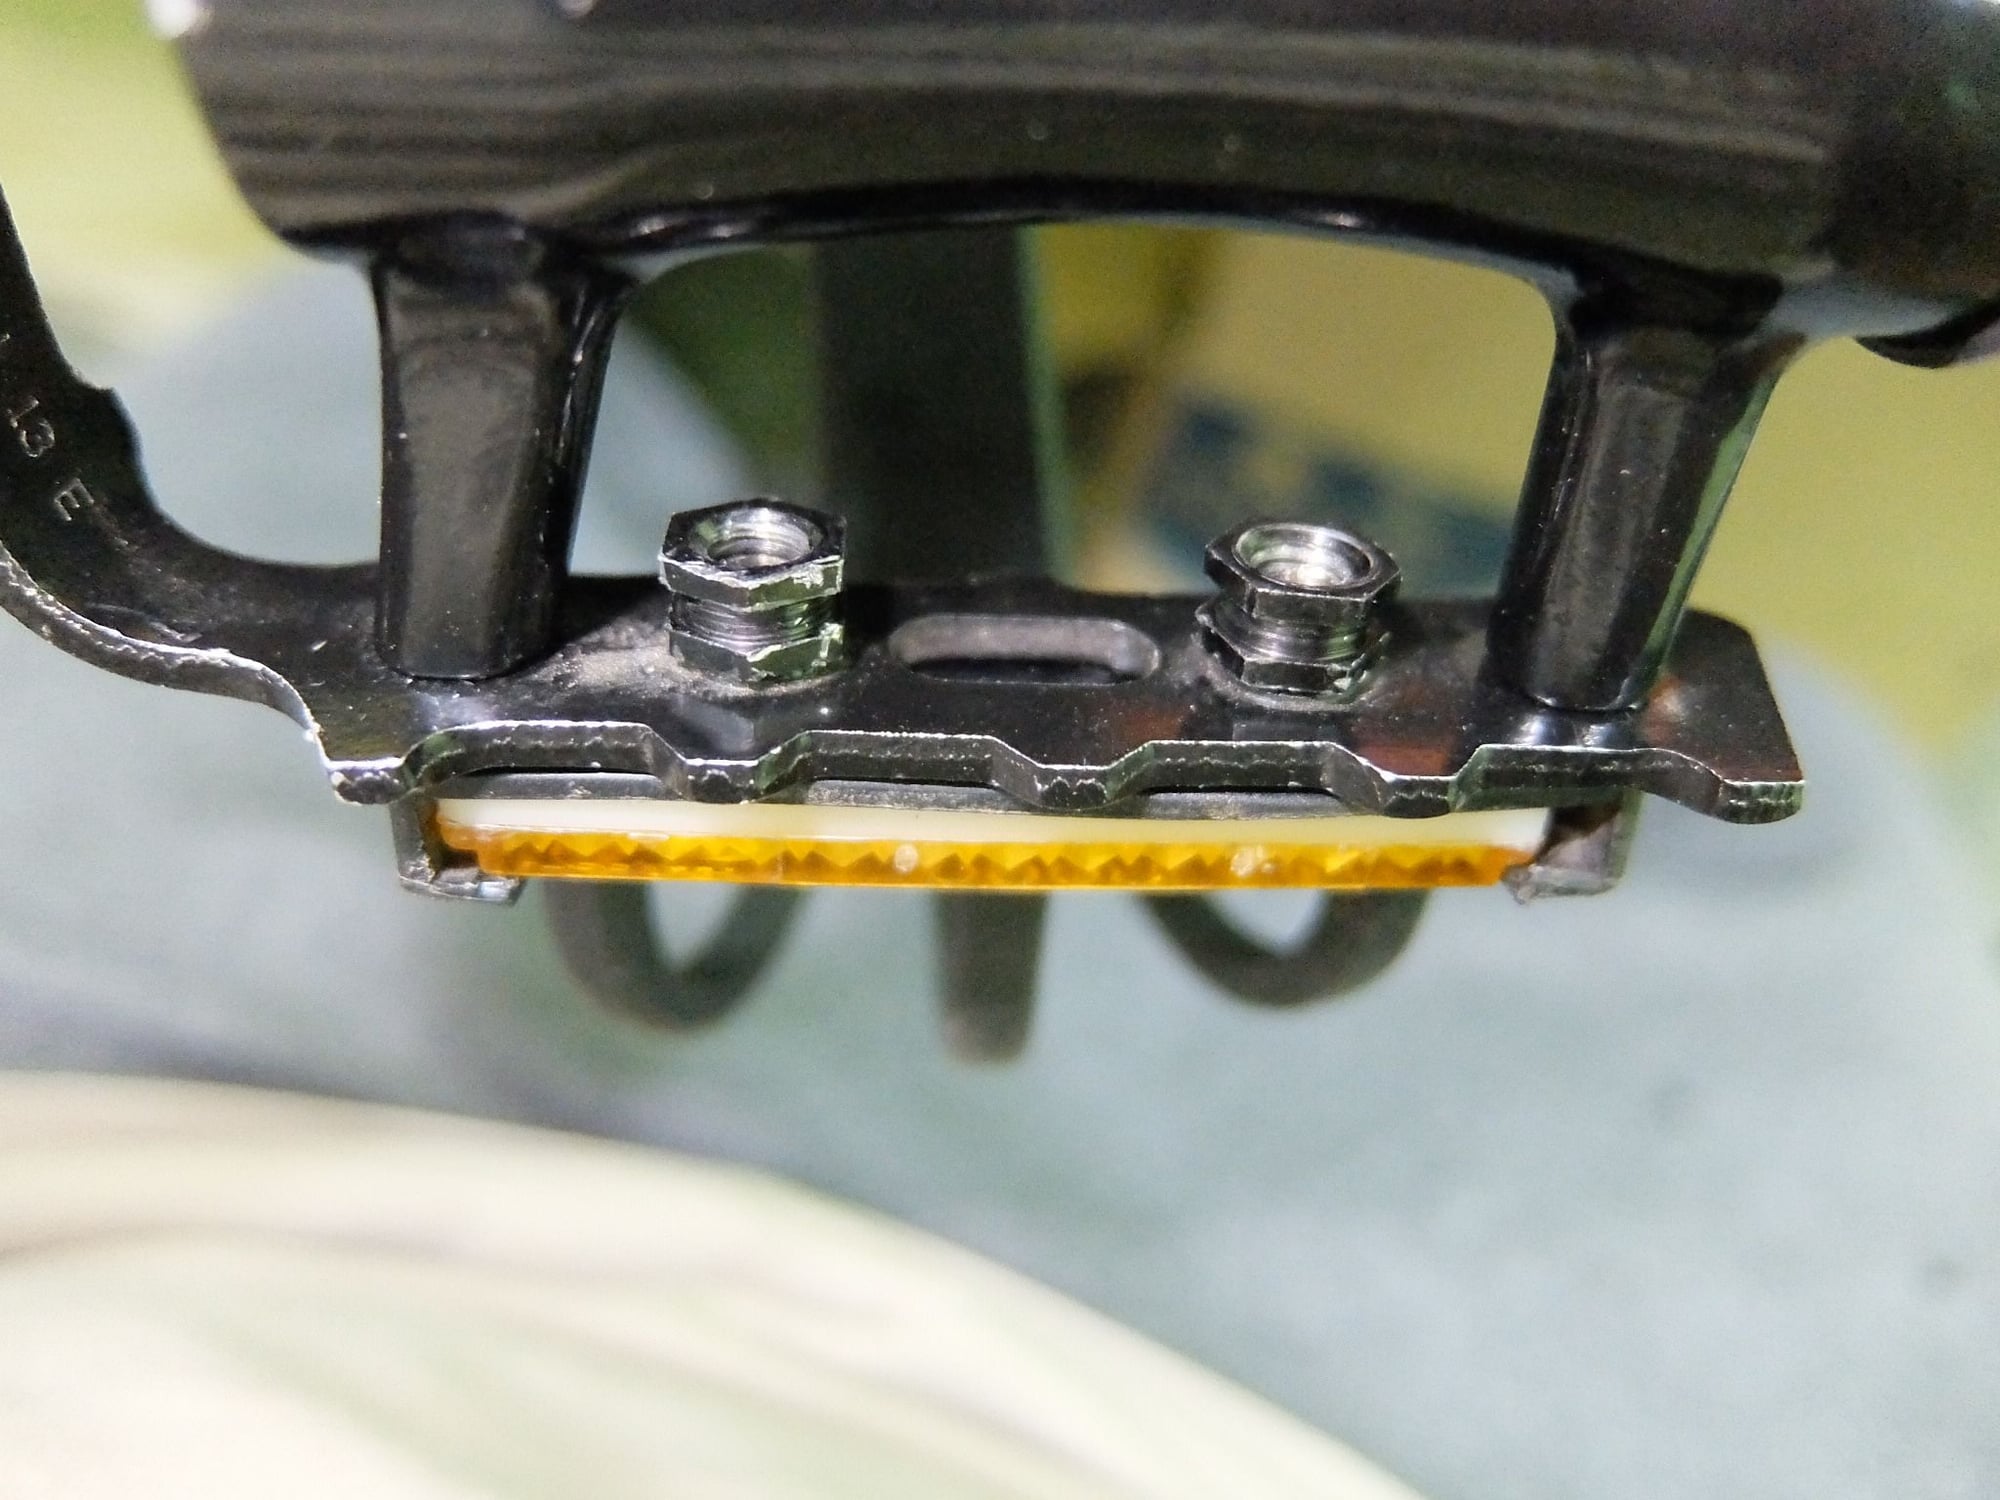
I even managed to push the reflector back into its holder without breaking it!
And voila! Two bear trap pedals with toe clips and straps!
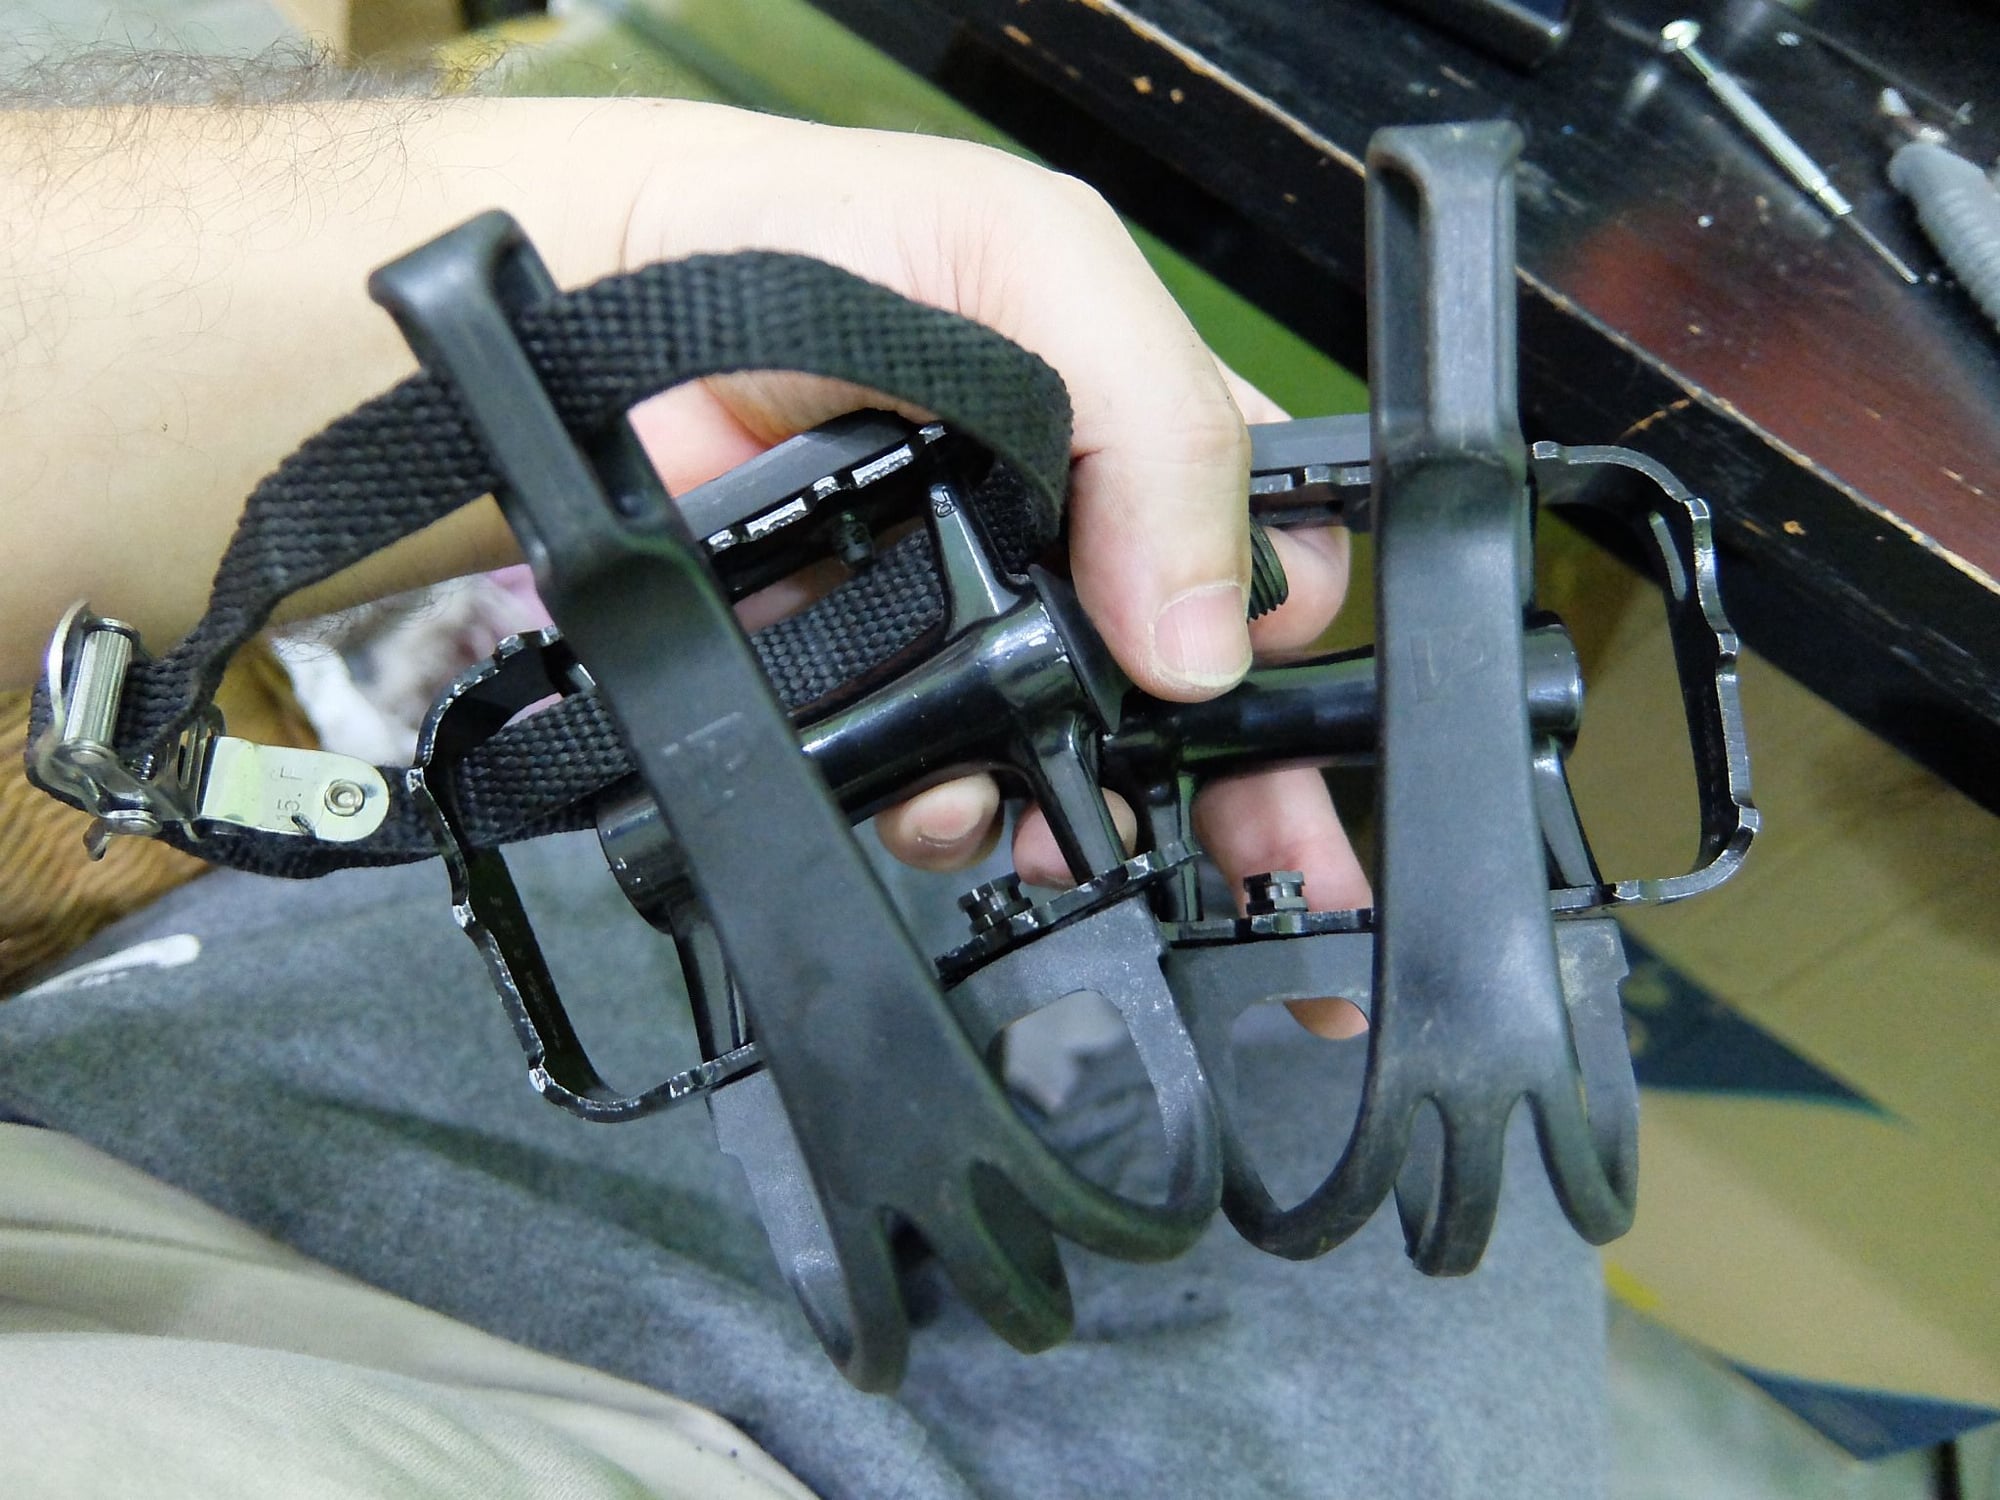
Now, I have no idea if or for how long this kind of setup will hold up before the first toe clip breaks off, but I'm hoping for the best here.
The original VPs, intact and sacrificed:
Making the necessary measurements and drilling the requisite holes (by hand; no need to hook up a power drill, as the resin material is soft enough):
The base is 58.5mm wide. The screw holes on the Wellgo pedal where the the toe clip will sit (in place of the original reflector) are exactly one inch/25.4mm apart. I measured 16.5mm from each side in and 4mm down from the thick part of the base (the screw head is 8mm in diameter) and marked out where to drill.
Now, prying the reflector off of the front side of the Wellgo (the hole where the strap goes into the body of the pedal, and the corresponding "tongue" in the cage, indicate the back side of the pedal):
Now, screwing the toe clip to the same holes where the reflector used to fit, using the same bolts that used to hold the toe clip to its original VP body (and the same nuts seen earlier):
I even managed to push the reflector back into its holder without breaking it!
And voila! Two bear trap pedals with toe clips and straps!
Now, I have no idea if or for how long this kind of setup will hold up before the first toe clip breaks off, but I'm hoping for the best here.
The original VPs, intact and sacrificed:
Last edited by sjanzeir; 08-13-18 at 01:00 PM.
08-12-18 | 05:10 PM
#636
Unreachable
Joined: Apr 2016
Posts: 1,742
Likes: 1,626
From: Jeddah, Saudi Arabia
Bikes: 1990 Raleigh Flyer; 2013 Trek 7.3 FX; 2014 Trek 7.6 FX; 2019 Dahon Mu D9.
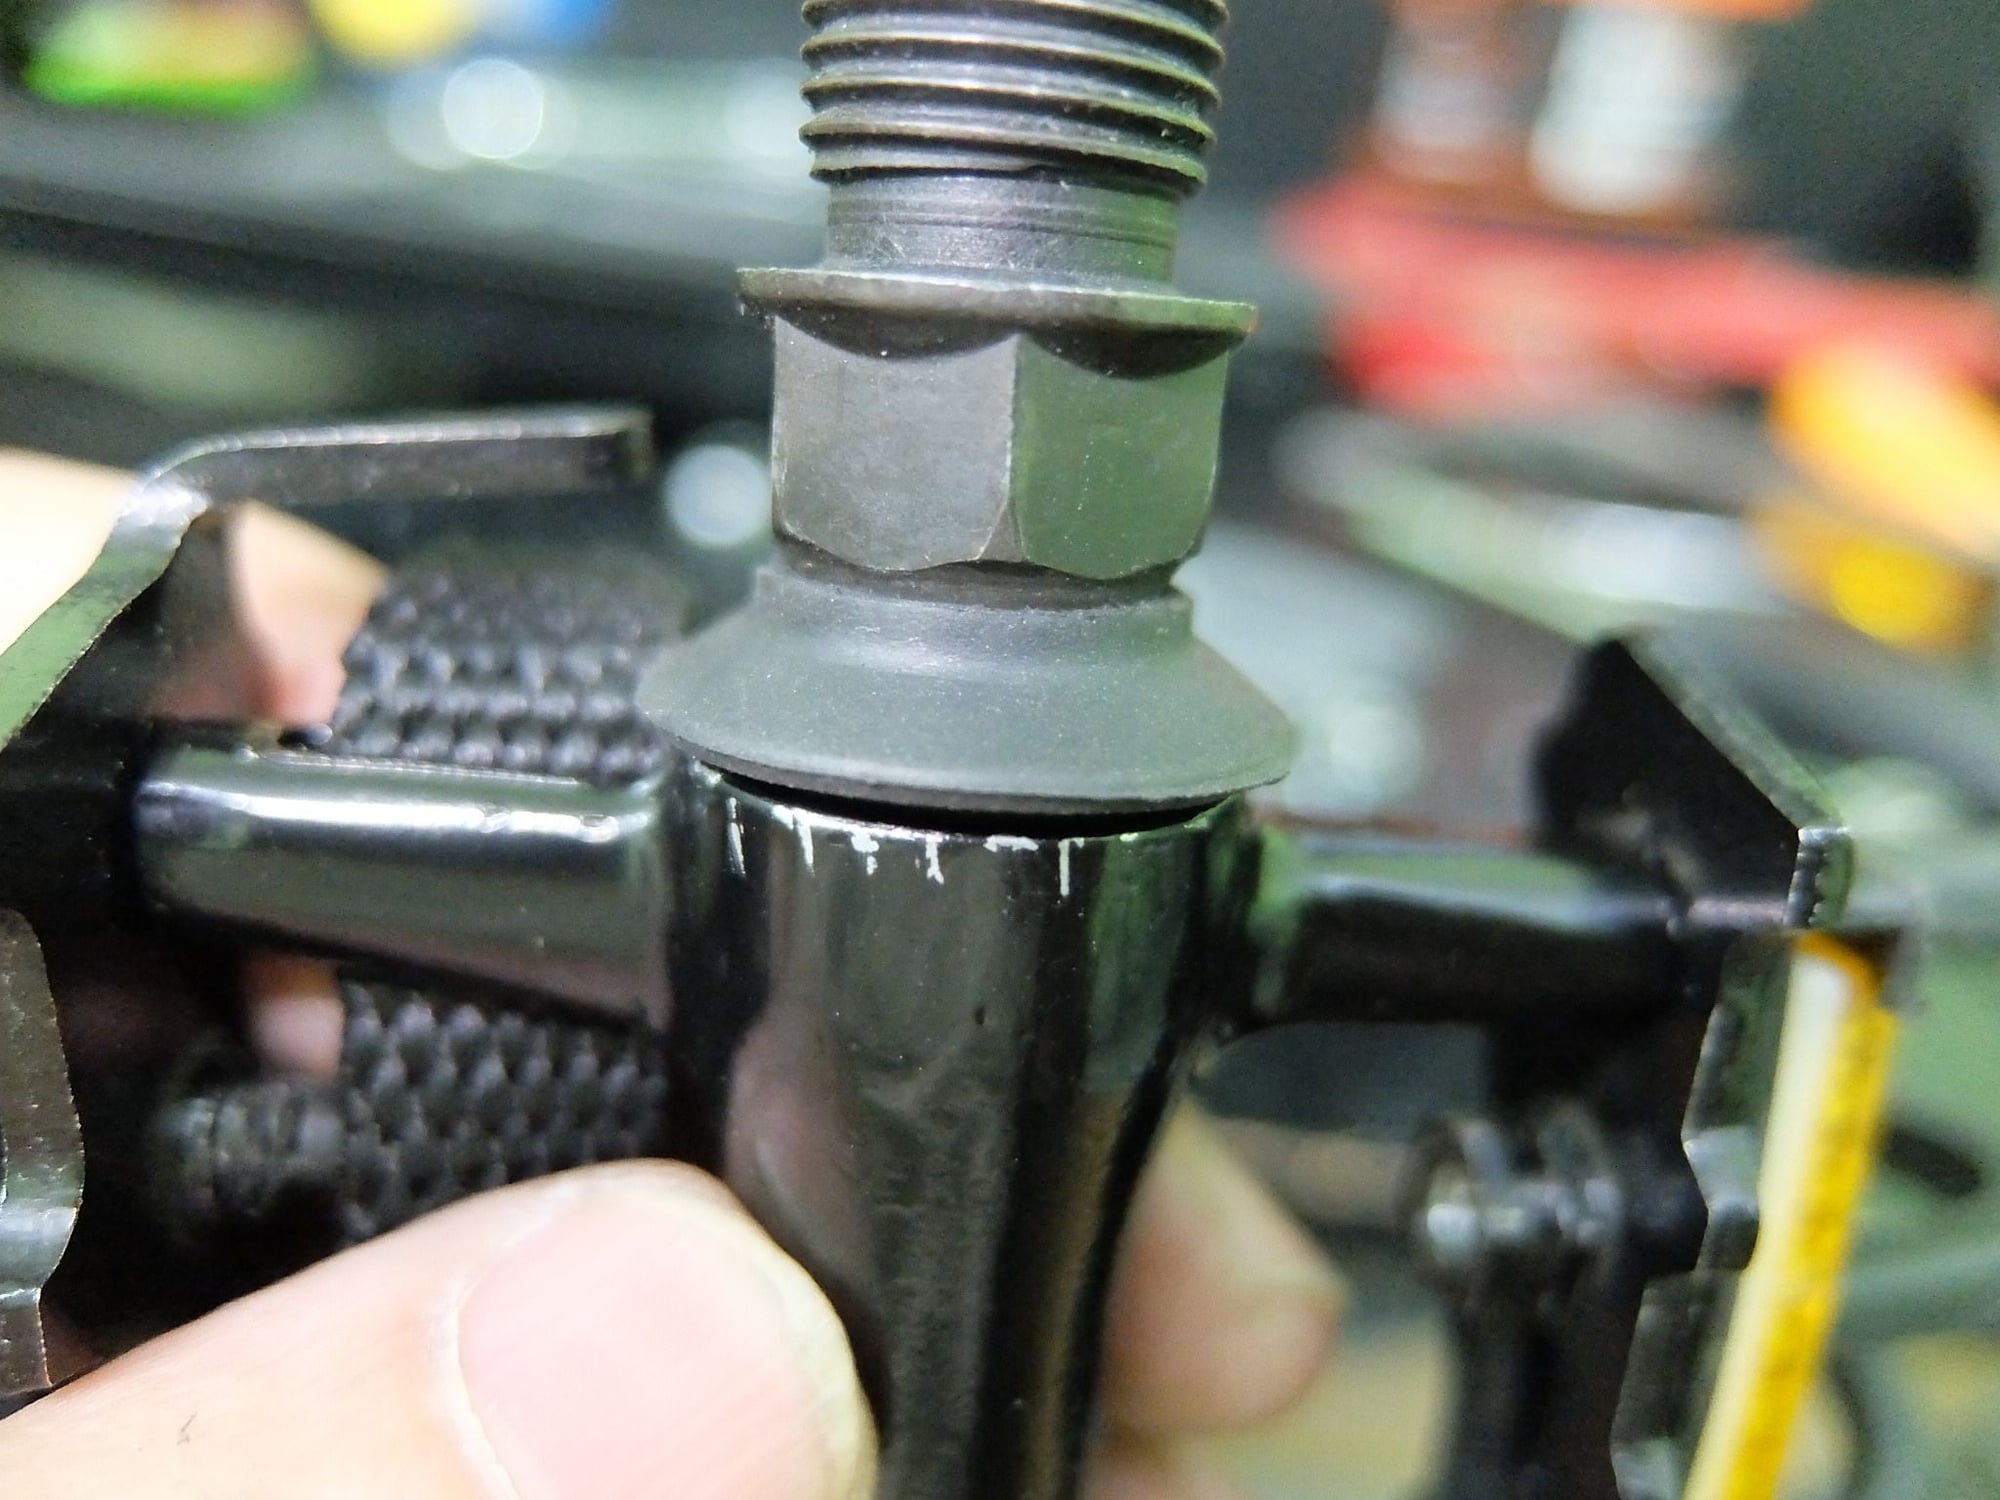
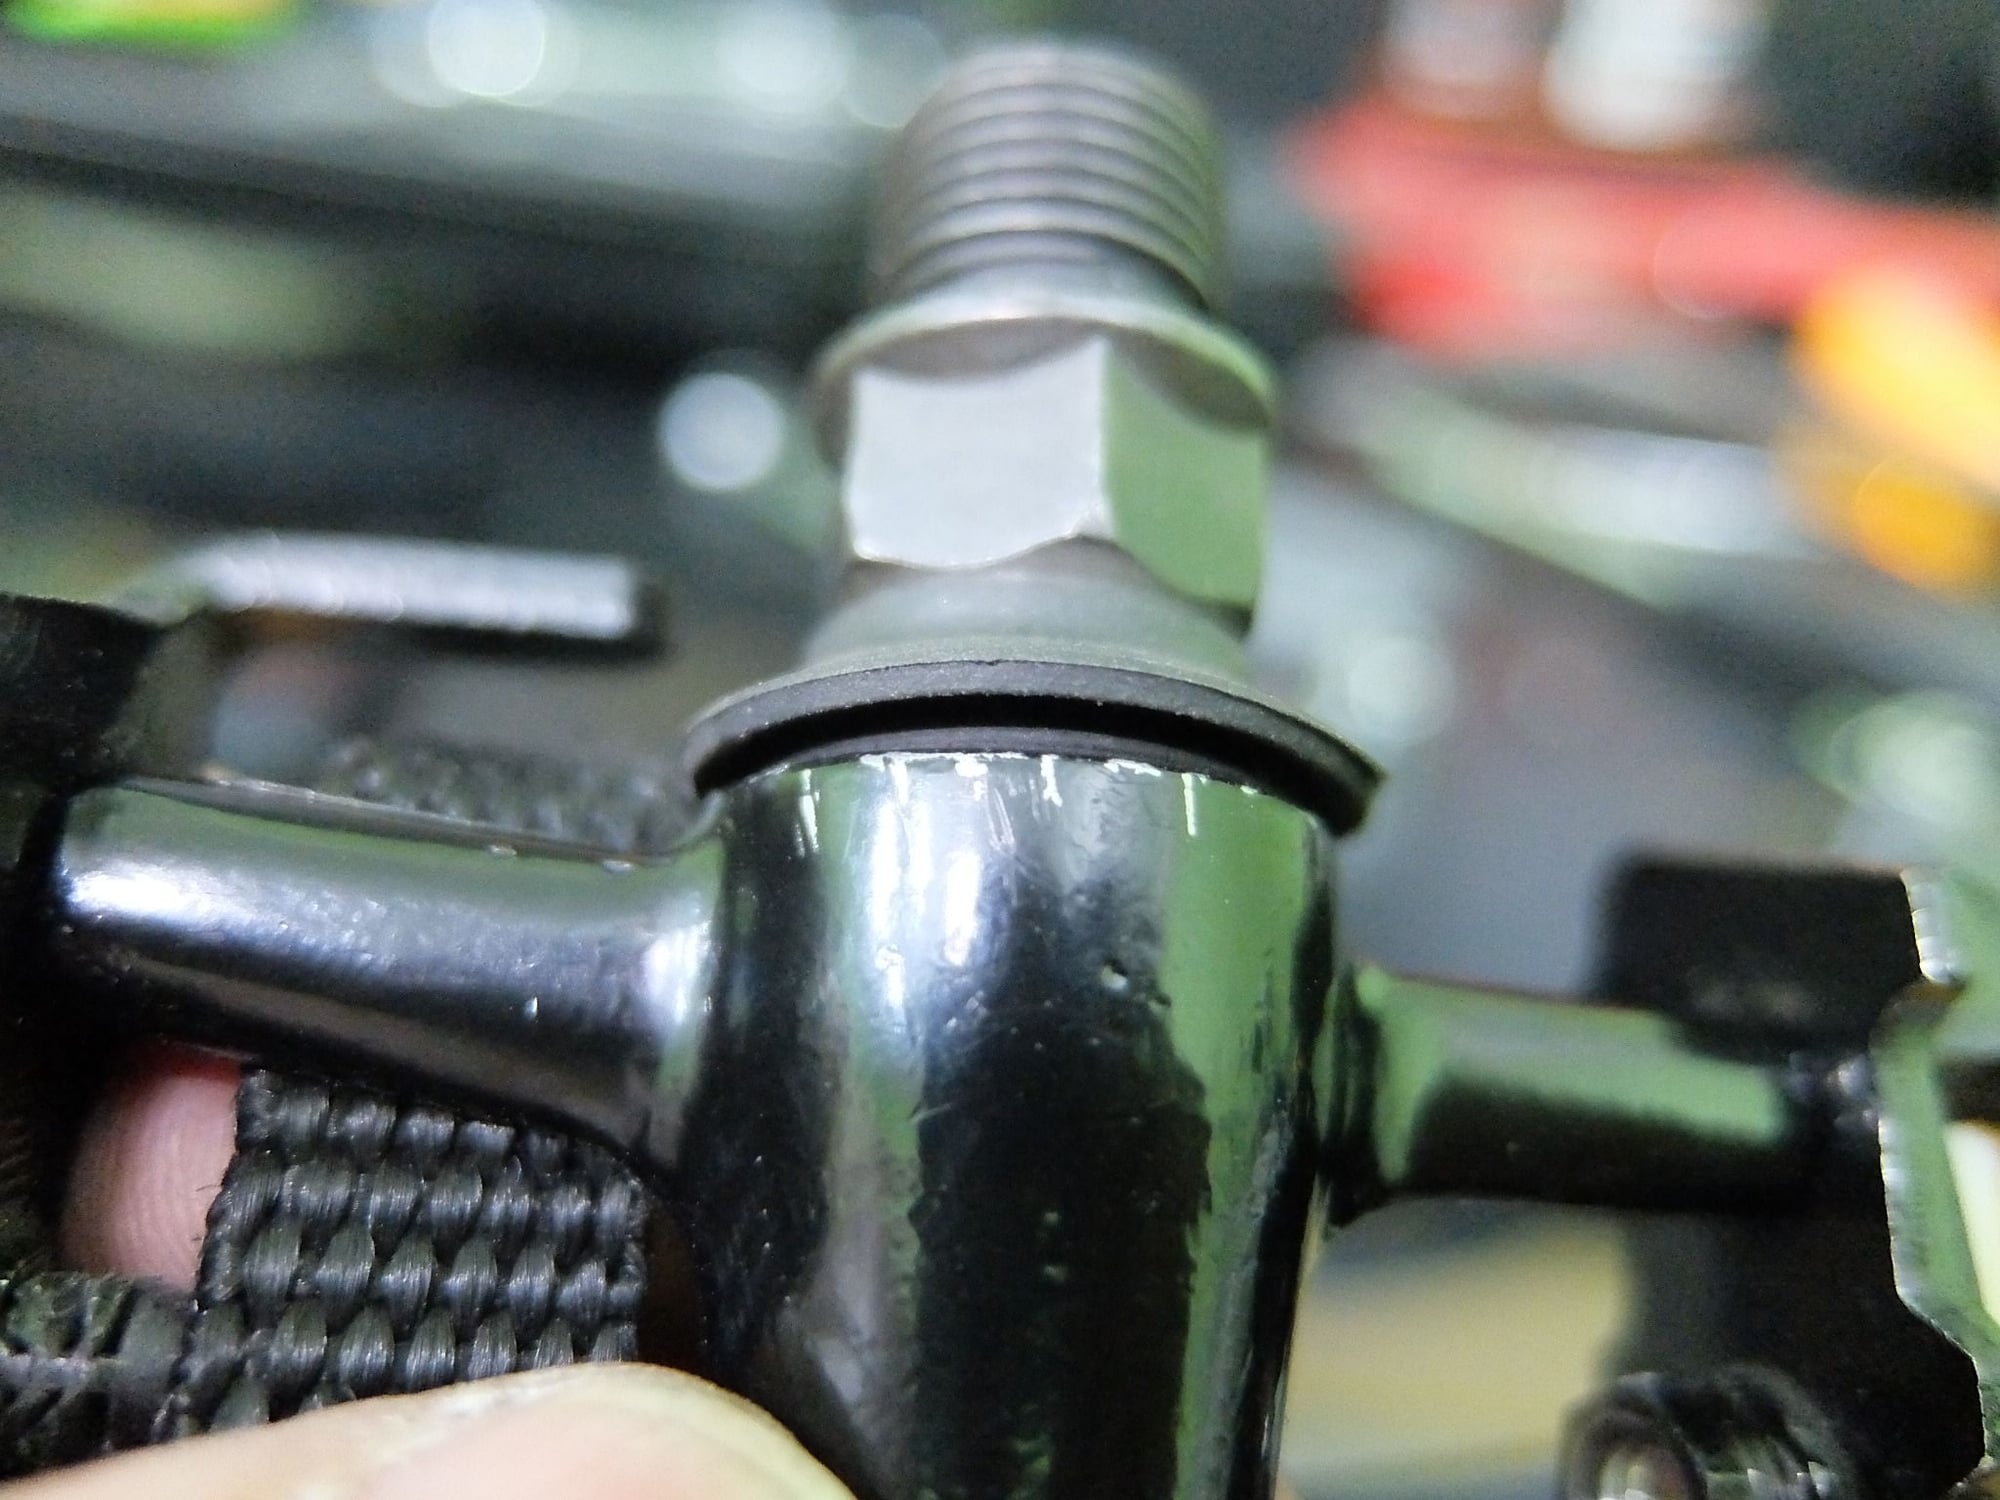
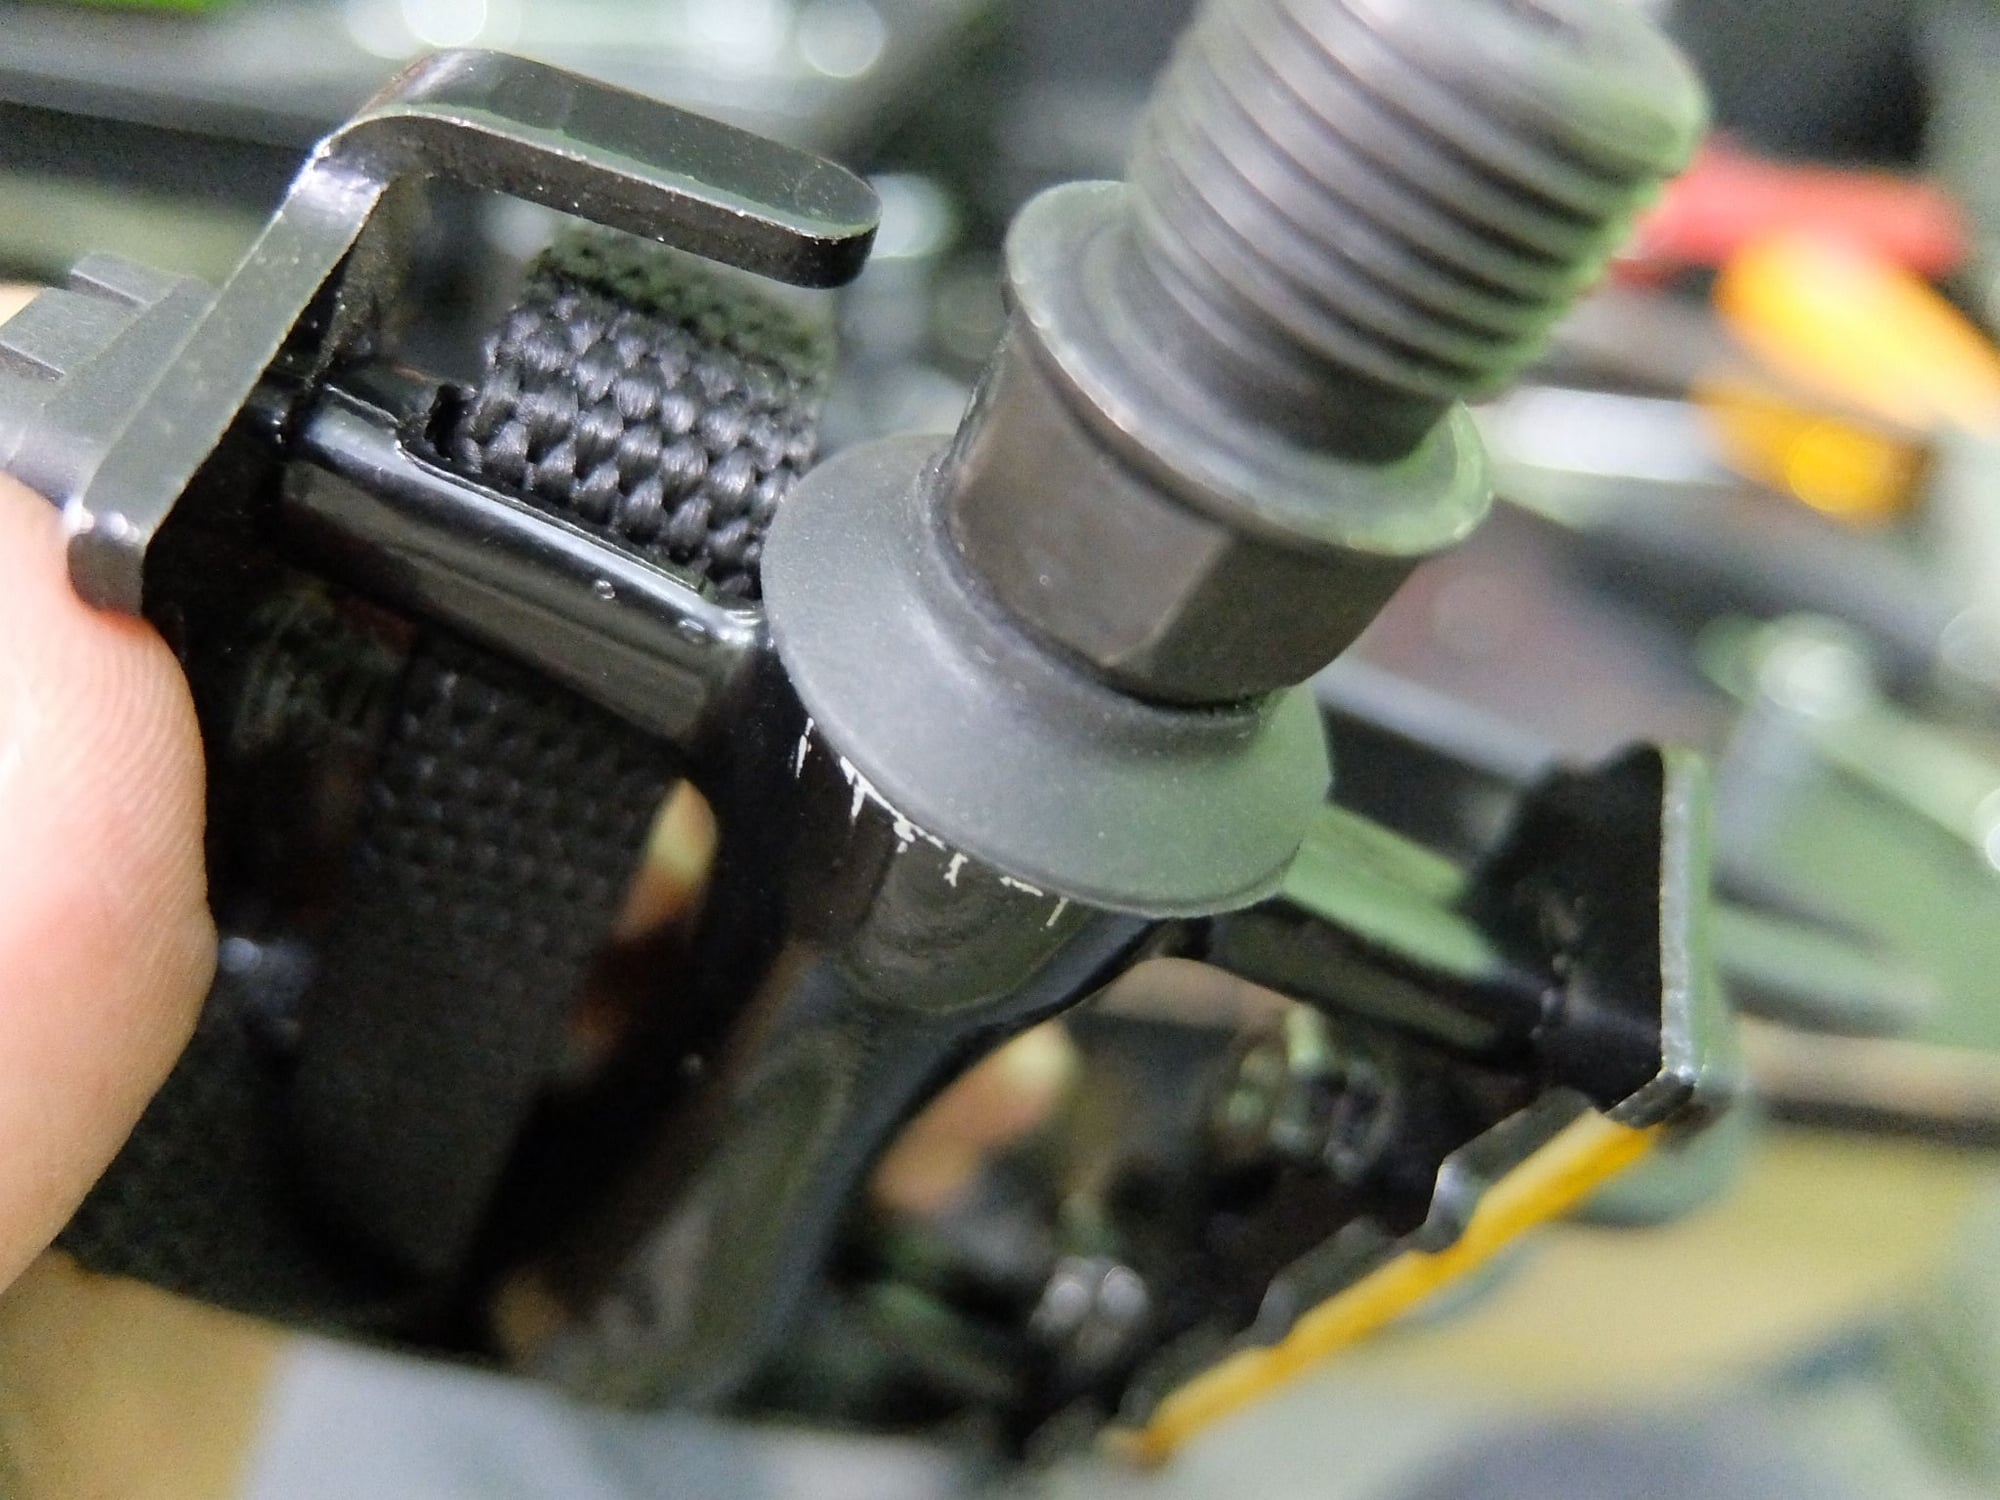
One more thing - the rubber seals of those original Wellgos were shot as the bike sat behind a sun-drenched window at the showroom for months, so I had to finagle replacements. I dug out a pair of rubber caps - probably the kind used to plug holes in furniture; I couldn't tell you for sure - and cut out holes in the middle, then I slipped them over the ends of the shafts and had them shield the exposed ball bearings from the elements:
08-18-18 | 06:07 PM
#637
Senior Member
Joined: May 2012
Posts: 112
Likes: 0
From: Yokohama, Japan
Thank you Very Much!
This one is not really a bike maintenance tip but something useful for those with the base model Park Tool repair stand. You can 3d print your own add-ons (if you have a printer or know someone who does).
Leg clip for storage:
https://www.thingiverse.com/thing:1272344
Tool caddy:
https://www.thingiverse.com/thing:1275681
Hex wrench bracket:
https://www.thingiverse.com/thing:1695559
Misc tool holder:
https://www.thingiverse.com/thing:49227
Leg clip for storage:
https://www.thingiverse.com/thing:1272344
Tool caddy:
https://www.thingiverse.com/thing:1275681
Hex wrench bracket:
https://www.thingiverse.com/thing:1695559
Misc tool holder:
https://www.thingiverse.com/thing:49227
 09-05-18 | 09:12 AM
#639
Full Member
Joined: Apr 2012
Posts: 387
Likes: 17
From: Iowa
Bikes: COLNAGO! Litespeed, Motobecane, Peugeot, Gitane, Fuji, Nishiki, Centurion, Panasonic, Giant, Trek, Cannondale, Raleigh, Bianchi, Winsor
09-14-18 | 06:54 AM
#640
Senior Member

Joined: Jan 2013
Posts: 3,139
Likes: 877
Bikes: too many sparkly Italians, some sweet Americans and a couple interesting Japanese
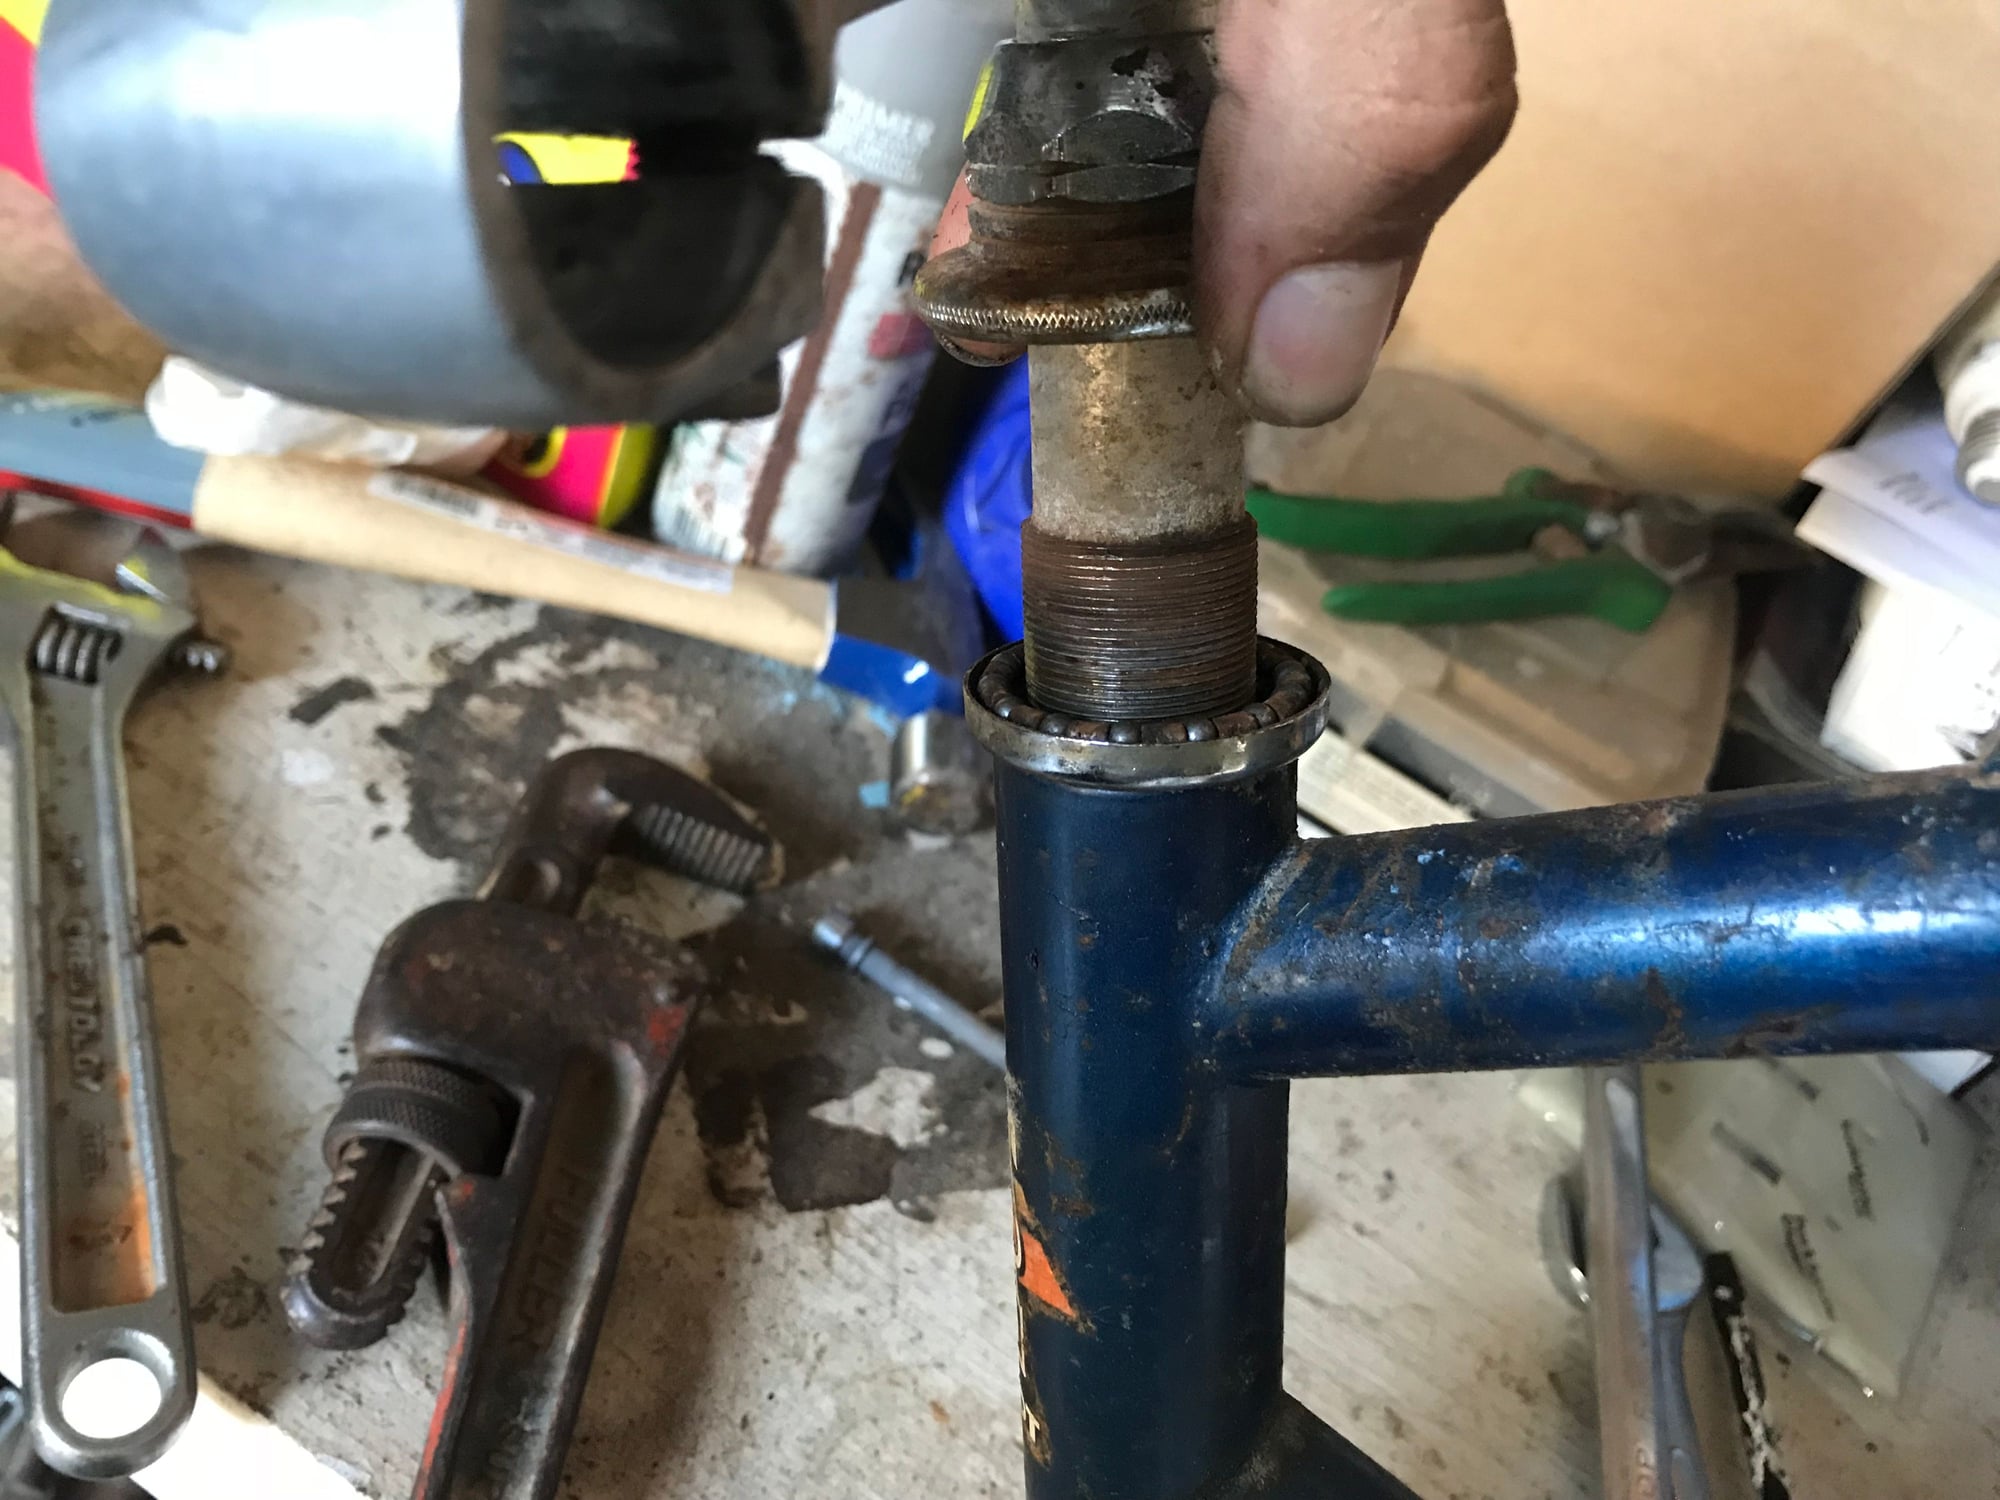
Google is your friend
If you google frame stuck stem or handlebar stuck, excellent sites of very knowledgeable people will come up, including my favorites, Park Tool, Sheldonbrown, davebikeblog, mytenspeeds, and many many more. Some stems are permanently bonded so good luck.
09-14-18 | 07:18 AM
#641
Senior Member
Joined: May 2016
Posts: 67
Likes: 0
From: Toronto, Ontario
Bikes: 1993 Pinarello Vuelta Retroroadie / 1974 Raleigh Sprite
Usually I would flip the bike upside down and spray penetrating oil down the fork so that it reaches the stem. Rinse and repeat every hour or two. The next day, I would flip the bike back over with the wheel in the fork, clamp the wheels with your leg and turn the stem to see if it's loosened up a little (it's easier with handlebars inside the stem). If that fails, keep trying that for the the next two or three days and if it still doesn't come out, then I resort to cutting the stem out.
11-23-18 | 09:38 PM
#643

Senior Member
Joined: Nov 2018
Posts: 117
Likes: 1
From: Idaho
Goat Head season never seems to end in my area. I had some Shoe Goo laying around and wondered if I could use it to repair my collection of old yet good tubes. After a few trials I was able to apply a thin enough layer to seal the small punctures. I figure I've saved a few bucks from new tubes and patch kits.
12-27-18 | 01:01 AM
#644
Junior Member
Joined: Jul 2017
Posts: 8
Likes: 0
Propane torch
use a vice to hold the stem, support the rear triangle on a saw horse or chair.
find an area where you can safely use an open flame, grab a pair of insulated gloves.
use a propane torch to heat the fork steerer tube. It may turn red hot. Focus the heat on the part of the tube that is in contact with the stem.
the steel will expand as it gets hot. So will the aluminum stem. If you heat them both for too long, they will stay fused.
Give it a try, best to heat the fork up quickly, then grab the blades and twist. A stubby 2x4 in the fork crown can be a big help, but is also capable damaging the fork.
Last edited by 206Moser; 12-27-18 at 01:02 AM. Reason: Spelling
01-21-19 | 01:11 PM
#646
Senior Member

Joined: Jan 2009
Posts: 4,370
Likes: 1,653
From: San Diego, CA
02-11-19 | 08:51 PM
#649

Full Member
Joined: Sep 2015
Posts: 340
Likes: 72
From: Denver Colorado
Bikes: 2020 Pivot Vault, 1983 Rossin Record, Garneau R1, Mesamods home built gravel/rain commuter bike, 1995 Barracuda A2V modified with Surley single speed dropouts, 1969 Bottecchia junkyard special fixed gear, Cervelo P4, Mesamods 650b klunker
My latest video demonstrating SRAM Double Tap cable replacement...
02-13-19 | 03:08 PM
#650
Senior Member
Joined: Jul 2012
Posts: 742
Likes: 4
From: Creede CO in summer & Okeechobee, FL or TX Gulf Coast in winter
Bikes: Zenetto Stealth road bike & Sundeal M7 MTN bike
Just had to cut a new 10 speed chain. OPS - old tool made for 7/9 speed. Ten minutes with a file and it now works with 10 speed chains.