


Latest Project
 03-23-18 | 10:23 AM
#51
Randomhead
Joined: Aug 2008
Posts: 25,930
Likes: 4,825
From: Happy Valley, Pennsylvania
I bought these Milwaukee locking pliers to make a dimpler from. They are really amazing, I think I'm going to have to buy another pair for the dimpler, because these things have been too useful in the toolbox
 03-25-18 | 08:33 AM
#52
Thread Starter
Senior Member


Joined: Aug 2012
Posts: 681
Likes: 283
From: Seattle
I picked these up at Hardwicks yesterday. They look almost made for dimpling. They will need a bit of work but should accomplish the goal with some tweaks.

__________________
https://www.flickr.com/photos/54319503@N05/
https://www.draper-cycles.com
https://www.flickr.com/photos/54319503@N05/
https://www.draper-cycles.com
03-27-18 | 04:50 PM
#53
Thread Starter
Senior Member
Joined: Aug 2012
Posts: 681
Likes: 283
From: Seattle
This past weekend was filled with finishing touches including dimpling the chainstay for chainring clearance, fillet smoothing, fork tip shaping and filling a few pin holes with silver.
My dimpler in action: It was pretty fiddly but, once I inserted a small piece of rod in the inner dimple and a sleeve of half round from an old chainstay, it worked pretty well:

The results:


I like filing fork tips to a point to make front wheel installs easier/faster:


Tomorrow, I will drop these off at the powder coater. Then I should have 2 weeks to get decals printed and the rest of the build kits received. The final step will be building these things up! I'm stoked to finish this up.
My dimpler in action: It was pretty fiddly but, once I inserted a small piece of rod in the inner dimple and a sleeve of half round from an old chainstay, it worked pretty well:
The results:
I like filing fork tips to a point to make front wheel installs easier/faster:
Tomorrow, I will drop these off at the powder coater. Then I should have 2 weeks to get decals printed and the rest of the build kits received. The final step will be building these things up! I'm stoked to finish this up.
__________________
https://www.flickr.com/photos/54319503@N05/
https://www.draper-cycles.com
https://www.flickr.com/photos/54319503@N05/
https://www.draper-cycles.com
03-28-18 | 12:10 PM
#54
Randomhead
Joined: Aug 2008
Posts: 25,930
Likes: 4,825
From: Happy Valley, Pennsylvania
looking good. Do you know what those locking pliers were intended to do?
Since the pliers I posted have curved jaws, I can use the same technique as you did. A tube on the backside and a rod on the front.
Since the pliers I posted have curved jaws, I can use the same technique as you did. A tube on the backside and a rod on the front.
Last edited by unterhausen; 03-28-18 at 12:17 PM.
03-28-18 | 10:01 PM
#55
Thread Starter
Senior Member
Joined: Aug 2012
Posts: 681
Likes: 283
From: Seattle
I thought these would be almost usable right out of the package. Unfortunately, I had to do some grinding and such so, yes, what you have would work as well or better.
__________________
https://www.flickr.com/photos/54319503@N05/
https://www.draper-cycles.com
https://www.flickr.com/photos/54319503@N05/
https://www.draper-cycles.com
 04-06-18 | 10:27 AM
#58
Thread Starter
Senior Member
Joined: Aug 2012
Posts: 681
Likes: 283
From: Seattle
Yes, I'm really stoked.
Next steps are:
I've learned a ton through this process. I'm excited to see my bikes out racing around the velodrome making kids happy and excited to continue refining my product and process. I'm still struggling to get the seatstays on without affecting rear end alignment.
Generally, when I'm using slotted dropouts it's not a big deal because I have files and know how to use them. With the through axles we don't have that fudge room.
When I put it on the table after adding the seatstays, I sometimes see the dropouts have moved 5-10 thou which then puts the wheel out by 15-30 thou at the rim. This is too much for my liking. I have ridden frames this far out and they rode fine but, if someone put it on a table I would feel bad.
I took the opportunity to create a more professional looking logo with the help of a friend who is a graphic designer. I mean, there has to be a decal on it somewhere so...


These bikes will get the shorter ones. I like the longer ones and couldn't decide so I saved both. I've only printed the short ones at this point.
It would be interesting to hear what the pros do in this area. Some have ability to print masks for each individual frame and it's part of the paint but, others have very consistent decal sets.
Alright, I have to pay some bills...
Next steps are:
- picking up frames from coater - hoping for next Friday
- Assembling bar/stem and post/saddle, wheels/tires - Next week
- picking up new decals from printer - next Friday
- Assembly and test ride day - next weekend
- Deliver to velodrome - Sunday
- Post final thoughts to BF thread - when I get to it !
I've learned a ton through this process. I'm excited to see my bikes out racing around the velodrome making kids happy and excited to continue refining my product and process. I'm still struggling to get the seatstays on without affecting rear end alignment.
Generally, when I'm using slotted dropouts it's not a big deal because I have files and know how to use them. With the through axles we don't have that fudge room.
When I put it on the table after adding the seatstays, I sometimes see the dropouts have moved 5-10 thou which then puts the wheel out by 15-30 thou at the rim. This is too much for my liking. I have ridden frames this far out and they rode fine but, if someone put it on a table I would feel bad.
I took the opportunity to create a more professional looking logo with the help of a friend who is a graphic designer. I mean, there has to be a decal on it somewhere so...
These bikes will get the shorter ones. I like the longer ones and couldn't decide so I saved both. I've only printed the short ones at this point.
It would be interesting to hear what the pros do in this area. Some have ability to print masks for each individual frame and it's part of the paint but, others have very consistent decal sets.
Alright, I have to pay some bills...
__________________
https://www.flickr.com/photos/54319503@N05/
https://www.draper-cycles.com
https://www.flickr.com/photos/54319503@N05/
https://www.draper-cycles.com
 04-06-18 | 12:51 PM
#60
Randomhead
Joined: Aug 2008
Posts: 25,930
Likes: 4,825
From: Happy Valley, Pennsylvania
powder and decals is a bit tricky. There are some decals for powder. Sometimes people shoot clear coat over the decals and powder. Others have a contrasting color powdercoated, put vinyl masks on, shoot the top coat of powder, do a partial cure, weed the masks and then do a full cure. That sounds expensive.
Masks can be done with a cheap vinyl cutter or farmed out to a sign making shop. I am not particularly happy with the local powder coat company, so my next frame will probably be wet paint. Thinking of getting decals from Velocal. I thought about getting a painter to use masks, but either way I have to get the artwork done.
If it only would warm up enough to shoot paint. Actually is probably warm enough today, but I'm nowhere near ready.
04-06-18 | 10:51 PM
#61
Thread Starter
Senior Member
Joined: Aug 2012
Posts: 681
Likes: 283
From: Seattle
powder and decals is a bit tricky. There are some decals for powder. Sometimes people shoot clear coat over the decals and powder. Others have a contrasting color powdercoated, put vinyl masks on, shoot the top coat of powder, do a partial cure, weed the masks and then do a full cure. That sounds expensive.
Masks can be done with a cheap vinyl cutter or farmed out to a sign making shop. I am not particularly happy with the local powder coat company, so my next frame will probably be wet paint. Thinking of getting decals from Velocal. I thought about getting a painter to use masks, but either way I have to get the artwork done.
If it only would warm up enough to shoot paint. Actually is probably warm enough today, but I'm nowhere near ready.
Masks can be done with a cheap vinyl cutter or farmed out to a sign making shop. I am not particularly happy with the local powder coat company, so my next frame will probably be wet paint. Thinking of getting decals from Velocal. I thought about getting a painter to use masks, but either way I have to get the artwork done.
If it only would warm up enough to shoot paint. Actually is probably warm enough today, but I'm nowhere near ready.
I talked with Victory Circle and they no longer make their thermal resistant decal that goes between powder coat coatings (ie under a clear powder coat). And they're too busy for a small builder anyway.
I've been really happy with Seattle Powder Coat. The only problem is with powder coat in general. It's really easy to have pin holes in the fillets and when the coater media blasts to prep the frame, they blow out whatever (flux/dust etc.) is plugging/hiding the hole. After it's coated, they REALLY are obvious. With these last 4, I tried to be meticulous about cleanliness and prep to avoid pinholes. After the fillets were polished, I still found a few holes - much less than I have previously but maybe 3 or 4 in total. I cleaned them up or drilled them out slightly and then soaked a thin layer of silver over the top and blended it all together. They aren't structural so, no worries there. They are the kinds of things that a painter would fix with bondo if using wet paint.
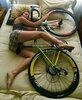
After dinner tonight, I did some upholstery:


Tomorrow, I need to do some serious clean up and organizing. For the past week or so, things have been piling up and I haven't had time to put stuff away.
__________________
https://www.flickr.com/photos/54319503@N05/
https://www.draper-cycles.com
https://www.flickr.com/photos/54319503@N05/
https://www.draper-cycles.com
04-22-18 | 12:05 AM
#62
Thread Starter
Senior Member
Joined: Aug 2012
Posts: 681
Likes: 283
From: Seattle
The home stretch!
Picked up the frame and forks from Seattle Powder Coat on Friday morning. They look awesome. I really like the color. The one drawback is how it puddles in certain places. I found it has settled into the dropouts which makes installing wheels difficult. I will need to trim some away and hopefully not go all the way through.

I spent Friday night prepping headtubes and facing and tapping BB's and cleaning up the fork crowns - as mentioned earlier, they were right at the minimum size so, it was really just cleaning off the powder coating flashing:


This morning I built one completely to go through a dry run so to speak and see if there were any gotchas I would run into:


The gotcha was that we didn't order chains!!
Tomorrow, I will be installing tires on wheels, installing headsets, forks, bar/stems.
Picked up the frame and forks from Seattle Powder Coat on Friday morning. They look awesome. I really like the color. The one drawback is how it puddles in certain places. I found it has settled into the dropouts which makes installing wheels difficult. I will need to trim some away and hopefully not go all the way through.
I spent Friday night prepping headtubes and facing and tapping BB's and cleaning up the fork crowns - as mentioned earlier, they were right at the minimum size so, it was really just cleaning off the powder coating flashing:
This morning I built one completely to go through a dry run so to speak and see if there were any gotchas I would run into:
The gotcha was that we didn't order chains!!
Tomorrow, I will be installing tires on wheels, installing headsets, forks, bar/stems.
__________________
https://www.flickr.com/photos/54319503@N05/
https://www.draper-cycles.com
https://www.flickr.com/photos/54319503@N05/
https://www.draper-cycles.com
05-02-18 | 12:12 AM
#64
Thread Starter
Senior Member
Joined: Aug 2012
Posts: 681
Likes: 283
From: Seattle
Final update Velodrome track bikes
Ok, this may be the final update. Tonight, I dropped the bikes off at the velodrome. Amara was there with around 25 kids who were just finishing up the Tuesday night track class. They looked exhausted and very happy.
Final steps:
Built the bikes up with all the stuff provided by FSA/Vision, Specialized and some other suppliers, applied decals and all the other stuff to complete the bikes. There was too much chaos at the track to bother taking pictures so, I just have the following. As for the pictures, I like the name down the seatstay and fork blade - it reminds me of old road racing bikes with advertiser stickers all over them. I remember back in the 80's a racer could get a bit of money for submitting a picture of themselves in a race (presumably winning or battling for the lead) with a sponsor's decal visible in the photo. Anyway, the look seemed appropriate here.


Link to flickr photo album
I would be lying if I said I was completely happy with how these turned out. On one hand, I am happy or proud that I have made progress but, I still see all the little imperfections and things I wish I had spent more time on or thought through more carefully or just been a better craftsman. Some individual thoughts:
Duane
Final steps:
Built the bikes up with all the stuff provided by FSA/Vision, Specialized and some other suppliers, applied decals and all the other stuff to complete the bikes. There was too much chaos at the track to bother taking pictures so, I just have the following. As for the pictures, I like the name down the seatstay and fork blade - it reminds me of old road racing bikes with advertiser stickers all over them. I remember back in the 80's a racer could get a bit of money for submitting a picture of themselves in a race (presumably winning or battling for the lead) with a sponsor's decal visible in the photo. Anyway, the look seemed appropriate here.
Link to flickr photo album
I would be lying if I said I was completely happy with how these turned out. On one hand, I am happy or proud that I have made progress but, I still see all the little imperfections and things I wish I had spent more time on or thought through more carefully or just been a better craftsman. Some individual thoughts:
- I'm 100% confident of the structural integrity and overall design however, after standing them up on the banking, I realize I could have lowered the BB a bit without sacrificing the safety margin.
- I'm super happy I insisted that components be delivered before paint for a dry install. I would have ruined the coating by putting dimples in the chainstays to clear the cranks. Also, we got 25mm tires and the rear end was measured quite precisely for 23mm. In the fully forward position, the rear tire touches the inner arch of the seatstay wishbone. The bike wouldn't ever be ridden like this but, I was trying very hard to avoid this interference. With the 23mm it was designed for, there is 1-2mm clearance.
- I still got a few pinholes in my fillets. I was very particular to look for these before sending to paint. Apparently when the coater blasts the fillets, it cleans out dust/flux that might obscure the pinholes. I need to work on how to avoid them OR go to wet paint and use bondo.
- Chain stays are still a challenge to install without chowdering up the vertical alignment of the rear dropouts.
- Powder coating has limitations but I'm quite happy with the look of these.
- I need a new decal solution - which is dependent upon the powder coat vs wet paint inner debate.
- batch building is certainly more efficient
- frame building is F@5&^ing HARD!
Duane
__________________
https://www.flickr.com/photos/54319503@N05/
https://www.draper-cycles.com
https://www.flickr.com/photos/54319503@N05/
https://www.draper-cycles.com
05-02-18 | 06:14 AM
#65
Senior Member
Joined: Dec 2012
Posts: 148
Likes: 10
From: Puyallup, WA
Bikes: Many... Up to 9 in the stable now
Awesome work. And I'm sure they'll be put to good use, ridden hard, and produce many smiles.
A couple thoughts on your above points:
1) Marymoor is a shallow banked track. You can get away with lower BB's on MV that would put you on the boards sideways on most other tracks in the country.
6) I've been using water slide decals from Gus Salmon (find him on FB). Very thin, easy to clear coat over with rattle can clear on powder coat (or provide them to the painter if going with wet). He can do great things with graphics, and specializes in reproduction graphics.


 05-02-18 | 08:04 AM
#67
Randomhead
Joined: Aug 2008
Posts: 25,930
Likes: 4,825
From: Happy Valley, Pennsylvania
Those turned out great. And having the parts on hand was a really good idea. Hopefully those things get raced hard.
what filler are you using? Did you clean the rod before brazing? It seems to me that since I started using either Gasflux or Cycledesign I haven't had many pinholes at all. The stuff I got from the LWS was horrible for pinholes.
Your post makes me want to get a blasting booth even more though.
what filler are you using? Did you clean the rod before brazing? It seems to me that since I started using either Gasflux or Cycledesign I haven't had many pinholes at all. The stuff I got from the LWS was horrible for pinholes.
Your post makes me want to get a blasting booth even more though.
 05-03-18 | 01:29 AM
#69
Thread Starter
Senior Member
Joined: Aug 2012
Posts: 681
Likes: 283
From: Seattle
Awesome work. And I'm sure they'll be put to good use, ridden hard, and produce many smiles.
A couple thoughts on your above points:
1) Marymoor is a shallow banked track. You can get away with lower BB's on MV that would put you on the boards sideways on most other tracks in the country..
A couple thoughts on your above points:
1) Marymoor is a shallow banked track. You can get away with lower BB's on MV that would put you on the boards sideways on most other tracks in the country..
Yes, I realize this now - 23*. I had a good long discussion with PVD on some other geometry/design topics and the design for these came up. After thinking deeper about it and draw it out in a way I hadn't thought about previously, I realized, I took the safe route and copied the existing bikes. I didn't know what pedals they would use and I also know they use them on the flats in the big lot next to the velodrome. I figured if the existing bikes weren't causing issues, I would be safe spec'ing the same. I now realize I should question everything and come to my own conclusions. Since these won't ever race on a different track, it would be nice to optimize for their environment.
6) I've been using water slide decals from Gus Salmon (find him on FB). Very thin, easy to clear coat over with rattle can clear on powder coat (or provide them to the painter if going with wet). He can do great things with graphics, and specializes in reproduction graphics.
__________________
https://www.flickr.com/photos/54319503@N05/
https://www.draper-cycles.com
https://www.flickr.com/photos/54319503@N05/
https://www.draper-cycles.com
05-03-18 | 01:39 AM
#70
Thread Starter
Senior Member
Joined: Aug 2012
Posts: 681
Likes: 283
From: Seattle
Those turned out great. And having the parts on hand was a really good idea. Hopefully those things get raced hard.
what filler are you using? Did you clean the rod before brazing? It seems to me that since I started using either Gasflux or Cycledesign I haven't had many pinholes at all. The stuff I got from the LWS was horrible for pinholes.
Your post makes me want to get a blasting booth even more though.
what filler are you using? Did you clean the rod before brazing? It seems to me that since I started using either Gasflux or Cycledesign I haven't had many pinholes at all. The stuff I got from the LWS was horrible for pinholes.
Your post makes me want to get a blasting booth even more though.
My prep is pretty tight:
scotchbrite the filler rod and then wipe with alcohol/acetone right before brazing.
scuff all metal parts and wipe with alcohol/acetone right before brazing
flux everything with gasflux blue flux.
Add heat/rod
most were pinhole-free but a few popped up so, I need to pay a bit more attention to what else might be causing it.
thanks
__________________
https://www.flickr.com/photos/54319503@N05/
https://www.draper-cycles.com
https://www.flickr.com/photos/54319503@N05/
https://www.draper-cycles.com
05-05-18 | 04:12 PM
#71
Thread Starter
Senior Member
Joined: Aug 2012
Posts: 681
Likes: 283
From: Seattle
I was digging around on Flickr and saw this from Curt Goodrich's feed. Aside from his usual amazing work, I notice the ring around the crown sockets. I think that ring is designed to wick the filler out a bit to avoid this valley at the butt joint of the tube and shelf on the casting. I'm sure he's figured out how to avoid the valley without the little ring but, if I ever design plug style dropouts or crowns, I will definitely add that ring!

After finishing:

IMG_6598 by curt_goodrich, on Flickr
IMG_6594 by curt_goodrich, on Flickr
__________________
https://www.flickr.com/photos/54319503@N05/
https://www.draper-cycles.com
https://www.flickr.com/photos/54319503@N05/
https://www.draper-cycles.com
05-05-18 | 08:09 PM
#72
Senior Member
Joined: Feb 2012
Posts: 19,353
Likes: 5,471
From: Rochester, NY
Bikes: Stewart S&S coupled sport tourer, Stewart Sunday light, Stewart Commuting, Stewart Touring, Co Motion Tandem, Stewart 3-Spd, Stewart Track, Fuji Finest, Mongoose Tomac ATB, GT Bravado ATB, JCP Folder, Stewart 650B ATB
As I mentioned just slightly later in my post the issues I've had with preforms (actually self made rings of filler) placed in a joint are when the gaps/fit is not spot on, when brass/bronze is used and that I nearly always found additional filler was needed to complete the joint's full fill.
As to the additional material around the socket's edges of the Goodrich shots I suspect this is to help both heat levels at the shorelines as well as to add thickness that the filler will meniscus up on to. Then when filed off/down the filler has complete joint edge fill. Andy
As to the additional material around the socket's edges of the Goodrich shots I suspect this is to help both heat levels at the shorelines as well as to add thickness that the filler will meniscus up on to. Then when filed off/down the filler has complete joint edge fill. Andy
05-06-18 | 11:56 AM
#73
Thread Starter
Senior Member
Joined: Aug 2012
Posts: 681
Likes: 283
From: Seattle
Exactly my thought but you used better words!
__________________
https://www.flickr.com/photos/54319503@N05/
https://www.draper-cycles.com
https://www.flickr.com/photos/54319503@N05/
https://www.draper-cycles.com

Thread
Thread Starter
Forum
Replies
Last Post
AfterThisNap
Singlespeed & Fixed Gear
31
04-30-10 09:54 AM
