


For the love of English 3 speeds...
 04-30-19, 10:19 AM
Senior Member
Join Date: Apr 2019
Location: N,W. Ohio
Posts: 75
Bikes: 1972 Raleigh Tourist
Mentioned: 1 Post(s)
Tagged: 0 Thread(s)
Quoted: 27 Post(s)
Likes: 0
Liked 14 Times
in
10 Posts
love the Brit 3 speeds
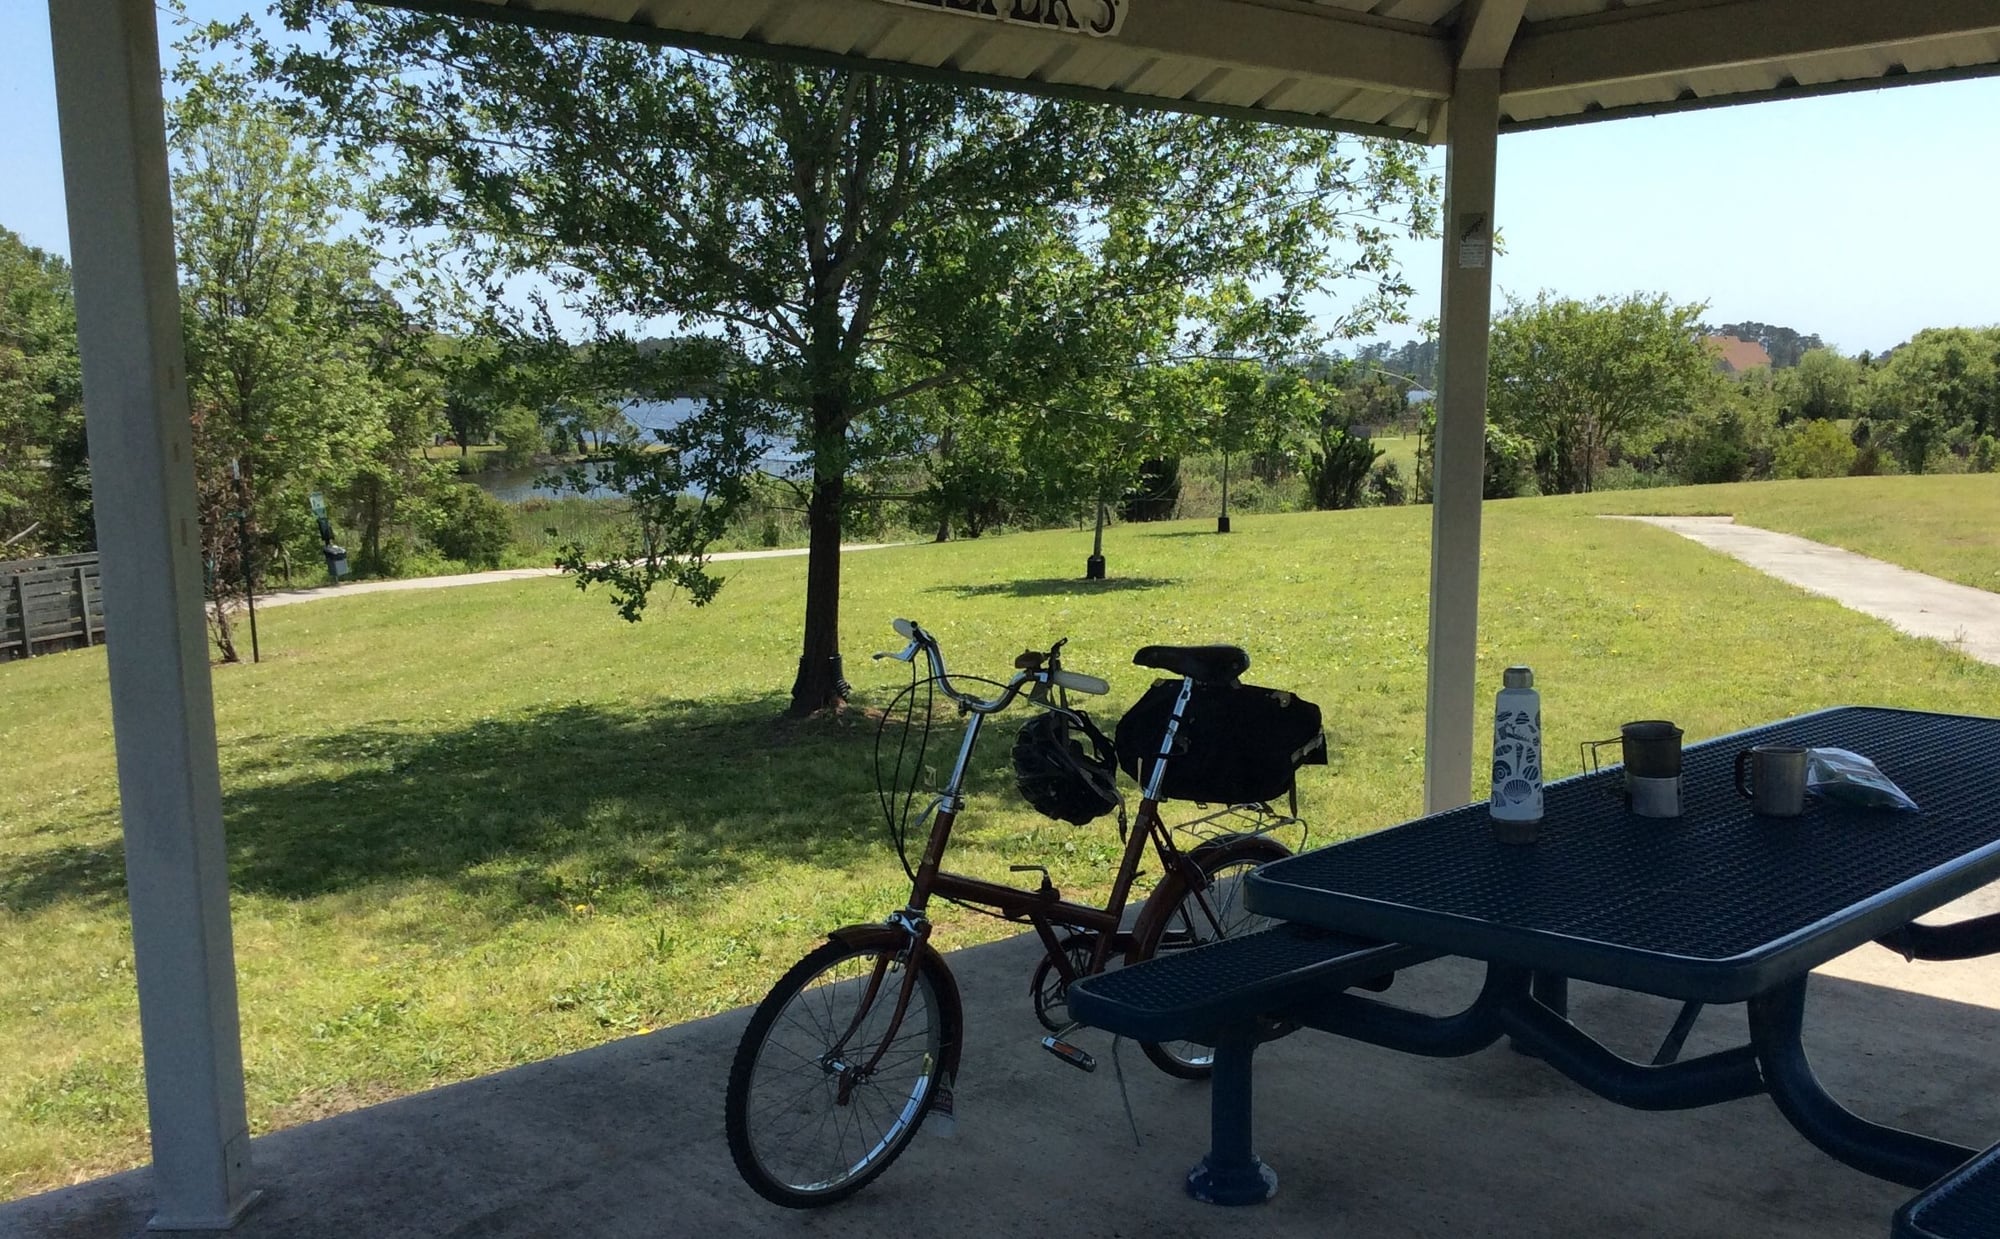
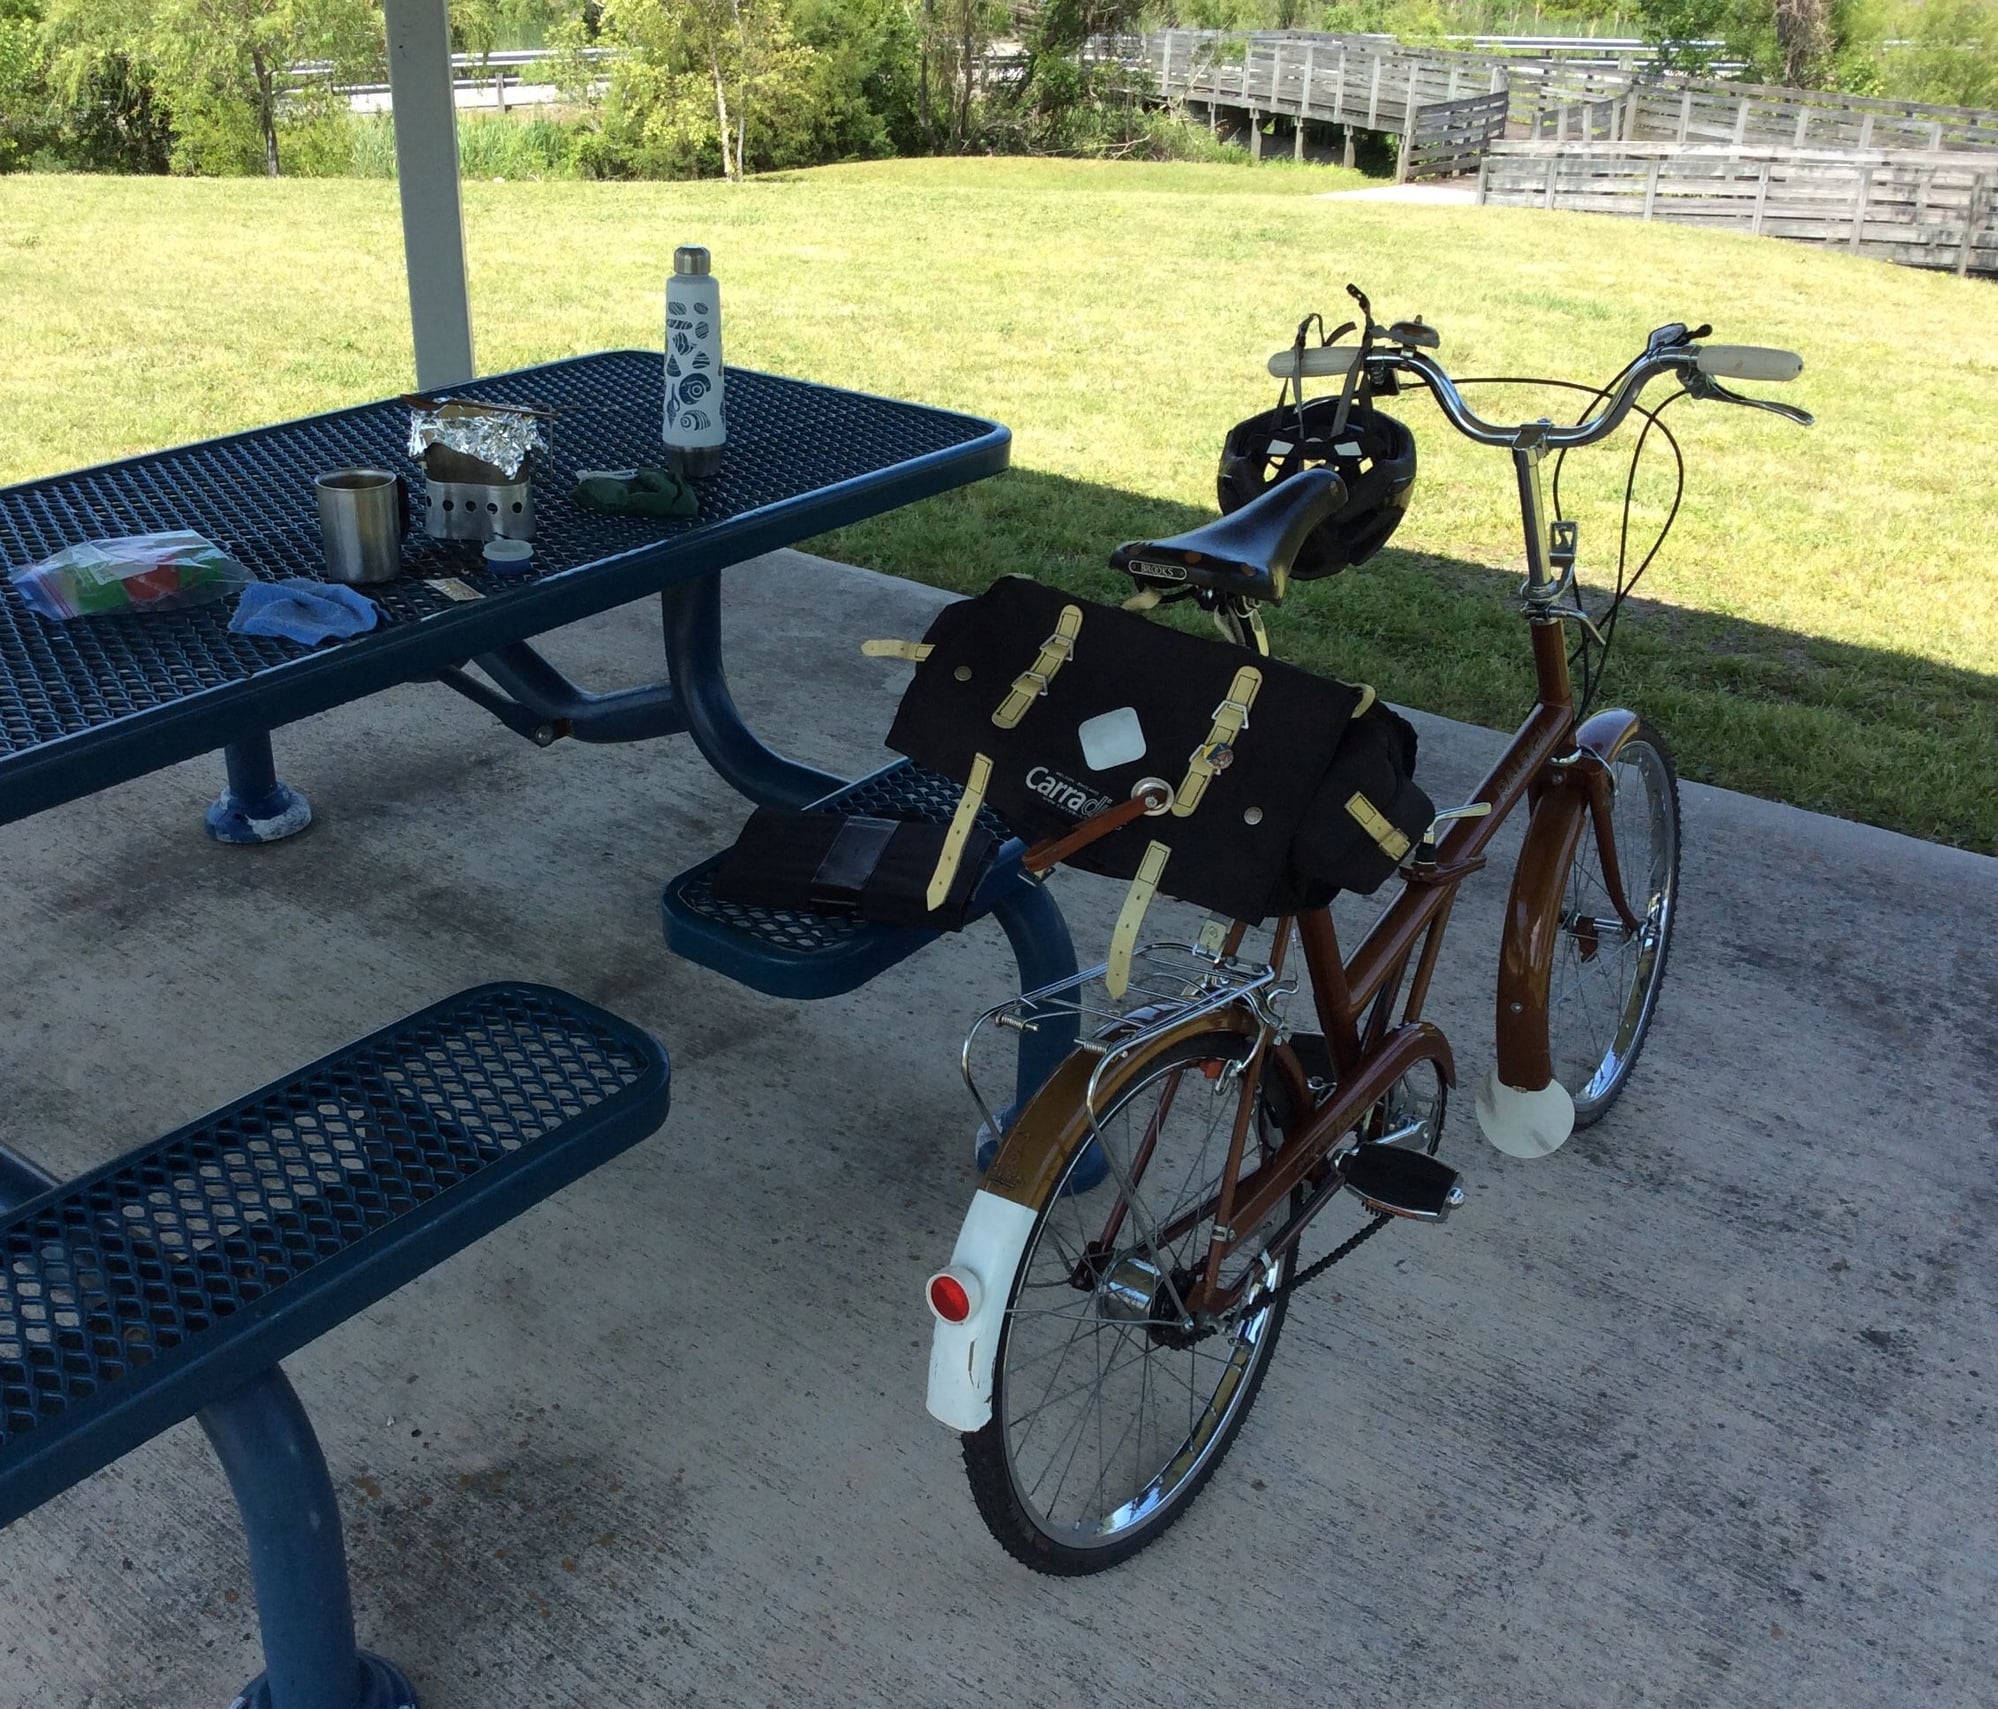
This thread gets more interesting with each new post. As Sixty Fiver said, one isn't enough so I've attached pics of the three other Raleighs in my stable. They all have SA AW three speed hubs except the Trent Sports, shown on a prior post, which has a FW four speed laced into the new 700c wheels I had made up last year. Cobrabyte, where did you get the Tufflex tires? I put some Panaracer Col de la Vie tires on the Sports in December but I don't think they ride any better that the el cheapo Kendas I had on it previously. I also agree that the R20 is a great bike for kickin' around town. The next item I'm thinking of aquiring is a Raleigh Sports with a SA S5 gear hub. I've seen a few on e-bay but it's been a while. PG.
Thanks Polish Guy..for the memories...love your bikes, I do...
My first English 3 peed Sturmey Archer was a 1952 Indian Scout....loved it. The came a new 1955 New Hudson with Twist Grip 3 speed, folowed by a new 1960 Dunault.
Currently riding a 1972 Raleigh Tourer (purchased new, for me by my wife) This is my all time fav...with just over 60,000 miles on it.
Did a have a Raleigh Superb, with Dynamo Hub...nice bike but perhaps a little to "spindly" for height and weight.
as ever, Julius in Ohio
 04-30-19, 10:50 AM
Senior Member

Join Date: Dec 2012
Location: St. Paul, MN
Posts: 1,597
Bikes: Too many 3-speeds, Jones Plus LWB
Mentioned: 12 Post(s)
Tagged: 0 Thread(s)
Quoted: 359 Post(s)
Liked 265 Times
in
119 Posts
Its an old and very wise tale that all mechanics know- if you have the right tools there is never a need to force anything. Cotter pins are such a great example of that- if they are stubborn coming out, you need to treat them with a good penetrating oil like Kanolabs.com Kroil and let it sit. Who knows what sort of abuse the bike might have had- a poor mechanic might have used a hammer to insert the pins and put a ridge on the cotter pin, or it may have sat in the rain for decades. You just don't know, but not knowing that is not a reason to use a hammer. Use finesse.
04-30-19, 11:16 AM

Phyllo-buster

Join Date: Jan 2010
Location: Nova Scotia
Posts: 8,847
Bikes: roadsters, club bikes, fixed and classic
Mentioned: 133 Post(s)
Tagged: 0 Thread(s)
Quoted: 2298 Post(s)
Liked 2,055 Times
in
1,255 Posts
Post WWII cotters were more precisely made with harder steel. Bevels were usually cut to fit a model of crank and they'd last decades. I've reused a set of cotters on a couple of old restorations for fun and they worked fine because they were hard enough to resist distortion when they were removed. Even with a hammer.
 04-30-19, 12:32 PM
Senior Member

Join Date: May 2018
Location: Ottawa, Ontario, Canada
Posts: 582
Bikes: 1951 Sun Wasp, 1953 Armstrong Consort, 1975 Raleigh Competition, 1980 Apollo Gran Sport, 1988 Schwinn Voyageur, Mystery MTB
Mentioned: 31 Post(s)
Tagged: 0 Thread(s)
Quoted: 360 Post(s)
Liked 470 Times
in
192 Posts
One tip- often cotter pins often only go in correctly in one direction; if you are trying to insert the pin from the wrong side it might not go in very far. So try both sides of the crank. Be sure to work the crank arm back and forth with respect to the bottom bracket axle as you work the pin in place. It should go in easily!! Only then do you use the press to seat the pin. Never, ever use a hammer! You will mushroom the cotter pin and risk damaging the cotter pin face as well as the crank arm, bearings and axle!
Its an old and very wise tale that all mechanics know- if you have the right tools there is never a need to force anything. Cotter pins are such a great example of that- if they are stubborn coming out, you need to treat them with a good penetrating oil like Kanolabs.com Kroil and let it sit. Who knows what sort of abuse the bike might have had- a poor mechanic might have used a hammer to insert the pins and put a ridge on the cotter pin, or it may have sat in the rain for decades. You just don't know, but not knowing that is not a reason to use a hammer. Use finesse.
Its an old and very wise tale that all mechanics know- if you have the right tools there is never a need to force anything. Cotter pins are such a great example of that- if they are stubborn coming out, you need to treat them with a good penetrating oil like Kanolabs.com Kroil and let it sit. Who knows what sort of abuse the bike might have had- a poor mechanic might have used a hammer to insert the pins and put a ridge on the cotter pin, or it may have sat in the rain for decades. You just don't know, but not knowing that is not a reason to use a hammer. Use finesse.
04-30-19, 01:17 PM
Junior Member
Join Date: Dec 2008
Posts: 122
Mentioned: 5 Post(s)
Tagged: 0 Thread(s)
Quoted: 70 Post(s)
Likes: 0
Liked 29 Times
in
14 Posts
adjust the AG hub and install the wheels, brake components, and new shifter cable (I think I have to pry the shifter pawl up a bit to fit the cable, as per instructions here). Fulcrum clip, etc. Once I have the hub shifting nicely, I'm going to bolt on the Cyclo 3-speed derailer after it gets some grease and lube for the cable. Set up looks tricky for it. I'll take a bunch of photos since the paint has come out of the clean and polish process reasonably well but with lots of age marks. The front wheel needs truing as well...
04-30-19, 02:23 PM
Senior Member
Join Date: Apr 2012
Location: Toronto
Posts: 2,572
Bikes: 1971 Hercules, 1978 Raleigh Superbe, 1978 Raleigh Tourist, 1964 Glider 3 Speed, 1967 Raleigh Sprite 5 Speed, 1968 Hercules AMF 3 Speed, 1972 Raleigh Superbe, 1976 Raleigh Superbe, 1957 Flying Pigeon, 1967 Dunelt 3 Speed
Mentioned: 57 Post(s)
Tagged: 0 Thread(s)
Quoted: 1028 Post(s)
Liked 444 Times
in
288 Posts
This makes sense now. I think that is what I was missing in terms of practical theoryisms...thanks.
These were filed by the Bikesmith fellow, and match the original 1950 cotters. It inserted quite a bit, just needs a bit more before I can get the press on it. I think it should be OK as long as I align it properly.
I wish I'd have adjusted the left side only, but I wanted to get in there and take a look. I will have lots of practice at any rate with this AG, my parts bin AW, and the FW destined for the Peugeot. Thanks all, I'll update when I get back there this weekend.
once you've got the hang of it they start to go back together
fairly quickly.
That video is quite helpful.

Likes For 3speedslow:
04-30-19, 05:56 PM
Senior Member
Join Date: Apr 2012
Location: Toronto
Posts: 2,572
Bikes: 1971 Hercules, 1978 Raleigh Superbe, 1978 Raleigh Tourist, 1964 Glider 3 Speed, 1967 Raleigh Sprite 5 Speed, 1968 Hercules AMF 3 Speed, 1972 Raleigh Superbe, 1976 Raleigh Superbe, 1957 Flying Pigeon, 1967 Dunelt 3 Speed
Mentioned: 57 Post(s)
Tagged: 0 Thread(s)
Quoted: 1028 Post(s)
Liked 444 Times
in
288 Posts
In a perfect world. All it takes is the slightest burr on either the pin or the crank hole to cause the insertion to hang up. Nothing to worry about, tap it down.
Post WWII cotters were more precisely made with harder steel. Bevels were usually cut to fit a model of crank and they'd last decades. I've reused a set of cotters on a couple of old restorations for fun and they worked fine because they were hard enough to resist distortion when they were removed. Even with a hammer.
Post WWII cotters were more precisely made with harder steel. Bevels were usually cut to fit a model of crank and they'd last decades. I've reused a set of cotters on a couple of old restorations for fun and they worked fine because they were hard enough to resist distortion when they were removed. Even with a hammer.
And I think that they'd been in there a very long time.
Much easier than most modern bikes...
I also hit them with a hammer, both in and out.
BTW, your rim is being built and should be ready
by tomorrow.
05-01-19, 07:16 AM
Senior Member
Join Date: May 2018
Location: Ottawa, Ontario, Canada
Posts: 582
Bikes: 1951 Sun Wasp, 1953 Armstrong Consort, 1975 Raleigh Competition, 1980 Apollo Gran Sport, 1988 Schwinn Voyageur, Mystery MTB
Mentioned: 31 Post(s)
Tagged: 0 Thread(s)
Quoted: 360 Post(s)
Liked 470 Times
in
192 Posts
I haven't been following the thread closely enough to know how much you are doing with your AG hub, but I can say I spent a good deal of time, after cleaning all the innards and repacking the bearings on mine, trying to get the bearings adjusted. It's the same old story that tightening the locknut seems to tighten the cone a little bit, and it's hard to gauge everything because of the dynohub. I've read that there's supposed to be a little bit of play, so I aimed for the smallest little wiggle to the hub when I rock the rim back and forth, that I could detect. It took many, many tries.
05-01-19, 08:01 AM
Senior Member
Join Date: Apr 2012
Location: Toronto
Posts: 2,572
Bikes: 1971 Hercules, 1978 Raleigh Superbe, 1978 Raleigh Tourist, 1964 Glider 3 Speed, 1967 Raleigh Sprite 5 Speed, 1968 Hercules AMF 3 Speed, 1972 Raleigh Superbe, 1976 Raleigh Superbe, 1957 Flying Pigeon, 1967 Dunelt 3 Speed
Mentioned: 57 Post(s)
Tagged: 0 Thread(s)
Quoted: 1028 Post(s)
Liked 444 Times
in
288 Posts
This has been my experience. The dynohub makes it a bit difficult to see where you are at (especially the innermost lock ring that adjusts the cone on the dyno side). How much resistance ought there to be when I rotate the assembly? I'm figuring that if it doesn't bind, and you can't feel too much tolerance, it should be OK. Getting to that adjustment and then tightening the locknut is tricky. The videos are very helpful.
due too the leverage of the wheel itself.
You should try to find a pair of these little cone wrenches...
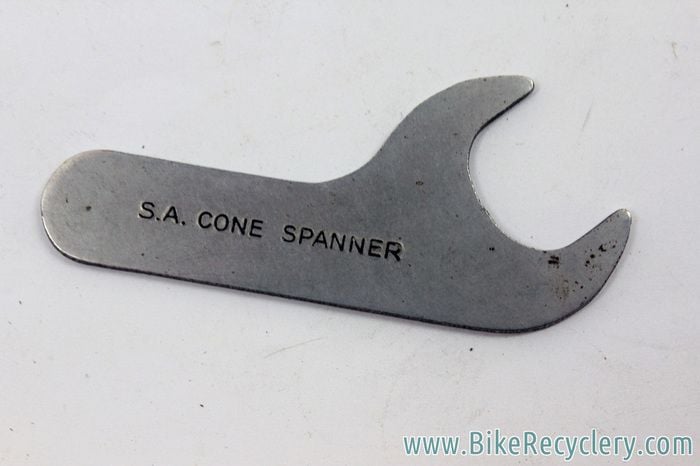
Once set, you lock the cone against the retaining nut and it's almost impossible to do
without at least one of these (or something similar/thin).
The hub is set when
-minimum play at hub
-little or no rotation of crank when back wheel spinning
-Spinning crank= too tight
Shift through all gears and observe.
Crank may spin briefly but should stop/settle down.
Also chain should not be tight either, it also needs a little play..
Sounds complicated but you'll get the hang of it.
05-01-19, 08:20 AM
Senior Member
Join Date: May 2018
Location: Ottawa, Ontario, Canada
Posts: 582
Bikes: 1951 Sun Wasp, 1953 Armstrong Consort, 1975 Raleigh Competition, 1980 Apollo Gran Sport, 1988 Schwinn Voyageur, Mystery MTB
Mentioned: 31 Post(s)
Tagged: 0 Thread(s)
Quoted: 360 Post(s)
Liked 470 Times
in
192 Posts
Adjusting/tuning the hub off the bike is good and then a final adjust in place. Once installed, you'll find more play
due too the leverage of the wheel itself.
You should try to find a pair of these little cone wrenches...
Once set, you lock the cone against the retaining nut and it's almost impossible to do
without at least one of these (or something similar/thin).
The hub is set when
-minimum play at hub
-little or no rotation of crank when back wheel spinning
-Spinning crank= too tight
Shift through all gears and observe.
Crank may spin briefly but should stop/settle down.
Also chain should not be tight either, it also needs a little play..
Sounds complicated but you'll get the hang of it.
05-01-19, 08:23 AM
Senior Member
Join Date: Apr 2012
Location: Toronto
Posts: 2,572
Bikes: 1971 Hercules, 1978 Raleigh Superbe, 1978 Raleigh Tourist, 1964 Glider 3 Speed, 1967 Raleigh Sprite 5 Speed, 1968 Hercules AMF 3 Speed, 1972 Raleigh Superbe, 1976 Raleigh Superbe, 1957 Flying Pigeon, 1967 Dunelt 3 Speed
Mentioned: 57 Post(s)
Tagged: 0 Thread(s)
Quoted: 1028 Post(s)
Liked 444 Times
in
288 Posts
Thanks gster. I've got the Park double ended cone wrenches, which I seem to use every time I do something on a bike now. I'll dial it in this Friday night after I install the cranks. Brakes are going on too, and I'm picking up some new brake cables today for that purpose. Much easier job with the '79 Sports brakes I took off the abandoned bike.
05-01-19, 11:09 AM
Senior Member

Join Date: Jan 2015
Posts: 3,240
Mentioned: 103 Post(s)
Tagged: 0 Thread(s)
Quoted: 1299 Post(s)
Likes: 0
Liked 103 Times
in
85 Posts
I don't know about the Park cone wrenches, but most wrenches are too thick for SA hubs. Not a problem if you have a bench grinder or some other way to thin them down a bit, but those little SA wrenches are perfect. Especially if you have 2 of em and you use them do the final adjustment with the wheel mounted on the bike.
05-01-19, 12:59 PM
Senior Member
I don't know about the Park cone wrenches, but most wrenches are too thick for SA hubs. Not a problem if you have a bench grinder or some other way to thin them down a bit, but those little SA wrenches are perfect. Especially if you have 2 of em and you use them do the final adjustment with the wheel mounted on the bike.
05-01-19, 02:48 PM
Senior Member
Join Date: Apr 2019
Location: N,W. Ohio
Posts: 75
Bikes: 1972 Raleigh Tourist
Mentioned: 1 Post(s)
Tagged: 0 Thread(s)
Quoted: 27 Post(s)
Likes: 0
Liked 14 Times
in
10 Posts
I don't know about the Park cone wrenches, but most wrenches are too thick for SA hubs. Not a problem if you have a bench grinder or some other way to thin them down a bit, but those little SA wrenches are perfect. Especially if you have 2 of em and you use them do the final adjustment with the wheel mounted on the bike.
Julius in Ohio
05-01-19, 04:28 PM

Senior Member
Join Date: Dec 2005
Posts: 17,160
Mentioned: 481 Post(s)
Tagged: 0 Thread(s)
Quoted: 3811 Post(s)
Liked 6,716 Times
in
2,613 Posts
 05-01-19, 04:35 PM
Senior Member
Thanks @nlerner
i know I’ve seen several that look that shape but if not SA, might still have that span. Hunting on Friday!
i know I’ve seen several that look that shape but if not SA, might still have that span. Hunting on Friday!
05-01-19, 04:39 PM
Senior Member
On another note, now that the SOTS April Challenge is over I want to go ahead and switch my 451 20” rims for some aluminium ones. Sorry to find out that pickings in that ISO are slim indeed. Might have to settle for a black CR18 product. Looks like it would match up close enough to tape the rims together and transfer the spokes over though.
i will be sticking with 451
Anybody else find this to be true, scarcity and ease?
i will be sticking with 451
Anybody else find this to be true, scarcity and ease?
05-02-19, 02:16 AM
Barred @ Velocipedesalon
Slipping gears, No More!
Hi Gster, glad you claimed your identification back!
I removed any extraneous fittings I installed, tweaked the indicator and it shifting like normal. Apparently my fabrication was causing just enough delay to keep things from adjusting to the correct position for proper shifting action. I will still attempt to cover that area again to prevent grit/dirt etc. from getting into hub; but might go with a non-flexible elbow this time and see how it works. Believe the indicator chain was hanging up on the rubber boot for a 1 second or so, and a hard elbow should avoid that problem as well as providing a better sweeping elbow for the chain. Thanks for the help everyone!
I've yet to put any photos of the Raleigh in my album, so I'll try to get it on shortly.
It's getting handmade custom leather panniers I'm making from some scrap material I have lying about. Have already removed OE grips and installed some leather strip wrapping I've made of the same leather as the panniers will be. The bike is called "The Black Widow", and will have some embellishments of black widow "hourglass" symbols on the panniers.
I did have some issues with the bar grips due to the thickness of the leather, thus I finished with external brass bar caps, vice internal plugs. Wrap is comfortable, but I might modify the end caps by removing the knurling and making smooth to the rest of the cap. Next time I'm pressing the edges of the leather strip to make it sit smoother once wrapped. Any advice folks; please let me know.
This bike is going to be used in a motorcycle "poker run" (it said all vehicles welcome!) in a month and a half so everything needs to function and look correct. Expect to ride about 40-50 miles that day, should be interesting. Support your VETS!
05-02-19, 06:37 AM
Senior Member
Join Date: Apr 2012
Location: Toronto
Posts: 2,572
Bikes: 1971 Hercules, 1978 Raleigh Superbe, 1978 Raleigh Tourist, 1964 Glider 3 Speed, 1967 Raleigh Sprite 5 Speed, 1968 Hercules AMF 3 Speed, 1972 Raleigh Superbe, 1976 Raleigh Superbe, 1957 Flying Pigeon, 1967 Dunelt 3 Speed
Mentioned: 57 Post(s)
Tagged: 0 Thread(s)
Quoted: 1028 Post(s)
Liked 444 Times
in
288 Posts
Hi Gster, glad you claimed your identification back!
I removed any extraneous fittings I installed, tweaked the indicator and it shifting like normal. Apparently my fabrication was causing just enough delay to keep things from adjusting to the correct position for proper shifting action. I will still attempt to cover that area again to prevent grit/dirt etc. from getting into hub; but might go with a non-flexible elbow this time and see how it works. Believe the indicator chain was hanging up on the rubber boot for a 1 second or so, and a hard elbow should avoid that problem as well as providing a better sweeping elbow for the chain. Thanks for the help everyone!
I've yet to put any photos of the Raleigh in my album, so I'll try to get it on shortly.
It's getting handmade custom leather panniers I'm making from some scrap material I have lying about. Have already removed OE grips and installed some leather strip wrapping I've made of the same leather as the panniers will be. The bike is called "The Black Widow", and will have some embellishments of black widow "hourglass" symbols on the panniers.
I did have some issues with the bar grips due to the thickness of the leather, thus I finished with external brass bar caps, vice internal plugs. Wrap is comfortable, but I might modify the end caps by removing the knurling and making smooth to the rest of the cap. Next time I'm pressing the edges of the leather strip to make it sit smoother once wrapped. Any advice folks; please let me know.
This bike is going to be used in a motorcycle "poker run" (it said all vehicles welcome!) in a month and a half so everything needs to function and look correct. Expect to ride about 40-50 miles that day, should be interesting. Support your VETS!
I removed any extraneous fittings I installed, tweaked the indicator and it shifting like normal. Apparently my fabrication was causing just enough delay to keep things from adjusting to the correct position for proper shifting action. I will still attempt to cover that area again to prevent grit/dirt etc. from getting into hub; but might go with a non-flexible elbow this time and see how it works. Believe the indicator chain was hanging up on the rubber boot for a 1 second or so, and a hard elbow should avoid that problem as well as providing a better sweeping elbow for the chain. Thanks for the help everyone!
I've yet to put any photos of the Raleigh in my album, so I'll try to get it on shortly.
It's getting handmade custom leather panniers I'm making from some scrap material I have lying about. Have already removed OE grips and installed some leather strip wrapping I've made of the same leather as the panniers will be. The bike is called "The Black Widow", and will have some embellishments of black widow "hourglass" symbols on the panniers.
I did have some issues with the bar grips due to the thickness of the leather, thus I finished with external brass bar caps, vice internal plugs. Wrap is comfortable, but I might modify the end caps by removing the knurling and making smooth to the rest of the cap. Next time I'm pressing the edges of the leather strip to make it sit smoother once wrapped. Any advice folks; please let me know.
This bike is going to be used in a motorcycle "poker run" (it said all vehicles welcome!) in a month and a half so everything needs to function and look correct. Expect to ride about 40-50 miles that day, should be interesting. Support your VETS!
They're one of the first things to get lost over the years.

One of my bikes still has one.
Not sure if they really do much.
05-02-19, 07:07 AM
Senior Member
Join Date: Apr 2019
Location: N,W. Ohio
Posts: 75
Bikes: 1972 Raleigh Tourist
Mentioned: 1 Post(s)
Tagged: 0 Thread(s)
Quoted: 27 Post(s)
Likes: 0
Liked 14 Times
in
10 Posts
Hi Gster, glad you claimed your identification back!
I removed any extraneous fittings I installed, tweaked the indicator and it shifting like normal. Apparently my fabrication was causing just enough delay to keep things from adjusting to the correct position for proper shifting action. I will still attempt to cover that area again to prevent grit/dirt etc. from getting into hub; but might go with a non-flexible elbow this time and see how it works. Believe the indicator chain was hanging up on the rubber boot for a 1 second or so, and a hard elbow should avoid that problem as well as providing a better sweeping elbow for the chain. Thanks for the help everyone!
I've yet to put any photos of the Raleigh in my album, so I'll try to get it on shortly.
It's getting handmade custom leather panniers I'm making from some scrap material I have lying about. Have already removed OE grips and installed some leather strip wrapping I've made of the same leather as the panniers will be. The bike is called "The Black Widow", and will have some embellishments of black widow "hourglass" symbols on the panniers.
I did have some issues with the bar grips due to the thickness of the leather, thus I finished with external brass bar caps, vice internal plugs. Wrap is comfortable, but I might modify the end caps by removing the knurling and making smooth to the rest of the cap. Next time I'm pressing the edges of the leather strip to make it sit smoother once wrapped. Any advice folks; please let me know.
This bike is going to be used in a motorcycle "poker run" (it said all vehicles welcome!) in a month and a half so everything needs to function and look correct. Expect to ride about 40-50 miles that day, should be interesting. Support your VETS!
I removed any extraneous fittings I installed, tweaked the indicator and it shifting like normal. Apparently my fabrication was causing just enough delay to keep things from adjusting to the correct position for proper shifting action. I will still attempt to cover that area again to prevent grit/dirt etc. from getting into hub; but might go with a non-flexible elbow this time and see how it works. Believe the indicator chain was hanging up on the rubber boot for a 1 second or so, and a hard elbow should avoid that problem as well as providing a better sweeping elbow for the chain. Thanks for the help everyone!
I've yet to put any photos of the Raleigh in my album, so I'll try to get it on shortly.
It's getting handmade custom leather panniers I'm making from some scrap material I have lying about. Have already removed OE grips and installed some leather strip wrapping I've made of the same leather as the panniers will be. The bike is called "The Black Widow", and will have some embellishments of black widow "hourglass" symbols on the panniers.
I did have some issues with the bar grips due to the thickness of the leather, thus I finished with external brass bar caps, vice internal plugs. Wrap is comfortable, but I might modify the end caps by removing the knurling and making smooth to the rest of the cap. Next time I'm pressing the edges of the leather strip to make it sit smoother once wrapped. Any advice folks; please let me know.
This bike is going to be used in a motorcycle "poker run" (it said all vehicles welcome!) in a month and a half so everything needs to function and look correct. Expect to ride about 40-50 miles that day, should be interesting. Support your VETS!
Julius in Ohio
05-02-19, 10:16 AM
Old fart

Join Date: Nov 2004
Location: Appleton WI
Posts: 24,792
Bikes: Several, mostly not name brands.
Mentioned: 153 Post(s)
Tagged: 0 Thread(s)
Quoted: 3591 Post(s)
Liked 3,401 Times
in
1,935 Posts
05-02-19, 12:29 PM
Senior Member
Join Date: Apr 2019
Location: N,W. Ohio
Posts: 75
Bikes: 1972 Raleigh Tourist
Mentioned: 1 Post(s)
Tagged: 0 Thread(s)
Quoted: 27 Post(s)
Likes: 0
Liked 14 Times
in
10 Posts
05-02-19, 03:14 PM
Senior Member
Join Date: Apr 2012
Location: Toronto
Posts: 2,572
Bikes: 1971 Hercules, 1978 Raleigh Superbe, 1978 Raleigh Tourist, 1964 Glider 3 Speed, 1967 Raleigh Sprite 5 Speed, 1968 Hercules AMF 3 Speed, 1972 Raleigh Superbe, 1976 Raleigh Superbe, 1957 Flying Pigeon, 1967 Dunelt 3 Speed
Mentioned: 57 Post(s)
Tagged: 0 Thread(s)
Quoted: 1028 Post(s)
Liked 444 Times
in
288 Posts